• Skip to main content
  • Skip to primary sidebar
  • Terms and Conditions
  • Privacy Policy
  • Contact

Driftwood 4 Us

Just About Driftwood

crafts

Driftwood Number Sign

June 14, 2025 by admin

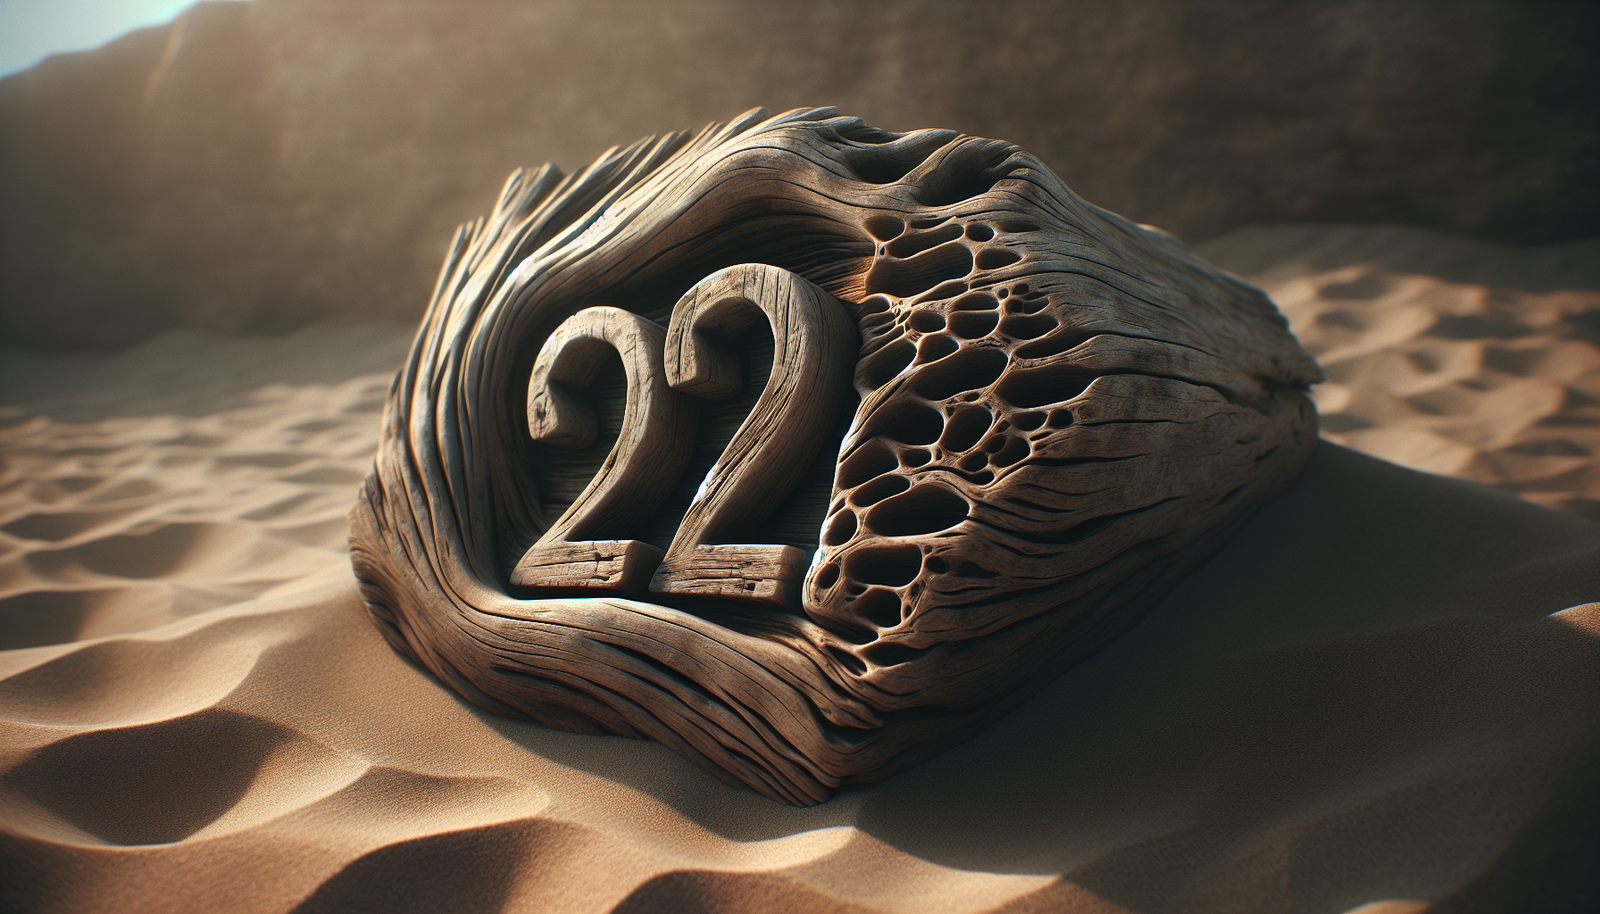
Have you ever pondered how to add a natural, artistic touch to your home or garden? Creating a driftwood number sign could be the perfect solution. These unique pieces not only serve a practical function but also add rustic charm and character to your space. They’re a wonderful blend of artistry and nature, making them both functional and aesthetically pleasing.
Driftwood Number Sign

What is a Driftwood Number Sign?

A driftwood number sign is essentially a house or garden sign crafted using pieces of driftwood. Driftwood is wood that has been washed onto the shore by the weather, seawater, or a natural mechanism. Over time, it has become smooth and uniquely shaped, making it not only durable but also distinctively beautiful. By affixing numbers to the driftwood, you get a one-of-a-kind sign that can be used to display your house number or label different areas in your garden.

Why Choose Driftwood?

Driftwood is not only visually appealing due to its organic shapes and patterns; it is also eco-friendly. Reusing natural materials lessens our environmental impact, giving new life to what might otherwise be disregarded as waste. Furthermore, each piece of driftwood is unique, ensuring that no two signs will be exactly alike. This offers a personal touch that adds an element of character and allure to your living space.

Benefits of a Driftwood Number Sign

Incorporating a driftwood number sign into your home or garden décor comes with a plethora of benefits. Not only does it create a warm, inviting atmosphere, but it also serves as a conversation starter. Let’s delve into some of the key advantages.

Aesthetic Appeal

One of the most significant benefits of using driftwood is its natural beauty. Each piece carries its own personality, whether it adorned coastlines in its previous life or journeyed through rivers. Its textured surface and irregular shapes lend an artistic flair to any environment. When numbers are attached, these driftwood pieces transform into eye-catching, functional art.

Durability

Driftwood is often very robust, having been naturally weathered and hardened by exposure to the elements. This makes it particularly suitable for outdoor use. It can withstand harsh weather conditions that might otherwise damage other materials, allowing it to remain beautiful year-round.

Customizability

Creating a driftwood number sign offers you a high level of customizability. From the size of the driftwood piece to the style of numbering and the type of finish you apply, you have the power to create something that perfectly matches your taste and complements your home’s style.

Easy Maintenance

Driftwood is relatively low maintenance. It can be left to weather naturally, which only enhances its rustic charm, or it can be sealed with varnish or oil for added longevity and finish. Either way, it requires minimal care to stay in excellent condition.

How to Create Your Own Driftwood Number Sign

Crafting your driftwood number sign can be a rewarding endeavor. While it does not require an exceptional level of skill, it does involve patience and creativity. Here’s a step-by-step guide to creating your personalized driftwood number sign.

Materials Needed

Before getting started, gather the necessary materials. Here’s a list that will be helpful:

  • Driftwood
  • House numbers (metal or wood)
  • Strong adhesive or small screws
  • Drill (if using screws)
  • Sealant (optional)
  • Sandpaper
  • Varnish or wood oil (optional)

Step One: Selecting Driftwood

Choosing the right piece of driftwood is crucial. Aim to find a balanced piece that’s sturdy yet visually interesting. Consider the location where you’ll hang the sign: a larger, bold piece may work well in a spacious garden, while a more delicate piece might be better suited for a home entrance.

Step Two: Cleaning the Driftwood

Once selected, the driftwood should be cleaned thoroughly. Use a stiff brush to remove any dirt, sand, or loose bark. If it’s particularly dirty, a gentle wash with water and mild soap should suffice. After cleaning, leave it to dry completely.

Step Three: Preparing the Driftwood

Lightly sand any rough edges or surfaces for a smoother finish. This step is especially important if you’re planning to apply a varnish or sealant, as it allows the product to adhere more effectively. Once sanded, ensure all dust is removed and the wood is as clean as possible.

Step Four: Attaching the Numbers

Decide on the placement of your numbers. Arrange them until satisfied with the design. If using an adhesive, simply dab a generous amount onto the back of each number and press firmly onto the driftwood. When using screws, drill small pilot holes before fixing the numbers. Ensure each number is securely attached.

Step Five: Finishing Touches

At this stage, you can choose to apply a sealant or varnish to your driftwood for extra protection, especially if it will be exposed to the elements. A wood oil can also be used to enhance the grain and color of the wood. Allow sufficient drying time before displaying your driftwood number sign.

Displaying Your Driftwood Number Sign

Once your driftwood number sign is complete, it’s time to decide where it will be displayed. The location will depend on its primary purpose and your personal preference.

Outdoor Placements

For homes, an obvious choice is near the front door or on a mailbox, making it easy for visitors or delivery personnel to find the address. If you’re considering a garden, placing it at the entry or alongside a pathway can direct guests while adding a unique artistic feature.

Indoor Uses

Inside, driftwood number signs can become striking decorative pieces. Consider using them in a child’s room to denote their space, or as part of an artistic installation in a living area. Whatever the location, ensure it enhances and aligns with the surrounding interior design.
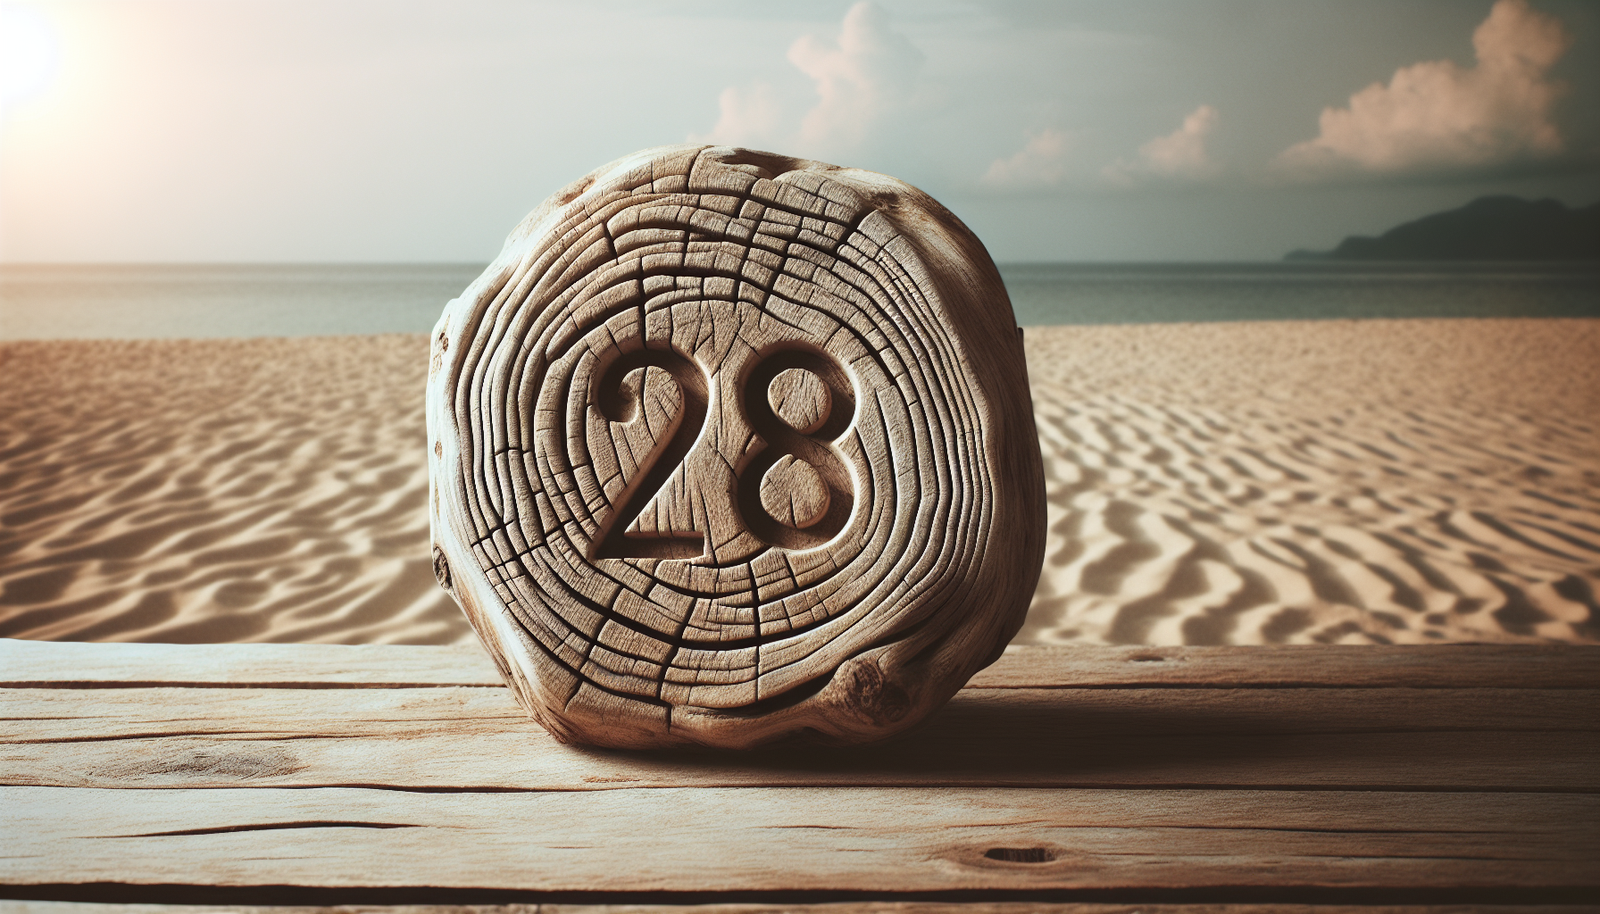
Driftwood Number Sign

Driftwood Number Sign Ideas

Still not sure about how your own driftwood number sign should look? Here are a few creative ideas to spark your inspiration:

Nautical Theme

If your home embraces a coastal aesthetic, incorporate maritime elements like shells or small anchors beside or around the numbers. These can be glued onto the driftwood and painted in shades of blue or turquoise for a cohesive ocean vibe.

Minimalist Style

Opt for a simple yet elegant design with clean, straight house numbers in a monochrome palette. Let the driftwood’s natural form and texture take center stage.

Vintage Look

Achieve a vintage feel by selecting aged metal numbers and lightly distressed driftwood. Complement this look with a patina finish to evoke rustic charm.

Nature-Inspired Design

Combine driftwood with other natural materials such as stone or small moss patches. This can create a seamless harmony with a lush garden backdrop.

How Driftwood Number Signs Impact Your Space

Driftwood number signs can significantly enhance both the look and feel of a space. Their natural origin renders them appealing to those seeking a connection with nature, while their artistic merit offers an exciting creative outlet.

Enhancing Curb Appeal

These signs are excellent for boosting your property’s curb appeal. They can make a strong first impression on visitors or potential buyers, contributing positively to initial perceptions of your home.

Reflecting Personal Style

A driftwood number sign is a custom piece that can reflect your personal taste in a small yet impactful way. Whether your style is bohemian, classic, or eclectic, the versatility of driftwood allows you to express yourself.

Functional Art

Beyond their decorative appeal, driftwood number signs serve a functional purpose, merging utility with artistry. They can guide guests, identify locations, or simply add to the environment’s vibrancy.

Caring for Your Driftwood Number Sign

Although driftwood is resilient, some care will ensure it remains attractive over time. Here are a few simple tips to maintain its condition:

Protective Coating

If your sign is displayed outdoors, consider applying a protective coating annually to guard against moisture and UV damage. Using marine varnish can offer added resistance.

Regular Checks

Inspect your sign periodically for any loose numbers or significant wear. Reinforce anything that seems unstable and smooth down any emerging rough edges.

Cleaning

Use a damp cloth to gently wipe off dirt and debris that accumulates. Avoid harsh chemicals; mild soapy water works well for heavier cleaning, ensuring you dry the wood thoroughly afterward.

In conclusion, creating a driftwood number sign offers not only a practical solution for marking your home or garden but also a chance to engage with nature in a unique and creative way. By combining the beauty of natural elements with personal creativity, you produce a one-of-a-kind piece that enhances your environment and reflects your individual style. Whether you’re a seasoned DIY enthusiast or a beginner, this project promises satisfaction and a visually stunning result.
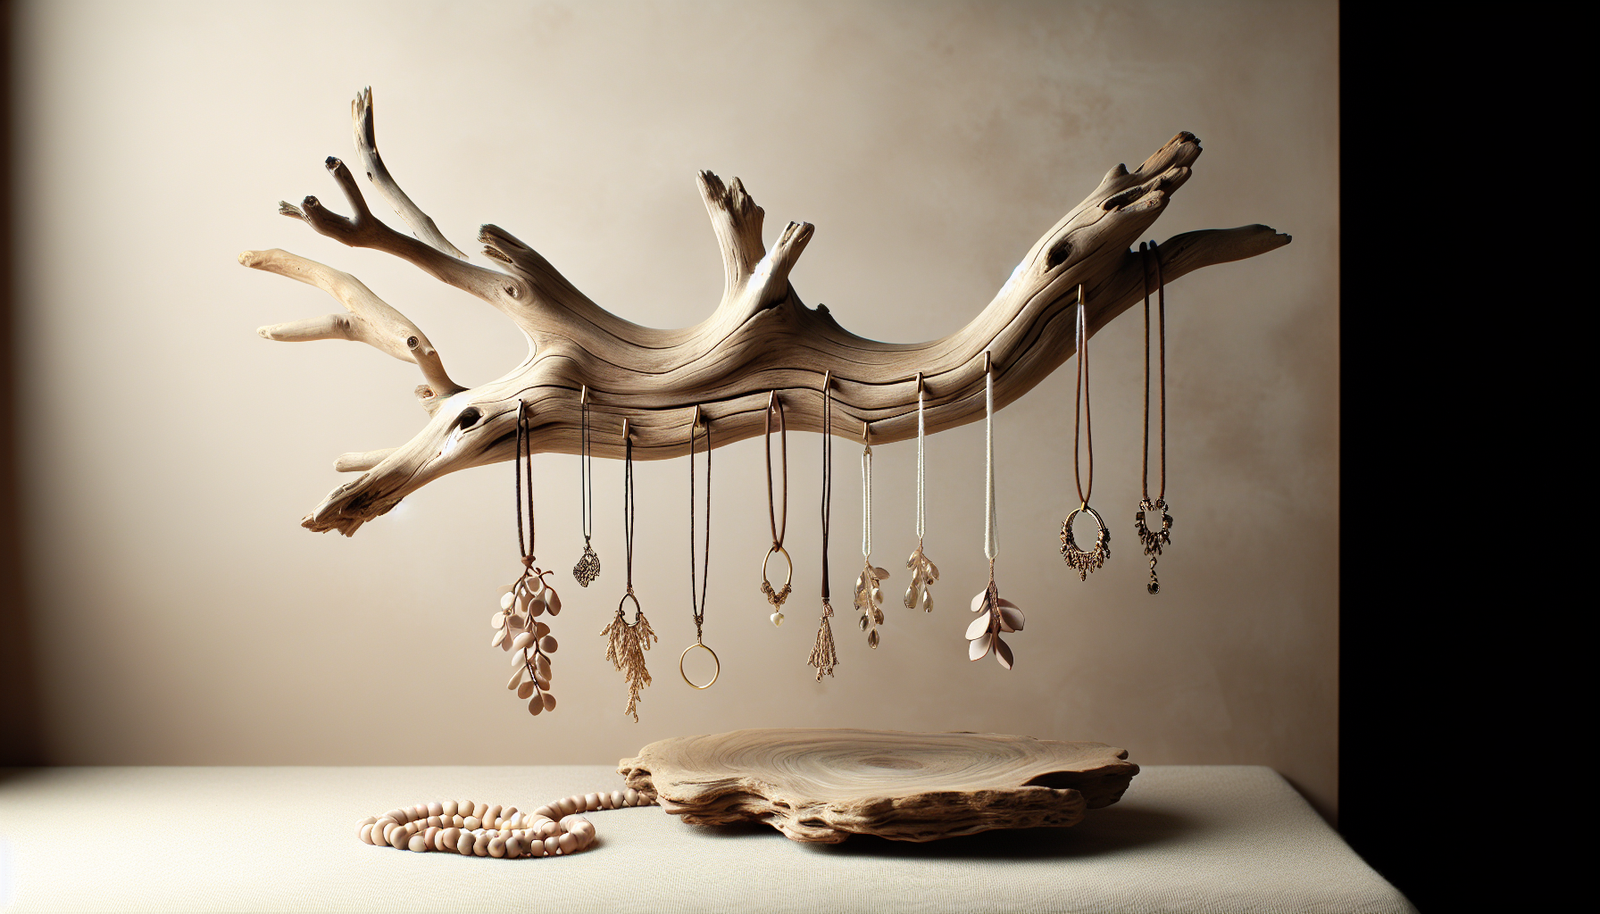
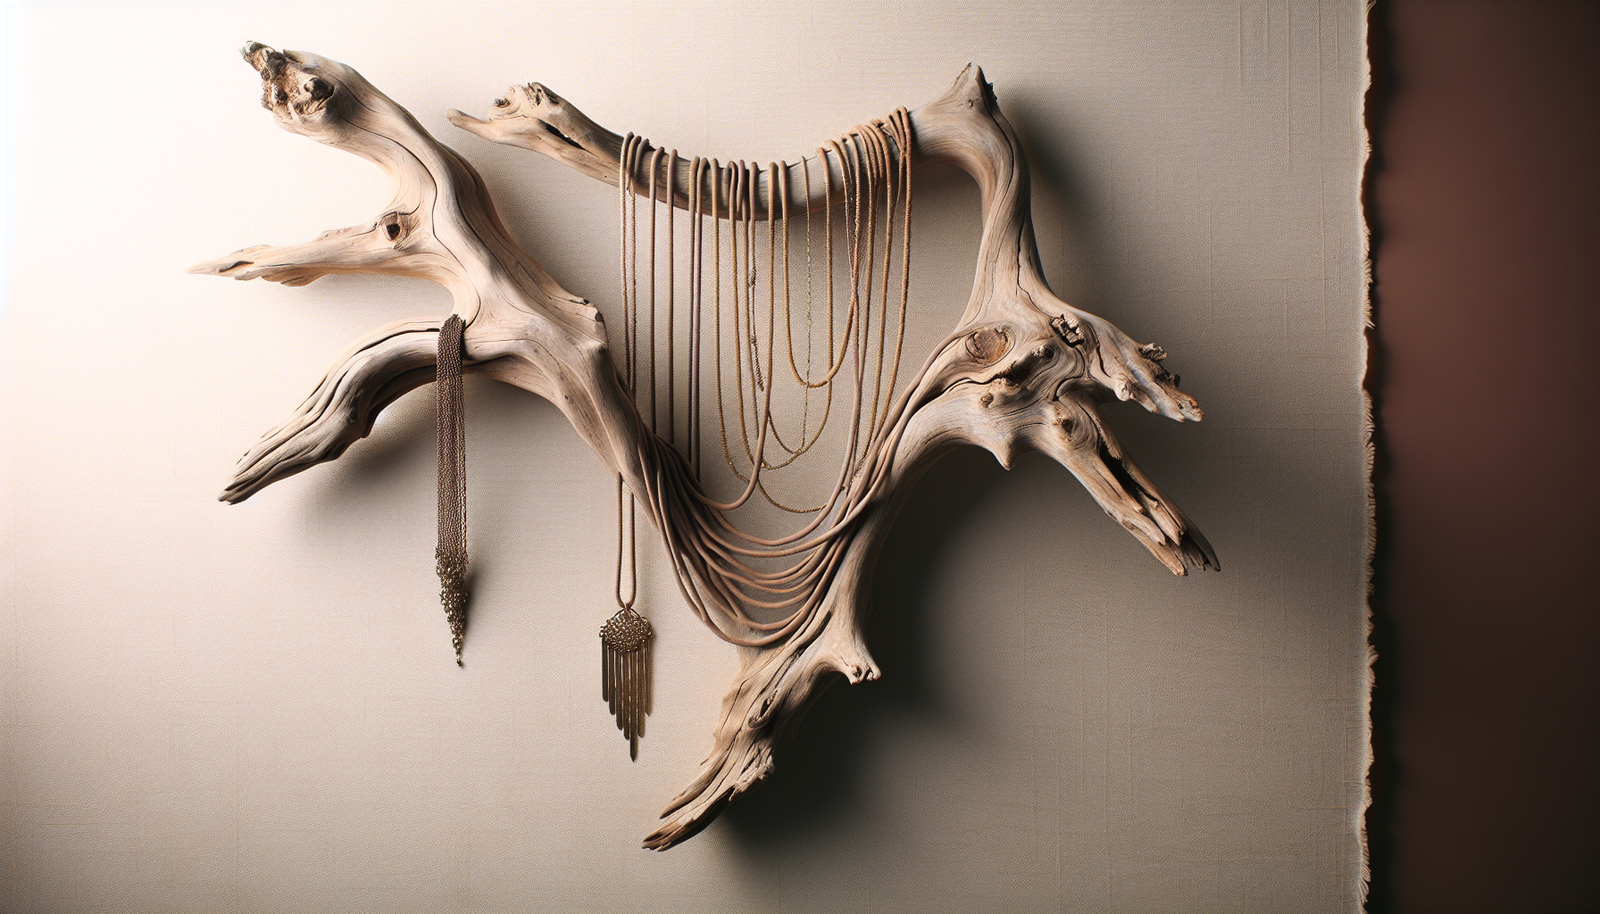
Filed Under: Driftwood Ideas Tagged With: crafts, DIY, Driftwood, Number Sign, Rustic

Driftwood Necklace Hanger

June 7, 2025 by admin

Have you ever wondered how to combine functionality with a touch of nature in your home decor? The answer might be right at your fingertips with a driftwood necklace hanger. Not only does it serve as a practical solution for organizing your favorite necklaces, but it also adds a unique, rustic charm to any room. Let’s explore how you can incorporate this beautiful piece of nature into your home décor.

Driftwood Necklace Hanger

Understanding Driftwood

Driftwood is often found washed ashore on beaches and riverbanks, shaped and smoothed over time by water, wind, and sand. Its unique textures and natural forms make it a favorite for DIY enthusiasts and eco-conscious decorators. But what exactly makes driftwood so special?

The Beauty of Driftwood

Driftwood’s aesthetically pleasing forms and textures are a gift from Mother Nature. Its natural color variations and organic shapes offer a rustic beauty that brings warmth and character to home interiors. No two pieces of driftwood are alike, which ensures your project is truly one-of-a-kind.

The Environmental Appeal

Using driftwood is a sustainable choice for home decor. It’s a natural, renewable material that doesn’t require any harmful processes to shape into desired forms. By incorporating driftwood into your projects, you’re also engaging in an eco-friendly practice, reducing the need for manufactured materials.

Why Choose a Driftwood Necklace Hanger?

The idea of a driftwood necklace hanger isn’t just about utility; it’s about bringing the outdoors inside and making your space feel more connected to nature. But why specifically a necklace hanger?

Functionality Meets Aesthetic

A driftwood necklace hanger provides a perfect blend of functionality and aesthetic appeal. It gives you a creative, eye-catching way to display your jewelry, transforming everyday items into a piece of art.

Versatility in Design

Due to its organic shape and form, driftwood can be fashioned into various designs that suit any decor style, from coastal and bohemian to modern and minimalist. This versatility makes it easy to integrate a driftwood hanger into your existing home environment.

DIY Driftwood Necklace Hanger: Gathering Materials

Creating your own driftwood necklace hanger is not only rewarding but a fun project that can be personalized to fit your style. Let’s start by gathering the right materials.

Finding the Perfect Driftwood

While driftwood can often be collected from local beaches and riverbanks, ensure you’re allowed to take it, as some areas have restrictions. If collecting isn’t possible, craft stores sometimes sell driftwood for such projects.

Additional Materials Required

Beyond the driftwood, you’ll need a few basic tools and supplies to complete the hanger:

  • Small hooks or nails
  • Drill or hammer
  • Sandpaper
  • Wood sealant or clear varnish (optional, for preservation)
  • Hanging hardware (to attach your piece to the wall)

Step-by-Step Guide to Making Your Driftwood Necklace Hanger

Creating your driftwood necklace hanger can be a simple yet fulfilling project. Here’s how you can turn a simple piece of driftwood into an elegant jewelry display.

Preparing the Driftwood

  1. Cleaning: Gently clean your driftwood with a brush to remove sand, dirt, and debris. Avoid using soap or detergents, as these can damage the wood’s natural finish.

  2. Sanding: Use sandpaper to smooth any rough edges. This will prevent splinters and ensure the wood is safe to handle.

  3. Sealing: Applying a thin layer of wood sealant or clear varnish can protect the wood and enhance its natural color. This step is optional but recommended for longevity.

Crafting the Hanger

  1. Hook Placement: Plan where you’d like to place the hooks or nails. Consider the length and number of necklaces you plan to hang.

  2. Attaching the Hooks: Use a drill for hooks or a hammer for nails to attach them securely to the wood. Space them evenly for a clean look.

  3. Preparing for Wall Mounting: Finally, add the necessary hardware to the back of the driftwood, usually a sawtooth hanger or D-rings for easy wall mounting.

Driftwood Necklace Hanger

Styles and Design Ideas

Now that you’ve created your driftwood necklace hanger, let’s explore some styles and designs to inspire how you can personalize it further.

Coastal and Beachy

Enhance the seaside theme by incorporating seashells, small starfish, or other beach treasures into your design. You can glue these accents directly to the driftwood for a cohesive, oceanic aesthetic.

Bohemian and Eclectic

For a bohemian vibe, consider adding colorful tassels or ribbons hanging from the driftwood. Mixing different textures and materials creates a visually stimulating and eclectic piece.

Minimalist and Modern

If you prefer a minimalist style, keep the design clean and simple. Use a piece of driftwood with a straightforward shape and space the hooks with precision. The natural beauty of the driftwood will speak for itself.

Luxury Touches

For a touch of glamour, add metallic accents like gold leaf application or brass hooks. These elegant enhancements can elevate the rustic driftwood to a chic statement piece.

Maintaining Your Driftwood Necklace Hanger

While driftwood is naturally durable, maintaining it will keep your necklace hanger looking its best over the years.

Regular Cleaning

Dust your hanger regularly to keep it clean. Use a dry cloth or a soft brush to gently remove dust and dirt that may accumulate.

Reapplying Sealant

If you’ve chosen to seal your driftwood, reapply the sealant every couple of years. This will keep the driftwood from drying out or cracking and maintain its rich color and appearance.

Checking for Wear

Regularly check the hooks or nails for any signs of loosening. Tighten or replace as necessary to ensure stability and safety for your necklaces.

Conclusion

Creating a driftwood necklace hanger is a beautiful way to incorporate the elegance of nature into your home. Not only does it serve a functional purpose, but it also acts as a conversation piece that reflects your unique style and connection to the natural world. By following the steps outlined above, you can craft a stunning, personal accessory organizer that channels the serenity of the outdoors right into your living space. So, gather your tools and unleash your creativity on this simple yet fulfilling project. Your necklaces—and your home—will thank you.

Filed Under: Driftwood Ideas Tagged With: crafts, DIY, Driftwood, Hanger, Necklace

Driftwood Name Cards

June 4, 2025 by admin

Have you ever thought about adding a touch of nature to your gatherings with something as unique as driftwood name cards? Using driftwood to create name cards for events combines creativity with sustainability, offering a fresh and earthy twist to your table settings. It’s not just about names; it’s about setting a tone and telling a story with every piece of carefully chosen wood. You might be wondering how to embark on this creative journey and what makes driftwood such a cherished material for name cards. Let’s navigate through the enchanting process and the reasons why driftwood name cards might just be the perfect addition to your next event.

Driftwood Name Cards

What Exactly Is Driftwood?

Driftwood refers to any wooden debris that washes ashore along coastlines after being carried away by rivers, tides, or wind. This wood often undergoes a natural weathering process, giving it a unique, smooth appearance. Each piece tells a story of where it has traveled, adding a touch of mystery and elegance to any crafting project you may have.

The Journey of Driftwood

The journey of a piece of driftwood often starts in a forest or park. A tree may fall due to natural causes such as wind or water erosion. Once the wood makes its way into a body of water, it can travel for long distances. The constant battering by water and sand eventually smooths and refines its texture. You never get the same piece twice, which makes every creation with driftwood entirely unique.

The Aesthetic Appeal of Driftwood

Why driftwood, you ask? Its natural and rugged beauty makes it an ideal choice for a variety of crafting projects. The neutral colors of driftwood lend themselves well to different themes, from rustic and coastal to minimalist and modern. Its versatility can match or contrast elegantly with other materials like metal, glass, or fabric. When you work with driftwood, you’re embracing not just nature’s art but also its imperfections, which often turn out to be perfect for any occasion.

Why Driftwood Name Cards?

If you are keen on unique ways to personalize your events, driftwood name cards are a conversation starter. They offer more than just a label; they are decorative items that guests can appreciate and even take home as souvenirs. Let’s explore why driftwood name cards are not just trendy but also meaningful.

Eco-Friendliness

Driftwood is an environmentally friendly material. By utilizing wood that has already fallen and weathered naturally, you are essentially giving new life to something that might otherwise be discarded. This sustainable practice is especially appealing in today’s world where everyone is becoming more environmentally conscious.

Personal Touch

The tactile feel of driftwood, its irregular shapes, and its rustic charm make it a personable item. By inscribing a name onto each piece, you’re not just labeling a seat but creating an individualized artifact. It shows that you’ve put thought and effort into every guest’s experience, making them feel valued.

Versatility for Any Event

Whether it’s a wedding, a corporate dinner, or a small family gathering, driftwood name cards fit seamlessly into any event type or theme. Their adaptability means you can pair them with other elements, ranging from fine china to simple picnic supplies, without missing a beat.

Creating Your Own Driftwood Name Cards

Now that you’re convinced of their charm, it’s time to understand how to craft these unique pieces. The process isn’t as daunting as it may seem; it’s a fun and rewarding endeavor anyone can undertake with a bit of creativity and patience.

Collecting Driftwood

The first step is to gather your driftwood pieces. You can frequently find driftwood along beaches or riverbanks. Remember to choose pieces that are appropriate in size for name cards, approximately 4-6 inches long. Collect more than you need, as there will always be some pieces that work better than others.

Cleaning the Driftwood

Cleaning is essential to remove any debris, salt, or insects that might have accompanied your wood on its journey. Start with a thorough rinse and scrub with a brush under fresh water. For a deeper clean, you can soak the pieces in a mixture of water and vinegar overnight. Dry them completely before proceeding to the next steps.

Designing and Personalizing

Once your driftwood is clean and dry, it’s time to let your creativity flow. Depending on your style and resources, you can use different tools and techniques to inscribe names:

  • Wood Burning Tools: This method allows you to burn the name into the wood surface for a lasting and visually impactful effect.
  • Markers or Paint Pens: These are ideal for those who prefer ease and speed without compromising on beauty.
  • Engraving Tools: If you have access to engraving tools, they can offer precision and an elegant finish.

Consider adding additional decorative touches, such as attaching small seashells, sand dollars, or twine to enhance the natural theme.

How to Display Driftwood Name Cards

The way you choose to display your driftwood name cards can influence the overall presentation and ambiance of your event. Here are some ideas to spark inspiration:

On the Plate

Place each driftwood name card centrally on the plate or nestled in a napkin fold. This creates an intimate and immediate introduction for guests to their designated spots.

In a Holder

Opt for small holders that can cradle the driftwood in place, allowing for easy visibility. Holders can be of varying styles, using materials like metal, glass, or even more natural wood to complement the theme.

Hanging From Glasses

Incorporate a small hole into each driftwood piece and attach a string or thin twine. You can then hang them from water or wine glasses, adding an elegant touch to your table setting.

Driftwood Name Cards

Enhancing the Event Theme with Driftwood

Driftwood name cards can tie into larger event themes, elevating the visual attractiveness while maintaining a sense of cohesion. Here are a few theme ideas that naturally welcome driftwood:

Coastal or Nautical

Given its origins, driftwood is a natural fit for coastal or nautical themes. Pair it with sea-colored linens and marine-inspired decor for a unified theme.

Rustic Elegance

Combined with other earthy materials like burlap and lace, driftwood can greatly enhance a rustic-themed event—perfect for barn weddings or garden parties.

Minimalist and Modern

For a minimalist look, consider keeping the design of the driftwood name cards simple and clean. Pair them with monochrome dinnerware to emphasize understated elegance.

Caring for Driftwood Name Cards

Maintaining the integrity and appearance of driftwood name cards is key to ensuring they last beyond the event. Here’s how to keep them in pristine condition:

Sealing

Applying a sealant can help protect the wood from moisture and potential damage. Choose a clear, matte sealant to preserve the natural look.

Storage

Store them in a dry, cool place away from direct sunlight. Stacking them carefully, with soft material between layers, can prevent scratches or other damage.

Reusability

Given their durability, driftwood name cards can be easily reused for future occasions. Re-inscribe new names, or perhaps consider passing them on to friends or family planning events of their own.

Driftwood Beyond Name Cards

Driftwood’s charm and versatility aren’t limited to name cards alone. It can serve as a central element in various crafting projects that echo the same natural elegance:

Centerpieces and Decor

With a few larger pieces of driftwood, you can craft stunning centerpieces. Combine with candles, foliage, or shells for a cohesive and eye-catching table arrangement.

Framed Art

A driftwood frame surrounding a mirror or photo can add a rustic touch to your home decor. It’s a beautiful way to carry the theme from the table to the wall.

Holiday Ornaments

Create seasonal decorations using smaller pieces of driftwood combined with paint, glitter, or fabric to match holiday themes.

Conclusion

Exploring the world of driftwood name cards unveils a path filled with creativity, sustainability, and natural beauty. Whether you’re planning a grand wedding or an intimate gathering, these unique items offer a personal and environmentally friendly way to express your style and welcome guests. Each piece of driftwood, with its unique story and character, invites you to add your personal imprint, making every gathering memorable for both you and those you’re hosting. So, as you begin or continue your crafting journey, consider the timeless charm and quiet elegance of driftwood—a gift from nature, repurposed by you.

Filed Under: Driftwood Ideas Tagged With: crafts, Driftwood, Handmade, Name Cards, Rustic Decor

Driftwood Mobile Diy Drift Wood

May 30, 2025 by admin

Have you ever stumbled upon a piece of driftwood along the shore and wondered about all the creative possibilities it holds? Driftwood, with its unique shapes and weathered textures, can be a magical find for a do-it-yourself (DIY) enthusiast. Creating a driftwood mobile is not only a fantastic way to use these natural treasures but also an excellent way to bring a piece of nature into your home. Let’s begin this crafty journey together, exploring everything you need to know to make your very own driftwood mobile.

Driftwood Mobile Diy Drift Wood

Understanding Driftwood

Before diving into the DIY project, it’s essential to gain a better understanding of driftwood — its origins, characteristics, and varieties. This helps you appreciate your materials and make informed decisions when selecting pieces for your mobile.

What is Driftwood?

Driftwood is essentially any type of wood that has been washed onto the shore by winds, tides, or waves. Over time, pieces of wood that come from various sources such as tree branches, logs, or even man-made sources are sculpted by water and sand into beautiful, smooth forms. Driftwood is unique and full of character due to the countless hours nature has spent perfecting it.

Characteristics of Driftwood

Driftwood typically displays colors ranging from pale beige to brown and even gray, depending on its exposure to sun, salt, and other elements. It’s often lightweight due to the natural drying process. The pieces might have holes, knots, and other features formed by marine life or the natural erosion process, offering a rustic charm.

Sourcing Driftwood

You might be wondering where to find driftwood for your project. Fortunately, there are a few ways to source it. You can collect driftwood during walks along lakeshores, rivers, and beaches. Remember to check local regulations on collecting natural materials. If that’s not an option, craft stores, online marketplaces, or specialized decor shops often sell driftwood for crafting purposes.

Preparing Your Driftwood

Before you start crafting, some preparation is necessary. Preparing your driftwood ensures you have clean, sturdy pieces that will make a gorgeous and durable mobile.

Cleaning Your Driftwood

Start by removing sand, dirt, and any potential critters from the wood. A simple but effective cleaning method involves rinsing the driftwood under tap water. If there are hard-to-remove debris, an old toothbrush can be handy for scrubbing. For added disinfection and to kill bacteria or mold, let your driftwood soak in a mixture of water and a small amount of bleach (1 part bleach to 9 parts water) for about 24 hours. After soaking, rinse them thoroughly.

Drying the Driftwood

Once cleaned, allow the driftwood to dry completely. Place it in a well-ventilated, sunny location. Depending on the size and density of the wood, drying can take anywhere from a couple of days to a week. Proper drying prevents future mold growth and helps retain the driftwood’s wonderful texture.

Designing Your Driftwood Mobile

Now comes the exciting phase of designing your mobile. This process involves deciding on the style, layout, and overall appearance of your mobile.

Choosing a Style

The style of your driftwood mobile can range from simple and minimalist to intricate and decorative. Here are a few style ideas to consider:

  • Natural and Organic: Focus on showcasing the rustic beauty of the wood.
  • Seaside-inspired: Incorporate shells, miniature buoys, or other marine-themed items.
  • Bohemian/Eclectic: Use colorful threads, beads, or crystals to enhance the driftwood’s natural appeal.

Deciding on a Layout

Consider how you want the pieces to hang and move in space. A balanced and visually harmonious layout often uses symmetry or asymmetry to create interest. You might want a central piece of driftwood with others suspended around it or a cascading design, where pieces of decreasing size hang below one another.

Sketching Your Design

Before threading and assembling your mobile, sketch out your design on paper. This plan will guide you during the assembly process and help you determine the number and size of pieces you need. Be flexible; inspiration might strike as you physically work with your materials.

Gathering Materials and Tools

Beyond the pieces of driftwood you’ve collected, you’ll need additional materials and tools to create your mobile.

Essential Materials

MaterialFunction
DriftwoodThe main focus and structure of your mobile
Strong twine or threadFor hanging the driftwood pieces
Hooks or screwsFor attaching pieces or hanging the mobile
Decorative accentsOptional: shells, beads, feathers
Drill or screwdriverFor making holes (optional)

Tools You May Need

  • Scissors: For cutting twine or thread
  • Tape measure or ruler: To ensure even spacing and length
  • Hot glue gun or strong adhesive: To secure decorative elements or joints

By ensuring you’ve gathered all necessary materials before starting, you can streamline your crafting process and focus on the creative aspects.

Driftwood Mobile Diy Drift Wood

Creating Your Driftwood Mobile

With preparation complete, you’re ready to start assembling your driftwood mobile. This hands-on part of the process is where your creativity truly comes to life.

Drilling Holes (if necessary)

If your design requires, use a small drill bit to carefully make holes in your pieces of driftwood. Drilling should be done with care to avoid splitting the wood. This is often required only if your assembly involves threading driftwood onto a central support wire or if you want to precisely thread your twine through each piece.

Threading and Knotting

Take your chosen thread or twine and begin assembling your mobile by threading it through or around each piece of driftwood following your design. Use secure knots to ensure the pieces stay in place. Here are some knot types you can consider:

  • Overhand Knot: Simple and effective for securing ends.
  • Square Knot: Ideal for joining two strings together.
  • Lark’s Head Knot: Good for attaching items like beads or feathers.

Balancing Your Mobile

Achieving balance is crucial to ensuring your mobile hangs properly. Check the balance by hanging the mobile temporarily and observing how it settles. Adjust by trimming twine, moving pieces, or adding additional weight where necessary.

Adding Decorative Elements

If you opted for a more eclectic or themed mobile, now is the time to attach decorative accents like beads, feathers, or crystals. Use your hot glue gun or adhesive to secure them. Just remember to maintain balance and don’t overload any section.

Displaying Your Driftwood Mobile

Finally, it’s time to hang and display your creation where it can be fully appreciated. Consider locations such as:

  • Near a sunny window to highlight shadows and movement
  • In a breezy spot for gentle motion
  • As a focal point in a room to enhance natural or coastal decor

Secure your mobile with appropriate fixtures to ensure it is safely mounted.

Caring for Your Driftwood Mobile

To keep your mobile looking fresh and beautiful:

  • Dust it regularly with a dry cloth.
  • Occasionally check knots and connections for security.
  • Avoid overly humid areas to prevent potential wood warping.

Dive into the Creative Process

Crafting a driftwood mobile is more than a mere DIY project; it’s an exploration of creativity and nature. As you place each piece on your mobile, you’re not just connecting elements of wood; you’re connecting stories, memories, and personal touches into a beautiful, harmonious display. Enjoy every step of crafting and remember that every imperfection adds character and uniqueness to your creation. Let your artistic instincts guide you, and have fun bringing a piece of the outdoors into your heart and home.

Filed Under: Driftwood Ideas Tagged With: crafts, DIY, Driftwood, home decor

Driftwood Miniature Houses Diy

May 28, 2025 by admin

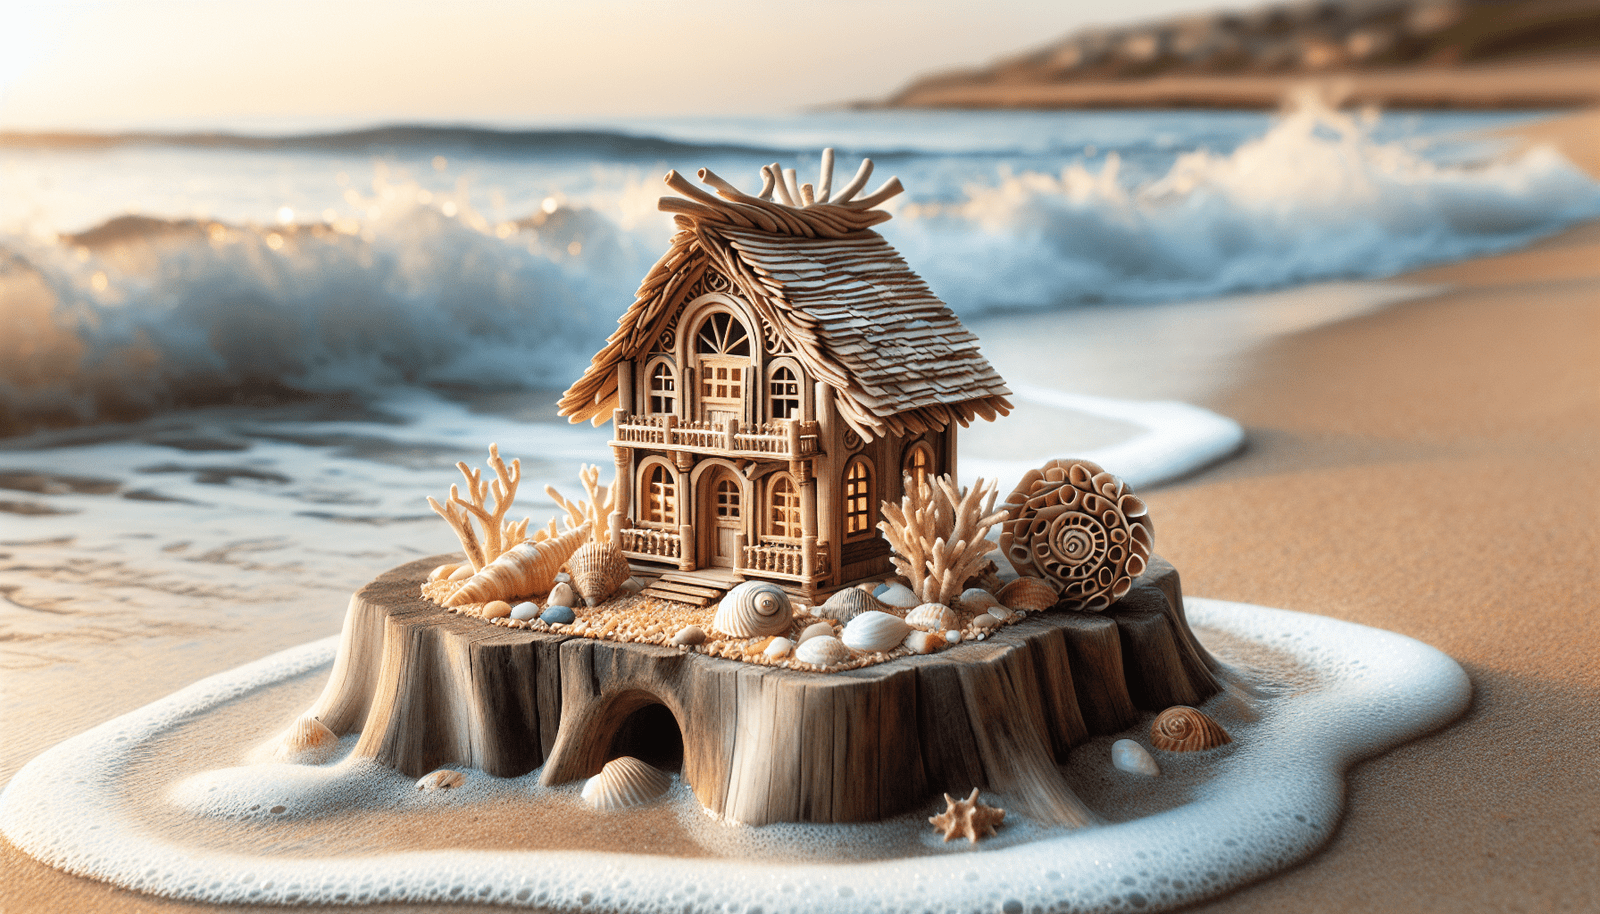
Have you ever gazed at a piece of driftwood and wondered about the story it might tell? There’s something inherently captivating about these naturally weathered pieces of wood—perhaps it’s their journey through rivers and oceans, or the way nature shapes them into unique forms. If you’ve ever felt inspired to create something magical from these pieces, then driftwood miniature houses could be your new favorite project. Let’s explore how you can transform ordinary driftwood into enchanting little homes!

Driftwood Miniature Houses Diy

Understanding Driftwood

What is Driftwood?

Driftwood is wood that has been washed onto a shore, riverbank, or beach by the action of winds, tides, or waves. These pieces often have a distinctive, weather-beaten appearance, resulting from prolonged exposure to water and sunlight. Each piece of driftwood is unique, with its own distinct shape, color, and texture.

Why Use Driftwood for Miniature Houses?

Driftwood offers a natural, rustic charm that perfectly complements miniature houses. Its varied shapes and textures provide endless creative possibilities. Using driftwood also embraces sustainability, repurposing natural materials instead of synthetic ones.

Gathering Your Materials

Selecting the Right Driftwood

Before starting your project, you need the right pieces of driftwood. Look for pieces that have interesting shapes or resemble structures you might use in a house, such as flat pieces for roofs or long, slender pieces for chimneys or fence posts.

Additional Materials

Apart from driftwood, here are some essentials you’ll need:

  • Glue: A strong adhesive, such as wood glue or a hot glue gun, to hold your structures together.
  • Cutting Tools: A small saw or craft knife to shape your pieces as needed.
  • Paint and Brushes: For adding color or details to your houses.
  • Sealer: To protect the wood and give it a finished look.
  • Additional Decorations: Items like pebbles, moss, shells, or miniature accessories to enhance your design.

Preparing the Driftwood

Cleaning and Drying

It’s crucial to clean your driftwood before use. Start by rinsing it thoroughly to remove sand and debris. For a more thorough clean, soak the wood in a solution of water and vinegar, which can help remove any remaining salt and potential pests. Once cleaned, let the wood dry completely—this may take several days depending on the humidity and size of the wood.

Shaping Driftwood

While driftwood comes in many interesting shapes, you might need to refine it a bit. Use a saw to cut larger pieces down to size or a craft knife for more precise shaping. Remember to work with the natural form of the wood to maintain its unique character.

Constructing Your Driftwood Miniature House

Creating the Base

Start by choosing a sturdy, flat piece of driftwood to serve as the base of your house. This will provide stability for your structure and a starting point for layout. You can place additional smaller pieces around the base to create the appearance of landscape or garden elements.

Building the Structure

Once you have your base, begin by arranging the main elements of your house. Use flat, wide pieces for floors and roof panels, stacking or layering them to create walls. Secure each piece with glue, allowing sufficient time for it to set before moving on to the next.

Adding Details

This is where you can let your creativity shine. Consider carving or affixing door and window shapes onto the walls. Use slender bits of driftwood for railings, fences, or chimney stacks. This is your chance to personalize the house with unique touches.

Painting and Sealing

You have the option to paint your driftwood house, though many prefer to leave the wood’s natural hues. If you decide to add color, use water-based paints for a more subtle, washed-out effect. Lastly, apply a sealant to protect your house from moisture and ensure it withstands the elements.

Driftwood Miniature Houses Diy

Decorating and Finishing Touches

Landscaping with Natural Elements

Enhance your driftwood house with elements like moss roofs, pebble pathways, and tiny shell gardens. These natural additions create a whimsical, enchanted appearance befitting of a fairy tale.

Incorporating Miniature Accessories

Seek out miniature furniture or inhabitants that can bring your driftwood house to life. Consider tiny figurines, miniature garden tools, or little lanterns to give a sense of occupancy and activity.

Displaying Your Driftwood Creation

Indoor Display Ideas

Your driftwood house can become a conversation piece indoors. Place it on a shelf with complementary decorations, perhaps accompanied by coastal-themed art or a collection of other unique miniatures.

Outdoor Display Ideas

If you’ve treated your house with weatherproof sealant, consider displaying it in the garden. Nestle it amongst plants or create a designated area for a fairy garden, where it can be surrounded by flowers and nature.

Additional DIY Driftwood Projects

Beyond Houses: Other Driftwood Crafts

Once you’ve mastered making miniature houses, consider expanding into other projects. Driftwood can be used to create picture frames, decorative wall art, or even functional furniture like tables and coat racks. The possibilities are boundless.

Sharing Your Craft

Consider sharing your driftwood creations with a community of crafters. Join online forums dedicated to driftwood art or participate in local craft fairs. Many find joy in both creating and sharing their work with others.

Safety and Preservation Tips

Crafting Safely

Always prioritize safety while crafting. Use tools with care, and have a first-aid kit handy for any minor injuries. Work in a well-ventilated area, especially when using glue and sealants.

Maintaining Your Driftwood Pieces

Over time, exposure to elements can cause driftwood to degrade. Periodically check your creations for signs of wear, and reapply sealant as needed to extend their lifespan.

Conclusion

Creating driftwood miniature houses is a delightful way to use natural materials to craft something extraordinary. It’s a hobby that combines art, nature, and storytelling, offering endless opportunities to express your creativity. Whether you keep your creations for personal enjoyment or share them with others, each piece is a testament to the beauty and wonder that can come from the simplest materials. So next time you see a piece of driftwood, remember the enchanting little world you can build just beneath the surface.

Filed Under: Driftwood Ideas Tagged With: crafts, DIY Projects, Driftwood, home decor, Miniature Houses

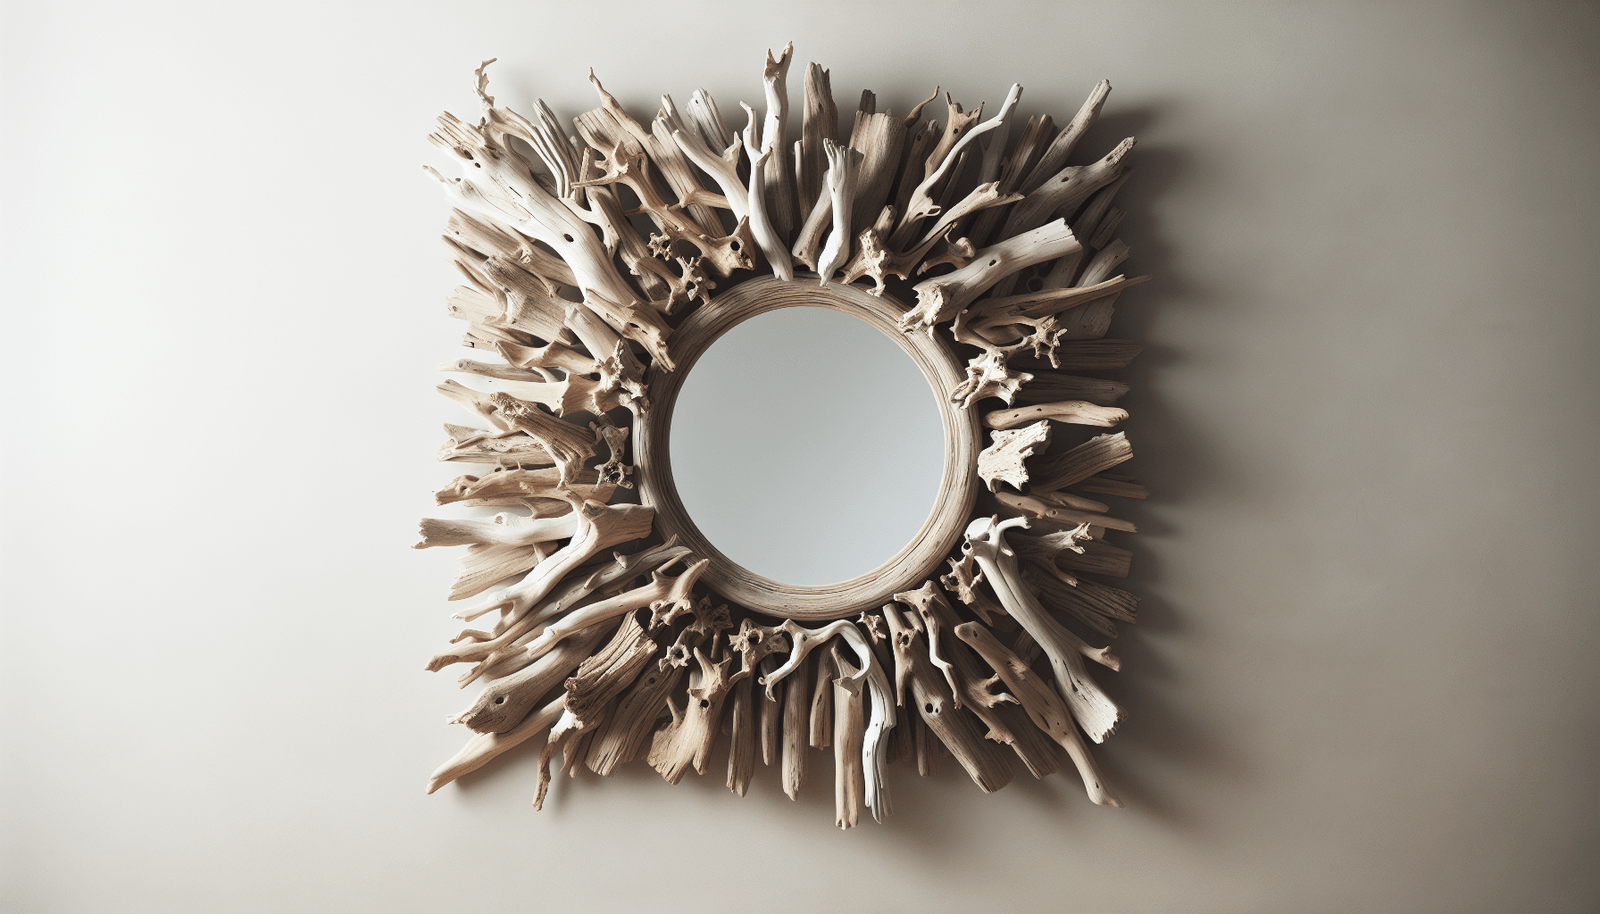
Driftwood Mirror Diy How To Make

May 28, 2025 by admin

Have you ever admired the rustic charm and natural beauty of driftwood mirrors in coastal or bohemian interiors and thought to yourself, “Could I create something like that?” The good news is that not only is it possible, but making a driftwood mirror is an enjoyable and satisfying project you can tackle on your own! In this guide, I will walk you through everything you need to know to create your own stunning driftwood mirror. From sourcing your driftwood to putting the final touches on your masterpiece, you’ll learn all the steps necessary to craft a mirror that will be the envy of anyone who steps into your home.

Understanding Driftwood

What is Driftwood?

Before you begin collecting materials for your DIY project, it helps to understand what driftwood is. Driftwood refers to pieces of wood that have been washed onto shores by the action of tides, winds, or waves. Over time, these pieces of wood are naturally weathered, giving them their unique appearance. The natural sculpting process creates interesting shapes and textures, making each piece one-of-a-kind.

Why Use Driftwood?

Driftwood is not only beautiful; it is sustainable and eco-friendly. By using driftwood, you repurpose materials already in existence, minimizing environmental impact. This makes driftwood an excellent choice for those who want to incorporate more environmentally responsible pieces into their home decor.

Finding Driftwood

Driftwood can often be found along beaches, riverbanks, or lakeshores. Each location offers unique characteristics to the driftwood, whether it’s the type of wood or the way it’s been shaped by nature. When collecting driftwood, always ensure it’s legal to do so in your chosen location and that you’re not disrupting any natural habitats.

Gathering Materials for Your Driftwood Mirror

Before you roll up your sleeves and get started, you’ll need to gather all your materials. Here’s what you’ll need to craft your driftwood mirror:

Materials Needed

  • Driftwood Pieces: Gather a variety of pieces in different sizes and shapes.
  • Mirror: Choose a base mirror of your desired size and shape.
  • Strong Adhesive: Opt for industrial-strength adhesives like Epoxy or a hot glue gun for bonding the driftwood to the mirror.
  • Backing Board: This could be plywood or MDF to provide extra stability, especially if your mirror will be large.
  • Sandpaper: To smooth any rough edges on the driftwood.
  • Saw: For trimming driftwood as needed.
  • Cloth and Water: For cleaning the driftwood pieces.
  • Hangers: To mount the finished mirror on a wall.

Optional Materials

  • Wood Finish: For those who want to give the driftwood a polished or stained look.
  • Tapestry Needles: Useful if you are threading smaller pieces together before attaching them to the mirror.
  • Protective Gear: Gloves and goggles to keep you safe while working with tools and adhesives.

Driftwood Mirror Diy How To Make

Preparing Your Driftwood

Cleaning Driftwood

Once you have your driftwood, it’s important to clean it thoroughly. Given that driftwood comes from natural bodies of water, it might be covered in algae, salt, sand, or even insects. Here’s how you can clean your driftwood:

  1. Rinse Thoroughly: Use water and a sturdy brush to clean off any debris or dirt.
  2. Soak in Water: Submerge your driftwood in water for several hours to dissolve any ocean salt or trapped sand.
  3. Use Mild Soap: For particularly stubborn dirt, consider using a mild soap to help lift it away.
  4. Dry Completely: After cleaning, let the driftwood pieces dry completely. Place them in a well-ventilated area for several days to ensure they are fully dried.

Treating Driftwood

For additional preservation and to avoid any potential pests:

  • Boil the Driftwood: If your pieces fit into a pot, boiling them for an hour can help eliminate pests.
  • Freeze Method: Alternatively, placing driftwood in the freezer for a week can also help kill any insects.

Optional Sanding

Using sandpaper, gently sand any edges or surfaces you prefer to be smoother. This can make handling the driftwood easier and may enhance the final appearance by giving a more finished look.

Designing Your Driftwood Mirror

Plan Your Design

The first step in designing your mirror is to plan how you want your driftwood to be laid out around it. Here’s how you can approach this:

  • Arrange Without Glue: Place your driftwood pieces around your mirror to get an idea of how you want them arranged.
  • Mix Sizes and Shapes: Use a variety of shapes and sizes to create an appealing and natural look. Sporadically placing larger and smaller pieces can give a balanced aesthetic.
  • Consider Depth and Layers: Think about layering some pieces on top of others for added depth.

Finalizing the Design

Once you’re satisfied with your layout, take a photograph or sketch it out. This will help you remember the placement when it’s time to attach the pieces.

Driftwood Mirror Diy How To Make

Assembling Your Driftwood Mirror

Attaching Driftwood to a Backing Board

For larger mirrors, using a backing board can add stability. Here’s how you can do it:

  1. Cut the Backing Board: Ensure it matches the dimensions of your mirror. You can extend it slightly if desired for a ‘floating’ look.
  2. Attach the Mirror to the Board: Use your strong adhesive to attach the mirror securely onto the backing board’s center.

Gluing the Driftwood

With your arrangement in mind, begin attaching the driftwood pieces:

  • Apply Adhesive: Generously apply adhesive to the driftwood and press it onto the mirror’s border or the backing board.
  • Press Firmly: Hold each piece for a few seconds to ensure it adheres securely.
  • Work in Sections: Attach one section at a time, referring back to your photo or sketch for accuracy.

Let it Set

Allow the adhesive to cure according to its instructions. This can take anywhere from a few hours to a full day. Patience during this step is crucial for ensuring your mirror is sturdy and safe for hanging.

Finishing Touches

Sealing the Wood

If you opted to use a wood finish, now is the time to apply it. Sealing the wood can enhance the color, give it a uniform appearance, and provide a layer of protection.

Attach Hanging Hardware

Once your mirror is fully assembled and the glue has dried:

  • Choose Hanging Hardware: D-rings and picture wire, or sawtooth hangers, are popular choices.
  • Align to the Backing Board: Ensure the hardware is aligned so the mirror will hang straight and securely.

Positioning Your Mirror

Find the ideal spot on your wall to hang your mirror. Consider factors like lighting, visibility, and what it will reflect back into your space.

Troubleshooting Tips

Problematic Adhesion

If your driftwood pieces do not stick well:

  • Check Adhesive Use: Make sure you’re using enough adhesive and pressing firmly.
  • Surface Prepping: Lightly scuff the back of the wood or the adhesive area to give a better grip.

Warping Over Time

If any driftwood pieces warp:

  • Secure Reinforcement: You may need to remove and reattach these pieces or reinforce them with additional adhesive or a small wood nail.

Caring for Your Driftwood Mirror

Regular Maintenance

Maintaining your driftwood mirror will keep it looking beautiful for years to come:

  • Dust Regularly: Use a soft cloth or duster to keep the mirror and wood clean.
  • Avoid Moisture: Keep it away from high-moisture environments unless treated to handle humidity.

Restoring Luster

If the driftwood’s color fades over time:

  • Reapply Wood Finish: Refresh the driftwood by applying a wood finish or wax to restore its appearance.

Congratulations! You’ve now created your own driftwood mirror. Your handmade piece isn’t just a safe guarder of reflection; it’s a story of sustainability, creativity, and natural beauty. Hopefully, this driftwood mirror instills in your home a touch of nature’s coastline charm. If you have any thoughts or additional tips to share about making driftwood mirrors, feel free to contribute. Your experiences will surely inspire and aid other aspiring DIY enthusiasts.

Filed Under: Driftwood Ideas Tagged With: crafts, DIY, Driftwood, Home Projects, Mirror

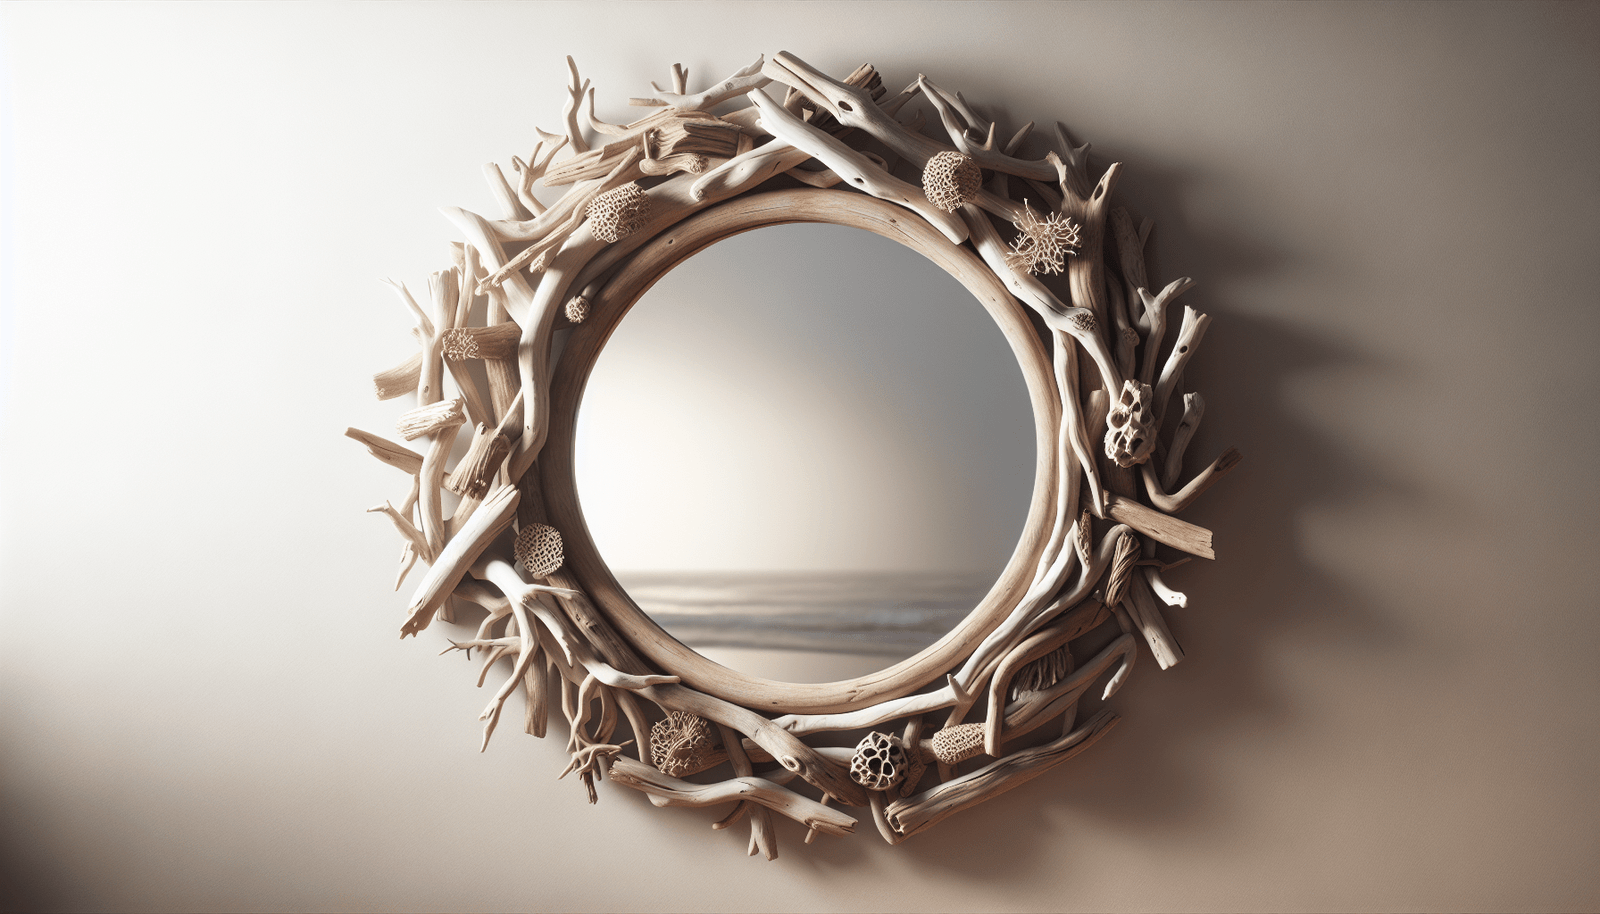
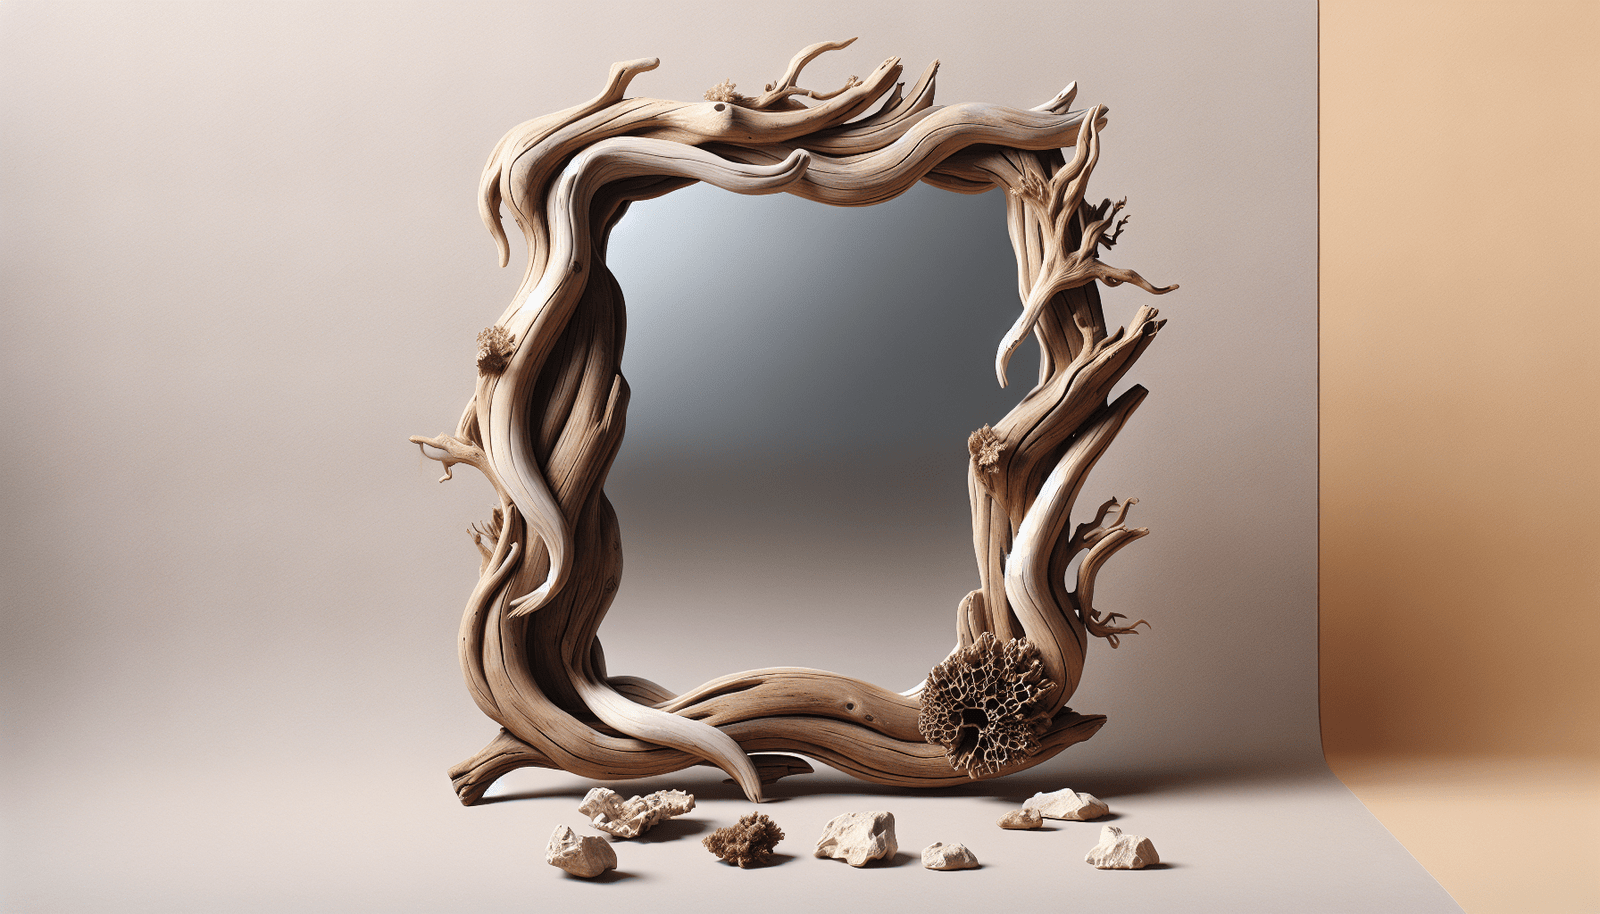
Driftwood Mirror Frame

May 26, 2025 by admin

Have you ever thought about adding a touch of nature to your home decor? A driftwood mirror frame might just be the perfect project for you. With its rustic elegance, a driftwood mirror frame can transform any ordinary space into one that echoes the tranquility and beauty of the coast. Imagine gazing into a mirror framed with pieces of driftwood, each telling its own story and resonating with the spirit of the ocean.

Driftwood Mirror Frame

What is a Driftwood Mirror Frame?

A driftwood mirror frame is a mirror framed with pieces of driftwood. Driftwood refers to wood that has been washed onto the shore by the tides and waves. Known for its smooth texture and unique shapes, driftwood adds an exotic and natural aesthetic to home decor. The weathered appearance of driftwood makes each piece distinct, offering a one-of-a-kind frame every time.

Why Choose Driftwood?

Driftwood has a unique charm that speaks volumes about nature and its resilience. Each piece is crafted by the elements, resulting in a wide variety of textures and shapes that are both pleasing to the eye and environmentally sustainable. When you choose driftwood for your DIY projects, you’re selecting a material that’s not only naturally beautiful but also eco-friendly.

The Charm of Incorporating Driftwood Into Your Decor

Bringing driftwood into your home decor creates a calming and peaceful ambience. Its natural hues and textures add a touch of warmth without overwhelming the space. By incorporating driftwood, you’re able to subtly nod to beachside aesthetics, bringing in the sophistication of a natural environment without the need for seashells or overly nautical elements.

Versatility and Style

Driftwood works fabulously with various design styles. Whether your home is modern, rustic, or coastal, driftwood has the versatility to blend seamlessly. It can add an organic touch to minimalist settings or enhance the raw charm of rustic spaces. The key lies in how you integrate it with the rest of your decor, making sure it complements rather than competes.

Gathering the Perfect Driftwood

Ready to begin your project? The first step is collecting the right pieces of driftwood. This can be an enjoyable process, allowing you to explore the beach and discover various forms provided by nature.

Where to Find Driftwood

Start by visiting local beaches or rivers known for washed-up driftwood. These are often found post-storms when waves push large amounts of driftwood ashore. National parks or protected natural areas may limit collecting, so be sure to follow any local regulations in place.

Selecting the Right Pieces

When selecting driftwood pieces, pay attention to their size, shape, and texture. Ideally, you’ll want pieces that are sturdy and free from excessive rot. Variations in color and size provide character and depth, enhancing the overall aesthetic of your frame.

Preparing Driftwood for Use

Before you start building your mirror frame, it’s crucial to prepare your driftwood properly. This ensures longevity and a clean, polished look that won’t harm the rest of your decor.

Cleaning Your Driftwood

Begin by brushing off any loose particles and scrubbing off dirt with mild soap and water. Be gentle to avoid stripping the wood of its natural charm. Once clean, soak the pieces in a solution of water and household bleach to kill any insects or bacteria, rinsing thoroughly afterward.

Drying and Sanding

After cleaning, let the driftwood dry completely. Place the pieces in a sunny, well-ventilated area for several days. Once dry, you can gently sand any rough edges with fine-grit sandpaper. This step not only cleans but also smooths the pieces for safe handling and an aesthetically pleasing result.

Driftwood Mirror Frame

Designing Your Driftwood Mirror Frame

Now that your driftwood is prepped and ready, it’s time to design your frame. The design process involves envisioning how you want the final piece to look and ensuring it complements your existing decor.

Planning the Layout

Lay your driftwood pieces around the mirror to experiment with different arrangements. Start with the corners, since these areas will naturally draw the eye and anchor the design. Once satisfied with a basic layout, capture the design with a photo for reference as you assemble.

Mirror and Backing Selection

Choose a mirror size that complements the space where it will hang. The driftwood will extend the mirror’s borders, so take into account this extra width. For backing, you will need a sturdy board or plywood that fits the dimensions of your completed frame for mounting purposes.

Construction: Assembling the Frame

With your design in place, it’s time to bring it to life. Construction involves securing the driftwood pieces with either glue or screws.

Tools You’ll Need

The tools required for this project include a drill, a strong wood adhesive, screws, and clamps. All of these will assist in securely attaching the driftwood to both the mirror and the backing.

Assembling the Frame

Begin by attaching your driftwood pieces to the backing according to your design. Use clamps to hold the pieces securely in place while the adhesive dries. You can reinforce this with screws for added stability, ensuring the screws are short enough not to pierce through the front of the driftwood.

Adding Finishing Touches

Finishing touches can elevate your driftwood mirror frame from a simple project to a stunning work of art.

Sealing the Driftwood

Once your frame is assembled and the adhesive has dried fully, apply a clear sealant. This will protect the driftwood from any potential moisture, preserving its natural finish and preventing decay.

Hanging Your Mirror

Select sturdy hanging hardware to match the weight of the mirror and frame. Consider using wall anchors or picture-hanging wire for additional support. Ensure the frame is securely hung to prevent any accidents.

Maintaining Your Driftwood Mirror Frame

A little care and attention will keep your driftwood mirror frame looking its best for years to come. Regular dusting with a soft cloth will maintain its appearance, while avoiding excessive moisture will prevent damage.

Touch-Ups and Repairs

From time to time, inspect your frame for any signs of wear or damage. Minor scratches or chips can be gently sanded, while any loose pieces should be re-glued promptly.

Unique Ideas and Inspirations

Driftwood mirror frames can be as varied as the driftwood pieces themselves. Here are some creative ideas to inspire your next project.

Color Accents

Consider adding subtle color accents with washed-out shades that complement the natural wood. This can be achieved with color washes or diluted paint for a soft touch that won’t overpower the driftwood.

Additional Materials

Integrate additional natural elements like pebbles, shells, or sea glass to enhance the coastal aesthetic. These can be glued in place or strategically placed to catch the light and add sparkle.

Conclusion

Crafting your own driftwood mirror frame is not only a relaxing and rewarding endeavor but also a wonderful way to bring a piece of the natural world into your home. By combining the organic beauty and unique charm of driftwood with your personal style, you create a functional piece of art that reflects both your creativity and appreciation for nature. Enjoy the process and the satisfaction that comes with personalizing your space with such a distinctive and eco-friendly touch.

Filed Under: Driftwood Ideas Tagged With: crafts, Driftwood, Interior Design, Mirror

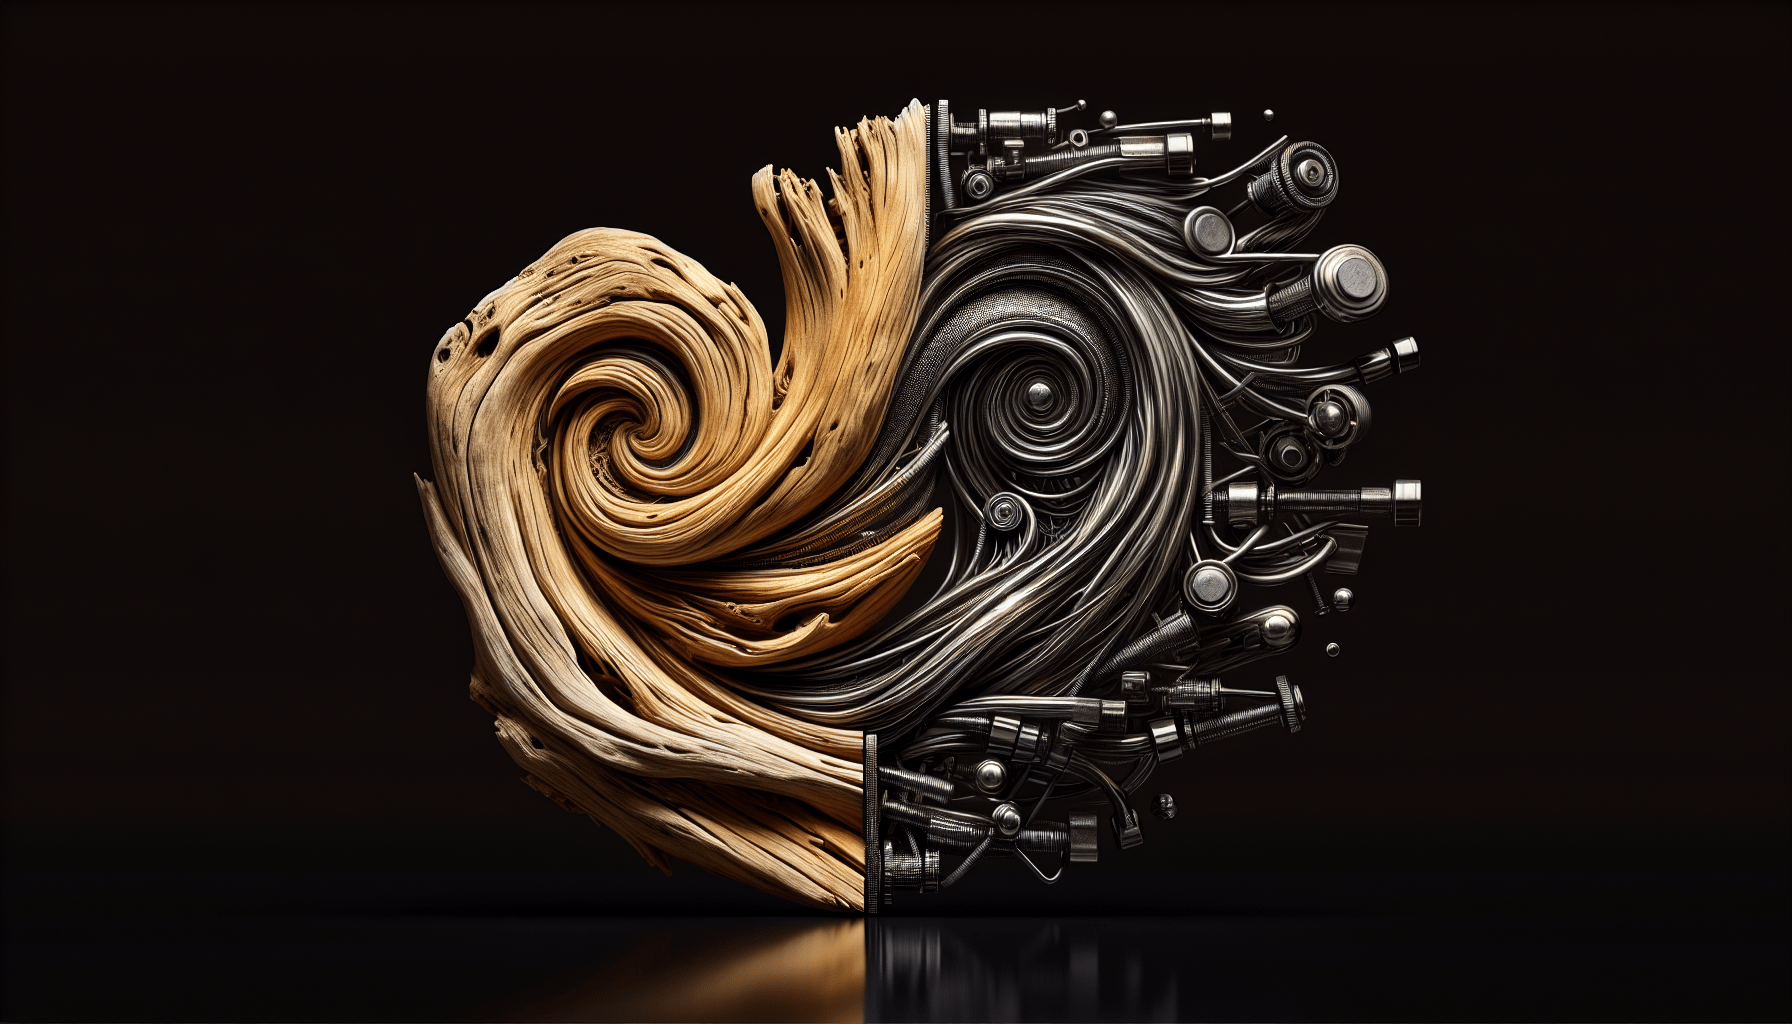
Driftwood Metal

May 25, 2025 by admin

Have you ever been strolling along the beach and stumbled across a beautifully aged piece of wood, sun-worn and smoothed by the ocean’s embrace? This piece of driftwood, a testament to time and nature, may evoke a curiosity about its journey and its potential transformation into something extraordinary, such as driftwood metal. Curious about what driftwood metal is and how these two seemingly different elements come together? You are not alone.

As we journey through the fascinating world of driftwood metal, you will uncover the harmonious blend of natural textures and industrial elements. This captivating fusion results in unique pieces that elevate both art and function.

Driftwood Metal

Understanding Driftwood

Driftwood, at its essence, is wood that has been washed onto a shore by the actions of wind, waves, or other forces of nature. This wood has traveled across oceans, tumbled through storms, and embraced the smoothness that only years of oceanic movement can bestow.

The Journey of Driftwood

Driftwood starts its existence as fallen branches or trees along riverbanks or coastal forests. Logs and branches are carried by rivers into vast oceans, where they begin their journey. Over time, the relentless tides and salty waters strip the wood of its bark. The result is a stunning textural quality. Each piece becomes a natural sculpture with curves, bends, and a smooth finish that only time can create.

The Ecology of Driftwood

Driftwood is more than just a testament to nature’s artistry; it plays a vital ecological role. It provides shelter and nurseries for marine life, offering protection in its crevices. Birds and sea creatures find it as a source of refuge and food. Driftwood is an integral part of the coastal ecosystem.

The Allure of Metal

In contrast to the natural process of driftwood, metal is a product of human ingenuity. Metals are elements that, when polished or engineered, offer a strength and industrial appeal desirable in many applications, from construction to art.

Types of Metals Used with Driftwood

The metals paired with driftwood often include:

  • Steel: Known for its strength and durability, steel brings a sleek modern feel when juxtaposed against the organic texture of driftwood.
  • Copper: With its warm, inviting tones, copper complements the earthy qualities of driftwood while adding richness and elegance.
  • Aluminum: Lightweight yet robust, aluminum allows for flexibility in design, adding contemporary touches to driftwood creations.

These metals each bring their own visual and functional qualities to driftwood art and crafts, making each creation unique.

Driftwood Metal: The Fusion

Driftwood metal is where the organic meets the industrial, crafting a hybrid that captures the essence of nature complemented by human design. This fusion often results in stunning pieces of furniture, artistic sculptures, and various home decor items.

The Art of Combining Driftwood and Metal

The craftsmanship required to combine these elements demands a deep understanding of both materials. The artisan must respect the natural form and beauty of the driftwood while crafting metal elements to fit and bolster the piece. This balancing act creates harmony, allowing each material to shine.

Applications of Driftwood Metal

Pieces crafted using driftwood metal can vary greatly, offering both decorative and practical uses:

  • Tables and Chairs: Furniture that showcases the juxtaposition of materials, often featuring driftwood bases with metal-framed surfaces.
  • Sculptures: Art pieces that highlight the unique shapes of driftwood enhanced by metal designs, providing both contrast and support.
  • Lighting Fixtures: Driftwood pieces that serve as the foundation for lamps and chandeliers, incorporating metal for structure and style.

Decorating with Driftwood Metal

Adorning your home with driftwood metal pieces can transform any space by adding an element of nature balanced with industrial chic. Whether subtle or bold, these pieces can become conversation starters that elevate the aesthetic of any room.

Choosing the Right Piece

When selecting driftwood metal pieces, consider the scale and existing style of the space. A large driftwood metal dining table may serve as a centerpiece, while smaller sculptures can add interest to a mantle or shelf.

Caring for Driftwood Metal Pieces

Proper maintenance ensures your driftwood metal art retains its charm. For driftwood, dusting with a soft cloth is usually sufficient. For metal parts, use a gentle cleaner to preserve its luster and prevent tarnishing. Regular maintenance will help in preserving the integrity and beauty of your pieces.

Driftwood Metal

The Environmental Aspect

The crafting of driftwood metal can also embrace sustainability. Using driftwood minimizes wood waste, and reclaimed or recycled metals can enhance this eco-friendly approach. This aspect not only supports environmental consciousness but also allows artisans to be resourceful and creative in their methods.

Sustainable Practices

Artisans focused on sustainability may seek certification or partnerships that ensure their materials, both wood and metal, comply with environmental standards. This commitment can be an essential part of selecting pieces for your home, knowing that they contribute to a healthier planet.

The Cultural Significance

Driftwood metal art often carries cultural meanings, embodying themes of resilience, transformation, and balance. The journey of driftwood across the sea can represent life’s path, with the incorporation of metal highlighting technological advancement and human impact.

Artisans’ Inspirations

Artisans often draw inspiration from the natural landscapes around them, translating natural beauty into their designs. Their works may draw upon local scenery, history, or personal experiences, bringing depth to each piece.

Investing in Driftwood Metal Art

For collectors or enthusiasts, driftwood metal art can be a valuable addition. The uniqueness of each piece coupled with the skill involved in creating them can make these items both personal treasures and financially wise investments.

Evaluating Authenticity and Craftsmanship

Evaluating driftwood metal pieces involves recognizing quality craftsmanship and authentic materials. Reputable artisans or galleries should provide transparency about the origins of the materials and the artistic process. Understanding these elements helps in appreciating the intricacies and the value of the piece.

Conclusion

In combining the worn beauty of driftwood with the robust utility of metal, driftwood metal offers a unique blend that celebrates nature and design. These pieces stand as beautiful reminders of the harmony between organic elements and industrial materials. Understanding this blend of natural and human-made elements invites you to see not just art, but also the inherent story each piece tells, enriching both personal spaces and collective narratives alike.

Filed Under: Driftwood Ideas Tagged With: crafts, Driftwood, Metalwork, Mixed Media, Sculpture

Driftwood Magnets

May 22, 2025 by admin

Have you ever strolled along the beach, only to find yourself enchanted by the unique shapes and patinas of driftwood? These pieces, sculpted by nature’s own hands, hold both beauty and mystery that can draw you in effortlessly. Driftwood has a timeless appeal, whispering stories of the sea and its journeys. But there’s more you can do with these weathered treasures than merely admire them. How about turning them into functional art—like driftwood magnets?

Discovering the Magic of Driftwood

What is Driftwood?

Driftwood comes from trees or shrubs and is washed onto shorelines by winds, waves, or tides. Once vibrant and lush, these remnants are transformed by water, time, and nature. Their gnarled forms and smoothed edges speak of travel over great distances. Driftwood can vary vastly in size, shape, and texture depending on the origin and the journey it has taken.

Why Driftwood Attracts Our Attention

The allure of driftwood lies in its individuality. No two pieces are alike, each possessing a history that invites the imagination. The natural curves and variable colors can mimic abstract art or become the centerpiece of home décor. Moreover, driftwood is eco-friendly and sustainable, encouraging creativity without compromising nature.

Environmental Impact and Sustainability

By utilizing driftwood, you contribute to an eco-friendly practice. This renewable resource reduces the need to cut down new trees for creative purposes. Collecting driftwood also encourages awareness of beach conservation and the importance of maintaining clean shorelines.

Transforming Driftwood into Magnets

Why Craft Driftwood Magnets?

Making driftwood magnets is a creative way to bring a bit of the ocean’s charm into your home. They’re not only practical in holding up papers and photos but also serve as a gentle reminder of nature’s artistry. Driftwood magnets can be gifts infused with personal touch and stories of their creation.

What You’ll Need

To transform pieces of driftwood into magnets, you’ll need a few simple materials. Here’s a handy list to get you started:

Materials RequiredSuggested Sources/Tools
DriftwoodBeaches or craft stores
Magnets (small)Craft stores or online
Strong adhesiveEpoxy or hot glue gun
Saw or hand toolHardware store
Sandpaper120 grit
Optional: Paint or wood stainDIY shops

Step-by-Step Guide to Crafting Driftwood Magnets

Step 1: Selecting the Driftwood

First, wander under the sunlit or perhaps cloudy skies of your favorite beach to find driftwood. Look for pieces that catch your eye—unusual shapes, sizes that fit comfortably in hand, or textures that stand out.

Step 2: Preparing Your Pieces

Once you’ve gathered your driftwood, it’s time to prepare them. Saw larger pieces to your desired size. Use sandpaper to smooth any rough edges, ensuring they feel pleasant to touch.

Step 3: Personalization

You can opt to leave your driftwood pieces natural or add a personal touch with paint or wood stain. Think about designs or initials that might make these magnets uniquely yours.

Step 4: Attaching the Magnet

Heat your glue gun or prepare your epoxy. Carefully apply a generous spot of adhesive to one side of the dried driftwood piece. Firmly press your magnet to the adhesive and allow it to cure as per the product’s instructions.

Step 5: Enjoy Your Artwork

Once everything is secured and any adhesives have dried, test your driftwood magnets. Place them on a magnetic surface and see how beautifully they display.

Driftwood Magnets

Creative Inspiration and Ideas

Artistic Variations

Driftwood magnets can be more than functional; they can also be miniature works of art. Consider incorporating elements like sea glass, small shells, or pebbles into the design. Adding these elements can maintain the coastal feel and introduce additional colors and textures.

Themed Magnet Sets

Creating themed sets of driftwood magnets can be another engaging project. Imagine a collection based on sea creatures, lighthouses, or seaside scenes, using paint or even attached materials to convey the theme. These can add a coastal flair to any refrigerator or workspace.

Ongoing Projects

As you hone your skills, consider expanding your magnet-making into a more extensive hobby. You could explore creating wall art using a collection of driftwood magnets, or even start an online shop, spreading your love for the ocean and creativity.

The Benefits of Crafting Driftwood Magnets

For Personal Use

Driftwood magnets crafted by your hands carry unique sentimental value. They serve as daily reminders of calm beach walks and seaside vacations. Each glance at these creations can transport you back to moments of peace and nature.

As Gifts

Handmade driftwood magnets make thoughtful, personal gifts. Sharing these handmade items with friends and family can let them take a piece of your experiences with them. They also make excellent souvenirs from trips, highlighting local beaches’ charm and appeal.

For the Community

Engaging in driftwood magnet crafting can have wider community benefits. Consider hosting workshops inviting others to join you in learning this art. Not only does this create community bonds, but it also promotes crafting as an eco-friendly alternative to buying factory-produced magnets.

Driftwood Magnets

Care and Maintenance

Keeping Driftwood Magnets Clean

Keeping your driftwood magnets clean is straightforward. Since they’re usually placed in kitchens, gently dust them regularly with a soft, damp cloth to remove any kitchen debris or dust. Avoid using excessive water or harsh cleaners that might wear away the wood.

Ensuring Longevity

To ensure the longevity of your creations, avoid placing them in direct sunlight for extended periods, which can cause fading. Also, keep them away from areas prone to high moisture to prevent mold or deterioration, particularly if you have used less treated or raw wood.

Conclusion

The journey of transforming driftwood into magnets is marked by creativity and personal touch. You don’t just make an object; you craft a conversation starter, a daily joy, and perhaps even a cherished family tradition. Driftwood magnets embody the perfect blend of aesthetic charm and practical application, bringing the serenity of the coast directly into your home.

Whether you’re new to crafting or a seasoned artisan, creating driftwood magnets offers a delightful way to connect with nature and express your unique style. So next time you find yourself at the beach, keep an eye out for that perfect piece of driftwood, waiting for a second life as a cherished magnet in your own world.

Filed Under: Driftwood Ideas Tagged With: crafts, DIY, Driftwood, Home Projects, Magnets

Driftwood Macrame Plant Hanger

May 21, 2025 by admin

Have you ever gazed upon the intriguing charm of driftwood and wondered how you could incorporate it into your home décor? Driftwood is more than just a relic from the beach; it’s a unique, natural element that can elevate your interior design in ways that are both rustic and elegant. In this guide, you’ll learn how to create a beautiful and functional driftwood macrame plant hanger that will not only spruce up your space but also bring a bit of the outdoors inside.

Driftwood Macrame Plant Hanger

Understanding Driftwood and Its Appeal

Driftwood, swept by waves and polished by time, carries with it a story of journey and resilience. Its coarse texture and unique shapes offer a glimpse into nature’s raw beauty. Integrating driftwood into home décor has gained popularity due to its sustainable nature and aesthetic value.

Why Choose Driftwood for a Macrame Project?

Driftwood serves as an excellent medium for macrame projects because of its strength and visual appeal. Each piece is unique, granting a one-of-a-kind outcome to your creations like plant hangers. Its irregular shapes provide an interesting contrast to the uniformity of macrame knots, creating a fascinating visual dynamic.

Benefits of Using Driftwood in Home Decor

Utilizing driftwood in your decor can infuse your home with a sense of calm and earthiness. It’s a sustainable choice as it repurposes elements already present in nature. Moreover, its neutral tones make it versatile, blending seamlessly with various color schemes and styles from modern to coastal.

The Art of Macrame: A Brief Overview

Macrame is the art of knotting cords or strings in patterns to make decorative and functional objects. With roots tracing back centuries, it has evolved from traditional textiles to a modern craft form that’s perfect for home decor.

Key Macrame Knots for Beginners

To begin your macrame journey, you need to familiarize yourself with a few basic knots. Here’s a quick overview:

  • Square Knot: This is the cornerstone of many macrame projects. It involves four strands: the outer two are working cords, and the inner two are filler cords.
  • Half Hitch Knot: By knotting around a central cord, you create a chain that can form spirals.
  • Lark’s Head Knot: Commonly used to attach cords to a piece of driftwood, it’s simple and sturdy.
Knot NameDescription
Square KnotCreates a flat, wide knot.
Half HitchUsed for making rows or spirals.
Lark’s HeadSecures cords to driftwood.

The Appeal of Combining Driftwood and Macrame

When you combine driftwood and macrame, you get the best of both worlds: the rugged, natural beauty of driftwood and the intricate patterns and textures of macrame. This pairing is particularly enchanting for plant hangers as it not only cradles your green friends but also adds an artistic touch to any room.

Creating Your Driftwood Macrame Plant Hanger

Let’s now venture into the step-by-step creation of your own driftwood macrame plant hanger. Gather your tools and materials and prepare to transform them into art.

Materials Needed

To embark on this project, you’ll need the following materials:

  • Driftwood piece of your choice
  • Macrame cord (3-4mm thickness recommended)
  • Scissors
  • Tape measure
  • Plant pot
  • Hooks or ceiling mounts for hanging

Choosing the Right Driftwood

Select a piece of driftwood that’s sturdy, not brittle, and appropriately sized for the hanging space. Its shape should balance aesthetics with functionality, providing places for your cords to attach securely.

Preparing the Materials

Before you start knotting, measure and cut your macrame cords into lengths that fit your specific project. An average plant hanger typically requires cords that are about four to five times the desired finished length. You may want to start longer and trim down later to ensure you have enough material.

Step-by-Step Guide to Crafting a Driftwood Macrame Plant Hanger

Now that your materials are ready, let’s dive into the creation process. Each step below will guide you through making a simple yet beautiful driftwood macrame plant hanger.

Step 1: Attach Cords to Driftwood

Using the Lark’s Head Knot, attach your macrame cords to the driftwood. This will act as the foundation for your design. Ensure the cords are secured evenly along the driftwood to distribute weight properly.

Step 2: Form the Main Pattern

Create your main pattern using square knots. You can get creative here: form a tightly knit section at the top and then gradually loosen the pattern as you move down, or mix it up with different knot styles for varied textures.

Step 3: Create the Plant Holder

Use a series of square knots and spiral patterns to form a basket or cradle where the plant pot will sit. Ensure this section is snug enough to hold the pot securely but loose enough to insert or remove the pot easily.

Step 4: Finishing and Trimming

Once your main structure is complete, trim excess cords to your desired length, creating a tassel effect if you wish. Ensure everything is even and robust enough to hold the weight of your plant.

Step 5: Final Assembly and Hanging

Attach your finished macrame piece to hooks or ceiling mounts in your desired location. Ensure the space receives adequate light if you’re planning to hang living plants.

Driftwood Macrame Plant Hanger

Maintenance and Care for Your Plant Hanger

Maintaining your driftwood macrame hanger ensures it stays beautiful and functional for years to come. Here are some quick tips.

Caring for Driftwood

While driftwood is durable, it benefits from occasional cleaning to remove dust and buildup. Gently wipe it with a damp cloth, being careful not to disturb the macrame knots.

Macrame Cord Maintenance

Macrame cords can collect dust, especially in high-traffic areas. Light vacuuming or gentle shaking can help keep them clean. If necessary, spot clean using mild soap and water.

Tips for Plant Care in a Hanger

When watering the plant, ensure water doesn’t spill excessively onto the macrame cords as this may lead to discoloration. Opt for plants that thrive in hanging environments, such as trailing ivy or spider plants, which can cascade beautifully from the hanger.

Creative Variations and Personalization

Once you’ve mastered the basics, consider experimenting with different types of driftwood or macrame patterns. This customization can reflect your personal style or blend seamlessly with existing decor.

Exploring Different Macrame Patterns

Dive into more advanced macrame patterns such as the Josephine knot or clove hitch for an added challenge. These sophisticated designs can significantly enhance the visual appeal of your plant hangers.

Incorporating Different Materials

While driftwood is a fantastic choice, you can also incorporate other materials like copper pipes or metal hoops for a modern twist. Mixing different textures and materials can create a truly unique and striking piece.

Adding Decorative Elements

You can also embellish your macrame hanger with beads, feathers, or painted accents on the driftwood. These additions offer a playful touch, allowing for seasonal or thematic decorations.

The Environmental Impact and Sustainability

Driftwood macrame hangers are not just stylish; they’re a nod to sustainability. Embracing this form of decor supports eco-friendly practices and conscious living.

Sourcing Sustainable Driftwood

Ensure your driftwood is sourced responsibly. Collect pieces found naturally washed ashore without disturbing local wildlife habitats or removing too much from delicate ecosystems.

Reducing Waste with DIY Projects

Creating your own home decor reduces the demand for mass-produced items, often made with non-renewable materials. Crafting with driftwood and natural fibers promotes creativity while minimizing waste and overproduction.

Conclusion: Bringing It All Together

Creating a driftwood macrame plant hanger is more than just a project; it’s a journey into the appreciation of nature’s beauty and the joy of crafting. This timeless piece will not only adorn your space but also serve as a gentle reminder of the harmony between aesthetic appeal and sustainable living. Whether you’re a seasoned crafter or a beginner, the art of combining driftwood and macrame offers endless possibilities, accentuating your living space with rustic charm and personal flair.

Filed Under: Driftwood Ideas Tagged With: crafts, DIY, Driftwood, Macrame, Plant Hanger

  • Page 1
  • Page 2
  • Page 3
  • …
  • Page 10
  • Next Page »

Primary Sidebar

Driftwood4us.com, is a participant in the Amazon Services LLC Associates Program, an affiliate advertising program designed to provide a means for sites to earn advertising fees by advertising and linking to amazon.com.