• Skip to main content
  • Skip to primary sidebar
  • Terms and Conditions
  • Privacy Policy
  • Contact

Driftwood 4 Us

Just About Driftwood

crafts

Driftwood Jewelry Holder

June 28, 2024 by admin

Welcome to your next favorite DIY project: the Driftwood Jewelry Holder! Imagine a delightful piece of nature serving not just as decor, but also as a practical organizer for your cherished accessories. With just a bit of creativity and a touch of patience, you can transform a simple piece of driftwood into an elegant and functional display. This article will guide you through the steps to create a personalized jewelry holder that adds a coastal charm to your space while keeping your jewelry neatly arranged. Let’s dive into this fun and easy craft to bring a hint of the seaside into your home! Have you ever found yourself tangled in a mess of necklaces or searching for a lost earring in your jewelry box? If so, it’s time to think about a stylish and functional way to store your favorite pieces. Enter the Driftwood Jewelry Holder: a charming, rustic way to organize your jewelry that adds a natural flair to your home décor.

Driftwood Jewelry Holder

What is a Driftwood Jewelry Holder?

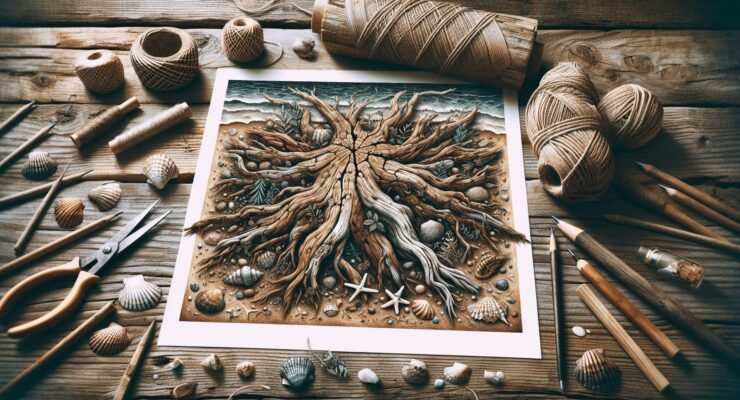
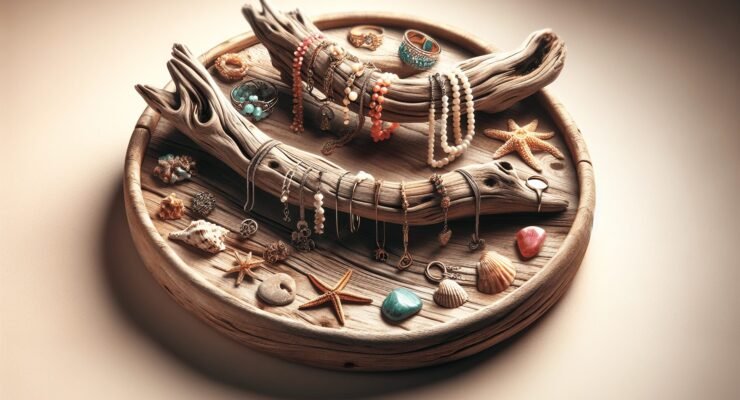
A Driftwood Jewelry Holder is a creative storage solution crafted from pieces of driftwood collected from rivers, beaches, or lakes. Each piece of driftwood brings its own unique history and character, making every jewelry holder a one-of-a-kind piece of art. These holders can have hooks, knobs, or strings to hold your rings, bracelets, necklaces, and earrings.

Why Choose a Driftwood Jewelry Holder?

Choosing a Driftwood Jewelry Holder has numerous benefits beyond its obvious aesthetic appeal. Here’s why you might want one:

  1. Unique Design: No two pieces of driftwood are alike, giving you a unique, personalized touch to your décor.
  2. Eco-Friendly: Using found driftwood is an environmentally friendly option. It repurposes natural materials that would otherwise go to waste.
  3. Versatile Storage: Perfect for hanging a variety of jewelry items, from earrings to necklaces.
  4. Stylish Décor: Adds a natural, rustic touch to any room’s interior design.

How To Find Driftwood

Finding quality driftwood is the first step in creating your very own Driftwood Jewelry Holder. Here are some tips on where and how to collect it:

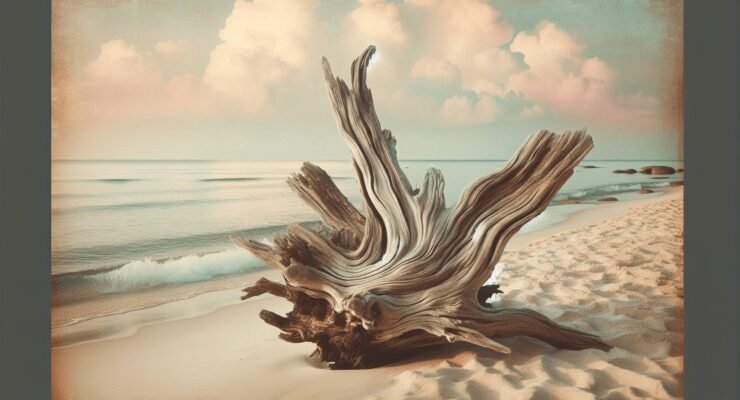
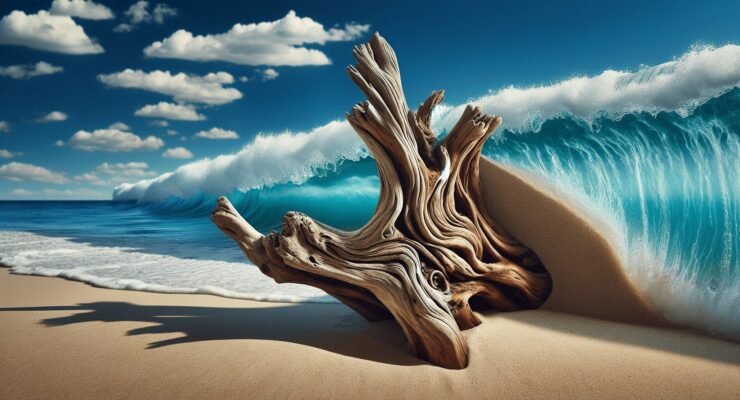
Local Beaches and Rivers

The most common places to find driftwood are along beaches and riverbanks. You might need to go for a few walks to collect enough pieces for your project.

Quality Check

Ensure the wood is dry and free from pests or decay. Driftwood that has been aged in water for a long time will generally be more durable and attractive.

Legal and Environmental Considerations

Check local laws and regulations before collecting driftwood. Some areas protect their shoreline ecosystems and restrict the removal of natural materials.

Tools and Materials Needed

Creating a Driftwood Jewelry Holder is a hands-on project that requires some basic tools and materials. Here’s a list to get you started:

Tool/MaterialPurpose
DriftwoodMain structure of the holder
SandpaperSmoothing the driftwood surface
Hooks/KnobsFor hanging jewelry
Drill and ScrewsAttaching hooks or knobs
Hanging HardwareFor wall mounting
Paint/Stain (optional)Customize the look (if desired)

Recommended Items

While some materials are optional, certain tools like a drill and sandpaper are essential for preparing and customizing your driftwood.

Step-by-Step Guide to Making Your Driftwood Jewelry Holder

Here’s a detailed guide on how to transform your found driftwood into a stunning jewelry holder.

Step 1: Clean the Driftwood

Start by thoroughly cleaning the driftwood. Soak it in a mixture of water and a small amount of bleach to kill any bacteria or pests. Rinse well and let it dry completely.

Step 2: Sand the Surface

Using fine-grit sandpaper, smooth the surface of the driftwood. This will help remove any rough spots or splinters, making it safer for handling and more attractive.

Step 3: Plan Your Design

Think about how you want to arrange your hooks or knobs. Lay out your jewelry to visualize the spacing and placement.

Step 4: Drill Holes

Carefully drill holes for the hooks or knobs where you marked your placements. Ensure the holes are evenly spaced and deep enough to hold the hooks securely.

Step 5: Attach Hooks and Knobs

Screw in the hooks or knobs, making sure they are secure. Double-check that everything is sturdy and placed where you want it.

Step 6: Add Hanging Hardware

Attach hanging hardware to the back of your driftwood jewelry holder. This will allow you to mount it on the wall. Choose a spot that is easily accessible but also showcases your beautiful holder.

Optional: Paint or Stain

If you want to match your holder to your home décor, you can paint or stain the driftwood. This step is entirely optional but can add a personalized touch.

Driftwood Jewelry Holder

Using and Maintaining Your Driftwood Jewelry Holder

Now that you’ve created your jewelry holder, it’s time to put it to use and keep it looking great. Here are some tips:

Organize Your Jewelry

Start by hanging your jewelry in an organized way. Use the hooks for necklaces and bracelets, and knobs for rings. Smaller hooks can be used for earrings.

Regular Cleaning

To keep your driftwood jewelry holder in pristine condition, dust it regularly. Wipe it down with a soft, damp cloth to remove any buildup without damaging the wood.

Inspect for Wear and Tear

Periodically check the hooks and knobs to ensure they are still secure. Tighten any loose screws and replace any worn-out hooks as needed.

Creative Variations and Upgrades

If you love DIY projects, consider these creative variations and upgrades to personalize your driftwood jewelry holder even further.
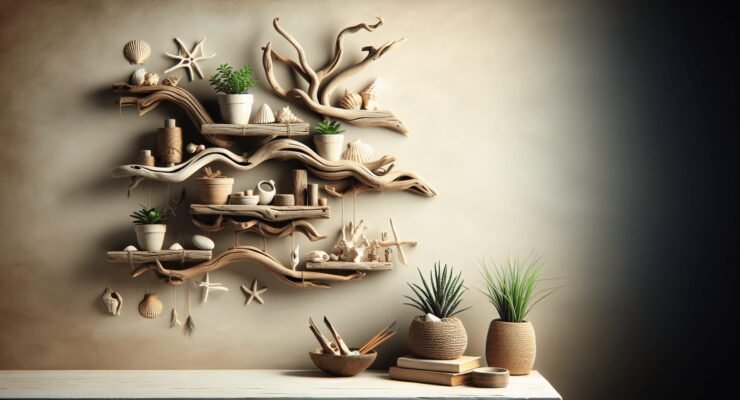
Incorporate Shelves

Add small shelves to your driftwood for additional storage. This can be a great place for keeping small jewelry boxes or decorative items.

Use Decorative Hooks

Instead of plain hooks, use decorative ones that complement your home’s style. Look for vintage knobs or colorful hooks to add an extra element of design.
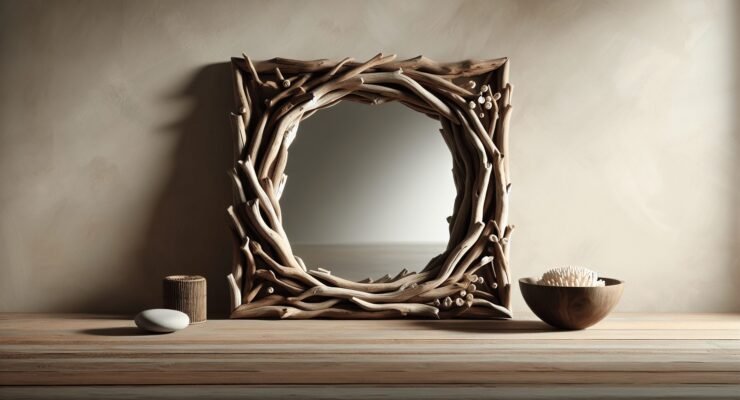
Add a Mirror

Incorporate a small mirror into your driftwood piece for a convenient way to check your appearance while accessorizing.

Conclusion

Creating a Driftwood Jewelry Holder is not only a fun and rewarding DIY project but also a way to add a unique and eco-friendly piece of décor to your home. By following the steps outlined here, you can design a holder that fits your personal style and helps keep your jewelry organized. Plus, every time you glance at your handmade creation, you’ll be reminded of the joy and satisfaction of making something both beautiful and functional.

So next time you find yourself on a beach or near a river, keep an eye out for that perfect piece of driftwood. With a little creativity and effort, you can turn it into something truly special. Happy crafting!

Filed Under: Driftwood Ideas Tagged With: crafts, DIY, Driftwood, home decor, Jewelry Holder

Diy With Driftwood Projects

June 3, 2024 by admin

Ever stumbled upon a piece of driftwood during a peaceful walk along the shore and wondered how to bring its natural beauty into your home? “DIY With Driftwood Projects” is your gateway to turning these ocean treasures into stunning decor pieces. You’ll discover how easy and fun it is to create unique, rustic home accents and furniture with just a bit of creativity and some basic tools. Let’s dive into the endless possibilities of driftwood DIY and transform your living spaces with a touch of seaside charm! Have you ever strolled along the beach and been captivated by the unique, weathered look of driftwood scattered along the shore? If so, you’re not alone! Driftwood has a rustic charm that’s hard to resist, making it an ideal material for all sorts of DIY projects. Whether you’re an experienced crafter or just looking for a new hobby, this guide will walk you through some incredible DIY driftwood projects that you can tackle.

Diy With Driftwood Projects

Why Use Driftwood for DIY Projects?

Driftwood is more than just free beach décor; it’s a material that’s versatile and eco-friendly. Each piece is unique, having been naturally sculpted by the elements. Plus, using driftwood in your projects helps clean up the beaches and repurpose materials that would otherwise go to waste. Here’s why driftwood should be your material of choice:

  • Uniqueness: No two pieces of driftwood are the same, giving your projects an exclusive touch.
  • Sustainability: Using naturally weathered wood is eco-friendly.
  • Durability: The natural elements season the wood, making it robust and long-lasting.

Preparing Driftwood for DIY Projects

Before diving into crafting, it’s important to properly prepare your driftwood. This ensures that your projects are safe, durable, and as beautiful as possible. Follow these steps to prepare your driftwood:

Cleaning the Driftwood

First, you need to clean your driftwood to remove any salt, sand, and grime.

  1. Rinse: Use a hose to thoroughly rinse off any surface debris.
  2. Soak: Submerge the driftwood in a bucket of fresh water for 1-2 weeks, changing the water every few days.
  3. Scrub: After soaking, use a stiff brush to scrub away any remaining grime.

Drying the Driftwood

Once cleaned, the driftwood needs to be properly dried to prevent mold and decay.

  1. Air Dry: Lay the driftwood out in a sunny, well-ventilated area to air dry. This may take a few weeks, depending on the size and thickness of the wood.
  2. Oven Dry (Optional): For faster drying, you can place the driftwood in an oven at a low temperature (around 200°F) for several hours. Always keep an eye on it to prevent burning.

Treating the Driftwood

  1. Seal (Optional): Apply a coat of wood sealant if you want to keep the wood’s appearance for a longer time. This helps preserve the wood and protects it from further wear and tear.
  2. Bleach: For a whiter appearance, you can apply a diluted bleach solution (1:1 ratio of bleach to water) and let it sit for 10-15 minutes before rinsing and drying the wood again.

DIY Driftwood Projects to Try

Now that your driftwood is ready, let’s dive into some fun and creative projects. Here’s a list of various DIY driftwood projects that can add a touch of nature to your home.

Driftwood Wall Art

One of the simplest yet most impactful projects you can try is creating wall art with driftwood.

Materials Needed:

  • Driftwood pieces
  • Hot glue gun or wood glue
  • Picture frame or canvas
  • Optional: Paint, stencils, and other decorative elements

Steps:

  1. Design: Lay out your driftwood pieces on the canvas or inside the picture frame to create a design.
  2. Glue: Once you’re happy with your layout, glue each piece of driftwood in place.
  3. Decorate: Use paint, stencils, or other decorative elements to enhance your design.

Driftwood Mirror Frame

A driftwood mirror frame not only looks stunning but also adds a coastal vibe to any room.

Materials Needed:

  • Round or square mirror
  • Driftwood pieces
  • Wood glue or heavy-duty adhesive
  • Saw (optional)

Steps:

  1. Layout: Arrange the driftwood pieces around the mirror to create a frame. You might need to saw some pieces to fit.
  2. Attach: Use the heavy-duty adhesive to attach the driftwood pieces to the outer edge of the mirror.
  3. Cure: Let the glue cure completely before hanging the mirror.

Driftwood Table

A driftwood table can be a stunning centerpiece for your living room or outdoor space.

Materials Needed:

  • Driftwood sticks or branches
  • Tabletop (glass, wood, etc.)
  • Saw
  • Sandpaper
  • Wood glue and screws

Steps:

  1. Measure & Cut: Measure and cut the driftwood to the desired length for the table legs. Sand any rough edges.
  2. Assemble Base: Arrange the driftwood sticks to form a stable base. Use wood glue and screws to secure them in place.
  3. Attach Tabletop: Place and secure the tabletop onto the driftwood base.

Driftwood Candle Holders

Driftwood candle holders can add a rustic touch to your home décor.

Materials Needed:

  • Driftwood pieces
  • Drill with a forstner bit
  • Candles (tea lights or votives)
  • Sandpaper

Steps:

  1. Drill Holes: Use the drill to make holes in the driftwood pieces large enough to hold your candles.
  2. Smooth Edges: Sand the edges of the holes to remove any splinters.
  3. Insert Candles: Place your candles into the holes and enjoy your new candle holders.

Driftwood Coat Rack

Create a functional and stylish coat rack with your collected driftwood.

Materials Needed:

  • Large driftwood branch
  • Hooks
  • Screws
  • Drill

Steps:

  1. Attach Hooks: Attach hooks to the driftwood branch at evenly spaced intervals.
  2. Mount: Use screws and a drill to mount the driftwood coat rack to your wall.
  3. Hang Coats: Hang up your coats and enjoy your new, rustic coat rack.

Driftwood Shelf

A driftwood shelf can serve as a unique display area for your favorite items.

Materials Needed:

  • Flat driftwood pieces (for the shelf)
  • Smaller pieces (for the brackets)
  • Screws
  • Drill
  • Level

Steps:

  1. Measure & Cut: Measure and cut your driftwood to the desired length and size for your shelf and brackets.
  2. Assemble: Use screws and a drill to attach the shelf to the brackets.
  3. Mount: Mount the shelf onto your wall, making sure it’s level.

Driftwood Photo Display

Use driftwood to create a charming display for your favorite photos.

Materials Needed:

  • Driftwood branch
  • Twine or string
  • Small clothespins or clips
  • Photos
  • Hooks

Steps:

  1. Attach String: Tie the string or twine to both ends of the driftwood branch, creating a hanging mechanism.
  2. Clothespins: Attach clothespins or clips to the string.
  3. Display: Hang the driftwood branch and clip your favorite photos to the string.

Enhancing Your Driftwood Projects

Adding a personal touch to your driftwood projects can make them even more special. Here are some tips for customization:

Painting and Staining

You can paint or stain your driftwood to match your home décor or personal style.

Materials Needed:

  • Paint or wood stain
  • Paintbrush
  • Sandpaper

Steps:

  1. Sand: Lightly sand the surface of the driftwood to help the paint or stain adhere better.
  2. Paint/Stain: Apply your chosen paint or stain evenly across the driftwood.
  3. Dry: Allow it to dry completely before using or mounting.

Adding Hardware

Incorporate hardware for functionality and design.

Materials Needed:

  • Hooks
  • Handles
  • Screws
  • Drill

Steps:

  1. Mark Placement: Determine where you want to place your hardware and mark the spots.
  2. Attach: Use screws and a drill to attach the hardware securely.

Incorporating Other Natural Elements

Add other natural elements like shells, stones, or sea glass to enhance the nautical theme.

Materials Needed:

  • Shells, stones, or sea glass
  • Hot glue gun or heavy-duty adhesive

Steps:

  1. Plan Layout: Arrange your additional elements on the driftwood to create a design.
  2. Attach: Use the hot glue gun or adhesive to secure the elements in place.

Diy With Driftwood Projects

Safety Tips for Working with Driftwood

While crafting with driftwood is generally safe, there are some precautions you should take to ensure your safety:

Ventilation while Gluing or Painting

Always work in a well-ventilated area when using adhesive or paint to avoid inhaling fumes.

Proper Tool Handling

Make sure to handle all tools, such as saws and drills, with care to prevent injury.

Protective Gear

Wear protective gear like gloves and safety glasses when cutting, sanding, or drilling.

Conclusion

DIY driftwood projects are a fantastic way to bring a piece of the beach into your home, all while being eco-friendly and budget-conscious. The unique, weathered look of driftwood adds a rustic charm to any project, making it truly one-of-a-kind. With a little creativity and some basic tools, you can create stunning driftwood art, furniture, and décor that you’ll be proud to show off.

So, next time you find yourself at the beach, keep an eye out for some driftwood. Who knows? Your next amazing DIY project might be just a piece of driftwood away! Happy crafting!

Filed Under: Driftwood Ideas Tagged With: crafts, DIY Projects, Driftwood, home decor, Woodworking

Simple Driftwood Projects

June 2, 2024 by admin

If you love adding a touch of nature-inspired beauty to your home decor, “Simple Driftwood Projects” is the perfect guide for you. This article will reveal how you can transform ordinary driftwood into stunning pieces of art, bringing a rustic yet elegant charm to any space. You’ll discover step-by-step instructions for creating unique and stylish items like picture frames, candle holders, and wall hangings. Each project is designed to be approachable and enjoyable, allowing you to unleash your creativity and personalize every piece. Dive in and start crafting your own driftwood masterpieces today! Have you ever looked at a piece of driftwood and wondered what you could create with it? Driftwood’s unique texture and intriguing shapes make it an excellent material for a variety of DIY projects. With imagination and some simple tools, you can transform this natural treasure into beautiful and functional decor for your home.

Simple Driftwood Projects

What You Need to Get Started

Before diving into our driftwood projects, it’s essential to gather the necessary materials and tools. Here’s a simple table summarizing what you’ll need:

MaterialsTools
Driftwood piecesSandpaper
Non-toxic wood glueHandsaw or hacksaw
Hooks, screws, and small nailsDrill and drill bits
Picture hanging hardwarePencil
Wood finish (optional)Safety goggles (recommended)
Paint, varnish, or sealant (optional)Work gloves (optional, but recommended)

Investing some time to prepare can make your crafting experience smooth and enjoyable. Now, let’s explore some driftwood project ideas to get your creativity flowing.

Driftwood Picture Frame

Creating a driftwood picture frame can add a coastal vibe to any room. This project is straightforward, even if you’re new to crafting.

Materials and Tools:

  • Driftwood sticks
  • Picture frame (size of your choice)
  • Wood glue
  • Saw
  • Sandpaper

Steps:

  1. Gather Driftwood: Choose pieces that are straight and roughly the same thickness.
  2. Cut to Size: Measure the sides of your existing picture frame and cut the driftwood to match these dimensions.
  3. Sand the Edges: Smooth out any rough edges using sandpaper.
  4. Attach Driftwood: Use wood glue to attach the driftwood pieces around the frame’s edges. Allow it to dry completely.
  5. Finishing Touches: If desired, apply a wood finish or sealant to protect and enhance the natural look of the driftwood.

Driftwood Candle Holders

Driftwood candle holders bring a touch of nature indoors, creating a warm and cozy atmosphere. They make great centerpieces or accent pieces.

Materials and Tools:

  • Driftwood pieces (thicker sticks or logs)
  • Tea light candles
  • Drill and spade bit (size to match candles)
  • Sandpaper

Steps:

  1. Select Your Driftwood: Choose pieces that are wide and stable enough to hold a tea light candle.
  2. Drill Holes: Use the drill and spade bit to create holes in the driftwood that are deep and wide enough to hold the tea light candles securely.
  3. Smooth the Edges: Sand around the drilled holes to prevent any rough parts.
  4. Insert Candles: Place the tea light candles into the drilled holes.

Driftwood Shelf

A driftwood shelf can add rustic charm to any space, perfect for displaying small plants, books, or decorative items.

Materials and Tools:

  • Long, flat driftwood pieces
  • Shelf brackets
  • Screws and wall anchors
  • Drill
  • Level
  • Pencil

Steps:

  1. Select Driftwood: Find a piece that is flat and long enough to serve as a shelf.
  2. Sand and Finish: Sand the surface to smooth out any rough spots. You can also apply a coat of wood finish for added protection.
  3. Install Brackets: Measure and mark where you want the shelf on the wall. Drill holes and install the brackets using screws and wall anchors.
  4. Attach the Driftwood: Place the driftwood on the brackets and secure it with screws if necessary.
  5. Ensure Level: Use the level to make sure the shelf is even.

Simple Driftwood Projects

Driftwood Wall Art

Create a unique piece of wall art to showcase your creativity and bring a bit of nature into your home.

Materials and Tools:

  • Driftwood pieces of various shapes and sizes
  • Backing board (wood or sturdy cardboard)
  • Wood glue or small nails
  • Picture hanging hardware
  • Optional: Paint or varnish

Steps:

  1. Design Your Artwork: Arrange the driftwood pieces on the backing board to create your desired pattern or design.
  2. Attach Driftwood: Glue or nail the driftwood pieces to the backing board.
  3. Optional Finish: Paint or varnish the piece if you want to add color or a protective layer.
  4. Hang Your Art: Attach picture hanging hardware to the back of the board and hang your creation on the wall.

Driftwood Coat Rack

A driftwood coat rack is both practical and stylish, perfect for entryways or mudrooms.

Materials and Tools:

  • Long, straight driftwood piece
  • Hooks or pegs
  • Screws
  • Drill
  • Level
  • Pencil
  • Wall anchors

Steps:

  1. Select Driftwood: Choose a piece that is long and sturdy enough to hold multiple hooks.
  2. Sand and Finish: Smooth out any rough spots with sandpaper. Optionally, finish with a coat of varnish.
  3. Attach Hooks: Evenly space out and attach hooks along the driftwood using screws.
  4. Mount on Wall: Mark the wall where you want to hang the rack, drill holes for the screws, and insert wall anchors. Secure the driftwood coat rack onto the wall.
  5. Check for Level: Ensure the rack is level before tightening the screws.

Driftwood Planter

Use driftwood to create a charming planter, perfect for succulents or small plants.

Materials and Tools:

  • Hollow driftwood piece or multiple pieces to form a container
  • Small plants or succulents
  • Soil
  • Moss (optional)
  • Drill
  • Wood glue

Steps:

  1. Select Driftwood: Find a single hollow piece or arrange multiple pieces to form a container.
  2. Prepare Planting Area: Drill any necessary drainage holes in the bottom of the driftwood.
  3. Assemble Planter: If using multiple pieces, glue them together to form a container, ensuring it’s secure.
  4. Add Soil: Fill the planter with soil appropriate for your plants.
  5. Plant: Arrange your plants or succulents in the soil. Add moss around the plants for a finished look.
  6. Water: Ensure you water your plants as needed.

Driftwood Mirror

A driftwood mirror adds a gorgeous, natural touch to your decor. This project requires a bit more time but is totally worth the effort.

Materials and Tools:

  • Mirror (size of your choice)
  • Driftwood pieces
  • Wood glue or small nails
  • Saw
  • Sandpaper
  • Picture hanging hardware

Steps:

  1. Choose Your Driftwood: Select pieces that you like and that will fit around your mirror.
  2. Cut to Fit: Measure and cut the driftwood to frame the mirror.
  3. Sand Edges: Smooth the cut edges with sandpaper.
  4. Attach to Mirror: Use wood glue or small nails to attach the driftwood around the mirror. Ensure the pieces fit snugly and securely.
  5. Add Hanging Hardware: Attach picture hanging hardware to the back of the mirror frame.
  6. Hang and Enjoy: Hang your driftwood mirror in your desired location and enjoy the natural beauty it brings to your space.

Driftwood Wind Chime

A driftwood wind chime is a delightful addition to any outdoor space, bringing soothing sounds and rustic charm.

Materials and Tools:

  • Small to medium driftwood pieces
  • Twine or string
  • Small bells or metal chimes (optional)
  • Drill
  • Scissors

Steps:

  1. Choose Driftwood: Select pieces that are light enough to hang and swing in the wind.
  2. Drill Holes: Drill small holes in each piece of driftwood where you will thread the twine or string.
  3. String Driftwood: Cut pieces of twine to the desired length and thread them through the holes in the driftwood.
  4. Attach Chimes: Tie small bells or metal chimes to the ends of the twine if you’d like to add sound.
  5. Assemble: Gather the other ends of the strings and attach them to a central driftwood piece or ring to form the top of the wind chime.
  6. Hang: Find a suitable spot outside, hang your wind chime, and enjoy its tranquil sounds.

Driftwood Jewelry Hanger

Keep your jewelry organized and tangle-free with a stylish driftwood jewelry hanger.

Materials and Tools:

  • Medium driftwood piece
  • Small hooks or nails
  • Drill
  • Screws and wall anchors
  • Pencil
  • Optional: Wood finish

Steps:

  1. Select Driftwood: Choose a piece that is long enough to hold multiple pieces of jewelry.
  2. Sand and Finish: Smooth out any rough spots and apply a wood finish if desired.
  3. Attach Hooks: Evenly space hooks or nails along the driftwood to hang jewelry.
  4. Install on Wall: Mark the wall where you want to place the hanger, drill holes, and install wall anchors.
  5. Mount Driftwood: Secure the driftwood to the wall with screws.
  6. Organize Jewelry: Hang your necklaces, bracelets, and other jewelry pieces on the hooks.

Tips for Working with Driftwood

Clean Your Driftwood

Before you start any project, it’s essential to clean the driftwood thoroughly. Soaking it in a bleach solution (1 part bleach to 9 parts water) for a few hours can help remove any organic matter or pests. Rinse the driftwood well and let it dry completely in the sun.

Types of Driftwood to Use

Look for different shapes and sizes when collecting driftwood. Pieces with unique textures and features can make your project more interesting. Remember to only collect driftwood that has naturally washed ashore and avoid taking it from protected areas.

Embrace Imperfections

One of the charming qualities of driftwood is its imperfections. Embrace the natural knots, curves, and textures. These features make each piece unique and add character to your projects.

Safety First

Always take safety precautions when working with tools. Wear safety goggles and work gloves to protect yourself from splinters and debris. Ensure you’re working in a well-ventilated area, especially when using adhesives.

Inspiration and Creativity

Don’t limit yourself to the projects listed here. Driftwood’s versatility means the possibilities are endless. From simple coat racks to intricate sculptures, let your creativity guide you. If you find a unique piece of driftwood, think about how it can be incorporated into a project or stand alone as a natural art piece.

Consider browsing through craft sites, design blogs, or social media for inspiration. Joining a local crafting group or attending workshops can also provide new ideas and techniques.

Creating driftwood projects can be a rewarding and satisfying experience. With each completed piece, not only will you have a beautiful, handmade addition to your home, but you’ll also have the satisfaction of creating something unique from nature. Happy crafting!

Filed Under: Driftwood Ideas Tagged With: crafts, DIY, Driftwood, home decor, Woodworking

Small Driftwood Projects

June 2, 2024 by admin

In “Small Driftwood Projects,” you’ll dive into the charming world of creative crafts using driftwood. As you explore the article, you’ll discover simple yet delightful DIY projects that transform humble pieces of driftwood into beautiful and functional art. Whether it’s a rustic photo frame, a whimsical mobile, or a cozy candle holder, each project showcases the natural beauty and unique character of driftwood. Get ready to be inspired and bring a touch of the seaside into your home with these easy and enjoyable small driftwood projects. Have you ever wondered what you could do with that beautiful piece of driftwood you found on your last beach trip? Not only does driftwood have a unique and natural beauty, but it also seems to carry a bit of the ocean’s history with it. With just a bit of creativity and effort, you can transform these pieces of weathered wood into charming, functional, and decorative items for your home. Welcome to your guide on “Small Driftwood Projects!”

Why Choose Driftwood?

Driftwood is not just a piece of wood; it’s a piece of art created by nature itself. The sea’s constant motion shapes and smooths the wood, giving it a natural texture and unique shapes that are hard to replicate with other materials. Using driftwood in your projects brings natural beauty and a touch of the seaside to your home.

Sustainable and Eco-Friendly

One of the greatest advantages of using driftwood is that it’s a sustainable and eco-friendly material. Instead of purchasing new wood, you recycle what nature has given you, reducing waste and your environmental footprint.

Unique and Personal

Every piece of driftwood is unique. No two pieces are the same, which means your projects will have their own distinctive flair. This uniqueness allows you to create personal and customized pieces that reflect your style.

Basic Tools and Supplies

Before diving into your projects, gather the necessary tools and supplies. While the list may vary depending on your specific project, here are some basics to keep on hand:

Tool/SupplyPurpose
SawCutting driftwood to desired size
SandpaperSmoothing surfaces and edges
DrillMaking holes for screws or hooks
Wood GlueBonding pieces together
Varnish or SealantProtecting and finishing your driftwood project
Paint and BrushesAdding design or color (optional)
Measuring TapeEnsuring proper measurements
ClampsHolding pieces in place while glue dries

Small Driftwood Projects

Getting Started: Preparing Your Driftwood

Cleaning

Before you start any project, it’s essential to clean your driftwood thoroughly. Soak it in water to remove salt and loose debris, then scrub it with a brush to eliminate any remaining dirt. Rinse it well and allow it to dry completely.

Sanding

Sanding your driftwood will smooth out any rough edges and surfaces. This step is crucial if you plan on handling or painting the wood. Use sandpaper with varying grit levels, starting with a coarser grit and working up to a finer grit for a smoother finish.

Sealing

To protect your driftwood from future damage and preserve its natural beauty, consider sealing it. Apply a coat of varnish or sealant according to the manufacturer’s instructions, and let it dry completely.

Small Driftwood Projects

Driftwood Jewelry Holder

A driftwood jewelry holder can be a charming addition to your dresser or vanity. Here’s how you can make one:

  1. Select a Piece of Driftwood: Choose a piece with a shape that appeals to you. It should be long enough to hold several pieces of jewelry.
  2. Drill Holes: Drill small holes into the wood where you want to place hooks or pegs.
  3. Insert Hooks/Pegs: Screw in hooks or pegs into the drilled holes. You can use metal hooks for a more modern look or wooden pegs for a rustic vibe.
  4. Hang and Enjoy: Hang your jewelry holder on the wall or place it on a stand. Now you have a stylish and functional piece to organize your necklaces, bracelets, and more.

Driftwood Candle Holders

Driftwood candle holders bring a warm and cozy feel to any room. They are simple to make and add a touch of nature to your home decor.

  1. Choose Your Wood: Find a flat piece of driftwood that can sit stable on its own.
  2. Mark Candle Positions: Decide where you want to place the candles and mark these spots with a pencil.
  3. Drill Holes: Using a spade bit, drill holes slightly smaller than the base of your candles. Ensure you don’t drill all the way through.
  4. Insert Candles: Push your candles into the holes. You might need to shave the bottom of the candles slightly for a snug fit.
  5. Finishing Touch: You can leave your candle holder natural or add a coat of varnish for a more polished look.

Driftwood Picture Frame

Creating a driftwood picture frame can be a fun and rewarding project, giving special photographs a rustic, seaside feel.

  1. Gather Materials: You’ll need small pieces of driftwood, a plain picture frame, wood glue, and optionally a backing board.
  2. Layout Design: Arrange pieces of driftwood around the frame to get an idea of your design.
  3. Glue Pieces: Apply wood glue to each piece of driftwood and press them onto the frame. Hold them in place with clamps if necessary until the glue dries.
  4. Finishing Touches: Seal the frame with varnish or paint if desired. Insert your photo and enjoy!

Driftwood Key Holder

A driftwood key holder can add character to your entryway and keep your keys organized.

  1. Select a Piece: Choose a reasonably flat piece of driftwood.
  2. Drill Holes: Mark and drill holes where you want to place the hooks for hanging keys.
  3. Insert Hooks: Screw in metal hooks into the drilled holes.
  4. Mount: Attach a sawtooth hanger or picture hanging wire to the back of the driftwood and mount it on the wall.

Driftwood Christmas Tree

A driftwood Christmas tree can be a unique and eco-friendly holiday decoration.

  1. Collect Pieces of Driftwood: Gather various sizes of driftwood pieces.
  2. Arrange in Tree Shape: Lay out your pieces from largest to smallest, creating a tree shape.
  3. Drill and Attach: Drill holes through the center of each piece and stack them on a dowel or metal rod, securing with wood glue if necessary.
  4. Decorate: Add lights, ornaments, or paint your driftwood tree to your liking.

Driftwood Garden Markers

Garden markers made from driftwood can add a personalized touch to your garden while helping you keep track of your plants.

  1. Choose Pieces: Select small, flat pieces of driftwood.
  2. Write Plant Names: Using a sharpie or wood-burning tool, write the names of your plants on each piece.
  3. Finish: Seal the driftwood markers with a clear varnish to protect them from the elements.
  4. Place in Garden: Insert a small stake or stick into the ground and attach the driftwood marker.

Tips for Working with Driftwood

Embrace Imperfections

One of the charms of driftwood is its imperfections. Embrace the knots, holes, and unusual shapes. These features add character and tell the story of its journey across the sea.

Combine with Other Materials

Don’t hesitate to combine driftwood with other materials like metal, glass, or fabric. These combinations can create stunning contrasts and enhance your project’s appeal.

Safety First

Always prioritize safety when working with driftwood. Wear protective gear such as gloves and goggles, especially when using power tools. Ensure your workspace is well-ventilated if you’re applying varnish or sealant.

Conclusion

Driftwood projects offer a fantastic way to bring a piece of nature into your home. From jewelry holders to Christmas trees, the possibilities are endless. These small projects can be both a relaxing pastime and a creative outlet. The next time you find a piece of driftwood on the beach, think beyond decoration and imagine the functional and beautiful items you can create. You’ll not only produce unique pieces for your home but also contribute to a more sustainable way of crafting. So why wait? Grab your tools, start exploring your creativity, and let driftwood work its magic in your next project.

Filed Under: Driftwood Ideas Tagged With: Beach Crafts, crafts, DIY Home Decor, Driftwood, Small Projects

Rustic Driftwood Projects Unique

June 2, 2024 by admin

Welcome to the charming world of “Rustic Driftwood Projects Unique,” where the ordinary becomes extraordinary. Delight in the beauty of nature with these creative and original ideas that transform driftwood into stunning pieces of art and functional decor. With each project, you’ll discover new ways to bring a touch of rustic elegance into your home, all while honoring the natural beauty of weathered wood. So gather your materials and let your imagination drift as we explore the endless possibilities of crafting with driftwood. Have you ever found yourself walking along a beach, picked up a piece of weathered wood, and wondered what kind of beautiful creation you could turn it into? If so, you’re not alone. Many people share a passion for repurposing driftwood into captivating, rustic home decor and craft projects. Driftwood, with its unique shape, texture, and history, can add a touch of natural beauty to any space.

Rustic Driftwood Projects Unique

In this article, we’ll explore a variety of unique driftwood projects that you can create, whether you’re a seasoned woodworker or just starting. From small, simple pieces to more complex designs, there’s something here for everyone. Let’s dive into the wonderful world of rustic driftwood projects and uncover some inspiring ideas!

Why Choose Driftwood?

Driftwood is not just any ordinary type of wood; it has a unique charm and character due to its journey through water and weather. Here are a few reasons why you should consider using driftwood in your next project:

  • Natural Aesthetics: Driftwood has a weathered, rustic look that can’t be replicated by any other type of wood.
  • Eco-Friendly: Using driftwood in your projects is a great way to recycle and repurpose natural materials.
  • Variety: Each piece of driftwood is unique, offering endless creative possibilities.

Types of Driftwood

Depending on where you live and where you collect your driftwood, you may come across different types of wood. Common kinds include cedar, pine, and oak, which each have their distinct characteristics and appearances. Here’s a quick look at the features of these popular types:

Type of WoodCharacteristicsCommon Uses
CedarSoft, lightweight, often aromaticSmall decor items, crafts
PineLight color, easy to work withShelving, large decor pieces
OakHard, durable, darker in colorFurniture, structural elements

Unique Driftwood Project Ideas

Driftwood Wall Art

One of the simplest yet most impactful ways to use driftwood is to create stunning wall art. Whether you want to construct a minimalist arrangement or a complex design, your imagination sets the limits.

Creating a Driftwood Wall Sculpture

  1. Gather and Clean Driftwood: Choose pieces that fit the design. Clean them with a brush, mild detergent, and water.
  2. Design Your Layout: Arrange the driftwood pieces on the floor until you find a pattern you love. Remember, there are no rules; embrace the wood’s natural shapes.
  3. Mounting: Use a strong adhesive or screws to attach the driftwood to a wooden board or directly onto the wall.

Driftwood Furniture

Creating furniture from driftwood can give your home a cozy, cabin-like feel while showcasing rustic beauty. Essential pieces like tables, shelves, and chairs can all benefit from the driftwood’s natural aesthetics.

Building a Driftwood Coffee Table

  1. Select the Base and Top: Choose a sturdy base made from either large driftwood pieces or a metal frame. For the top, you can use a glass sheet that highlights the wood beneath.
  2. Prepare the Driftwood: Sand down any rough edges, and ensure the pieces fit together well.
  3. Assembly: Attach the driftwood to the base securely using screws and strong adhesives. Place the glass top on, ensuring it fits snugly.

Driftwood Lighting

Lighting fixtures made from driftwood can add a warm, inviting glow to any room while serving as a conversation piece.

Crafting a Driftwood Lamp

  1. Select Suitable Driftwood Pieces: Look for a piece that has an interesting shape and is sturdy enough to hold the weight of a lamp.
  2. Clean and Prepare the Wood: As with other projects, clean and sand the wood.
  3. Drill a Hole for Wiring: Ensure you safely drill a hole through the driftwood for the lamp wiring.
  4. Assemble the Lamp: Follow the instructions for your lamp kit, wiring, and attaching the light bulb and shade to the driftwood.

Rustic Driftwood Projects Unique

Driftwood Decor

Smaller decor items can bring a subtle touch of nature into your home without requiring large pieces of wood or intricate craftsmanship.

Driftwood Picture Frames

Using smaller pieces of driftwood to create picture frames can be a simple yet stylish way to display your favorite photos.

Making a Driftwood Frame

  1. Supplies Needed: Basic picture frame, small pieces of driftwood, strong adhesive (like hot glue), and sandpaper.
  2. Clean and Arrange: Clean the driftwood pieces and lay them out around the frame in a design you like.
  3. Adhere the Wood: Use the adhesive to attach each piece of driftwood to the frame, ensuring they stick firmly.

Gardening with Driftwood

Incorporating driftwood into your garden can enhance its natural beauty while providing unique opportunities for showcasing plants.

Driftwood Planters

Creating planters from driftwood can add an organic touch to your garden or indoor plant collection.

Assembling a Driftwood Planter

  1. Select Driftwood Pieces: Choose pieces that can form a container-like shape when assembled.
  2. Prepare for Planting: Line the inside of your driftwood structure with landscape fabric to hold soil and plants.
  3. Plant and Enjoy: Fill the planter with soil and your favorite plants, ensuring adequate drainage.

Driftwood Birdhouses

Birdhouses made from driftwood are not only functional but also visually appealing, blending seamlessly into natural settings.

Constructing a Driftwood Birdhouse

  1. Design and Find Materials: Decide on the size and shape of your birdhouse. Gather suitable driftwood pieces.
  2. Cut and Assemble: Cut pieces to fit together in your design, then use nails or screws to secure them.
  3. Finishing Touches: Ensure there are no sharp edges that could harm birds, and add a hanging mechanism.

Rustic Driftwood Projects Unique

Tips for Working with Driftwood

Safety First

When working with any type of wood, especially driftwood, safety should be a top priority. Always wear gloves, masks, and safety glasses when cutting, sanding, or cleaning the wood.

Cleaning Driftwood

Cleaning driftwood is essential to remove any salt, sand, and debris that could affect the final project. A gentle scrub with a brush, water, and a mild detergent usually does the trick. For more persistent dirt, soak the driftwood in a solution of water and white vinegar.

Preservation and Finishing

To ensure your driftwood projects stand the test of time, it’s a good idea to apply a finish. A clear wood sealer can preserve the driftwood’s natural look, while a wood stain can enhance its color and grain. Always test a small, hidden area first to see how the wood reacts to the finish.

Inspiration from Nature

Driftwood projects are a wonderful way to bring the beauty and essence of nature indoors. Using natural materials like driftwood not only creates striking pieces but also connects us to the outdoors, evoking a sense of tranquility and warmth.

Collaborate with the Elements

Driftwood has been shaped and tumbled by natural elements, giving it an unmatched uniqueness. When creating with driftwood, think about how you can complement and enhance its natural beauty rather than altering it completely.

Outdoor Driftwood Projects

Driftwood Pathways

Laying small pieces of driftwood as a path through your garden can create a natural, whimsical look.

Making a Driftwood Pathway

  1. Measure the Area: Determine the path dimensions.
  2. Prepare the Ground: Clear the area of debris and level it.
  3. Arrange Driftwood: Lay down pieces of driftwood, either as stepping stones or a continuous path.

Driftwood Fences

Using driftwood to create a garden fence can blend seamlessly with outdoor landscapes.

Constructing a Driftwood Fence

  1. Collect Materials: Gather large, sturdy driftwood pieces.
  2. Design the Layout: Plan your fence, considering height and length.
  3. Secure the Driftwood: Use posts and wire or nails to fix the driftwood into place.

Conclusion

Creating rustic driftwood projects can be immensely satisfying, allowing you to craft something unique while celebrating the natural beauty of wood that has traveled through water and time. Whether you’re making art, furniture, or garden ornaments, each piece tells its own story. The possibilities are as endless as your imagination. So, next time you find yourself on a beach or by a lake, consider picking up some driftwood. You may be holding the start of your next extraordinary project!

Filed Under: Driftwood Ideas Tagged With: crafts, Driftwood, home decor, Rustic, Unique

Driftwood Projects Unique Mirrors

May 31, 2024 by admin

Driftwood Projects will take your home decor to a whole new level by offering unique mirrors crafted from beautiful, naturally weathered wood. Each mirror is a one-of-a-kind masterpiece, capturing the rustic charm of driftwood while adding a touch of elegance to any room. Perfect for those who appreciate the beauty of nature combined with practical design, these mirrors are sure to become a focal point in your living space. Discover how these unique pieces can transform your home and reflect your personal style. Have you ever thought about how enchanting a piece of driftwood can become when crafted into a unique mirror? The beauty of driftwood, with its natural, weathered appearance, brings a touch of nature’s charm into your living spaces. If you love getting creative with projects and you’re looking for a way to add a special piece to your home decor, driftwood mirrors might just be the perfect activity for you.

Driftwood Projects Unique Mirrors

Understanding Driftwood: Nature’s Masterpiece

Driftwood is wood that has been washed onto shore by the tides, winds, or waves. The natural processes of erosion and the elements give it a uniquely rugged and weathered appearance that can’t be replicated artificially. Each piece of driftwood is a treasure trove of history, having spent years being shaped by nature.

Why Choose Driftwood for Mirrors?

Driftwood isn’t just appealing because of its looks. Driftwood mirrors are environmentally friendly since they repurpose natural materials that would otherwise be left on the shore. On top of that, each driftwood mirror is entirely unique, just like each piece of driftwood is different.

The Aesthetic Appeal

The rustic texture and the organic lines of driftwood bring a sense of tranquility into any room. The colors usually range from soft whites and greys to dark browns and even black, providing earthy tones that complement various home decor styles.

Preparing for Your Driftwood Mirror Project

Before starting your project, you need a game plan. Gathering your materials and safety gear will ensure a smooth crafting experience.

Collecting Your Driftwood

Firstly, you need to collect driftwood. Visit local beaches, lakesides, or rivers where driftwood can typically be found. Be mindful of local regulations and only collect driftwood from areas where it is permitted.

Essential Materials

Here’s what you’ll need for your driftwood mirror project:

MaterialPurpose
Driftwood piecesThe main element for framing the mirror
MirrorBase of your project
Adhesive (e.g., wood glue)To attach driftwood to the mirror
SandpaperTo smooth out rough edges
SawFor cutting driftwood to desired sizes
Measuring tapeTo measure dimensions accurately
Protective gear (gloves, goggles)For safety during crafting

Selecting Your Mirror

Choose a mirror that suits the space where you intend to hang it. It could be square, rectangular, oval, or circular—each shape offers a different aesthetic.

Designing Your Driftwood Mirror Frame

Designing your driftwood frame requires some creativity. The layout will center around how you want the driftwood pieces to fit around the mirror.

Arrangement Styles

  1. Symmetrical: Arrange the driftwood pieces in a consistent pattern.
  2. Asymmetrical: Place driftwood pieces in varying sizes and shapes for a rugged look.
  3. Layered: Stack driftwood pieces for a 3D effect.

Consider laying out your driftwood around the mirror before attaching them to get a feel for your design.

Measuring and Cutting

Measure the perimeter or circumference of your mirror. Cut the driftwood pieces to fit around the mirror accurately. Utilize a saw for precise cuts and sandpaper to smooth any rough edges.

Attaching Driftwood to the Mirror

Once you’ve designed the layout, it’s time to attach the driftwood. Use a strong adhesive. Apply the glue to the back of each driftwood piece and press it firmly onto the mirror. Allow it to dry according to the adhesive’s instructions.

Finishing Touches for Your Driftwood Mirror

The final steps involve ensuring your mirror is ready to hang and adding any additional decorative elements.

Sealing the Driftwood

To preserve the natural beauty of the driftwood and protect it from further wear, apply a wood sealant. This will also enhance the colors and give a slight sheen to your frame.

Adding Hooks or Hangers

Attach appropriate hooks or hangers to the back of your mirror to ensure it can be hung securely. Make sure they are strong enough to hold the weight of the mirror and the driftwood.

Optional Enhancements

You can add other decor elements to your driftwood mirror, such as shells, stones, or even fairy lights. These can further personalize your creation.

Driftwood Projects Unique Mirrors

Displaying and Caring for Your Driftwood Mirror

Now that your mirror is complete, consider the best spot to display it and how to care for it.

Ideal Places to Display

  1. Living Room: Above a fireplace or a sofa.
  2. Bedroom: Over a dresser or by the bedside.
  3. Bathroom: Perfect for a coastal-themed bathroom.
  4. Entryway: Makes a statement as soon as guests enter.

Maintenance Tips

To keep your driftwood mirror looking pristine, gently dust it regularly. Avoid using harsh chemicals, as they can damage the wood. If the driftwood appears to dry out, a light coat of sealant or natural oil can restore its luster.

The Joy of Crafting with Driftwood

Creating a driftwood mirror is not just about the final product but also the joy of making something with your hands. Assembling these natural elements allows you to connect with nature while crafting a unique piece of decor for your home.

Share Your Creation

Engage with the community of DIY enthusiasts. Share your driftwood mirror creation on social media, DIY forums, or local craft fairs. You’ll find that many others appreciate the art and effort that goes into creating driftwood projects.

Exploring Other Driftwood Projects

Once you’ve mastered the driftwood mirror, there are myriad other projects you can explore:

  1. Driftwood Shelves: Use larger pieces to create rustic floating shelves.
  2. Driftwood Wall Art: Arrange driftwood pieces on a canvas or frame for unique art.
  3. Driftwood Furniture: For the more advanced crafters, driftwood can be used to create tables or chairs.

Conclusion

Crafting a driftwood mirror is a rewarding project that combines the beauty of nature with your creative touch. Not only will you end up with a stunning, unique piece of decor, but you’ll also have the satisfaction of having made it yourself. So, gather your materials, set up your workspace, and start crafting your very own driftwood mirror. Enjoy the process and the beautiful addition it will make to your home!

Filed Under: Driftwood Ideas Tagged With: crafts, DIY Projects, Driftwood, home decor, Unique Mirrors

Diy Driftwood Projects Mirrors

May 31, 2024 by admin

Imagine transforming simple pieces of driftwood into stunning mirrors that bring a touch of the beach to your home decor. In “DIY Driftwood Projects Mirrors,” you’ll discover step-by-step methods to create unique, rustic mirrors using collected driftwood. You’ll gain insights on selecting the right materials, preparing the wood, and assembling your pieces into striking, one-of-a-kind decor items. Get ready to unleash your creativity and add a bit of coastal charm to any room with these easy-to-follow, delightful projects. Have you ever strolled along the beach and come across pieces of driftwood washed up on the shore, wondering how you could bring such natural beauty into your home decor? You’re not alone! Driftwood, with its unique shapes and natural texture, can add a touch of organic charm and elegance to your living space, especially when transformed into stunning DIY driftwood mirrors.

Why Choose Driftwood for Your DIY Projects?

Driftwood isn’t just any wood. It’s lovingly shaped by nature, having traveled through rivers and oceans, basked in the sun, and tumbled over rocks. Each piece is unique, carrying stories of its journey. This makes driftwood an exceptional material for home decor projects, adding character and a natural element that artificial materials often lack.

Sustainability and Environmental Impact

Using driftwood for your DIY projects is a fantastic way to contribute to environmental sustainability. By repurposing wood that has already been processed by nature, you reduce the demand for newly cut timber. This minimizes deforestation and helps maintain natural habitats.

Aesthetic and Versatility

Driftwood fits seamlessly into various decor styles—from coastal and rustic to modern and bohemian. It’s versatile enough to be the focal point of a room or a subtle accent piece, making it a fantastic addition to any home.

Gather Your Materials

Before you dive into your DIY driftwood mirror project, you’ll need to gather some materials. Here’s a handy table to help you keep track of what you’ll need:

MaterialDescription
Driftwood piecesCollect various shapes and sizes to frame your mirror.
MirrorChoose a mirror in the size and shape you prefer.
Wooden or cardboard backingProvides a sturdy structure for mounting the mirror and driftwood.
Hot glue gun and glue sticksSecures the driftwood pieces to the mirror backing.
Hooks or hangersFor hanging your finished mirror on the wall.
SandpaperTo smooth any rough edges on the driftwood.
Sealant (optional)A clear protective coat to preserve the driftwood’s natural beauty and durability.

Where to Find Driftwood

You can collect driftwood yourself if you live near a beach, river, or lake. It’s a fantastic way to get some fresh air while finding pieces that personally resonate with you. If that’s not an option, many craft stores and online marketplaces sell driftwood.

Diy Driftwood Projects Mirrors

Preparing Your Driftwood

Before you start assembling your mirror, it’s crucial to prepare your driftwood. Proper preparation ensures your project will be sturdy and long-lasting.

Cleaning the Driftwood

Once you’ve gathered your driftwood, you’ll need to clean it to remove any dirt, sand, or salt. Here’s how you can do it:

  1. Rinse the driftwood with fresh water.
  2. Soak in a bleach solution (four parts water to one part bleach) for a few hours to kill any remaining bacteria or insects.
  3. Rinse again thoroughly with clean water.
  4. Allow the driftwood to dry completely, preferably in the sun to help it dry faster and kill any remaining bacteria.

Sanding and Smoothing

Driftwood can have rough edges or splinters that you’ll want to smooth out. Use sandpaper to gently sand the edges and surfaces of the wood. This not only makes it safer to handle but also helps the pieces adhere better to the backing.

Creating the Mirror Frame

Now that your driftwood is prepared, it’s time to start creating your mirror frame. Here’s a step-by-step guide to help you through the process:

Step 1: Arrange the Driftwood

Lay out your mirror on a flat surface and arrange the driftwood pieces around it. This helps you visualize the final look and allows you to experiment with different configurations. Don’t worry about making it perfect yet—this step is all about getting a feel for the design.

Step 2: Attach the Driftwood to the Backing

Once you’re happy with your arrangement, start attaching the pieces to the wooden or cardboard backing using a hot glue gun. Apply glue to the back of each driftwood piece and press it firmly onto the backing. Hold each piece in place for a few seconds to ensure it sticks well.

Step 3: Secure the Mirror

Now that your driftwood frame is set, place the mirror in the center. You can use additional glue or mounting adhesive strips to secure it to the backing. Make sure it’s centered and level before pressing it firmly in place.

Step 4: Add Hooks or Hangers

Attach hooks or hangers to the back of your mirror so you can easily mount it on the wall. Ensure they are securely fastened and capable of supporting the weight of your completed mirror.

Optional Step: Apply Sealant

If you want to protect your driftwood frame and enhance its natural beauty, apply a clear wood sealant. This step is optional but recommended, especially if your mirror will be in a humid area like a bathroom.

Diy Driftwood Projects Mirrors

Creative Variations

The beauty of DIY projects is that you can tailor them to your personal style. Here are a few creative variations to inspire you:

Adding Decorative Elements

Incorporate other natural elements like seashells, pebbles, or even small plants to complement the driftwood. You can glue these decorations to the frame for an added touch of personality.

Using Different Shapes and Sizes

Don’t feel limited to a rectangular or square mirror. Driftwood frames look stunning on round, oval, or even abstract-shaped mirrors. Use your imagination and create a design that speaks to you.

Combining Driftwood with Other Materials

Mix and match materials to create a unique look. For example, combine driftwood with metal or glass accents. This adds texture and interest to your mirror while still highlighting the natural beauty of the wood.

Maintaining Your Driftwood Mirror

Once you’ve completed your driftwood mirror, you’ll want to ensure it stays beautiful and durable for years to come. Here are some maintenance tips to keep it in top condition:

Regular Dusting

Dust your mirror regularly to keep it looking fresh. Use a soft cloth or a feather duster to gently remove dust from both the mirror surface and the driftwood frame.

Avoiding Excess Moisture

While driftwood is generally resilient, it’s a good idea to avoid exposing it to excessive moisture. If your mirror is in a humid environment, consider applying a sealant to protect the wood from absorbing too much moisture.

Gentle Cleaning

For occasional deep cleaning, use a damp cloth to wipe down the driftwood frame. Avoid harsh chemicals, as they can damage the natural finish of the wood.

Inspiration from the DIY Community

If you’re looking for more ideas or just some visual inspiration, there are plenty of resources available. Here are a few places to find inspiration for your next driftwood mirror project:

Social Media Platforms

Websites like Pinterest and Instagram are treasure troves of DIY ideas. Search for “driftwood mirror” and you’ll find countless examples of beautiful projects by other DIY enthusiasts.

DIY Blogs and Websites

Many DIY bloggers share detailed tutorials and tips on their websites. These can be incredibly helpful if you’re looking for step-by-step guidance or want to learn from someone else’s experience.

Online Forums

Join online forums and communities dedicated to DIY projects and home decor. These platforms allow you to ask questions, share your progress, and get feedback from like-minded individuals.

Troubleshooting Common Issues

Even the best-laid plans can encounter hiccups. Here are some common issues you might face during your driftwood mirror project and how to solve them:

Driftwood Not Sticking Properly

If your driftwood pieces are not adhering well to the backing, ensure both surfaces are clean and free of dust. Use a stronger adhesive if necessary, and hold each piece in place for a longer time while the glue sets.

Mirror Not Being Centered

It can be tricky to get the mirror perfectly centered within the driftwood frame. Use a measuring tape or ruler to double-check the placement before securing the mirror to the backing.

Uneven Driftwood Edges

Uneven edges can add to the rustic charm of your driftwood mirror, but if they bother you, try rearranging the pieces or sanding them down further to create a more uniform look.

DIY Driftwood Projects Beyond Mirrors

Creating driftwood mirrors is just the beginning! Once you’ve mastered this project, you’ll find that driftwood can be used in many other DIY projects. Here are a few ideas to inspire your next creation:

Driftwood Shelves

Add a touch of rustic elegance to your walls with simple yet beautiful driftwood shelves. Pair them with iron brackets for a functional and stylish storage solution.

Driftwood Candle Holders

Create unique candle holders by attaching driftwood pieces to a base. This project is perfect for adding ambiance and warmth to any room in your home.

Driftwood Wall Art

Use driftwood to create stunning wall art. Arrange the pieces in a pattern or shape that speaks to you and secure them to a backing for a one-of-a-kind piece of wall decor.

Driftwood Furniture

For the truly ambitious, try your hand at driftwood furniture. From coffee tables to headboards, driftwood can be transformed into functional and artistic furniture pieces.

Conclusion

Transforming driftwood into a beautiful mirror frame is a rewarding DIY project that combines creativity, sustainability, and craftsmanship. Each piece of driftwood carries its unique history, making your mirror a truly one-of-a-kind creation.

By following the steps and tips outlined in this article, you’ll be well on your way to creating a driftwood mirror that adds a touch of nature and elegance to your home decor. Remember to have fun with the process and let your creativity shine. Whether you stick to a simple frame or experiment with more elaborate designs, your driftwood mirror will be a stunning addition to any room.

Happy crafting! Enjoy bringing a piece of the great outdoors into your home with your very own DIY driftwood mirror.

Filed Under: Driftwood Ideas Tagged With: crafts, DIY Projects, Driftwood, home decor, Mirrors

Driftwood Log Projects

May 30, 2024 by admin

If you love adding a touch of nature and rustic charm to your home, “Driftwood Log Projects” is just the inspiration you need. This guide brims with creative ideas to transform washed-up wood into stunning decor pieces. Imagine crafting unique candle holders, picture frames, or even furniture that tell a story of their own. Your living space will get an instant upgrade, all while showcasing the natural beauty of driftwood. Get ready to unleash your inner artist and let these driftwood projects breathe new life into your home.

Driftwood Log Projects

Have You Ever Thought About Getting Creative with Driftwood?

Driftwood is more than just debris washed ashore. It’s nature’s gift to creatives, crafters, and DIY enthusiasts. Whether you regularly scour beaches for interesting finds or just stumbled upon a beautiful driftwood piece, transforming it into something remarkable is incredibly satisfying.

In this article, you’ll explore a wide range of driftwood log projects. These projects not only add a rustic touch to your home decor but also help in recycling and upcycling natural material. So why not give it a try?

Driftwood Log Projects

Why Choose Driftwood?

If you’re wondering why driftwood makes such a great material for DIY projects, think about its unique appearance. Each piece comes with its own shape, texture, and history. Driftwood is eco-friendly, readily available (especially if you live near a coast or a lake), and versatile. Plus, it’s an excellent conversation starter!

Benefits of Using Driftwood

Here are some compelling reasons to incorporate driftwood into your next project:

  • Sustainability: Driftwood is an excellent option for eco-conscious crafters looking to reduce their impact on the environment.
  • Unique Aesthetic: No two pieces are alike, which means your creations will always be one-of-a-kind.
  • Durability: Properly treated and finished, driftwood can last for many years.
  • Versatility: Driftwood works well in various projects ranging from small crafts to large furniture pieces.

Preparing Driftwood for Projects

Finding the Right Piece

Not all driftwood pieces are suitable for crafting. Look for wood that’s sturdy, dry, and free from pests or rot. Ensure the piece has the right texture and shape for the project you have in mind.

Cleaning Driftwood

Before you start your project, it’s crucial to clean your driftwood properly. Here’s how you can do it:

  1. Rinse Thoroughly: Use a garden hose to rinse off any sand, salt, or dirt.
  2. Soak in a Bleach Solution: Mix one-part bleach with nine parts water in a large container. Submerge the driftwood for 24 hours. This step will kill bacteria, pests, and spores.
  3. Rinse Again: After soaking, rinse the driftwood thoroughly to remove any bleach residue.
  4. Dry Completely: Let the driftwood dry in a sunny spot for several days until it’s completely dry.

Easy Driftwood Projects

If you’re new to driftwood crafting, start with these simple but beautiful projects. They won’t require extensive tools or experience, but they’ll definitely provide a great introduction to working with this material.

Driftwood Coasters

Driftwood coasters are a charming and functional addition to any coffee table. Here’s how you can make them:

Materials:

  • Small, flat pieces of driftwood
  • Sandpaper
  • Varnish or wood sealant

Steps:

  1. Clean and dry your pieces of driftwood.
  2. Sand the pieces to achieve a smooth surface.
  3. Apply a coat of varnish or wood sealant for protection.
  4. Let them dry completely before use.

Driftwood Candle Holders

Creating driftwood candle holders adds a cozy, rustic touch to your decor. Here’s a quick guide:

Materials:

  • Driftwood logs with a flat side
  • Tea light candles
  • Drill with a hole saw attachment

Steps:

  1. Clean and dry the driftwood.
  2. Use the hole saw to drill candle-sized holes into the wood, ensuring they’re evenly spaced.
  3. Insert the tea light candles into the drilled holes.
  4. Optionally, you can varnish the wood for added protection.

Intermediate Driftwood Projects

Once you feel comfortable handling driftwood, you can move on to some intermediate projects. These will require a bit more skill and tools but are still manageable for most DIY enthusiasts.

Driftwood Wall Art

Creating driftwood wall art can be as simple or as complex as you want it to be. Here’s a straightforward way to get started:

Materials:

  • Assorted driftwood pieces
  • Hot glue gun
  • Sturdy backing (canvas or plywood)
  • Wall mounting hardware

Steps:

  1. Plan your design by laying out the driftwood pieces on your backing material.
  2. Once you’re happy with the layout, use the hot glue gun to adhere the driftwood pieces to the backing.
  3. Let the glue dry completely.
  4. Attach the wall mounting hardware to the back and hang your creation.

Driftwood Shelves

Driftwood shelves are both functional and decorative. Here’s how to make them:

Materials:

  • Large, flat pieces of driftwood
  • Brackets
  • Screws
  • Drill

Steps:

  1. Clean and dry your driftwood pieces.
  2. Attach the brackets to the driftwood using screws.
  3. Mount the shelves on your wall, ensuring they’re level and securely fastened.

Driftwood Log Projects

Advanced Driftwood Projects

If you’re ready to dive deeper into driftwood crafting, these advanced projects will challenge your skills and creativity. They might require specialized tools or techniques, but the results are incredibly rewarding.

Driftwood Furniture

Creating furniture from driftwood is a fantastic way to make a statement piece for your home. Here’s a project to get you started:

Driftwood Coffee Table

Materials:

  • Large, sturdy driftwood logs
  • Glass tabletop
  • Wood screws
  • Drill
  • Sander

Steps:

  1. Select and Clean: Choose logs that are similar in height. Clean and sand them thoroughly.
  2. Create the Base: Arrange the logs into a stable formation to create a base for the glass tabletop.
  3. Secure the Logs: Use wood screws to secure the logs together. Make sure they’re tightly fastened and stable.
  4. Add the Tabletop: Place the glass tabletop onto the secured base. You can attach it using silicone adhesive if you want it to be more stable.

Driftwood Headboard

Making a driftwood headboard can give your bedroom a unique, coastal vibe. Here’s how to do it:

Materials:

  • Large, flat pieces of driftwood
  • Wood screws
  • Drill
  • Sandpaper
  • Varnish (optional)

Steps:

  1. Plan the Layout: Plan the arrangement of the driftwood pieces to fit the width of your bed.
  2. Prepare the Wood: Clean, sand, and optionally varnish the pieces.
  3. Assembly: Attach the pieces to each other using wood screws and a drill. Ensure it’s sturdy enough to stand upright.
  4. Install: Mount the headboard securely to the wall or the bed frame.

Creative Driftwood Decor Ideas

Sometimes it’s the little touches that make a space feel special. These driftwood decor ideas are perfect for adding unique accents to your home.

Driftwood Wind Chimes

Wind chimes made from driftwood create soothing sounds and add a whimsical touch to your garden or patio.

Materials:

  • Assorted small driftwood pieces
  • Fishing wire or strong thread
  • Metal ring or wooden circle

Steps:

  1. Prepare: Clean all driftwood pieces thoroughly.
  2. Drill Holes: Carefully drill small holes in each driftwood piece.
  3. String Them Together: Thread the fishing wire or strong thread through the holes and tie them to the metal ring or wooden circle.
  4. Hang: Suspend the wind chime in a place where it can catch the breeze.

Driftwood Mirrors

Adding a frame of driftwood to a mirror can turn an ordinary item into a focal point in any room.

Materials:

  • Driftwood pieces
  • Mirror
  • Hot glue gun
  • Hanging hardware

Steps:

  1. Clean the Driftwood: Make sure all pieces are clean and dry.
  2. Arrange the Pieces: Lay out the design around the mirror before gluing.
  3. Glue: Use a hot glue gun to attach the driftwood pieces around the mirror’s edge.
  4. Hang: Install hanging hardware on the back of the mirror and display it on your wall.

Driftwood in the Garden

Driftwood can easily be integrated into your outdoor spaces. Here are a couple of projects that will make your garden stand out.

Driftwood Planters

Driftwood planters add a rustic charm to your garden and are perfect for succulents and small plants.

Materials:

  • Hollow driftwood logs or large driftwood pieces with indentations
  • Potting soil
  • Plants (succulents, small herbs, etc.)

Steps:

  1. Prepare the Driftwood: Clean and hollow out the driftwood if needed.
  2. Add Soil: Fill the hollowed-out areas with potting soil.
  3. Plant: Place your plants in the soil and pat it down firmly.
  4. Water: Water the plants lightly, being careful not to overwater.

Driftwood Garden Sculpture

Creating a driftwood sculpture can serve as a unique statement piece for your garden.

Materials:

  • Assorted driftwood pieces
  • Metal rods or stakes (for support)
  • Drill
  • Screws

Steps:

  1. Design: Plan your sculpture design on paper.
  2. Preparation: Clean and dry all driftwood pieces.
  3. Assembly: Begin assembling your sculpture, drilling holes to join pieces with screws. Use metal rods or stakes for added support in the soil.
  4. Install: Place your sculpture in the garden and ensure it’s stable.

Tips for Working with Driftwood

Safety First

When working with any type of wood, especially driftwood, safety should be a priority. Always wear gloves when handling driftwood to avoid splinters. When cutting or sanding, use protective eyewear and a mask to avoid inhaling dust particles.

Tools You Might Need

Here are some tools that can make your driftwood projects easier and more efficient:

  • Drill: Useful for making holes and securing pieces together.
  • Saw: For cutting driftwood to the desired length or shape.
  • Sandpaper or Sander: To smooth out rough edges.
  • Hot Glue Gun: Handy for smaller projects.
  • Varnish or Sealant: To protect your driftwood creations.

Storage and Maintenance

Driftwood, like any natural material, can degrade over time if not properly cared for. If you have leftover driftwood, store it in a dry place to prevent mold and rot. For driftwood projects that will be kept outside, consider applying a weather-resistant finish to protect them from the elements.

Final Thoughts

Transforming driftwood into beautiful creations can be a rewarding experience. Not only do you get to create something unique and personal, but you also contribute to sustainable crafting by repurposing natural materials. Whether you’re looking to start small with coasters or go big with furniture, there’s a driftwood project for everyone.

So, next time you find yourself on a beach or lake shore, keep an eye out for interesting pieces of driftwood. Your next great project might just be waiting to be discovered!

Happy crafting!

Filed Under: Driftwood Ideas Tagged With: crafts, Driftwood, home decor, Upcycling, Woodworking

Drift Wood Projects Driftwood Ideas

May 28, 2024 by admin

Welcome to “Drift Wood Projects Driftwood Ideas,” a delightful guide brimming with creative ways to transform simple pieces of driftwood into stunning decorations and functional items for your home. Imagine the rustic charm and natural beauty you can bring into your space by crafting unique art pieces, cozy home accents, or even practical objects like shelves and coat racks. This article is your treasure trove of inspiration, guiding you through various projects that not only repurpose driftwood but also infuse your home with a touch of nature’s elegance. Get ready to let your creativity flow and discover how driftwood can add a magical, coastal vibe to your living area.

Drift Wood Projects Driftwood Ideas

Have you ever stumbled upon a piece of driftwood washed up on the shore and wondered what you could create with it? Driftwood has a natural beauty and charm that can add a rustic touch to any home decor. Plus, it’s an eco-friendly way to repurpose materials that have been shaped by nature itself. In this article, we’ll explore various driftwood projects and ideas that you can easily incorporate into your craft repertoire.

Why Driftwood?

Driftwood is more than just a piece of wood; it’s a material that’s been weathered and shaped by natural elements over time. This creates unique textures and shapes, making each piece one-of-a-kind. Plus, working with driftwood is a sustainable craft choice, helping you reduce, reuse, and recycle in a creative way.

Unique Aesthetic

Driftwood boasts a naturally distressed look that can’t be easily replicated with other materials. Its organic, weathered appearance makes it perfect for adding rustic and coastal vibes to your space.

Eco-Friendly

Repurposing driftwood helps in reducing waste and gives you a chance to work with materials that are naturally renewable. It’s an excellent example of sustainable living.

Versatility

From furniture pieces to small decorative items, driftwood can be used in a variety of projects. This versatility makes it a favorite among crafters and DIY enthusiasts.

Getting Started: Collecting Driftwood

Before diving into driftwood projects, you need to collect your materials. However, it’s important to do so responsibly.

Where to Find Driftwood

Driftwood can be commonly found on beaches, riversides, and lakeshores. Always ensure you’re collecting driftwood from legal areas where it’s allowed to do so. Avoid protected areas like national parks or wildlife reserves where removing natural objects might be prohibited.

Choosing the Right Pieces

When selecting driftwood, keep an eye out for pieces that are dry, mildew-free, and relatively lightweight. You’ll want pieces that are well-weathered, as fresh driftwood can still carry a lot of moisture, making it difficult to work with.

Cleaning and Preparing Driftwood

Before using driftwood in any project, it’s crucial to clean it thoroughly. Here’s a simple process to get you started:

  1. Rinse: Rinse the driftwood with fresh water to remove any salt and debris.
  2. Soak: Soak it in a mixture of water and a bit of bleach (roughly 1 part bleach to 9 parts water) to kill off any pests or bacteria.
  3. Rinse Again: Rinse thoroughly to remove any bleach residue.
  4. Dry: Allow the driftwood to dry completely, which may take a few days.

Drift Wood Projects Driftwood Ideas

Driftwood Projects: Ideas to Inspire You

Ready to dive into some driftwood projects? Here are several categories of items you can create, complete with examples to spark your creativity.

Driftwood Home Decor

Decorating your home with driftwood can create a serene and natural ambiance. Here are some ideas to get you started:

Driftwood Wall Art

Create an eye-catching piece of wall art using reclaimed driftwood. Here’s an easy project to try:

Materials Needed

  • Several small pieces of driftwood
  • Hot glue gun or wood glue
  • Canvas or wooden board as a base
  • Optional: paint and brushes

Steps

  1. Arrange the driftwood pieces on your canvas or board in a pattern you like.
  2. Once you’re satisfied with the arrangement, glue the pieces in place.
  3. For a splash of color, you can paint certain parts of the driftwood, or leave it natural for a more rustic look.
  4. Allow the glue to dry completely, and your unique piece of art is ready to hang!

Driftwood Mirrors

A driftwood frame around a mirror adds a rustic charm. This project is simple yet elegant.

Materials Needed

  • Mirror
  • Assorted pieces of driftwood
  • Strong adhesive or mirror epoxy
  • Hanging hardware

Steps

  1. Lay the mirror flat and arrange the driftwood around the edges, ensuring the pieces fit tightly together.
  2. Once the design is set, glue each piece in place.
  3. Allow to dry thoroughly before mounting the mirror on your wall.

Driftwood Furniture

If you’re up for a bigger project, consider making your own driftwood furniture.

Driftwood Coffee Table

A driftwood coffee table can become a centerpiece in your living room, combining functionality with natural beauty.

Materials Needed

  • Large, flat piece of driftwood or a collection of smaller pieces
  • Glass tabletop
  • Table legs (or driftwood supports)
  • Screws and strong adhesive

Steps

  1. Securely assemble the driftwood to form a stable base. This might involve screwing smaller pieces together or using larger, more stable pieces as the main support.
  2. Attach the glass tabletop using appropriate adhesive if needed.
  3. Make sure the table is level and sturdy before using it.

Driftwood Shelves

Incorporating driftwood shelves into your home decor adds both storage and aesthetic appeal.

Materials Needed

  • Straight, long pieces of driftwood
  • Brackets and screws
  • Sandpaper

Steps

  1. Select pieces of driftwood that are straight and long enough to be functional shelves.
  2. Sand down rough edges to prevent splinters.
  3. Securely attach the brackets to the wall and then mount the driftwood on the brackets using screws.

Driftwood Garden Projects

Driftwood is also a fantastic material for enhancing your garden.

Driftwood Plant Hangers

Combine your love for plants and driftwood by creating unique plant hangers.

Materials Needed

  • Small to medium pieces of driftwood
  • Twine or rope
  • Small pots or planters
  • Optional: hooks or nails for mounting

Steps

  1. Cut twine or rope to your desired length and attach it securely to the pieces of driftwood.
  2. Hang the driftwood horizontally or vertically, attaching the plants securely to the wood.
  3. Use hooks or nails to mount your driftwood plant hanger in your garden or balcony.

Driftwood Garden Sculptures

Create a focal point in your garden with a driftwood sculpture.

Materials Needed

  • Large pieces of driftwood
  • Outdoor wood adhesive
  • Paint or outdoor sealant (optional)

Steps

  1. Arrange the driftwood pieces in a design that pleases you, from abstract shapes to animal forms.
  2. Glue the pieces securely together and allow to dry completely.
  3. Optionally, add a coat of paint or sealant to protect the sculpture from the elements.

Driftwood Household Items

Driftwood can also be used to create everyday household items that are both practical and beautiful.

Driftwood Candle Holders

Make a rustic candle holder that adds a cozy touch to any room.

Materials Needed

  • Small to medium pieces of driftwood
  • Drill
  • Tea light candles or small votive candles

Steps

  1. Select pieces of driftwood that are flat and stable enough to hold a candle.
  2. Use a drill to create a hole the size of your candle.
  3. Insert the candle into the hole and light up your home!

Driftwood Key Holder

Never lose your keys again with a stylish driftwood key holder.

Materials Needed

  • Flat piece of driftwood
  • Hooks or small knobs
  • Screws and screwdriver
  • Hanging hardware

Steps

  1. Attach hooks or knobs evenly spaced along the driftwood piece.
  2. Secure hanging hardware to the back of the driftwood.
  3. Mount it near your doorway, and you have a practical and decorative key holder.

Tips and Tricks

To make your driftwood projects even more successful, here are some additional tips and tricks:

Choosing the Right Driftwood for Your Projects

  • Size and Shape: Match the size and shape of the driftwood to the scale of your project. Smaller pieces work well for decor items, while larger ones are better suited for furniture.
  • Texture: The natural texture of driftwood adds to the appeal of your project. Look for pieces with interesting grain patterns and natural imperfections.

Preserving Driftwood

  • Sealant: Use a clear wood sealant to protect your driftwood projects, particularly if they will be placed outdoors.
  • Polishing: A light sand and polish can enhance the natural beauty of the driftwood without taking away its rustic charm.

Tools of the Trade

  • A sturdy pair of gloves can protect your hands while working with driftwood.
  • A small hand saw and a drill can be extremely useful for more intricate projects.
  • Sandpaper is essential for smoothing out rough edges and splinters.

Drift Wood Projects Driftwood Ideas

Troubleshooting Common Issues

Like any craft project, working with driftwood has its challenges. Here are some common issues and how to solve them:

  • Wood Splitting: If the driftwood splits while drilling, try drilling a pilot hole first with a smaller bit before using the final sized drill bit.
  • Mold and Mildew: Ensure your driftwood is thoroughly dried and cleaned before use to avoid mold and mildew.
  • Structural Integrity: For larger furniture projects, ensure that your driftwood is sturdy and stable. Reinforce joints with screws or wood adhesive as needed.

Conclusion

Creating driftwood projects is not only a fun and rewarding hobby but also a great way to bring a touch of nature into your home. Whether you’re making a simple candle holder or a complex piece of furniture, the unique characteristics of driftwood will make each project special.

So next time you find yourself walking along the beach, think about the potential each piece of driftwood holds. Why not pick up a piece or two, bring them home, and see what you can create? Happy crafting!

Filed Under: Driftwood Ideas Tagged With: crafts, Driftwood, home decor, ideas, projects

Diy Driftwood Projects Ideas

May 28, 2024 by admin

Imagine transforming ordinary pieces of driftwood into stunning home décor and practical household items that showcase your creativity. In “DIY Driftwood Projects Ideas,” you’ll explore a variety of simple yet impressive ways to use these natural treasures from the beach. From rustic furniture to unique art displays, this guide will inspire you to give new life to driftwood, turning your home into a cozy, inviting space with your personalized touch. Whether you’re a seasoned DIY enthusiast or just starting out, you’ll find plenty of projects to spark your imagination and bring a bit of coastal charm indoors.

DIY Driftwood Projects Ideas

Have you ever stumbled upon a piece of driftwood and wondered what you could create with it?

Imagine walking along the shoreline, feeling the sand between your toes, and spotting a piece of weathered driftwood that seems to have a story of its own. Driftwood, with its naturally sculpted shapes and textures, presents an incredible opportunity for DIY enthusiasts to craft something truly unique and special. In this article, we’ll dive into a treasure trove of creative DIY driftwood project ideas that you can try at home. From simple decorations to functional furniture, there’s a project here for everyone, regardless of your crafting skill level.

Why Driftwood?

Driftwood carries a unique charm and inherent beauty that comes from being naturally weathered by sun, sea, and time. Each piece is one-of-a-kind, offering endless possibilities for creativity. But why driftwood? Here are a few reasons why driftwood is a fantastic material for DIY projects:

  1. Sustainability: Driftwood is repurposed from nature, making it an eco-friendly material choice.
  2. Uniqueness: No two pieces are alike, making your creations genuinely unique.
  3. Natural Aesthetic: Adds a rustic or coastal charm to home decor.
  4. Durability: Weathered driftwood tends to be hardy and long-lasting.

Now, let’s get down to some inspirational DIY driftwood project ideas!

Diy Driftwood Projects Ideas

Easy Driftwood Projects

Sometimes, the simplest projects can have the most significant impact. If you’re new to working with driftwood or just want something quick and easy, these projects are perfect for you.

Driftwood Wall Art

Creating wall art from driftwood can be as straightforward or as complex as you desire. You can start small by arranging a few pieces into an abstract design or go big by crafting a stunning focal piece for your living room.

Materials Needed:

  • Driftwood pieces
  • Adhesive glue or nails
  • Backing board or canvas (optional)
  • Hanging hardware

Steps:

  1. Clean the Driftwood: Remove any debris or seaweed and allow it to dry completely.
  2. Design Your Art: Lay out a design on the floor or a table.
  3. Assemble: Use glue or nails to attach the driftwood to your backing board, or directly to your wall if you’re confident.
  4. Hang: Attach hanging hardware to the back of your board and display your new art piece.

Driftwood Candle Holders

Transforming driftwood into candle holders is incredibly simple yet offers an elegant touch to any space.

Materials Needed:

  • Small pieces of driftwood
  • Tea light candles
  • Drill with a Forstner bit or spade bit (same size as your candles)
  • Sandpaper

Steps:

  1. Prepare the Driftwood: Clean and dry the driftwood.
  2. Mark and Drill: Mark where you want to place your candle and carefully drill a hole large enough to fit the tea light.
  3. Smooth and Finish: Sand the drilled area for a smooth finish and place your tea light candle inside.

Intermediate Driftwood Projects

Once you’ve gained some confidence with easier projects, why not take things up a notch? These intermediate projects involve a bit more time and skill but are equally rewarding.

Driftwood Mirrors

Driftwood mirrors can add a touch of coastal elegance to your decor. This project involves framing a mirror with driftwood pieces to create a stunning visual effect.

Materials Needed:

  • Driftwood pieces
  • Mirror
  • Strong adhesive
  • Plywood (for backing)
  • Saw
  • Hanging hardware

Steps:

  1. Prepare Materials: Clean the driftwood and cut the plywood to the size you’d like your mirror to be.
  2. Attach the Mirror: Secure the mirror to the center of the plywood using adhesive.
  3. Arrange the Driftwood: Lay out your driftwood pieces around the mirror on the plywood backing to form a frame.
  4. Attach the Driftwood: Glue or nail the driftwood pieces in place.
  5. Fix Hanging Hardware: Attach hanging hardware to the back and display your new driftwood mirror.

Driftwood Shelves

Functional and stylish, driftwood shelves add natural beauty to any room. This project is perfect for adding storage while maintaining a rustic or coastal vibe.

Materials Needed:

  • Long, flat pieces of driftwood
  • Brackets or shelf supports
  • Screws
  • Drill

Steps:

  1. Select Driftwood: Find suitably flat and sturdy pieces of driftwood.
  2. Secure Brackets: Attach brackets or shelf supports to your wall at the desired height.
  3. Mount Shelf: Place the driftwood on the brackets and secure with screws.
  4. Style and Enjoy: Arrange your favorite items atop your new driftwood shelf.

Diy Driftwood Projects Ideas

Advanced Driftwood Projects

For those of you who are particularly crafty and looking for a challenge, these advanced projects may be just what you’re after. These require more tools, skills, and time but the results can be truly spectacular.

Driftwood Furniture

Creating furniture from driftwood can be immensely satisfying. From coffee tables to headboards, the possibilities are numerous. Here we’ll take a look at building a driftwood coffee table.

Materials Needed:

  • Large sturdy pieces of driftwood for the base
  • A flat piece of driftwood or glass for the tabletop
  • Adhesive or wood screws
  • Saw
  • Drill
  • Sandpaper
  • Wood finish (optional)

Steps:

  1. Design Your Table: Plan how you want your table to look and which pieces of driftwood will be used for the base.
  2. Prepare the Driftwood: Clean, cut, and sand the driftwood as necessary.
  3. Assemble the Base: Attach the base pieces together using adhesive or screws, ensuring it’s stable.
  4. Attach the Tabletop: Place your flat piece of driftwood or glass on top and secure.
  5. Finish: Sand any rough edges and apply a wood finish if desired.

Driftwood Light Fixtures

Lighting made from driftwood can be a stunning conversation piece. This project is ideal for those comfortable working with electrical components. Let’s look at creating a driftwood chandelier.

Materials Needed:

  • Driftwood pieces
  • Light fixture kit
  • Drill
  • Screws
  • Wire nuts
  • Hanging hardware

Steps:

  1. Plan Your Design: Decide how your chandelier will be structured and how many lights it will have.
  2. Prepare the Driftwood: Clean and arrange the driftwood in the desired shape.
  3. Drill Holes: Drill holes for wiring through the driftwood.
  4. Assemble Electrical Components: Follow your light fixture kit instructions to wire the lights, ensuring all connections are secure and safe.
  5. Mount and Install: Hang your chandelier and connect it to the ceiling fixture, ensuring all is safe and functional.

Driftwood Care and Maintenance

Once you’ve crafted your beautiful driftwood masterpiece, you’ll want to ensure it stays in excellent condition. Here are some tips for caring for and maintaining your driftwood projects:

Cleaning Driftwood

Driftwood can carry a lot of debris, salt, and even critters. Clean it thoroughly before beginning any project.

Steps:

  1. Rinse: Use fresh water to rinse off sand, salt, and debris.
  2. Soak: Soak the driftwood in a mixture of water and bleach (about 1 part bleach to 9 parts water) for a few hours to remove any remaining contaminants and pests.
  3. Rinse Again: Rinse thoroughly to remove any bleach residue.
  4. Dry: Allow the driftwood to dry fully, which may take several days.

Sealing and Preserving

While driftwood is generally durable, sealing it can help preserve its appearance and structural integrity.

Steps:

  1. Sand: Sand any rough areas using fine-grit sandpaper.
  2. Seal: Apply a clear wood sealer or polyurethane to protect the wood. This step can also help enhance the color and grain.
  3. Dry: Allow the sealer to dry completely before using your driftwood piece.

Safety Tips

When working on DIY projects, safety should always be a priority. Here are a few safety tips to keep in mind when working with driftwood:

  • Wear Protective Gear: Use gloves, safety glasses, and a mask when cutting, sanding, or drilling.
  • Work in a Ventilated Area: Especially when dealing with bleach or sealants, make sure you’re in a well-ventilated area.
  • Check for Sturdiness: Ensure any furniture or functional pieces are securely assembled to avoid accidents.
  • Handle Electrical Components Safely: If you’re incorporating lighting or other electrical elements, ensure all connections are secure and up to code.

Your Next Steps in Crafting with Driftwood

You’ve now got a plethora of ideas and the know-how to start crafting with driftwood. Whether you’re looking for quick and easy projects or are ready to dive into something more complex, the natural beauty and uniqueness of driftwood can truly elevate your home decor and offer a rewarding crafting experience.

Starting Small

If you’re new to working with driftwood or DIY projects in general, start with simple projects like wall art or candle holders. These are less time-consuming and can help you build confidence.

Collaborate and Share

Crafting can be even more enjoyable when shared with friends or family. Consider inviting others to join you in creating driftwood projects. Sharing ideas and working together can lead to new inspirations and exciting outcomes.

Explore and Experiment

Don’t be afraid to let your creativity flow. Driftwood is forgiving and versatile; there’s no right or wrong way to use it. Experiment with different pieces and arrangements until you find what works for your vision.

Showcase and Enjoy

Once you’ve completed a project, give it a special place in your home where it can be admired and appreciated. Handmade items often carry sentimental value and can be wonderful conversation starters.

Whether you’re just getting started or are looking for your next big project, driftwood offers endless possibilities for those who love to create and explore. Happy crafting!

Filed Under: Driftwood Ideas Tagged With: crafts, Driftwood, Handmade, home decor, recycling

  • « Previous Page
  • Page 1
  • …
  • Page 5
  • Page 6
  • Page 7
  • Page 8
  • Page 9
  • Page 10
  • Next Page »

Primary Sidebar

Driftwood4us.com, is a participant in the Amazon Services LLC Associates Program, an affiliate advertising program designed to provide a means for sites to earn advertising fees by advertising and linking to amazon.com.