• Skip to main content
  • Skip to primary sidebar
  • Terms and Conditions
  • Privacy Policy
  • Contact

Driftwood 4 Us

Just About Driftwood

DIY Crafts

Driftwood Wall Art Mountain

June 24, 2024 by admin

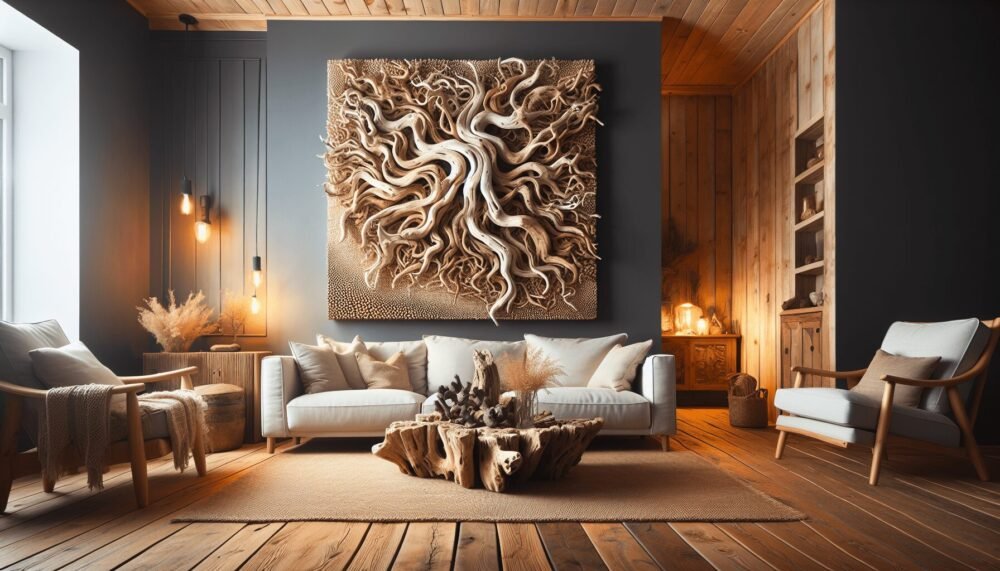
Picture this: a serene mountain scene meticulously crafted from pieces of driftwood, capturing the rugged beauty of nature right on your wall. “Driftwood Wall Art Mountain” transforms simple, weathered wood into a stunning masterpiece that evokes the tranquility of the great outdoors. Whether you’re a nature lover or an art enthusiast, this unique wall art adds a touch of rustic elegance to any space. Dive into the artistry and creativity that goes into making each panel, and discover how these pieces of driftwood can bring a breath of mountain air into your home. Have you ever found yourself captivated by the beauty of a piece of driftwood? There’s an undeniable allure to this natural material, shaped by the elements and time itself. Imagine capturing that essence and using it to craft stunning wall art that brings the majesty of mountains into your home. Today, let’s explore the world of driftwood wall art mountain creations and how you can bring these natural sculptures into your own living space.

Driftwood Wall Art Mountain

Why Driftwood?

Let’s start with the basics: why is driftwood such a popular material for wall art? Driftwood is essentially pieces of wood that have been washed ashore by the ocean, rivers, or lakes. Each piece is unique, having been shaped and weathered by the elements, making it a work of art by nature itself.

Natural Beauty

There’s something inherently beautiful about driftwood. Its natural, weathered look adds a rustic and timeless charm to any piece of art. The variations in color, texture, and shape of driftwood pieces ensure that each creation is one-of-a-kind.

Sustainability

Using driftwood for art is also an eco-friendly choice. It repurposes natural materials that would otherwise go to waste, reducing the need for new resources. This sustainable approach is perfect for those looking to minimize their environmental impact while creating stunning decor.

Versatility

Driftwood is incredibly versatile. It can be used in various forms, from entire logs to small fragments. This flexibility allows for creativity, enabling you to craft intricate designs or simple, minimalist pieces depending on your artistic vision.

Driftwood Wall Art Mountain: The Concept

Creating a driftwood wall art mountain involves assembling pieces of driftwood to form a representation of mountainous landscapes. The result is a captivating piece that blends the natural elegance of driftwood with the grandeur of mountain scenery.

Inspiration

Mountains have long been a source of inspiration for artists due to their majestic presence and the sense of adventure they embody. When combined with the organic beauty of driftwood, the result is a piece of art that evokes a sense of wonder and tranquility.

Design Elements

When creating driftwood wall art depicting mountains, consider the following design elements:

  • Silhouette: The overall shape or outline of the mountains is crucial. Using driftwood pieces to outline jagged peaks and slopes can create a recognizable silhouette.
  • Texture: Driftwood naturally brings texture to the piece. Use this to your advantage by selecting pieces with varied textures to represent different elements of the mountains.
  • Depth: Layering driftwood pieces can add depth to your art, making it more dynamic and lifelike.
  • Color: While driftwood is often in shades of gray and brown, you can incorporate pieces with different hues to add dimension and personality to your mountain art.

Tools and Materials

To get started on your driftwood wall art mountain, you’ll need a few tools and materials. Here’s a basic list:

ToolsMaterials
Hot glue gun or wood glueVarious pieces of driftwood
Saw or cutting toolBacking board or frame
SandpaperOptional: paint and varnish
Protective glovesHanging hardware

Step-by-Step Guide to Creating Driftwood Wall Art Mountain

  1. Gather Your Driftwood: Begin by collecting driftwood. Visit local beaches, rivers, or lakes to find pieces that suit your vision. Ensure they are clean and dry before use.
  2. Plan Your Design: Sketch out your design on paper. This will help you visualize the final product and serve as a guide while assembling your driftwood.
  3. Prepare Your Backing Board: Cut and sand your backing board to the desired size. This will serve as the canvas for your art.
  4. Arrange Your Driftwood: Lay out your driftwood pieces according to your sketch. Play around with the placement until you are satisfied with the composition.
  5. Attach the Driftwood: Use a hot glue gun or wood glue to attach the driftwood pieces to the backing board. Hold each piece in place until the glue sets.
  6. Add Layers for Depth: If desired, add additional layers of driftwood to create depth and dimension.
  7. Finish the Piece: Optionally, you can paint or varnish the driftwood to protect it and enhance its appearance.
  8. Add Hanging Hardware: Attach hanging hardware to the back of the board so your art is ready to display.

Creative Variations

While the basic concept remains the same, there are numerous creative variations you can explore to make your driftwood wall art mountain truly unique.

Minimalist Approach

For those who prefer a simpler look, a minimalist approach might be ideal. Use fewer pieces of driftwood and focus on the clean lines and natural beauty of each piece. This can create a striking and elegant piece of art that complements modern decor.

Mixed Media

Combine driftwood with other materials to add interest and contrast. Metals, stones, or even shells can be incorporated to enhance the texture and visual appeal of your mountain art.

Color Accents

While driftwood’s natural colors are beautiful, some artists choose to add color accents. This can be done using paint or stains to highlight specific features or add a pop of color to the overall piece.

Themed Mountains

Create mountain art pieces inspired by specific mountain ranges or landscapes. For example, you could craft a piece based on the Rockies, the Swiss Alps, or any mountain range that holds personal significance to you. This adds an element of personalization and storytelling to your art.

Tips for Success

Achieving a stunning piece of driftwood wall art mountain is a rewarding process, but there are a few tips to keep in mind to ensure success.

Selecting the Right Driftwood

  • Look for Variety: Pieces with different shapes, sizes, and textures can add a lot of character to your art.
  • Check for Stability: Ensure the driftwood is dry and free from rot, mold, or insects.
  • Clean Thoroughly: Use a brush to remove debris and rinse the pieces in fresh water. Allow them to dry completely before use.

Working with Driftwood

  • Safety First: Driftwood can have sharp or rough edges, so wear protective gloves while handling it.
  • Be Patient: Assembling driftwood art can take time. Don’t rush the process; take your time to get the composition right.
  • Trial and Error: Don’t be afraid to rearrange pieces multiple times until you achieve the desired look. The flexibility to experiment is part of the creative process.

Driftwood Wall Art Mountain

Displaying Your Driftwood Wall Art Mountain

Once your art is complete, it’s time to display it! Consider these factors to ensure your piece shines:

Placement

  • Focus Point: Ideally, place your driftwood wall art mountain in an area where it can be a focal point, such as above a fireplace, in a hallway, or as the centerpiece of a gallery wall.
  • Lighting: Good lighting can enhance the natural textures and details of your driftwood art. Natural light or strategically placed lamps can make a big difference.

Maintenance

  • Dusting: Regularly dust your driftwood art with a soft brush or cloth to keep it looking its best.
  • Avoid Moisture: While driftwood is weathered, it’s still best to avoid placing it in overly humid areas to prevent further deterioration.

Conclusion

Creating a driftwood wall art mountain is not only a fun and rewarding project but also a way to bring the beauty and tranquility of nature into your home. Whether you’re an experienced artist or a beginner looking for a new hobby, working with driftwood allows for endless creativity and the opportunity to produce a truly unique piece of art.

So, next time you find yourself strolling along the beach or a lake, keep an eye out for interesting pieces of driftwood. With a little imagination and some effort, you can transform these natural treasures into stunning mountain art that will captivate and inspire anyone who sees it. Happy crafting!

Filed Under: Driftwood Ideas Tagged With: DIY Crafts, driftwood art, Mountain Art, Rustic Decor, Wall Decor

Driftwood Crafts Wall Hangings Art

June 19, 2024 by admin

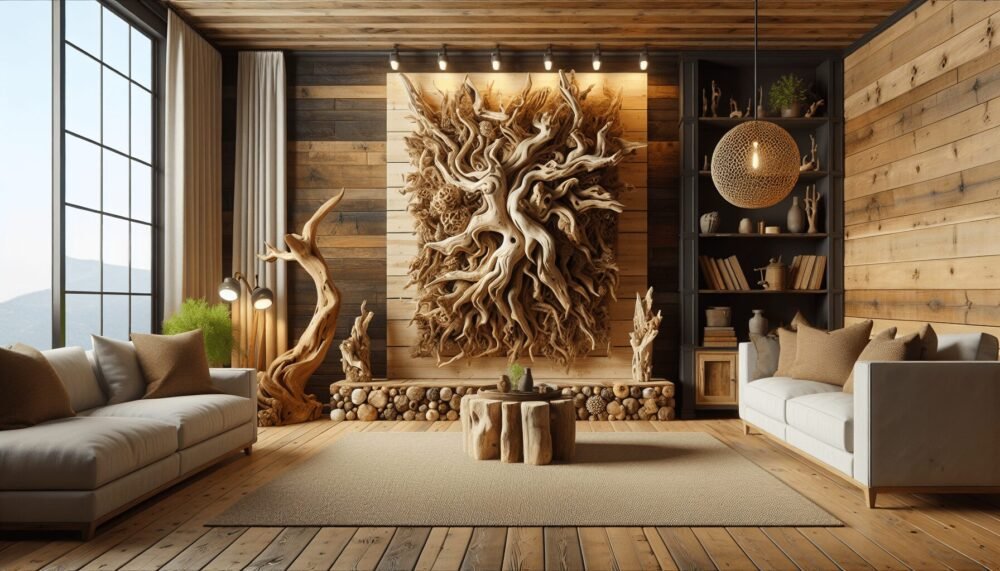
You’ve stumbled upon a treasure trove of creativity with “Driftwood Crafts Wall Hangings Art.” In this article, you’ll explore the captivating world of turning humble driftwood into stunning wall art. Each piece of driftwood, weathered and shaped by the sea, holds its own unique charm, ready to be transformed into a beautiful hanging for your home. Discover DIY tips, design ideas, and the joy of bringing a bit of nature indoors with these handmade creations. Dive into this artistic adventure and let your imagination set sail! Have you ever come across a piece of driftwood and thought about its journey through the elements to arrive in its current state? This natural treasure, shaped by water and time, presents an ideal medium for creating beautiful, rustic wall hangings. Driftwood crafts wall hangings art allows you to bring a piece of nature’s artistry into your home, merging the organic with your creative expression. Let’s dive into the world of driftwood wall hangings and explore how you can turn simple pieces of wood into striking art.

The Beauty of Driftwood

Driftwood Crafts Wall Hangings Art

When you look at a piece of driftwood, you’re seeing the result of a long, transformative journey. Its unique texture and shape come from the relentless work of water, wind, and sun. Driftwood boasts an array of earthy tones and intricate patterns – each piece distinct from the next. This individuality makes driftwood an excellent material for crafting one-of-a-kind wall hangings.

Why Driftwood?

Driftwood has many appealing qualities:

  • Natural Aesthetic: Its organic look blends seamlessly into various decorating styles.
  • Sustainability: Using driftwood for crafts is an environmentally-friendly practice, as it repurposes natural elements.
  • Texture and Shape: Every piece has a unique story, offering a natural element that mass-produced items can’t match.

Table of Driftwood Properties and Benefits

PropertyBenefit
Unique ShapeOne-of-a-kind art pieces
Natural TonesComplement various interior designs
Eco-FriendlySustainable and repurposed material
Textured SurfaceAdds depth and interest to art

Gathering Driftwood

Finding the perfect piece of driftwood is an adventure in itself. Whether you’re strolling along a beach, riverbank, or lake, keep an eye out for pieces with interesting shapes and textures.

Where to Find Driftwood

Driftwood can be found in various natural settings, especially:

  • Beaches: Coastal areas are hotspots for driftwood, with plenty of variety.
  • Rivers and Lakes: Inland bodies of water can also have driftwood, often with a different character compared to coastal wood.
  • Local Stores: Some crafting stores or online marketplaces sell driftwood if you’re not near a natural source.

Driftwood Crafts Wall Hangings Art

Preparing Your Driftwood

Before you start your craft, it’s crucial to clean and prepare your driftwood. This process ensures that your art will be both beautiful and durable.

Cleaning Driftwood

You can follow these steps to clean your driftwood:

  1. Rinse Thoroughly: Wash the driftwood with fresh water to remove any debris or salt.
  2. Soak: Submerge the driftwood in a mixture of water and a mild bleach solution (1 part bleach to 9 parts water) for 1-2 days to kill any organisms or bacteria.
  3. Scrub: Use a brush to scrub off any remaining dirt.
  4. Dry: Let the driftwood dry completely in the sun to ensure it is free of moisture.

Designing Your Wall Hanging

The design phase is where your creativity truly shines. Consider the overall theme and style you want to achieve with your wall hanging.

Concept and Inspiration

Where do you find inspiration for your driftwood art? Nature itself is often the best muse:

  • Floral Motifs: Use driftwood to create the forms of flowers or trees.
  • Geometric Designs: Combine several pieces of driftwood to form geometric shapes.
  • Abstract Art: Embrace the natural irregularity and texture of the wood for a more abstract design.

Tools and Materials

Here are the basic tools and materials needed for most driftwood wall hanging projects:

  • Glue or Epoxy: For attaching pieces of wood together.
  • String or Wire: For hanging or embellishing pieces.
  • Drill or Dremel Tool: To create holes for hanging or stringing pieces.
  • Screws or Nails: For secure attachments.
  • Sealer: To protect the wood and enhance its natural hues.

Table of Tools and Materials

Tool/MaterialPurpose
Glue/EpoxyAttaching wood pieces securely
String/WireHanging and embellishing
Drill/Dremel ToolCreating precise holes for hanging
Screws/NailsSecure attachments
SealerProtecting and enhancing the wood

Driftwood Crafts Wall Hangings Art

Creating Your Driftwood Wall Hanging

Now that you have your materials and design in mind, it’s time to bring your vision to life.

Step-by-Step Process

Here’s a step-by-step guide to creating a simple driftwood wall hanging:

  1. Plan Your Layout: Arrange your driftwood pieces on a flat surface. Play around with the arrangement until you find a composition you like.
  2. Cut and Shape: If needed, cut the driftwood into desired shapes. Sand any rough edges to ensure they’re smooth.
  3. Drill Holes: Drill small holes where you plan to thread the string or wire.
  4. Attach Pieces: Use glue or epoxy to attach pieces together. Be sure to let it cure fully.
  5. Seal the Wood: Apply a coat of sealer to protect the driftwood and bring out its natural color.
  6. Hang: Thread string or wire through the drilled holes and securely tie off the ends. Attach a hook or loop for wall hanging.

Personalize Your Wall Hanging

Adding personal touches to your driftwood wall hanging makes it even more special. Consider these ideas for customization:

Adding Color

Incorporating color can make your wall hanging pop. Options include:

  • Paint: Use acrylic paint to add accents or fully color some of the wood pieces.
  • Stains: Apply wood stains to enhance the natural grain and provide a more uniform appearance.

Embellishments

Consider adding different elements to your artwork, such as:

  • Shells and Stones: Glue small shells or polished stones to the driftwood.
  • Textiles: Weave in fabric or thread to add texture and color.
  • Personal Mementos: Attach small keepsakes for a more personal touch.

Maintaining Your Driftwood Art

Proper maintenance ensures that your driftwood wall hanging remains beautiful for years to come. Here are some tips for keeping your art in great shape:

Indoor Care

  • Dust Regularly: Use a soft brush or cloth to gently remove dust.
  • Avoid Direct Sunlight: Prolonged exposure to direct sunlight can cause the wood to fade or crack.

Outdoor Care

If you plan to display your driftwood art outdoors:

  • Use Outdoor Sealer: Apply a sealant designed for outdoor use to protect against the elements.
  • Shield from Extreme Weather: Try to place your artwork in a sheltered area to avoid direct rain or snow exposure.

Driftwood Art: Beyond Wall Hangings

While wall hangings are a wonderful way to display driftwood, this versatile material can be used for numerous other types of art and crafts. Consider expanding your driftwood creations with these ideas:

Furniture

Driftwood can create unique, rustic furniture pieces such as:

  • Tables: Use larger driftwood pieces for table legs combined with a glass or wooden top.
  • Shelves: Mount driftwood on the wall as natural shelving.

Home Decor

Add driftwood elements throughout your home:

  • Centerpieces: Combine driftwood with candles or flowers as a stunning table centerpiece.
  • Mirrors and Frames: Frame mirrors or photos with driftwood for a coastal, chic look.

Jewelry

Smaller pieces of driftwood can be crafted into:

  • Necklaces: Carve or attach charms to driftwood pieces.
  • Bracelets: Shape driftwood into smooth, wearable pieces.

Sharing Your Art

Creating driftwood art is not only about personal enjoyment but can also be a fulfilling way to connect with others. Here’s how you can share your driftwood creations:

Gifting

Handmade driftwood wall hangings make thoughtful, personalized gifts for:

  • Housewarmings: A unique piece of driftwood art can be a charming addition to a new home.
  • Birthdays: Customized art that reflects the recipient’s personality is always appreciated.
  • Weddings: Driftwood art can serve as a meaningful, handcrafted wedding gift.

Selling Your Art

If you find yourself with a surplus of driftwood art, consider selling your pieces. Platforms like Etsy provide a marketplace for handmade crafts. Be sure to:

  • Take Quality Photos: Good lighting and clear images make a big difference in online sales.
  • Write Detailed Descriptions: Include the size, materials, and any special care instructions for your art.

Hosting Workshops

Share your skills and passion for driftwood art by hosting workshops. This can be a fun way to teach others and build a community of craft enthusiasts:

  • Local Craft Stores: Partner with craft stores or community centers to host in-person workshops.
  • Online Tutorials: Create video tutorials or live online classes to reach a wider audience.

Conclusion

Driftwood crafts wall hangings art bring the beauty of nature into your home, allowing you to create personal and unique pieces that tell a story. Whether you’re a seasoned crafter or just starting, the possibilities are endless. From sourcing and preparing your driftwood to designing and creating a stunning wall hanging, each step is an opportunity to unleash your creativity and connect with the natural world. So next time you come across a piece of driftwood, don’t just walk past it – pick it up, take it home, and let your imagination turn this simple yet extraordinary material into a beautiful work of art. Happy crafting!

Filed Under: Driftwood Ideas Tagged With: DIY Crafts, Driftwood, Handmade Art, home decor, Wall Hangings

Driftwood Wall Art Branches Painted Sticks

June 16, 2024 by admin

Dive into the enchanting world of Driftwood Wall Art with our guide on creating beautiful pieces from branches and painted sticks. In this article, you’ll discover how to transform simple driftwood into stunning decorations that bring the natural beauty of the outdoors into your home. Whether you’re a seasoned DIY enthusiast or a curious beginner, you’ll find easy-to-follow tips and creative ideas to craft your own unique wall art. Embrace your artistic side and let nature inspire your next masterpiece! Have you ever looked at a piece of driftwood and wondered about its journey? How it became this beautifully weathered, polished treasure? Welcome to a world where art meets nature, and simple beach finds can be transformed into stunning wall decorations. Let’s delve into the magical realms of driftwood wall art, branches, and painted sticks and discover how you can create your own beautiful pieces.

Driftwood Wall Art Branches Painted Sticks

The Allure of Driftwood

Driftwood has a certain mystique about it. Whether it’s the natural smoothing effect from the water, the unique shapes it takes on, or the hues it develops over time, driftwood connects us with nature in a way few materials can.

Why Driftwood?

Driftwood offers a unique charm that is hard to replicate with manufactured materials. Each piece tells a story of strength and endurance, having been shaped by the relentless ocean. This natural beauty and individuality make driftwood a perfect medium for art.

Collecting Driftwood

Before you start, you’ll need a good collection of driftwood. Beaches and lakeshores are the best places to find these natural treasures. Be sure to check local regulations, as collecting driftwood is not allowed in some areas to preserve natural habitats.

Preparing Driftwood

To begin your DIY journey, you must first prepare your driftwood. Cleaning and drying it thoroughly ensures that you start with a fresh, workable piece. Take a brush to remove any sand, dirt, or small organisms clinging to it. Once cleaned, let it air-dry completely to avoid mold growth.

Creating Driftwood Wall Art

Now that you have your driftwood ready, it’s time to get creative. Driftwood can be used in numerous ways to create stunning wall art pieces.

Simple Driftwood Arrangement

A simple way to start is by arranging your driftwood pieces into a pattern or shape. Imagine a sunburst, a star, or a heart. Secure the pieces with strong adhesive or nails on a wooden or canvas backing.

Driftwood Collage

Take it a step further by incorporating other materials like sea glass, shells, or small stones. Arrange these items with your driftwood to create a textured, multi-dimensional collage.

Tips for Design

When arranging your driftwood, consider contrasting lengths, thicknesses, and textures. A balanced yet varied composition will make your art piece more captivating.

DIY Driftwood Branches

Using driftwood branches can elevate your decor to a rustic, earthy aesthetic. Here’s how you can utilize driftwood branches in your home decor.

Standalone Driftwood Branches

Clean and sand down the branches and place them in vases or hang them from walls. A simple yet elegant way to bring a touch of nature indoors.

Driftwood Branch Chandelier

For a more complex project, create a chandelier using driftwood branches and some low-wattage bulb lights. This project requires some planning and basic electrical knowledge, but the result is a unique and impressive light fixture.

Painted Driftwood Branches

Adding color to your driftwood branches can make them pop even more. Consider painting them in your favorite shades or creating ombre effects that can add depth and interest.

Project IdeaMaterials NeededTime to Complete
Standalone Driftwood BranchesDriftwood branches, vase30 minutes
Driftwood Branch ChandelierDriftwood branches, light fixtures, electrical kits3-4 hours
Painted Driftwood BranchesPaint, brushes, primer, sealer1-2 hours

Mastering Painted Sticks

When driftwood and branches are shaped and polished, you can further enhance their look by painting them.

Choosing the Right Paint

Select the right type of paint depending on your desired effect. Acrylic paints work well for vibrant colors and quick drying. For a more rustic touch, you could use chalk paint.

Techniques for Painting Driftwood

Before painting, apply a primer to ensure the paint adheres well. Use multiple coats for rich, even color. To add more artistic flair, try techniques like dry brushing or using stencils for patterns.

Sealing Your Painted Sticks

To preserve your hard work, seal painted driftwood with a clear acrylic sealer. This step is crucial, especially if you plan to use your driftwood art outdoors.

Driftwood Wall Art Branches Painted Sticks

Combining Techniques: Ultimate Driftwood Art

To create a masterpiece, why not combine all that you’ve learned? You can marry the natural beauty of driftwood with the vibrant colors of painted sticks and the organic feel of branches into one cohesive artwork.

Step-by-Step Guide

  1. Sketch Your Design: Plan out your design on paper. Decide how you want to merge different elements.

  2. Gather Materials: Collect driftwood, branches, paint, and other embellishments you intend to use.

  3. Prepare and Paint: Clean, sand, and paint your materials as necessary.

  4. Assemble Your Art: Lay out your design on a flat surface before affixing anything permanently.

  5. Secure All Pieces: Use glue, nails, or wire to attach your parts. Ensure everything is safely and securely anchored.

  6. Final Touches: Add any last details and seal your piece if needed.

Ideas for Inspiration

  • Nature Scene: Use various pieces of driftwood and painted sticks to create a beach or forest scene.
  • Abstract Art: Arrange your materials in an abstract design to fit modern and contemporary decor.
  • Functional Art: Incorporate elements that make your art functional, like peg hooks or small shelves.

Maintaining and Displaying Your Driftwood Art

Once you’ve completed your piece, maintaining it is essential to keep it looking fresh.

Cleaning

Regularly dust your driftwood art and use a damp cloth to clean off any buildup. Avoid harsh chemicals as they could damage the wood.

Placement

Hang your driftwood artwork securely to ensure it stays in place. For heavier pieces, use wall anchors or screws.

Avoiding Direct Sunlight

Overexposure to sunlight can fade paint and weaken wood fibers. Place your artwork in a spot with moderate lighting.

Sustainability and Ethical Considerations

While creating your driftwood masterpiece, it’s important to keep sustainable practices in mind.

Responsible Collecting

Only collect driftwood where it’s legally and environmentally permissible. Driftwood forms critical habitats for various wildlife.

Eco-Friendly Materials

Use non-toxic, eco-friendly paints and sealers. They’re better for the environment and safer for you to use.

Conclusion

Diving into the world of driftwood wall art, branches, and painted sticks is a creative journey that connects you to nature. It allows you to bring a piece of the great outdoors into your home with personalized flair. Whether you’re a seasoned artist or a beginner, these techniques offer endless possibilities. So, the next time you find a piece of driftwood, don’t just walk by—pick it up and let your imagination bring it to life. Happy crafting!

Filed Under: Driftwood Ideas Tagged With: DIY Crafts, driftwood art, Painted Sticks, Wall Decor

Drift Wood Art Ideas Driftwood Projects

May 21, 2024 by admin

Welcome to “Drift Wood Art Ideas Driftwood Projects”! Here, you’ll dive into the enchanting world of driftwood, exploring creative projects that transform this natural material into stunning pieces of art. You’ll discover unique ideas and step-by-step guides to craft everything from rustic home decor to intricate sculptures. Let your imagination set sail and find inspiration in the beauty of driftwood, turning washed-up wood into treasured masterpieces that add a coastal charm to your living space.

Drift Wood Art Ideas Driftwood Projects

Have You Ever Considered Turning Driftwood Into Art?

If you’ve ever walked along a beach or lakeshore, you’ve probably encountered fascinating pieces of driftwood, their unique shapes and textures sculpted by nature itself. But did you know that these natural treasures can be transformed into stunning pieces of art? With a little creativity and some basic tools, you can bring the beauty of driftwood into your home through various projects. In this article, we’ll explore numerous driftwood art ideas and projects that you can start on your own.

Why Driftwood?

Before diving into the projects, let’s talk about why driftwood is such a brilliant medium for art. Driftwood is not only eco-friendly but also incredibly versatile. Each piece carries its own history and character, making every creation genuinely one-of-a-kind. Moreover, its rustic, natural charm can complement various interior decor styles, from modern minimalist to cozy rustic.

Gathering Driftwood: The Basics

Where to Find Driftwood

Beachcombing is the most common way to find driftwood. Shorelines along lakes, rivers, and oceans are the best places to look. But before you start collecting, be aware of local regulations regarding the removal of natural materials from protected areas.

Things to Consider When Collecting Driftwood

When collecting driftwood, pay attention to its size, shape, and sturdiness. Avoid pieces that are too brittle or show signs of infestation. Smaller pieces are great for intricate projects, while larger pieces can be the focal points of bigger art installations.

Drift Wood Art Ideas Driftwood Projects

Preparing Driftwood for Art Projects

Cleaning Your Driftwood

Before you start your project, you’ll need to clean the driftwood to remove any dirt, salt, or microorganisms.

  1. Rinse: Start by rinsing the driftwood thoroughly with fresh water.
  2. Scrub: Use a brush to scrub off any surface dirt.
  3. Soak: Soak the driftwood in a mixture of water and a little bleach (usually a cup of bleach per gallon of water) for 24-48 hours. This will kill any remaining organisms.
  4. Dry: Place the driftwood in a sunny, well-ventilated area to dry completely. This can take several days.

Tools You Might Need

Here’s a handy table of tools you might need for your driftwood projects:

ToolPurpose
Hand SawCutting larger pieces to desired lengths
SandpaperSmoothing rough edges
Wood GlueAssembling smaller pieces
DrillCreating holes for fixtures or decorations
Varnish or SealantProtecting the finished product
PaintbrushesApplying varnish, paint, or other finishes

Driftwood Art Ideas and Projects

Driftwood Sculptures

One of the simplest yet most impactful uses of driftwood is creating sculptures. Due to its natural irregularities, each piece can embody a unique, organic aesthetic. You might choose to assemble several small pieces into an intricate design or use a single large piece as a statement sculpture.

Tips for Driftwood Sculptures:

  • Study Your Pieces: Examine each piece from different angles to identify the natural beauty and potential shapes within.
  • Combine with Other Natural Elements: Incorporate stones, shells, or feathers to add more texture and depth to your sculpture.
  • Secure with Glue: Use strong wood glue to attach pieces together securely.

Driftwood Wall Art

Driftwood wall art can range from simple, rustic arrangements to more complex, multi-dimensional pieces. Whether you want to hang a single piece or create an entire mural, driftwood offers a tactile and visual appeal that’s hard to match.

Ideas for Driftwood Wall Art:

  • Collages: Arrange smaller pieces of driftwood in a pattern or shape of your choice and glue them onto a canvas or board.
  • Frames: Use driftwood to create picture frames, adding a coastal touch to your photographs or art prints.
  • Wall Hangings: Combine driftwood with textiles, beads, or macramé to create bohemian wall hangings.

Driftwood Furniture

Building furniture from driftwood can be more challenging but incredibly rewarding. From coffee tables to bed frames, the possibilities are endless.

Driftwood Furniture Ideas:

  • Tables: Use larger, sturdy pieces of driftwood for legs and a solid wooden plank for the tabletop.
  • Shelves: Driftwood logs can be mounted on walls to create rustic, functional shelves.
  • Chairs: For advanced crafters, constructing a chair from driftwood combines artistry with functionality.

Driftwood Home Decor

There are countless ways to incorporate driftwood into your home decor. Here are a few ideas to get you started:

Driftwood Home Decor Projects:

  • Candlesticks: Attach small pieces of driftwood together and secure candle holders on top for a cozy, beachy feel.
  • Mirrors: Frame a mirror with driftwood pieces to add a nautical touch to your bathroom or hallway.
  • Hooks and Hangers: Attach hooks to driftwood pieces for unique coat racks or towel holders.

Driftwood for the Garden

Driftwood isn’t just for indoors; it can enhance your outdoor space as well.

Garden Driftwood Projects:

  • Planters: Use hollowed-out pieces of driftwood as planters for succulents or small flowers.
  • Garden Paths: Lay large, flat pieces of driftwood to create rustic garden pathways.
  • Birdhouses: Construct whimsical birdhouses using driftwood and other reclaimed materials.

Driftwood Jewelry

If you’re into smaller, more intricate projects, driftwood jewelry offers a fantastic way to showcase your creativity in a wearable form.

Driftwood Jewelry Ideas:

  • Pendants: Smaller, polished pieces of driftwood can be turned into unique necklaces.
  • Bracelets: Combine driftwood beads with other natural elements like shells or stones.
  • Earrings: Lightweight pieces of driftwood can be crafted into statement earrings.

Drift Wood Art Ideas Driftwood Projects

Tips and Tricks for Working with Driftwood

Safety First

Whenever you’re working with wood, especially materials collected from the wild, it’s essential to prioritize safety.

Safety Tips:

  • Gloves and Goggles: Wear gloves to protect your hands from splinters and goggles to guard your eyes when sawing or drilling.
  • Ventilation: Ensure you’re working in a well-ventilated area, especially when using sealants or varnishes.
  • Mask: Consider wearing a mask to avoid inhaling any dust or particles created during sanding.

Preserving Your Driftwood Creations

To ensure your driftwood art stands the test of time, it’s crucial to protect it from the elements.

Preservation Tips:

  • Sealant: Apply a coat of varnish or wood sealant to protect against moisture and pests.
  • Location: Avoid placing driftwood items in direct sunlight or damp environments indoors.

Combining Driftwood with Other Materials

Don’t hesitate to mix materials for a more dynamic aesthetic. Combining driftwood with metal, glass, or fabric can result in truly unique pieces.

Experiment with Finishes

Although the natural look of driftwood is beautiful, experimenting with different finishes can add a modern twist. Consider stains, paints, or even metallic finishes to diversify your projects.

Inspiring Driftwood Art Projects Step-by-Step

Let’s walk through a couple of detailed driftwood art projects to inspire you and help you get started.

Driftwood Candle Holder

Materials Needed:

  • Medium-sized driftwood pieces
  • Tea light candle holders
  • Wood glue
  • Sandpaper
  • Varnish
  • Paintbrush

Steps:

  1. Select Driftwood Pieces: Choose medium-sized, sturdy driftwood pieces that can hold candle holders securely.
  2. Sand and Clean: Sand the pieces to smooth any rough edges and clean them thoroughly.
  3. Glue Candle Holders: Use strong wood glue to attach the tea light candle holders to the driftwood pieces. Allow it to dry completely.
  4. Apply Varnish: Apply a coat of varnish to protect the wood. Allow it to dry.
  5. Insert Candles: Place the tea light candles into the holders, and you’re done!

Driftwood Wall Hanger

Materials Needed:

  • Long driftwood branch
  • Rope or twine
  • Hooks
  • Drill

Steps:

  1. Choose a Branch: Select a long, sturdy piece of driftwood that will serve as the base for your hanger.
  2. Clean and Sand: Clean and sand the branch to remove any debris and smooth rough areas.
  3. Drill Holes: Drill evenly spaced holes along the length of the driftwood branch.
  4. Insert Hooks: Screw hooks into the drilled holes securely.
  5. Add Rope: Tie a piece of rope or twine to each end of the branch, allowing enough length to hang it from a wall.
  6. Hang and Use: Hang the driftwood wall hanger in your desired location and use the hooks for items like keys, jewelry, or small tools.

Final Thoughts

Driftwood art is more than just a creative outlet; it’s a way to bring a piece of nature into your living space. Whether you’re a seasoned artist or a beginner looking to explore new mediums, driftwood offers endless possibilities for expression. Not only will you create beautiful art, but you’ll also contribute to sustainable practices by repurposing nature’s leftovers.

So next time you’re at the beach, keep an eye out for those unique pieces of driftwood. With a bit of vision and creativity, you’ll find that the possibilities for driftwood art and projects are as infinite as the ocean itself.

Happy crafting!

Filed Under: Driftwood Ideas Tagged With: Beach Theme, Creative Projects, DIY Crafts, driftwood art, home decor

Driftwood Projects Unique Home

May 19, 2024 by admin

Imagine coming home to a place that feels more like a cozy, artistic retreat than a regular house. In “Driftwood Projects Unique Home,” you’ll discover how creatively using driftwood can transform a living space into something truly special. This article reveals the journey from gathering driftwood by the shore to crafting it into distinctive pieces that add character and warmth to every room. Whether you’re an avid DIY enthusiast or someone who simply loves a unique, personalized home, you’ll be inspired by the enchanting ways driftwood can turn ordinary spaces into extraordinary sanctuaries.

Driftwood Projects Unique Home

Have you ever wondered how you can transform ordinary driftwood into extraordinary pieces for your home? Driftwood projects can refresh your living spaces and bring a touch of nature indoors. This article will dive deep into the realm of driftwood projects, offering you unique and creative ideas to enhance your home decor. You’ll learn how to select, prepare, and craft driftwood for an array of breathtaking home projects. So, let’s get started!

Driftwood Projects Unique Home

Why Choose Driftwood for Home Projects?

Driftwood is not only aesthetically pleasing but also environmentally friendly and often free. It’s collected from natural sources, usually beaches and riverbanks, where it has naturally weathered and aged. This unique material brings a rustic charm to any home decor project.

Eco-Friendly Material

Using driftwood is an excellent way to repurpose natural resources. By repurposing driftwood, you’re reducing waste and making a conscious effort to be environmentally friendly.

Unique and Irreplaceable

Each piece of driftwood is one-of-a-kind, providing your home with a unique touch that can’t be replicated. No two pieces look the same, giving your projects their distinctive character.

Versatile and Timeless

Driftwood fits various design styles, from rustic and coastal to modern and minimalist. Its versatility ensures it never goes out of style.

Collecting and Preparing Driftwood

Before you can start your craft, you’ll need to find and prepare your driftwood. This section will guide you through the process from gathering to prepping the wood for your projects.

Where to Find Driftwood

You can find driftwood along beaches, lakeshores, and riverbanks. Below are some tips to help you gather it effectively:

LocationTips
BeachesFocus on areas where tides deposit debris.
LakeshoresCheck after storms for newly washed up wood.
RiverbanksLook in bend areas where water flow deposits.

Selecting the Right Pieces

Choosing the right piece of driftwood can make or break your project. Here are some points to consider:

  • Size and Shape: Match the size and shape to your project needs.
  • Condition: Avoid pieces with rot or excessive damage.
  • Texture: Prefer pieces with interesting texture and grains.

Cleaning and Preparing Driftwood

Before you start crafting, driftwood needs proper cleaning and preparation.

  1. Wash Thoroughly: Use a hose and scrub brush to remove dirt and salt.
  2. Remove Bark: Peel off any remaining bark.
  3. Soak in Water and Borax: Submerge driftwood in a mixture of one gallon of water and one cup of borax for 48 hours to kill insects and get rid of salt.
  4. Dry Completely: Allow it to dry in a well-ventilated area for at least a week.

Driftwood Project Ideas

Now that your driftwood is ready, let’s get into some exciting project ideas. From small decorative items to functional furniture, driftwood can do it all.

Driftwood Wall Art

Creating a mural or piece of wall art is a wonderful way to showcase your driftwood.

Materials Needed:

  • Driftwood pieces
  • Wood glue or screws
  • Backing board
  • Saw (optional)

Steps:

  1. Design Your Layout: Arrange your driftwood pieces on a flat surface.
  2. Attach to Backing Board: Use glue or screws to fix the driftwood to the backing board.
  3. Finish: Sand any rough edges and apply a sealant if desired.

Driftwood Candle Holders

Driftwood candle holders add a warm, rustic charm to any living space.

Materials Needed:

  • Small pieces of driftwood
  • Drill and spade bit
  • Tea light candles

Steps:

  1. Mark Candle Placement: Mark where each candle will be placed.
  2. Drill Holes: Use a spade bit to drill holes deep enough to hold the candles.
  3. Insert Candles: Place the tea lights into the drilled holes.

Driftwood Shelves

Functional and stylish, driftwood shelves can be a highlight in any room.

Materials Needed:

  • Long pieces of driftwood
  • Brackets
  • Screws and wall plugs
  • Drill

Steps:

  1. Measure and Cut: Cut the driftwood to the desired shelf length.
  2. Attach Brackets: Screw the brackets to the bottom side of the driftwood.
  3. Install on Wall: Use wall plugs and screws to secure the shelves.

Driftwood Picture Frames

A driftwood picture frame adds a personal touch to your photos or artwork.

Materials Needed:

  • Small driftwood pieces
  • Wood glue
  • Picture frame backing and glass

Steps:

  1. Create Frame Outline: Arrange the driftwood pieces to form a frame.
  2. Glue Pieces Together: Use wood glue to fix the pieces in place.
  3. Attach Backing and Glass: Secure the backing and glass to complete the frame.

Driftwood Furniture

For the more ambitious crafters, creating furniture like tables or chairs can be a rewarding challenge.

Materials Needed:

  • Large driftwood pieces
  • Furniture legs (optional)
  • Screws and wood glue
  • Sandpaper and finish

Steps:

  1. Plan Your Design: Sketch a design and select driftwood pieces that fit your vision.
  2. Assemble Frame: Use screws and wood glue to assemble the driftwood.
  3. Add Legs: Attach prefabricated legs or craft legs from additional driftwood.
  4. Finish: Sand edges and apply a finish to protect the wood.

Adding Driftwood to Existing Home Decor

Integrating driftwood into your home doesn’t always require starting from scratch. Here are some ideas for adding this natural material to your existing decor.

Driftwood Accents on Mirrors

Enhance your bathroom or living room mirrors with a driftwood frame or accents.

Materials Needed:

  • Driftwood pieces
  • Wood glue
  • Existing mirror

Steps:

  1. Design Layout: Arrange pieces around the frame of the mirror.
  2. Secure with Glue: Use wood glue to attach the driftwood.

Driftwood Table Centerpieces

Turn your dining or coffee table into a conversation starter with driftwood centerpieces.

Materials Needed:

  • Driftwood pieces
  • Decorative elements (candles, stones, plants)

Steps:

  1. Choose a Base Piece: Select a substantial driftwood piece as the base.
  2. Add Decorative Elements: Place candles, stones, and small plants around it.

Driftwood Hooks and Hangers

Create natural hooks and hangers for your hallway or bedroom.

Materials Needed:

  • Small, sturdy pieces of driftwood
  • Screws
  • Drill

Steps:

  1. Select Pieces: Choose driftwood pieces with natural hooks or branches.
  2. Install on Wall: Use screws to secure the driftwood to the wall.

Driftwood Projects Unique Home

Safety Tips for Working with Driftwood

While driftwood is a fantastic material, safety should always be a priority. Here are some safety tips to keep in mind:

Use Proper Tools

Always use the right tools for cutting, drilling, and sanding to avoid accidents.

Wear Protective Gear

Wear safety glasses, gloves, and a dust mask when cutting or sanding wood.

Secure the Wood

Make sure your driftwood is securely clamped or held in place before you start working on it.

Ventilation

Work in a well-ventilated area, especially if you’re using adhesives, sealants, or finishes.

Child Safety

Keep all sharp tools and small pieces of wood away from children.

Conclusion

Driftwood projects offer countless opportunities to create unique and beautiful home decor. Whether you’re a seasoned crafter or just starting, using driftwood can transform any space with its natural, rustic charm. From wall art and furniture to picture frames and candle holders, driftwood provides versatility and a distinctive aesthetic.

Now it’s your turn to bring the coastal essence into your home. Gather some driftwood, follow the guidelines, and let your creativity flow. Enjoy the process, and you’ll soon have some truly unique pieces that reflect not just nature’s beauty, but also your own artistic vision. Have fun crafting!

Filed Under: Driftwood Ideas Tagged With: DIY Crafts, Driftwood, Home Projects, Interior Design, Unique Decor

  • « Previous Page
  • Page 1
  • Page 2

Primary Sidebar

Driftwood4us.com, is a participant in the Amazon Services LLC Associates Program, an affiliate advertising program designed to provide a means for sites to earn advertising fees by advertising and linking to amazon.com.