• Skip to main content
  • Skip to primary sidebar
  • Terms and Conditions
  • Privacy Policy
  • Contact

Driftwood 4 Us

Just About Driftwood

DIY Projects

Driftwood

July 6, 2024 by admin

In the heart of your quiet, coastal village lies a fascinating story beneath the surface of the ocean’s waves. Worn smooth by its journey, each piece of driftwood carries with it tales of distant shores and untold adventures. It’s more than just a forgotten fragment of timber; driftwood reflects the relentless power of nature and the gentle passage of time. Whether you find it during a serene morning walk or as a surprising addition to your beachcombing treasures, these weathered pieces of wood aren’t just barren remnants—they’re timeless souvenirs of nature’s own artistry, making each discovery a small, personal chapter in the collective narrative of our world’s waters. Have you ever stumbled upon a smooth, weathered piece of wood on the beach and wondered about its journey? Driftwood, those pieces of wood found floating or washed ashore by the action of winds, tides, or waves, has a rich history and fascinating ecological role.

What is Driftwood?

Driftwood is more than just wood that’s been tossed around by the sea. It has a unique story to tell, shaped by the environment and the elements that it encounters during its journey. It can be anything from a tiny piece of branch to a massive tree trunk that has been carried away from its original location.

The Journey of Driftwood

Every piece of driftwood embarks on its own unique journey. Once a tree falls into a river or ocean, it starts a transformation shaped by the elements. Tides and currents transport it over long distances, often across multiple geographical locations. Along the way, it smooths out, loses bark, and may even foster marine life.

Types of Driftwood

Here are some common types of driftwood you might encounter:

TypeDescription
SoftwoodGenerally from trees like pine or cedar. Light and more prone to erosion.
HardwoodFrom trees like oak and maple. Denser and more durable against marine elements.
RootballThe tangle of roots that sometimes accompanies fallen trees.
Log or TrunkLarge pieces of trees that have fallen into water.

The Ecological Impact of Driftwood

Driftwood plays an important role in both marine and terrestrial ecosystems. While it might just look like dead wood, it offers much more than meets the eye.

Habitat Creation

Driftwood provides shelter and breeding grounds for many species. It serves as a habitat for fish, insects, and even small mammals. Birds often use it as perches, and some aquatic creatures like crabs utilize it for protection against predators.

Nutrient Cycle

As driftwood decomposes, it releases nutrients back into the environment, enriching the water and the soil. This is incredibly beneficial for plant life and subsequently the animals that rely on those plants for food.

Human Uses

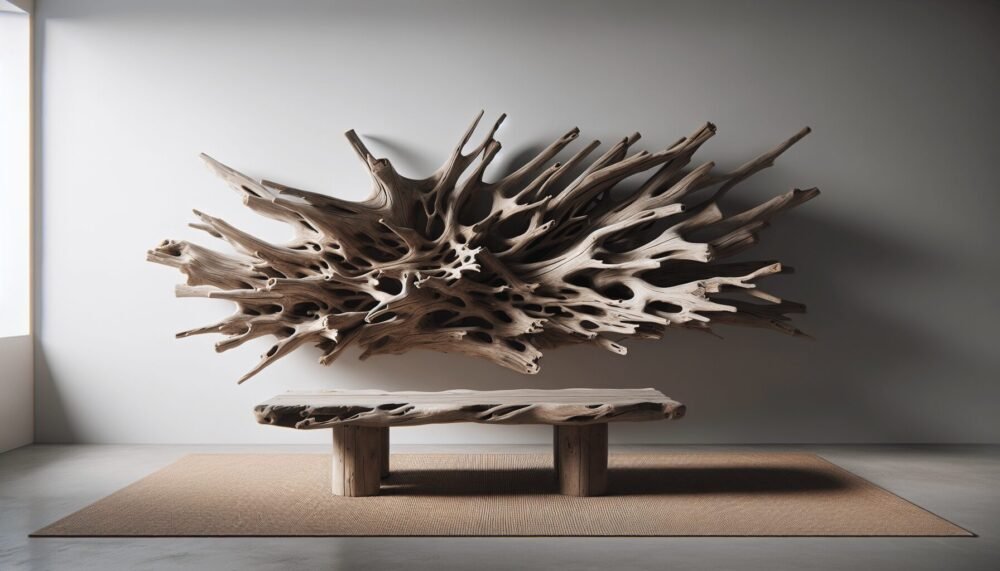
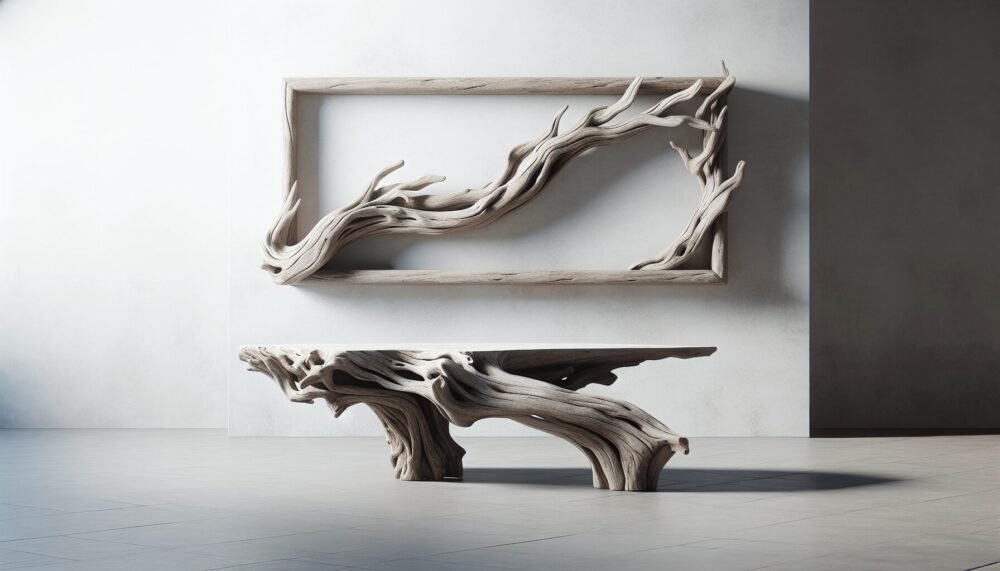
Historically, humans have found numerous uses for driftwood. It has been used as fuel, material for crafting, and even in art. The polished and unique appearance of driftwood makes it a desirable choice for décor and furniture.

Driftwood

Driftwood in Art and Craft

Driftwood’s unique characteristics make it a popular material in the world of art and craft. From small decorative items to large furniture pieces, the possibilities are endless.

Collection and Legalities

Before you head out to collect your own driftwood, it’s crucial to understand the local regulations. In some areas, collecting driftwood is restricted to protect the environment.

CountryRegulation
USAVaries by state; some national parks restrict collection entirely.
CanadaGenerally allowed, but check regional regulations.
AustraliaHeavily regulated in some states to protect coastal ecosystems.

DIY Driftwood Projects

There’s no end to what you can create with driftwood. Here are a few ideas to get you started:

  1. Driftwood Candle Holders – Simple yet elegant, create candle holders by drilling holes in the driftwood.
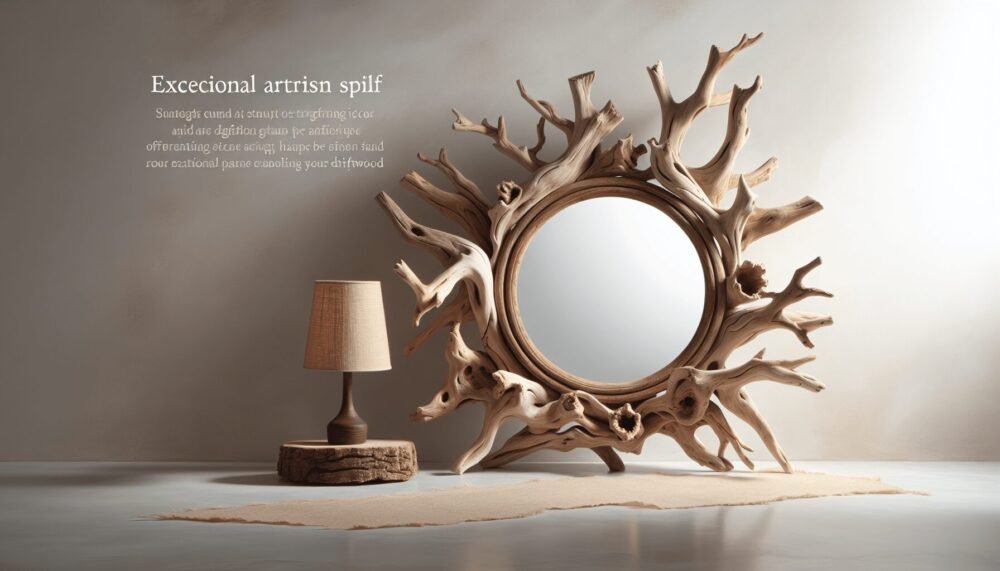
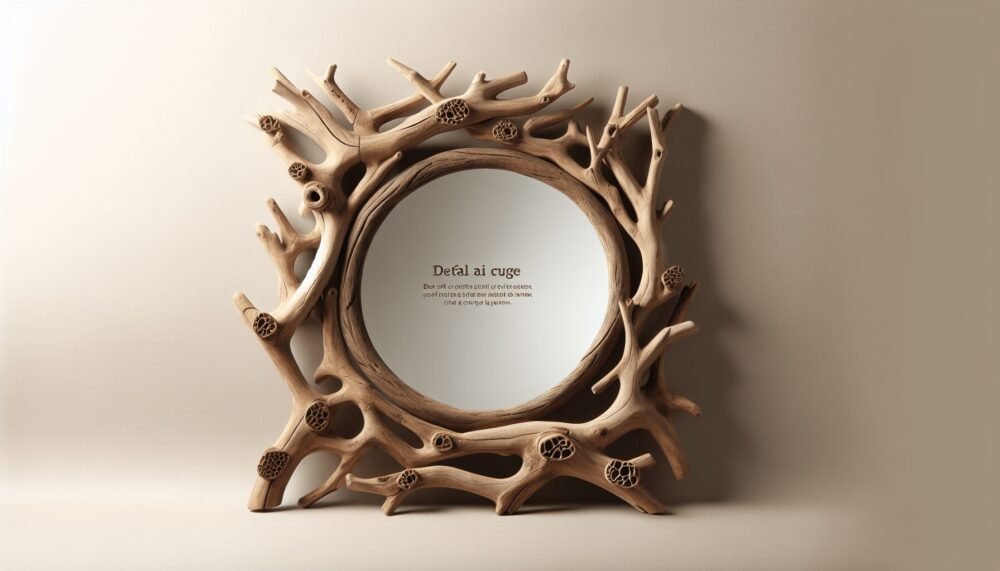
  2. Driftwood Mirrors – Frame a mirror using several pieces of driftwood glued together.
  3. Driftwood Sculptures – Use smaller pieces to build animals, abstract forms, or even human figures.
  4. Furniture – For the more adventurous, larger pieces can be transformed into tables, chairs, or even bed frames.

Tips for Working with Driftwood

When working with driftwood, it’s essential to clean and sanitize it properly. Soaking the wood in a bleach solution can help eliminate any harmful bacteria or fungi. Remember to let it dry completely before starting your project.

Driftwood in Landscape Design

In landscape design, driftwood can add a natural, rustic charm to your garden or backyard. It’s often used to create features that blend seamlessly into natural surroundings.

Garden Decor

Driftwood can be used effectively in gardens. Here are a few ideas:

  • Borders and Pathways: Lay pieces of driftwood along the edges of garden paths or flower beds.
  • Planters: Hollow out large chunks of driftwood to create unique planters.
  • Water Features: Incorporate driftwood into ponds or fountains for an added touch of nature.

Enhancing Natural Elements

Pairing driftwood with other natural materials like stones, plants, and water can create a harmonious outdoor environment. It helps in creating a blend of textures and colors that elevate the aesthetic appeal of your outdoor spaces.

Safety Considerations

While driftwood can be a fantastic addition to your garden, it’s essential to anchor it properly to prevent it from shifting or moving. This is particularly important in areas prone to heavy winds or rains.

Driftwood

The Science Behind Driftwood

Driftwood also plays a fascinating role in the scientific community. Researchers study driftwood to understand more about environmental changes, marine biology, and even history.

Environmental Indicators

Driftwood can serve as an indicator of environmental conditions. Scientists study the types of wood, origins, and the journey of driftwood to learn about ocean currents, climate changes, and even past weather events.

Carbon Dating

Due to its long journey and exposure to different elements, driftwood can also be carbon-dated to provide insights into historical timelines. This application is particularly useful in archaeology and history.

Biodiversity in Driftwood

Sometimes, driftwood pieces become mini-ecosystems, hosting a variety of marine life forms. Studying these ecosystems offers insights into marine biodiversity, species interaction, and environmental health.

Driftwood: Cultural and Symbolic Significance

Driftwood is not just an ecological or artistic element. For many, it holds cultural or symbolic importance.

Folktales and Myths

Throughout history, driftwood has featured in various folktales and myths. In some cultures, it is considered a symbol of travel and adventure, a metaphor for overcoming life’s challenges.

Native American Cultures

In some Native American cultures, driftwood is used in ceremonial practices. It is believed to have spiritual significance, representing the life journey from birth to rebirth.

Contemporary Symbolism

Today, driftwood continues to inspire. Many people see it as a symbol of resilience and transformation, having withstood the elements and undergone a transformation to become something beautiful and unique.

Practical Tips for Driftwood Enthusiasts

If you’re interested in exploring the world of driftwood further, here are some tips to get you started.

Finding Driftwood

Here’s where you’re likely to find driftwood:

  • Beaches and Coastal Areas: The most common spots where driftwood is found.
  • Riverbanks: Falling trees and branches often end up floating downstream.
  • Lakesides: Less common but still possible, especially in large lakes.

Cleaning and Preservation

Once you’ve found your perfect piece, cleaning is crucial:

  1. Initial Rinse: Rinse the driftwood with clean, fresh water to remove salt, sand, or residues.
  2. Sanitizing: Soak the wood in a bleach solution (1 part bleach to 9 parts water) for a few hours.
  3. Rinse Again: Thoroughly rinse to remove any bleach.
  4. Drying: Allow the wood to dry completely, preferably in the sun.

Tools and Techniques

When working with driftwood, you’ll need some basic tools:

  • Saw: For cutting larger pieces into smaller, manageable chunks.
  • Drill: Handy for making holes if you plan to create art pieces or furniture.
  • Sander: Helps in smoothing rough edges and surfaces.
  • Glue/Adhesive: For attaching pieces together.

Conclusion

Driftwood is a fascinating natural element that holds both ecological and artistic significance. From its journey through the elements to its role in ecosystems, and its cultural symbolism to its use in art and landscape design, driftwood has a lot to offer. Whether you’re an artist, a nature enthusiast, or someone who enjoys the simple joys of beachcombing, driftwood can add a touch of nature’s artistry to your life.

Next time you find a piece of driftwood, take a moment to appreciate its history and consider how you might use it to bring a piece of the wild into your world.

Filed Under: Driftwood Ideas Tagged With: Beach decor, DIY Projects, driftwood art, natural materials

How To Make Driftwood Jewelry

July 1, 2024 by admin

Welcome to the wonderful world of creating driftwood jewelry! In “How To Make Driftwood Jewelry,” you’ll discover the charm of transforming nature’s coastal treasures into stunning, handmade accessories. This guide walks you through selecting the perfect pieces of driftwood, preparing them for crafting, and incorporating additional elements like beads, wire, and clasps to design unique earrings, necklaces, and bracelets. Whether you are a seasoned crafter or a complete novice, this article will inspire your creativity and help you bring a touch of the ocean’s magic to your personal collection. Have you ever wondered how to transform simple pieces of driftwood into stunning, unique jewelry? If you love crafting and have a passion for creating one-of-a-kind accessories, making driftwood jewelry can be a fulfilling and rewarding project. Not only is it eco-friendly, but it also allows you to carry a little piece of nature with you wherever you go.

Creating driftwood jewelry involves a mix of creativity, basic woodworking, and a love for natural aesthetics. In this guide, we’ll walk through the process step-by-step, making it easy for you to follow along and create your very own collection of driftwood treasures.

How To Make Driftwood Jewelry

Gathering Your Materials

Before you begin, you need to gather all the necessary materials. Each item plays a crucial role in the creation process, so let’s explore what you’ll need.

Driftwood

Driftwood is the star of the show. Find small pieces at beaches, lakeshores, or riverbanks. The wood should be clean, dry, and free from mold or excessive grime.

Tools

A set of basic tools will come in handy. Here’s a list of what you’ll need:

ToolPurpose
Small saw or hand jigsawCutting driftwood to size
Sandpaper (various grits)Smoothing edges and surfaces
Drill with fine bitsMaking holes for jewelry findings
Craft knifeDetailing and shaping
PliersBending and attaching findings
Safety gogglesEye protection while cutting and drilling

Jewelry Findings

These are essential components like hooks, clasps, and jump rings that turn pieces of driftwood into wearable jewelry.

Finding NameTypePurpose
Jump ringsMetalConnecting pieces and findings
Earring hooksMetalCreating earrings
ClaspsMetalFastening necklaces or bracelets
WireMetalWrapping and decorating

Decorative Elements

Consider adding beads, shells, or small stones to accentuate your pieces. These add extra flair and uniqueness to your jewelry.

Preparing Your Driftwood

Before you can begin crafting, you’ll need to prepare your driftwood. Proper preparation ensures that your pieces are safe to wear and look their best.

Cleaning the Wood

First, scrub the driftwood with water and a brush to remove any dirt or sand. Let the wood dry completely. This might take a few days if the wood is thick or very moist.

Cutting and Shaping

Once your driftwood is dry, decide on the shapes and sizes you want for your jewelry. Use your saw or hand jigsaw to carefully cut the wood into smaller, more manageable pieces.

After cutting, use various grits of sandpaper to smooth the edges and surfaces, starting with a coarse grit to get rid of large imperfections and moving to finer grits for a smooth finish.

Drilling Holes

Holes are necessary for threading wire or attaching findings. Mark the spots where you want the holes to go using a pencil. When drilling, go slowly to avoid splitting the wood. Wear safety goggles to protect your eyes from wood shavings.

Crafting Your Jewelry

Now comes the part where your creativity shines! With your prepared driftwood and materials ready, you can start crafting your jewelry.

Making Driftwood Earrings

Earrings are a great way to start because they’re simple yet elegant. Here’s a basic guide:

  1. Select two similar pieces of driftwood.
  2. Drill a small hole at the top for the hook.
  3. Insert a jump ring into each hole and attach an earring hook.
  4. Add beads or decorative elements if desired, using wire to wrap them around the driftwood.

Creating Driftwood Necklaces

Necklaces can be as simple or elaborate as you like. Here’s a simple method:

  1. Choose a piece of driftwood for the pendant.
  2. Drill a hole at the top for the cord or chain.
  3. Thread the cord or chain through the hole and secure it with a clasp.
  4. Decorate with beads, shells, or stones using wire or additional findings.

Designing Driftwood Bracelets

Bracelets are a bit more advanced but equally rewarding. Here’s a basic process:

  1. Collect several small pieces of driftwood.
  2. Drill holes at both ends of each piece.
  3. Connect the pieces with jump rings, creating a chain.
  4. Add a clasp to complete the bracelet.
  5. Optional: Decorate each piece of driftwood with mini beads or wire wraps for added flair.

Finishing Touches

Once you have crafted your pieces, there are a few more steps to ensure they look polished and professional.

Sealing the Wood

Sealing the wood protects it from moisture and enhances its natural beauty. Use a clear wood sealant or a natural oil finish. Apply it with a brush and let it dry fully before wearing your jewelry.

Adding Decorations

When adding decorations like beads or wire wraps, consider using complementary colors and textures to highlight the natural beauty of the driftwood. Attach these elements securely so they can withstand regular wear.

Testing for Wearability

Before wearing or gifting your driftwood jewelry, test the durability and comfort. Make sure all findings are securely attached, and there are no sharp edges or points that might cause discomfort.

How To Make Driftwood Jewelry

Tips and Tricks for Success

Creating driftwood jewelry can be a learning process. Here are some tips to help you along the way:

Selecting Driftwood

Look for driftwood that is lightweight yet sturdy, and avoid pieces with cracks or deep grooves that might weaken the jewelry.

Sanding Patience

Take your time when sanding, moving from coarse to fine grits for the best finish. This ensures that your jewelry is smooth and comfortable to wear.

Experimenting with Designs

Don’t be afraid to experiment! Driftwood jewelry allows for endless creativity. Try different combinations of wood, beads, and wire to create unique designs.

Troubleshooting Common Issues

If you encounter problems while making your driftwood jewelry, don’t worry. Here are solutions to some common issues:

Splitting Wood

If your driftwood splits while drilling, try drilling more slowly or choosing a finer drill bit. You can also reinforce the wood with a drop of wood glue if necessary.

Loose Findings

If your findings feel loose, ensure you are using the correct size jump ring or clasp. You can also use a small dab of epoxy to secure findings in place.

Uneven Shapes

Uneven shapes can be part of the charm of driftwood jewelry. However, if you need more uniform pieces, consider using a template to guide your cuts and sanding.

Caring for Your Driftwood Jewelry

To ensure your driftwood jewelry lasts, you’ll need to take good care of it. Here’s how:

Avoid Excess Moisture

Driftwood can absorb water, which may weaken it or cause discoloration. Avoid wearing your jewelry in the shower or while swimming.

Store Properly

Store your driftwood jewelry in a dry place, away from direct sunlight, to prevent fading and deterioration.

Gentle Cleaning

If your jewelry gets dirty, clean it gently with a damp cloth and dry it immediately. Avoid using harsh chemicals or soaking the wood.

Sharing and Selling Your Jewelry

If you’ve come to love making driftwood jewelry, why not share it with others? You can give pieces as gifts, or even start selling them.

Craft Fairs and Markets

Local craft fairs and markets are great places to showcase your work. Make sure to display your pieces nicely and have business cards or flyers to hand out.

Online Platforms

Platforms like Etsy, Instagram, and Pinterest can help you reach a wider audience. Take high-quality photos of your jewelry and write detailed descriptions to attract buyers.

Building a Brand

Creating a consistent brand around your jewelry will help it stand out. Think about your packaging, logo, and even a catchy shop name to make a memorable impression.

Conclusion

Making driftwood jewelry is a delightful blend of creativity and craftsmanship. Each piece tells a story, embodying the natural beauty of driftwood and your artistic vision. With this guide, you now have the knowledge and tools to start crafting your own unique pieces of driftwood jewelry. Enjoy the process, and let your creativity flow!

Filed Under: Driftwood Ideas Tagged With: crafting, DIY Projects, Driftwood, Handmade, Jewelry Making

Driftwood Furniture Diy Ideas

June 30, 2024 by admin

Are you looking to bring a touch of coastal charm into your home? “Driftwood Furniture DIY Ideas” is packed with inspiring projects that will transform ordinary pieces of driftwood into stunning and functional furniture. This guide offers you easy-to-follow instructions to create beautiful driftwood tables, chairs, and shelves that capture the essence of oceanfront living. Let your creativity flow and craft unique, eco-friendly furniture that tells a story of its own. Have you ever strolled along the beach and stumbled upon a piece of driftwood that seemed to whisper, “Take me home; I have a story to tell”? Driftwood isn’t just a piece of wood; it’s a timeless relic shaped by the rhythm of the waves and kissed by the salt of the sea. Bringing this natural beauty into your home through DIY driftwood furniture projects can be incredibly fulfilling and add a unique touch to your décor.

Driftwood Furniture Diy Ideas

What is Driftwood?

Driftwood is wood that has been washed onto the shore by the sea, rivers, or lakes. It could be fragments of trees, branches, and even entire trees that have been broken down by the natural forces of water, sun, and wind. Each piece is unique, boasting its own texture, shape, and color palette, making it a versatile material for crafting one-of-a-kind furniture pieces.

Why Use Driftwood for DIY Projects?

Ecological Contribution

By repurposing driftwood, you are contributing to a more sustainable and eco-friendly lifestyle. Rather than harvesting new wood, you give new life to something nature has already discarded.

Aesthetic Appeal

Driftwood’s organic, weathered look adds a rustic, coastal touch that is both timeless and contemporary. Its natural shapes and textures easily blend into different interior design styles, whether modern, bohemian, or traditional.

Cost-Effective

Driftwood is generally free if you collect it yourself. This makes it an economical option for DIY enthusiasts looking to save money while still creating beautiful, functional pieces.

How to Prepare Driftwood?

Before diving into your DIY projects, you must prepare your driftwood properly to ensure it is clean, safe, and ready for use.

Cleaning

  1. Rinse Thoroughly: Start by rinsing the driftwood with fresh water to remove any sand, salt, or debris.
  2. Scrub: Use a stiff brush to scrub off any remaining dirt or barnacles.
  3. Rinse Again: Rinse again to ensure it is thoroughly clean.

Disinfection

  1. Soak in a Bleach Solution: Prepare a mixture of one part bleach to nine parts water and soak the driftwood for a minimum of 24 hours. This will help to kill any bacteria, mold, or tiny creatures residing in the wood.
  2. Rinse: Rinse the driftwood thoroughly with fresh water to remove any residual bleach.
  3. Drying: Allow the driftwood to dry completely. This can take anywhere from a few days to a few weeks, depending on the size and moisture content of the wood.

Sanding

Once dry, lightly sand the driftwood to smooth out any rough edges. This step is especially important for pieces that will be touched frequently, like tabletops or seating surfaces.

Driftwood Furniture DIY Ideas

Driftwood Coffee Table

A driftwood coffee table can be the centerpiece of your living room, combining functionality with organic beauty.

Materials Needed

  • A large, flat piece of driftwood or several smaller pieces connected together
  • Table legs or a base (metal or wood)
  • Screws and screwdriver
  • Sandpaper
  • Clear sealant

Steps to Create

  1. Choose Your Driftwood: Select a flat piece of driftwood or arrange several pieces to form your tabletop.
  2. Prepare the Wood: Follow the cleaning, disinfecting, and sanding steps outlined earlier.
  3. Attach Table Legs/Base: Flip the driftwood over and securely attach the legs or base using screws.
  4. Seal the Wood: Apply a clear sealant to protect the wood and enhance its natural colors.

Driftwood Headboard

Add a touch of coastal charm to your bedroom with a driftwood headboard.

Materials Needed

  • Multiple pieces of driftwood
  • Plywood sheet (optional for mounting)
  • Screws and screwdriver
  • Mounting brackets
  • Clear sealant

Steps to Create

  1. Select Driftwood Pieces: Choose pieces of driftwood of varying lengths and textures.
  2. Arrange the Layout: Lay out the pieces on the floor to find a layout that pleases you.
  3. Mount on Plywood (Optional): For added stability, you can mount the driftwood to a sheet of plywood.
  4. Attach to Wall: Using mounting brackets, attach the driftwood assembly to the wall behind your bed.
  5. Seal the Wood: Apply a clear sealant for protection and aesthetic enhancement.

Driftwood Shelves

Driftwood shelves add a rustic element to your walls while providing functional storage space.

Materials Needed

  • Several long, flat pieces of driftwood
  • Wall brackets or shelf mounts
  • Screws and screwdriver
  • Clear sealant

Steps to Create

  1. Select Driftwood: Choose long, flat pieces of driftwood suitable for shelf platforms.
  2. Prepare and Sand: Follow the cleaning and sanding steps to prep the wood.
  3. Mount Brackets: Attach wall brackets or shelf mounts to the wall at your desired height.
  4. Install Shelves: Place the prepared driftwood on the brackets and secure with screws if necessary.
  5. Seal the Wood: Apply a clear sealant to protect the shelves.

Driftwood Mirror Frame

Transform a plain mirror into a statement piece with a driftwood frame.

Materials Needed

  • A plain mirror
  • Driftwood pieces (small to medium-sized)
  • Strong adhesive or mounting putty
  • Clear sealant

Steps to Create

  1. Gather Driftwood: Collect pieces of driftwood small enough to frame your mirror without overwhelming it.
  2. Prepare the Wood: Clean and sand the driftwood as needed.
  3. Arrange Pieces: Lay out the driftwood around the mirror to create your desired pattern.
  4. Attach Driftwood: Use a strong adhesive or mounting putty to attach each piece around the mirror’s edge.
  5. Seal the Wood: Apply a clear sealant to protect the driftwood and add a polished finish.

Driftwood Floor Lamp

Create a unique driftwood floor lamp that brings warmth and character to any room.

Materials Needed

  • Long, sturdy driftwood branch
  • Lamp kit (socket, cord, light bulb)
  • Lamp base (can be purchased separately)
  • Drill
  • Clear sealant

Steps to Create

  1. Select Driftwood: Choose a long, sturdy piece of driftwood that can support a light fixture.
  2. Prepare the Wood: Clean, disinfect, and dry the driftwood.
  3. Drill Hole: Drill a hole through the driftwood for the lamp cord to pass through.
  4. Assemble Lamp Kit: Follow the instructions on your lamp kit to attach the socket and run the cord through the driftwood.
  5. Attach Base: Securely attach the driftwood to the lamp base for stability.
  6. Install Light Bulb: Add the light bulb and plug in your new lamp.
  7. Seal the Wood: Apply a clear sealant to protect your lamp.

Driftwood Coat Rack

A driftwood coat rack is both functional and decorative, providing a natural spot to hang your outerwear.

Materials Needed

  • A sturdy piece of driftwood
  • Coat hooks or pegs
  • Screws and screwdriver
  • Wall mounts or brackets
  • Clear sealant

Steps to Create

  1. Choose Driftwood: Select a sturdy piece of driftwood long enough to accommodate multiple hooks.
  2. Prepare the Wood: Clean, disinfect, and dry your driftwood.
  3. Attach Hooks: Screw the coat hooks into the driftwood at even intervals.
  4. Mount on Wall: Use wall mounts or brackets to secure the driftwood coat rack to the wall.
  5. Seal the Wood: Apply a clear sealant for added protection.

Driftwood Dining Table

A driftwood dining table can be a true conversation starter and a beautiful addition to your home.

Materials Needed

  • Large flat piece of driftwood or several smaller pieces
  • Table legs or base
  • Screws and screwdriver
  • Sandpaper
  • Clear sealant

Steps to Create

  1. Select Driftwood: Choose a large piece of driftwood or arrange several pieces together to create a tabletop.
  2. Prepare and Sand: Clean, disinfect, and sand your driftwood.
  3. Attach Table Legs/Base: Secure the table legs or base to the driftwood tabletop.
  4. Seal the Wood: Apply a clear sealant to protect the wood and enhance its appearance.

Driftwood Candle Holders

These simple yet elegant decorations can add a cozy, rustic charm to any space.

Materials Needed

  • Small pieces of driftwood
  • Tea light holders or small glass containers
  • Strong adhesive
  • Clear sealant

Steps to Create

  1. Select Driftwood: Choose small pieces of driftwood that can hold a tea light holder.
  2. Prepare the Wood: Clean and disinfect the driftwood.
  3. Attach Candle Holders: Use a strong adhesive to attach tea light holders to the driftwood.
  4. Seal the Wood: Apply a clear sealant to protect the driftwood and add a polished look.

Driftwood Picture Frame

Create a memorable frame for your favorite photos using driftwood.

Materials Needed

  • A plain picture frame
  • Small pieces of driftwood
  • Strong adhesive or mounting putty
  • Clear sealant

Steps to Create

  1. Gather Driftwood: Collect small pieces of driftwood to frame your picture.
  2. Prepare the Wood: Follow the cleaning steps to prepare the driftwood.
  3. Attach Driftwood: Use adhesive or putty to secure the driftwood pieces around the frame.
  4. Seal the Wood: Apply a clear sealant to finish your driftwood picture frame.

Driftwood Plant Stand

A driftwood plant stand brings a touch of nature indoors, perfect for showcasing your favorite plants.

Materials Needed

  • Sturdy piece of driftwood
  • Plant holder or pot
  • Screws and screwdriver
  • Clear sealant

Steps to Create

  1. Select Driftwood: Choose a sturdy piece of driftwood that can support your plant holder.
  2. Prepare the Wood: Clean and disinfect the driftwood.
  3. Attach Plant Holder: Secure the plant holder or pot to the driftwood.
  4. Seal the Wood: Apply a clear sealant to protect your plant stand.

Driftwood Furniture Diy Ideas

Tips for Working with Driftwood

Safety First

Always wear protective gear such as gloves and safety glasses when cutting, sanding, or drilling. Driftwood can have sharp edges, splinters, or fastenings embedded in it, which can be hazardous.

Choosing the Right Tools

Use proper tools for cutting and sanding driftwood. Power tools can speed up the process, but hand tools offer more control and precision.

Patience is Key

Preparing and creating with driftwood can be time-consuming. Take your time to clean, disinfect, dry, and assemble each piece to ensure the final product is both beautiful and durable.

Conclusion

Creating DIY driftwood furniture is not just a craft; it’s a way to bring the serenity and charm of the coast into your home. Each piece of driftwood has a story to tell, and by transforming it into furniture, you become part of that story. Whether it’s a simple candle holder or an elaborate dining table, these projects can enrich your living space with natural beauty and a sense of accomplishment.

So the next time you find yourself wandering along the beach, keep an eye out for those special pieces of driftwood. Who knows? Your next home décor masterpiece might just be waiting for you in the sands. Happy crafting!

Filed Under: Driftwood Ideas Tagged With: craft ideas, DIY Projects, Driftwood, furniture, home decor

Driftwood Jewelry Holder Diy

June 30, 2024 by admin

Creating a charming and functional piece for your home has never been easier with this Driftwood Jewelry Holder DIY guide. You’ll discover step-by-step instructions to transform a simple piece of driftwood into a beautiful, rustic display for your favorite jewelry. Not only will you learn to craft a stunning holder that complements any decor, but you’ll also enjoy the satisfaction of making something unique with your own hands. Let’s dive into this delightful project and add a touch of nature to your organizing essentials! Have you ever found yourself with an abundance of beautiful jewelry and not nearly enough space to organize it? There’s something uniquely satisfying about incorporating natural elements into your home décor, and a driftwood jewelry holder might just be the perfect solution for your needs! Not only will it provide a whimsical but functional space for your favorite adornments, but it also adds a touch of nature-inspired elegance to your room. In this friendly and detailed guide, we’ll walk you through everything you need to know to create your very own driftwood jewelry holder.

Materials You’ll Need

To start, let’s gather all the materials and tools needed for this DIY project. It’s a flexible list depending on your personal tastes and the specific look you’d like to achieve.

Essential Materials:

  1. Driftwood Piece: Choose a piece of driftwood that is sturdy and has interesting, natural shapes. Ensure it is free from mold or decay.
  2. Hooks or Small Nails: These will be used to hang your jewelry.
  3. Strong Adhesive or Drill: Depending on how you plan to attach the hooks, you will need either a strong adhesive or a drill.
  4. Sandpaper: For smoothing out rough edges on the driftwood.
  5. Clear Sealant (Optional): If you wish to protect the wood and bring out its natural beauty.

Optional Materials:

  1. Paint or Stain: To give the wood a particular color or finish.
  2. Decorative Items: Think shells, beads, or small stones to personalize your holder.
  3. Twine or Ribbon: To add some visual interest.

Tools:

  1. Screwdriver or Hammer: Depending on the type of hooks or nails you use.
  2. Measuring Tape: To ensure evenly spaced hangers.
  3. Pliers: Handy for bending and securing hooks.

Step 1: Preparing the Driftwood

Before you start working on your jewelry holder, you need to prepare the driftwood. Start by cleaning your piece thoroughly to remove any dirt, mold, or salt residue.

Cleaning Driftwood:

  1. Rinse with Fresh Water: Use a hose or a bathtub.
  2. Scrub: Gently scrub with a brush to remove any debris or soft areas.
  3. Dry: Let the driftwood dry completely, which can take 24-48 hours depending on the size of the piece.

Sanding:

Once it’s clean and dry, use sandpaper to smooth out any rough areas. This will make it safer to handle and help your jewelry stay in good shape.

Driftwood Jewelry Holder Diy

Step 2: Designing Your Jewelry Holder

Now that your driftwood is prepped, it’s time to think about the design. This step is all about utilizing your creativity.

Choosing the Placement of Hooks:

  1. Balance: Aim for a balanced spread of hooks to accommodate different lengths and types of jewelry.
  2. Spacing: Use your measuring tape to ensure even spacing. A common rule of thumb is to space hooks around 1-2 inches apart for necklaces and bracelets.

Adding Personal Touches:

  1. Paint or Stain: Apply paint or stain if desired and allow it to dry thoroughly.
  2. Decorative Elements: This is the perfect opportunity to add shells or beads to complement your driftwood’s natural aesthetics.

Step 3: Assembling Your Jewelry Holder

With your design in place, it’s time to bring it all together.

Attaching the Hooks:

  1. Drilling Holes: If you’re using screws or hooks that require drilling, go ahead and carefully drill evenly spaced holes.
  2. Adhesive Hooks: Alternatively, you can apply strong adhesive to hooks and press them firmly in place.

Securing Your Decorative Items:

If you’ve chosen to add additional decorative items like shells or beads, now is the time to affix them using adhesive or twine.

Driftwood Jewelry Holder Diy

Step 4: Installing Your Jewelry Holder

Once the assembly is complete, the final step is to secure your driftwood jewelry holder in your desired location.

Wall Mounting:

  1. Selecting the Spot: Choose a convenient and visible location.
  2. Mounting Tools: Depending on your driftwood’s weight, use appropriate wall anchors and screws.
  3. Securing the Holder: Attach your holder to the wall, ensuring it’s level and stable.

Alternative Displays:

If you prefer not to mount it on the wall, consider placing the driftwood on a flat surface or securing it between two brackets on a shelf.

Tips and Tricks for the Perfect Jewelry Holder

You’ve done an amazing job making your own driftwood jewelry holder! Here are a few additional tips and tricks to make the most out of your new creation:

Ensuring Stability:

Make sure your driftwood is securely fastened if it’s wall-mounted. Consider using heavy-duty wall anchors for extra security.

Maximizing Space:

If you have a lot of jewelry, consider adding multiple rows of hooks or including a small vertical section to hang earrings.

Maintenance:

Keep your driftwood looking great by occasionally wiping it down with a damp cloth and checking for any loose components.

Benefits of Using a Driftwood Jewelry Holder

You might be wondering why choose driftwood over a conventional jewelry holder. Here are a few impressive benefits:

Environmentally Friendly:

Using driftwood is an eco-friendly option as it repurposes natural material that would otherwise go to waste.

Unique and Personal:

Each piece of driftwood is unique, creating a one-of-a-kind jewelry holder customized to your tastes.

Aesthetic Appeal:

Incorporating natural elements like driftwood can enhance the aesthetic appeal of your living space, adding a rustic and serene vibe.

Cost-Effective:

Creating your own jewelry holder is often more cost-effective than buying one, and it’s an excellent way to spend an enjoyable DIY day.

Commonly Asked Questions

Here are answers to some frequently asked questions about driftwood jewelry holders:

What Type of Driftwood Should I Use?

Look for driftwood that is sturdy and free from decay. It should be a size and shape that suits your space and needs.

Can I Buy Driftwood Instead of Finding It?

Absolutely! Some craft stores and online retailers sell pre-cleaned and dried driftwood.

How Many Hooks Should I Include?

This depends on the amount of jewelry you have. Typically, around 10-20 hooks are sufficient for most collections.

Is there a Way to Make the Driftwood Shine?

Yes, applying a clear sealant can give the driftwood a polished appearance while protecting its surface.

What’s the Best Way to Hang Heavy Jewelry?

Ensure that the hooks or nails you use are sturdy and properly secured to handle the weight of heavier pieces.

Conclusion

Congratulations on taking the initiative to create a beautiful and functional driftwood jewelry holder! This DIY project not only gives you a handy place to keep your jewelry organized but also adds a unique element to your home décor. Whether you’ve kept it simple or decked it out with plenty of decorative touches, your new jewelry holder is sure to be a conversation starter. So go ahead, hang your trinkets, and admire your handiwork—after all, you’ve earned it!

Filed Under: Driftwood Ideas Tagged With: crafting, DIY Projects, Driftwood, Homemade, Jewelry Holder

Driftwood Wall Art Diy Decor

June 20, 2024 by admin

Welcome to the whimsical world of Driftwood Wall Art DIY Decor! Imagine transforming your space with the natural, serene beauty of driftwood that you can easily craft into stunning pieces of art. You’re about to embark on a creative journey that lets you bring a touch of the ocean’s charm right into your home. Whether you’re sprucing up your living room or adding a unique accent to your bedroom, this guide will show you step-by-step how to make your own driftwood wall art. Get ready to unleash your inner artist and enjoy the delightful process of turning simple driftwood into eye-catching, elegant decor. Have you ever found yourself strolling along the beach, enjoying the sound of the waves and suddenly noticing those beautiful, weathered pieces of wood scattered along the shoreline? Ever thought about how you could transform these natural treasures into stunning pieces of art for your home? Welcome to the charming world of DIY driftwood wall art decor!

Introduction to Driftwood Wall Art

Why Driftwood?

Driftwood isn’t just a byproduct of nature; it’s a piece of history. Each piece tells a story—one that’s been shaped by the elements, smoothed by water, and washed ashore. Its natural beauty, combined with its unique texture and shape, makes it an ideal material for creating rustic, yet elegant, wall art.

The Appeal of DIY Projects

Do-It-Yourself (DIY) projects aren’t just a way to save money. They allow you to add a personal touch to your living space, making your decor truly one-of-a-kind. Plus, there’s something incredibly fulfilling about completing a project with your own two hands!

Getting Started with Driftwood Wall Art

Gathering Materials

Before you get started, you’ll need to gather your materials. Luckily, the main ingredient—driftwood—is freely available if you live near a beach. Here’s a list of essentials to get you started:

MaterialsDescription
DriftwoodVarious sizes, shapes, and tones
SandpaperFor smoothing rough edges
Nails and ScrewsTo join pieces together
Fishing LineFor hanging delicate pieces
GlueA strong adhesive for added stability
HooksFor mounting your completed art on the wall
Sealant or FinishTo protect and preserve your driftwood artwork

Preparation and Cleaning

Once you have your materials, the first step is to clean your driftwood. You want to remove any debris, bugs, or salt that could deteriorate your piece over time.

  1. Rinse Thoroughly: Wash each piece of driftwood with fresh water.
  2. Soak in a Bleach Solution: Mix one part bleach with nine parts water and soak your driftwood for 30 minutes to an hour.
  3. Rinse Again: Ensure all bleach is washed off.
  4. Dry Completely: Let your driftwood dry out thoroughly—this can take several days.

Designing Your Driftwood Art

Creating art from driftwood is a bit like piecing together a puzzle. Here are some tips to help you design your masterpiece:

  1. Layout on the Ground: Arrange the pieces on the ground before committing to a design. This allows you to experiment with different layouts.
  2. Symmetry and Balance: Aim for a balanced look, but don’t worry about making it perfect—part of the charm is the natural, organic feel.
  3. Sketch Your Design: Drawing your plan can help you visualize the end result.

Driftwood Wall Art Diy Decor

Types of Driftwood Wall Art

Driftwood Mirror Frames

A driftwood mirror frame can add rustic charm to any room. Here’s how you can create your own:

  1. Select a Mirror: Choose a plain mirror with a simple frame.
  2. Prepare the Driftwood: Cut driftwood pieces to fit around the mirror.
  3. Attach with Glue: Use a strong adhesive to attach driftwood to the frame.
  4. Seal the Wood: Apply a sealant to protect your driftwood.

Driftwood Wall Hangings

Wall hangings can vary from simple to intricate designs. Here’s a basic guide to creating a wall hanging:

  1. Select a Base: Use a larger piece of driftwood as the base.
  2. Dangle Smaller Pieces: Use fishing line to dangle smaller pieces of driftwood from the base.
  3. Add Shells or Beads: For extra flair, consider adding shells or beads between the driftwood pieces.

Driftwood Sculptures

Sculptures can be as simple or as complex as you like. Here are some steps to creating a driftwood sculpture:

  1. Choose a Central Piece: Start with a larger piece of driftwood.
  2. Add Branches: Attach smaller pieces using nails or screws.
  3. Enhance with Details: Add sea glass, stones, or other beach finds to embellish your sculpture.

Tools You’ll Need

Having the right tools can make your project a breeze. Here’s a list of tools that might come in handy:

ToolPurpose
SawCutting driftwood to desired lengths
DrillMaking holes for screws or fastening accessories
HammerNailing pieces together
Tape MeasureEnsuring accurate measurements
ClampsHolding pieces together while glue dries
Hot Glue GunQuick application of glue

Driftwood Wall Art Diy Decor

Techniques for Assembling Driftwood Art

Cutting Driftwood

Cutting driftwood can be tricky due to its irregular shapes and densities. Use a saw designed for wood, and take your time to prevent splitting the wood.

Drilling Holes

A drill is essential for making precise holes to join pieces together. Start with a small drill bit and gradually increase in size if necessary.

Sanding Edges

Sanding removes rough spots and sharp edges, making your piece safer and more polished. Use medium-grit sandpaper to start, followed by finer grits for a smoother finish.

Gluing and Nailing

For a strong bond:

  1. Apply Wood Glue: Use an appropriate adhesive for wood.
  2. Press Together: Hold pieces firmly together for a few seconds.
  3. Reinforce with Nails: For larger pieces, add nails for extra strength.

Finishing Touches

Sealing and Protecting

A sealant will protect your driftwood from moisture and pests. Choose a clear, matte finish to maintain the natural look of the wood.

Adding Hardware

Attach hooks or other mounting hardware securely to the back of your driftwood art to ensure it hangs safely.

Incorporating Other Natural Elements

Incorporating additional beach finds like sea glass, shells, or even small stones can add interesting textures and colors to your driftwood art.

Tips for Displaying Your Driftwood Wall Art

Choosing the Right Location

Your driftwood art deserves a prominent place in your home. Consider high-traffic areas like the living room or entryway.

Lighting Considerations

Place your art where natural light can highlight its textures, or use spotlights for dramatic effect.

Grouping Multiple Pieces

If you have several driftwood pieces, group them together on the same wall for a cohesive look.

Caring for Your Driftwood Art

Driftwood art is relatively low maintenance, but a bit of care can ensure it stays beautiful for years.

  1. Dust Regularly: Use a soft, dry cloth to remove dust.
  2. Avoid Excessive Moisture: Keep it away from damp areas to prevent mold and rot.
  3. Reapply Sealant Annually: A fresh coat of sealant each year can help protect the wood.

Conclusion

Driftwood wall art is more than just a decor trend—it’s a way to bring a piece of the natural world into your home. Crafting your own pieces allows you to create something that’s uniquely yours, with a story and a history that’s all its own. So, next time you’re at the beach, pick up some driftwood and start your creative journey. Your walls will thank you!

Happy crafting! If you try your hand at making driftwood wall art, share your creations and inspire others to do the same. Who knew that a simple walk on the beach could lead to such beautiful DIY decor?

Filed Under: Driftwood Ideas Tagged With: DIY Projects, driftwood art, Handmade Art, home decoration, Wall Decor

Driftwood Wall Art Diy Ideas

June 20, 2024 by admin

Creating your own driftwood wall art can be a delightful and personal way to bring a touch of nature and creativity into your home. With these DIY ideas, you’ll find a variety of inspiring projects that are both simple and fun to make, whether you’re a seasoned crafter or just starting out. From rustic arrangements to intricate designs, driftwood offers endless possibilities for unique and charming wall decor that adds warmth and character to any room. Let your imagination flow as you explore these inventive and eco-friendly ways to turn beach finds into one-of-a-kind masterpieces. Have you ever felt that empty wall in your living room could use a touch of coastal magic? Well, my friend, you’re in for a treat! Let’s chat about how you can transform that bland space into a stunning piece of art with some driftwood wall art DIY ideas.

Creating art with driftwood is not just about beautifying your home; it’s a fun and engaging way to bring a piece of nature indoors. Driftwood, with its unique textures and shapes, lends an organic charm that artificial materials often can’t match. Plus, this DIY project is kinder to the environment, repurposing what’s already naturally available. So, let’s dive into these wonderful DIY ideas!

Gathering and Preparing Driftwood

Before you start turning your vision into reality, you need to get your hands on some driftwood. There’s a bit of an adventure in this, don’t you think? Imagine taking a trip to the beach, strolling along the shore, and picking pieces of driftwood that speak to you.

Where to Find Driftwood

You can find driftwood on beaches, lakeshores, and riverbanks. Just think about your next beach trip. While everyone else is tanning, you could be hunting for that perfect piece of driftwood. It’s a beautiful way to connect with nature too!

Cleaning Driftwood

After collecting your pieces, the first step is cleaning them. You don’t want any mold or little critters taking up residence in your house! Here’s a simple method to clean driftwood:

  1. Rinse with Fresh Water: Use a hose to remove sand, dirt, and any loose material.
  2. Scrub: With a stiff brush, scrub each piece thoroughly to remove any stubborn bits.
  3. Soak in Water and Bleach Solution: Soak the driftwood in a mix of one part bleach to nine parts water for 24 hours. This will help to disinfect and whiten the wood.
  4. Rinse Again: After soaking, rinse each piece thoroughly to remove any bleach residue.
  5. Dry: Let the driftwood dry completely in the sun, which could take several days depending on the size of the wood.

Once your driftwood is clean and dry, you’re ready to unleash your creative talents!

Driftwood Wall Art Ideas

Now, let’s explore some beautiful and doable driftwood wall art DIY ideas. Each project can range from simple to slightly complex, but don’t worry. I’ll walk you through every step.

Driftwood Hanger

A driftwood hanger is one of the simplest projects and an excellent place to start. It can be used to hang small items like keys, jewelry, or even lightweight decor.

You’ll Need:

  • A piece of driftwood
  • Hook screws
  • Twine or wire for hanging
  • Drill (optional)

Instructions:

  1. Ensure your driftwood piece is strong and long enough to hold your desired items.
  2. Screw the hooks into the driftwood at evenly spaced intervals.
  3. Attach twine or wire to both ends of the driftwood for hanging.
  4. Nail or screw your driftwood hanger to the wall and voila, you have a functional and decorative piece!

Driftwood Photo Frame

A driftwood photo frame can be a beautiful way to display your favorite memories. Here’s how to make it:

You’ll Need:

  • Driftwood sticks
  • Photo frame (optional)
  • Hot glue gun or wood glue
  • String or fishing line

Instructions:

  1. Lay out the driftwood sticks around your frame to create a rough outline.
  2. Once you’re happy with the layout, start gluing the driftwood sticks onto the frame, layering them to create dimension.
  3. Ensure the sticks are securely glued and let it dry thoroughly.
  4. Attach a string or fishing line to the back of the frame for hanging.
  5. Place your chosen photo inside and hang your new frame on the wall.

Driftwood Wall Sculpture

If you’re up for a bit more creative challenge, a driftwood wall sculpture is a fantastic option. This type of art can serve as a statement piece in any room.

You’ll Need:

  • Several pieces of driftwood in various sizes
  • Wood glue
  • Nails and a hammer
  • A wooden board or frame

Instructions:

  1. Arrange the driftwood pieces on the board/frame until you create a design you like.
  2. Once you have your design, start piecing them together with wood glue and nails for extra stability.
  3. Allow the glue to dry fully.
  4. Hang your driftwood sculpture on the wall using the appropriate hanging hardware based on its weight.

Driftwood Shelf

A driftwood shelf combines functionality with rustic charm. It’s perfect for any room that needs extra storage and a touch of nature.

You’ll Need:

  • A sturdy piece of driftwood
  • Shelf brackets
  • Screws
  • Drill

Instructions:

  1. Select a piece of driftwood that is flat and strong enough to hold items.
  2. Attach shelf brackets to the wall at the desired height and distance apart.
  3. Secure the driftwood to the brackets using screws.
  4. Make sure it’s level and can support the weight you plan to place on it. Then, go ahead and decorate your new shelf!

Driftwood Mirror Frame

Another beautiful idea is a driftwood mirror frame. It adds a rustic and sophisticated touch to any space.

You’ll Need:

  • An existing mirror
  • Driftwood pieces
  • Hot glue gun or wood glue
  • Sandpaper

Instructions:

  1. Sand the edges of the driftwood to remove rough edges.
  2. Arrange the pieces around the mirror to create a border you like.
  3. Attach the driftwood to the mirror frame with the hot glue gun or wood glue.
  4. Let it dry thoroughly before hanging it on the wall.

Driftwood Wall Art Diy Ideas

Creative Tips and Tricks

A few tips can really elevate your driftwood wall art, making it stand out and ensuring it lasts longer.

Finishing Touches

Sealing your driftwood with a clear varnish can protect it and enhance its natural beauty. This is especially useful if you plan to hang your art in areas with varying humidity, like bathrooms or kitchens.

Personal Touch

Incorporate personal items in your driftwood art. For example, you can add small seashells, stones, or even photographs to give it a unique and personal touch.

Lighting

Lighting plays a crucial role in highlighting your driftwood art. Specially positioned spotlights or natural light can cast interesting shadows and bring out the texture of the driftwood.

Safety Tips

Your safety is paramount when working on DIY projects. Here are some safety tips to keep in mind.

Work in a Well-Ventilated Area: Particularly when cleaning or gluing driftwood, make sure you’re in a well-ventilated space to avoid inhaling harmful fumes.

Gloves and Masks: Wear gloves and a mask when handling bleach and driftwood to protect your hands and respiratory system.

Tools: Always handle tools like drills, nails, and hammers carefully. Keep them away from the reach of children.

Driftwood Wall Art Diy Ideas

Conclusion

There you have it! Several beautiful and straightforward driftwood wall art DIY ideas that can add an element of nature to your home. The best part is, this is not just a creative endeavor; it’s a chance to enrich your environment with personalized, handmade decor. Getting started is as simple as heading to your nearest beach and collecting some driftwood!

We hope you’ll enjoy creating these unique pieces and perhaps even come up with your own creative ideas. Happy crafting!

Filed Under: Driftwood Ideas Tagged With: craft, DIY Projects, Driftwood, Wall Art

Driftwood Fridge Magnets

June 19, 2024 by admin

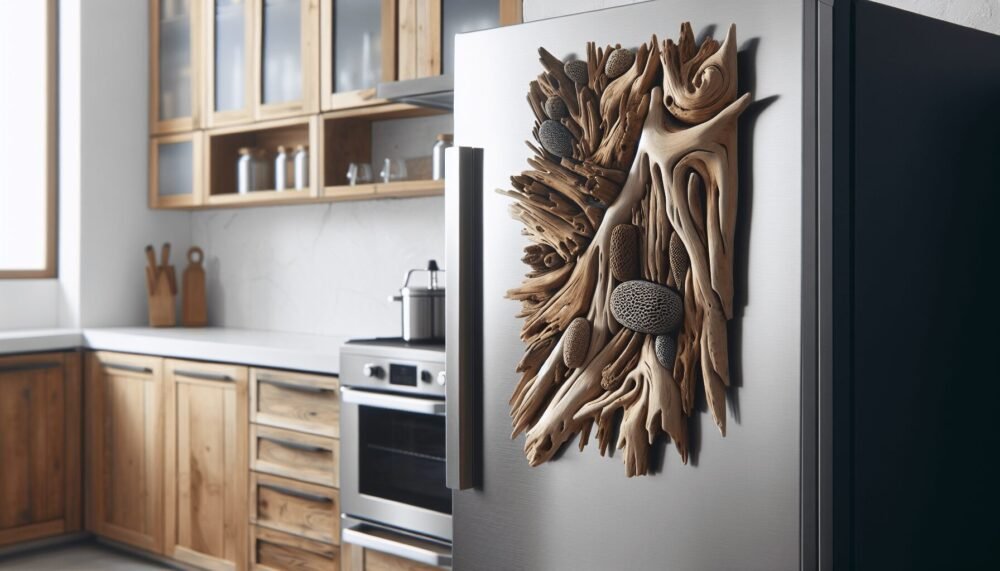
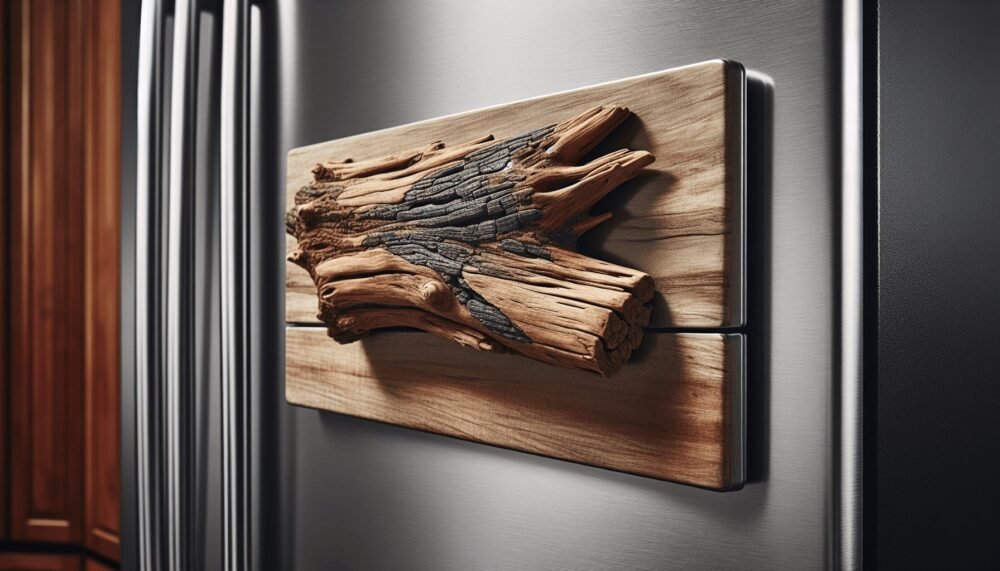
Imagine transforming ordinary driftwood into charming fridge magnets that bring a touch of nature into your home. In the article “Driftwood Fridge Magnets,” you’ll discover how to create these unique pieces, adding a rustic charm to your kitchen decor. You’ll learn step-by-step instructions on selecting, preparing, and personalizing driftwood to craft your own beautiful magnets. Get ready to unleash your creativity and enjoy a fun, simple project that turns washed-up wood into stunning functional art. Have you ever strolled along a beach and been captivated by the beauty of driftwood? Those naturally weathered pieces of wood tell stories of their journeys across the waves, and they make perfect material for unique and eco-friendly crafts. One fun and creative way to bring a bit of the beach into your home is by making driftwood fridge magnets! This project not only recycles natural materials but also adds a rustic, coastal charm to your kitchen decor.

Driftwood Fridge Magnets

Why Driftwood?

Driftwood has a distinct, timeless appeal. Nature’s handiwork produces driftwood in unique shapes, textures, and colors that artificial materials can’t replicate. Beyond aesthetics, using driftwood encourages sustainable crafting practices. By repurposing what nature has already provided, you contribute to reducing waste and promoting eco-friendly habits.

The Appeal of Driftwood Arts and Crafts

Engaging in driftwood arts and crafts provides a dual benefit: creative expression and an opportunity to connect with nature. Driftwood has already undergone a natural transformation process, so each piece is unique and ready for your artistic touch. Plus, working with driftwood is incredibly versatile, allowing you to create anything from furniture to small decorative items like fridge magnets.

Materials and Tools Needed

Before diving into the crafting process, you need to gather all the necessary materials and tools. This ensures your project goes smoothly and you’re not interrupted by gaps in your supplies.

Essential Materials

You’ll need a few basic supplies to get started. Here’s a list to guide you:

MaterialPurpose
DriftwoodThe main body of the fridge magnets
Magnetic Discs or StripsTo adhere to the back, allowing it to stick to your fridge
Adhesive (Super Glue or Epoxy)To attach the magnet to the driftwood
Sealant (optional)To preserve the wood and give a finished look

Essential Tools

A variety of tools can help you in the crafting process. Here are some you’ll likely need:

ToolPurpose
SandpaperTo smooth rough edges
Small Saw or ClippersTo trim and shape the driftwood if necessary
Drill (Optional)For any intricate designs or additions
Brush/PaintbrushTo apply sealant or paint if desired

Step-by-Step Guide to Making Driftwood Fridge Magnets

Creating driftwood fridge magnets is a simple yet fulfilling DIY project. Let’s break down the process step by step.

Step 1: Collecting Driftwood

The first and perhaps most enjoyable step is collecting the driftwood. Take a relaxing walk along the beach and look for pieces that inspire you. Remember to consider the size and weight of the wood, as you’ll be attaching magnets to them.

Step 2: Preparing the Driftwood

Once you’ve gathered your driftwood, it’s essential to prepare each piece before making it into a magnet.

  1. Cleaning: Rinse off any salt residue or debris with fresh water.
  2. Drying: Let the pieces air-dry completely. You can lay them out in the sun for faster results.
  3. Sanding: Use sandpaper to smooth any rough edges or surfaces. This makes handling them safer and more aesthetically pleasing.

Step 3: Attaching the Magnets

Now that your driftwood pieces are ready, it’s time to attach the magnets.

  1. Choosing the Magnet: Pick magnets that are strong enough to hold the wood yet thin enough to stick to a flat surface.
  2. Applying Adhesive: Apply a small amount of adhesive to one side of the magnet. Super glue or epoxy works best for a secure bond.
  3. Positioning: Press the magnet onto the back of the driftwood piece. Hold it in place for a few seconds to ensure a good bond. Allow it to dry completely as per the adhesive instructions.

Step 4: Finishing Touches

You can leave your driftwood fridge magnets as they are for a natural look or add some finishing touches.

  1. Sealant: Applying a wood sealant can help preserve the wood and give it a polished finish.
  2. Decorating: Feel free to paint or draw designs on the driftwood to give it a personal touch.

Creative Ideas and Customization

Your fridge magnets can be as unique as the driftwood itself. Here are some ideas to customize and enhance your driftwood fridge magnets:

Natural Finish

If you prefer a minimalist approach, leaving the driftwood in its natural state highlights its raw beauty. A simple coat of clear wood sealant can enhance the natural color and grain.

Painted Designs

Express your creativity by painting small designs or patterns on the driftwood. Use acrylic paint for best results, and consider themes like beach landscapes, marine life, or abstract patterns.

Engraving

If you have a steady hand, consider engraving your driftwood pieces with inspirational quotes, dates, or symbols. A small engraving tool or wood-burning pen can help achieve intricate designs.

Driftwood Fridge Magnets

Caring for Your Driftwood Fridge Magnets

While driftwood is naturally durable, taking care of your handcrafted magnets ensures they last a long time.

Cleaning

To clean your driftwood fridge magnets, simply wipe them with a damp cloth. Avoid soaking them in water as it may weaken the wood or adhesive.

Repositioning

Driftwood can be relatively light, but if you notice the magnets slipping, try reapplying the adhesive or using stronger magnets.

Avoiding High Humidity

Although driftwood originates from the water, prolonged exposure to high humidity indoors can affect the wood and magnet’s adhesion. Keep them dry and avoid placing them near steamy areas.

Benefits of DIY Driftwood Projects

Why should you consider crafting with driftwood? Beyond the beauty of your creations, there are several advantages:

Eco-Friendly

Repurposing driftwood is an excellent way to recycle natural materials. You’re giving a new life to something that might otherwise be discarded.

Unique and Personal

Every piece of driftwood is unique, making your creations one-of-a-kind. They can serve as personalized gifts or keepsakes with a touch of nature and your artistry.

Therapeutic

Crafting is a great way to relax and relieve stress. Spending time on a creative project using natural materials can be incredibly soothing.

Selling Your Crafts

Once you’ve mastered the art of making driftwood fridge magnets, you might consider selling them. Here’s a guide to get you started:

Market Research

First, check if there’s a demand for handcrafted driftwood items in your area or online. Platforms like Etsy, local craft fairs, and artisan markets are great places to start.

Pricing

Factor in the cost of materials, your time, and any additional costs like shipping when setting your prices. Research similar products to set competitive and fair prices.

Expense CategoryConsiderations
MaterialsDriftwood, magnets, adhesive, paint, etc.
TimeHow much is your time worth per hour?
Shipping and HandlingPackaging, postage, insurance if necessary

Promotion

Utilize social media to showcase your creations. High-quality photos and engaging stories about your creative process can attract potential buyers.

Conclusion

Driftwood fridge magnets are a delightful and environmentally friendly way to bring a touch of the beach into your home. The process is simple, the materials are often free, and the results are uniquely charming. So the next time you find yourself at the beach, take a moment to collect some driftwood and start creating your own little masterpieces!

Remember, the best part about crafting with driftwood is the individuality each piece brings. Whether you keep them all for yourself or share them with friends and family, these magnets are sure to bring joy and a touch of natural beauty to any kitchen. Happy crafting!

Filed Under: Driftwood Ideas Tagged With: DIY Projects, Driftwood, Fridge Magnets, home decor, Homemade Crafts

Diy With Driftwood Projects

June 3, 2024 by admin

Ever stumbled upon a piece of driftwood during a peaceful walk along the shore and wondered how to bring its natural beauty into your home? “DIY With Driftwood Projects” is your gateway to turning these ocean treasures into stunning decor pieces. You’ll discover how easy and fun it is to create unique, rustic home accents and furniture with just a bit of creativity and some basic tools. Let’s dive into the endless possibilities of driftwood DIY and transform your living spaces with a touch of seaside charm! Have you ever strolled along the beach and been captivated by the unique, weathered look of driftwood scattered along the shore? If so, you’re not alone! Driftwood has a rustic charm that’s hard to resist, making it an ideal material for all sorts of DIY projects. Whether you’re an experienced crafter or just looking for a new hobby, this guide will walk you through some incredible DIY driftwood projects that you can tackle.

Diy With Driftwood Projects

Why Use Driftwood for DIY Projects?

Driftwood is more than just free beach décor; it’s a material that’s versatile and eco-friendly. Each piece is unique, having been naturally sculpted by the elements. Plus, using driftwood in your projects helps clean up the beaches and repurpose materials that would otherwise go to waste. Here’s why driftwood should be your material of choice:

  • Uniqueness: No two pieces of driftwood are the same, giving your projects an exclusive touch.
  • Sustainability: Using naturally weathered wood is eco-friendly.
  • Durability: The natural elements season the wood, making it robust and long-lasting.

Preparing Driftwood for DIY Projects

Before diving into crafting, it’s important to properly prepare your driftwood. This ensures that your projects are safe, durable, and as beautiful as possible. Follow these steps to prepare your driftwood:

Cleaning the Driftwood

First, you need to clean your driftwood to remove any salt, sand, and grime.

  1. Rinse: Use a hose to thoroughly rinse off any surface debris.
  2. Soak: Submerge the driftwood in a bucket of fresh water for 1-2 weeks, changing the water every few days.
  3. Scrub: After soaking, use a stiff brush to scrub away any remaining grime.

Drying the Driftwood

Once cleaned, the driftwood needs to be properly dried to prevent mold and decay.

  1. Air Dry: Lay the driftwood out in a sunny, well-ventilated area to air dry. This may take a few weeks, depending on the size and thickness of the wood.
  2. Oven Dry (Optional): For faster drying, you can place the driftwood in an oven at a low temperature (around 200°F) for several hours. Always keep an eye on it to prevent burning.

Treating the Driftwood

  1. Seal (Optional): Apply a coat of wood sealant if you want to keep the wood’s appearance for a longer time. This helps preserve the wood and protects it from further wear and tear.
  2. Bleach: For a whiter appearance, you can apply a diluted bleach solution (1:1 ratio of bleach to water) and let it sit for 10-15 minutes before rinsing and drying the wood again.

DIY Driftwood Projects to Try

Now that your driftwood is ready, let’s dive into some fun and creative projects. Here’s a list of various DIY driftwood projects that can add a touch of nature to your home.

Driftwood Wall Art

One of the simplest yet most impactful projects you can try is creating wall art with driftwood.

Materials Needed:

  • Driftwood pieces
  • Hot glue gun or wood glue
  • Picture frame or canvas
  • Optional: Paint, stencils, and other decorative elements

Steps:

  1. Design: Lay out your driftwood pieces on the canvas or inside the picture frame to create a design.
  2. Glue: Once you’re happy with your layout, glue each piece of driftwood in place.
  3. Decorate: Use paint, stencils, or other decorative elements to enhance your design.

Driftwood Mirror Frame

A driftwood mirror frame not only looks stunning but also adds a coastal vibe to any room.

Materials Needed:

  • Round or square mirror
  • Driftwood pieces
  • Wood glue or heavy-duty adhesive
  • Saw (optional)

Steps:

  1. Layout: Arrange the driftwood pieces around the mirror to create a frame. You might need to saw some pieces to fit.
  2. Attach: Use the heavy-duty adhesive to attach the driftwood pieces to the outer edge of the mirror.
  3. Cure: Let the glue cure completely before hanging the mirror.

Driftwood Table

A driftwood table can be a stunning centerpiece for your living room or outdoor space.

Materials Needed:

  • Driftwood sticks or branches
  • Tabletop (glass, wood, etc.)
  • Saw
  • Sandpaper
  • Wood glue and screws

Steps:

  1. Measure & Cut: Measure and cut the driftwood to the desired length for the table legs. Sand any rough edges.
  2. Assemble Base: Arrange the driftwood sticks to form a stable base. Use wood glue and screws to secure them in place.
  3. Attach Tabletop: Place and secure the tabletop onto the driftwood base.

Driftwood Candle Holders

Driftwood candle holders can add a rustic touch to your home décor.

Materials Needed:

  • Driftwood pieces
  • Drill with a forstner bit
  • Candles (tea lights or votives)
  • Sandpaper

Steps:

  1. Drill Holes: Use the drill to make holes in the driftwood pieces large enough to hold your candles.
  2. Smooth Edges: Sand the edges of the holes to remove any splinters.
  3. Insert Candles: Place your candles into the holes and enjoy your new candle holders.

Driftwood Coat Rack

Create a functional and stylish coat rack with your collected driftwood.

Materials Needed:

  • Large driftwood branch
  • Hooks
  • Screws
  • Drill

Steps:

  1. Attach Hooks: Attach hooks to the driftwood branch at evenly spaced intervals.
  2. Mount: Use screws and a drill to mount the driftwood coat rack to your wall.
  3. Hang Coats: Hang up your coats and enjoy your new, rustic coat rack.

Driftwood Shelf

A driftwood shelf can serve as a unique display area for your favorite items.

Materials Needed:

  • Flat driftwood pieces (for the shelf)
  • Smaller pieces (for the brackets)
  • Screws
  • Drill
  • Level

Steps:

  1. Measure & Cut: Measure and cut your driftwood to the desired length and size for your shelf and brackets.
  2. Assemble: Use screws and a drill to attach the shelf to the brackets.
  3. Mount: Mount the shelf onto your wall, making sure it’s level.

Driftwood Photo Display

Use driftwood to create a charming display for your favorite photos.

Materials Needed:

  • Driftwood branch
  • Twine or string
  • Small clothespins or clips
  • Photos
  • Hooks

Steps:

  1. Attach String: Tie the string or twine to both ends of the driftwood branch, creating a hanging mechanism.
  2. Clothespins: Attach clothespins or clips to the string.
  3. Display: Hang the driftwood branch and clip your favorite photos to the string.

Enhancing Your Driftwood Projects

Adding a personal touch to your driftwood projects can make them even more special. Here are some tips for customization:

Painting and Staining

You can paint or stain your driftwood to match your home décor or personal style.

Materials Needed:

  • Paint or wood stain
  • Paintbrush
  • Sandpaper

Steps:

  1. Sand: Lightly sand the surface of the driftwood to help the paint or stain adhere better.
  2. Paint/Stain: Apply your chosen paint or stain evenly across the driftwood.
  3. Dry: Allow it to dry completely before using or mounting.

Adding Hardware

Incorporate hardware for functionality and design.

Materials Needed:

  • Hooks
  • Handles
  • Screws
  • Drill

Steps:

  1. Mark Placement: Determine where you want to place your hardware and mark the spots.
  2. Attach: Use screws and a drill to attach the hardware securely.

Incorporating Other Natural Elements

Add other natural elements like shells, stones, or sea glass to enhance the nautical theme.

Materials Needed:

  • Shells, stones, or sea glass
  • Hot glue gun or heavy-duty adhesive

Steps:

  1. Plan Layout: Arrange your additional elements on the driftwood to create a design.
  2. Attach: Use the hot glue gun or adhesive to secure the elements in place.

Diy With Driftwood Projects

Safety Tips for Working with Driftwood

While crafting with driftwood is generally safe, there are some precautions you should take to ensure your safety:

Ventilation while Gluing or Painting

Always work in a well-ventilated area when using adhesive or paint to avoid inhaling fumes.

Proper Tool Handling

Make sure to handle all tools, such as saws and drills, with care to prevent injury.

Protective Gear

Wear protective gear like gloves and safety glasses when cutting, sanding, or drilling.

Conclusion

DIY driftwood projects are a fantastic way to bring a piece of the beach into your home, all while being eco-friendly and budget-conscious. The unique, weathered look of driftwood adds a rustic charm to any project, making it truly one-of-a-kind. With a little creativity and some basic tools, you can create stunning driftwood art, furniture, and décor that you’ll be proud to show off.

So, next time you find yourself at the beach, keep an eye out for some driftwood. Who knows? Your next amazing DIY project might be just a piece of driftwood away! Happy crafting!

Filed Under: Driftwood Ideas Tagged With: crafts, DIY Projects, Driftwood, home decor, Woodworking

Drift Wood Decor Driftwood Projects

June 3, 2024 by admin

Dive into the world of beachside elegance with “Drift Wood Decor Driftwood Projects.” This inspiring article will transport you to a place where the ocean meets creativity, guiding you through various charming and innovative ways to incorporate driftwood into your home decor. From DIY projects that add a rustic touch to your living room, to sophisticated pieces that can be the highlight of any space, you’ll find endless ideas to bring the serene beauty of the coast right into your home. Get ready to unleash your inner artisan and transform ordinary driftwood into extraordinary decor with these delightful driftwood projects! Have you ever strolled along the beach, stumbled upon beautifully weathered pieces of driftwood, and wondered how to incorporate them into your home decor? If you’re drawn to the natural beauty of driftwood and wish to enhance your living space with unique, eco-friendly projects, you’re in the right place. Let’s delve into the world of driftwood decor and explore some exciting driftwood projects you can undertake to add a touch of nature to your interiors.

Drift Wood Decor Driftwood Projects

Understanding Driftwood

Before jumping into projects, it’s essential to get a good grasp of what driftwood is and why it makes such a fantastic material for home decor.

What is Driftwood?

Driftwood refers to pieces of wood that have been washed onto shores by the action of winds, tides, or waves. The journey through water seasoned the wood, lending it a soft, bleached look that’s incredibly appealing. Driftwood can come from a variety of sources, including trees, shrubs, and even discarded pieces of timber, giving it a diverse range of textures and shapes.

Why Use Driftwood in Decor?

Driftwood is not just beautiful; it also embodies a sense of history and connectivity with nature. Each piece tells a story, making it a unique addition to any setting. It’s also an eco-friendly choice, repurposing materials that might otherwise be discarded. Plus, it’s versatile! Whether your style is rustic, coastal, or contemporary, driftwood can blend seamlessly into your decor.

Driftwood Decor: Getting Started

Selecting the Right Driftwood

Not all driftwood is the same, and choosing the right pieces is crucial for your project’s success. Here are some tips to consider:

  • Size and Shape: Look for pieces that suit your project’s needs—whether it’s large logs for a coffee table or smaller branches for a picture frame.
  • Condition: Ensure the driftwood is free from rot, bugs, and other contaminants. It’s natural for it to have some crevices and imperfections, but it should be structurally sound.
  • Texture and Color: Consider how the driftwood’s natural texture and color will complement your existing decor. Some pieces may have a silver-gray patina, while others might be more brown or bleached.

Preparing Your Driftwood

Proper preparation is key to ensuring your driftwood is clean and ready for use. Here’s a simple process to follow:

  1. Cleaning: Rinse the driftwood to remove salt, sand, and debris. Use a brush to get into crevices, paying special attention to make sure it’s thoroughly clean.
  2. Soaking: Soak the driftwood in a solution of water and white vinegar (roughly 1 part vinegar to 9 parts water) for a few hours. This helps to kill any remaining bacteria or insects.
  3. Drying: Allow the driftwood to dry completely, which may take a few days to a week. Place it in a dry, ventilated area to speed up the process.

Driftwood Projects

Driftwood Wall Art

One of the simplest yet most impactful ways to use driftwood is to create wall art. This project doesn’t require many tools and allows for a lot of creativity.

Materials Needed:

  • Driftwood pieces
  • Backing board or canvas
  • Strong adhesive or nails
  • Picture hanging hardware

Steps:

  1. Plan Your Design: Lay out your driftwood pieces on the backing board to determine the arrangement. You could go with a random, abstract pattern or something more structured.
  2. Secure the Driftwood: Use strong adhesive or nails to attach the driftwood to the backing board. Make sure each piece is firmly secured.
  3. Hang Your Art: Affix the picture hanging hardware to the back of the board and display your newly created driftwood art prominently.

Driftwood Coat Rack

A driftwood coat rack adds a rustic, nature-inspired touch to your entryways. It’s functional and beautiful—a perfect blend of form and utility.

Materials Needed:

  • Straight, sturdy driftwood branch
  • Coat hooks
  • Screws and wall anchors
  • Drill

Steps:

  1. Prepare the Driftwood: Ensure your selected driftwood piece is clean and dry. Cut to size if necessary.
  2. Attach Coat Hooks: Evenly space and attach the coat hooks along the length of the driftwood using screws.
  3. Mount the Rack: Drill appropriate holes in the wall and insert wall anchors for stability. Secure your driftwood rack to the wall.

Driftwood Shelves

Driftwood shelves offer a unique way to display your favorite items, blending functionality with natural aesthetics.

Materials Needed:

  • Flat, wide pieces of driftwood
  • Brackets
  • Screws and wall anchors
  • Drill

Steps:

  1. Select the Driftwood: Choose pieces of driftwood that are flat and strong enough to hold items.
  2. Attach Brackets: Secure metal brackets to the driftwood shelf. Make sure they are evenly spaced.
  3. Mount the Shelves: Use the drill to insert wall anchors, then attach the brackets and shelves to the wall. Check for levelness and stability.

Driftwood Table

Creating a driftwood table is a more ambitious project, but the results can be stunning. Whether it’s a coffee table or a nightstand, driftwood can bring a unique character to your space.

Materials Needed:

  • Larger pieces of driftwood
  • Tabletop (glass or wood)
  • Strong adhesive or screws
  • Table legs if needed

Steps:

  1. Design Your Table: Plan the structure and layout of your driftwood base. You can stack pieces, intertwine them, or create a more structured look.
  2. Secure the Base: Use strong adhesive or screws to secure the pieces of driftwood together.
  3. Attach the Tabletop: Depending on your design, attach a glass or wooden tabletop to the driftwood base. Ensure it’s level and sturdy.

Driftwood Candle Holders

Simple yet elegant, driftwood candle holders can add a warm, cozy ambiance to any room.

Materials Needed:

  • Driftwood branches
  • Drill with spade bit (to create candle holes)
  • Sandpaper

Steps:

  1. Prepare the Driftwood: Clean your driftwood and smooth any rough edges with sandpaper.
  2. Drill Candle Holes: Use the spade bit to carefully drill holes into the driftwood. The size of the bit will depend on the candles you’re using.
  3. Finishing Touches: Sand the edges of the holes for a smooth finish. Place candles in the holes and enjoy your new decor.

Additional Tips for Working with Driftwood

Preserving Driftwood

To ensure your driftwood projects last, consider applying a wood preservative or sealant. This protects the wood from moisture and further degradation.

Safety Considerations

Always wear protective gear (gloves, masks, and safety glasses) when working with tools and driftwood. Ensure proper ventilation if you’re using adhesives or preservatives.

Sourcing Driftwood

If you don’t live near a beach, you can purchase driftwood from craft stores or online retailers. Ensure it has been ethically sourced to protect natural environments.

Drift Wood Decor Driftwood Projects

Conclusion

Driftwood is a versatile, eco-friendly material that can bring a touch of nature into your home. Whether you’re crafting a simple candle holder or a complex coffee table, the unique shapes and textures of driftwood ensure each piece is one-of-a-kind. So why not start your own driftwood project today? Embrace the beauty of nature and create something truly special for your home.

Filed Under: Driftwood Ideas Tagged With: DIY Projects, Driftwood Crafts, Driftwood Decor, Home Projects, Sustainable decor

Driftwood Projects Outdoor

June 1, 2024 by admin

In “Driftwood Projects Outdoor,” you discover a world where your creativity meets the rustic charm of nature. This guide helps you transform old, weathered driftwood into extraordinary outdoor projects that bring character and a touch of the seaside to your garden or patio. Whether you’re crafting unique planters, building whimsical furniture, or designing artistic accents, you’ll find inspiration and practical tips to elevate your outdoor space. Dive into this rewarding journey, and let your imagination ride the waves of possibility with driftwood. Have you ever found yourself strolling along a beach, spotting pieces of driftwood, and wondering how you could use these natural treasures in your outdoor space? If so, you’re not alone! Driftwood, with its rustic charm and unique textures, has become increasingly popular for various outdoor projects that add a touch of nature to any setting. From garden features to furniture, there are endless ways you can incorporate driftwood into your outdoor living spaces.

Driftwood Projects Outdoor

Understanding Driftwood

Before we dive into specific projects, let’s talk a bit about driftwood itself. Driftwood refers to wood that has been washed ashore by the action of tides, waves, or winds. This wood can often be found on beaches, riverbanks, and even in swamps. The natural elements have worn it down, giving it that distinctive smooth and weathered appearance.

Types of Driftwood

Not all driftwood is created equal. Different types of wood may respond differently to weathering and may offer distinct looks for your projects. Here are a few common types you might encounter:

Type of WoodCharacteristics
Beach DriftwoodTypically smooth with a white or greyish color due to sun bleaching.
River DriftwoodOften darker and more textured, shaped by freshwater and rocks.
Swamp DriftwoodMay have more irregular shapes and unique patterns.
Root DriftwoodGnarled and twisted, perfect for more complex designs.

Identifying the type of driftwood you have can help you better decide how to use it in your outdoor projects.

Collecting Driftwood

Collecting driftwood can be an adventure in itself. Here’s how to go about it:

Where to Look

Depending on your location, some places are better for finding driftwood than others:

  • Beaches: Coastal beaches provide plenty of driftwood, especially after storms.
  • Rivers: Riverbanks and areas where rivers meet the sea.
  • Lakes: Shorelines of large lakes often have a supply of driftwood owing to wave actions.

Ethical Considerations

Always ensure you’re collecting driftwood ethically and legally. Some areas have restrictions in place to protect ecosystems. Make sure to:

  • Check local regulations.
  • Only take what’s needed.
  • Respect the natural habitat.

Preparing Driftwood

Once you’ve collected your driftwood, it’s crucial to clean and prepare it for use.

Cleaning Driftwood

Cleaning driftwood helps remove any salt, dirt, and potential pests.

  1. Rinse: Wash the driftwood with fresh water to remove loose debris.
  2. Soak: Soak the wood in a bucket of water mixed with a little bleach for 1-2 days. This helps kill any bacteria or insects.
  3. Rinse Again: Thoroughly rinse the wood to eliminate any bleach residue.
  4. Dry: Let the wood dry completely, which might take a few days to a few weeks depending on the size and density of the wood.

Sealing Driftwood

Sealing driftwood can enhance its durability, especially for outdoor use.

  1. Sand: Smooth any rough edges with sandpaper.
  2. Seal: Apply a coat of wood sealant or a mixture of linseed oil and turpentine.

Driftwood Projects for Your Outdoor Space

Now that you’re prepared, let’s explore some incredible driftwood projects that you can bring to life!

Driftwood Garden Features

Creating garden features with driftwood can turn an ordinary garden into a majestic, nature-inspired retreat.

Driftwood Planters

Driftwood planters are a simple project you can start with. They add a rustic charm to your garden and are relatively easy to make.

Materials Needed:

  • A sizeable piece of driftwood
  • Potting soil
  • Succulents or small plants
  • Drill

Steps:

  1. Hollow Out: Carve out small holes in the driftwood where the plants will sit.
  2. Plant: Fill the holes with potting soil and place the plants inside.
  3. Water: Lightly water the plants and set the planter in your garden.

Driftwood Garden Paths

Using driftwood to create garden paths adds a lovely natural look while recycling those beautiful wood pieces.

Materials Needed:

  • Large flat pieces of driftwood
  • Smaller driftwood chunks
  • Wood chips or gravel

Steps:

  1. Design: Plan the layout for your path.
  2. Place Driftwood: Lay large pieces of driftwood as stepping stones.
  3. Fill In: Use smaller pieces and wood chips or gravel to fill in the gaps between the large driftwood steps.

Driftwood Furniture

Adding driftwood furniture to your outdoor space not only provides functionality but also serves as beautiful conversation pieces.

Driftwood Benches

A driftwood bench can be a wonderful addition to your garden or patio.

Materials Needed:

  • Large driftwood logs
  • Smaller driftwood pieces
  • Screws and bolts
  • Sealant

Steps:

  1. Select Pieces: Choose two large, sturdy pieces for the legs and a long, flat piece for the seat.
  2. Attach Legs: Secure the legs to the seat using screws and bolts.
  3. Seal: Apply sealant to protect the wood from the elements.

Driftwood Tables

Driftwood tables, especially coffee tables, are a great way to make an impactful design statement.

Materials Needed:

  • Driftwood branches or logs
  • Glass tabletop
  • Adhesive or brackets

Steps:

  1. Arrange Wood: Form the base of the table by arranging the driftwood pieces into a stable structure.
  2. Secure Base: Use adhesive or brackets to hold the pieces together.
  3. Add Glass: Place the glass tabletop on the driftwood base.

Driftwood Lighting

Illuminate your outdoor space in style with driftwood lanterns and lamps.

Driftwood Lanterns

Lanterns made from driftwood imbue your outdoor space with a warm, cozy glow.

Materials Needed:

  • Small driftwood pieces
  • Battery-operated candles or LED lights
  • Glue or twine

Steps:

  1. Form Shape: Create a cage-like structure with driftwood.
  2. Secure: Use glue or twine to hold the pieces together.
  3. Insert Lights: Place the lighting element inside.

Driftwood Lamp

A driftwood lamp adds a unique touch to your patio or garden.

Materials Needed:

  • Driftwood piece
  • Lamp kit (light socket, cord, etc.)
  • Drill

Steps:

  1. Drill Hole: Drill a hole through the driftwood for the lamp cord.
  2. Install Kit: Follow the instructions on the lamp kit to install the socket and cord.
  3. Finish: Add a light bulb and any additional decorative elements.

Driftwood Art and Decor

For those of you with a creative flair, driftwood offers incredible opportunities for art and decor.

Driftwood Sculptures

Creating sculptures from driftwood is an excellent way to express your artistic side while decorating your outdoor space.

Materials Needed:

  • Various driftwood pieces
  • Epoxy
  • Sealant

Steps:

  1. Design: Plan your sculpture, sketching if necessary.
  2. Assemble: Fit the pieces together, securing them with epoxy.
  3. Seal: After the epoxy has dried, apply a sealant to protect your sculpture.

Driftwood Wind Chimes

Wind chimes made of driftwood add an auditory element to your outdoor décor, providing soothing natural sounds.

Materials Needed:

  • Small driftwood pieces
  • String
  • Metal chimes or shells
  • Drill

Steps:

  1. Drill Holes: Drill small holes in each driftwood piece.
  2. String Pieces: Thread the string through the holes, tying knots to secure each piece.
  3. Assemble: Attach metal chimes or shells to the bottom for added sound.

Driftwood Projects Outdoor

Tips for Driftwood Projects

Creating driftwood projects can be both enjoyable and rewarding. Here are some extra tips to ensure your projects turn out great.

Choosing the Right Pieces

Not every piece of driftwood is suitable for every project. Here’s what to look out for:

  • Solidness: Ensure the wood is strong and not rotted.
  • Shape: Pick pieces that naturally fit the design you have in mind.
  • Size: Choose appropriately sized driftwood for your project.

Combining with Other Materials

Driftwood can be beautifully combined with other natural materials. Here are a few ideas:

MaterialUses
StoneGarden borders, table bases
MetalLamp fixtures, art structures
GlassTabletops, decorative accents

Maintenance

To keep your driftwood creations looking their best:

  • Regular Cleaning: Wipe down surfaces to avoid buildup of dirt and grime.
  • Resealing: Apply a new coat of sealant annually to protect the wood from weather.

Seasonal Storage

For those living in areas with harsh winters, consider storing smaller driftwood items indoors to prolong their lifespan.

Conclusion

Driftwood offers endless opportunities for outdoor projects that are both beautiful and practical. Whether you’re looking to add charming accents to your garden, create functional furniture, or even craft unique art pieces, driftwood can be your go-to material. The process of collecting, preparing, and creatively using driftwood not only gives you unique pieces but also offers a sustainable approach by recycling what nature provides.

So, next time you find yourself near a body of water, keep an eye out for driftwood and let your creativity flow. Your outdoor space will thank you for it. Happy crafting!

Filed Under: Driftwood Ideas Tagged With: DIY Projects, Driftwood, natural materials, Outdoor Decor, Woodworking

  • « Previous Page
  • Page 1
  • Page 2
  • Page 3
  • Page 4
  • Next Page »

Primary Sidebar

Driftwood4us.com, is a participant in the Amazon Services LLC Associates Program, an affiliate advertising program designed to provide a means for sites to earn advertising fees by advertising and linking to amazon.com.