• Skip to main content
  • Skip to primary sidebar
  • Terms and Conditions
  • Privacy Policy
  • Contact

Driftwood 4 Us

Just About Driftwood

DIY

Driftwood Gold Leaf

September 7, 2024 by admin

Have you ever come across an elegant piece of artwork that seemed to perfectly blend the rustic charm of nature with a touch of opulence? Driftwood Gold Leaf combines these elements into stunning, eye-catching creations that can elevate any space in your home. Today, we’ll explore the fascinating world of Driftwood Gold Leaf and guide you through the process of creating these unique pieces, including generating photo-realistic images perfect for Pinterest.

Driftwood Gold Leaf

What is Driftwood Gold Leaf?

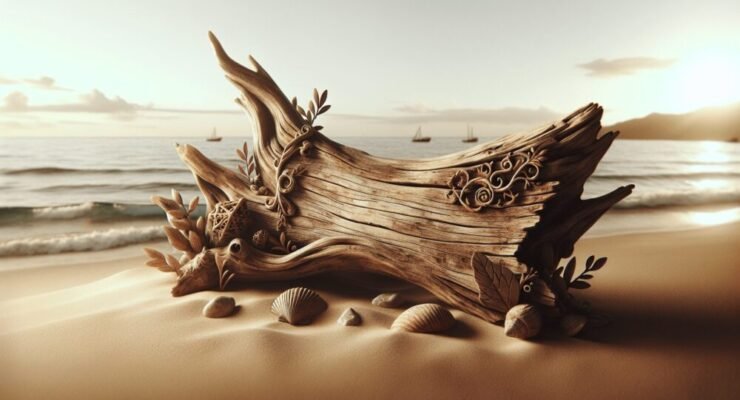
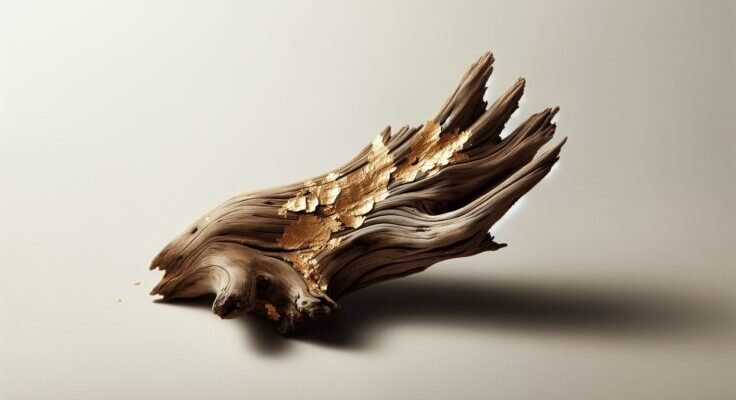
Driftwood Gold Leaf involves using pieces of driftwood – naturally weathered wood found by the shore – and enhancing them with delicate applications of gold leaf. This combination creates a striking blend of organic and luxurious aesthetics, making for truly unique and versatile art pieces.

The Appeal of Driftwood

Driftwood has a distinct, natural beauty. Over time, the elements weather it, resulting in smoother edges, intricate textures, and a unique patina. These pieces of wood have their own story to tell, adding character and depth to any art or décor project.

Adding Gold Leaf

Gold leaf adds an element of luxury and sophistication. The contrast between the weathered, rustic texture of driftwood and the smooth, shiny surface of the gold leaf creates a captivating and balanced visual appeal.

Materials Needed

Creating your own Driftwood Gold Leaf art requires a few specific materials. Here’s a list to get you started:

MaterialDescription
DriftwoodNaturally weathered wood pieces found along beaches or rivers.
Gold Leaf SheetsThin sheets of gold available in various karats (alternatives include imitation gold leaf).
Adhesive SizeA special glue used to adhere gold leaf to surfaces.
Soft BrushUsed for applying the adhesive and for smoothing out the gold leaf.
Sealer (Optional)Used to protect and extend the life of the gold leaf application.

Preparing Driftwood

Before you start your gold leaf application, you’ll need to prepare your driftwood. Proper preparation ensures that the adhesive and gold leaf adhere well.

Cleaning the Wood

The first step is to clean your driftwood. Driftwood may have sand, salt, or other residues from its time on the shore.

  • Rinse Thoroughly: Use water to thoroughly rinse off any dirt or salt.
  • Scrub Gently: Use a soft brush to remove any stubborn debris.
  • Dry Completely: Ensure the wood is completely dry before proceeding. This might take a few days.

Smoothing the Surface

While the natural texture is part of the driftwood’s charm, you may want to smooth out areas where you plan to apply the gold leaf.

  • Sandpaper: Use a fine-grit sandpaper to lightly sand the areas that will be gilded.
  • Wipe Down: Remove any dust or particles with a damp cloth.

Applying Gold Leaf

Now comes the exciting part – applying the gold leaf to the driftwood.

Applying Adhesive Size

The adhesive size is crucial for making sure the gold leaf stays in place.

  1. Select Areas: Decide where you want the gold leaf to be applied.
  2. Apply Adhesive: Use a soft brush to apply the adhesive size to these areas. Follow the manufacturer’s instructions for drying times, as some sizes require a tacky surface while others need to dry completely.

Applying Gold Leaf Sheets

Once the adhesive is ready, you can start applying the gold leaf.

  1. Cut Gold Leaf: Cut the gold leaf sheets into manageable pieces.
  2. Apply Carefully: Place the gold leaf onto the tacky adhesive. It’s delicate, so take your time.
  3. Smooth Out: Use a soft brush to gently smooth out the gold leaf and adhere it to the surface.

Sealing the Gold Leaf

Sealing is optional but recommended to protect your artwork, especially if it will be handled frequently or exposed to elements.

  • Apply Sealer: Use a sealer specifically designed for gold leaf. Apply according to the product’s instructions.
  • Let Dry: Allow sufficient time for the sealer to dry completely.

Driftwood Gold Leaf

Creating Photo-Realistic Images for Pinterest

To showcase your Driftwood Gold Leaf creations, photo-realistic images are essential, especially when sharing on a platform like Pinterest. Let’s walk through this process step-by-step.

Camera and Setup

A good camera and the right setup can make all the difference in capturing high-quality images.

  • Camera Choice: A DSLR camera is ideal, but many smartphones today also have excellent cameras.
  • Lighting: Natural light is best. Set up near a window or outdoors on a bright, overcast day to avoid harsh shadows.
  • Backdrop: A simple, non-distracting background works best. Consider using a plain wall or a piece of solid-colored fabric.

Staging Your Art

How you stage your Driftwood Gold Leaf piece can significantly impact the final image.

  • Positioning: Place your art so that it’s the focal point of the image. Experiment with angles to find the most flattering perspective.
  • Props: Use minimal props that complement but do not overshadow the artwork. Perhaps a small plant or a neutral-toned object.

Taking the Photo

Take the time to get several shots from different angles and adjustments.

  • Multiple Angles: Capture the piece from various angles to showcase its details.
  • Focus: Ensure your camera is focusing properly to capture the textures and gold leaf details.
  • Steady Shot: Use a tripod if necessary to keep your camera steady.

Editing for Perfection

Even the best photos can benefit from some editing. Here are a few tips:

  • Brightness/Contrast: Adjust to make the details stand out.
  • Crop: Ensure the focus remains on your artwork by cropping out unnecessary background.
  • Filters: Use subtle filters that enhance rather than overshadow your art.

Showcasing Your Creations on Pinterest

Pinterest is a visual platform, making it perfect for displaying Driftwood Gold Leaf art. Here’s how to make the most impact.

Optimal Image Sizes

Pinterest recommends using images with a 2:3 aspect ratio for the best visual appeal.

  • Dimensions: For photo-realistic images, aim for 1000×1500 pixels.

Descriptive Titles and Captions

When posting your images, use descriptive titles and captions to attract viewers.

  • Title: Create clear and enticing titles, e.g., “Custom Driftwood Gold Leaf Wall Art.”
  • Description: Include key details, techniques used, and inspiration behind the piece.

Keywords and SEO

Utilize keywords to make your posts discoverable.

  • Keywords: Think of what users might search for, such as “driftwood art,” “gold leaf craft,” or “coastal decor.”
  • Tags: Use relevant hashtags to increase visibility.

Engage and Interact

Engagement can boost your visibility on Pinterest.

  • Respond to Comments: Engage with viewers who comment on your pins.
  • Join Group Boards: Participate in Pinterest group boards related to art and crafts to expand your reach.

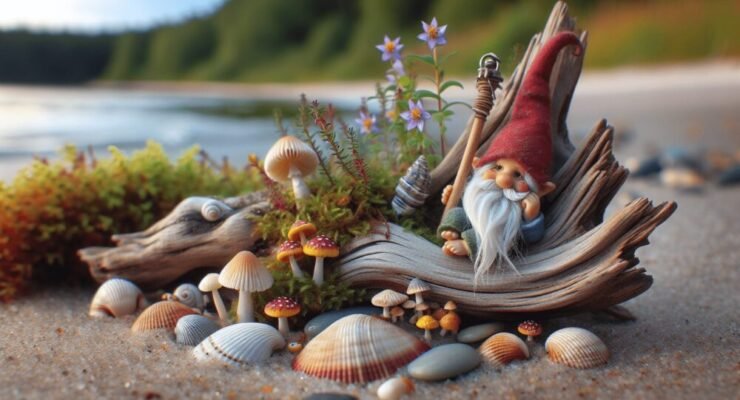
Inspiration and Ideas

Creating Driftwood Gold Leaf art provides endless possibilities, here are some ideas to spark your creativity.
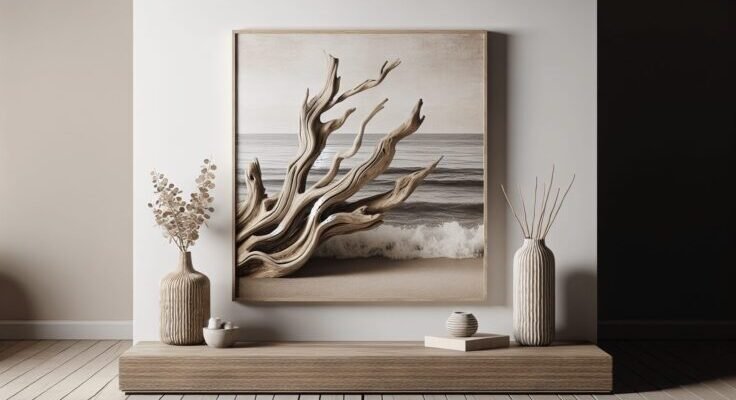
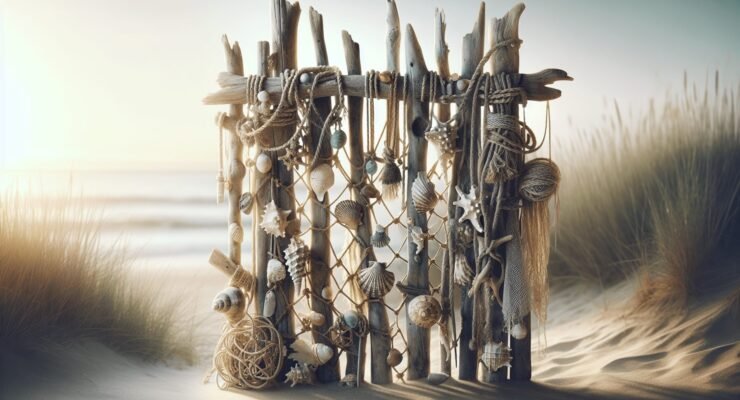
Wall Hangings

Turn your driftwood into stunning wall hangings. Create patterns, such as waves or geometric shapes, with the gold leaf, making for a striking wall art piece.

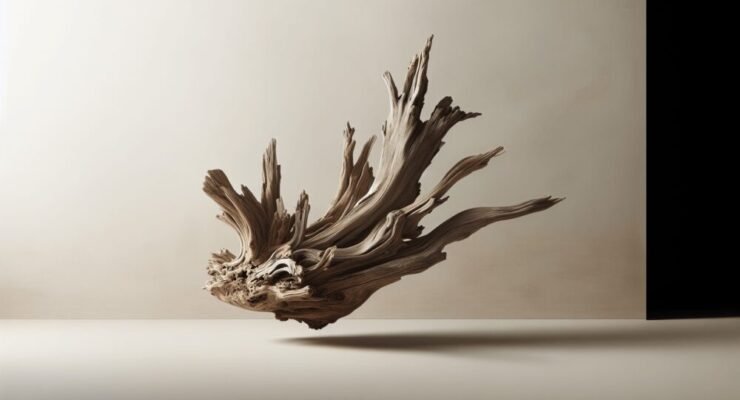
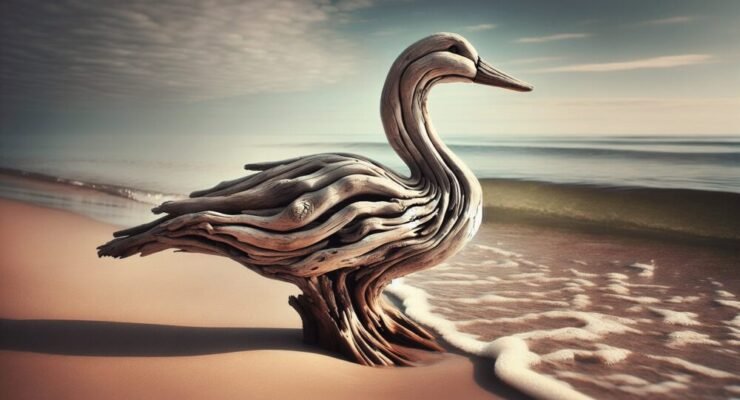
Sculptures and Figures

Use driftwood pieces to form sculptures or abstract figures, highlighting certain areas with gold leaf to draw attention and add a touch of elegance.
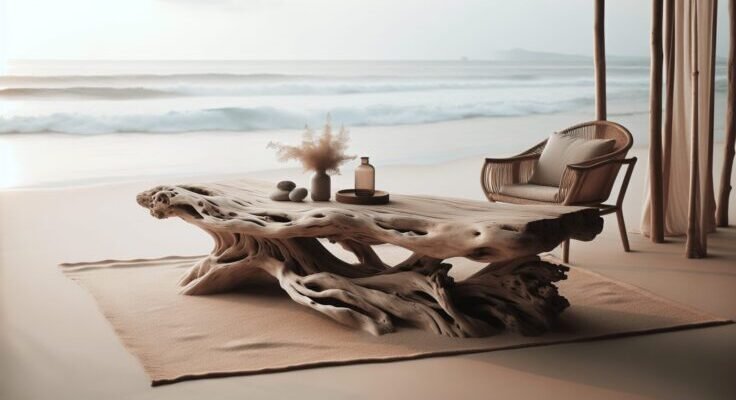
Home Décor Items

Create functional yet beautiful home décor items, such as candle holders, picture frames, or tabletop centerpieces adorned with gold leaf.
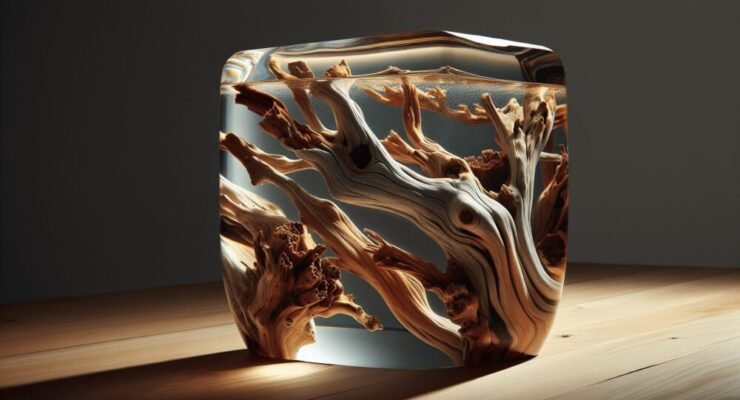
Mixed Media Art

Combine driftwood and gold leaf with other materials such as glass, resin, or paint. Create mixed media art that is as complex and layered as it is beautiful.

Conclusion

Driftwood Gold Leaf art is a rewarding and creative endeavor that combines the natural beauty of driftwood with the luxurious appeal of gold leaf. With the proper materials and techniques, you can craft stunning, one-of-a-kind pieces. Capturing these creations in photo-realistic images ensures they shine on platforms like Pinterest, reaching a wide audience and inspiring others.

By following this guide, you’ll have all the information needed to get started on your Driftwood Gold Leaf projects, from preparing your materials to showcasing your artwork. We hope you find joy and satisfaction in every step of your artistic journey. So, gather your driftwood, prepare your gold leaf, and let your creativity shine!

Filed Under: Driftwood Ideas Tagged With: Craft Project, DIY, Driftwood, Gold Leaf, home decor

Driftwood Table Decor

September 6, 2024 by admin

Have you ever looked at a piece of driftwood and wondered how you could transform it into something beautiful for your home? Driftwood table decor can offer a touch of nature’s beauty to your living spaces. With its rustic charm and unique textures, driftwood fits seamlessly into various home decor styles, from coastal to modern chic.

Driftwood Table Decor

What is Driftwood?

Driftwood refers to wood that has been washed ashore by rivers, lakes, or the ocean. Over time, it gets weathered and smoothened due to natural elements like wind, water, and sun. Each piece of driftwood tells a story, having traveled through waterways for years before finally coming to rest on shorelines.

Why Choose Driftwood for Your Table Decor?

Driftwood is not only aesthetically pleasing but also eco-friendly. Using driftwood in your decor repurposes nature’s debris into functional and beautiful art pieces. Moreover, driftwood boasts unique shapes, colors, and textures that make every piece original, bringing a one-of-a-kind element to your living space.

Types of Driftwood Table Decor

There are various forms and styles of driftwood decor that can be incorporated into your table settings. Here are some popular types:

Driftwood Centerpieces

A centerpiece is the focal point on a table, and driftwood makes an excellent option. You can either use a single large piece of driftwood or arrange smaller pieces for a more intricate design.

Driftwood Candle Holders

Imagine the captivating ambiance created by candles nestled in natural driftwood holders. These unique pieces add warmth and a touch of nature to any setting.

Driftwood Bowls

Driftwood bowls can be both decorative and functional. They can hold fruit, keys, or small trinkets while adding a rustic element to your table.

Driftwood Table Lamps

A driftwood table lamp can serve as a conversation piece. It combines functionality with artistic design, offering both light and style to your room.

Driftwood Picture Frames

Use driftwood to frame your cherished memories. A driftwood picture frame adds a natural and artistic flair to your photos and table setting.

How to Choose the Right Driftwood Pieces

Before you start crafting your driftwood table decor, it’s essential to choose the right pieces. Here are some tips to help you make your selection:

Size and Shape

  • Large Pieces: Ideal for centerpieces or table lamps.
  • Medium Pieces: Good for candle holders and smaller decor items.
  • Small Pieces: Perfect for intricate designs or details within a larger piece.

Texture and Color

Driftwood comes in various textures and shades. Opt for pieces that complement the existing decor in your home. Some pieces may be smoother, while others have a rougher texture. The color can range from bleached white to deep brown, offering diverse options to match your style.

Conditions to Avoid

Avoid driftwood that is too brittle, moldy, or has an unpleasant odor. These pieces may not be durable or could be difficult to clean.

Cleaning and Preparing Driftwood

Cleaning and preparing driftwood is a crucial step before turning it into decor. Proper cleaning ensures that the wood is free from dirt, pests, and any other unwanted particles.

Materials Needed for Cleaning

MaterialPurpose
BucketTo hold cleaning solution
BleachTo disinfect and clean the wood
Soft BrushFor scrubbing the wood surface
SandpaperFor smoothing the wood if needed

Cleaning Process

  1. Rinse: Rinse the driftwood under running water to remove loose dirt.
  2. Bleach Solution: Create a solution with one part bleach and nine parts water.
  3. Soak: Soak the driftwood in the bleach solution for 24 hours.
  4. Scrub: Use a soft brush to scrub the wood lightly.
  5. Rinse and Dry: Rinse the wood thoroughly with water and allow it to dry completely in the sun.

Driftwood Table Decor

DIY Driftwood Table Decor Projects

Transforming driftwood into table decor is a rewarding DIY project. Here are some simple yet creative ideas:

Driftwood Candle Holder

Materials Needed:

  • Driftwood piece
  • Drill with a hole saw attachment
  • Tea light candles
  • Sandpaper

Steps:

  1. Select the Driftwood Piece: Choose a stable piece of driftwood that can lay flat on your table.
  2. Drill Holes: Using the hole saw attachment, drill holes that are deep and wide enough to securely fit tea light candles.
  3. Sand: Sand the edges of the holes to smoothen any rough areas.
  4. Insert Candles: Place tea light candles into the holes.

Driftwood Centerpiece

Materials Needed:

  • Multiple pieces of driftwood
  • Hot glue gun or wood glue
  • Sandpaper
  • Decorative items (like seashells or small plants)

Steps:

  1. Arrange the Pieces: Lay out the driftwood pieces in a design that you find appealing.
  2. Attach the Pieces: Use a hot glue gun or wood glue to attach the driftwood pieces together.
  3. Sand: Smooth any rough edges with sandpaper.
  4. Decorate: Add decorative items to enhance the centerpiece.

Driftwood Picture Frame

Materials Needed:

  • Driftwood pieces
  • Picture frame (to use as a base)
  • Hot glue gun or wood glue
  • Sandpaper

Steps:

  1. Prepare the Frame: Remove the glass and backing from the picture frame.
  2. Arrange the Driftwood: Lay out the driftwood pieces around the frame.
  3. Attach: Use a hot glue gun or wood glue to attach the driftwood to the frame.
  4. Sand: Smooth any rough edges with sandpaper.
  5. Reassemble: Place the glass and backing back into the frame.

Where to Display Your Driftwood Table Decor

Knowing where to place your driftwood decor can enhance its impact. Here are some ideas:

Dining Table

A driftwood centerpiece or candle holder on your dining table can create a cozy and inviting atmosphere.

Coffee Table

Driftwood decor on a coffee table can serve as a conversation starter and add aesthetic value to your living room.

Bedroom Nightstand

Incorporate driftwood decor on your nightstand for a touch of nature in your personal space.

Outdoor Patio

Bring the outdoors in by using driftwood decor on your patio table, enhancing your outdoor living area.

Enhancing Your Decor with Driftwood

Driftwood table decor can be enhanced by combining it with other natural elements and accessories.

Combine with Greenery

Adding plants or succulents to your driftwood decor can bring a fresh and vibrant feel.

Use With Natural Textiles

Pair your driftwood pieces with linens, burlap, or other natural textiles for a cohesive, earthy aesthetic.

Incorporate Lighting

Using fairy lights or candles can bring a magical glow to your driftwood decor, making it perfect for evening settings.

Caring for Your Driftwood Decor

Like any other decor item, driftwood pieces require care to maintain their beauty and longevity.

Dusting

Regularly dust your driftwood decor using a soft cloth to keep it clean.

Avoiding Moisture

Keep your driftwood decor dry, as excessive moisture can cause the wood to deteriorate.

Occasional Cleaning

If needed, occasionally clean your driftwood with a damp cloth and allow it to dry completely.

Inspiration and Trends in Driftwood Decor

For those looking for fresh ideas, here are some trends and sources of inspiration in driftwood decor:

Boho Chic

Driftwood fits seamlessly into boho chic decor, which emphasizes natural elements and eclectic styles.

Coastal Aesthetic

A coastal aesthetic relies heavily on natural materials, making driftwood an ideal component.

Minimalist Approach

Even in minimalist designs, a single piece of driftwood can serve as a focal point without overwhelming the space.

Creating Photorealistic Images for Pinterest

To showcase your driftwood decor ideas on Pinterest, high-quality images are essential. Generating photorealistic images can make your DIY projects stand out. Consider the following steps:

Setting Up Your Shot

  • Lighting: Natural lighting works best. Make sure the area is well-lit but avoid direct sunlight that can cast harsh shadows.
  • Background: Keep the background simple to make the driftwood the focal point.
  • Props: Use complementary props like candles or small plants to enhance the visual appeal.

Using Image Editing Software

Editing software like Adobe Photoshop or Lightroom can help improve the quality of your images. Adjust brightness, contrast, and colors to make your driftwood decor pop.

Sizing for Pinterest

Pinterest recommends an image size of 1000×1500 pixels to ensure your images look their best and get more engagement.

Generate multiple angles and close-up shots to offer a detailed view of your driftwood decor.

Conclusion

Driftwood table decor offers endless possibilities for adding a touch of nature to your home. Each piece of driftwood is unique, bringing its own story and character. Whether you’re creating a centerpiece, candle holder, or picture frame, driftwood can enhance any space with its rustic charm.

By selecting the right pieces, properly preparing and cleaning them, and using a little creativity, you can craft beautiful and functional driftwood decor. Display these pieces on dining tables, coffee tables, nightstands, or outdoor patios to elevate your home decor. Don’t forget to take high-quality, photorealistic images to share your creations with others on platforms like Pinterest.

Now that you’re equipped with the knowledge and inspiration, it’s time to start your driftwood decor project. Enjoy the process and the beautiful results that follow!

Filed Under: Driftwood Ideas Tagged With: Coastal Style, DIY, Driftwood, Rustic Design, Table Decor

Driftwood Table

September 6, 2024 by admin

Have you ever wondered what it would be like to bring a piece of nature into your home in the form of a beautifully crafted piece of furniture? Crafting or purchasing a driftwood table can be a rewarding way to do just that. Whether you are looking for a project or seeking to add a unique touch to your living space, driftwood tables offer a perfect blend of rustic charm and practical functionality.

Driftwood Table

What is Driftwood?

Driftwood is wood that has been washed up on shorelines by the action of winds, tides, or waves. Over time, the wood undergoes a natural weathering process that gives it a distinct, worn appearance. This process smoothens the wood and often results in beautifully unique pieces that retain a sense of natural artistry.

Why Choose Driftwood?

Driftwood is not only beautiful; it’s also eco-friendly. By using driftwood, you are recycling a natural material, reducing the need for newly manufactured wood products. Additionally, driftwood tables can add a touch of nature-inspired elegance to any space, making them perfect focal points for homes or offices.

The Appeal of Driftwood Tables

Driftwood tables are unique, each one telling its own story through its distinct texture and shape. These pieces are versatile and can complement various interior design styles, from rustic and coastal to modern and minimalist.

The Beauty of Imperfection

One of the main draws of driftwood is its “imperfect” nature. The irregular shapes, unique textures, and weathered look contribute to its charm. No two pieces of driftwood are alike, making each table a one-of-a-kind piece of art.

Creating Your Own Driftwood Table

Building a driftwood table can be a fulfilling DIY project. Not only will you gain a functional piece of furniture, but you’ll also have the satisfaction of creating something with your own hands.

Materials You’ll Need

Before you start, gather the necessary materials. Here’s a basic list to get you started:

MaterialQuantityPurpose
Driftwood PiecesVariesTable top surface or legs
Wooden PlanksVariesSupport and structure
Screws or NailsSeveralSecuring pieces together
Sandpaper2-3 sheetsSmoothing rough edges
Wood Glue1 bottleAdditional securing
Finish/Sealant1 canProtecting the wood
Saw1Cutting pieces to size
Drill1Creating holes for screws/nails
Paintbrushes2-3Applying finish/sealant
Measuring Tape1Ensuring accurate dimensions

Selecting Driftwood

Selecting the right pieces of driftwood is essential for creating a sturdy and visually appealing table. Look for pieces that are dry, sturdy, and free of any major cracks. Driftwood found on beaches often needs to be cleaned and dried thoroughly before use.

Design and Assembly

Sketch out a design plan before you start assembling your table. This will help you visualize the final product and make any necessary adjustments early on. Whether you aim for a simple, minimalistic design or something more intricate, having a clear plan will make the assembly process smoother.

  1. Frame Construction: Start by constructing the table’s frame using wooden planks. Ensure the frame is well balanced and sturdy.
  2. Driftwood Placement: Arrange the pieces of driftwood on top of the frame to create the tabletop surface. This may require some trial and error to find the best layout.
  3. Securing Driftwood: Once you’re satisfied with the layout, secure the driftwood pieces to the frame using screws or nails. Apply wood glue between pieces for extra stability.
  4. Sanding: Smooth out any rough edges with sandpaper. This step is crucial for both the appearance and safety of the table.
  5. Finishing Touches: Apply a wood finish or sealant to protect the driftwood and enhance its natural beauty. Multiple coats may be required for the best result.

DIY vs. Buying Ready-Made

While creating your own driftwood table can be a rewarding experience, it may not be for everyone. If you lack the time, tools, or skills required, you might consider purchasing a ready-made driftwood table. Many artisans specialize in creating these unique pieces, and finding one that suits your taste and budget can be relatively easy.

Enhancing Your Driftwood Table

Once you have your driftwood table, there are various ways to enhance and maintain its beauty.

Choosing the Right Location

Placement is key to showing off your driftwood table. Consider the room’s overall aesthetic and how the table can complement or contrast with existing furniture.

Complementary Decor

Decorate your table with items that add to its natural charm. Think along the lines of seashells, candles, or potted plants. These can enhance the coastal or rustic vibe that driftwood naturally exudes.

Maintenance Tips

To keep your driftwood table looking its best, regular maintenance is important. Dust the table regularly and reapply sealant annually to protect the wood from wearing down.

Driftwood Table

Conclusion

A driftwood table can be a captivating addition to any home or office. Whether you choose to make your own or purchase a ready-made piece, this unique furniture can bring a touch of nature indoors, offering both beauty and functionality. By understanding the various elements—from material selection to placement and maintenance—you can ensure that your driftwood table remains a stunning centerpiece for years to come.

Filed Under: Driftwood Ideas Tagged With: DIY, Driftwood, furniture, Rustic Decor, Table

Driftwood Shelves

September 5, 2024 by admin

Have you ever found yourself wanting a unique and natural addition to your home décor? Imagine creating beautiful, rustic shelves using something as simple and organic as driftwood. Driftwood shelves not only bring a touch of nature into your home but also add texture and warmth to your living space.

Driftwood Shelves

What Exactly is Driftwood?

Driftwood refers to wood that has been washed onto shore by the action of winds, tides, or waves. This wood often has a weathered, gray, and smooth appearance due to prolonged exposure to water and sand. Its natural, raw beauty makes it a perfect material for DIY home projects, especially shelves.

Why Choose Driftwood for Shelves?

Driftwood is a sustainable material that can be sourced naturally from beaches and riverbanks. It’s also incredibly versatile and can be shaped or arranged in various ways to suit different types of interior design styles. Additionally, using driftwood can help you create a relaxed, beachy vibe or a rustic, nature-inspired look in your home.

The Benefits of Driftwood Shelves

Using driftwood for your shelves comes with several advantages:

  1. Eco-friendly: Driftwood is a form of recycled material, making it a green choice for home projects.
  2. Durability: It’s surprisingly durable given its weathered appearance.
  3. Uniqueness: No two pieces of driftwood are the same, guaranteeing that your shelves will be one-of-a-kind.
  4. Aesthetic appeal: Driftwood can add a natural, rustic charm to any room.

How to Find and Prepare Driftwood

When planning to make driftwood shelves, the first step is sourcing the right pieces of wood. Here are some tips on how to find and prepare driftwood for your shelving project.

Finding Driftwood

Search along beaches, riverbanks, and lakeshores. Look for pieces that are dry, lightweight, and free from rot. Remember to check for local regulations about collecting driftwood to ensure you’re following the law.

Cleaning and Preparing Driftwood

It’s essential to clean your driftwood thoroughly before using it to make shelves.

  1. Rinse and Soak: Rinse off any sand or debris. Soak the driftwood in a mixture of water and bleach (about 1 cup of bleach per gallon of water) for 24 hours. This helps to disinfect and kill any bacteria or pests living in the wood.
  2. Drying: Let the driftwood dry completely in the sun. This process may take a few days, depending on the size of the wood.
  3. Sanding: Sand down any rough edges to create a smooth surface. This makes the wood safer to handle and gives it a more refined appearance.

Designing Your Driftwood Shelves

Designing driftwood shelves involves creativity and a bit of planning. Here are several design considerations to keep in mind.

Types of Shelves

There are various types of driftwood shelves you can create. The choice depends on your preference and the space where you’ll install them.

Shelf TypeDescription
FloatingShelves that appear to ‘float’ on the wall without visible brackets or supports.
BracedShelves that use visible brackets for support.
CornerShelves designed to fit into the corners of a room, optimizing space.
HangingShelves suspended by ropes or cables, adding a rustic or nautical theme to the room.

Measuring and Cutting Driftwood

Ensure that your driftwood pieces are cut to the desired length. Use a saw to cut the wood carefully, keeping in mind the final placement of the shelves. You might want to measure the wall space beforehand and cut the driftwood accordingly to ensure a perfect fit.

Arranging the Shelves

Arrange the driftwood pieces in a way that complements your existing décor. You can create asymmetrical patterns for a modern look or go for a more traditional arrangement with uniformly spaced shelves.

Installation of Driftwood Shelves

Installing driftwood shelves involves attaching the shelves to the wall safely and securely. Here are some simple steps to guide you.

Tools You Will Need

  • Drill
  • Screws
  • Level
  • Stud Finder
  • Brackets (if using braced shelves)

Installation Steps

  1. Locate Studs: Use a stud finder to locate the studs on the wall where you want to install your shelves.
  2. Mark Placement: Mark the placement of the brackets or the floating shelf mounts on the wall.
  3. Drill Holes: Drill holes in the wall according to the marks.
  4. Attach Brackets or Mounts: Secure the brackets or mounts to the wall using screws.
  5. Mount Shelves: Place the prepared driftwood on the mounts or brackets and secure them in place if necessary.

Driftwood Shelves

Maintenance of Driftwood Shelves

Driftwood shelves require minimal maintenance to keep them looking their best. Dust them regularly with a soft, dry cloth to prevent the buildup of dirt. If the wood begins to look dry or faded, you can apply a mixture of beeswax and mineral oil to restore its luster.

Regular Checkups

Periodically check the stability of the shelves and the brackets or mounts. Tighten any loose screws and make sure the shelves remain securely in place.

Styling Your Driftwood Shelves

Once your driftwood shelves are up, the fun part begins: styling them! Here are some ideas to inspire you.

Decorative Items

Consider placing decorative items that complement the natural look of driftwood. Items such as:

  • Potted plants
  • Ceramic vases
  • Photo frames
  • Books

Balancing Aesthetics and Functionality

It’s crucial to strike a balance between aesthetics and functionality. Avoid overcrowding the shelves with too many items, as this can detract from the natural beauty of the driftwood.

Themed Shelves

Create themed shelves based on seasons or holidays. For example, you can feature nautical items like shells and starfish during the summer or cozy candles and pinecones during the winter.

Conclusion

Creating driftwood shelves is a rewarding DIY project that brings nature indoors and adds charm to your home. The natural beauty, uniqueness, and eco-friendly attributes of driftwood make it an excellent material for shelves. By following simple steps for finding, preparing, designing, and installing your driftwood shelves, you can create a stylish and functional addition to your living space, all while expressing your creativity and personal style. Happy crafting!

Filed Under: Driftwood Ideas Tagged With: DIY, Interior Design, Rustic, Shelves

Driftwood Goose

September 5, 2024 by admin

Have you ever stumbled upon a piece of driftwood during a beach walk and wondered about its potential? Driftwood has a unique charm, shaped by natural elements into elegant forms that fire up the imagination. One of the most captivating and simple creations you can craft from driftwood is a “Driftwood Goose.” It’s not just about art; it’s about connecting with nature and letting your creativity flow.

Driftwood Goose

What is a Driftwood Goose?

A Driftwood Goose is a whimsical sculpture created using pieces of driftwood collected from beaches, lakesides, or river banks. These sculptures often resemble geese or other birds, capturing a sense of movement and grace. They can serve as captivating décor pieces for your home or garden, reflecting both artistic flair and an appreciation for nature.

A Blend of Art and Nature

Crafting a Driftwood Goose is an exercise in finding harmony between natural randomness and your artistic intent. Each piece of driftwood is unique, molded by water, wind, and time. Your challenge and delight lie in seeing the potential shapes within each piece and assembling them into a coherent, lifelike sculpture.

Collecting Driftwood

Collecting driftwood is the first step in creating your Driftwood Goose. This process can be as enjoyable as the crafting itself, offering you a chance to explore nature and find intriguing pieces of wood.

Where to Find Driftwood

  • Beaches: Coastal areas are the most common locations for driftwood. The ebb and flow of tides wash up a variety of pieces.
  • Lakes: Freshwater lakes can also be fruitful hotspots, offering smoother wood due to the gentler waters.
  • Rivers: Riverbanks, especially after floods, can leave behind unique driftwood fragments.

Selecting the Right Pieces

Look for pieces that inspire you. A curved piece may serve as a goose’s neck, a broad wooden fragment could be an excellent body, and smaller, slender pieces can form legs or wings. Focus on the piece’s shape, size, and texture, as these elements will bring your creation to life.

Key AttributesDescription
ShapeCurvature, irregularities, and natural forms that suggest parts of a goose.
SizeVaried sizes, from small details like legs and beaks to larger body sections.
TextureSmoothness or roughness, often softened after natural water erosion.

Preparing Your Driftwood

Before you start assembling your pieces, it’s crucial to clean and prepare the driftwood. This step ensures your sculpture is durable and free of pests.

Cleaning Driftwood

  1. Rinse Thoroughly: Use fresh water to rinse off any salt, sand, or debris.
  2. Soak in Water: Submerge the driftwood in a large container of water for 1-2 weeks to remove any remaining salt.
  3. Brush and Scrub: After soaking, use a brush to scrub away additional impurities.
  4. Dry Completely: Leave the driftwood to dry completely in a warm, dry place. This might take several days or even weeks, depending on the size and thickness of your pieces.

Treating for Longevity

To ensure your Driftwood Goose lasts, you may opt to treat the wood:

  • Bleach Solution: A mild bleach solution can help sterilize the wood.
  • Sealant or Varnish: Applying a wood sealant or varnish can protect the sculpture from moisture and decay.

Creating Your Driftwood Goose

Now that your driftwood is ready, it’s time to bring your goose to life. This process can be both intuitive and methodical.

Planning Your Sculpture

Start by laying out your driftwood pieces on a flat surface. Experiment with different arrangements to see how the pieces fit together. Think about the anatomy of a goose and try to visualize how the driftwood’s natural forms correspond to different parts.

Tools and Materials

To assemble your driftwood goose, you’ll need:

  • Epoxy Resin or Wood Glue: For strong bonds between pieces.
  • Screws and Nails: Additional support for larger pieces.
  • Drill: To make holes for screws if needed.
  • Sandpaper: For smoothing any rough edges.
  • Paints and Brushes: Optional, if you wish to add colors or details.

Assembling the Goose

  1. Body: Start with the largest piece for the body. This will be the anchor for the rest of the sculpture.
  2. Neck and Head: Select a slender, curved piece for the neck. Attach a smaller piece for the head, considering the angle and posture to give it a natural look.
  3. Wings and Tail: Choose flatter pieces for the wings. Attach them at slight angles to simulate resting or flight.
  4. Legs: Smaller, thinner pieces can be used for legs. Ensure they are sturdy enough to support the sculpture.
  5. Finishing Touches: Add any small details like eyes or additional feathers using smaller driftwood fragments or paint.

Securing the Pieces

  • Apply wood glue or epoxy resin to attach driftwood pieces. Hold each piece in place until the adhesive sets.
  • For extra support, use screws or nails. Drill pilot holes to avoid splitting the wood.

Driftwood Goose

Displaying Your Driftwood Goose

Once your sculpture is complete, think about how to display it. A well-chosen location can enhance its beauty and charm.

Indoor vs. Outdoor Display

  • Indoor: Place your Driftwood Goose on a shelf, mantel, or as a centerpiece. Ensure it’s in a dry location to prevent decay.
  • Outdoor: Position it in your garden, patio, or porch. Use a waterproof sealant to prolong its lifespan against the elements.

Highlighting Your Art

Consider aspects like lighting and background to make your Driftwood Goose stand out. Soft, natural light can highlight the wood’s texture and the sculpture’s graceful lines.

Driftwood Goose Ideas and Inspirations

Every piece of driftwood tells a story, and every Driftwood Goose is a unique expression of that story. Here are some variations and inspirations to stir your creativity:

Incorporating Other Natural Elements

Combine driftwood with other natural materials like stones, shells, or feathers. This can add an extra layer of texture and interest to your sculpture.

Themed Creations

Create themed Driftwood Geese for different seasons or occasions. For instance, adorn a summer goose with seashells or decorate a winter goose with painted snowflakes.

Personalized Touches

Personalize your Driftwood Goose with a name tag or a small plaque. You can also paint patterns or symbols that resonate with you on the wood.

Caring for Your Driftwood Goose

To keep your Driftwood Goose looking its best, regular maintenance is key.

Regular Cleaning

Dust your sculpture regularly with a dry cloth. For outdoor sculptures, occasionally rinse with water and allow to dry completely.

Inspect for Damage

Periodically check for signs of wear or damage. Reapply sealant as needed to maintain the wood’s integrity, especially if it’s exposed to the elements.

Sharing Your Creation on Pinterest

A Driftwood Goose can be a fantastic visual addition to Pinterest boards. To create photo-realistic images that capture your sculpture’s charm:

Setting Up Your Photo

  • Background: Use a simple, neutral background to keep the focus on your sculpture.
  • Lighting: Natural light works best. Avoid harsh shadows by shooting during the golden hours (early morning or late afternoon).
  • Angles: Capture your Driftwood Goose from multiple angles to showcase its full form and details.

Editing for Perfection

After taking your photos, use editing tools to adjust brightness, contrast, and sharpness. Ensure the colors are true to life and the details are vivid.

Pinterest Image Size

For Pinterest, the recommended image size is 1000×1500 pixels. Ensure your images meet this specification for optimal display and engagement.

The Joy of Driftwood Crafting

Creating a Driftwood Goose is more than just making a sculpture; it’s about engaging with nature, exercising creativity, and producing something unique and enduring. Each piece of driftwood carries a history, and by transforming it into art, you contribute to its story.

Whether you’re displaying your Driftwood Goose in your home, garden, or sharing it with the world on Pinterest, it stands as a testament to the beauty of nature and the power of creative expression. So next time you spot a piece of driftwood, you’ll see more than just wood—you’ll see the beginning of a new artistic journey.

Filed Under: Driftwood Ideas Tagged With: Craft Projects, DIY, Driftwood, Goose Sculpture, Handmade Art

Driftwood Signs

September 4, 2024 by admin

Have you ever considered adding a charming rustic touch to your home, garden, or business with driftwood signs? Driftwood signs are a beautiful way to showcase your creativity while incorporating the natural beauty of weathered wood. They evoke feelings of tranquility and a connection to nature, making them a popular choice for decorating spaces both indoors and outdoors.

What is Driftwood?

Driftwood refers to wood that has been washed onto shore by the action of winds, tides, or waves. It often has a smooth, weather-beaten surface after being subjected to the elements of nature for a long period, giving it a unique and organic appearance. Driftwood can come from a variety of sources, including trees, branches, or even remnants of wooden boats.

Types of Driftwood

Driftwood can vary widely in its characteristics based on its source and the environmental conditions it has endured. Below are different types of driftwood you may encounter:

TypeCharacteristics
HardwoodDense, strong, and often darker in color
SoftwoodLighter in weight, color, and less dense
Lake DriftwoodUsually softer due to prolonged water exposure
Ocean DriftwoodOften polished and smooth due to tidal action

Why Choose Driftwood Signs?

Driftwood signs add a unique, rustic charm that can’t be replicated by synthetic or new wood materials. Their weathered appearance adds character to any space, and each piece of driftwood is unique, ensuring that no two signs are the same. They also offer an eco-friendly option for decor, as they utilize reclaimed materials that have been naturally processed by the environment.

Benefits of Driftwood Signs

BenefitDescription
Eco-FriendlyUses reclaimed natural materials, reducing waste
Unique DesignEach piece of driftwood has its own unique shape, texture, and color
VersatileSuitable for various environments, from coastal homes to urban gardens
DurableNaturally resistant to the elements, making it ideal for both indoor and outdoor use

Driftwood Signs

How to Create Driftwood Signs

Creating your own driftwood sign can be a rewarding project that allows you to personalize your decor in a meaningful way. Whether you’re looking to add a welcome sign to your front door or a motivational quote to your living room, the possibilities are endless.

Materials You’ll Need

To get started, gather the following materials:

  • Pieces of driftwood
  • Sandpaper
  • Paint (acrylic or outdoor paint)
  • Brushes
  • Stencils (optional)
  • Sealer (optional, for outdoor use)
  • Hanging accessories (hooks, twine, etc.)

Step-by-Step Guide

  1. Select Your Driftwood: Choose pieces of driftwood that fit the size and shape you need for your sign. Ensure the wood is dry and free from any marine debris.

  2. Prepare the Wood: Clean the driftwood by brushing off any loose particles. Lightly sand the surface to remove splinters and create a smooth area for painting.

  3. Design Your Sign: Plan what you want your sign to say. You can use stencils for precision or freehand your design if you prefer a more rustic look.

  4. Paint Your Sign: Use acrylic or outdoor paint to apply your design. Multiple coats may be needed for bright colors.

  5. Seal Your Sign: If your driftwood sign will be placed outdoors, apply a wood sealer to protect it from the elements.

  6. Attach Hanging Accessories: Depending on where you’ll display your sign, attach hooks, twine, or other hanging accessories.

Creating Pinterest-Ready Images of Driftwood Signs

Sharing your driftwood sign creation on Pinterest can inspire others and showcase your work. Here’s how you can generate photo-realistic images for Pinterest:

Photography Tips

  1. Lighting: Use natural light wherever possible to highlight the texture and color of the driftwood.
  2. Background: Choose a rustic or neutral background that complements the style of your sign.
  3. Composition: Focus on the angles that best showcase your artwork. Close-up shots can highlight details, while wider shots can show context.

Image Editing Tools

Use tools like Adobe Photoshop, Canva, or other photo editing software to enhance your images. You can adjust lighting, contrast, and add text overlays to make your images Pinterest-worthy.

Optimal Image Size

Pinterest images should ideally be vertical, with a recommended size of 1000×1500 pixels. This ensures your images fit well within the Pinterest feed, making them more likely to be pinned and shared by others.

Driftwood Signs

Popular Uses for Driftwood Signs

Driftwood signs are incredibly versatile and can be tailored to suit many different environments and purposes. Here are a few popular uses:

Home Decor

Driftwood signs can add a natural, rustic element to your home decor. Use them to display family names, inspirational quotes, or welcome messages. They work well in living rooms, entryways, and even bathrooms.

Garden Decor

Enhance your garden with driftwood signs that label different plants, welcome guests, or add whimsical touches to your outdoor space. They blend seamlessly with nature and add an organic feel to your garden.

Business Signage

For businesses, driftwood signs can set you apart with their unique, handcrafted appearance. Use them for shop names, directional signs, or menu boards in cafés and restaurants, especially those with a coastal or rustic theme.

Wedding Decor

Driftwood signs are a popular choice for wedding decor, adding a touch of romance and natural beauty. They can be used to direct guests, mark seating arrangements, or display the couple’s names and wedding date.

Preserving and Maintaining Driftwood Signs

To ensure your driftwood sign retains its beauty over time, follow these maintenance tips:

Indoor Use

For indoor signs, the primary concern is dust and dirt. Regularly wipe your sign with a dry cloth. Avoid using water or cleaning solutions which could damage the paint or wood.

Outdoor Use

Outdoor signs will face more harsh conditions. Apply a wood sealer annually to protect against moisture and UV rays. If your sign is exposed to extreme weather, consider placing it in a more sheltered area.

Where to Find Driftwood

If you’re not near a beach or lake, you can still find driftwood from various sources:

Local Sources

  • Beaches and Lakeshores: Collect driftwood that has naturally washed ashore.
  • Forest Trails: Look for fallen branches and pieces of wood that have naturally weathered.

Online Sources

If you can’t gather driftwood locally, many online retailers sell driftwood pieces. Ensure you choose reputable sources that responsibly harvest driftwood.

Trends in Driftwood Decor

Driftwood has become a popular material not just for signs, but for a variety of decor items. Here are some trending uses of driftwood in home decor:

Shelving

Driftwood shelves add a rustic touch to any room, providing both functionality and aesthetic appeal.

Furniture

Driftwood is used to craft unique furniture pieces like coffee tables, benches, and headboards.

Art

Driftwood can be used to create stunning wall art, sculptures, and other decorative items that make a statement.

Inspiring Ideas for Driftwood Signs

If you’re searching for ideas to get started on your driftwood sign project, consider these inspirations:

Welcome Signs

Create a warm and inviting welcome sign for your home or garden using driftwood’s natural charm.

Inspirational Quotes

Paint meaningful quotes or phrases that uplift and inspire.

Custom Names

Personalize your spaces with driftwood signs featuring your family name or the names of loved ones.

Directional Signs

Use driftwood to craft rustic directional signs for events, gardens, or large properties.

Conclusion

Crafting driftwood signs is a fulfilling way to add a touch of nature and personality to your spaces. Whether you’re a seasoned crafter or a beginner, the materials are accessible, the process is straightforward, and the results are uniquely beautiful. So, gather your tools and some driftwood, and let your creativity flow!

Thank you for reading about driftwood signs. I hope you feel inspired to create your own, whether to beautify your home, garden, or even as gifts for friends and family. Your space will soon have a distinctive and charming new addition that brings the tranquility and beauty of nature right to your doorstep.

Filed Under: Driftwood Ideas Tagged With: crafts, DIY, Driftwood, Rustic Decor, Signs

Driftwood Shelf

September 3, 2024 by admin

Have you ever strolled along the beach, admiring the beautiful pieces of driftwood washed ashore by the tides? Driftwood possesses a unique charm, weathered by the sea, sun, and sand, and it can bring a touch of rustic beauty into your home when transformed into functional décor. One fantastic item you can craft from this natural wonder is a driftwood shelf. Not only is it a visually striking piece, but it also infuses your space with a sense of nature and history.

What is Driftwood?

Driftwood refers to wood that has been washed onto shorelines, banks, or beaches by winds, tides, or waves. This wood often comes from trees that have fallen into rivers or oceans, where they undergo a process of natural treatment involving water and sand. This creates the distinctive weathered look that makes driftwood so appealing for various decorative purposes.

Why Use Driftwood for Shelves?

Unique Aesthetics

No two pieces of driftwood are identical, making each driftwood shelf a one-of-a-kind creation. The natural contours, colors, and textures offer a rustic aesthetic that is hard to replicate with synthetic materials.

Eco-Friendly

Using driftwood is an environmentally friendly choice. It involves repurposing natural materials that would otherwise go to waste. You are reducing the demand for new timber, which helps in preserving our forests and reducing deforestation.

Versatility

Driftwood shelves can fit into various interior design styles, from coastal-themed homes to rustic or even minimalist settings. Their natural look adds warmth and a touch of nature to any room.

Driftwood Shelf

Gathering Driftwood

Before you start building your driftwood shelf, you need to find the perfect pieces. Here’s how you can do it:

Where to Find Driftwood

While beaches are the most common places to find driftwood, you can also find them near rivers, lakes, and even in wooded areas close to water bodies.

Legal Considerations

Always check local regulations before collecting driftwood. Some beaches and areas have rules protecting natural resources, and you could face fines if caught taking driftwood illegally.

Selecting the Right Pieces

When searching for driftwood, look for pieces that are sturdy and free of rot or infestations. The best pieces are those that have been weathered smooth by water and sand but maintain structural integrity.

Preparing Driftwood

Once you’ve collected your driftwood, there’s some preparation needed before it’s ready to be transformed into a shelf.

Cleaning the Wood

Start by scrubbing away any dirt, sand, and salt residue with a stiff brush. You might also need to rinse it with freshwater to get rid of any remaining debris. Let the wood dry completely in the sun.

Sanitizing the Wood

To ensure that your driftwood is free from pests and bacteria, you can soak it in a mixture of water and bleach (1:9 ratio) for a few hours. Rinse thoroughly and allow it to dry thoroughly before moving on to the next step.

Finishing Touches

Sanding the driftwood helps to smooth out rough edges and splinters. Depending on the look you want to achieve, you can sand your driftwood lightly for a more natural appearance or more extensively for a polished finish.

Driftwood Shelf

Building Your Driftwood Shelf

Now, let’s move on to the fun part—constructing your driftwood shelf!

Materials Needed

MaterialsPurpose
Driftwood piecesMain material for the shelf
Screws or nailsFastening the driftwood together
Brackets or supportsSecuring the shelf to the wall
Wood glueAdditional bonding strength
SandpaperSmoothing the driftwood pieces
Measuring tapeAccurate measurements
Saw (if needed)Cutting wood to size
DrillCreating screw holes

Step-by-Step Instructions

1. Design Your Shelf

Start by sketching a simple design for your shelf. Will it be a single piece of driftwood mounted to the wall, or will you craft a multi-level structure? Consider the space where you plan to install the shelf and measure it precisely.

2. Measure and Cut Wood

Using a measuring tape, mark the driftwood pieces to the required lengths. If you need to cut any piece to size, use a saw to make precise cuts. Sand the cut edges smooth.

3. Arrange Your Pieces

Lay out your pieces to see how they fit together. Adjust as necessary to ensure a level surface and aesthetically pleasing composition.

4. Assemble the Shelf

Using screws or nails, attach the pieces of driftwood together according to your design. For extra strength, apply wood glue to the joints before fastening them.

5. Attach Brackets or Supports

Secure brackets or supports to the back of the shelf. Make sure they are evenly spaced to distribute weight effectively.

6. Install the Shelf

Using a drill, create holes in the wall where you want to mount the shelf. Insert wall anchors if necessary, then screw the brackets or supports into the wall. Finally, mount your driftwood shelf securely.

Styling Your Driftwood Shelf

A driftwood shelf is only as beautiful as what you put on it. Here are some ideas for styling your new piece:

Books and Plants

Books and small plants can add life and functionality to your driftwood shelf. The green of the plants complements the natural wood, creating a harmonious look.

Coastal Décor

If you love the ocean, fill your shelf with shells, coral, and other coastal decorations. This theme ties in perfectly with the natural origins of the driftwood.

Minimalist Approach

For a more minimalist aesthetic, use fewer items, ensuring each piece stands out. Neutral colors and simple designs work best with this approach.

Maintaining Your Driftwood Shelf

Regular Cleaning

Dust and clean your driftwood shelf regularly. Use a soft cloth to wipe down the surface. Avoid using harsh chemicals that could damage the wood.

Inspecting for Wear

Periodically check the shelf for any signs of wear or damage. Tighten any loose screws and replace any parts that show significant deterioration.

Protection from Elements

If your driftwood shelf is placed outdoors or in a damp area, consider applying a waterproof sealant to protect it from the elements.

Benefits of DIY Projects

Creativity and Personalization

Creating a driftwood shelf allows you to express your creativity and personalize your space. Every decision, from the pieces of wood you select to how you arrange and decorate the final product, reflects your unique style.

Skills and Knowledge

Engaging in DIY projects enhances your skills and knowledge. Through the process, you learn about material properties, construction techniques, and design principles.

Sense of Accomplishment

Completing a DIY project provides a sense of accomplishment. Seeing a functional and beautiful object that you created with your own hands can be deeply satisfying.

Conclusion

Crafting a driftwood shelf is an enriching and rewarding experience. It allows you to bring a piece of nature into your home, creating a functional and aesthetically pleasing item with your unique touch. Whether you’re new to DIY or a seasoned crafter, this project offers an excellent opportunity to explore your creativity, learn new skills, and make something beautiful and practical. So gather your driftwood, prepare your tools, and start building your very own driftwood shelf today!

Filed Under: Driftwood Ideas Tagged With: DIY, Home Improvement, Rustic, shelf

Driftwood Resin Table

September 3, 2024 by admin

Have you ever imagined transforming a piece of driftwood into a stunning, functional piece of furniture? The concept of a Driftwood Resin Table might seem like an art project reserved for expert craftsmen, but it’s an achievable and rewarding endeavor that can turn into the centerpiece of your home. In this article, you’ll discover the magic blended in the symphony of nature and craftsmanship, bringing life to driftwood through resin.

Driftwood Resin Table

What is a Driftwood Resin Table?

A Driftwood Resin Table is an artistic and functional piece of furniture that marries the natural elegance of driftwood with the modern, durable allure of resin. These tables are often created by embedding pieces of driftwood in a resin base, giving a unique touch to each table as the driftwood and resin meld together.

They are not just tables; they are unique art forms, each telling a story of nature’s journey through the driftwood and the creator’s vision through the resin.

Why Choose a Driftwood Resin Table?

Uniqueness

Every Driftwood Resin Table is one-of-a-kind, owing to the unique shape and texture of each piece of driftwood. Unlike mass-produced furniture, these tables carry a personal touch and an element of surprise.

Durability

Resin is a strong, durable material that preserves and protects the driftwood. Not only does it add to the aesthetic appeal, but it also ensures that the table will last for years to come.

Eco-Friendly

Driftwood is often sourced from natural materials washed ashore, making it an eco-friendly choice. Pairing it with non-toxic resins can make your table an environmentally friendly piece of art.

Materials Needed for a Driftwood Resin Table

Creating a Driftwood Resin Table requires a few specific materials. Here’s a list to get you started:

MaterialPurpose
DriftwoodMain feature and structure of the table
Epoxy ResinEncapsulating the driftwood and creating the table surface
HardenerTo mix with resin for curing
Pigments or DyesTo color the resin if desired
Mold or FrameTo shape the table base and support during curing
SandpaperSmoothing the surface during finishing
Varnish or SealantAdditional protection and gloss

Choosing the Right Driftwood

Sourcing Driftwood

You can find driftwood along beaches, lakeshores, and rivers. It’s important to ensure that you source your driftwood responsibly, respecting local guidelines and wildlife.

Preparing the Driftwood

Before using driftwood, it needs to be cleaned and dried thoroughly. Remove any dirt, algae, or barnacles using a brush and clean water. Let it dry completely; you may need to leave it in a dry place for a few weeks.

Driftwood Resin Table

Crafting the Table

Designing Your Table

Before starting, it’s essential to have a clear design in mind. Sketch out your table’s dimensions and shape, and decide how you want the driftwood to be positioned within the resin.

Creating a Mold

The mold will form the shape of your table. It can be made from various materials, such as wood or plastic. Ensure it’s sturdy and well-sealed to prevent resin leaks.

Arranging the Driftwood

Place the dry driftwood in the mold according to your design. Ensure it’s stable and well-supported as you will pour resin around it.

Mixing and Pouring the Resin

Mix the epoxy resin with the hardener according to the manufacturer’s instructions. If you’re using pigments, add them to the mixture. Pour the resin slowly into the mold, making sure it covers the driftwood completely.

Curing Process

Allow the resin to cure for the recommended time (usually 24-48 hours). This step is crucial for the resin to harden properly.

Finishing Touches

Sanding

Once the resin has cured, remove the table from the mold. Sand the surface to smooth any rough edges or imperfections.

Sealing and Varnishing

Apply a layer of varnish or sealant to the table for added protection and a polished finish. This step will enhance the resin’s clarity and make the table more durable.

Incorporating Driftwood Resin Tables into Your Home

Driftwood resin tables can fit into various home interiors. Here are a few ideas:

Living Room Centerpiece

A Driftwood Resin Table can be a stunning centerpiece in your living room. Pair it with minimalist decor to let the table’s natural beauty stand out.

Office Workspace

Add a touch of nature to your workspace by using a driftwood resin table as a desk. The calming effects of nature-inspired decor can enhance your productivity and reduce stress.

Dining Table

Imagine hosting a dinner party around a beautiful driftwood resin dining table. It’s a conversation starter and a piece of art that adds a unique flair to your dining space.

Maintenance and Care

Maintaining your driftwood resin table is relatively simple but crucial to keep it looking its best.

Regular Cleaning

Wipe the table regularly with a soft, damp cloth to remove dust and spills. Avoid using harsh chemicals that can damage the resin.

Avoid Direct Sunlight

Prolonged exposure to direct sunlight can cause the resin to yellow over time. Place your table in an area with indirect light, or use UV-protective finishes.

Protect from Heat

Although resin is durable, it can be affected by high temperatures. Use coasters and placemats to protect the surface from hot items.

Common Questions about Driftwood Resin Tables

How long does it take to make a Driftwood Resin Table?

The process can take a few days to several weeks, depending on the complexity of your design and the curing time of the resin.

Can I use other types of wood?

Yes, while driftwood is popular for its unique appearance, you can use other types of wood as well. However, ensure the wood is properly dried and prepped.

What happens if bubbles form in the resin?

Bubbles can be avoided by pouring the resin slowly and allowing it to settle. If bubbles form, you can use a heat gun or torch to pop them while the resin is still wet.

Benefits of DIY Driftwood Resin Tables

Personal Satisfaction

Creating your table allows you to customize every aspect, yielding a personal sense of accomplishment and a unique piece that reflects your style.

Cost-Effective

Building your own driftwood resin table can be more cost-effective compared to purchasing one. It also allows you to use materials and finishes according to your budget.

Learning Experience

The process of making a driftwood resin table can be a valuable learning experience. You’ll gain new skills and knowledge in woodworking and resin crafting.

Safety Considerations

Protective Gear

Wear gloves, a mask, and safety glasses when working with resin to protect your skin and eyes from potential irritants.

Ventilation

Ensure your workspace is well-ventilated when working with resin, as fumes can be harmful if inhaled over prolonged periods.

Handling Tools

Always use tools safely and follow manufacturer guidelines. Keep your workspace organized to prevent accidents.

Conclusion

Creating a Driftwood Resin Table is a captivating journey of merging nature with modern art. It’s not only a functional piece of furniture but also a testament to your creativity and craftsmanship. By following the steps outlined in this article, you’ll be well on your way to crafting your unique Driftwood Resin Table that can be cherished for years to come. Remember, the charm of these tables lies in their imperfections and natural beauty, so embrace the uniqueness of each piece.

Filed Under: Driftwood Ideas Tagged With: DIY, Driftwood, furniture, Resin Table, Woodworking

Gnomes On Driftwood

September 3, 2024 by admin

Have you ever wondered where the magical world of gnomes intersects with nature’s artistry of driftwood? These unique and enchanting creations capture the imagination, blending folklore with natural beauty in a way that brings warmth and whimsy to any space. Whether you are a seasoned collector or a curious newcomer, “Gnomes On Driftwood” promises to offer you a delightful journey into this charming niche.

What Are Gnomes on Driftwood?

Gnomes on driftwood are essentially delightful little gnome figurines that are either carved from or set on pieces of naturally sculpted driftwood. This unique art form combines the whimsy and magic of gnomes with the organic beauty of driftwood, resulting in a fusion that’s both aesthetically pleasing and heartwarming.

The Origin of Gnome Folklore

Gnomes have a long history in European folklore, typically depicted as small, stout creatures that live underground. They are often associated with the protection of nature and hidden treasures. Their mysterious and magical qualities make them endearing characters that captivate the imagination.

The Beauty of Driftwood

Driftwood is wood that has been washed onto shore by the elements, often over many years. Each piece has its own unique texture and shape carved out by water, wind, and sand. This makes every gnome on driftwood a one-of-a-kind piece of art.

Why Combine Gnomes and Driftwood?

Creating gnomes on driftwood merges two wonderful worlds: the fantasy of gnomes and the raw beauty of nature. This combination offers both aesthetic appeal and emotional connection, bringing a touch of magic to everyday life.

Emotional Connection

When you combine whimsical gnomes with naturally sculpted driftwood, you create art that resonates on an emotional level. The natural patterns and textures of driftwood combined with the charming figures of gnomes offer a comforting, almost nostalgic feeling.

Aesthetic Appeal

There is a simple beauty in merging natural elements with folklore-inspired art. The driftwood provides an organic base that complements the gnome figurines, making them perfect for both outdoor gardens and indoor decor.

How to Make Your Own Gnomes on Driftwood

Creating your own gnome on driftwood can be both a rewarding and enjoyable project. Here are some simple steps to get you started.

Materials You Will Need

ItemPurpose
DriftwoodBase for your gnome
Gnome FigurinesCan be store-bought or handmade
Glue GunTo securely attach the gnome to the driftwood
PaintOptional, for adding personal touches
SealantTo protect the driftwood and gnome from elements

Step-by-Step Instructions

  1. Select Your Driftwood: Choose a piece of driftwood that speaks to you. Its natural shape should be something that can accommodate a small gnome.
  2. Prepare the Driftwood: Clean the driftwood and let it dry out completely. If needed, sand down any rough edges.
  3. Choose or Create Your Gnome: You can either purchase a small gnome figurine or create one using materials like clay or wood.
  4. Attach the Gnome: Using a glue gun, carefully attach your gnome to the piece of driftwood. Ensure it is securely fastened.
  5. Add Personal Touches (Optional): You can paint the gnome or the driftwood to add more character.
  6. Seal Your Creation: Apply a sealant to protect your gnome on driftwood from the elements.

Gnomes On Driftwood

Where to Display Gnomes on Driftwood

Once you have your gnomes on driftwood, the next step is finding the perfect spot to display them. Here are some ideas to get your creative juices flowing.

Indoor Spaces

These charming pieces of art can bring personality to various indoor settings. Consider placing them on bookshelves, mantels, or even as part of your desk decor. They can also be a talking point in living rooms or dining areas.

Outdoor Spaces

Gnomes on driftwood make great additions to gardens, patios, or porches. Their natural and whimsical appearance can add a magical touch to your outdoor spaces. Just make sure they are protected from extreme weather conditions.

Buying Gnomes on Driftwood

If creating your own gnomes on driftwood isn’t your thing, there are plenty of places where you can purchase them. Various artisans specialize in this niche, offering a range of designs and sizes.

Online Marketplaces

Platforms like Etsy and eBay have numerous listings for gnomes on driftwood. These are often handcrafted items, so each piece is unique.

Local Craft Fairs

Craft fairs are excellent places to find local artisans who create gnome on driftwood pieces. You’ll not only find unique items but also support local artists.

Taking Care of Your Gnomes on Driftwood

Once you have your gnomes on driftwood, proper care will ensure they last a long time. Here are some tips to keep them in pristine condition.

Cleaning

Avoid using harsh chemicals. A gentle wipe with a damp cloth should suffice.

Protection

If you’re displaying them outdoors, consider bringing them in during extreme weather conditions to prolong their life.

Gnomes On Driftwood

Benefits of Gnomes on Driftwood

By now, you might be curious about the benefits of owning these charming artworks. Let’s delve into why they’re worth your consideration.

Aesthetics

Gnomes on driftwood are visually pleasing. Their unique and whimsical appearance can add character to any space, whether indoors or outdoors.

Emotional Well-being

There’s something inherently comforting about these pieces. They remind us of simpler times and fuel our imagination, which can actually have a calming effect.

Eco-Friendly Art

Using driftwood for crafts is a form of recycling, contributing to a more sustainable environment. You’re not only getting a unique piece of art but also helping the planet.

Gnomes in Various Cultures

Gnomes are not just a Western phenomenon. Many cultures around the world have their own versions of these mythical creatures.

European Gnomes

In Europe, gnomes are often seen as guardians of the earth, living underground and protecting buried treasures.

Asian Mythical Creatures

Though not called gnomes, similar small mythical beings exist in various Asian cultures. For example, in Japan, the Zashiki-warashi are believed to be childlike spirits that protect homes.

Native American Folklore

Some Native American tribes have legends about small, mystical creatures that can control nature and offer protection to humans.

Popular Themes and Variations

Gnomes on driftwood come in various themes and styles. Here’s a list of popular types that you might find intriguing:

Seasonal Themes

Some artisans create gnomes on driftwood tailored to different seasons. For example, summer gnomes might come with sunflower decorations, while winter gnomes might feature snowflakes.

Holiday Themed Gnomes

Holiday versions are also a big hit. Halloween gnomes on driftwood could be dressed as witches, while Christmas gnomes might come in Santa hats.

Themed Collections

Some artists create themed collections, such as “beach gnomes” or “forest gnomes,” incorporating elements that relate to these environments. This can make for a cohesive and charming collection.

Customizing Your Gnomes on Driftwood

Customization is one of the joys of owning gnomes on driftwood. Here’s how you can personalize your pieces to make them truly unique.

Painting

Consider painting your gnome and driftwood base. Whether it’s adding a splash of color to the gnome’s hat or painting a scene on the driftwood, this can make your piece stand out.

Adding Accessories

Small accessories like miniature tools, tiny flowers, or even faux jewels can add a special touch to your gnomes on driftwood.

Engraving

If you’re handy with tools, you could engrave names, dates, or even short messages onto the driftwood, making the piece even more unique.

The Role of Gnomes in Modern Pop Culture

Gnomes have found their way into modern pop culture, influencing art, literature, and even movies. Their enduring charm ensures they remain relevant through the years.

In Literature

Books like “Gnomes” by Wil Huygen and Rien Poortvliet provide an in-depth look into gnome lore, captivating readers with their detailed illustrations and storytelling.

In Movies and TV Shows

Movies like “Gnomeo & Juliet” and various other animations have brought gnomes into the limelight, making them popular among people of all ages.

In Garden Décor

Garden gnomes have been a popular choice for outdoor decoration for years, and gnomes on driftwood are a sophisticated extension of this trend.

Frequently Asked Questions (FAQs)

What Size Should Driftwood Pieces Be?

The size of the driftwood you choose depends on where you plan to display your gnome. Small pieces are great for indoor settings, while larger pieces can make a statement in outdoor spaces.

Is It Safe to Collect Driftwood?

Collecting driftwood is generally safe, but always make sure to follow local guidelines, as some places have restrictions on gathering natural materials from public lands.

Can I Use Any Type of Gnome?

You can use any type of gnome, but ensure it’s made of durable material suitable for either indoor or outdoor display, depending on your needs.

How Do I Seal My Driftwood and Gnome?

A water-based polyurethane sealant works well for both driftwood and gnome figurines. It’s advisable to apply multiple thin layers rather than one thick layer.

Where Can I Find Driftwood?

You can find driftwood at beaches, lakeside shores, riverbanks, or purchase them from craft stores or specialty online shops.

Conclusion

Gnomes on driftwood present a charming blend of folklore and nature’s artistry, making them an enchanting addition to any setting. Whether you choose to create your own or purchase one, these unique pieces are sure to bring a smile to your face and warmth to your heart. By merging the whimsical world of gnomes with the natural beauty of driftwood, you are not only acquiring a piece of art but also a little slice of magic that can transform any space. So why not add a touch of enchantment to your home with a gnome on driftwood today?

Filed Under: Driftwood Ideas Tagged With: Art, crafts, DIY, Driftwood, Gnomes, Handmade

Driftwood Rack

September 2, 2024 by admin

Have you ever come across a beautiful piece of driftwood and wondered how you could use it in your home decor? When you think about coastal living, the image of driftwood often pops into your mind. Its natural, rustic charm can bring a touch of the coast right into your home. Today, let’s talk about creating a driftwood rack—a functional yet aesthetically pleasing addition to your living space.

Driftwood Rack

Understanding Driftwood

Driftwood is wood that has been washed onto shore by the waves, wind, and tides. Over time, this wood gets weathered and transformed into unique pieces that tell a story of the sea. The organic, natural forms of driftwood make it a popular choice for various DIY projects, especially for those who appreciate nature-inspired decor.

Why Choose Driftwood for a Rack?

Driftwood serves as a unique material for making racks due to its texture, shapes, and colors. It’s not just about aesthetics; driftwood is also sturdy, versatile, and eco-friendly. When you create a driftwood rack, you’re not only reusing natural materials but also adding a one-of-a-kind piece to your home.

Environmental Impact

Opting for driftwood means you are using a renewable resource, minimizing your carbon footprint. Driftwood has already been cast off by nature, so repurposing it adds zero environmental burden. Moreover, it’s a step toward sustainable living, as you are recycling materials instead of buying new ones.

Types of Driftwood Racks

Driftwood racks can come in various forms and serve different purposes. The basic idea is to use driftwood as a structural element for hanging or storing items. Here are some types of driftwood racks that you could consider:

Coat Racks

A driftwood coat rack can add a nautical touch to your entryway. You can either create a standing coat rack or mount driftwood pieces to the wall with hooks.

Towel Racks

In the bathroom, a driftwood towel rack can offer both utility and beauty. The natural wood adds warmth and creates a spa-like environment.

Wine Racks

For wine lovers, a driftwood wine rack is an excellent way to store your collection. It combines rustic charm with functionality.

Shelf Racks

Driftwood can also be used to create wall-mounted shelves. These shelves can hold books, decorative items, or potted plants.

Materials Needed

Before you begin any project, it’s important to gather your materials. Here are some common tools and items you’ll need to create a driftwood rack:

MaterialPurpose
Driftwood PiecesMain structural element
Screws/NailsFor attaching pieces together
HooksEssential for hanging coats or towels
SandpaperTo smooth out rough edges
Wood GlueFor additional stability
DrillFor making holes and securing screws/nails
SawTo cut driftwood pieces to the desired length
Measuring TapeEnsures accuracy in dimensions
Finish or SealantProtects and enhances the wood

Step-by-Step Guide

Let’s walk through the process of creating a driftwood rack, step by step.

Choosing Your Driftwood

Start by selecting pieces that suit your needs. Consider the size, shape, and durability of each piece. Make sure that the wood is clean and free from pests. If necessary, scrub the driftwood with soapy water and let it dry completely.

Preparation

Once you’ve chosen your pieces, measure and cut them to the desired length. Sand any rough edges to ensure that the wood is smooth to the touch. This will prevent splinters and make the finished product look more polished.

Assembly

  1. Layout: Arrange the driftwood pieces to visualize the final look. This will help you determine where to attach hooks and other elements.
  2. Drilling Holes: Use a drill to make holes for screws or nails. This is especially important for thicker pieces of driftwood.
  3. Attaching Hooks: Screw in hooks at designated spots. Make sure they are evenly spaced and secure.

Finishing Touches

Apply a finish or sealant to protect the wood from moisture and wear. This step will also enhance the natural color and texture of the driftwood.

Driftwood Rack

Customization Ideas

One of the best things about creating a driftwood rack is the ability to customize it according to your taste and needs. Here are some ideas to make your driftwood rack truly unique:

Paint and Stain

You can paint the driftwood in colors that match your home decor or apply a wood stain to enrich its natural tones.

Add Decorative Elements

Consider adding shells, stones, or small nautical-themed ornaments. These elements can be glued to the wood, adding a bit of personal flair.

Mix with Other Materials

Combine driftwood with metal hooks, glass shelves, or fabric elements. Mixing materials can bring a modern twist to a traditional rustic look.

Benefits of a Driftwood Rack

Creating a driftwood rack isn’t just a fun DIY project; it also comes with several benefits:

Unique Design

No two pieces of driftwood are the same, making your rack a one-of-a-kind creation. The unique forms and textures add character to any space.

Eco-Friendly

Using driftwood is a sustainable choice that helps reduce waste. You’re repurposing natural materials instead of relying on new, potentially less eco-friendly products.

Budget-Friendly

Driftwood is often free, or at the very least, inexpensive. Using found materials can significantly cut down on the cost of your DIY projects.

Versatility

A driftwood rack can be adapted for various uses around your home—from the entryway to the bathroom, kitchen, or even the garden.

Maintenance and Care

To ensure your driftwood rack stands the test of time, proper maintenance is essential. Here are some tips for keeping it in pristine condition:

Regular Cleaning

Wipe down your driftwood rack with a damp cloth to remove dust and dirt. Avoid using harsh chemicals as they can damage the wood.

Protecting from Moisture

If your driftwood rack is in a humid environment, make sure it’s sealed properly. Moisture can cause the wood to deteriorate over time.

Periodic Inspections

Regularly check for loose hooks or screws. Tighten them as needed to maintain the structural integrity of your rack.

Driftwood Rack Projects for Different Rooms

Let’s explore how you can incorporate driftwood racks into various rooms in your home:

Entryway

A driftwood coat rack can be the perfect statement piece in your entryway. It offers a functional place to hang coats, hats, and bags while setting a welcoming, coastal tone as soon as someone walks in.

Living Room

In the living room, a driftwood shelf rack can showcase your books, photos, or decorative items. It adds a touch of natural beauty and can serve as an interesting conversation starter.

Bathroom

A driftwood towel rack combines practicality with style. In a space where materials often need to withstand moisture, well-sealed driftwood offers both durability and charm.

Kitchen

Using driftwood for hanging pots and pans or as a wine rack can add rustic elegance to your kitchen. It’s a great way to blend function with a cozy, natural aesthetic.

Bedroom

In the bedroom, a driftwood clothes rack or shelf can add a sense of tranquility. Its natural look blends well with soft textiles and neutral color schemes.

Tips for Finding Driftwood

Not all driftwood is created equal, so finding the right pieces is key to a successful project. Here are some tips for sourcing driftwood:

Beaches and Riverbanks

Look for driftwood on beaches, riverbanks, and near lakes. These areas are often rich sources of naturally weathered wood.

Permits and Regulations

Make sure you’re aware of any local regulations regarding the collection of driftwood. Some areas protect their natural habitats and may require permits.

Quality Check

Inspect the wood for rot, pests, or other forms of damage. Choose pieces that are sturdy and free from any serious defects.

Inspiration from Nature

Consider the natural surroundings when designing your driftwood rack. The unique shapes and textures of driftwood are reminiscent of the ocean, wind, and waves. A driftwood rack can help bring a slice of nature into your home, creating a serene and grounding environment.

Incorporating Natural Elements

Enhance the natural feel of your driftwood rack by incorporating other elements like stones, shells, and plants. These additions can further deepen the connection to the natural world.

Seasonal Decorations

Your driftwood rack can also hold seasonal decorations. Whether it’s summer vibes with starfish and seashells or winter coziness with pinecones and fairy lights, your rack can adapt to the changing seasons.

Eco-Friendly Practices

When working with driftwood, always adhere to eco-friendly practices. Collect only what you need and ensure that you are not disrupting local wildlife or ecosystems. This mindful approach helps preserve natural habitats for future generations.

Repurposing Leftovers

If you have leftover pieces of driftwood, consider using them for other small projects. Driftwood can be turned into everything from photo frames to candle holders, reducing waste and maximizing resources.

Conclusion

Creating a driftwood rack is an excellent way to incorporate natural, sustainable materials into your home decor. The versatility of driftwood allows for countless creative possibilities, making each piece truly unique. By following the steps and tips outlined in this guide, you can craft a driftwood rack that is both functional and aesthetically pleasing. Whether it’s in your entryway, living room, or bathroom, a driftwood rack adds a touch of nature’s beauty to your home while promoting eco-friendly practices.

If you’re inspired to start your own driftwood project, remember that the most important aspect is to enjoy the process. Each piece of driftwood you collect and transform carries a story, adding a personal and meaningful touch to your living space.

Now, are you ready to bring a little piece of the coast into your home?

Filed Under: Driftwood Ideas Tagged With: DIY, Driftwood, Rack, Rustic, Storage

  • « Previous Page
  • Page 1
  • …
  • Page 20
  • Page 21
  • Page 22
  • Page 23
  • Page 24
  • …
  • Page 41
  • Next Page »

Primary Sidebar

Driftwood4us.com, is a participant in the Amazon Services LLC Associates Program, an affiliate advertising program designed to provide a means for sites to earn advertising fees by advertising and linking to amazon.com.