• Skip to main content
  • Skip to primary sidebar
  • Terms and Conditions
  • Privacy Policy
  • Contact

Driftwood 4 Us

Just About Driftwood

DIY

Driftwood Keyrings

August 2, 2024 by admin

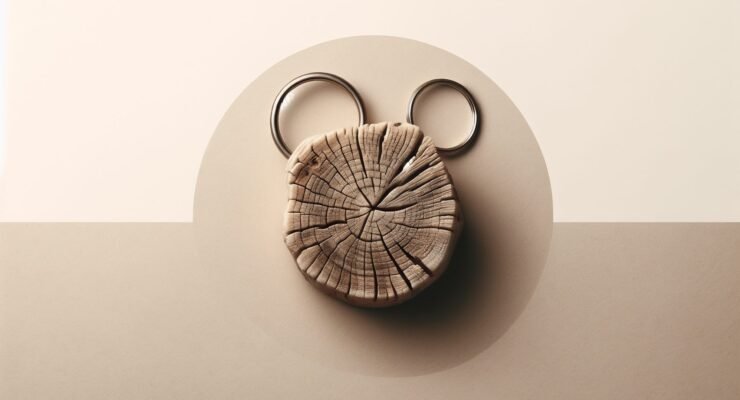
Have you ever stumbled upon a piece of driftwood washed ashore and wondered about its story? Maybe even thought about taking it home as a keepsake? Driftwood is nature’s art, shaped by the sea and time. Driftwood keyrings combine the natural beauty of this material with functionality, yielding a unique and charming accessory.

What is Driftwood?

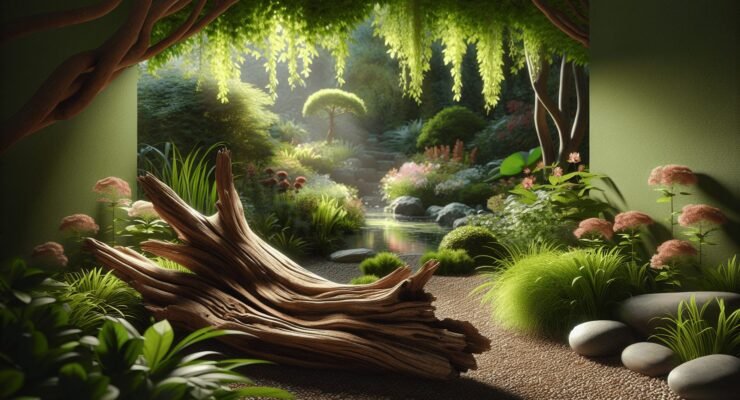
Driftwood refers to wood that has been washed onto shores by the action of winds, tides, or waves. Over time, this wood undergoes a natural process of erosion and refinement, resulting in a smooth, worn look. It’s often found along beaches, riverbanks, and lakeshores, each piece telling its own story through its unique shapes and textures.

Driftwood can be utilized in various forms of decoration, but one of the most practical and charming uses is turning it into keyrings. These pieces serve both as a functional tool and a small memento of nature, making them perfect for anyone who wants to carry a piece of the outdoors with them.

Why Choose Driftwood Keyrings?

Choosing a driftwood keyring means you’re opting for something natural, eco-friendly, and extraordinarily unique. Mass-produced keyrings lack character and individuality, whereas no two pieces of driftwood are the same. Let’s unpack some compelling reasons to consider driftwood keyrings.

Unique Aesthetic

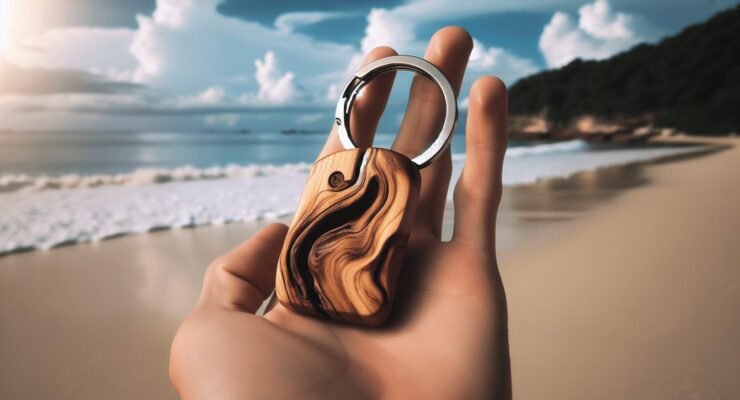
Every piece of driftwood is distinct. The natural curves, textures, and color variations make each keyring a one-of-a-kind masterpiece. It’s like carrying a small piece of art in your pocket.

Eco-Friendly

Driftwood is naturally occurring and doesn’t require the felling of trees, making it a sustainable option. By repurposing driftwood, you’re helping reduce waste and supporting eco-friendly practices.

Durability

Driftwood is surprisingly durable. Its time spent in water makes it more resistant to elements, ensuring that your keyring will stand the test of time.

Sentimental Value

If you collect driftwood during memorable trips or occasions, turning them into keyrings can preserve those memories in a tangible form. It’s like carrying a little piece of your adventures wherever you go.

Conversation Starter

A unique driftwood keyring can be a great icebreaker. People are often curious about the stories behind personalized, unique items, and your keyring can lead to interesting conversations about your travels and the beauty of nature.

Driftwood Keyrings

Types of Driftwood for Keyrings

When crafting your driftwood keyring, the type of wood you select can influence the final product’s appearance and durability. Here are some common types of driftwood that are ideal for keyrings.

Type of DriftwoodCharacteristicsDurability
CedarLight, aromatic, and resistant to decay.High
PineOften found lighter in color, and soft-grained.Moderate
OakDense, hard, and darkens over time.High
RedwoodReddish hue and less prone to shrinking or warping.High
BirchSmooth, pale, and often has a fibrous texture.Moderate
MapleLight-colored and tight-grained.High

Different types of driftwood will offer various looks and textures, so you have plenty of choices to match your personal style or the style you’re aiming to achieve.

How to Make Your Own Driftwood Keyring

Making your own driftwood keyring can be a rewarding DIY project. Here’s a step-by-step guide to help you get started.
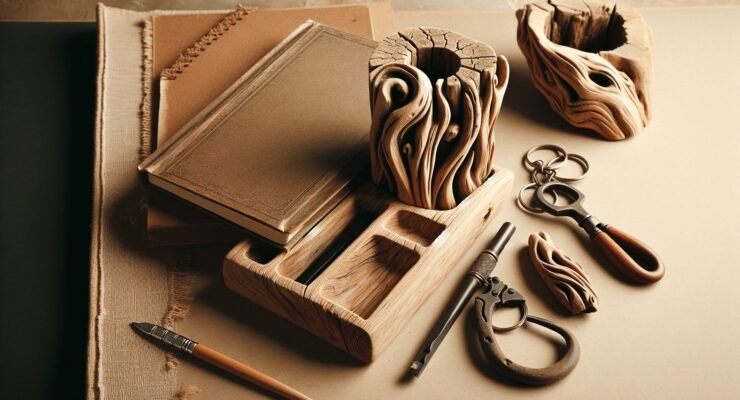
Materials Needed

Before you begin, gather all the necessary materials. Here’s a basic list:

  • A piece of driftwood
  • Sandpaper (various grits)
  • Hand drill
  • Keyring hardware (split ring, chain, etc.)
  • Protective finish (like beeswax or tung oil)

Step 1: Selecting the Driftwood

Choose a piece of driftwood that’s small enough to be a keyring but large enough to be durable. It should feel comfortable in your hand and have minimal cracks or weaknesses.

Step 2: Preparing the Driftwood

Clean the driftwood thoroughly with a mild detergent and water to remove any dirt or debris. Let it dry completely. Sand the driftwood using different grits of sandpaper to achieve a smooth finish.

Step 3: Drilling the Hole

Using a hand drill, carefully drill a small hole at one end of the driftwood. The hole should be large enough to accommodate the keyring hardware but small enough to maintain the piece’s integrity.

Step 4: Adding the Keyring Hardware

Thread the keyring hardware through the drilled hole. Ensure that it is securely attached and can rotate freely without falling off.

Step 5: Applying the Finish

Apply a protective finish to your driftwood keyring to enhance its durability and appearance. Beeswax, tung oil, or a clear sealant can all work well for this purpose.

Step 6: Final Touches

Inspect your keyring for any rough spots and sand them down if needed. Your driftwood keyring is now ready to use!

Driftwood Keyrings

Caring for Your Driftwood Keyring

To ensure that your driftwood keyring remains beautiful and durable, you’ll need to take some care of it. Here are a few tips:

Regular Cleaning

Wipe your keyring with a damp cloth to remove any accumulated dirt or grime. Avoid using harsh chemicals or soaking the driftwood, as this can weaken it.

Protective Finish

Reapply a protective finish periodically, especially if the driftwood becomes dry or starts to show signs of wear. This will help maintain its appearance and strength.

Avoid Extreme Conditions

Driftwood is naturally resilient, but extreme conditions can still cause damage. Avoid exposing your keyring to extreme heat, moisture, or cold for prolonged periods.

Personalizing Your Driftwood Keyring

One of the joys of owning or creating a driftwood keyring is the ability to personalize it. Here are some ideas for making your keyring uniquely yours:

Wood Burning

Use a wood-burning tool to etch designs, initials, or symbols onto your driftwood. This can add a custom touch and make your keyring truly one-of-a-kind.

Paint or Dye

Consider adding a splash of color with paint or natural dyes. You can create intricate designs or simple colorful accents to match your style.

Add Beads or Charms

Thread small beads or charms onto the keyring hardware for extra decoration. You can use materials like glass, metal, or even small seashells to complement the driftwood.

Engraving

If you lack the tools for wood burning but still want to add a personalized touch, consider having your driftwood piece professionally engraved.

Buying Driftwood Keyrings

If DIY isn’t your style, there are plenty of places to purchase beautifully crafted driftwood keyrings. Here are some options:

Online Marketplaces

Websites like Etsy feature numerous artisans who sell handmade driftwood keyrings. You can browse a wide range of designs and even request custom orders.

Craft Fairs

Local craft fairs and markets are excellent places to find unique, handmade driftwood keyrings. Plus, you can often meet the artisans and learn more about their process.

Specialty Stores

Some specialty stores focus on natural, eco-friendly, or handmade items. These stores often carry driftwood keyrings as part of their product range.

Driftwood Keyrings as Gifts

Driftwood keyrings make excellent gifts for various occasions. They’re personal, unique, and thoughtful, making them perfect for:

Souvenirs

Traveling to a coastal area? Bring back a piece of driftwood and turn it into a keyring. It makes for a memorable and unique souvenir.

Weddings

Driftwood keyrings can serve as unique wedding favors, especially for beach or nature-themed weddings. You can even engrave the couple’s initials or the wedding date on each piece.

Birthdays

Gift a driftwood keyring to nature-loving friends or family members. Personalize it with initials, a favorite symbol, or a special message.

Corporate Gifts

Looking for eco-friendly corporate gifts? Driftwood keyrings can be customized with company logos or mottos, making them both unique and sustainable options.

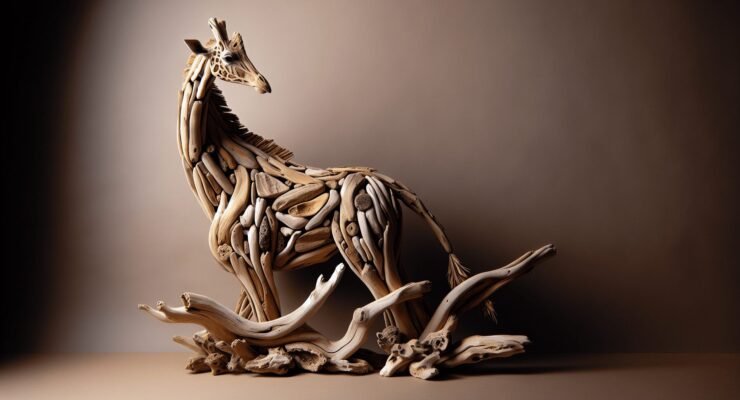
Driftwood Keyrings: A Symbol of Nature

Driftwood keyrings are more than just functional accessories; they symbolize nature’s beauty and resilience. Each piece of driftwood carries with it the essence of its journey, shaped by water, wind, and time. By using driftwood, you’re not only embracing a piece of nature but also contributing to sustainable practices.

In a world increasingly driven by mass production, choosing something handcrafted, natural, and unique stands out. A driftwood keyring is a small but significant step towards appreciating the simpler, more beautiful things in life.

Conclusion

Crafting or purchasing a driftwood keyring is an excellent way to connect with nature and introduce a touch of uniqueness into your daily life. Whether you make your own or buy one from an artisan, a driftwood keyring is a testament to the enduring beauty and versatility of nature. Each piece is a story, waiting to be part of yours.

So next time you find yourself wandering along a beach or a riverbank, keep an eye out for a piece of driftwood that catches your attention. You may just find the perfect candidate for your next favorite accessory.

Filed Under: Driftwood Ideas Tagged With: Accessories, DIY, Driftwood, Handmade, keyrings

Driftwood Keychain

August 2, 2024 by admin

Have you ever wondered how to infuse a piece of nature into your everyday life in a beautiful, practical way? Driftwood keychains might just be the perfect answer for you. Combining natural beauty with functionality, these unique accessories not only keep your keys organized but also add a touch of rustic elegance to your daily routine.

What is Driftwood?

Before we dive into the specifics of driftwood keychains, let’s first understand what driftwood is. Essentially, driftwood is wood that has been washed onto the shore by the action of wind, tides, and waves. Over time, it becomes smooth and often takes on interesting shapes and forms, making each piece one-of-a-kind.

Formation and Collection

Driftwood can originate from various sources, ranging from branches broken off trees by storms, remnants of wooden structures degraded by natural elements, or even long-forgotten shipwrecks. For DIY enthusiasts, finding your own driftwood pieces can turn into a fun scavenger hunt along the beach. Animal and environmental factors contribute to the uniqueness of each piece, making driftwood not just a simple material, but a story keeper.

Types of Driftwood

There are several types of driftwood based on the kind of wood and where it is found:

TypeCharacteristicsCommon Uses
SoftwoodLight and easily broken, often pine or cedarDecorative pieces
HardwoodHeavy and dense, like oak or mapleFurniture and larger projects
BogwoodNaturally preserved wood from swampy areasAquariums, crafting
Coral woodWood encrusted with or resembling coralOrnamental purposes

Each type of driftwood has its own unique appeal and sets the stage for different creative projects. For keychains, softwood or hardwood is usually preferred due to its durability and smooth finish.

Why Choose a Driftwood Keychain?

Driftwood keychains aren’t just aesthetically pleasing; they come with a myriad of benefits that make them stand out as a worthwhile addition to your keyring.

Environmental Impact

Opting for driftwood over plastic or metal significantly reduces environmental footprint. Driftwood is biodegradable and doesn’t contribute to pollution. By using driftwood, you’re giving new life to a natural material that might otherwise rot away unnoticed.

Unique Designs

Every piece of driftwood is unique, which means no two keychains are exactly alike. This uniqueness adds a personal touch and often evokes curiosity and admiration.

Cost-Effectiveness

If you’re someone who enjoys DIY projects, sourcing and crafting with driftwood can be extremely cost-effective. You can often find driftwood for free or at very low cost, and transforming this raw material into a keychain requires minimal investment in tools and accessories.

Driftwood Keychain

Crafting Your Own Driftwood Keychain

Creating your own driftwood keychain can be a fulfilling and straightforward project, even for beginners. Here’s a step-by-step guide to get you started.

Materials Needed

You’ll need a few basic materials to create your driftwood keychain:

MaterialPurpose
Driftwood piecesMain component of the keychain
SandpaperSmoothing edges
DrillMaking holes for key rings
Key ringsFor attaching keys
Varnish or sealantProtecting the wood

Step-by-Step Instructions

Step 1: Select Your Driftwood

Choose pieces that are small and lightweight but have an interesting shape or texture. Driftwood with natural holes or curves often works well for keychains.

Step 2: Clean the Driftwood

Rinse your driftwood pieces thoroughly with water to remove any salt, sand, or dirt. You can also soak them in a mixture of water and mild bleach to kill any lingering bacteria or pests. Let them dry completely before proceeding.

Step 3: Sanding

Use sandpaper to smooth out any rough edges and surfaces. Finer grit sandpaper can be used for a more polished finish.

Step 4: Drilling

Drill a small hole at one end of your driftwood piece. The hole should be just big enough to fit your key ring. Be careful while drilling to maintain the integrity of the wood.

Step 5: Sealing

Apply a coat of varnish or sealant to protect the wood and give it a polished look. Allow ample time for drying between coats, if multiple applications are needed.

Step 6: Assembling

Attach the key ring through the drilled hole. Make sure it is secure to prevent it from coming loose.

Customization Ideas

After mastering the basics, you can experiment with various ways to personalize your driftwood keychain. Here are some ideas:

  • Painting or Staining: Add a splash of color or a vintage effect.
  • Carvings: Try simple carvings or wood-burning techniques.
  • Beads and Charms: Add additional elements for a more elaborate design.

Maintaining Your Driftwood Keychain

Proper maintenance can extend the life of your driftwood keychain and keep it looking its best.

Cleaning

Every once in a while, wipe your keychain with a damp cloth to remove dirt and grime. Avoid soaking it in water to protect the sealant.

Repairs

If your keychain shows signs of wear and tear, lightly sand the affected area and reapply a coat of varnish or sealant.

Storage

When not in use, store your keychain in a dry place to prevent any unwanted moisture absorption.

Driftwood Keychain

Where to Buy Ready-made Driftwood Keychains

For those who prefer buying over making, many artisan shops and online marketplaces offer beautiful, ready-made driftwood keychains. Here are some options to consider:

Store/WebsiteFeatures
EtsyWide range of handmade driftwood keychains
AmazonAffordable, bulk options, customer reviews
Local Craft FairsUnique, one-of-a-kind items

Gift Ideas and Occasions

Driftwood keychains make excellent gifts for various occasions.

Personal Gifts

A driftwood keychain personalized with carvings or initials can be a heartfelt gift for a friend or family member.

Corporate Gifts

Companies can opt for custom driftwood keychains as eco-friendly corporate gifts. They can even be branded with the company logo.

Special Events

They make great keepsakes for weddings, reunions, or any special gathering.

Environmental and Ethical Considerations

While driftwood is a sustainable material, there are still ethical considerations to keep in mind.

Responsible Collection

Make sure to collect driftwood responsibly. Avoid taking wood from protected areas or habitats crucial for wildlife.

Support Local Artisans

Purchasing handmade keychains from local artisans supports small businesses and promotes ethical craftsmanship.

Conclusion

A driftwood keychain is more than just a practical item; it’s a unique piece of nature that you can carry with you. Whether you choose to make your own or purchase one, it offers a wonderful blend of functionality, aesthetic appeal, and environmental responsibility. So why not add a touch of rustic charm to your everyday life with a driftwood keychain?

Filed Under: Driftwood Ideas Tagged With: crafts, DIY, Driftwood, Handmade, Keychain

Driftwood Key Holder

August 2, 2024 by admin

Ever wondered what you could create with that beautiful piece of driftwood you found on the beach? What if I told you that it could be transformed into a functional and aesthetic piece of home decor? Enter the world of driftwood key holders—a perfect blend of nature and utility that adds a touch of rustic charm to any living space.

Driftwood Key Holder

What is a Driftwood Key Holder?

A driftwood key holder is a type of wall-mounted organizer where you can hang your keys, ensuring that you always know where to find them. This everyday object is crafted from pieces of driftwood—wood that has been washed ashore, smoothed and shaped by natural elements like water, sand, and wind. The unique character of each piece of driftwood makes every key holder a one-of-a-kind creation.

Why Choose a Driftwood Key Holder?

You might ask why you should choose a driftwood key holder over something more conventional. The appeal lies in its uniqueness, sustainability, and the warm, natural vibe it brings into your home. Not only does it serve a practical purpose, but it also acts as a piece of art that can spark conversations among your guests.

The Aesthetic Appeal of Driftwood

Driftwood is inherently beautiful because it showcases the raw power of nature through its irregular shapes, textures, and colors. Each piece tells a story—one of journeys across rivers and oceans, weathering storms, and surviving the test of time. When used to make key holders, these characteristics translate into a decorative item that’s both eye-catching and meaningful.

Materials and Tools You’ll Need

Before you start, it’s essential to gather all the required materials and tools. Here’s a handy table to help you get organized:

ItemDescription
DriftwoodThe main material; ensure it’s dry and clean
Hooks or PegsMetal, wood, or ceramic for hanging keys
Screws and NailsTo attach hooks/pegs to the driftwood
SandpaperTo smooth any rough edges
Drill (if necessary)For making holes for screws
Paint/Varnish (optional)For a finished look
Hanging HardwareFor mounting the key holder on the wall

You’ll also need some basic tools like a screwdriver, measuring tape, and a pencil to mark holes.

Picking the Right Driftwood

When choosing driftwood, consider its size, shape, and texture. The piece should be large enough to accommodate several hooks but not so big that it dominates the wall space. Take note of its surface; while some prefer a smoother texture, others might find the rugged, weathered look more appealing.

Step-by-Step Guide to Making Your Own Driftwood Key Holder

Let’s walk through the process of crafting your very own driftwood key holder. The steps are simple, and you can customize them to fit your style and needs.

Step 1: Preparing the Driftwood

The first step is to clean and prepare the driftwood. Use a brush to remove any debris, and wash it with mild soap and water if needed. Let it dry thoroughly. Sand down any rough spots to prevent splinters, but try to retain the natural look and feel of the wood.

Step 2: Planning the Layout

Lay your driftwood flat and plan where to place the hooks or pegs. Use a pencil to mark the spots. Space them evenly to ensure a balanced look. You may want to measure the distance between hooks to keep it consistent.

Step 3: Drilling Holes (if necessary)

Depending on the type of hooks or pegs you have, you may need to drill holes. Use a drill bit that matches the size of your screws. Be careful and go slow to avoid splitting the wood.

Step 4: Attaching Hooks or Pegs

Screw in the hooks or pegs according to your marks. Make sure they are secure and can hold the weight of your keys. If you’re using pegs, ensure they are tightly fitted to prevent them from loosening over time.

Step 5: Finishing Touches

If you prefer a more finished look, you can paint or varnish the driftwood. This step is optional and depends on your personal taste. A coat of varnish will preserve the wood and give it a polished look, while paint can add a splash of color to your decor.

Step 6: Adding Hanging Hardware

Flip the driftwood over and attach the hanging hardware. This could be sawtooth hangers, D-rings, or wire, depending on your preference and the weight of the driftwood.

Step 7: Mounting Your Key Holder

The final step is to mount your driftwood key holder on the wall. Choose a spot near the entrance where it’s easily accessible. Use appropriate wall anchors or screws to ensure it stays securely in place.

Customizing Your Driftwood Key Holder

One of the best things about making your own driftwood key holder is the ability to customize it fully. Here are some ideas to make it uniquely yours:

Adding Personal Touches

Consider adding elements that reflect your style or interests. You can incorporate small shells, stones, or even miniature nautical decorations. Glue them onto the driftwood to create a theme that resonates with you.

Creating a Message Board

Combine your key holder with a small chalkboard or corkboard. This addition can turn your key holder into a multifunctional message center, perfect for jotting down reminders or pinning important notes.

Using Different Hooks

Don’t feel limited to standard metal hooks. You can use vintage cabinet knobs, repurposed spoons, or handcrafted ceramic pegs. These variations add character and make your key holder even more unique.

Experimenting with Different Finishes

Aside from varnish and paint, consider staining the driftwood to enhance its natural grain. There are also eco-friendly and non-toxic options available that maintain the wood’s integrity while giving it a polished look.

Driftwood Key Holder

Benefits of Using a Driftwood Key Holder

While the rustic charm of a driftwood key holder is evident, its benefits extend beyond aesthetics. Here are some practical reasons why this piece of decor is a smart addition to your home:

Organization

A designated place for your keys can save you from the daily scramble of finding them. Having an organized spot ensures you’ll always know where your keys are, reducing stress and saving time.

Sustainability

Using driftwood is an eco-friendly choice. Driftwood is a naturally occurring material, and repurposing it helps reduce waste. By choosing driftwood over plastic or synthetic materials, you’re making a sustainable choice for your home decor.

Unique Decor

Every piece of driftwood is unique, which means no two key holders will ever be the same. This individuality adds a one-of-a-kind charm to your home, making it stand out even more.

Conversation Starter

Guests are bound to notice your driftwood key holder. Its unique appearance and backstory make it an excellent conversation starter, giving you a chance to share your creative process and the importance of sustainable practices.

Inspirations for Display and Styling

Your driftwood key holder doesn’t have to stand alone. Integrating it into your home decor can elevate your overall aesthetic. Consider these ideas for displaying and styling your new piece:

Coastal and Nautical Themes

Driftwood naturally complements coastal and nautical themes. Pair it with rope accents, seashells, and shades of blue to create a cohesive look. This style brings a sense of tranquility and beach-side relaxation into your home.

Rustic and Farmhouse Styles

If your home has a rustic or farmhouse style, a driftwood key holder fits right in. Combine it with other natural elements like stone, metal, and reclaimed wood. These materials work together to create a warm, inviting atmosphere.

Minimalist Designs

For a minimalist look, opt for a more streamlined piece of driftwood and clean, simple hooks. This design maintains the functionality while keeping the overall appearance understated and elegant.

Eclectic Mix

Don’t be afraid to mix styles. A driftwood key holder can be a striking addition to an eclectic decor scheme. Combine it with colorful, bohemian elements or blend it with modern, sleek furnishings for a unique fusion.

Maintaining Your Driftwood Key Holder

To ensure your driftwood key holder remains beautiful and functional, consider these maintenance tips:

Cleaning

Dust your key holder regularly using a soft cloth. If it gets dirty, wipe it gently with a damp cloth. Avoid using harsh chemicals that could damage the wood or any finishes you’ve applied.

Inspecting Hardware

Periodically check that the hooks and hanging hardware are secure. Tighten any loose components to ensure the key holder remains safe and sturdy.

Avoiding Moisture

Keep your driftwood key holder away from direct moisture or extreme humidity. Although driftwood is naturally water-resistant, prolonged exposure can cause deterioration.

Refreshing Finishes

Over time, the finish on your driftwood may start to wear. Reapplying varnish or paint can refresh its appearance and extend its lifespan. Always use products that are safe for wood and provide the desired look.

Where to Find Driftwood

If you haven’t found your perfect piece of driftwood yet, here are some tips on where and how to find it:

Nature Walks

Look for driftwood along riverbanks, lakeshores, or beaches. Early morning or after a high tide are often the best times to find newly washed-up pieces.

Local Markets

Some local markets or craft stores offer driftwood. These pieces are often cleaned and ready for crafting, saving you some preparation time.

Online Sources

You can also purchase driftwood online. Websites like Etsy and eBay offer a variety of sizes and shapes, allowing you to choose the ideal piece for your project.

Conclusion

Creating a driftwood key holder is a fulfilling and creative project that merges practicality with art. It not only helps you keep your keys organized but also adds a touch of nature’s beauty to your home. Whether crafted as a personal item or a thoughtful gift, a driftwood key holder is a testament to the charm of simplicity and sustainability. Embrace the whimsical, rustic allure of driftwood and transform it into something both useful and delightful for your everyday life.

Filed Under: Driftwood Ideas Tagged With: DIY, Driftwood, Home Organization, Key Holder, Rustic Decor

Driftwood In Garden

July 31, 2024 by admin

Welcome to the world of enchanting garden decor with “Driftwood In Garden.” You’ll discover how beautifully natural driftwood pieces can transform your outdoor space into a serene, artistic sanctuary. From crafting unique sculptures to creating functional garden elements, the use of driftwood provides an easy and eco-friendly way to enhance your garden’s charm and character. You’ll love how these timeless wooden pieces blend effortlessly with the foliage, adding texture and intrigue to your garden paradise. Have you ever strolled along a beach, noticed a piece of driftwood, and imagined how it would look in your garden? Driftwood, with its weathered and rustic charm, can truly transform a garden space, adding both artistic and natural elements. Using driftwood in a garden isn’t just a fad; it’s a brilliant way to create unique, eco-friendly decor that tells a story.

Driftwood In Garden

What is Driftwood?

Driftwood refers to the wood that has been washed onto shores by the action of tides and currents. These pieces are often beautifully bleached and smoothed by the sea, turning them into natural art objects. Driftwood can come from trees, branches, or other wooden objects that met the fate of riverine travel.

Origin and Characteristics

Driftwood starts its journey far from the ocean, usually in rivers, lakes, or forests. Over time, it merges with water bodies and undergoes weathering and erosion, giving it the unique textures and shapes we admire. Each piece of driftwood is unique, differing in size, shape, texture, and color.

Types of Driftwood

There are several types of driftwood based on their origin and characteristics:

TypeCharacteristics
Hardwood DriftwoodDense, dark brown or black; very durable
Softwood DriftwoodLighter, less dense; easier to work with
Craggly DriftwoodFull of knots and bends, highly textured
Smooth DriftwoodSoft and rounded, smoother appearance
Marine DriftwoodOften covered with shells or seaweed, washed ashore

Benefits of Using Driftwood in Your Garden

Driftwood is more than just an aesthetic component. It offers a host of benefits – both practical and ecological.

Eco-Friendly Decor

Using driftwood is a sustainable option. By repurposing wood that would otherwise decay or be burnt, you contribute to reducing waste and preserving lumber resources.

Natural Artistry

Each driftwood piece is a piece of natural art. Their unique shapes, hues, and textures can serve as focal points and conversation starters in your garden.

Habitat for Wildlife

Driftwood can create mini ecosystems within your garden. Birds can use it for perching, insects find shelter, and plants might use it for support.

Low Maintenance

Unlike treated wood or synthetic garden decorations, driftwood requires minimal maintenance. It can withstand various weather conditions and doesn’t need painting or staining.

How to Choose Driftwood for Your Garden

Choosing the right piece of driftwood is essential for achieving the envisioned aesthetic and functional goals for your garden.

Size and Shape

Consider the size and shape of your garden area when choosing driftwood. Smaller pieces are perfect for flower beds or rock gardens, while larger ones can serve as focal points or natural sculptures.

Durability

Select driftwood that is sturdy and dense. Hardwood tends to be more durable and will withstand the elements better than softwood.

Preparing Driftwood for Garden Use

Before placing driftwood in your garden, some preparation steps are necessary to ensure it lasts long and is safe for your garden environment.

Cleaning

First, clean your driftwood thoroughly. Sea salts, debris, and potential pests need to be removed. A soak in fresh water followed by scrubbing with a brush can help clean your piece effectively.

Preserving

To enhance its durability, consider applying a wood preservative or a clear sealant. This is optional but can protect the wood from further weathering and decay.

Positioning

Think about how and where to place the driftwood. Envision its placement in various spots to ensure it complements your garden’s layout and other decor.

Driftwood In Garden

Creative Ideas for Using Driftwood in Your Garden

The possibilities with driftwood are endless. Here are some creative ways to incorporate driftwood into your garden:

Driftwood Planters

Create unique planters by hollowing out a piece of driftwood. You can place succulents, air plants, or small flowers. This brings a rustic and natural element to your garden.

Driftwood Pathway Borders

Use driftwood logs and branches to border garden pathways. This gives a natural, forest-like feel to your garden trails and helps in delineating different garden zones.

Driftwood Sculptures

Arrange several driftwood pieces to form sculptures. This could be abstract forms or more defined shapes like animals or birds, adding a touch of whimsy and creativity.

Supporting Structures

Driftwood can be used as stakes or supports for climbing plants. Its natural look blends seamlessly, unlike synthetic stakes, which can be obtrusive.

Garden Seating

Use larger driftwood logs or assembled pieces to create rustic benches or seating areas. This provides a perfect spot to sit and appreciate the beauty of your garden.

Table: Driftwood Uses and Ideas

Driftwood UseDescription
Driftwood PlantersHollowed pieces for planting succulents and flowers.
Pathway BordersLogs and branches to line garden paths.
Natural SculpturesArt pieces created by arranging driftwood.
Plant SupportsStakes and supports for climbing plants.
Garden SeatingLogs or assembled pieces for rustic benches.

Maintaining Driftwood in Your Garden

Maintenance for driftwood is fairly straightforward but essential for prolonging its charm and functionality.

Regular Cleaning

While driftwood doesn’t require intense maintenance, occasional cleaning to remove dirt and algae will help maintain its appearance.

Sealing

If you’ve opted for a sealant, reapply it annually. This preserves the wood, especially in regions with drastic weather changes.

Inspection

Regularly inspect the driftwood for any signs of decay or pest infestation. Addressing these issues early will prevent serious damage.

Safety Considerations

While driftwood is generally safe, some considerations can ensure it doesn’t pose a risk to your garden or its inhabitants.

Toxins

Be cautious with wood that shows signs of chemical treatment. Driftwood sourced from industrial areas or near treated wooden structures might carry harmful toxins.

Sharp Edges

Ensure pieces do not have sharp edges or splinters which can be hazardous, especially if you have children playing in the garden.

Driftwood and Garden Styles

Driftwood can complement a variety of garden styles, enhancing the overall ambiance.

Coastal Gardens

Given its origin, driftwood naturally complements a coastal-themed garden. Pairing it with seagrasses, shells, and sand features creates a seamless beach-inspired yard.

Zen and Rock Gardens

With its organic and asymmetrical shapes, driftwood fits perfectly in zen and rock gardens, providing a natural contrast to stones and gravel.

Woodland Gardens

Infuse driftwood into woodland gardens to mimic fallen logs and natural tree detritus, enhancing the forest-like vibe.

Modern Gardens

Modern gardens can also benefit from driftwood’s raw and untamed forms. Pairing it with sleek materials like metal or glass creates an interesting visual tension.

Engaging with Local Driftwood Communities

Engaging with communities that share your interest in driftwood can provide inspiration and assistance.

Online Communities

Join online forums or social media groups. Platforms like Instagram and Pinterest abound with creative driftwood ideas.

Local Workshops and Markets

Participate in local workshops to learn techniques in driftwood crafting. Local markets often feature artisans selling driftwood pieces, providing an opportunity to find unique additions for your garden.

Legal and Environmental Considerations

Before collecting driftwood, be aware of the legal and environmental implications.

Regulations

Some locations have regulations against collecting driftwood, to preserve natural habitats. Always check local laws before gathering driftwood.

Environmental Impact

Be mindful not to disturb marine wildlife or ecosystems when collecting driftwood. Only take what you need and leave the rest for nature to reclaim.

Conclusion

Driftwood brings an element of natural beauty, history, and sustainability into your garden. Whether used for planters, sculptures, or simply as a focal point, each piece of driftwood carries the story of its journey through rivers and oceans. With minimal maintenance and endless creative possibilities, driftwood can transform your garden into a unique, artistic haven. So next time you see a piece of driftwood on the shore, imagine the potential it holds and bring a piece of nature’s sculpture into your garden.

Should you find yourself inspired to start incorporating driftwood into your garden, you might begin to see it in a whole new light—a versatile medium for expressing your creativity and love for the natural world.

Filed Under: Driftwood Ideas Tagged With: DIY, Driftwood, garden decor, Landscaping, Outdoor Design

Driftwood Giraffe

July 30, 2024 by admin

Welcome to the whimsical world of the “Driftwood Giraffe,” where nature’s artistry and imagination intertwine! You’ll be enchanted by the story of how driftwood pieces, meticulously collected and expertly arranged, come together to form a majestic giraffe sculpture. This distinctive creation not only showcases the beauty of natural materials but also reflects the boundless creativity and vision required to bring such a unique project to life. Have you ever stumbled upon a piece of driftwood during your beach visits and wondered if you could transform it into something extraordinary? If you’re intrigued by the idea of combining the raw beauty of reclaimed wood with your creative flair, then building a driftwood giraffe might be the perfect project for you.

What is a Driftwood Giraffe?

A driftwood giraffe is an imaginative creation made from pieces of driftwood assembled to resemble the shape of a giraffe. It merges the natural, weathered aspects of wood washed up by the sea with the iconic, elegant silhouette of a giraffe. This unique combination not only serves as a stunning decorative piece but also connects you with nature in a truly artistic manner.

Why Choose Driftwood?

Driftwood has an unparalleled charm and character. Each piece tells a story of its journey through waves and currents, giving it a distinct appearance that’s impossible to replicate artificially. Using driftwood for art projects like a driftwood giraffe adds a rustic, natural aesthetic to your work, making it stand out in any space.

Gathering Your Materials

Before diving into the construction of your driftwood giraffe, you’ll need to gather all the necessary materials. Here’s a list to get you started:

MaterialDescription
Driftwood piecesVarying sizes and shapes to form the giraffe’s body, neck, legs, and head.
Wood glueFor adhering smaller pieces together securely.
Nails and screwsTo provide firm support and stability.
Twine or wireUseful for additional reinforcement.
SandpaperFor smoothing rough edges.
Protective finishTo seal and protect the wood.
ToolsHammer, screwdriver, pliers, and possibly a saw.

Selecting the Right Driftwood

When selecting driftwood, aim for pieces that are relatively lightweight yet sturdy. The varying textures and shapes will add to the intricate and organic look of your giraffe. Try to find a piece that will work as the main body and search for others that could resemble the legs, neck, and head.

Driftwood Giraffe

Designing Your Giraffe

Creating a driftwood giraffe involves some initial planning. Take time to sketch out your design before you start assembling the wood. This will give you a clear vision and guide you through the process.

Sketching the Outline

Start by envisioning the giraffe’s proportions. You don’t need to be an artist—just a simple sketch will do. Focus on the overall shape, making sure to denote where each major part (body, neck, legs, head) will be placed.

Proportion and Balance

A giraffe’s slender appearance means it’s crucial to maintain good proportions and balance. Pay attention to the length and angles of the limbs and neck. Ensure that the base of your giraffe is wide and stable enough to support its height.

Step-by-Step Construction

Now, let’s break down the steps involved in creating your driftwood giraffe.

1. Constructing the Body

Begin with the body since it serves as the core structure. Select a sturdy piece of driftwood that can support the rest of the figure.

  1. Lay the Body Foundation: Position it so it lies flat and stable.
  2. Attach the Legs: Attach four driftwood pieces that will serve as the legs. Ensure they are evenly spaced and securely fixed.
  3. Strengthening the Joints: Use wood glue, nails, and screws to reinforce the connections. If needed, wrap twine or wire around the joints for extra stability.

2. Adding the Neck

The neck is one of the most distinctive features of the giraffe and also the most prone to instability due to its length and thinness.

  1. Selecting the Neck Piece: Choose a long, straight piece of driftwood.
  2. Securing the Neck: Attach it securely to the body. Reinforce it well with nails, screws, and possibly twine or wire.
  3. Support Structure: Depending on the size, you might need to add a support structure at the base of the neck to help balance the weight.

3. Forming the Head

The head can be a bit tricky due to its smaller size and requirement for detail.

  1. Choosing the Pieces: Find smaller, curved pieces of driftwood suitable for the head and ears.
  2. Shaping the Head: Assemble these pieces to form the head, ears, and possibly the ossicones (the bony protuberances on a giraffe’s head).
  3. Attaching the Head: Secure it at the top of the neck, ensuring that it is well-balanced and firmly affixed.

4. Final Touches

Finish your driftwood giraffe by sanding down any rough edges and applying a protective finish.

  1. Sanding: Use sandpaper to smooth out rough spots and sharp edges. This makes your sculpture safer to handle and gives it a polished look.
  2. Protective Coating: Apply a clear finish to protect the wood from further weathering and to bring out its natural colors.
  3. Detailing: Add any additional details, such as smaller pieces for spots or other textural elements.

Driftwood Giraffe

Displaying Your Driftwood Giraffe

Once your driftwood giraffe is complete, consider how best to display it. It’s a versatile piece that can enhance both interior and exterior spaces.

Indoor Display

Place it in a living room, hallway, or study where it can act as a conversation starter. The natural materials will add warmth and character to your home.

Outdoor Display

If displayed outdoors, ensure that it is in a sheltered area to protect it from direct exposure to sunlight and rain. A porch or garden nook would be ideal.

Caring for Your Driftwood Giraffe

To keep your driftwood giraffe looking its best, occasional maintenance is necessary.

  1. Cleaning: Dust it regularly using a soft cloth.
  2. Inspecting: Check occasionally for signs of wear or instability, especially in joint areas.
  3. Reapplying Finish: Reapply the protective finish annually to maintain the wood’s color and protect it from moisture and UV damage.

Benefits of Creating Art with Driftwood

Apart from the aesthetic appeal, crafting with driftwood offers several additional benefits.

Environmental Impact

Using driftwood is an eco-friendly option. It recycles materials that would otherwise go to waste, reducing the demand for fresh timber and helping to preserve forests.

Therapeutic Activity

The process of gathering and assembling driftwood can be highly therapeutic. It connects you with nature and allows you to engage in a mindful and creative practice.

Unique Decor

Every piece of driftwood is unique, ensuring that no two driftwood giraffes will ever look the same. This uniqueness adds a personal and exclusive touch to your home decor.

Inspiration and Ideas

If you’re considering further projects, or variations of the driftwood giraffe, here are some ideas to spark your creativity:

Driftwood Zoo

Expand your collection by creating more animals using driftwood. Think elephants with long, curving driftwood trunks, or birds with delicate twig wings.

Functional Art

Combine form and function by creating furniture pieces, like coffee tables or coat racks, that incorporate driftwood in their design.

Driftwood Sculptures

Venture into abstract art with large, intricate driftwood sculptures that become focal points in gardens or interior spaces.

Tips and Tricks for Success

Here are some extra tips to ensure your driftwood giraffe project goes smoothly:

  1. Source Quality Driftwood: Be selective in your driftwood gathering to ensure you have pieces that are both aesthetically pleasing and structurally sound.
  2. Plan Your Design: A well-thought-out design will save you time and effort in the long run.
  3. Take Your Time: Rushing through the assembly could lead to instability and frustration.
  4. Safety First: Use appropriate gear, such as gloves and safety glasses, especially when sawing or nailing driftwood.
  5. Practice Patience: Sometimes pieces won’t fit perfectly on the first try. Be patient and willing to make adjustments.

Conclusion

Creating a driftwood giraffe is a rewarding and creative project that combines art and nature in an intriguing way. From gathering your materials to putting on the final touches, each step allows you to engage with natural materials and transform them into a beautiful piece of art. Whether it’s displayed indoors or outdoors, your driftwood giraffe is sure to captivate and inspire. Embrace the opportunity to create something unique and enjoy the process every step of the way!

Filed Under: Driftwood Ideas Tagged With: Craft Projects, DIY, Driftwood, Giraffe Sculpture

Driftwood Hanging Planter

July 30, 2024 by admin

Imagine adding a touch of natural elegance to your living space with a piece of décor that’s as unique as you are. In “Driftwood Hanging Planter,” you’ll discover how to create a stunning hanging planter using pieces of driftwood. This guide will walk you through selecting the perfect driftwood, assembling your planter, and incorporating it seamlessly into your home. With just a few simple steps and a bit of creativity, you’ll have a striking, eco-friendly piece that brings both beauty and tranquility to any room. Have you ever wondered how to bring a touch of coastal beauty and rustic charm into your living space? Look no further because creating a driftwood hanging planter is a wonderful way to achieve that. This project is not only simple and fun but also adds a stunning centerpiece to any room or outdoor area.

What is a Driftwood Hanging Planter?

A driftwood hanging planter is a unique and artistic way to showcase your favorite plants by combining the natural beauty of driftwood with the greenery of plants. Driftwood, which is often found along beaches, has a weathered, rustic appearance that brings a coastal feel to any decor. When paired with plants, it creates a striking and sustainable display.

Benefits of a Driftwood Hanging Planter

Creating a driftwood hanging planter isn’t just about aesthetics; it also has several practical benefits:

  • Eco-Friendly: Repurposing driftwood supports recycling and reduces waste.
  • Customizable: You can design it to fit any space or style.
  • Natural Appeal: Driftwood’s natural textures and colors add an organic feel.
  • Space-Saving: Hanging planters free up surface space in your home or garden.

Materials Needed for Your Driftwood Hanging Planter

Before you start, gather all the materials you’ll need. Here’s a handy table to help you prepare:

MaterialDescription
DriftwoodChoose pieces that are sturdy and appealing to your taste.
Hanging hardwareHooks, nails, or screws suitable for your installation location.
Twine or ropeStrong enough to hold the weight of your planter.
Plant pots or holdersLightweight and the right size for your driftwood piece.
Potting soilSuitable for the plants you choose to grow.
PlantsChoose plants that thrive in your indoor or outdoor environment.

Selecting Driftwood

When selecting driftwood, look for pieces that have interesting shapes and sturdy structures. Driftwood can be found along beaches, riverbanks, or even purchased from craft stores. Ensure that the wood is thoroughly dry and free from pests or mold.

Choosing Plants

Choose plants that match the conditions of your arrangement’s location. For instance, succulents or air plants are excellent choices for indoor settings due to their low maintenance needs. For outdoor planters, consider hardy plants like ferns or ivy.

Driftwood Hanging Planter

Step-by-Step Guide to Crafting Your Driftwood Hanging Planter

Now that you have all your materials, let’s walk through the process of creating your driftwood hanging planter.

Step 1: Cleaning and Preparing Driftwood

Before you start, make sure your driftwood is clean. Here’s how:

  1. Rinse: Wash the driftwood with fresh water to remove salts, sand, and debris.
  2. Scrub: Use a brush to scrub off any remaining dirt or algae.
  3. Disinfect: If you suspect pests, soak the driftwood in a solution of one part bleach to nine parts water for a few hours, then rinse thoroughly.
  4. Dry: Allow the driftwood to air dry completely, which can take several days.

Step 2: Planning Your Design

Lay out all your materials and start planning your design. Consider the following:

  • Balance: Ensure that the driftwood and plants balance aesthetically and physically.
  • Accessibility: Plan for watering and care access.
  • Stability: Make sure the final arrangement will be secure.

Step 3: Attaching the Plant Holders

  1. Placement: Position your plant pots or holders on the driftwood where they look best.
  2. Secure: Attach the holders to the driftwood using screws, nails, or strong adhesive. Make sure they are secure enough to hold the weight of the plants and soil.
  3. Test: Before adding soil, test the stability by gently tugging on the holders.

Step 4: Adding the Plants

  1. Prepare Soil: Fill your plant pots or holders with potting soil.
  2. Planting: Transfer your plants into the pots. Press soil firmly around the plant bases to secure them.
  3. Watering: Water the plants thoroughly after planting.

Step 5: Attaching Hanging Hardware

  1. Hooks: Attach hooks to the top ends of the driftwood.
  2. Rope or Twine: Tie the rope or twine securely to the hooks.
  3. Measure: Measure and adjust the length of the rope to ensure the planter hangs at the desired height.
  4. Secure Installation: Install hooks or screws in the ceiling or wall where you want to hang the planter.

Step 6: Hanging the Planter

  1. Final Check: Double-check the security of all attachments.
  2. Hang: Carefully hang the planter in your chosen location.
  3. Adjust: Make any final adjustments to ensure it hangs level and securely.

Care and Maintenance of Your Driftwood Hanging Planter

Keeping your driftwood hanging planter looking its best requires a bit of care. Here are some maintenance tips:

Watering

  • Indoor Plants: Water according to the needs of your specific plants. Most indoor plants require less frequent watering.
  • Outdoor Plants: Outdoor plants might need more regular watering, especially in hot weather.

Cleaning

  • Dusting: Regularly dust the driftwood and plant leaves to keep them looking fresh.
  • Pest Control: Check periodically for pests and take action as needed.

Plant Care

  • Pruning: Trim dead or yellowing leaves to promote healthy growth.
  • Fertilization: Occasionally fertilize your plants according to their specific needs.

Driftwood Hanging Planter

Enhancing Your Home Decor with Driftwood Hanging Planters

Driftwood hanging planters aren’t just functional; they’re also a beautiful addition to your home decor. Here’s how to enhance your space with them:

Creating a Coastal Theme

If you love the beach, decorate around your driftwood hanging planter to create a cohesive coastal theme. Use shells, light blues, and sandy colors to complement the natural look of the driftwood.

Combining with Other Natural Elements

Combine your planter with other natural elements like stones, crystals, or other types of wood. This creates a harmonious and serene environment.

Indoor and Outdoor Placements

Indoor Placement Ideas

  • Living Room: Place it in a well-lit corner to serve as a focal point.
  • Kitchen: Use herbs in your planters for a practical and decorative touch.
  • Bathroom: Add a small succulent planter for a fresh, spa-like feel.

Outdoor Placement Ideas

  • Porch or Patio: Hang multiple planters at varying heights for a lush, garden feel.
  • Garden Area: Use the planters to create vertical interest in your garden.

Inspiration for Different Styles of Driftwood Hanging Planters

Not sure where to start with your design? Here are some inspiring styles to consider:

Minimalist

A minimalist driftwood hanging planter features clean lines and simple plants like succulents or air plants. The focus is on the natural beauty of the driftwood and the understated elegance of the plants.

Bohemian

For a bohemian style, opt for colorful plants and intricate macramé hangers. You can also add beads or feathers to the design for an eclectic and free-spirited look.

Rustic

A rustic driftwood hanging planter pairs well with hardy plants and rugged twine. Use metal pots or reclaimed containers to enhance the rustic charm.

Modern

If you prefer a modern look, choose sleek pots and monochromatic plants. Use polished driftwood pieces and metal hardware for a contemporary twist.

Troubleshooting Common Issues

Even with the best intentions, you might encounter some challenges. Here’s how to overcome common issues:

Driftwood Stability

If your driftwood piece is unstable, consider reinforcing it with additional hooks or screws. Make sure all attachments are secure.

Plant Health

Yellowing leaves or drooping plants may indicate improper watering or insufficient light. Adjust your care routine accordingly.

Hanging Issues

If the planter tilts or doesn’t hang straight, adjust the lengths of the ropes or reposition the hanging hardware.

Frequently Asked Questions

To help you even further, here are answers to some frequently asked questions about driftwood hanging planters.

Can I use any type of wood?

While driftwood is ideal due to its natural beauty and weathered look, you can use other types of wood. Ensure that it’s treated and safe for indoor use to avoid mold and pests.

How do I know if my driftwood is dry enough?

Dry driftwood is lighter in color and weight. It should not feel damp to the touch. Air drying is the best method, but if you’re in a hurry, you can bake it in a low-temperature oven to speed up the process.

What if I have no access to natural driftwood?

If you can’t find natural driftwood, many craft stores sell it. Alternatively, you can use any weathered wood piece that appeals to you.

Can I hang the planter outside in any weather?

Consider the durability of both the driftwood and plants when deciding on outdoor placement. Some driftwood pieces and plants handle weather variations better than others.

Why Make a Driftwood Hanging Planter?

Aside from being a beautiful decorative piece, creating a driftwood hanging planter is a rewarding project that allows you to connect with nature and express your creativity. It’s a perfect weekend project that can involve friends and family, making it not just a decorative addition but also a memorable crafting experience.

Personal Satisfaction

There’s immense satisfaction in crafting something beautiful and functional with your own hands. Watching your plants grow and thrive in their unique setting adds another layer of reward.

Eco-Friendly Decor

By using driftwood and plants, you contribute to sustainable and eco-friendly decor choices. It reflects a commitment to recycling and living in harmony with nature.

Conversation Starter

Such a unique piece is bound to attract attention and admiration, making it a great conversation starter when you have guests.

Final Thoughts

A driftwood hanging planter is more than just a planter; it’s a testament to nature’s beauty and your creativity. It combines the rugged charm of driftwood with the vibrant life of plants, creating a unique decorative piece that resonates with natural elegance. Not only will you enjoy the process of making it, but you’ll also take pride in the distinctive, living art piece you’ve created.

So grab your materials, unleash your creativity, and bring a piece of coastal charm into your home with a driftwood hanging planter. Happy crafting!

Filed Under: Driftwood Ideas Tagged With: DIY, Driftwood, Hanging Planter, Indoor Gardening

Driftwood Home Decor

July 29, 2024 by admin

Imagine transforming your living space into a serene coastal retreat without ever stepping foot near the ocean. Driftwood Home Decor invites you to infuse your home with the natural beauty and rustic charm of driftwood. With its unique shapes and earthy tones, driftwood brings an organic elegance that’s both timeless and versatile. Whether it’s a stunning wall art piece, a handcrafted frame, or a cozy centerpiece, driftwood decor creates a warm, inviting atmosphere that makes every day feel like a beachside escape. Dive into this enchanting world and discover how driftwood can breathe new life into your home. Have you ever walked along the beach, found an intriguing piece of driftwood, and wondered how you could integrate it into your home decor? Driftwood, with its natural beauty and unique characteristics, offers a plethora of opportunities to bring the tranquility and charm of the coast into your living space.

Driftwood Home Decor

Why Choose Driftwood for Home Decor?

Driftwood is not only aesthetically pleasing but also an eco-friendly decor option. By upcycling natural driftwood, you are making a conscious decision to incorporate sustainable materials into your home, reducing your carbon footprint. Plus, each piece of driftwood is unique, adding an exclusive touch to your decor.

Eco-Friendly Benefits

By choosing driftwood, you’re helping to reduce waste and support a zero-waste lifestyle. The ocean and lakes naturally weather the wood, giving each piece its distinct character without the need for additional processing or chemicals. This natural aging process makes every item one-of-a-kind.

Unique Aesthetic Appeal

Each piece of driftwood carries its history, shaped by the water and time. No two pieces are alike, each with its own set of knots, grooves, and patterns. This uniqueness can add a rustic, nautical, or even elegant flair to your home, depending on how you use it.

Where to Find Driftwood

Before you start your DIY projects, you need to gather your materials. Driftwood can be found naturally or bought from stores.

Beachcombing and Lake Searching

A day out by the shore can be both a relaxing and productive experience. Look for areas abundant with driftwood, such as beaches, lakeshores, or riverbanks. Be sure to check local regulations, as some areas may have restrictions on removing natural elements.

LocationBest TimeWhy?
Ocean BeachesAfter stormsStorms wash up fresh pieces of driftwood.
Lake ShoresEarly spring or autumnLower water levels make driftwood more accessible.
RiverbanksThroughout the yearConsistent water flow often brings new pieces.

Online and Specialty Stores

If you don’t live near a body of water, don’t worry. Many online retailers and specialty stores offer driftwood for purchase. These pieces are often cleaned and ready for use, saving you time.

Preparing Driftwood for Indoor Use

Once you’ve gathered your driftwood, some preparation is necessary. Cleaning and treating are essential to ensure the wood is free of pests and safe for long-term use.

Cleaning Your Driftwood

Begin by soaking the driftwood in a large bucket or tub filled with water. Add a bit of bleach or vinegar to disinfect the wood. Let it soak for at least 24 hours. After soaking, scrub the driftwood with a stiff brush to remove any remaining debris.

Drying and Treating

After cleaning, allow the driftwood to dry thoroughly, which may take several days or even weeks, depending on its size and density. Place it in a dry, sunny spot or use a dry, well-ventilated area indoors. Once dry, you can optionally apply a clear wood finish or sealant to preserve its look and longevity.

Ideas for Driftwood Home Decor

Now, let’s dive into some creative ways to incorporate driftwood into your home decor. From simple accents to impressive furniture pieces, driftwood can enhance any space.

Driftwood Wall Art

Wall art made from driftwood can add a coastal touch to any room. You can create intricate designs, simple arrangements, or even combine driftwood with other materials like shells, stones, and fabrics.

  1. Simple Arrangement: Arrange smaller pieces of driftwood in a pattern on a canvas and glue them in place. This can create stunning, natural artworks that are perfect for any wall.

  2. Intricate Designs: For the more artistically inclined, use a variety of sizes and shapes of driftwood to create detailed images or abstract designs.

Driftwood Mirrors

Adding a driftwood mirror to your space not only adds function but also enhances the coastal vibe. Frame a plain mirror with pieces of driftwood for a rustic, eye-catching accessory.

  1. Classic Rectangular/Square Frame: Fit pieces around the edges of a rectangular or square mirror.
  2. Circular Frame: Use curved pieces to follow the round contour of the mirror, giving it a unique look.

Driftwood Picture Frames

Turn your favorite photos into a stylish display by creating driftwood picture frames. This is a simple project that requires only a few pieces of wood, some glue, and your creativity.

  1. Minimal Design: Use four straight pieces of driftwood to create a basic frame.
  2. Layered Effect: Layer smaller pieces of driftwood over each other for a more complex, textured look.

Driftwood Shelves

Incorporate driftwood shelves for a functional and decorative touch. Whether it’s for books, plants, or knick-knacks, driftwood shelves can enhance the natural feel of your home.

  1. Floating Shelves: Attach driftwood to hidden wall brackets to create floating shelves.
  2. Bracketed Shelves: Use metal or wooden brackets to support larger pieces of driftwood.

Driftwood Furniture

For a more substantial project, consider making furniture out of driftwood. Anything from side tables to bed frames can be crafted out of larger pieces of driftwood.

  1. Tables: Assemble pieces of driftwood to create the base of a coffee table, end table, or dining table. Top it with a glass or wood surface.
  2. Bed Frames: Use longer pieces of driftwood to construct a rustic bed frame.
Furniture TypeMaterials NeededTools Required
Coffee TableLarge pieces of driftwood, glass topSaw, drill, screws, sandpaper
End TableMedium-sized driftwood, wood topSaw, drill, screws, wood glue
Bed FrameLong, sturdy pieces of driftwoodSaw, drill, screws, lag bolts

Driftwood Home Decor

Maintaining Your Driftwood Decor

Once you’ve incorporated these beautiful creations into your home, it’s important to maintain them properly. Driftwood requires minimal care but a few key steps can keep it looking its best.

Dusting

Regularly dusting your driftwood decor will keep it clean and free of buildup. Use a soft cloth or a duster to gently remove dust and debris. For more intricate pieces, a soft brush can reach into the nooks and crannies.

Avoiding Moisture

Driftwood is naturally porous and can absorb moisture, which may lead to mold or mildew. Keep your driftwood decor away from damp areas and occasionally check for any signs of moisture damage.

Reapplying Sealant

If you chose to seal your driftwood, it’s a good idea to reapply the sealant every couple of years. This will keep your decor looking fresh and protected.

Conclusion

Incorporating driftwood into your home decor is a wonderful way to bring the beauty of nature indoors. Its unique, rustic charm can beautifully complement a variety of interior styles. Plus, by using driftwood, you’re making an eco-friendly choice that celebrates the natural world.

From simple wall art to substantial furniture pieces, driftwood offers endless opportunities for creativity and expression in your home decor. So next time you’re by the water, keep an eye out for that perfect piece of driftwood – it might just become the next stunning addition to your living space.

We hope this guide has inspired you to give driftwood home decor a try. Whether you’re an experienced crafter or a complete novice, there’s a driftwood project out there waiting for you. Happy decorating!

Filed Under: Driftwood Ideas Tagged With: Coastal Style, DIY, Driftwood, natural materials, Rustic Decor

Driftwood Hanging

July 29, 2024 by admin

Driftwood Hanging is a charming and versatile piece of decor that brings natural beauty into any living space. Whether you live by the sea or simply adore the tranquility of coastal aesthetics, incorporating driftwood into your home can add a touch of elegance and warmth. You’ll learn how easy it is to craft your own driftwood hanging, perfect for your front porch, living room, or even your bedroom. From selecting the right pieces of driftwood to choosing complementary materials and assembling your masterpiece, this article guides you through each step with ease, making it a delightful project for any DIY enthusiast. Have you ever wandered along the beach, marveling at the various treasures the ocean leaves behind, and wondered what you could create with them? If you have, you’re probably familiar with driftwood. This naturally weathered wood, smoothed by water and sun, is not only beautiful in its organic form but also perfect for unique and creative DIY projects. One such project is making a driftwood hanging, a captivating and artistic way to bring a piece of the beach into your home.

Driftwood Hanging

What is Driftwood?

Driftwood is wood that has been washed ashore by waves, tides, or winds. It often has a rustic, weathered look due to prolonged exposure to the elements. Each piece of driftwood carries its own history, etched into its grain and form by the forces of nature. From small twigs and branches to large logs and stumps, driftwood comes in various shapes and sizes, providing endless creative possibilities.

Why Choose Driftwood for Crafting?

Driftwood is more than just a piece of wood; it’s a material imbued with natural beauty and character. Here are a few reasons why it’s ideal for crafting:

  • Eco-Friendly: Using driftwood is an excellent way to recycle and repurpose natural materials.
  • Unique: No two pieces of driftwood are the same, ensuring your creation will be truly one-of-a-kind.
  • Versatile: Driftwood can be used in various crafts and home decor projects, from furniture to wall art.

Gathering Your Materials

Before you start your driftwood hanging project, you’ll need to gather some essential materials. Here’s a handy table to keep track of everything you need:

MaterialDescription
Driftwood PiecesVarious sizes and shapes for a visually interesting design
Twine or RopeNatural fibers work best for a rustic look
Hooks or RingsFor hanging the finished piece on a wall
DrillTo create holes in your driftwood for threading twine or rope
SandpaperTo smooth out rough edges or surfaces
Optional: Beads, ShellsFor additional decorative elements

Preparing the Driftwood

Cleaning the Driftwood

Once you’ve collected your driftwood, it’s important to clean it thoroughly. Even though driftwood is naturally beautiful, it may carry dirt, salt, and microorganisms that you’d prefer not to have in your home.

  1. Rinse: Start by rinsing the driftwood pieces with fresh water to remove any sand and surface dirt.
  2. Soak: Soak the driftwood in a mixture of water and bleach (1:9 ratio) for 24 hours to sterilize it.
  3. Scrub: Use a brush to scrub away any remaining debris.
  4. Dry: Let the driftwood dry completely in a well-ventilated area. This can take several days, depending on the size and thickness of the pieces.

Smoothing and Drilling

To ensure your driftwood hanging looks polished, you’ll want to smooth out any rough edges. Use sandpaper to gently buff the surfaces, paying extra attention to any jagged areas that might catch on clothing or skin.

After smoothing the wood, you’ll need to drill holes for threading the twine or rope. Decide on the arrangement of your driftwood pieces before drilling. Mark the spots for the holes with a pencil, ensuring they are aligned properly for even hanging.

Driftwood Hanging

Designing Your Driftwood Hanging

Plan Your Layout

Before you start assembling, it’s helpful to lay out your design on a flat surface. Arrange the driftwood pieces in a way that pleases you, considering balance and symmetry.

Adding Decorative Elements

To add a touch of individuality to your driftwood hanging, consider incorporating decorative elements such as shells, beads, or small charms. These can be threaded onto the twine or rope between the driftwood pieces.

Assembling the Hanging

Thread the twine or rope through the holes you drilled in the driftwood. Secure each piece with knots, ensuring they are evenly spaced. Here’s a step-by-step guide to help you:

  1. Start with the Top Piece: Thread a piece of twine through the top driftwood piece and tie a knot to secure it.
  2. Add Additional Pieces: Continue threading and knotting, spacing the driftwood pieces evenly.
  3. Secure the Bottom Piece: Once all pieces are added, tie a secure knot at the bottom to keep everything in place.
  4. Attach the Hanging Mechanism: Tie a loop or attach hooks or rings to the top for easy hanging.

Displaying Your Driftwood Hanging

Choosing the perfect spot for your driftwood hanging is key to showcasing your creation. Driftwood hangings are versatile and can enhance various areas of your home:

  • Living Room: Display your driftwood hanging above a couch or fireplace to create a focal point.
  • Bedroom: Hang it above the bed for a touch of natural serenity.
  • Bathroom: Driftwood’s beachy vibe makes it an ideal addition to bathroom decor.
  • Entryway: Welcome guests with a beautiful driftwood hanging in the entryway.

Maintenance and Care

Driftwood hangings are relatively low maintenance, but a little care will ensure they remain in good condition over time. Here are some tips:

  • Dust Regularly: Use a soft cloth or feather duster to remove dust from the driftwood.
  • Avoid Excess Moisture: While driftwood is naturally resistant to moisture, avoid hanging it in areas with high humidity to prevent mold growth.
  • Check for Stability: Periodically check the knots and hanging mechanisms to ensure they remain secure.

Additional Driftwood Craft Ideas

If you enjoyed making your driftwood hanging, you might want to try some other driftwood crafts. Here are a few ideas to inspire you:

Driftwood Mirror

Transform a plain mirror by framing it with driftwood pieces. This creates a stunning, rustic look perfect for any room.

Driftwood Sculpture

Create a free-standing sculpture by assembling larger driftwood pieces. This can be a striking centerpiece for your home or garden.

Driftwood Shelf

Construct a unique shelf by using a long, sturdy piece of driftwood as the base. Attach brackets and mount it on the wall for a functional piece of art.

Driftwood Candle Holder

Drill holes into a flat piece of driftwood to hold candles. This creates a warm and inviting ambiance.

Driftwood Wind Chime

Thread smaller pieces of driftwood, shells, and beads to create a wind chime. Hang it outside and enjoy the soothing sounds as the wind blows.

Conclusion

Creating a driftwood hanging is a fulfilling and rewarding project that allows you to bring a piece of nature into your home decor. The process is enjoyable and the results are stunning, especially knowing that each piece of driftwood carries its own natural history and charm.

By following the steps outlined in this guide, you’ll craft a unique and beautiful driftwood hanging that reflects your personal style and love for the ocean. Not only will you have a gorgeous piece of art, but you’ll also have a great conversation starter and a constant reminder of the beach’s beauty.

So, why not start collecting driftwood on your next beach walk and see what you can create? Happy crafting!

Filed Under: Driftwood Ideas Tagged With: DIY, Driftwood, Hanging Decor, natural materials

Driftwood Heart

July 29, 2024 by admin

In “Driftwood Heart,” you embark on a captivating journey, discovering the poignant tale of resilience and renewal through nature’s timeless artistry. The story revolves around a quaint coastal town where a simple piece of driftwood, shaped like a heart, becomes a symbol of hope and transformation for its inhabitants. Each chapter unfolds layers of emotional depth, capturing how this natural wonder impacts lives, weaves destinies, and mends fractured spirits. As you turn the pages, you’ll find yourself deeply moved by the heartfelt connections and personal growth spurred by this extraordinary piece of nature’s own handiwork, the driftwood heart. Have you ever found a piece of driftwood on a beach and wondered about its journey? We often pass by such treasures without thinking much of them, but each piece of driftwood has a story to tell. The wear and tear, the smooth curves, and the unique shapes like a driftwood heart speak of adventure, change, and transformation. In this article, we’re going to take a deep dive into the world of driftwood, specifically focusing on a term that’s both romantic and intriguing: the “Driftwood Heart.”

What is Driftwood?

Before we dive into the specifics of a driftwood heart, it’s important to understand what driftwood is. Driftwood comes from trees and bushes that have been washed into oceans, rivers, or lakes. Over time, the constant motion of water sands and polishes these wood pieces, making them a beautiful addition to nature’s art gallery.

The Journey of Driftwood

Let’s break down the journey driftwood undertakes:

  1. Start: It typically begins its life as a fallen tree or branch from forests near water bodies.
  2. Movement: It gets carried away by floods, storms, or normal water currents.
  3. Transformation: Over time, it soaks in water, becomes buoyant, and travels.
  4. Reshaping: Natural elements like water currents, sand, and rocks constantly reshape it.
  5. Destination: It often finds a new resting place on beaches, riverbanks, or lakeshores.

Importance of Driftwood

Driftwood is not just an aesthetic element. It serves as an ecological pillar in marine and freshwater environments:

  • Habitats: Provides shelter and living spaces for various creatures like crabs, fish, and even birds.
  • Nutrient Cycle: Contributes to the nutrient cycle by breaking down and releasing minerals back into the ecosystem.
  • Erosion Control: Helps in preventing erosion by breaking the force of ocean waves on shores.

What is a Driftwood Heart?

The term “Driftwood Heart” can be both literal and metaphorical. Literally, it refers to a piece of driftwood shaped like a heart, either naturally or carved by artists.

The Metaphorical Driftwood Heart

Metaphorically, a driftwood heart embodies resilience, transformation, and enduring beauty despite harsh conditions. Just like a heart can endure life’s storms and transform through experiences, driftwood undergoes a similar process in nature.

The Symbolism of the Driftwood Heart

Here’s what a driftwood heart can symbolize:

  1. Resilience: The strength to withstand relentless waves and currents.
  2. Transformation: The beauty that comes through constant change.
  3. Serendipity: The unexpected and pleasant surprise of finding a heart-shaped treasure.
  4. Love and Connection: Often used in weddings or as a gift to symbolize enduring love.

Driftwood Heart

How to Find Driftwood Hearts

Scouting for driftwood hearts can be a fun, rewarding activity. Here’s a step-by-step guide to help you.

Best Locations to Find Driftwood

While you can find driftwood in many places, some locations are more likely to yield heart-shaped pieces:

  • Beaches: Coastal areas are prime spots for driftwood accumulation.
  • Riverbanks: Rivers often carry wood from upstream to downstream banks.
  • Lakeshores: Like beaches, lakeshores also gather driftwood from surrounding areas.

Tips for Successful Searching

To increase your chances of finding that perfect driftwood heart:

  • Post-Storm Scavenging: After storms, there’s a higher chance of new driftwood washing ashore.
  • Seasonal Timing: Spring and autumn may offer more finds due to increased water activity.
  • Time of Day: Early mornings or late evenings often provide a quieter environment for searching.
  • Bring Tools: Carry a small bag, gloves, and perhaps a magnifying glass for closer inspection.

Ethical Considerations

Be mindful of your impact on local ecosystems:

  • Don’t Take Too Much: Leave enough driftwood for the habitat’s natural needs.
  • Avoid Living Areas: Ensure you’re not disrupting the habitat of marine or freshwater creatures.

Crafting with Driftwood Hearts

Once you find your driftwood heart, you can transform it into an art piece or home décor item.

Simple Ideas for Driftwood Hearts

Here are a few simple ways to use driftwood hearts:

  • Wall Art: Mount it on a wooden frame or canvas.
  • Jewelry: Use small driftwood hearts to create necklaces or bracelets.
  • Garden Décor: Place them in your garden as an organic decorative element.

Advanced Craft Ideas

Feeling more creative? Try these:

  • Driftwood Heart Sculptures: Combine with other driftwood pieces to create intricate designs.
  • Wind Chimes: Decorate a driftwood heart with beads, shells, and other natural elements.
  • Mobiles: Create hanging mobiles with multiple hearts and other natural treasures.

Preservation Tips

Driftwood, though beautiful, needs care to last:

  • Cleaning: Wash with a mild soap solution and let it dry completely.
  • Preservation: Use a clear wood preservative.
  • Heat Treatment: For removing any lingering pests, consider baking in an oven at a low temperature.

Driftwood Heart

Driftwood Hearts in Culture and Art

The driftwood heart is not just a hobbyist’s delight but has resonated through various forms of art and culture.

Driftwood in Art

Artists globally have embraced driftwood for its unique texture and history:

  • Sculptures: Artists create mesmerizing sculptures using the natural forms of driftwood.
  • Paintings: Driftwood heart motifs often appear in beach-themed art.
  • Installations: Large-scale installations in public spaces often use driftwood.

Driftwood in Literature and Poetry

Driftwood hearts are also a popular literary symbol:

  • Metaphors: Used to describe resilience and transformation.
  • Imagery: Poets and authors use driftwood to set picturesque scenes or convey emotional depth.

Embracing the Driftwood Heart Philosophy

Adopting the driftwood heart as a symbol in your life can encourage you to embrace resilience and transformation.

Personal Growth

Just as driftwood transforms through adversity, so can you:

  • Adaptability: Accept and adapt to life’s changes and challenges.
  • Strength: Draw strength from your experiences, shaping you into a more resilient person.

Relationship Goals

In relationships, the driftwood heart can remind you to:

  • Endure Together: Weather challenges together, becoming stronger as a unit.
  • Appreciate Beauty: Find beauty in imperfections and changes, enhancing your bond.

A Symbol for Special Occasions

Consider incorporating driftwood hearts in:

  • Weddings: Symbolize everlasting love and union through custom driftwood heart décor.
  • Valentine’s Day: Gift a unique driftwood heart piece as a symbol of your enduring love.

How to Recognize High-Quality Driftwood

To truly appreciate this natural treasure, it’s important to recognize high-quality driftwood.

Qualities to Look For

Good driftwood should have the following characteristics:

  • Smoothness: Years in water should have smoothed out sharp edges.
  • Color: Should have a natural, aged color—usually shades of gray or brown.
  • Durability: Should feel solid and not brittle.

Signs of Natural Weathering

Natural weathering creates unique features:

  • Grain Pattern: Indicates the wood type and can add aesthetic value.
  • Erosion Marks: Natural patterns created by water and sand.

Avoiding Treated Wood

Treated or processed wood can sometimes mix with natural driftwood:

  • Smell: Avoid wood with chemical odors.
  • Color: Unnatural colors may indicate treatment.
  • Texture: Smooth but glassy textures could indicate human processing.

Sustainable Practices in Driftwood Collection

Sustainability should be at the forefront when collecting and using driftwood.

Leave Enough Behind

Always remember that driftwood serves as an ecological resource:

  • Balance: Take only what you need and leave plenty for wildlife.
  • Local Guidelines: Follow local regulations about driftwood collection.

Support Eco-Friendly Businesses

When purchasing driftwood or driftwood products:

  • Ask Questions: Ensure the driftwood was sourced sustainably.
  • Check Certifications: Look for eco-friendly certifications and endorsements.

Conclusion

The driftwood heart is more than just a beautifully formed piece of nature; it’s a symbol of enduring love, resilience, and the constant, transformative journey through life’s experiences. By understanding the importance and symbolic nature of driftwood, you can find a deeper appreciation and joy in discovering or crafting your own driftwood hearts.

Whether you’re adding a unique touch to your home décor, giving a meaningful gift, or simply enjoying a peaceful scavenger hunt on the beach, the driftwood heart provides a connection to nature that reminds us of life’s beauty and unpredictability. Embrace this wonderful element and let it inspire resilience and love in your life.

Filed Under: Driftwood Ideas Tagged With: Craft Project, DIY, Driftwood, Heart Decoration, home decor

Driftwood Headboard

July 28, 2024 by admin

Creating a coastal-inspired bedroom retreat is easier than you think with a beautiful driftwood headboard. This charming piece brings a touch of the beach to your space, adding both rustic elegance and natural beauty. Driftwood, with its weathered texture and unique shapes, offers a one-of-a-kind statement that is sure to impress. Embrace the soothing, nature-inspired vibes of your own driftwood headboard and transform your bedroom into a tranquil haven. Have you ever thought about transforming your bedroom into a calming oasis by incorporating natural elements? One simple and elegant way to achieve this is by creating a driftwood headboard. Driftwood, with its unique shapes and weathered texture, brings a sense of the outdoors inside and adds a coastal or rustic charm to any space. In this guide, we’ll take you through everything you need to know about driftwood headboards, from sourcing materials to the final assembly of your own masterpiece.

Driftwood Headboard

What is Driftwood?

Driftwood refers to wood that has been naturally weathered or washed ashore by the action of water, whether it be freshwater or seawater. It often has a smooth, worn surface thanks to the natural elements. This kind of wood provides a rustic feel that can easily be incorporated into various styles of home decor.

Sourcing Driftwood

Where to Find Driftwood

Finding driftwood can be quite an adventure! Here are some common places where you can look for it:

  • Beaches: Coastal areas are abundant in driftwood due to ocean currents.
  • Rivers and Lakes: Freshwater bodies also carry driftwood, particularly after heavy rains or water releases from dams.
  • Forests: Even though it’s less common, some forest streams or lakes may carry driftwood-like material.

Legality

Before you start collecting, it’s crucial to check if it’s legal to gather driftwood in your area. Some public lands and private properties have specific regulations against it. Always respect local laws and consult with authorities if you’re unsure.

Preparing the Driftwood

Cleaning

Once you’ve collected your driftwood, you’ll need to clean it thoroughly. Here’s how you can do it:

  1. Remove Debris: Brush off any loose dirt or sand with a stiff brush.
  2. Soak the Wood: Soak the driftwood in a large container filled with a mixture of water and a small amount of bleach. This will help kill any bacteria, fungi, or insects.
  3. Scrub Again: After soaking for around 24 hours, scrub the wood again to remove any remaining dirt.
  4. Rinse and Dry: Rinse the wood with fresh water and let it dry completely. This can take several days, depending on the size of the pieces.

Treating for Longevity

To ensure that your driftwood headboard lasts for a long time, consider treating the wood before assembling your project:

  • Sealant: Apply a wood sealant to protect it from moisture and further damage.
  • Sanding: Lightly sand the surface to make it smooth and remove any sharp edges.
  • Finishing Oil: Use a finishing oil to enhance the natural texture and color of the wood.

Designing Your Driftwood Headboard

Choosing the Right Style

Your driftwood headboard can take various forms, depending on the style you aim for. Here are some popular styles:

StyleDescription
RusticUsing large, rugged pieces of driftwood to create a sturdy and rough-looking headboard.
BohemianIncorporating softer, smaller pieces and possibly adding elements like hanging ropes.
ModernCreating clean lines with well-matched pieces of driftwood for a minimalistic look.
ArtisticArranging pieces in abstract patterns or in combination with other materials.

Measuring and Planning

Measurement is the key to a well-fitted headboard. Here’s what you need to measure:

  1. Bed Size: Measure the width of your bed (e.g., Twin, Full, Queen, King).
  2. Desired Height: Decide how tall you want your headboard to be. Typically, 48-60 inches above the mattress is standard.

Create a sketch or blueprint of your headboard before you start assembling to have a clear idea of what the final product will look like.

Driftwood Headboard

Tools and Materials Needed

Here’s a handy table summarizing the tools and materials you’ll need for your driftwood headboard project:

ToolsMaterials
HammerDriftwood pieces
Nails/ScrewsWood glue
DrillWood sealant
Tape MeasureSandpaper
LevelFinishing oil
Safety Gear (gloves, goggles)Mounting hardware

Step-by-Step Guide to Make a Driftwood Headboard

Step 1: Layout the Driftwood Pieces

Lay out your driftwood pieces on the ground as per your blueprint. Arrange them to see which pieces fit best together.

Step 2: Cutting

Cut the driftwood pieces to the required lengths using a saw. Make sure the cuts are clean and match your design layout.

Step 3: Sand and Smooth

Sand the cut edges to ensure they are smooth. This will also make the assembly process easier and safer.

Step 4: Assemble the Frame

If your design includes a frame, build it first using sturdy wood that can support the weight of the driftwood. Attach the driftwood pieces to the frame using wood glue and nails or screws.

Step 5: Attach Driftwood

Once your frame is ready, start attaching the driftwood pieces according to your design. Use wood glue first and then secure with nails or screws for extra durability.

Step 6: Apply Sealant and Finishing Oil

After the headboard is fully assembled, apply a layer of wood sealant to protect it. Once the sealant is dry, you can also add a coat of finishing oil to enhance the natural beauty of the driftwood.

Step 7: Mount the Headboard

Finally, attach the headboard to the wall or to your bed frame using strong mounting hardware. Make sure it is securely fastened to avoid any accidents.

Maintenance Tips

Your driftwood headboard will require some care to keep it looking its best. Here are a few tips:

  • Dust Regularly: Use a soft cloth to dust the headboard regularly.
  • Avoid Excess Moisture: Keep the headboard away from areas with high humidity to prevent mold.
  • Inspect Annually: Check for any loose parts or signs of damage yearly and repair as needed.

Benefits of Using Driftwood

Using driftwood for your headboard has several benefits:

  • Eco-Friendly: Driftwood is a sustainable material that repurposes wood that has naturally fallen.
  • Unique: Each piece of driftwood is one-of-a-kind, so your headboard will be just as unique.
  • Aesthetic Value: Driftwood adds a natural, organic feel to your living space, enhancing the overall aesthetic.

Conclusion

Creating a driftwood headboard is a satisfying and enriching project that allows you to bring a piece of nature into your bedroom. With a bit of effort and creativity, you can craft a stunning and unique piece of furniture that not only serves as a functional headboard but also as a piece of art. Whether you go for a rustic, bohemian, modern, or artistic style, your driftwood headboard is bound to be a focal point that brings warmth and character to your space. Happy crafting!

Filed Under: Driftwood Ideas Tagged With: Bedroom, DIY, Driftwood, Headboard, Rustic

  • « Previous Page
  • Page 1
  • …
  • Page 24
  • Page 25
  • Page 26
  • Page 27
  • Page 28
  • …
  • Page 41
  • Next Page »

Primary Sidebar

Driftwood4us.com, is a participant in the Amazon Services LLC Associates Program, an affiliate advertising program designed to provide a means for sites to earn advertising fees by advertising and linking to amazon.com.