• Skip to main content
  • Skip to primary sidebar
  • Terms and Conditions
  • Privacy Policy
  • Contact

Driftwood 4 Us

Just About Driftwood

Driftwood Crafts

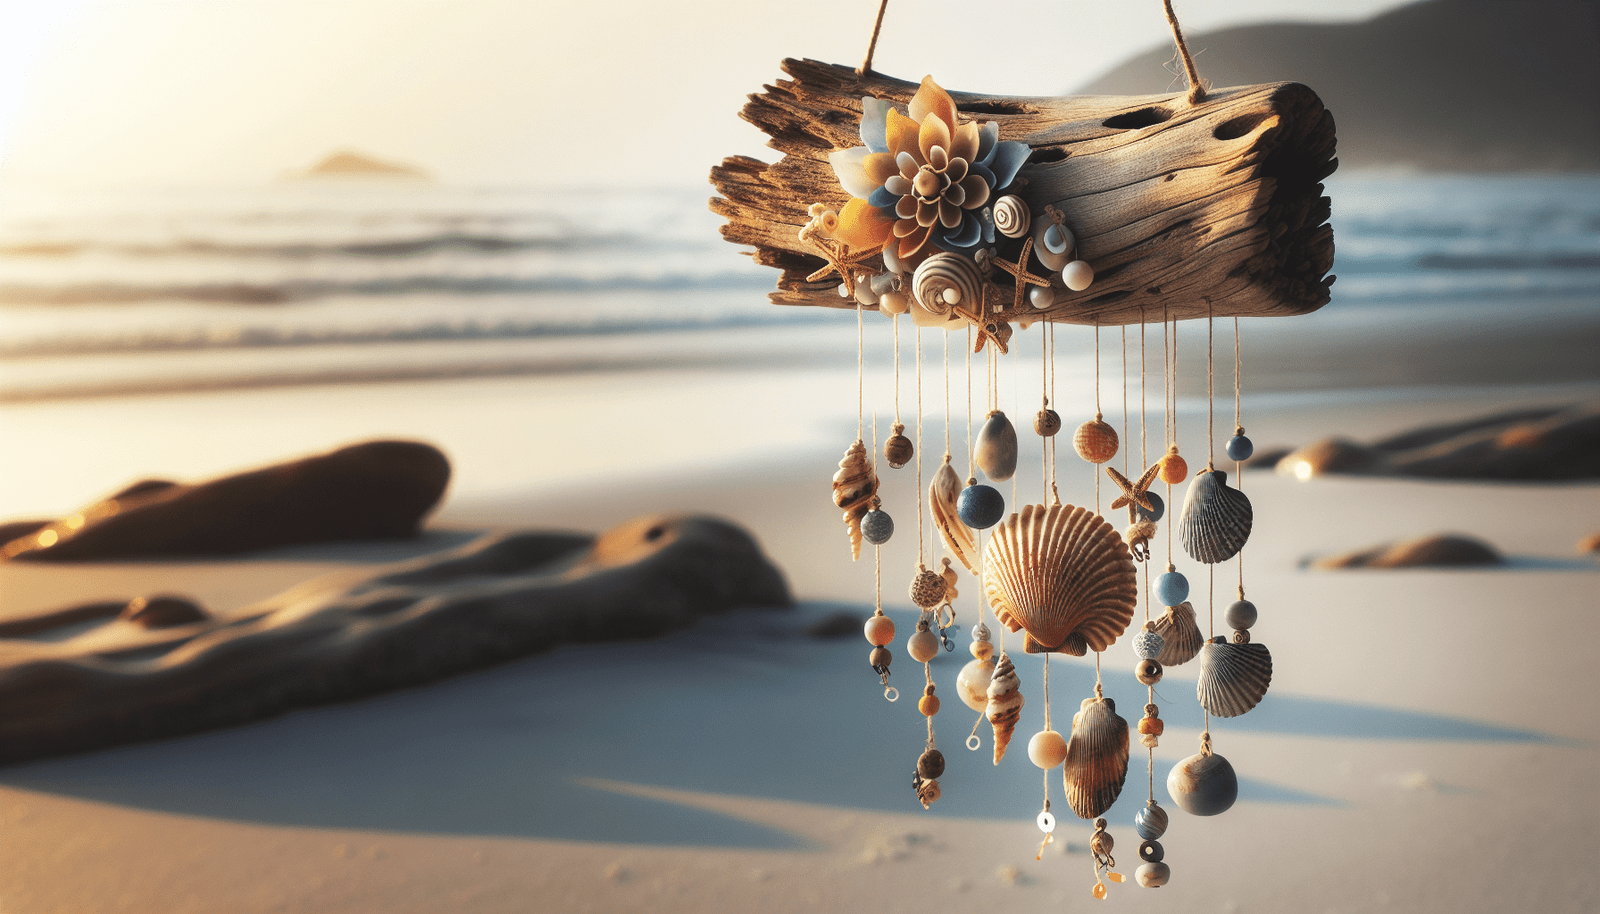
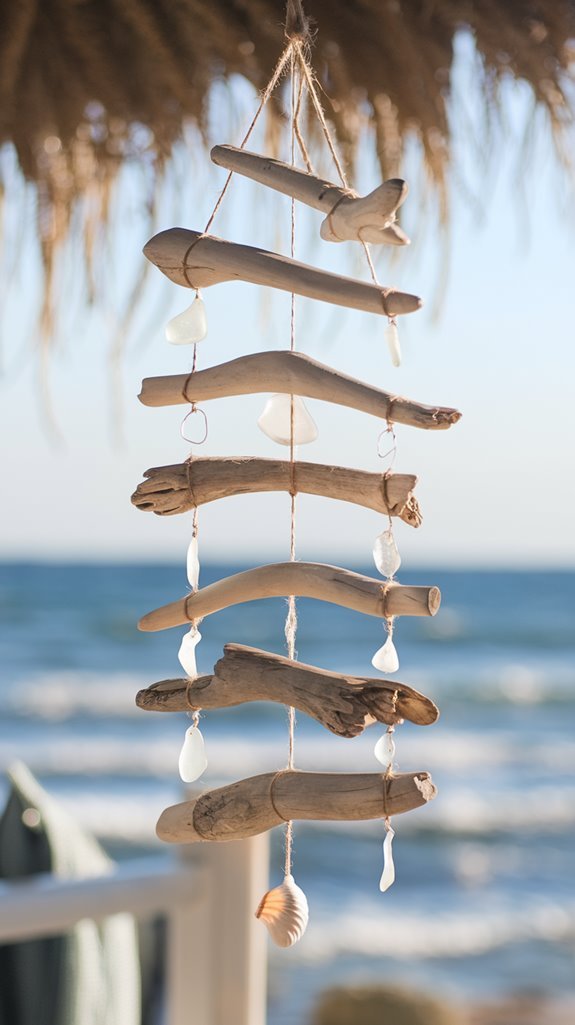
Driftwood Mobile Wind Chimes

May 29, 2025 by admin

Have you ever wondered about the gentle harmony that a set of driftwood mobile wind chimes can bring to your home or garden? Imagine the subtle caress of the wind as it passes through the carefully crafted pieces of driftwood, creating a soothing melody that calms the soul and invigorates the senses. These chimes aren’t just musical instruments; they are works of art that bring nature’s essence directly to your space. Let’s explore how these beautiful creations can enhance your environment.

Driftwood Mobile Wind Chimes

What Makes Driftwood Mobile Wind Chimes Unique?

Driftwood mobile wind chimes are not just ordinary decorative items; they represent a synthesis of art and nature. What makes them truly stand out is the material itself. Driftwood, as the name suggests, is wood that has been washed onto shore by the action of the sea, lakes, or rivers. This wood, naturally polished by the elements, has a unique texture and appearance that cannot be replicated by synthetic means.

The Natural Appeal of Driftwood

Driftwood’s allure comes from its natural origins. Each piece is a unique creation, having been shaped by wind, water, and time. The weathered appearance, with its organic shapes and textures, adds a rustic charm. Using driftwood as a material for wind chimes ensures each chime is unique, as no two pieces of driftwood are alike.

Environmental Benefits

Utilizing driftwood for creating wind chimes is an environmentally friendly practice. It recycles natural materials that have reached the end of their life cycle in the water. By crafting these materials into beautiful and functional art pieces, we give them a new purpose, reducing the need for processed and synthetic materials.

Crafting Driftwood Mobile Wind Chimes

The process of crafting driftwood mobile wind chimes is an art form that involves both creativity and patience. It requires an understanding of not only the aesthetic aspects of design but also the acoustic properties necessary to produce pleasing sounds.

Selecting the Right Driftwood

The selection process is critical. Not all driftwood pieces will make the best wind chimes. When choosing pieces, consider their size, density, and the sound they produce when they collide. Harder types of driftwood can produce clearer, brighter sounds, while softer woods might produce more muted tones.

Designing the Composition

Designing a driftwood mobile wind chime involves thoughtful arrangement. The pieces must be balanced to allow free movement. This balance is both visual and tonal, as you want an arrangement that is pleasing to the eye and harmonious to the ear. Symmetry is often key, but asymmetrical designs can also be effective, offering an eclectic, artistic touch.

Craftsmanship and Assembly

The craftsmanship is where creativity meets skill. Assembling the pieces to form a coherent structure requires precision. Strong, durable threads or wires are typically used to connect the driftwood pieces. The key is to ensure they allow for enough movement to create sound, yet are secured enough to withstand outdoor elements.

Acoustic Considerations

The sound quality of wind chimes hinges greatly on the way the materials are strung together. Different lengths, densities, and placements will affect the pitch and tone of the chime. Experiment with various setups to achieve the desired sound profile.

Enhancing Your Space with Driftwood Mobile Wind Chimes

Once crafted, these delightful objects have the power to transform a space. Whether indoors or outdoors, they offer an auditory and visual experience that enhances tranquility and beauty.

Outdoor Spaces

In gardens, courtyards, or on patios, driftwood mobile wind chimes bring life and movement. Placed in a spot with enough wind flow, they add a dynamic and organic element to your green spaces. They provide a gentle soundtrack to your outdoor activities or a relaxing background while you unwind.

Indoor Ambience

Inside the home, driftwood chimes serve as captivating art pieces. They add texture and interest to a room, sometimes acting as a focal point or integrated into the overall decor theme. Near windows or doorways where air currents can activate them, they perform their gentle dance as soft music fills the room.

Caring for Your Driftwood Mobile Wind Chimes

To ensure your driftwood mobile wind chimes remain as lovely and functional as the day you acquired them, proper care is essential.

Protecting from the Elements

If placed outdoors, consider the potential damage from intense weather conditions. Prolonged exposure can alter the wood, affecting its appearance and sound. During adverse weather, consider placing them in a sheltered area or bring them indoors.

Regular Cleaning

Routine cleaning can preserve the beauty of driftwood chimes. Use a soft brush to dust off any accumulation on the wood or strings. If necessary, a mild soap solution can be applied for deeper cleaning, followed by thorough drying.

Maintenance of Components

Check the integrity of strings or wires from time to time. Exposure to weather can weaken these components, so replacing them when signs of wear appear will help maintain the chime’s functionality.

Driftwood Mobile Wind Chimes

The Cultural and Symbolic Significance

Wind chimes hold a special place across various cultures throughout history. They carry aesthetic and spiritual significance that varies from one culture to another, enhancing the richness of their appeal.

Feng Shui Harmonization

In Feng Shui, wind chimes are often used to manipulate energy flows, or “chi”. Proper placement can encourage positive energy, fortune, and health in a home. Driftwood, due to its natural origins, can further enhance these qualities, bringing a calming and grounding energy.

Symbol of Tranquility

Across many cultures, wind chimes symbolize peace and tranquility. Their gentle sounds are linked with meditative practices and can help create a serene atmosphere conducive to reflection and relaxation.

Personalizing Your Driftwood Mobile Wind Chimes

While driftwood mobile wind chimes offer beauty and charm on their own, personalizing them allows for even deeper connection and creativity.

Customizing with Additional Elements

Consider incorporating other natural elements such as shells, stones, or crystals to add unique touches. These components can bring additional texture, color, and symbolism to the chimes.

Personal Symbolism

Incorporating personal symbols or small trinkets can transform your wind chime into a reflection of your personal story. Perhaps a small bell or charm with significant meaning can enhance its emotional resonance.

Family and Community Projects

Creating driftwood mobile wind chimes can also be an enriching group activity. Involving family or community members in the assembly process can create shared memories and result in a cherished piece that symbolizes collective creativity.

Conclusion

Driftwood mobile wind chimes are more than auditory decorations; they are embodiments of nature’s elegance, offering aesthetic beauty and peaceful sounds. By understanding their unique characteristics, crafting methods, and cultural significance, you can deepen your appreciation and move towards incorporating these delightful works of art into your life. Through care, personalization, and thoughtful placement, you bring a piece of nature’s music into your space, enhancing not only the aesthetics but also the spiritual ambiance of your surroundings.

Next time the gentle breeze passes through your driftwood mobile wind chimes, take a moment to pause and enjoy the simple yet profound joy that they can bring, reminding you of the artful dance between nature and sound.

Filed Under: Driftwood Ideas Tagged With: craft ideas, DIY Decor, Driftwood Crafts, Outdoor Decor, Wind Chimes

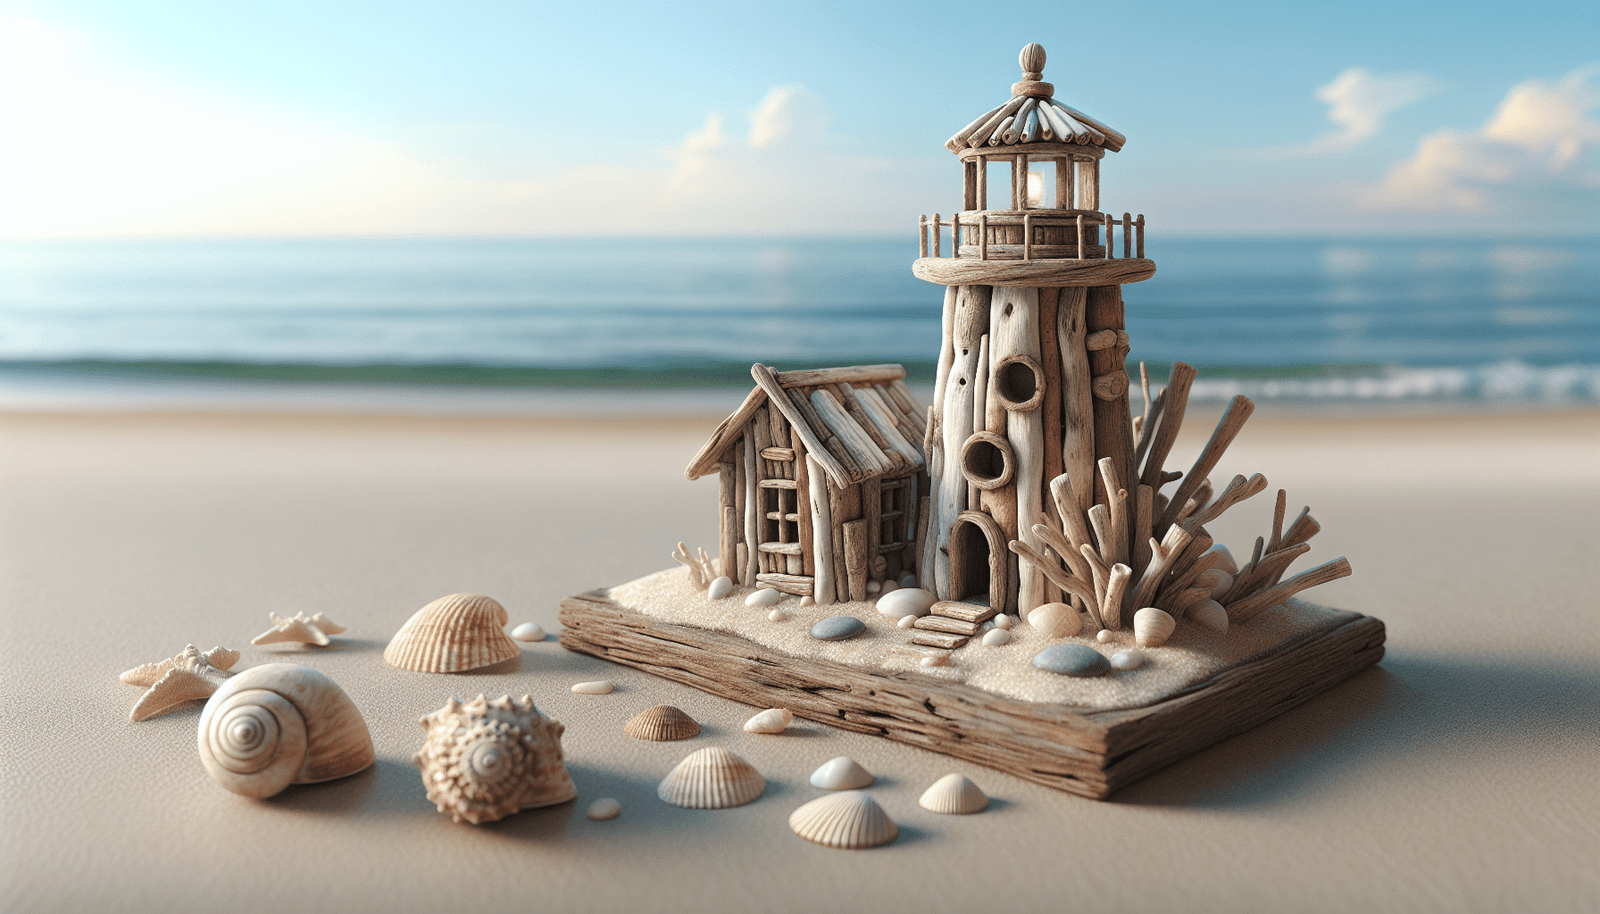
Driftwood Lighthouse Diy

May 12, 2025 by admin

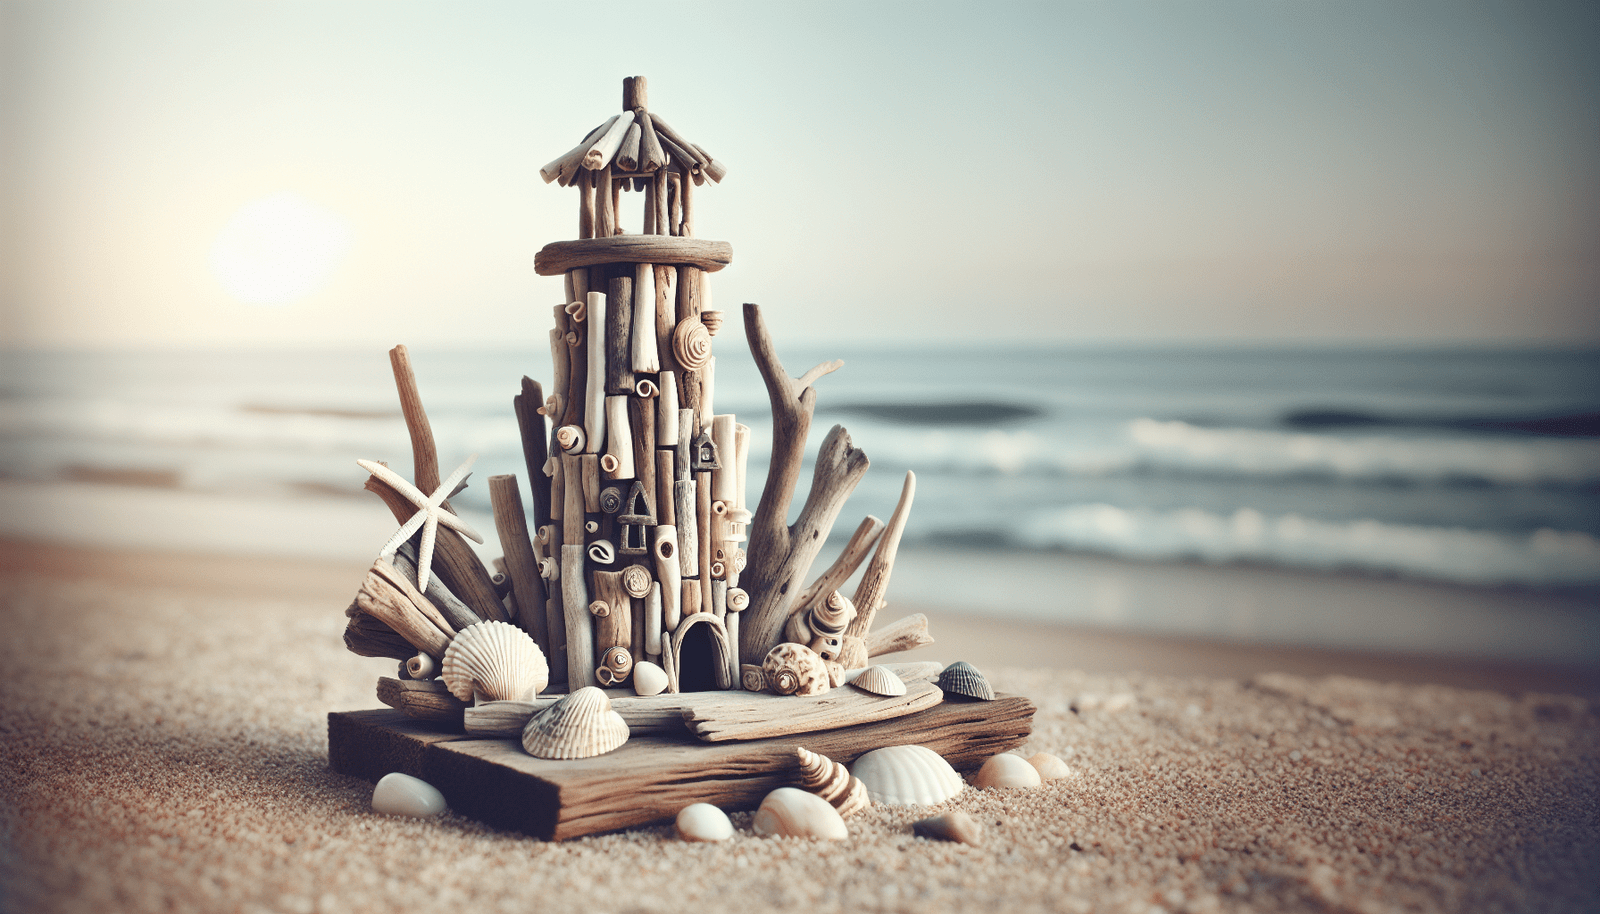
Have you ever found yourself captivated by the coastal charm of lighthouses? There’s something undeniably enchanting about these majestic towers that guide ships safely to shore. If you’ve ever wanted to bring a piece of that seaside elegance into your home, crafting a lighthouse from driftwood might just be the perfect project for you. Not only does it allow you to create a unique piece of decor, but it also repurposes natural materials that are typically found along the shoreline. Let’s embark on this delightful DIY journey together.

Driftwood Lighthouse Diy

Understanding Driftwood and Its Appeal

Before you get started, it’s helpful to understand what makes driftwood so special. Driftwood is essentially wood that has been washed onto the shore by the action of tides or waves. Over time, this wood becomes beautifully weathered and worn, acquiring a distinct texture and appearance that is cherished by crafters and artists alike.

Why Use Driftwood?

When it comes to DIY projects, driftwood offers several compelling benefits. Firstly, every piece is unique due to its natural shaping and texturing, which means your lighthouse will be one-of-a-kind. Additionally, using driftwood is an eco-friendly choice, often viewed as a form of upcycling. By repurposing remnants from nature, you’re minimizing waste and creating a sustainable piece of art.

Collecting Driftwood

For your driftwood lighthouse, you’ll want to gather pieces of varying sizes. Seek out driftwood along the beaches, rivers, or lakes. Be sure you’re allowed to collect in those areas, and remember to select pieces that are relatively clean and dry. Avoid collecting moist driftwood, as it might lead to mold issues later on.

Planning Your Driftwood Lighthouse

Every great DIY project starts with a solid plan. Here’s how to approach building your driftwood lighthouse.

Designing Your Lighthouse

Start by visualizing what your lighthouse might look like. Consider the size, shape, and style you want to achieve. Do you imagine a towering structure with many layers, or a quaint, simple lighthouse? Sketch out your ideas or gather some reference images to set your creative direction.

Gather Your Materials

Creating a driftwood lighthouse requires a mixture of materials and tools. Here’s a list of what you might need:

MaterialsTools
Assorted driftwood piecesGlue gun and glue sticks
A sturdy base (wooden or stone)Hand saw or miter saw
Decorative elements (shells, stones, paint)Sandpaper
LED candle or small light bulbDrill and bits

Preparing the Driftwood

Once you have your materials, it’s time to prepare the driftwood. Sand down any rough edges to avoid splinters and clean the wood if necessary. Use a wire brush or sandpaper to remove debris or loose bark. This ensures your lighthouse looks polished and professional.

Constructing the Driftwood Lighthouse

Armed with your design and materials, you’re ready to start the fun part—assembling your lighthouse.

Building the Base

Begin by securing your largest driftwood piece to your base. This piece will serve as the foundation for your lighthouse. Use a strong adhesive like wood glue or a glue gun to attach it firmly. Ensure it’s sturdy and stable as you’ll be building upwards from it.

Layering Driftwood

Once the base is secure, start stacking additional driftwood pieces. Vary the sizes and shapes as you go to add character to your lighthouse. As you build, take care to maintain balance. Alternating the orientation of the driftwood pieces can also bring an aesthetic appeal to your structure.

Adding Details

With the main structure complete, think about the details that make lighthouses special. Use smaller pieces of driftwood or decorative elements like shells or stones to create windows, doors, or light rooms on your lighthouse.

For the light, place an LED candle or a small bulb at the top to simulate the lighthouse’s guiding beam. Ensure this light feature is secure and won’t topple over.

Personalized Touches

A driftwood lighthouse isn’t just a structure; it’s an expression of creativity. Here’s how you can make it truly your own.

Painting and Finishing

You may choose to leave the driftwood in its natural state or paint it in classic lighthouse colors (red, white, yellow). If you paint, use acrylic paint for a durable finish. Consider using a sealant to protect your lighthouse from moisture and wear.

Thematic Embellishments

Embed elements of the sea into your lighthouse design. Consider adding a miniature boat, anchor, or wave-themed accents. Personalizing your lighthouse with thematic embellishments can capture the coastal essence you might be seeking.

Display Tips

Once your lighthouse is complete, display it in a place where it can stand out. The mantelpiece, a windowsill, or even the garden (if properly sealed) can be perfect spots. Your handcrafted masterpiece deserves to be showcased.

Driftwood Lighthouse Diy

Troubleshooting Common Issues

Every project might encounter a few hiccups. Here’s how to troubleshoot common problems when crafting your driftwood lighthouse.

Stability Concerns

If your lighthouse isn’t standing firm, reassess its base. Try adding more glue or repositioning the base pieces. Ensuring an even distribution of weight as you build upward can also help maintain balance.

Glue Issues

Glue may not adhere if the wood is still damp. Allow your driftwood pieces to dry completely before assembly, and always apply glue to clean surfaces.

Lighting Malfunction

If your light doesn’t work correctly, check the battery connections. Ensure the light fixture is securely seated within the top section of your lighthouse.

The Joy of Driftwood Crafting

Building a driftwood lighthouse combines the beauty of natural materials with the creative satisfaction of crafting something by hand. Each piece tells a story, and when combined, these pieces recreate the magic of the coast. Embrace the imperfections and let your personality shine through this project. It’s not just about the final product; it’s about enjoying the journey of creation.

Crafting with driftwood can be a soothing escape from the hustle and bustle of everyday life. Whether you craft alone or with friends and family, it provides a wonderful opportunity to connect with nature and creativity in a meaningful way. As you look at your lighthouse, remember each piece of driftwood that has traveled far and wide to finally become part of your artwork.

So, go ahead and begin this delightful project with enthusiasm. Before you know it, you will have your very own driftwood lighthouse casting a warm glow, evoking those cherished memories by the sea.

Filed Under: Driftwood Ideas Tagged With: Beach House Style, Driftwood Crafts, Lighthouse Decor

You Won’T Believe What You Can Make With These 25 Driftwood DIY Projects

April 13, 2025 by admin

If you’ve ever walked along the beach and admired the unique shapes of driftwood, you might wonder how to transform them into beautiful home decor. With these 25 DIY driftwood projects, you’ll discover practical and stylish ways to repurpose these natural treasures. From rustic mirror frames to functional coat racks, each project will inspire your creativity and add charm to your space. You won’t believe what’s possible with just a piece of driftwood.

Driftwood Wall Art

driftwood decor for budget friendly elegance

Driftwood wall art adds natural charm and character to your space, transforming ordinary interiors into coastal-inspired retreats. You don’t need expensive materials to create stunning pieces—pair driftwood with affordable dollar store wood crafts for budget-friendly elegance.

For example, combine small driftwood branches with dollar store picture frames to craft unique, textured wall hangings. Explore dollar store decorating ideas like attaching driftwood pieces onto painted canvases, creating an easy yet sophisticated art display.

Arrange various driftwood lengths vertically or horizontally for striking abstract designs. Consider painting driftwood tips in soft pastels or metallic shades to enhance visual interest.

With creativity, simple driftwood collected from the beach and budget-friendly items from the dollar store can become enchanting focal points in your home.

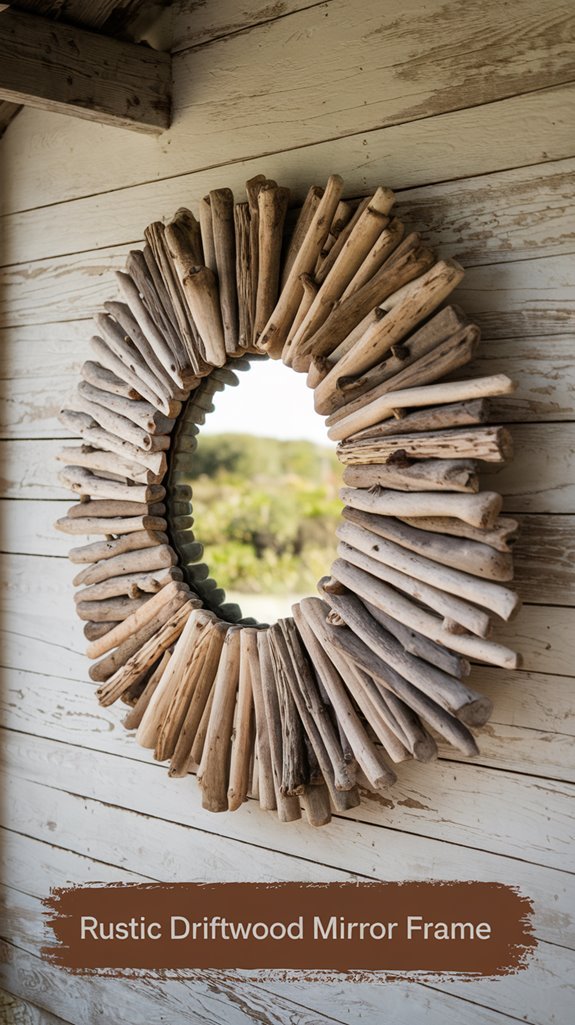
Rustic Driftwood Mirror Frame

rustic driftwood mirror frame

If you’re looking for a creative way to refresh an old mirror, consider crafting a rustic driftwood mirror frame.

Driftwood adds charm and natural texture, easily transforming your ordinary mirror into a stunning piece of dollarama diy decor. Gather driftwood pieces of varying shapes and sizes, then arrange them around the mirror’s border, securing each piece with strong adhesive or a glue gun.

The result is a unique, organic frame that instantly enhances your space. This project is affordable, eco-friendly, and perfect if you’re seeking homemade items to sell ideas. Rustic driftwood frames often attract buyers who appreciate handmade, earthy designs.

Once you’ve completed this simple DIY, your refreshed mirror will be a standout piece, adding a coastal-inspired vibe to your décor.

Driftwood Candle Holders

driftwood candle holder diy

Another charming DIY to brighten your home décor is creating candle holders from driftwood. This project offers rustic charm and elegance, making it perfect for enhancing your living room, patio, or dining table.

Simply collect driftwood pieces in various sizes, clean them thoroughly, and arrange them securely around inexpensive glass votive holders or tea lights. Use hot glue or strong adhesive to keep everything firmly in place.

Driftwood candle holders aren’t just beautiful—they’re also inexpensive crafts for adults that you can easily customize. Plus, once you’ve perfected your technique, these unique creations make wonderful diy crafts for money.

Sell them online or at local craft fairs, turning your relaxing hobby into a profitable side hustle while sharing your creativity with others.

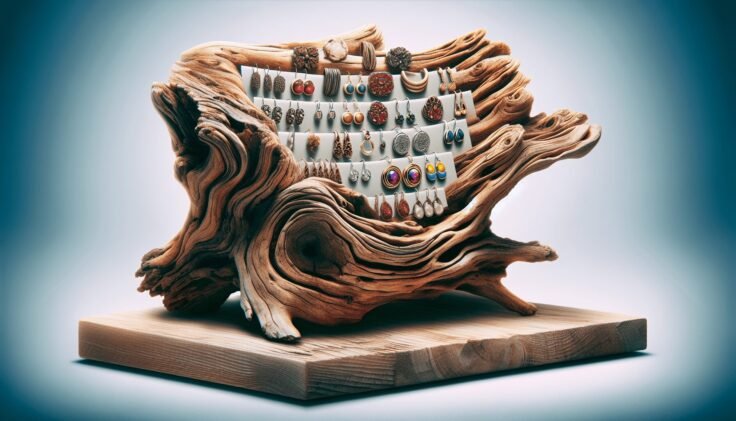
Driftwood Jewelry Organizer

rustic driftwood jewelry organizer

When you’re tired of tangled necklaces and misplaced earrings, creating a jewelry organizer from driftwood provides a stylish, practical solution.

Driftwood’s natural texture adds rustic charm, turning your jewelry storage into beautiful wall décor. Gather a sturdy driftwood piece, hooks, and knobs—dollar store craft organization ideas like inexpensive adhesive hooks or decorative knobs work perfectly.

Attach these securely to the driftwood using glue or screws, spacing them evenly to accommodate necklaces, bracelets, and rings. For earrings, stretch fine mesh or lace ribbon across the driftwood, securing at each end.

Hang your finished organizer easily with twine or picture hangers. Utilizing these dollar store hacks DIY projects, you’ll declutter your accessories creatively and affordably, showcasing your jewelry in style.

Driftwood Coat Rack

rustic driftwood coat rack

Driftwood isn’t just great for organizing jewelry—you can also craft a stylish coat rack that adds rustic charm to your entryway or hallway.

Start by selecting a sturdy piece of driftwood, ensuring it’s thoroughly dry and clean. Next, grab some inexpensive hooks from your local hardware store or repurpose dollar store signs by removing their hooks—this keeps costs low and boosts your creativity.

Secure each hook evenly along the driftwood using screws, then attach sturdy hardware on the back to mount it securely on your wall.

This practical driftwood coat rack provides a chic solution for hanging coats, scarves, and hats, enhancing your home’s organization. Plus, it’s one of those simple yet impressive craft ideas guests will definitely notice and admire.

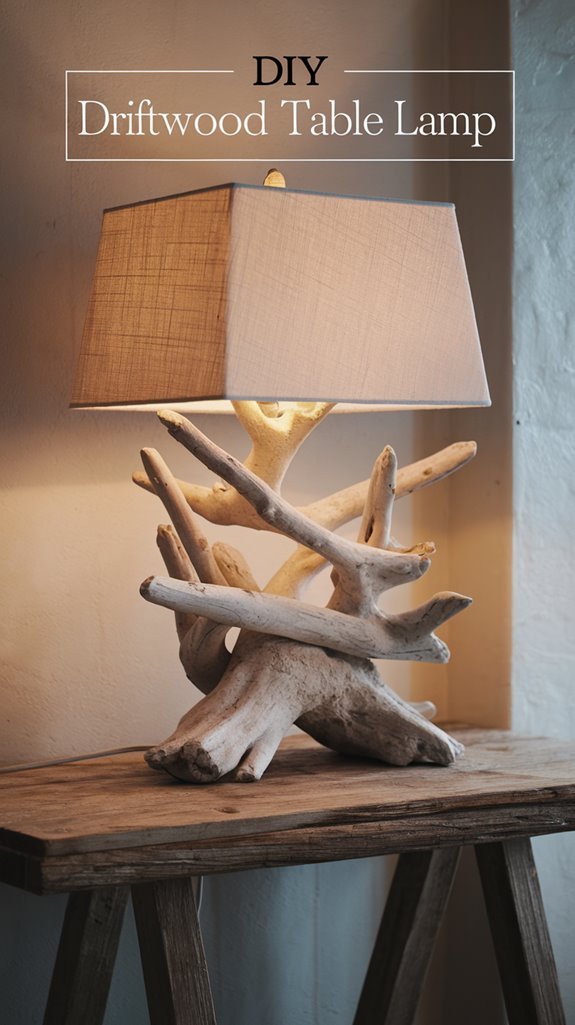
DIY Driftwood Table Lamp

diy rustic driftwood lamp

Transform your living space with a DIY driftwood table lamp that combines rustic beauty with practical lighting.

First, gather driftwood pieces in varied sizes and shapes, ensuring they’re clean and dry. Choose a sturdy wooden base and drill a hole through its center for the lamp cord.

Arrange driftwood pieces vertically around a threaded lamp rod, stacking them naturally to create an appealing, balanced design. Secure the driftwood stack firmly onto the base using a washer and nut.

Next, thread a lamp cord through the rod, attach a socket safely, and finish by adding a lampshade that complements your room’s aesthetic.

This driftwood table lamp will instantly enhance your decor, providing cozy illumination while showcasing your creative flair and appreciation for natural materials.

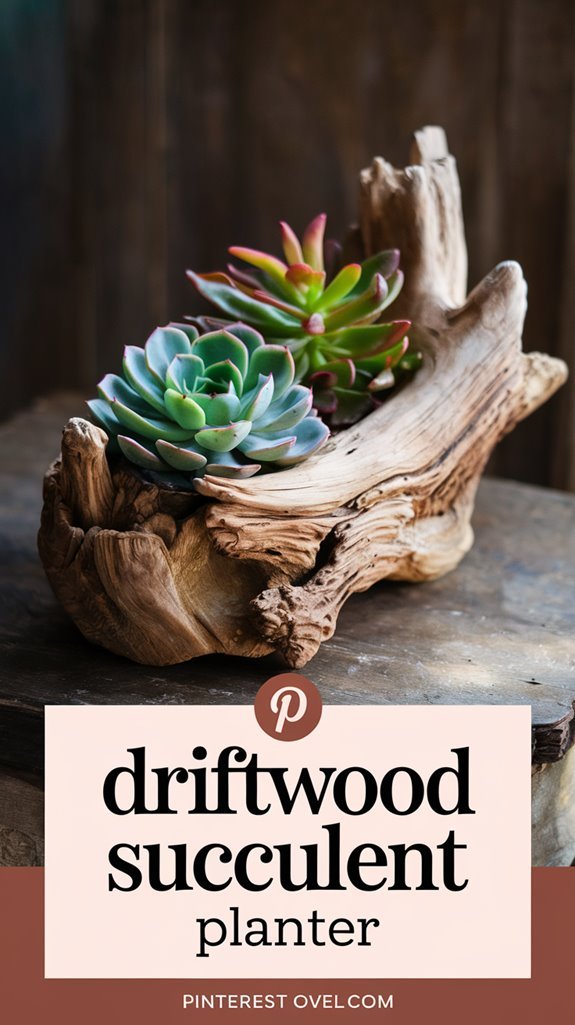
Driftwood Succulent Planter

driftwood succulent planter creation

Another stunning way to incorporate driftwood into your home decor is by creating a driftwood succulent planter. Succulents pair perfectly with driftwood’s natural beauty, creating an eye-catching, earthy centerpiece.

First, select a sturdy piece of driftwood with natural grooves or crevices. If necessary, drill out shallow pockets to hold the succulent soil securely. Add succulent-friendly soil into each crevice, gently pressing it down.

Next, choose a variety of colorful succulents, thoughtfully arranging them to complement each other and the driftwood’s shape. Carefully plant each one, gently pressing roots into soil pockets.

Finally, lightly water the succulents, allowing excess moisture to drain through the wood naturally. Place your planter on a coffee table or shelf to instantly enhance your space with rustic charm.

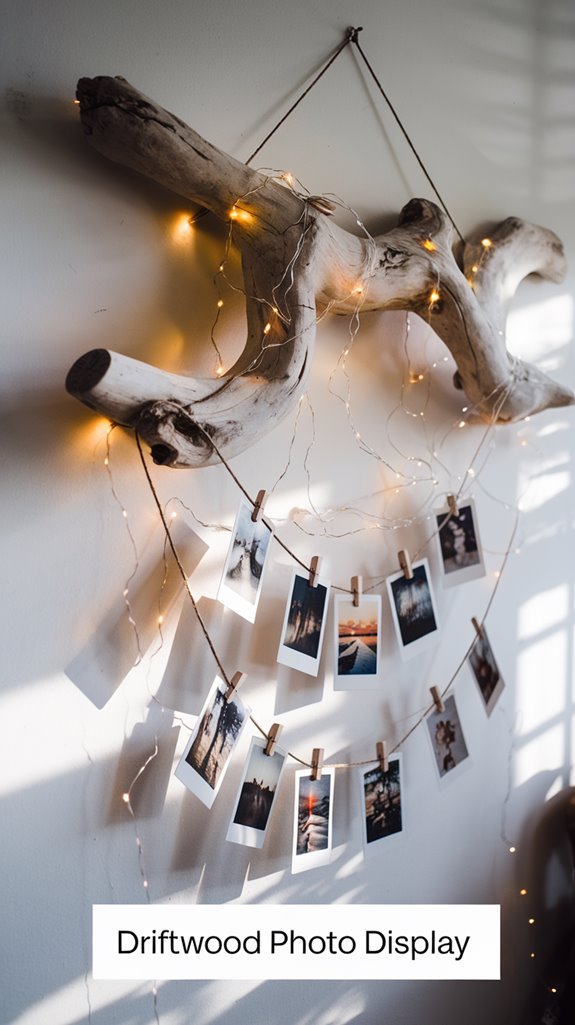
Driftwood Photo Display

rustic driftwood photo display

Showcase your favorite memories with a rustic yet stylish photo display made from driftwood.

First, choose a piece of driftwood that’s the right size and shape for your wall space. Clean and sand the wood lightly to remove any rough edges, while keeping its natural charm intact.

Next, attach small clips or hooks evenly spaced along the driftwood’s length. You can use metal clips for an industrial look or wooden clothespins for something more rustic.

Then, secure a sturdy twine or rope to either end of the driftwood, allowing it to hang level on your wall.

Finally, clip your favorite photos onto the hooks or clips. This simple, personalized driftwood photo display instantly adds warmth and character to your home, letting your cherished memories shine.

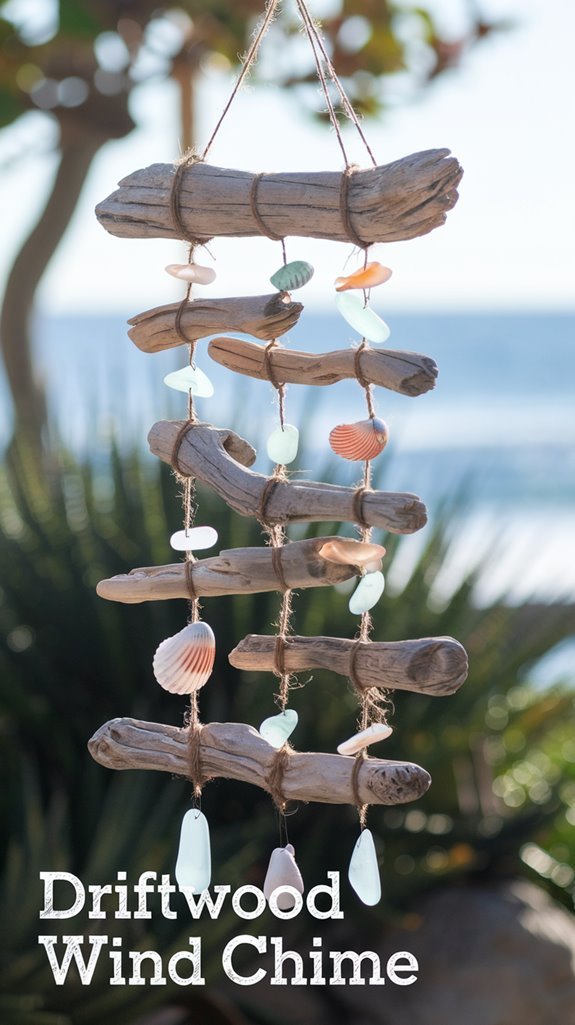
Driftwood Wind Chime

handcrafted driftwood wind chime

If you’re looking for a unique, handcrafted addition to your outdoor space, a driftwood wind chime can offer soothing sounds and visual charm.

First, select several slender pieces of driftwood of varying lengths to produce different tones. Sand them lightly to smooth any rough edges but keep their natural appearance.

Next, drill small holes near the top of each driftwood piece and thread them with durable fishing line or twine. Attach these pieces at staggered heights to a larger horizontal driftwood branch, creating a pleasing arrangement.

Add beads or seashells between the driftwood pieces for extra charm. Finally, secure a sturdy loop on top for hanging. Your driftwood wind chime will sway gently in the breeze, providing peaceful melodies and rustic beauty.

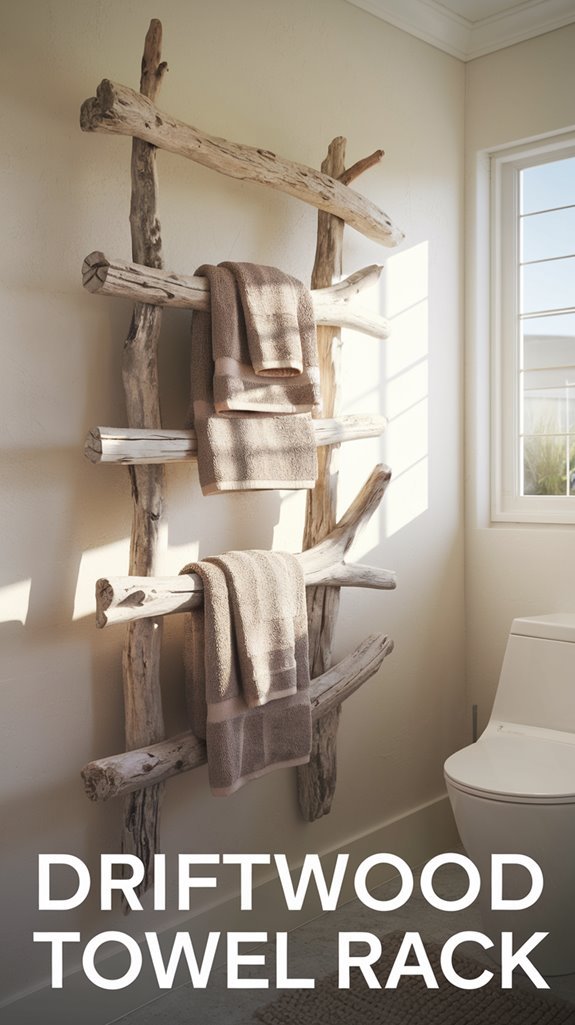
Driftwood Towel Rack

coastal charm towel storage

A driftwood towel rack adds coastal charm and practical storage to any bathroom or poolside area. You can easily create one by choosing a sturdy, visually appealing piece of driftwood that matches your space.

Clean and dry it thoroughly, then sand down rough edges. Attach metal or wooden hooks spaced evenly along the wood using screws or strong adhesive. Consider sealing your rack with a clear coating to preserve its natural beauty and protect against moisture.

To mount it securely, use sturdy brackets or wall anchors appropriate for your wall type. Hang towels, robes, or swimwear neatly, keeping them organized and accessible.

Your handmade driftwood towel rack not only enhances functionality but also brings a relaxed, beach-inspired atmosphere to your home with minimal effort.

Driftwood Key Holder

driftwood key holder project

When you’re constantly misplacing keys, creating a driftwood key holder can be a stylish and practical solution.

Driftwood offers a rustic, unique charm that complements any decor, from coastal-inspired spaces to modern interiors.

First, choose a sturdy driftwood piece that’s the right size for your entryway or hallway.

Sand any rough edges to smooth the surface, preserving its natural look.

Attach evenly spaced hooks or small knobs onto the driftwood using screws or strong adhesive, ensuring they’re secure enough to hold your keys.

Next, mount your new key holder on the wall near the entrance for easy access.

You’ll have an attractive, personalized organization piece that prevents the frustration of lost keys, while also showcasing your creativity and appreciation for natural materials.

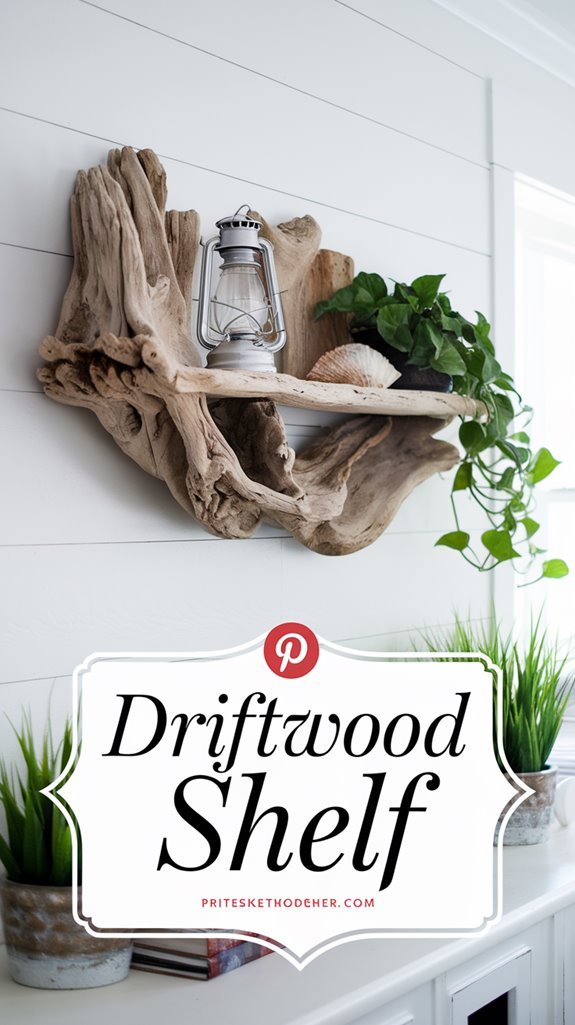
Driftwood Shelf

driftwood shelf diy project

Another practical and stylish driftwood project you can tackle is creating a driftwood shelf. Gather sturdy, weathered pieces that catch your eye, selecting those with flat surfaces suited for shelving.

First, clean each piece thoroughly and sand away sharp edges or splinters. Arrange driftwood pieces in a layout you love, combining them with metal brackets or sturdy rope, depending on the aesthetic you’re aiming for.

Mount the brackets securely to your wall or suspend the shelf with rope from sturdy hooks. Driftwood shelves add a rustic, coastal vibe to any room and offer practical storage for books, plants, or decorative knick-knacks.

With just a few simple steps, you’ll transform ordinary driftwood into a beautiful, functional, and unique shelf you’re proud to display.

Driftwood Birdhouse

driftwood birdhouse diy project

If you’re looking to attract birds to your yard while showcasing your creativity, consider building a driftwood birdhouse. Driftwood’s natural shapes and textures provide a rustic charm that complements any garden or yard.

Start by selecting pieces that are sturdy and weather-resistant. Combine various lengths and sizes to create a visually interesting, unique structure.

Assemble the birdhouse using nails or strong outdoor glue, leaving small gaps for ventilation and drainage. Make sure you drill an appropriately sized entry hole that’s suitable for the bird species you want to attract.

Position your driftwood birdhouse in a sheltered location, away from predators and harsh weather conditions. With this simple yet artistic DIY project, you’ll offer birds a safe haven while adding character and warmth to your outdoor space.

Driftwood Christmas Tree

eco friendly driftwood christmas tree

Driftwood isn’t just great for birdhouses—it also makes a charming and eco-friendly Christmas tree alternative.

To create your driftwood Christmas tree, first collect pieces in varying sizes, ensuring they’re clean and dry. Arrange them from longest at the bottom to shortest at the top, forming a tree shape.

Drill a hole through the center of each piece and thread them onto a sturdy wooden dowel or metal rod, spacing evenly. Secure the rod in a sturdy base, like a reclaimed wood block or rustic bucket filled with stones.

Add string lights or minimalist decorations like sea glass ornaments or simple white bulbs. Your driftwood Christmas tree brings coastal charm into your home, makes a meaningful conversation piece, and keeps sustainability at the heart of your holiday decor.

Driftwood Mobile

driftwood mobile crafting guide

Creating a mobile out of driftwood offers an artistic way to bring natural charm and coastal elegance into your living space. Start by gathering driftwood pieces in various lengths and shapes, choosing ones with interesting textures and smooth surfaces.

Next, lay them out, experimenting with arrangements until you find a balanced design. Drill small holes into each piece and thread sturdy twine or fishing line through them, spacing pieces evenly.

Include seashells, sea glass, or beads between driftwood segments to amplify visual appeal and add subtle pops of color. Securely tie each strand onto a larger driftwood branch to serve as your mobile’s anchor.

Hang your driftwood mobile near windows or patios, where gentle breezes create soothing movements, providing a calming atmosphere.

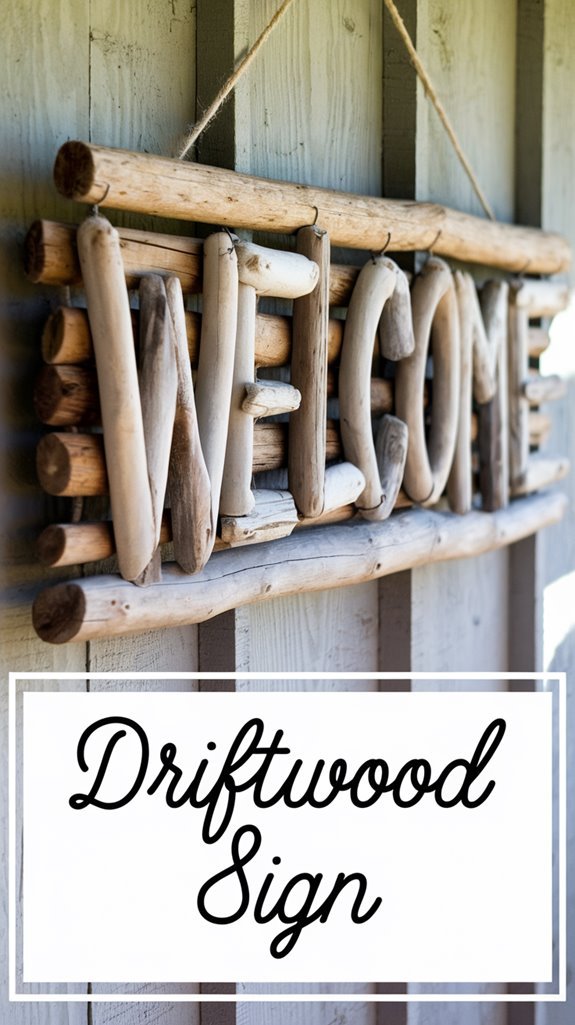
Driftwood Sign

coastal driftwood sign project

A charming driftwood sign adds rustic personality and coastal style to your home or garden. To create your own, start by choosing a flat, weathered piece of driftwood that fits your space.

You can paint a welcoming message, your family name, or a favorite coastal quote directly onto the wood using acrylic paints or a wood-burning tool for an authentic, rustic look.

Add decorative touches like seashells, nautical rope, or beach glass for extra charm. Seal your sign with a clear outdoor varnish to protect it from weather.

Hang it near your door, porch, or garden gate using twine, rope, or hooks. This simple DIY project not only showcases your creativity, but also brings a relaxing, beach-inspired feel right to your home.

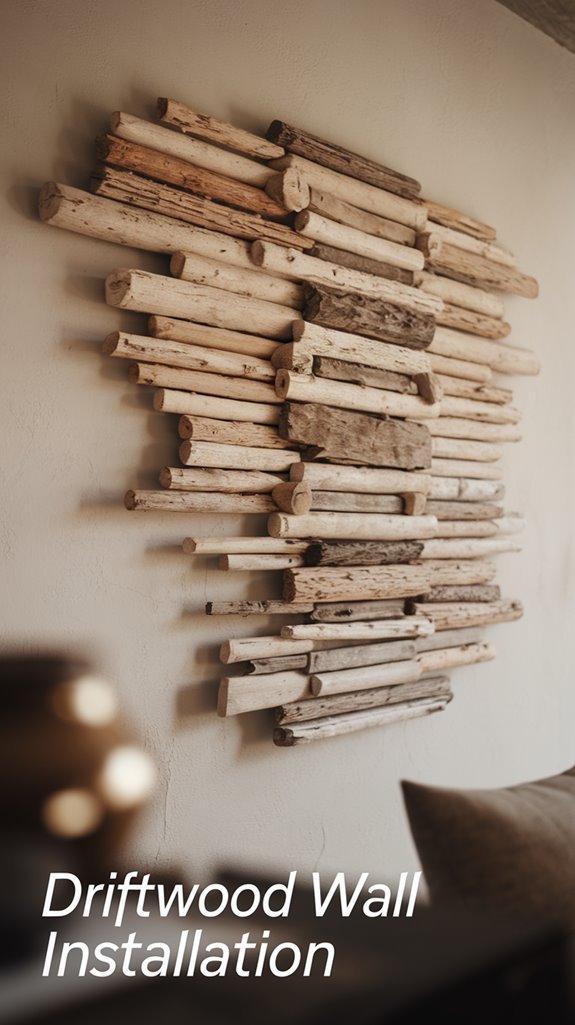
Driftwood Wall Installation

driftwood wall installation guide

If you’re looking for an eye-catching way to elevate your coastal-inspired décor beyond signs and smaller accents, consider installing a driftwood wall feature. This bold statement piece instantly transforms your space, adding texture, warmth, and an authentic seaside charm.

Begin by collecting driftwood pieces in varying lengths and thicknesses, ensuring they’re clean and dry. Plan your design layout on the floor first, mixing smaller pieces with larger ones for a natural flow. Secure each driftwood piece directly onto the wall using sturdy nails, screws, or adhesive mounting strips.

Staggering the driftwood creates visual interest and depth. Ideal for living rooms, bedrooms, or entryways, your driftwood wall installation becomes an artistic focal point that guests will admire and you’ll enjoy every day.

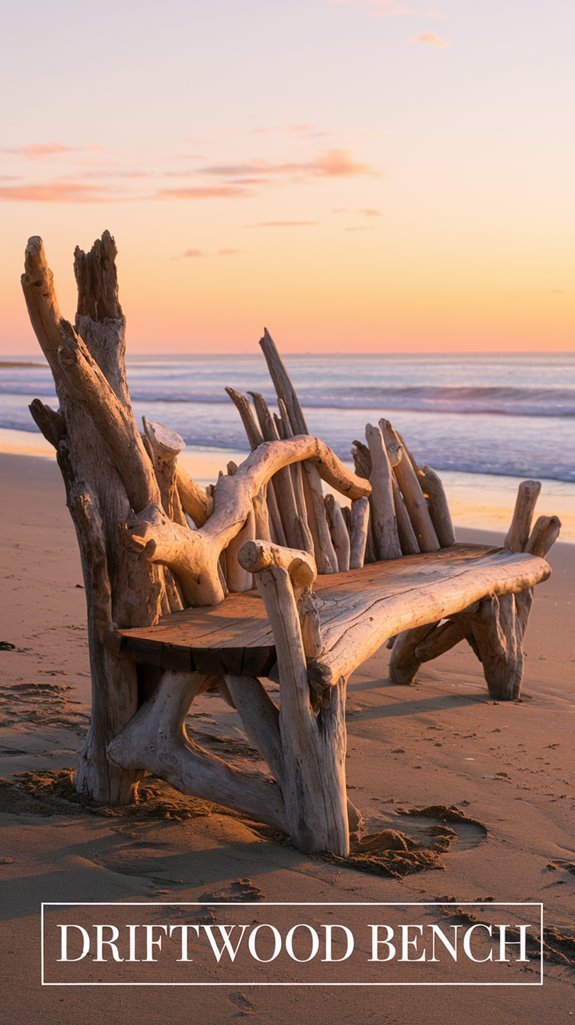
Driftwood Bench

driftwood bench crafting guide

Turning driftwood into a sturdy, rustic bench adds both function and coastal charm to your home or garden.

First, gather driftwood pieces that are solid and similar in thickness to guarantee stability. Arrange them into a flat, comfortable seat, securing the wood tightly with screws or durable wood glue.

For the legs, select sturdy, thicker driftwood branches that can comfortably support weight and attach them firmly beneath the seat. Sand down any rough edges to prevent splinters and apply a clear sealant or varnish to protect the wood and enhance its natural beauty.

Place your finished bench on your patio, porch, or garden area, and enjoy relaxing moments outdoors. Your handcrafted driftwood bench will become an eye-catching statement piece you’ll cherish for years.

Driftwood Lantern

driftwood lantern coastal elegance

Complement your driftwood bench with an inviting driftwood lantern that brings warmth and coastal elegance to any space.

Gather driftwood pieces of similar length and thickness, then carefully arrange them around a glass hurricane or mason jar. Secure the driftwood with hot glue or twine, ensuring they’re snug and stable.

Place a pillar candle or battery-operated LED inside to softly illuminate your creation. For added charm, consider wrapping a nautical rope or string lights around the lantern.

Whether it’s placed outdoors on your patio or indoors on your dining table, this driftwood lantern adds a cozy, beach-inspired ambiance you’ll love. Its natural textures and rustic appearance blend perfectly with your existing décor, making it a standout centerpiece that’s both functional and uniquely beautiful.

Driftwood Coffee Table

driftwood coffee table diy

A driftwood coffee table instantly becomes the focal point of your living room, offering both practicality and coastal charm.

You can craft this stunning centerpiece by selecting sturdy driftwood pieces that fit together securely, ensuring stability. Arrange them creatively to form a solid base, carefully checking balance as you go. Attach the driftwood using strong wood glue or screws hidden underneath.

Next, add a tempered glass tabletop or reclaimed wooden surface to complete the look. Sand the driftwood lightly to remove sharp edges and apply a clear sealant to preserve its natural beauty.

You’ll find this DIY project satisfying and budget-friendly, transforming your living space into a relaxing seaside retreat. Guests will admire your creativity and the unique, rustic elegance you’ve brought indoors.

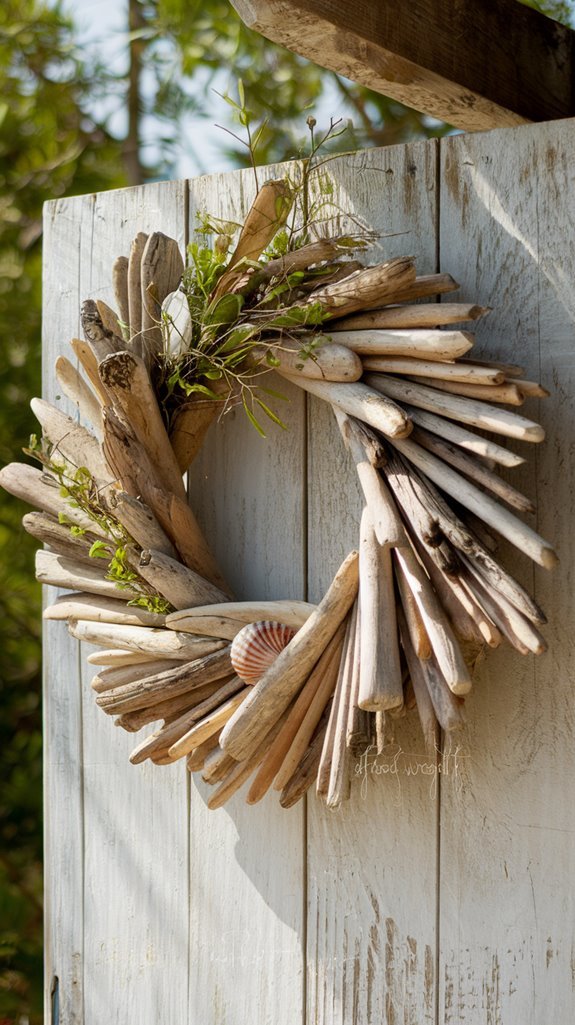
Driftwood Wreath

coastal charm driftwood wreath

Crafting your own driftwood wreath adds instant coastal charm and a warm welcome to your home’s entryway.

Begin by collecting driftwood pieces in various lengths from your favorite shoreline or local craft store. Sort them by size, and arrange them in a circular shape to visualize the final design.

Secure the driftwood pieces onto a sturdy wreath frame with hot glue, overlapping them naturally for a rustic coastal look. Consider incorporating seashells, starfish, or dried sea grass to add texture and visual interest.

Finish your wreath by attaching a burlap ribbon or nautical rope for hanging. Hang your handmade driftwood wreath on your door or entryway wall to provide a charming seaside touch that greets your guests with warmth, style, and personality.

Driftwood Garden Trellis

natural driftwood garden trellis

If you’re looking to add natural charm and functionality to your garden, consider building a driftwood trellis.

Driftwood offers a rustic, coastal appearance that instantly elevates your outdoor space. Gather various driftwood branches, choosing sturdy, weathered pieces of similar lengths.

Position longer sticks vertically into the ground, securely anchoring them. Arrange shorter horizontal branches across the vertical supports, securing each intersection tightly with weather-resistant twine or wire.

You can shape your design into a traditional rectangle, a whimsical diamond, or even an elegant fan pattern. Your driftwood trellis provides sturdy support for climbing plants like roses, cucumbers, or beans, creating a beautiful, organic focal point.

This DIY project repurposes nature’s materials, adding an eco-friendly, artistic touch to your garden landscape.

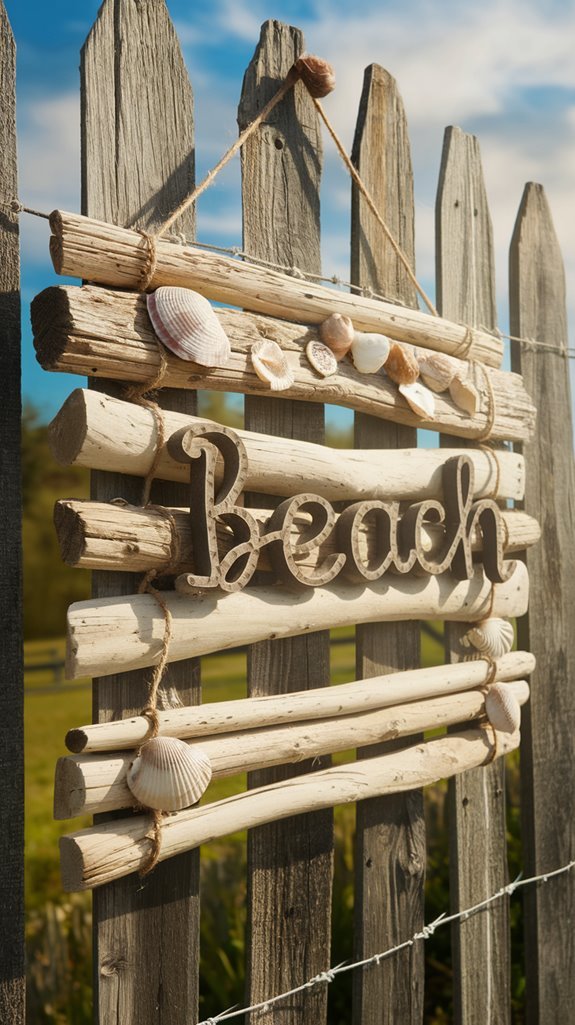
Driftwood Beach Sign

personalized driftwood beach sign

Bring coastal charm to your home or garden with a personalized driftwood beach sign. Start by selecting a flat, smooth piece of driftwood in a size that suits your space. Lightly sand it to remove rough spots without losing its natural, weathered appeal.

Next, choose beach-inspired lettering or stencils to paint your favorite coastal phrase, family name, or welcoming message directly onto the wood. Use acrylic paint in colors like soft whites, blues, or sandy tones. For added durability, apply a clear sealant once the paint dries.

Mount your completed sign on a fence, porch, or wall using sturdy hanging hardware or rustic rope. You’ll quickly create a charming statement piece that brings seaside vibes to your indoor or outdoor decor.

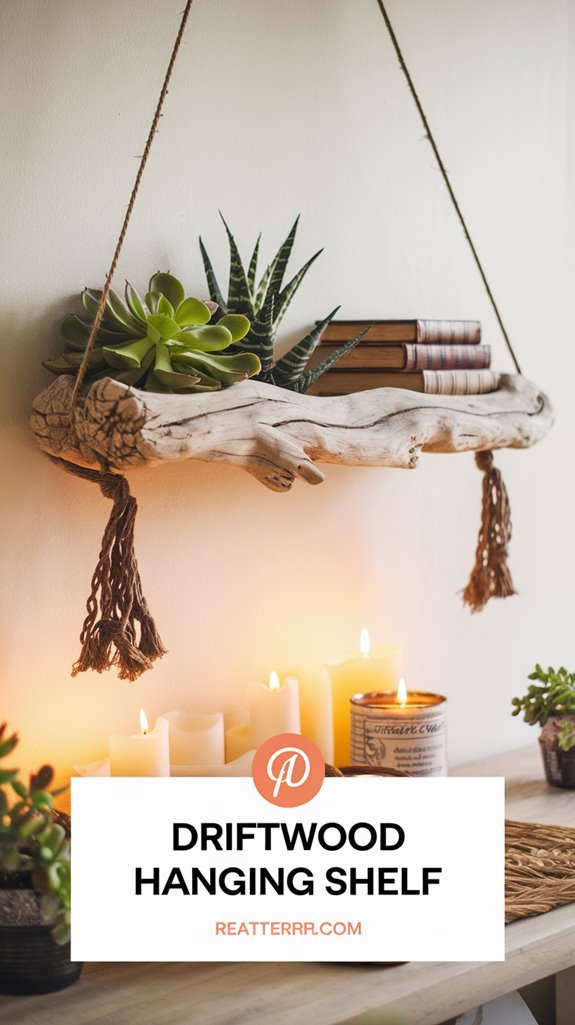
Driftwood Hanging Shelf

driftwood shelf crafting guide

Another practical yet stylish way to incorporate driftwood into your decor is by making a driftwood hanging shelf.

Start by choosing a sturdy, flat piece of driftwood that’s wide enough to hold small items, such as books, plants, or decorative pieces.

Sand the wood lightly to remove splinters without compromising its natural texture and rustic charm.

Drill two evenly spaced holes at each end of your driftwood, then thread strong rope or twine through them.

Adjust the rope length depending on how low or high you’d like your shelf to hang.

Securely tie the ropes together at the top to create a loop for hanging.

Place your new driftwood hanging shelf in any room to instantly add an appealing coastal-inspired focal point.

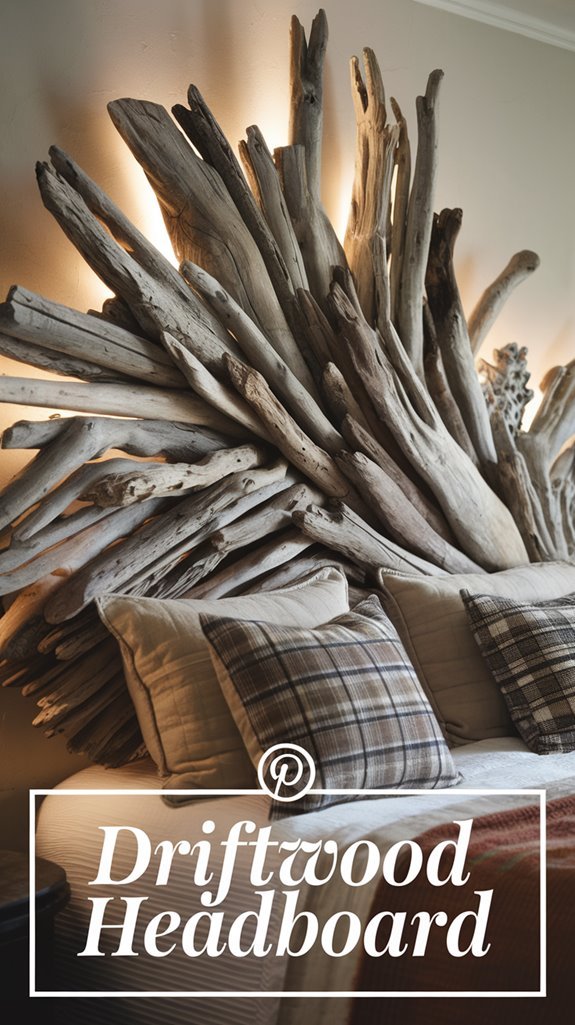
Driftwood Headboard

coastal driftwood headboard project

A driftwood headboard instantly transforms your bedroom into a cozy coastal sanctuary. Choose pieces of driftwood varying in shape and size, arranging them on a flat surface to achieve your desired pattern.

Sand each piece until smooth, preserving the unique textures and colors. Attach driftwood securely to a plywood or wooden backing using strong wood glue and screws from behind, ensuring a sturdy construction.

For added charm, leave small gaps between pieces, allowing the wall color to peek through. Mount your completed headboard directly on the wall behind your bed frame, creating a stunning focal point.

Enhance this natural look by pairing it with neutral linens and subtle beach-themed decor. With minimal effort, your driftwood headboard will evoke peaceful, seaside vibes every night.

Conclusion

With driftwood, you’re not just crafting decor—you’re blending elegance with earthiness, sophistication with simplicity. You’ve repurposed nature’s leftovers into meaningful treasures, transforming humble debris into enchanting centerpieces. Whether you choose practical shelves or whimsical wall art, rustic mirrors or refined jewelry holders, each project tells your story uniquely. So next time you stroll along the shore, gather those discarded pieces—you never know what stunning creation they could become in your hands.

Filed Under: Diy Driftwood Projects Tagged With: beach treasures, Driftwood Crafts, home decor

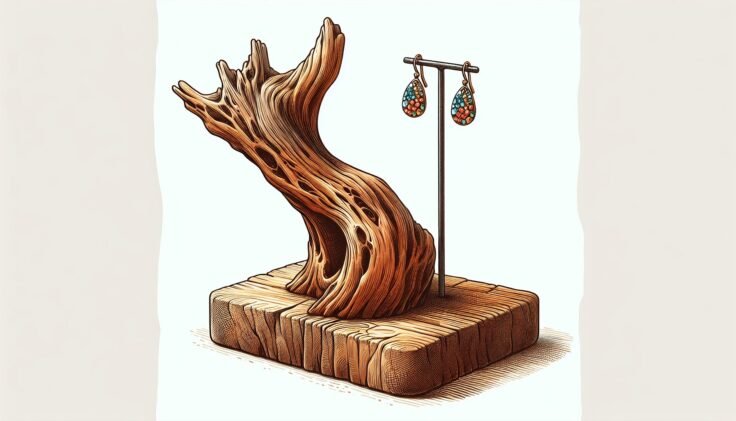
Driftwood Earring Stand

March 4, 2025 by admin

Have you ever noticed how earrings can quickly pile up, turning into a tangled mess at the bottom of your jewelry box? Organizing your earrings can sometimes feel like an overwhelming task, but there’s an elegant and natural solution you might not have considered yet: a driftwood earring stand. Driftwood, with its rustic charm and unique beauty, offers a fantastic way to not only organize but also display your collection in a visually appealing manner.

What is a Driftwood Earring Stand?

A driftwood earring stand can be defined as an artful display made from pieces of wood that have been naturally shaped and smoothed by water and time. This stand serves as a unique and decorative way to organize and display earrings. Driftwood is often found along shores and beaches, making each piece one-of-a-kind with its twists, knots, and unique textures.

Why Driftwood?

Driftwood stands apart due to its eye-catching natural characteristics. When wood drifts in water for prolonged periods, it’s exposed to elements that carve and smooth its surfaces, resulting in beautiful textures and patterns. Driftwood pieces can be small and intricate or large and dramatic. These unique pieces, once washed ashore, are ideal for crafting projects due to their sustainability and aesthetic appeal. Moreover, by using driftwood, you’re incorporating a piece of nature into your home, adding organic warmth to your decor.

How to Select Driftwood for Your Earring Stand

Selecting the right piece of driftwood is crucial for making an effective earring stand. It’s about finding a balance between functionality and aesthetic appeal.

Consider Size

The size of the driftwood plays a pivotal role in the number of earrings you can display. If you have an extensive collection, you may want a larger piece, but if you’re looking for a simple display for just a few pairs, something smaller may suffice. Ensure your piece fits comfortably in the space you have reserved for your earring stand.

Texture and Branching

Look for a piece with many offshoots or branches. These natural hooks can serve perfectly for hanging earrings. The texture is equally important; a smoother piece might fit modern décor, while a rugged texture complements more rustic styles.

Naturally Treated or Chemically Altered?

While it’s enticing to simply pick up any piece off the beach, you’ll need to clean and possibly treat the driftwood. Some prefer to leave it in its natural state to maintain its organic charm, but if you’re worried about durability or pests, a light treatment with non-toxic sealers or oils can be beneficial.

Driftwood Earring Stand

Creating Your Driftwood Earring Stand

Once you’ve selected the perfect piece of driftwood, it’s time to repurpose it into your very own earring stand. This process is fairly simple and doesn’t require a high level of crafting experience – just a bit of creativity and patience.

Cleaning the Driftwood

Before you transform it, ensure your driftwood is clean and free from any insects or algae. Soak the piece in a solution of water and vinegar for 24 hours to remove any unwanted growth. Afterward, rinse thoroughly and let it dry completely. Sun-drying is preferable as it also helps in weathering the wood further.

Materials You’ll Need

Here’s a simple list of materials to kickstart your project:

MaterialPurpose
DriftwoodThe main structure for the earring stand
Drill (small bit)To make holes if necessary
SandpaperTo smooth any rough spots
Paint or Wood StainOptional for customization
Sealant (non-toxic)To protect the wood
Base StandTo provide stability

Steps to Create

  1. Design Your Stand: Spend a moment visualizing how your earrings will hang. Identify natural hooks or spaces where earrings can nest comfortably.

  2. Prepare the Wood: Use sandpaper to smooth any overly rough patches, but retain some of the natural texture for that rustic feel.

  3. Drill Holes if Necessary: If your piece lacks natural branches, strategically drill small holes. Ensure they are spaced appropriately to prevent overcrowding.

  4. Finish and Secure: Apply wood stain or paint if desired, followed by a sealant to protect from moisture. Ensure the driftwood is securely mounted onto a solid base for stability.

Benefits of Using a Driftwood Earring Stand

Beyond being a picturesque way to organize your jewelry, a driftwood earring stand comes with numerous benefits:

Environmentally Friendly

Driftwood is a sustainable material, reusing natural resources that might otherwise be left to decay. It’s an eco-friendly choice compared to purchasing new material.

Unique and Decorative

Each driftwood piece is inherently unique, offering a distinctive and personal touch to your home décor. It becomes not just a functional item but a conversation starter.

Versatile

Driftwood stands are not limited to holding just earrings. Depending on the design, they can hold necklaces, bracelets, or even serve other decorative purposes.

Driftwood Earring Stand

Incorporating Your Driftwood Earring Stand into Home Decor

A driftwood earring stand isn’t just for utility; it’s a beautiful accent piece in its own right. Placing it strategically in your home can enhance its charm.

Bedroom or Vanity

Place your driftwood earring stand on your vanity or dresser. It keeps your earrings accessible and adds a touch of nature to your personal space.

Bathroom

Depending on the moisture levels and ventilation, you might consider placing your stand in the bathroom. Just ensure it’s protected against excess moisture with a suitable sealant.

Wall Mounted Options

If you want to save space, consider creating or purchasing wall-mounted driftwood stands. With appropriate support, these can become striking wall art.

Conclusion

By crafting a driftwood earring stand, you’re not only organizing your jewelry in an aesthetically pleasing manner but also bringing a piece of nature into your living space. This project is simple, sustainable, and allows for personal creativity, turning what could be chaotic earring storage into an artful display. Let your individuality shine by choosing driftwood that resonates with you and customizing your earring stand to meet your unique style and needs.

Filed Under: Driftwood Ideas Tagged With: Driftwood Crafts, Earring Organizer, Jewelry Display

Driftwood Diy Decor

February 21, 2025 by admin

Have you ever wondered how to bring the serene charm of the seaside into your own home? Driftwood, with its unique weathered appearance and natural beauty, offers a wonderful way to create a coastal vibe wherever you live. In this article, we will explore how you can incorporate driftwood into your home decor with various do-it-yourself projects. Whether you’re an experienced crafter or a beginner, there’s something for everyone. Let’s embark on this creative journey and discover the endless possibilities of driftwood DIY decor.

Driftwood Diy Decor

What is Driftwood?

Driftwood refers to wood that has been washed onto the shore by the ocean, sea, or river currents. Over time, the water and sand sculpt the wood, giving it a smooth, worn appearance. This natural process makes each piece of driftwood unique, providing a rustic and organic aesthetic. Driftwood is often used in home decor for its ability to add warmth and texture while evoking a sense of tranquility found at the beach.

Sustainable Sourcing of Driftwood

Before starting your DIY projects, it’s important to consider where and how to source driftwood sustainably. Collecting driftwood responsibly ensures that the natural habitat and ecosystem are preserved. Many coastal areas have regulations about collecting materials from the shoreline, so it’s essential to research and adhere to these guidelines.

Where to Find Driftwood

  1. Local Coastlines: Visit nearby beaches or riverbanks where driftwood naturally accumulates. Be mindful of environmental guidelines.
  2. Garden Centers: Some stores offer driftwood collected responsibly.
  3. Online Suppliers: Several retailers offer ethically sourced driftwood pieces of various sizes.

Preparing Driftwood for DIY Projects

Once you have acquired your driftwood, a little preparation is needed before you can use it for projects. This step is crucial to ensure the wood is clean, safe, and suitable for crafting.

Cleaning Driftwood

  1. Remove Debris: Gently scrub the driftwood using a brush to remove sand and debris.
  2. Soak in Water: Immerse the driftwood in fresh water for at least 24 hours. This helps to leach out any remaining salt that can degrade the wood.
  3. Sterilize: For additional safety, soak the driftwood in a solution of one-part bleach to ten parts water for 30 minutes. Rinse thoroughly afterward.
  4. Drying: Allow the driftwood to dry completely, ideally in the sun, to prevent any mold or mildew.

Driftwood DIY Decor Projects

Now comes the exciting part: creating stunning decor pieces with driftwood. From simple projects to more elaborate designs, these ideas will inspire you to bring a coastal touch to your living spaces.

Driftwood Wall Art

Create an impressive focal point in your home with driftwood wall art. Whether it’s a large standalone piece or a series of smaller installations, driftwood can transform any wall into a piece of art.

  1. Materials Needed:

    • Various pieces of driftwood
    • Strong adhesive or nails
    • Backing board (optional)
    • Hanging hardware
  2. Instructions:

    • Arrange your driftwood pieces on a flat surface to design your art piece.
    • Attach each driftwood piece to a backing board using adhesive or secure them directly to the wall with nails.
    • Ensure the structure is solid before hanging and add mounting hardware if needed.

Driftwood Candle Holders

Driftwood can be easily transformed into beautiful candle holders that exude a warm, natural glow ideal for any room setting.

  1. Materials Needed:

    • Medium-sized driftwood
    • Drill with a spade bit
    • Tea light candles
  2. Instructions:

    • Drill holes slightly larger than your tea light candles into the driftwood.
    • Ensure the holes are shallow enough that the candles sit flush with the top of the driftwood.
    • Insert tea light candles and place them in your desired location, such as a dining table or shelf.

Driftwood Mirrors

Bring light and an illusory sense of space to your home with a driftwood-framed mirror. This project may require more precision but yields a stunning result.

  1. Materials Needed:

    • Driftwood pieces
    • Mirror (any size)
    • Strong adhesive
    • Frame backing (optional)
  2. Instructions:

    • Lay your mirror flat and arrange driftwood pieces around the edge to form a frame.
    • Once satisfied with the arrangement, attach each piece using strong adhesive.
    • Allow the adhesive to dry thoroughly before hanging.

Driftwood Shelves

For a rustic storage solution, consider crafting shelves out of driftwood. These shelves are not only functional but also add a distinct decorative touch.

  1. Materials Needed:

    • Large, flat pieces of driftwood
    • Heavy-duty brackets
    • Screws and wall anchors
  2. Instructions:

    • Use a level to mark where you want your shelf on the wall.
    • Secure brackets to the wall using screws and anchors for added stability.
    • Place the driftwood shelf on top and ensure it’s level, then secure it in place.

Driftwood Table Centerpiece

A driftwood centerpiece can add a touch of elegance and nature to any table setting, perfect for home decorating or hosting gatherings.

  1. Materials Needed:

    • Large driftwood piece or collection of smaller pieces
    • Optional decorative elements like seashells, succulents, or faux flowers
    • Craft glue
  2. Instructions:

    • Arrange your driftwood piece(s) in the center of the table.
    • Add decorative elements by securing them with craft glue.
    • Adjust arrangements until satisfied with the appearance.

Driftwood Diy Decor

Caring for Your Driftwood Decor

Driftwood decor requires minimal maintenance but keeping it looking its best ensures longevity. It’s wise to regularly dust and clean your driftwood items. If your driftwood will be exposed to direct sunlight, consider applying a wood sealant to protect it from bleaching and preserve its natural look.

The Benefits of Driftwood Decor

Incorporating driftwood into your home decor provides several benefits beyond its aesthetic appeal.

Natural Aesthetic

Driftwood’s organic shapes and textures naturally elevate any interior design by adding warmth and character. It helps create a cozy, inviting atmosphere while celebrating the beauty of the natural world.

Versatility

Driftwood decor is versatile enough to blend seamlessly with various design styles, from coastal and bohemian to contemporary and rustic. The neutral tones complement a wide range of color palettes.

Eco-Friendly

Choosing driftwood decor supports sustainable living. By repurposing natural materials, you reduce the demand for new raw resources and help preserve the environment.

Final Thoughts

Driftwood DIY decor combines creativity, sustainability, and style, offering a unique way to enhance your home. By incorporating driftwood artfully, you invite the tranquility and beauty of nature indoors. Whether you’re creating a statement piece or subtle accents, driftwood projects provide a rewarding way to engage with natural materials and reflect your personal style in home decor.

So, gather your driftwood, prepare your tools, and let your creativity flow. With a bit of imagination, you can transform these pieces of nature into cherished elements of your home. Enjoy the process, and take pleasure in the coastal charm that driftwood decor brings to your living space.

Filed Under: Driftwood Ideas Tagged With: DIY, Driftwood Crafts, home decoration

Crafting Coastal Charm: Designing with Driftwood and Grout

September 22, 2024 by admin

Have you ever thought about bringing the peaceful serenity of the coast into your home decor? Coastal charm is not just about nautical themes and beach hues; it’s also about incorporating natural elements that create a calming, effortless beauty. Two materials that stand out in achieving this look are driftwood and grout. In this article, we’ll walk you through how to use these materials to craft decor pieces that add a touch of coastal elegance to any space.

Understanding Driftwood and Grout

What is Driftwood?

Driftwood is wood that has been washed onto the shore by the action of winds, tides, or waves. Over time, it takes on a weathered, unique appearance that makes it an appealing resource for home decoration. Its natural look adds organic charm to any piece, making it a favorite among designers and DIY enthusiasts alike.

What is Grout?

Grout is a construction material used to fill gaps between tiles or other materials. It comes in various forms, including cement-based and epoxy-based, and is available in multiple colors, making it versatile for various projects. When combined with driftwood, grout can help create sturdy, aesthetically pleasing decor items.

Benefits of Using Driftwood in Home Decor

Natural Aesthetic

One of the main reasons people opt for driftwood in their home decor is its natural aesthetic. Each piece is unique, with its own distinct shape, texture, and color. This individuality allows you to create one-of-a-kind pieces that reflect your personal style.

Sustainability

Using driftwood is an environmentally friendly option. Since it is naturally occurring and often collected from beaches, it doesn’t involve cutting down trees. This makes it a sustainable choice for eco-conscious decorators.

Versatility

Driftwood can be used in a wide range of projects, from furniture and wall art to smaller decorative accents. Its versatility makes it suitable for any room in the house, whether it’s a rustic living room centerpiece or an elegant bathroom mirror frame.

Crafting Coastal Charm: Designing with Driftwood and Grout

Choosing the Right Driftwood

Where to Find Driftwood

Driftwood can be found on beaches, lakesides, or river banks. However, not all driftwood is suitable for crafting. Aim for pieces that are thoroughly dried out and free from rot or damage.

Selection Criteria

When selecting driftwood for your project, consider the size, shape, and texture of each piece. Also, keep in mind the specific aesthetic you are aiming for. Small, smooth pieces may be perfect for intricate designs, while larger, more rugged pieces can serve as statement items.

Cleaning and Preparing Driftwood

Cleaning Process

To ensure your driftwood is free from contaminants, follow these steps:

  1. Rinse Thoroughly: Wash the driftwood with fresh water to remove any sand, dirt, or salt.
  2. Soak in Water and Bleach: Soak the driftwood in a solution of one part bleach to nine parts water for a few hours to kill any microorganisms.
  3. Dry Completely: Let the driftwood dry completely in the sun to remove any remaining moisture and bleach smell.

Sanding and Finishing

To prepare the driftwood for crafting, you may need to sand down rough edges and surfaces. Use fine-grit sandpaper to smooth out any splinters and bring out the natural beauty of the wood.

Crafting Coastal Charm: Designing with Driftwood and Grout

Types of Grout and Their Uses

Cement-Based Grout

Cement-based grout is the most commonly used type. It’s ideal for indoor projects like tiling and decorative accents. It’s available in a variety of colors, allowing you to match it perfectly with your driftwood pieces.

Epoxy Grout

Epoxy grout is more durable and resistant to stains and chemicals, making it suitable for high-traffic areas or outdoor projects. It is, however, more challenging to work with and typically more expensive than cement-based grout.

Choosing the Right Grout

Select grout based on the requirements of your project. For outdoor pieces or those that may come into contact with water, epoxy grout is a better option. For indoor decor where ease of use and variety of color are important, cement-based grout is ideal.

Crafting Projects with Driftwood and Grout

Driftwood and Grout Mirror Frame

A driftwood and grout mirror frame is an excellent way to add a coastal touch to your living space. Here’s how you can make one:

Materials Needed:

MaterialQuantity
Driftwood PiecesVaries based on frame size
Mirror1
Cement Grout1 small bag
Grout Sealer1 bottle
Adhesive Glue1 tube
Sandpaper1 sheet
Sealant1 can

Steps:

  1. Clean and Prepare Driftwood: Follow the cleaning and preparing steps mentioned earlier.
  2. Design Layout: Arrange the driftwood pieces around the mirror to get an idea of the layout.
  3. Adhere Driftwood: Use adhesive glue to stick the driftwood pieces to the mirror frame.
  4. Apply Grout: Fill any gaps between the driftwood pieces with cement grout. Allow it to dry according to the manufacturer’s instructions.
  5. Seal Grout: Apply grout sealer to protect the grout and ensure longevity.
  6. Finish with Sealant: Apply a final coat of sealant over the entire frame to give it a polished look.

Driftwood and Grout Tabletop

For a functional yet decorative table, incorporate both driftwood and grout:

Materials Needed:

MaterialQuantity
Driftwood PiecesEnough to cover the tabletop
Table Frame1
Epoxy Grout1 small bag
Grout Sealer1 bottle
Adhesive Glue1 tube
Varnish1 can

Steps:

  1. Clean and Prepare Driftwood: Follow the standard cleaning and preparation process.
  2. Arrange Driftwood: Layout your driftwood pieces on the table frame to fit your desired design.
  3. Attach Driftwood: Use adhesive glue to attach the driftwood pieces securely to the table frame.
  4. Apply Grout: Mix epoxy grout as instructed and fill in the gaps between the driftwood pieces.
  5. Seal Grout: Apply a layer of grout sealer.
  6. Finish with Varnish: Apply varnish to enhance the longevity and luster of the table.

Driftwood and Grout Wall Art

Creating wall art with driftwood and grout can transform a blank wall into a feature wall:

Materials Needed:

MaterialQuantity
Driftwood PiecesVaries
Backing Board1 large board
Cement Grout1 small bag
Grout Sealer1 bottle
Adhesive Glue1 tube
Sandpaper1 sheet
Hooks2-4 (for hanging)

Steps:

  1. Prepare Driftwood: Follow the cleaning and preparing process.
  2. Design Layout: Lay out your driftwood pieces on the backing board until you achieve a pleasing design.
  3. Attach Driftwood: Secure the pieces to the board with adhesive glue.
  4. Apply Grout: Fill in spaces between the driftwood pieces with cement grout.
  5. Seal Grout: Once the grout has dried, apply grout sealer.
  6. Finish and Hang: Sand any rough spots, add hooks to the back of the board, and hang your driftwood wall art.

Enhancing Coastal Charm

Color Choices

Choosing the right colors can enhance the coastal charm of your driftwood and grout projects. Stick to soft, natural tones like sandy beiges, ocean blues, and crisp whites. These colors help keep the focus on the natural beauty of the materials.

Complementary Materials

In addition to driftwood and grout, you can incorporate other natural materials to enhance the coastal vibe. Think seashells, beach stones, and sea glass. These materials can be used as accents or highlights in your projects.

Lighting

Proper lighting can also play a significant role in highlighting your driftwood and grout decor. Use natural lighting where possible, and complement it with warm, ambient light fixtures to create a cozy, inviting atmosphere.

Maintenance Tips for Driftwood and Grout Decor

Regular Cleaning

To keep your driftwood and grout decor looking its best, regular cleaning is essential. Dust the pieces regularly and clean grout lines with a mild cleaner to prevent buildup.

Re-Sealing Grout

Over time, grout can wear down and become susceptible to stains and damage. Re-seal grout periodically, depending on the traffic and exposure, to maintain its durability and appearance.

Repairing Damaged Areas

If any driftwood pieces become loose or damaged, secure or replace them promptly. Likewise, repair any cracks or chips in the grout using a grout repair kit to keep the decor intact.

Conclusion

Crafting coastal charm with driftwood and grout is more than just a trend; it’s an art form that brings a piece of the serene seaside right into your home. By understanding both materials and following proper techniques, you can create stunning, unique decor pieces that evoke the beauty and tranquility of the coast. Whether it’s a mirror frame, a tabletop, or wall art, your driftwood and grout creations will undoubtedly add a touch of coastal elegance to your living space. So, gather your materials, plan your projects, and start crafting—your coastal paradise awaits!

Filed Under: Driftwood Ideas Tagged With: Beach Style, Coastal Decor, DIY Home Projects, Driftwood Crafts, Grout Techniques

Driftwood Towel Rack

September 8, 2024 by admin

Have you ever thought about how to add a rustic and natural touch to your bathroom decor? A driftwood towel rack might just be the perfect solution!

Driftwood Towel Rack

What is a Driftwood Towel Rack?

A driftwood towel rack is a functional and decorative piece made from driftwood that has been naturally weathered by sea and sand. The driftwood is often collected from beaches and then cleaned and treated to create a unique, eco-friendly towel rack.

Why Choose Driftwood?

Driftwood is not only beautiful but also sustainable. Using driftwood in your home decor prevents it from ending up in landfills or rotting away on the beach. Each piece of driftwood is unique, offering a one-of-a-kind look that can complement various styles of decor, from coastal to rustic and everything in between.

Benefits of Driftwood Towel Racks

There are multiple benefits to choosing a driftwood towel rack for your home.

Unique Aesthetics

Each piece of driftwood carries its own history, shaping its appearance with distinctive grains, knots, and textures. This uniqueness lends a one-of-a-kind aesthetic to your bathroom.

Eco-Friendly

Driftwood is naturally occurring and recycled, minimizing its environmental impact. By using driftwood, you’re repurposing natural resources rather than contributing to deforestation or the production of synthetic materials.

Versatility

Driftwood towel racks can fit into various home decor styles. Whether your bathroom is modern, rustic, coastal, or eclectic, driftwood can blend seamlessly or stand out as a statement piece.

Durability

Driftwood is naturally tough and resistant to water, making it a suitable choice for bathroom environments. With proper care, a driftwood towel rack can last for many years.

How to Make Your Own Driftwood Towel Rack

Creating your own driftwood towel rack can be a fun and rewarding DIY project. Below, you’ll find a step-by-step guide to making your very own driftwood towel rack.

Materials Needed

Here is a list of materials you’ll need to get started:

MaterialDescription
Driftwood piecePreferably long and straight
Wood screwsTo attach hooks and wall mounts
Wall anchorsFor secure mounting
Screw hooksFor hanging towels
SandpaperFor smoothing driftwood
Wood sealerTo protect and preserve the driftwood
DrillFor making holes
Measuring tapeTo measure placement of screws and hooks
PencilFor marking drill points

Step-by-Step Instructions

Step 1: Choose Your Driftwood

Select a piece of driftwood that is long and sturdy enough to support the weight of towels. Make sure it has an interesting shape and texture that you love.

Step 2: Clean the Driftwood

Before doing anything else, clean the driftwood. You can do this by scrubbing it with a brush and soapy water. Let it dry completely before moving to the next step.

Step 3: Smooth the Driftwood

Use sandpaper to smooth out any rough spots on the driftwood. This will make it safer to handle and give it a more polished look.

Step 4: Seal the Driftwood

Apply a wood sealer to the driftwood. This will help protect it from moisture and extend its lifespan. Follow the manufacturer’s instructions for drying times.

Step 5: Mark and Drill Holes

Using your measuring tape and pencil, mark the spots where you’ll place the screw hooks. Make sure they are evenly spaced. Once marked, drill holes at these spots.

Step 6: Attach Screw Hooks

Insert the screw hooks into the pre-drilled holes. Make sure they are securely fastened to hold the weight of the towels.

Step 7: Mount the Towel Rack

Mark the spots on the wall where you’ll mount the driftwood towel rack. Drill holes for the wall anchors and insert them. Finally, attach the driftwood to the wall using wood screws.

Optional: Add Extra Features

You can customize your driftwood towel rack by adding extra features such as additional hooks for robes or baskets for bathroom essentials.

How to Style Your Driftwood Towel Rack

A driftwood towel rack can serve as a focal point in your bathroom decor. Here are some styling tips to make the most out of your new towel rack.

Coordinate with Natural Elements

Pair your driftwood towel rack with other natural elements like seashells, stone soap dishes, and potted plants to create a cohesive look.

Use Complementary Colors

Driftwood typically has neutral tones that pair well with a variety of color schemes. Consider using towels in shades of blue, white, or beige to complement the driftwood.

Add Functional Decor

Incorporate functional decor such as woven baskets for storing extra towels or toiletries. This will keep your bathroom organized while enhancing its aesthetic appeal.

Driftwood Towel Rack

Care and Maintenance Tips

Maintaining your driftwood towel rack is essential to keep it looking great and ensuring its longevity.

Regular Cleaning

Wipe down the driftwood with a damp cloth periodically to remove dust and grime. Avoid using harsh chemicals that could damage the wood.

Reapply Sealer

Depending on the level of humidity in your bathroom, you may need to reapply the wood sealer every year or so. This will help protect the driftwood from moisture and wear.

Inspect for Damage

Regularly check your driftwood towel rack for any signs of damage, such as cracks or loose screws. Address any issues promptly to ensure the rack remains sturdy and safe to use.

Where to Buy Driftwood Towel Racks

If you’re not inclined to make your own driftwood towel rack, there are plenty of places where you can purchase them. Here are a few options:

Online Marketplaces

Websites like Etsy, eBay, and Amazon offer a variety of driftwood towel racks. These platforms often have unique, handmade pieces that you won’t find in traditional stores.

Local Artisan Shops

Visiting local artisan shops or markets can help you find one-of-a-kind driftwood towel racks while supporting local craftsmen.

Specialty Home Decor Stores

Some specialty home decor stores, especially those that focus on coastal or rustic themes, may carry driftwood towel racks.

Store TypePotential Options
Online MarketplacesEtsy, eBay, Amazon
Local Artisan ShopsLocal markets
Specialty Home Decor StoresStores with coastal/rustic themes

Conclusion

A driftwood towel rack is a splendid way to bring natural beauty and functionality into your bathroom. Whether you choose to DIY or purchase one, this unique piece offers both an aesthetic charm and practical use. Don’t forget to care for and maintain your driftwood towel rack to keep it looking its best for years to come. Consider adding this rustic touch to your home, and enjoy the blend of nature with everyday utility.

Filed Under: Driftwood Ideas Tagged With: DIY, Driftwood Crafts, Home Improvement, Rustic Decor, Towel Rack

Gifts Made With Driftwood

August 16, 2024 by admin

Have you ever walked along a beach and noticed the beautiful, weathered pieces of driftwood scattered along the shore? It’s fascinating how nature can transform something as simple as a piece of wood into a unique and charming material. Driftwood has a rustic beauty and a history that make it perfect for creating one-of-a-kind gifts. Whether you want to craft something for a special occasion or simply enjoy a new hobby, making gifts with driftwood is a rewarding and creative endeavor.

Understanding Driftwood

Driftwood refers to pieces of wood that have been washed ashore by the action of tides, waves, and currents. Over time, this wood gets weathered from exposure to water, wind, and the elements, giving it a distinct texture and color. Each piece of driftwood is unique, carrying its own story.

Where to Find Driftwood

Finding the right pieces of driftwood is the first step in creating your gifts. You can often find driftwood along the shoreline of beaches, lakes, and rivers. Be mindful of local laws and environmental considerations when collecting driftwood; in some places, it’s protected.

Preparing Driftwood for Crafting

Before you start crafting, it’s crucial to clean and prepare your driftwood.

Steps to Clean Driftwood:

  1. Rinse: Remove any sand, dirt, or debris by rinsing the driftwood with fresh water.
  2. Soak: Soak the driftwood in a mixture of water and bleach (10:1 ratio) for a few days to kill any organisms and remove odors.
  3. Dry: Let the driftwood dry thoroughly in the sun for at least a week. Ensure it’s completely dry to prevent mold growth.

Crafting Gifts with Driftwood

Now that you have your driftwood cleaned and ready, let’s explore some ideas for crafting unique gifts. From simple projects to more intricate creations, there’s something for everyone.

Driftwood Picture Frames

A driftwood picture frame is a timeless and personal gift, perfect for displaying cherished memories.

Materials Needed:

  • Driftwood pieces
  • A basic photo frame
  • Hot glue gun and glue sticks
  • Sandpaper

Steps:

  1. Select Driftwood: Choose pieces of driftwood that complement the size of your photo frame.
  2. Prepare the Frame: Sand the edges of the photo frame to ensure the driftwood adheres well.
  3. Attach Driftwood: Using the hot glue gun, carefully glue the driftwood pieces around the frame, layering them for a natural look.
  4. Finishing Touches: Ensure the driftwood is securely attached and the frame is polished to your liking.

Driftwood Wall Art

Creating wall art with driftwood can add a touch of nature to any home.

Materials Needed:

  • Driftwood pieces
  • Strong adhesive
  • A backing board (optional)
  • Hooks for hanging

Steps:

  1. Plan Your Design: Lay out your driftwood pieces in a pattern or design of your choice.
  2. Attach Driftwood: Glue the driftwood to the backing board or directly to the wall hooks.
  3. Hang Your Art: Once dry, hang your driftwood art in the desired location.

Driftwood Candle Holders

Candles paired with driftwood can create a charming and cozy ambiance.

Materials Needed:

  • Driftwood pieces
  • Tealight candles or small glass candle holders
  • Sandpaper
  • Drill

Steps:

  1. Select Driftwood: Choose pieces that are flat and stable enough to hold candles.
  2. Prepare the Wood: Sand the driftwood to smooth any rough edges.
  3. Create Candle Holders: If using tealight candles, drill small holes into the driftwood to fit the candles snugly. Alternatively, place small glass candle holders on top of the driftwood.
  4. Finishing Touches: Ensure the candles are securely placed and the driftwood is stable.

Driftwood Wind Chimes

Wind chimes made from driftwood add a rustic charm to outdoor spaces.

Materials Needed:

  • Driftwood pieces of various sizes
  • Strong twine or fishing line
  • Drill
  • Small metal bells or chimes

Steps:

  1. Drill Holes: Drill holes into the driftwood pieces for threading the twine or fishing line.
  2. Thread the Pieces: Thread the line through the driftwood pieces, spacing them out evenly, and secure with knots.
  3. Attach Bells or Chimes: Tie on the metal bells or chimes to the ends of the lines.
  4. Hang Your Wind Chime: Find a suitable spot outdoors, like a porch or tree branch, to hang your wind chime.

Driftwood Jewelry

Driftwood can also be transformed into beautiful, natural jewelry, such as pendants or earrings.

Materials Needed:

  • Small pieces of driftwood
  • Jewelry findings (e.g., earring hooks, necklace chains)
  • Drill
  • Strong adhesive

Steps:

  1. Select Driftwood: Choose small, interestingly shaped pieces of driftwood.
  2. Drill Holes: Carefully drill small holes into the driftwood for attaching jewelry findings.
  3. Attach Findings: Use the adhesive to secure the findings to the driftwood.
  4. Assemble Jewelry: Attach the driftwood pieces to earring hooks or necklace chains.

Personalizing Your Driftwood Gifts

A personal touch can make all the difference in making your driftwood gift special. Consider customizing your creations with names, dates, or personal messages.

Painting and Staining

You can add color or highlight your driftwood’s natural texture with paint or wood stain.

Steps:

  1. Choose Your Medium: Select a wood stain or paint that complements the look you want to achieve.
  2. Apply Evenly: Use a brush to apply the medium evenly across the driftwood.
  3. Let Dry: Allow sufficient drying time before adding any additional decorations.

Adding Decorative Elements

Enhance your driftwood gifts with decorative elements such as shells, beads, or crystals.

Ideas for Decoration:

  • Shells: Glue small seashells onto your driftwood pieces.
  • Beads: String beads onto twine and wrap around the driftwood.
  • Crystals: Attach small crystals to catch the light and create a sparkling effect.

Benefits of Crafting with Driftwood

Crafting with driftwood offers numerous benefits, both for the crafter and the recipient of the gift.

Ecological Impact

By using driftwood, you’re recycling a natural material that would otherwise be left to decompose.

natural, landscape, nature
. This sustainable approach helps reduce waste and makes use of readily available resources.

Health and Well-being

Creating something beautiful with your hands can have therapeutic benefits.

driftwood, coast, tree
.
driftwood, nature, texture
. Engaging in craft activities can reduce stress, boost mood, and encourage mindfulness.

Unique and Personalized

Each piece of driftwood is unique, ensuring that your creations are one-of-a-kind. Handmade gifts carry a personal touch that store-bought items often lack, making them extra special.

Conclusion

Crafting gifts with driftwood is a rewarding, enjoyable, and eco-friendly way to create unique gifts for your loved ones. From picture frames and wall art to wind chimes and jewelry, the possibilities are endless. With a little creativity and some basic materials, you can transform pieces of weathered wood into beautiful, memorable gifts. So the next time you find yourself walking along a shoreline, pick up a few pieces of driftwood and let your imagination run wild. The natural beauty and history of driftwood make it an exceptional medium for expressing your creativity and making heartfelt gifts.

Filed Under: Driftwood Ideas Tagged With: DIY Projects, Driftwood Crafts, Eco-Friendly Gifts, Handmade Gifts, natural materials

Driftwood Jewelry Display

June 28, 2024 by admin

Transform your space and showcase your jewelry with a touch of nature using a Driftwood Jewelry Display. Crafted from genuine pieces of driftwood, each display is unique and brings a charming, rustic element into your home. Imagine hanging your necklaces and bracelets on beautifully weathered wood, creating an organized and visually appealing arrangement. This stylish, eco-friendly solution complements various decor styles, ensuring your favorite pieces are always within reach and beautifully presented. Have you ever wondered how you could elevate your jewelry display game while bringing a bit of nature into your home? Driftwood jewelry displays might just be the perfect solution. Not only do they evoke a sense of rustic charm, but driftwood displays also offer a beautiful and functional way to showcase your favorite pieces. In this article, we will delve into the ins and outs of creating your own driftwood jewelry display. We’ll cover everything from sourcing the wood to designing the layout, ensuring your project is as seamless as possible.

What is Driftwood?

Driftwood refers to pieces of wood that have been washed ashore by the action of waves, wind, or tides. This natural shaping process gives each piece a unique, weathered look that is both aesthetically pleasing and functional for various DIY projects. Driftwood’s distinct characteristics make it a fantastic medium for creating eye-catching jewelry displays.

The Unique Qualities of Driftwood

Before we dive into the practical aspects of creating a driftwood jewelry display, it’s essential to understand why driftwood is such an excellent material for this purpose. Here are some qualities that make it special:

  • Texture: The rough, weathered surface adds a natural, rustic look.
  • Shape: Driftwood pieces are available in various forms, perfect for creative designs.
  • Durability: Thanks to its exposure to water and weather, driftwood is often more resilient than newly cut wood.

Sourcing Your Driftwood

Finding the right driftwood for your project is the first step to creating a fabulous jewelry display. There are several ways to go about this, each with its benefits and drawbacks.

Visiting the Beach

The most authentic way to source driftwood is to head to your nearest beach or coastline. Take a leisurely walk along the shore, keeping an eye out for pieces that catch your interest. Make sure to collect only as much as you need, and always check local regulations before collecting driftwood, as some areas have rules against taking it.

Online Stores

If you can’t make it to the beach or prefer the convenience of online shopping, numerous websites sell driftwood. Online stores often offer a variety of shapes and sizes, allowing you to pick pieces that fit your vision.

Craft Stores

Many craft stores carry driftwood in their floral and home décor sections. While these pieces might not have the same level of authenticity as what you’d find at the beach, they can still be a great alternative.

Driftwood Jewelry Display

Preparing Your Driftwood

Once you’ve sourced your driftwood, it’s essential to prepare it properly to ensure that it’s safe to use and long-lasting.

Cleaning

Your driftwood may have accumulated dirt, salt, and other debris. Start by rinsing it under fresh water. For a deeper clean, soak the wood in a mixture of water and a small amount of bleach for 24 hours. Rinse thoroughly after soaking to remove any residual bleach.

Drying

Dry your cleaned driftwood in a sunny location or a well-ventilated area. Depending on the size of the wood and the conditions, this can take anywhere from a few days to a couple of weeks. Ensure the wood is entirely dry before proceeding with your project to prevent any mold growth.

Sealing

Sealing your driftwood can help preserve its appearance and durability. Use a clear, matte finish wood sealant to keep the natural look intact. Apply according to the manufacturer’s instructions and allow it to dry completely before using the driftwood in your display.

Designing Your Driftwood Jewelry Display

Now that your driftwood is clean, dry, and sealed, it’s time to get creative with the design. The sky’s the limit, but here are a few ideas to get you started.

Single Piece Display

One of the simplest designs involves using a single, well-chosen piece of driftwood to display your jewelry. This can be done by attaching small hooks or nails to the wood, allowing you to hang necklaces, bracelets, and earrings in an organized manner.

  1. Materials: Single piece of driftwood, small hooks or nails, drill or hammer.
  2. Steps:
    • Select a driftwood piece with a flat side for stability.
    • Use a drill or hammer to attach hooks or nails in desired locations.
    • Consider adding a stand or base for added support.

Multi-Tier Display

For those with more jewelry to showcase, a multi-tier display can add an extra layer of functionality. You can use multiple pieces of driftwood or cut a large piece into sections.

  1. Materials: Multiple pieces of driftwood, hooks or nails, screws, wooden base, drill.
  2. Steps:
    • Design a layout using various driftwood pieces, focusing on balance and accessibility.
    • Attach smaller pieces to a sturdy base using screws for stability.
    • Add hooks or nails to each tier as required.

Wall-Mounted Display

A wall-mounted display can be an excellent choice if you’re short on counter space. This design allows you to create a visually appealing focal point while keeping your jewelry organized.

  1. Materials: Driftwood, hooks or nails, wall brackets, screws, drill.
  2. Steps:
    • Choose a piece of driftwood that suits your wall space.
    • Install wall brackets in appropriate spots to support the driftwood.
    • Attach hooks or nails to the driftwood and hang items as desired.

Hybrid Display

If you can’t decide between a table-top or wall-mounted display, why not combine both? A hybrid display offers versatility and can be customized to suit your needs.

  1. Materials: Combination of tabletop and wall-mounted pieces, hooks or nails, screws, drill.
  2. Steps:
    • Sketch a design that incorporates both display styles.
    • Use sturdy materials to ensure that all elements are secure.
    • Attach hooks or nails as needed, and decorate to your taste.

Driftwood Jewelry Display

Enhancing Your Driftwood Display

To make your driftwood jewelry display truly stand out, consider adding a few enhancements that will bring it to the next level.

Lighting

Good lighting can make a significant difference in how your jewelry is showcased. Consider using LED strip lights or small spotlights to illuminate your display.

Accent Pieces

Adding small décor items like shells, stones, or even small plants can elevate the visual appeal of your display. Use a hot glue gun or strong adhesive to attach these decorations securely.

Custom Labels

Custom labels can help keep your jewelry organized and clearly define sections within your display. Use small, chic labels, and attach them with elegant ribbon or string.

EnhancementDescriptionMaterials
LightingAdds brightness and focus to piecesLED strip lights, spotlights
Accent PiecesAdds visual interest and thematic elementsShells, stones, small plants, glue
Custom LabelsHelps in organizing and categorizationLabels, ribbon, string

Caring for Your Driftwood Jewelry Display

To ensure your driftwood jewelry display remains beautiful and functional, proper care is essential.

Regular Dusting

Dust can accumulate on both the wood and your jewelry over time. Use a microfiber cloth to gently dust your display and pieces every week or so.

Avoid Excess Moisture

Although driftwood is more resilient than regular wood, it’s still a good idea to avoid exposing it to excessive moisture. Keep your display in a dry, cool area for optimal longevity.

Periodic Sealing

Reapply a wood sealant every year or so to keep your driftwood looking fresh and prevent it from drying out or deteriorating.

Care TaskFrequencyTools/Materials
DustingWeeklyMicrofiber cloth
Avoid MoistureOngoingDry, cool storage
Re-SealingAnnuallyWood sealant, brush

Inspiring Examples

Sometimes seeing what others have done can inspire your creativity. Here are a few real-life examples of beautiful driftwood jewelry displays to spark your imagination.

Simple Elegance

A single piece of driftwood with minimal decoration can create a sense of simple elegance. Add just a few hooks to hold your favorite necklaces and let the wood’s natural beauty shine.

Full Statement

Combine multiple driftwood pieces of varying sizes to create a stunning wall-mounted display. Use this space to showcase a vast collection of jewelry, creating a visual statement that doubles as functional art.

Mixed Media

Mix driftwood with other materials like metal, glass, or fabric to add layers of texture and interest to your display. This approach can result in a unique, eclectic look that is both stylish and practical.

Conclusion

Creating a driftwood jewelry display is an incredibly rewarding experience. Not only do you get to craft something beautiful with your own hands, but you also bring a piece of nature into your home. From sourcing and preparing your driftwood to designing and enhancing your display, every step of the process allows you to add your personal touch. Whether you opt for a simple single-piece display or a complex multi-tiered arrangement, your driftwood jewelry display will undoubtedly stand out as a unique, functional piece of art. So why wait? Start planning your driftwood jewelry display today, and enjoy the blend of rustic charm and modern functionality it brings to your home!

Filed Under: Driftwood Ideas Tagged With: DIY Home Decor, Driftwood Crafts, Eco-Friendly Crafts, Handmade Jewelry, Jewelry Display

Drift Wood Decor Driftwood Projects

June 3, 2024 by admin

Dive into the world of beachside elegance with “Drift Wood Decor Driftwood Projects.” This inspiring article will transport you to a place where the ocean meets creativity, guiding you through various charming and innovative ways to incorporate driftwood into your home decor. From DIY projects that add a rustic touch to your living room, to sophisticated pieces that can be the highlight of any space, you’ll find endless ideas to bring the serene beauty of the coast right into your home. Get ready to unleash your inner artisan and transform ordinary driftwood into extraordinary decor with these delightful driftwood projects! Have you ever strolled along the beach, stumbled upon beautifully weathered pieces of driftwood, and wondered how to incorporate them into your home decor? If you’re drawn to the natural beauty of driftwood and wish to enhance your living space with unique, eco-friendly projects, you’re in the right place. Let’s delve into the world of driftwood decor and explore some exciting driftwood projects you can undertake to add a touch of nature to your interiors.

Drift Wood Decor Driftwood Projects

Understanding Driftwood

Before jumping into projects, it’s essential to get a good grasp of what driftwood is and why it makes such a fantastic material for home decor.

What is Driftwood?

Driftwood refers to pieces of wood that have been washed onto shores by the action of winds, tides, or waves. The journey through water seasoned the wood, lending it a soft, bleached look that’s incredibly appealing. Driftwood can come from a variety of sources, including trees, shrubs, and even discarded pieces of timber, giving it a diverse range of textures and shapes.

Why Use Driftwood in Decor?

Driftwood is not just beautiful; it also embodies a sense of history and connectivity with nature. Each piece tells a story, making it a unique addition to any setting. It’s also an eco-friendly choice, repurposing materials that might otherwise be discarded. Plus, it’s versatile! Whether your style is rustic, coastal, or contemporary, driftwood can blend seamlessly into your decor.

Driftwood Decor: Getting Started

Selecting the Right Driftwood

Not all driftwood is the same, and choosing the right pieces is crucial for your project’s success. Here are some tips to consider:

  • Size and Shape: Look for pieces that suit your project’s needs—whether it’s large logs for a coffee table or smaller branches for a picture frame.
  • Condition: Ensure the driftwood is free from rot, bugs, and other contaminants. It’s natural for it to have some crevices and imperfections, but it should be structurally sound.
  • Texture and Color: Consider how the driftwood’s natural texture and color will complement your existing decor. Some pieces may have a silver-gray patina, while others might be more brown or bleached.

Preparing Your Driftwood

Proper preparation is key to ensuring your driftwood is clean and ready for use. Here’s a simple process to follow:

  1. Cleaning: Rinse the driftwood to remove salt, sand, and debris. Use a brush to get into crevices, paying special attention to make sure it’s thoroughly clean.
  2. Soaking: Soak the driftwood in a solution of water and white vinegar (roughly 1 part vinegar to 9 parts water) for a few hours. This helps to kill any remaining bacteria or insects.
  3. Drying: Allow the driftwood to dry completely, which may take a few days to a week. Place it in a dry, ventilated area to speed up the process.

Driftwood Projects

Driftwood Wall Art

One of the simplest yet most impactful ways to use driftwood is to create wall art. This project doesn’t require many tools and allows for a lot of creativity.

Materials Needed:

  • Driftwood pieces
  • Backing board or canvas
  • Strong adhesive or nails
  • Picture hanging hardware

Steps:

  1. Plan Your Design: Lay out your driftwood pieces on the backing board to determine the arrangement. You could go with a random, abstract pattern or something more structured.
  2. Secure the Driftwood: Use strong adhesive or nails to attach the driftwood to the backing board. Make sure each piece is firmly secured.
  3. Hang Your Art: Affix the picture hanging hardware to the back of the board and display your newly created driftwood art prominently.

Driftwood Coat Rack

A driftwood coat rack adds a rustic, nature-inspired touch to your entryways. It’s functional and beautiful—a perfect blend of form and utility.

Materials Needed:

  • Straight, sturdy driftwood branch
  • Coat hooks
  • Screws and wall anchors
  • Drill

Steps:

  1. Prepare the Driftwood: Ensure your selected driftwood piece is clean and dry. Cut to size if necessary.
  2. Attach Coat Hooks: Evenly space and attach the coat hooks along the length of the driftwood using screws.
  3. Mount the Rack: Drill appropriate holes in the wall and insert wall anchors for stability. Secure your driftwood rack to the wall.

Driftwood Shelves

Driftwood shelves offer a unique way to display your favorite items, blending functionality with natural aesthetics.

Materials Needed:

  • Flat, wide pieces of driftwood
  • Brackets
  • Screws and wall anchors
  • Drill

Steps:

  1. Select the Driftwood: Choose pieces of driftwood that are flat and strong enough to hold items.
  2. Attach Brackets: Secure metal brackets to the driftwood shelf. Make sure they are evenly spaced.
  3. Mount the Shelves: Use the drill to insert wall anchors, then attach the brackets and shelves to the wall. Check for levelness and stability.

Driftwood Table

Creating a driftwood table is a more ambitious project, but the results can be stunning. Whether it’s a coffee table or a nightstand, driftwood can bring a unique character to your space.

Materials Needed:

  • Larger pieces of driftwood
  • Tabletop (glass or wood)
  • Strong adhesive or screws
  • Table legs if needed

Steps:

  1. Design Your Table: Plan the structure and layout of your driftwood base. You can stack pieces, intertwine them, or create a more structured look.
  2. Secure the Base: Use strong adhesive or screws to secure the pieces of driftwood together.
  3. Attach the Tabletop: Depending on your design, attach a glass or wooden tabletop to the driftwood base. Ensure it’s level and sturdy.

Driftwood Candle Holders

Simple yet elegant, driftwood candle holders can add a warm, cozy ambiance to any room.

Materials Needed:

  • Driftwood branches
  • Drill with spade bit (to create candle holes)
  • Sandpaper

Steps:

  1. Prepare the Driftwood: Clean your driftwood and smooth any rough edges with sandpaper.
  2. Drill Candle Holes: Use the spade bit to carefully drill holes into the driftwood. The size of the bit will depend on the candles you’re using.
  3. Finishing Touches: Sand the edges of the holes for a smooth finish. Place candles in the holes and enjoy your new decor.

Additional Tips for Working with Driftwood

Preserving Driftwood

To ensure your driftwood projects last, consider applying a wood preservative or sealant. This protects the wood from moisture and further degradation.

Safety Considerations

Always wear protective gear (gloves, masks, and safety glasses) when working with tools and driftwood. Ensure proper ventilation if you’re using adhesives or preservatives.

Sourcing Driftwood

If you don’t live near a beach, you can purchase driftwood from craft stores or online retailers. Ensure it has been ethically sourced to protect natural environments.

Drift Wood Decor Driftwood Projects

Conclusion

Driftwood is a versatile, eco-friendly material that can bring a touch of nature into your home. Whether you’re crafting a simple candle holder or a complex coffee table, the unique shapes and textures of driftwood ensure each piece is one-of-a-kind. So why not start your own driftwood project today? Embrace the beauty of nature and create something truly special for your home.

Filed Under: Driftwood Ideas Tagged With: DIY Projects, Driftwood Crafts, Driftwood Decor, Home Projects, Sustainable decor

  • Page 1
  • Page 2
  • Next Page »

Primary Sidebar

Driftwood4us.com, is a participant in the Amazon Services LLC Associates Program, an affiliate advertising program designed to provide a means for sites to earn advertising fees by advertising and linking to amazon.com.