• Skip to main content
  • Skip to primary sidebar
  • Terms and Conditions
  • Privacy Policy
  • Contact

Driftwood 4 Us

Just About Driftwood

Handmade

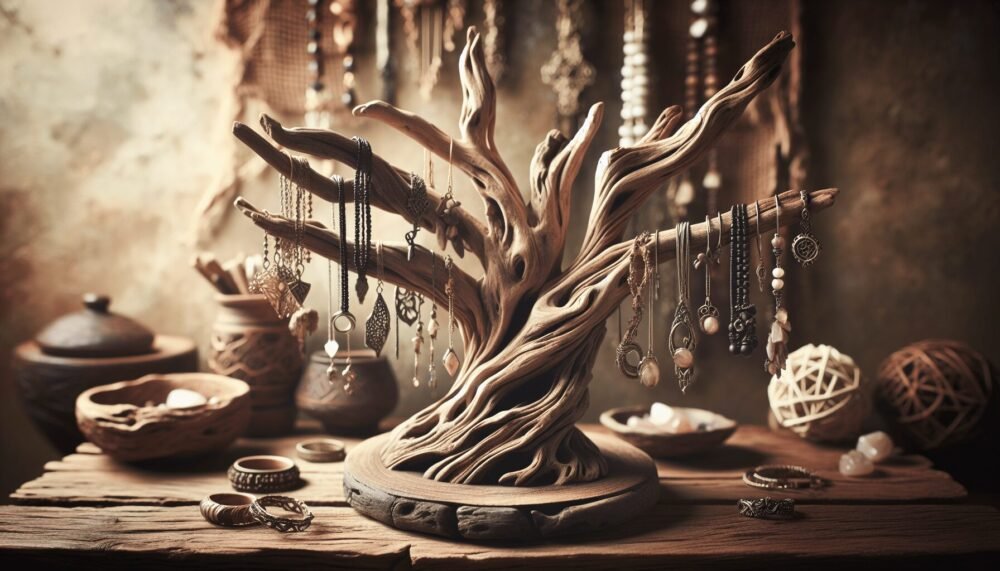
Driftwood Jewelry Display Diy

June 29, 2024 by admin

Imagine turning a simple piece of driftwood into a stunning display for your cherished jewelry. In this friendly and easy-to-follow guide, “Driftwood Jewelry Display DIY,” you’ll discover how to upcycle your beachcombing treasures into an artistic and functional accessory holder. Whether you’re a seasoned DIY enthusiast or just love a good creative project, this step-by-step guide will walk you through everything you need to know, making it the perfect weekend craft to showcase your unique style and keep your favorite pieces organized and beautifully displayed. Have you ever found yourself mesmerized by the natural beauty of driftwood and wondered how you could incorporate that aesthetic into your home decor? Welcome to the world of DIY driftwood jewelry displays! Whether you’re a beachcomber who loves collecting driftwood or someone who enjoys DIY projects, making your own driftwood jewelry display can be both a functional and decorative addition to your space.

The Allure of Driftwood

Driftwood brings a touch of nature indoors. Its unique textures, forms, and shades tell stories of journeys across the sea, making each piece a one-of-a-kind treasure. Using driftwood in your home decor allows you to bring a piece of the great outdoors inside, adding a rustic yet elegant charm to your space.

Why Driftwood for Jewelry Displays?

Driftwood is not just beautiful; it’s also exceptionally versatile. It can be used to create stunning, eye-catching displays that perfectly showcase your jewelry collection. Plus, incorporating natural elements into your living space has become increasingly trendy, so why not blend beauty with function?

Gathering Your Materials

Before you start the actual DIY project, you’ll need to gather your tools and materials. Here’s a handy list to make sure you have everything ready.

ItemPurpose
Driftwood piecesThe main material for your display
SandpaperSmoothing the driftwood
Hooks, nails, or screwsHanging the jewelry
Drill or screwdriverAttaching hooks or screws
Measuring tapePrecision in placement
Wood sealant (optional)Protecting and preserving the driftwood
Hot glue gun (optional)Attaching decor elements
Paint or wood stain (optional)Customizing the look of your driftwood display

Driftwood Jewelry Display Diy

Choosing the Right Driftwood

Not all driftwood pieces are created equal, so selecting the right pieces for your project is crucial. Consider the following points when choosing your driftwood:

Size and Shape

The size and shape of your driftwood will determine how you’ll use it in your jewelry display. Look for pieces that have interesting shapes and are long enough to hold your jewelry without overcrowding it. Branch-like pieces often work best for hanging earrings, necklaces, and bracelets.

Condition

Make sure the driftwood is in good condition. Avoid pieces that are too fragile or brittle, as they may not hold up well over time. Give it a gentle shake to see if it’s sturdy enough for your project.

Cleaning Your Driftwood

Once you’ve chosen your pieces, it’s time to clean them. Driftwood can harbor sand, dirt, and salt, so cleaning is an essential step.

Simple Cleaning Steps:

  1. Rinse: Rinse the driftwood pieces under fresh water to remove loose debris.
  2. Scrub: Use a mild soap and a brush to scrub away any dirt or grime.
  3. Soak: Soak the driftwood in fresh water for several hours to remove any remaining salt.
  4. Dry: Let it dry completely, either in the sun or in a well-ventilated area.

Preparing the Driftwood

After cleaning, you’ll want to prepare the driftwood for the project. This involves smoothing it out, potentially applying a sealant or paint, and making sure it’s ready to be used in your jewelry display.

Sanding

Sanding your driftwood will remove any rough edges and splinters. Use sandpaper with a medium grit to start, followed by finer grit to smooth it out. Remember to sand along the grain of the wood for the best result.

Sealing (Optional)

Applying a wood sealant can help preserve the driftwood and protect it from moisture. If you prefer a more natural look, you can skip this step.

Staining or Painting (Optional)

If you want to customize the look of your driftwood, now is the time to apply wood stain or paint. Choose a color that complements your decor and let it dry completely before moving on to the next steps.

Driftwood Jewelry Display Diy

Planning Your Jewelry Display Design

Now that your driftwood is clean and prepared, it’s time to design your jewelry display. Think about the types of jewelry you have and how you want to arrange them.

Sketching Your Design

A simple sketch can help you visualize the final product. Drawing your design will give you an idea of where to place hooks, nails, or screws. Consider including different sections for earrings, necklaces, and bracelets.

Measuring and Marking

Using a measuring tape and pencil, mark the spots where you will place hooks or screws. Even spacing will create a balanced look and ensure you have enough room for all your pieces.

Building Your Driftwood Jewelry Display

With your design in mind, you’re ready to start the building process. Follow these steps to create your unique jewelry display.

Attaching Hooks, Nails, or Screws

Depending on your design, you’ll be attaching hooks, nails, or screws to the driftwood.

Steps:

  1. Pre-drill Holes: Pre-drilling holes can prevent the wood from splitting. Use a drill bit that’s slightly smaller than your screws or nails.
  2. Attach Hardware: Screw in hooks or nails at the marked spots. Make sure they are securely fastened and aligned according to your design.

Adding Decorative Elements (Optional)

If desired, you can use a hot glue gun to attach decorative elements like shells, small stones, or beads to your driftwood. This step is entirely optional and allows you to add a personal touch to your display.

Hanging and Using Your Display

Finally, it’s time to hang your driftwood jewelry display. Choose a spot in your home where it will be both functional and eye-catching.

Hanging Your Display

Using sturdy picture hangers or wall anchors, securely attach your driftwood display to the wall. Ensure it is level and can support the weight of your jewelry.

Arranging Your Jewelry

Carefully hang your jewelry pieces on the hooks and nails you’ve attached. Arrange them in a way that is both pleasing to the eye and functional for easy access.

Maintaining Your Driftwood Jewelry Display

To keep your display looking its best, a bit of regular maintenance is required.

Dusting

Regularly dust your display to keep both the driftwood and your jewelry clean. Use a soft cloth to gently wipe down the wood and hardware.

Inspecting Hardware

Periodically check the hooks and nails to ensure they’re still secure. Tighten or replace them as needed.

Seasonal Adjustments

Feel free to update your display with the seasons by adding new decorative elements or rearranging your jewelry. This keeps the display fresh and reflects your current style.

Alternatives and Variations

If you’re feeling adventurous or want to try a different look, there are plenty of variations and alternatives to the basic driftwood jewelry display.

Multi-Tiered Displays

For larger collections, consider creating a multi-tiered display using several pieces of driftwood. You can stack them vertically or arrange them in an artistic pattern on the wall.

Driftwood Stand

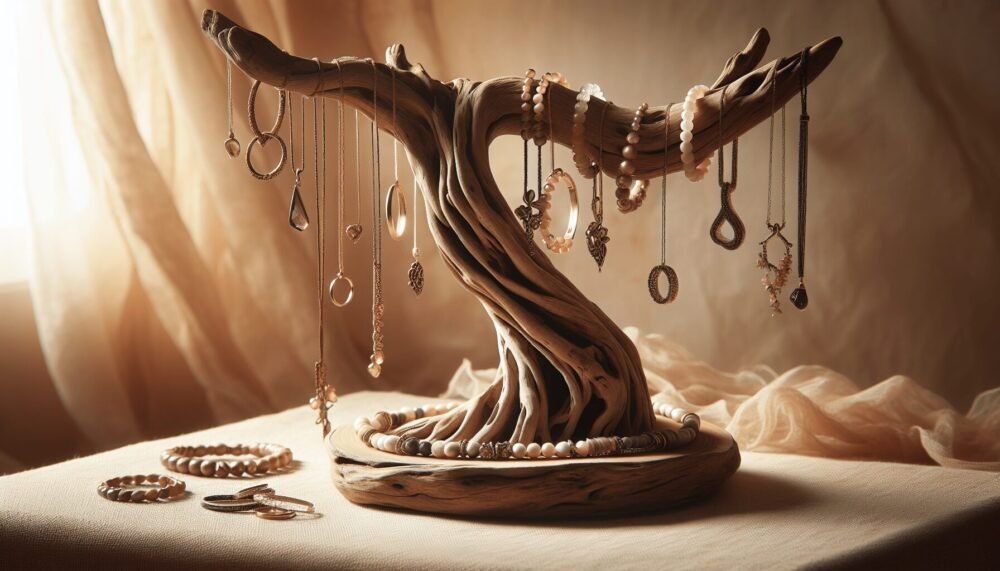
If wall space is limited, consider making a driftwood stand. Use a sturdy branch as the main post and attach smaller pieces to create horizontal arms for hanging jewelry.

Combining Materials

Blend driftwood with other natural materials like stone, shells, or even metal for a unique, mixed-media display.

Conclusion

Creating a driftwood jewelry display is a wonderful way to combine functionality with natural beauty. Each step, from selecting the perfect piece of driftwood to designing and building your display, allows you to express your creativity and craft something that’s uniquely yours. Not only will you have a beautiful new addition to your home decor, but you’ll also have a personalized, eco-friendly way to showcase your jewelry collection.

So, next time you find a lovely piece of driftwood on the beach, visualize the stunning jewelry display it could become. Happy crafting!
Filed Under: Driftwood Ideas Tagged With: craft, Driftwood, Handmade, home decor, Jewelry Display

Driftwood Jewelry Stand

June 29, 2024 by admin

Get ready to add a touch of coastal charm to your home with the Driftwood Jewelry Stand! This unique piece isn’t just about aesthetics; it’s also a practical solution for organizing your beloved accessories. Imagine showcasing your favorite necklaces, earrings, and bracelets on a beautifully weathered piece of driftwood that brings the serenity of the sea right to your bedroom. Easy to assemble and brimming with natural beauty, this jewelry stand combines functionality with a rustic, stylish appeal, making it a perfect addition to your décor. Have you ever looked at your beautiful collection of jewelry and thought, “I need a better way to display these treasures”? If so, you’re not alone! Many of us struggle to find both a functional and aesthetically pleasing way to showcase our jewelry. Enter the Driftwood Jewelry Stand—a charming solution that brings a touch of nature into your space while keeping your jewelry organized and easily accessible. Let’s dive into how you can create your own driftwood jewelry stand and the many benefits of having one.

Driftwood Jewelry Stand

What is a Driftwood Jewelry Stand?

A driftwood jewelry stand is essentially a display piece made from driftwood—wood that has been washed onto the shore by the action of waves and tides. The natural weathering process gives driftwood a unique look, with each piece having its distinct texture, shape, and color. When fashioned into a jewelry stand, it creates a rustic, natural aesthetic that beautifully complements various home décor styles, from bohemian to coastal and even modern minimalist themes.

Why Choose a Driftwood Jewelry Stand?

You might be curious as to why a driftwood jewelry stand over other types. Here are several compelling reasons:

Eco-Friendly

By using driftwood, you’re repurposing a natural material, thereby reducing waste and your environmental footprint. Driftwood is a renewable resource that isn’t manufactured through industrial processes.

Unique Design

Each piece of driftwood is distinct, meaning no two jewelry stands will ever be identical. This uniqueness adds a personal touch to your jewelry display.

Versatility

Driftwood jewelry stands complement virtually any type of home décor. Whether your rooms are decorated with modern, rustic, or traditional themes, driftwood can blend seamlessly, adding a touch of nature and elegance.

Materials You’ll Need

Driftwood

Start with a piece of driftwood that suits the size and shape you want for your stand. You can find driftwood along beaches, lakeshores, or even purchase them from craft or home décor stores.

Hooks and Hangers

Select hooks and hangers that match your style. Brass, silver, or antique finishes all work well.

Base

You’ll need a sturdy base to support your driftwood. Materials such as wooden planks, tiles, or even rocks can serve as good bases.

Tools

Having the right tools is crucial for creating a reliable driftwood jewelry stand.

  • Drill: To make holes for the hooks.
  • Screws: To attach the driftwood to the base.
  • Sandpaper: To smooth out rough edges.
  • Saw: If you need to adjust the size of the driftwood.
  • Screwdriver: For attaching components.

Optional Add-Ons

Feel free to get creative with other elements, such as paint, varnish, or additional decorations like shells and stones to further personalize your stand.

Step-by-Step Guide to Making a Driftwood Jewelry Stand

Step 1: Selecting the Driftwood

The first step in creating your jewelry stand is choosing your piece of driftwood. When looking for a piece, consider its size, shape, and stability. Ideally, it should have multiple branches or hooks naturally occurring, but don’t worry if it doesn’t—you can always add hangers later.

Step 2: Cleaning the Driftwood

Ensure your driftwood is clean and free of debris. Here’s how:

  1. Rinse the driftwood: Use fresh water to remove sand and grime.
  2. Scrub: Use a stiff brush to scrub the wood.
  3. Soak: If the wood is heavily stained, soak it in a bleach and water solution (ratio of 1:10) for about 24 hours.
  4. Dry: Allow the wood to thoroughly dry, preferably under the sun.

Step 3: Preparing the Base

Your base needs to be sturdy enough to support the driftwood and the weight of your jewelry. If you’re using a wooden plank or a tile, ensure it is the right size and shape. Sand it down if necessary to smooth any rough edges.

Step 4: Drilling and Mounting

Once your driftwood and base are ready, follow these steps to assemble:

  1. Drill Holes: Drill holes into the driftwood where you plan to attach hooks or hangers.
  2. Attach Screws: Secure the screw into the base and driftwood to firmly attach them together. Ensure it’s stable by gently shaking it.
  3. Add Hooks: Install your hooks and hangers in the pre-drilled holes.

Step 5: Finishing Touches

Sand down any rough edges on your driftwood to ensure no splinters remain. You can also paint or varnish the driftwood if desired, although many people prefer to keep its natural look.

Driftwood Jewelry Stand

Popular Styles and Designs

Minimalist

A single piece of driftwood with a few strategically placed hooks can create a minimalist yet functional jewelry stand. This style is elegant and doesn’t take up much space, making it perfect for smaller rooms or apartments.

Rustic

For a more rustic look, leave the driftwood in its natural state and use antique-finished hooks. Add some natural elements like small stones or twine for that extra touch.

Bohemian

Add colorful elements like beads, feathers, and shells to your driftwood. This type of stand not only functions as a jewelry holder but also as an eye-catching piece of art.

Coastal

If you’re a fan of beach décor, aim for a coastal theme by incorporating seashells, sand dollars, and a light whitewash finish to your driftwood.

Caring for Your Driftwood Jewelry Stand

Driftwood is fairly low maintenance, but a little care can go a long way in preserving its beauty:

  • Dust Regularly: Use a soft cloth or feather duster to remove accumulated dust.
  • Avoid Moisture: Driftwood can get moldy if exposed to damp conditions. Keep it in a dry place.
  • Sealing: Optionally, you can seal your driftwood with a clear varnish to protect it from wear and tear.

Tips and Tricks for a Successful Project

Selecting the Right Driftwood

Not every piece of driftwood is suitable for a jewelry stand. Look for wood that is large enough to be stable but has enough branches or protrusions to hang jewelry from.

Balancing Aesthetics and Functionality

While it’s tempting to focus solely on how beautiful your driftwood jewelry stand will look, remember it also needs to be functional. Make sure there are enough hooks to accommodate your jewelry collection.

Securing the Base

Your base is crucial for stability. Don’t skimp on this part, as it will bear the weight of the jewelry and the driftwood.

Getting Creative

Feel free to think outside the box when it comes to decorations and additional features. Driftwood is incredibly versatile and can be customized to suit your personal style.

Benefits of Making Your Own Driftwood Jewelry Stand

Personalized Touch

Making your own jewelry stand means you get a piece that reflects your personality and style. It’s a unique add-on that store-bought stands can’t offer.

Cost-Effective

Many of the materials required can be sourced for free or at a low cost. This makes it a budget-friendly project that offers great returns in terms of functionality and decoration.

Therapeutic Process

Crafting something with your hands can be very therapeutic. The process of creating your own driftwood jewelry stand can be a wonderful way to unwind and engage in a productive hobby.

Frequently Asked Questions

Where Can I Find Driftwood?

You can find driftwood along the shores of oceans, lakes, and rivers. Some craft and home décor stores also sell pre-cleaned and treated driftwood.

How Strong is Driftwood?

Driftwood is surprisingly strong, though it varies by type. When selecting your piece, ensure it’s sturdy enough to hold your jewelry without bending or breaking.

Can I Use Other Types of Wood?

While driftwood offers a unique, naturally weathered look, you can use any type of wood for this project. Just keep in mind that you may need to artificially treat it to achieve a similar aesthetic.

How Do I Clean and Maintain Driftwood?

Cleaning involves rinsing, scrubbing, and sometimes soaking in a bleach solution. For maintenance, regular dusting and keeping it in a dry environment are usually sufficient.

Can I Repaint or Varnish My Stand?

Absolutely! Paint or varnish can add an extra layer of protection and customize the look further. Just make sure to use finishes that are safe for the type of wood you’re using.

How Do I Make It More Stable?

Ensuring the base is heavy and well-secured will increase the stability of your driftwood jewelry stand. You can also use longer screws or additional supports if necessary.

By now, you should have a thorough understanding of how to create, customize, and care for your own driftwood jewelry stand. Happy crafting!

Conclusion

The driftwood jewelry stand is a functional art piece that serves both practical and decorative purposes. Not only does it provide an eco-friendly and unique way to display your jewelry, but it also adds a touch of natural beauty to your home. With the right materials and a bit of creativity, you can craft a stand that perfectly matches your décor style and meets your needs. So why wait? Start collecting your materials, let your creativity flow, and build your very own driftwood jewelry stand today. You’ll love how it turns out, and your jewelry will thank you for the beautiful display!

Filed Under: Driftwood Ideas Tagged With: crafting, Driftwood, Handmade, home decor

Driftwood Jewelry Hanger

June 29, 2024 by admin

You’re in for a delightful treat as you discover the charm and utility of the Driftwood Jewelry Hanger. Imagine taking a piece of nature’s artistry, like driftwood, and transforming it into a stunning display for your jewelry collection. This eco-friendly hanger not only keeps your necklaces, bracelets, and earrings neatly organized but also adds a rustic, beachy vibe to your décor. You’ll love how this simple yet elegant solution breathes new life into your space while showcasing your favorite accessories. Dive into the world of the Driftwood Jewelry Hanger and embrace its unique blend of style and functionality! Have you ever wondered about an eco-friendly, rustic, and stylish way to organize and display your jewelry? If so, you’re in luck! A driftwood jewelry hanger might be just what you need to combine practicality with a touch of coastal charm in your home decor. In this article, you’ll learn everything you need to know to create your own driftwood jewelry hanger, from gathering materials to making the final touches.

What Is a Driftwood Jewelry Hanger?

A driftwood jewelry hanger is a piece of driftwood that’s been transformed into an artistic and functional display for your jewelry. These hangers typically use hooks, nails, or other hardware to hold necklaces, bracelets, earrings, and rings.

Why Choose Driftwood?

Driftwood adds a unique, natural element to any room. Each piece of driftwood is one-of-a-kind, with its own shape, texture, and history. Utilizing driftwood for projects like a jewelry hanger helps you repurpose natural materials in a sustainable way. Plus, the overall aesthetic is both stylish and versatile, fitting well into various types of home decor, whether you’re aiming for a coastal, rustic, or bohemian look.

Materials You’ll Need

Before you begin, gather all the necessary materials. Here’s a table to help you keep track:

MaterialDescription
DriftwoodChoose a piece sturdy enough to hold multiple pieces of jewelry
SandpaperTo smooth out rough areas
Hooks or small nailsFor hanging jewelry
Measuring tapeTo ensure even spacing
PencilFor marking drill points and hook placements
DrillTo create holes for hooks or nails
ScrewsFor attaching the driftwood to the wall
Wall AnchorsOptional but recommended for added stability
ScrewdriverTo screw in wall anchors and screws

Choosing the Perfect Piece of Driftwood

When selecting your driftwood, look for a piece that’s sturdy and has a shape you find appealing. It should be large enough to accommodate several pieces of jewelry but small enough to fit comfortably in your chosen location.

Essential Tools

Make sure you have all the tools listed, especially a drill and sandpaper. The drill will be indispensable for making holes for hooks, and the sandpaper will ensure you don’t get any splinters while handling the wood.

Driftwood Jewelry Hanger

Preparing the Driftwood

Preparation is key to making sure your driftwood jewelry hanger turns out perfect.

Cleaning The Driftwood

Begin by thoroughly cleaning the driftwood. Given that it may have been sitting in water for quite some time, it could be home to barnacles, algae, or other debris.

  1. Rinse: Use fresh water to rinse off any loose dirt or debris.
  2. Soak: Submerge the driftwood in a mixture of water and a small amount of bleach for 24 hours to kill any remaining organisms.
  3. Dry: Allow it to air dry completely, which may take a few days.

Sanding The Driftwood

After your driftwood is clean and dry, it’s time to sand it. Smooth out any rough spots to prevent splinters and give the piece a polished look. Lightly sand the surface with medium-grit sandpaper, focusing on areas where you’ll be placing hooks or nails.

Assembling the Jewelry Hanger

Now that your driftwood is prepped, you can move on to the assembly phase.

Planning Hook Placement

Use your measuring tape and pencil to mark where each hook or nail will go. Evenly spaced hooks look most appealing and functional. Here’s a simple guide:

ItemIdeal Separation
Necklaces3 inches
Bracelets1.5 inches
Earrings1 inch

Drilling Holes

Once you’ve marked the placement for the hooks, use the drill to create shallow pilot holes. This will make it easier to screw in hooks or hammer in nails without splitting the wood.

Installing Hooks

Screw in the hooks or hammer in the nails according to your pencil marks. Ensure they’re secure but be careful not to split the wood. As you do this, try to maintain an even look.

Driftwood Jewelry Hanger

Mounting the Driftwood Jewelry Hanger

The final step is to mount your driftwood jewelry hanger securely on the wall.

Choosing a Location

Pick a spot that’s both practical and aesthetically pleasing. Bedrooms, bathrooms, and dressing areas are popular choices.

Installing Wall Anchors

If your chosen spot doesn’t have a stud, use wall anchors for added stability. Mark the spots where the screws will go, then drill holes and insert the wall anchors.

Attaching the Driftwood

Align the screws with the wall anchors or studs, then use a screwdriver to secure the driftwood to the wall. Ensure it’s level and firmly attached.

Finishing Touches

After mounting your driftwood jewelry hanger, you can add some finishing touches to make it perfect.

Decorating the Driftwood

Consider decorating the driftwood to match your room’s decor. You might add small seashells, paint it a color that complements your room, or wrap it in string lights for a bit of sparkle.

Organizing Your Jewelry

Arrange your jewelry on the hooks, taking care to balance the weight evenly. The result will be a beautiful, organized display that makes it easy to find and admire your pieces.

Benefits of a Driftwood Jewelry Hanger

Creating a driftwood jewelry hanger comes with multiple benefits.

Eco-Friendly

Using driftwood means repurposing natural materials, reducing waste, and cutting down on the need for new resources.

Unique and Aesthetic

Each piece of driftwood brings its own unique character, adding to the individuality of your décor.

Functional

Keeps jewelry organized, easily accessible, and tangle-free, saving you time and frustration.

Therapeutic Crafting

The process of creating your driftwood jewelry hanger can be a calming and satisfying activity, giving you a sense of accomplishment.

Maintenance and Care

Maintaining your driftwood jewelry hanger is simple but important to ensure it lasts a long time.

Regular Cleaning

Dust the driftwood regularly to keep it looking its best. Use a soft brush to avoid scratching the surface.

Checking for Stability

Periodically check to make sure hooks and screws are still secure, and tighten them if necessary. This will help prevent your jewelry from accidentally falling.

Avoiding Excessive Moisture

If your hanger is in a bathroom or another area with high humidity, keep an eye out for any signs of wood degrading or rusting hooks. You might occasionally need to reapply a protective finish to the driftwood to keep it in good shape.

Creative Variations

Once you’ve mastered the basics, consider trying some creative variations to make multiple driftwood jewelry hangers or even to give them as gifts.

Themed Decorations

For a coastal theme, add seashells, sand dollars, or small pieces of coral. For a more rustic look, consider adding small pine cones or dried flowers.

Different Sizes

Make smaller ones for just a few necklaces or larger ones that include shelving for additional storage options.

Combination Displays

Combine your driftwood hanger with a small mirror or picture frame to create a multifunctional wall piece.

Troubleshooting Tips

Even the best-laid plans encounter issues. Here are solutions to common problems you might face.

Uneven Hook Placement

If the hooks didn’t line up as planned, consider removing them and filling the holes with wood filler, then sanding and repainting that section before trying again.

Splitting Wood

If you encounter splitting, make sure to pre-drill pilot holes that are slightly smaller than the screws or nails to minimize stress on the wood.

Loose Hooks

If hooks become loose over time, remove them and apply a bit of wood glue before re-screwing them back in place.

Conclusion

A driftwood jewelry hanger is not just a practical solution for organizing your jewelry but also a beautiful and unique piece of home decor. By following the steps outlined in this article, you’ll be able to create your own charming driftwood jewelry hanger that combines functionality with rustic elegance. The joy of crafting something with your hands makes it even more special and adds a personal touch to your home.

So why wait? Dive into this creative project, and you’ll soon have a stunning display for your treasured jewelry pieces, not to mention the satisfaction of having made something both beautiful and practical.

Filed Under: Driftwood Ideas Tagged With: Craft Project, Driftwood, Handmade, home decor, Jewelry Organizer

Driftwood Jewelry Diy

June 28, 2024 by admin

If you love the idea of bringing a touch of nature into your personal style, “Driftwood Jewelry DIY” is the perfect guide for you. This engaging piece takes you through the enchanting process of transforming found driftwood into unique, wearable art. You’ll discover creative techniques, essential tools, and inspiring tips that will help you craft beautiful jewelry pieces. Whether you’re a seasoned crafter or a curious beginner, this guide will spark your imagination and leave you excited to start your next DIY adventure. Let’s dive in and create something truly special! Have you ever found yourself strolling along the beach, marveling at all the unique pieces of driftwood washed ashore, and wondered how you can transform these natural treasures into beautiful jewelry? Well, you’re in the right place! Driftwood jewelry is a splendid way to capture a piece of the ocean’s charm and carry it with you wherever you go. Plus, it’s an eco-friendly way to make use of natural resources.

What Is Driftwood?

Driftwood is essentially wood that has been washed onto shore by the action of winds, tides, or waves. This natural polishing process results in beautifully smooth and unique pieces that are perfect for creating one-of-a-kind jewelry. Each piece tells a story and carries with it the essence of the sea.

Why Choose Driftwood Jewelry?

Driftwood jewelry isn’t just another fashion trend; it’s a meaningful way to incorporate nature into your daily life. By wearing a piece of driftwood, you’re embracing sustainability and expressing a connection to the earth and sea.

Benefits:

BenefitExplanation
Unique and PersonalizedEach piece of driftwood is unique, making your jewelry one-of-a-kind.
Eco-friendlyUsing naturally sourced materials is a more sustainable choice.
Cost-effectiveDriftwood is freely available on many beaches, unlike expensive gemstones.
Creative ExpressionCustomize designs according to your personality and style.

Driftwood Jewelry Diy

Gathering Your Materials

Before you dive into creating your driftwood jewelry, you’ll need to gather some essential materials. Don’t worry; most of these can be found at your local craft store or even online.

Basic Materials

  1. Driftwood: Different sizes and shapes for variety.
  2. Jewelry Wire: For wrapping and attaching pieces.
  3. Cord or Chain: For necklaces or bracelets.
  4. Jewelry Findings: Clasps, jump rings, and earring hooks.
  5. Beads and Charms: Additional decorative elements.
  6. Glue: Strong adhesive like E6000 for adding embellishments.

Tools You’ll Need

  1. Wire Cutters: For trimming jewelry wire.
  2. Pliers: Round nose and flat nose pliers for manipulating wire and findings.
  3. Drill: For making holes in the driftwood.
  4. Sandpaper: To smooth any rough edges.

Preparing Your Driftwood

Before you start, you’ll need to prepare your driftwood pieces. This involves a few steps to ensure that they are clean and durable.

Cleaning

Rinse the driftwood pieces to remove any sand and dirt. You can use a soft brush to scrub off stubborn debris. Let the wood dry thoroughly in the sun for several days.

Sanding

Use sandpaper to smooth out any rough edges or surfaces. Driftwood is usually naturally smooth, but a little extra sanding can eliminate sharp points and make your jewelry more comfortable to wear.

Sealing

Applying a sealant is optional but recommended to protect your jewelry from moisture and wear. A clear, matte wood sealer will maintain the natural look of the driftwood.

Driftwood Jewelry Diy

Designing Your Jewelry

Now comes the fun part—designing your driftwood jewelry! The possibilities are endless, and you can let your creativity run wild.

Driftwood Necklaces

Necklaces are a great way to showcase larger pieces of driftwood. You can create a simple pendant or something more elaborate.

  1. Select Your Driftwood Piece: Choose one that catches your eye.
  2. Drill a Hole: For attaching the cord or chain.
  3. Add Decorations: Beads, charms, or even paint designs.
  4. Attach the Cord/Chain: Thread through the hole and secure with knots or clasps.

Driftwood Bracelets

Smaller pieces of driftwood work great for bracelets.

  1. Select Small Driftwood Pieces: Pieces that fit comfortably on your wrist.
  2. Drill Holes: On either side of the pieces.
  3. Connect with Jewelry Wire: Thread the wire through the holes, adding beads in between for decoration.
  4. Finish with a Clasp: Attach the jewelry clasp to complete the bracelet.

Driftwood Earrings

Earrings can be a delicate and stunning use of driftwood.

  1. Select Two Matching Pieces: Similar in size and shape for a symmetrical look.
  2. Drill Small Holes: At the top for hooks.
  3. Add Embellishments: Beads, charms, or wire wrapping for extra flair.
  4. Attach Hooks: Using jump rings.

Tips and Tricks

  • Keep It Simple: Sometimes less is more. Let the natural beauty of the driftwood shine.
  • Balance: When adding decorations, ensure they don’t overpower the driftwood.
  • Mix Materials: Combining driftwood with other elements like shells, stones, or metal can create a more dynamic piece.
  • Quality over Quantity: Invest time in finishing each piece properly rather than rushing through multiple pieces.

Troubleshooting Common Problems

Driftwood is Too Soft

If your driftwood is too soft, it might not hold up well in jewelry. Try using harder pieces, or reinforce them with a sealant.

Holes Not Drilling Cleanly

If your drill isn’t making clean holes, it could be dull. Use a sharp bit and go slowly to avoid splintering.

Jewelry Wire Breaking

This can happen if the wire is too thin. Use a thicker gauge wire for more durability.

Finding Materials

If you’re having trouble finding specific materials, online stores like Etsy or Amazon have extensive jewelry-making supplies.

Preserving Your Driftwood Jewelry

Once you’ve created your driftwood jewelry, you’ll want to ensure it lasts for years to come.

Cleaning

Gently wipe with a damp cloth and avoid immersing in water.

Storing

Store in a dry place, preferably in a jewelry box or pouch to prevent damage.

Wearing

Avoid wearing your driftwood jewelry in water or while doing activities that could cause damage.

Conclusion

Congratulations! You’ve now learned how to transform simple pieces of driftwood into beautiful, eco-friendly jewelry. By following these steps, you can create stunning necklaces, bracelets, and earrings that reflect both your creativity and love for nature. So, next time you find yourself on a beach walk, keep an eye out for those perfect pieces of driftwood. Happy crafting!

Filed Under: Driftwood Ideas Tagged With: crafts, DIY, Driftwood, Handmade, Jewelry

Driftwood Jewelry

June 28, 2024 by admin

When you think of coastal beauty, it’s easy to picture golden sands and rolling waves, but have you ever considered the hidden treasures that the tide brings in? In “Driftwood Jewelry,” you’ll discover the enchanting world where the ocean and artisanship combine. You’ll find that each piece of jewelry tells a unique story, crafted from driftwood that has been shaped and refined by the natural forces of the sea. Embrace the rustic elegance and organic charm that only nature can provide, making every accessory not just a piece of adornment but a memory of the shore. Have you ever strolled along a beach and been struck by the beauty of the driftwood scattered along the shoreline? If so, you’re not alone. But have you ever considered that this naturally weathered wood can be transformed into stunning pieces of jewelry? Welcome to the world of driftwood jewelry.

Driftwood Jewelry

What is Driftwood Jewelry?

Driftwood jewelry is exactly what it sounds like: fashioning pieces of natural driftwood into unique, eye-catching items that you can wear. This natural wood has been naturally weathered by water and wind, giving each piece its own unique shape and texture. No two pieces are ever the same, making driftwood jewelry a truly one-of-a-kind accessory.

The Appeal of Driftwood Jewelry

Crafting jewelry from driftwood offers a rustic, organic charm that’s hard to replicate with other materials. For those who love the beach or want to carry a piece of nature with them, driftwood jewelry is ideal. Moreover, it aligns perfectly with eco-friendly and sustainable fashion trends. Since driftwood is essentially upcycled natural material, turning it into jewelry has minimal environmental impact.

How to Make Driftwood Jewelry

Making driftwood jewelry can be an enjoyable and fulfilling hobby or even the beginning of a small business venture. Let’s break down the process into easy steps so you can start creating your own pieces.

Materials Needed

To get started, you’ll need a few basic materials and tools:

Material/ToolDescription
DriftwoodCollecting pieces from beaches, lakes, or rivers; ensure it’s cleaned and dried.
Saw or Cutting ToolTo shape the driftwood into the desired size and form.
SandpaperSmooth out rough edges and surfaces.
DrillCreate holes for cords or other attachments.
Jewelry FindingsItems like clasps, jump rings, and earring hooks to complete your pieces.
AdhesiveStrong glue for attaching parts together.
Protective FinishUse varnish or oil to seal and protect the wood.
Additional Beads and CharmsOptional embellishments to add personalized touches to your jewelry.

Steps to Create Driftwood Jewelry

  1. Collecting Driftwood

    • Head to a local beach, lake, or river. Look for pieces that catch your eye; think about the size and shape suitable for the jewelry you want to create.
  2. Cleaning the Driftwood

    • Driftwood can have sand, salt, and small organisms. Clean it with water and soap, then let it dry in the sun.
  3. Cutting and Shaping

    • Use your saw or cutting tool to shape the driftwood into the desired form. Wear safety glasses during this step.
  4. Sanding

    • Smooth out any rough or jagged edges with your sandpaper. This makes the piece comfortable to wear and more visually appealing.
  5. Drilling Holes

    • Use a drill to create holes for cords or other attachments. Make sure the holes are the correct size for your jewelry findings.
  6. Adding Protective Finish

    • Apply varnish or oil to the wood to protect it and enhance its appearance. Allow it to dry completely.
  7. Assembly

    • Attach clasps, hooks, and other findings to complete your piece. Use strong adhesive where necessary.
  8. Adding Embellishments

    • Personalize your jewelry with beads, charms, or even paint. Let your creativity shine!

Styles of Driftwood Jewelry

Driftwood jewelry ranges in style from minimalist to elaborate. Here are a few popular styles to help you get inspired:

Minimalist Designs

For those who appreciate simple elegance, minimalist designs focus on the natural beauty of the driftwood. Think slender driftwood pendants on a delicate chain or small, smooth wood pieces as stud earrings.

Bohemian Chic

Boho styles love the raw, natural look combined with vibrant colors and eclectic embellishments. Combine driftwood with colorful beads, feathers, and tassels for a boho-chic vibe.

Rustic and Earthy

Rustic designs often include more rugged, natural-looking pieces. Think of chunky driftwood bracelets paired with leather cords or driftwood brooches adorned with earthy stones.

Coastal Inspired

Celebrate the beachy origins of your driftwood with nautical themes. Use blue and white colors, seashells, and sea glass to create ocean-inspired jewelry that reminds you of the shore.

Benefits of Wearing Driftwood Jewelry

Aside from its unique aesthetic, driftwood jewelry offers a host of benefits that make it a great addition to your accessory collection.

Eco-Friendly

Driftwood is essentially nature’s recycling project. By using it to make jewelry, you’re reducing waste and minimizing environmental impact.

Unique Pieces

No two pieces of driftwood are identical. This means every piece of jewelry you create or purchase is unique, offering a personalized touch.

Versatile Fashion

Driftwood jewelry can be dressed up or down. It pairs just as well with casual beachwear as it does with more formal attire, making it a versatile addition to any wardrobe.

Therapeutic Crafting Process

The creation process can be both therapeutic and satisfying. Working with your hands to create something beautiful can be a great way to relax and destress.

Driftwood Jewelry

Caring for Your Driftwood Jewelry

Proper care is essential to ensure your driftwood jewelry lasts and continues to look its best. Although driftwood is naturally hardy due to its exposure to elements, it still requires care when transformed into jewelry.

Cleaning

Gently clean your driftwood jewelry with a damp cloth. Avoid soaking it in water or using harsh chemicals, as this could damage the wood and its finish.

Storage

Store your jewelry in a dry, cool place. Keeping it in an airtight container can prevent the wood from absorbing moisture from the air.

Maintenance

If the finish on your driftwood jewelry starts to wear off, you can apply another coat of varnish or oil to maintain its protective seal. Regularly check clasps and other findings to ensure they’re secure.

Avoid Excessive Exposure

While driftwood has been naturally toughened by the elements, avoid exposing your jewelry to too much water, sunlight, or extreme temperatures, which can cause damage over time.

Popular Driftwood Jewelry Items

If you’re still not sure where to start, here’s a list of popular driftwood jewelry items and a quick guide on how to create them.

Jewelry ItemDescription and How-To
Driftwood PendantCut a slim piece of driftwood, sand it smooth, drill a hole for the cord, and finish it with varnish.
Driftwood EarringsUse small, lightweight pieces, attach earring hooks, and add beads or paint for a personal touch.
Driftwood BraceletString smaller pieces of driftwood onto elastic cord, interspersed with beads or charms.
Driftwood BroochAttach a brooch pin to a shaped piece of driftwood, and decorate with small stones or shells.

Personalizing Your Driftwood Jewelry

Personalization adds another layer of uniqueness to your pieces. Here are some ways to make your driftwood jewelry even more special:

Engraving

If you have the tools, you can engrave small designs or initials into your driftwood pieces. This is a great way to make them even more personal.

Adding Inlays

Incorporate materials like metal, resin, or stones into the driftwood to create stunning inlays. This technique can add a touch of luxury to your jewelry.

Painting

Use non-toxic paint to add patterns, colors, or even landscapes onto your driftwood pieces. This allows for endless creative possibilities.

Mixed Media

Combine driftwood with other materials like metal, leather, or fabric to create mixed media pieces. This can add a new dimension to your jewelry and make it stand out.

Market Trends and Driftwood Jewelry

Driftwood jewelry has seen a rise in popularity thanks to the global shift towards sustainable fashion. Let’s explore some of the current market trends.

Sustainable Fashion

As more people become environmentally conscious, sustainable fashion has seen significant growth. Driftwood jewelry fits perfectly into this trend, offering eco-friendly and ethically made accessories.

Handmade and Artisanal

Consumers are increasingly looking for unique, handmade items as opposed to mass-produced products. Driftwood jewelry caters to this desire for artisanal craftsmanship.

Customization

There’s a growing interest in personalized items. Driftwood jewelry is inherently unique, and makers often offer customization options, aligning well with this trend.

Selling Your Driftwood Jewelry

If you’re considering turning your hobby into a business, here are some tips for selling driftwood jewelry:

Online Platforms

Online marketplaces like Etsy, eBay, and even your own website can be excellent platforms to sell your items. Make sure to take high-quality photos and write detailed descriptions.

Craft Fairs and Markets

Local craft fairs and farmers markets are great places to showcase and sell your handmade jewelry. They also offer an opportunity for customers to see and feel your products in person.

Social Media

Platforms like Instagram, Facebook, and Pinterest can help you reach a wider audience. Share high-quality images of your work, behind-the-scenes looks, and engage with potential customers to build a loyal following.

Challenges You Might Face

Making and selling driftwood jewelry is not without its challenges. Here are a few hurdles you might encounter and how to overcome them.

Quality of Driftwood

Finding pieces of driftwood that are suitable for jewelry can be tricky. If you live far from natural water bodies, you might need to purchase driftwood online, which can be more expensive.

Time-Consuming

Crafting jewelry, especially intricate designs, can be time-consuming. Ensure you’re patient and allow ample time for each piece.

Market Competition

The handmade jewelry market is highly competitive. To stand out, focus on high-quality craftsmanship, unique designs, and excellent customer service.

Pricing Your Work

Determining the right price for your jewelry can be difficult. Take into account the cost of materials, time spent creating each piece, and market demand when setting your prices.

Final Thoughts

Driftwood jewelry is more than just a fashion statement; it’s a testament to nature’s beauty and a nod towards sustainable living. Whether you’re making it for yourself or selling it to others, each piece tells a story as unique as the driftwood it’s fashioned from. So next time you find yourself strolling along a beach, keep an eye out for that perfect piece of driftwood that could become your next favorite accessory. Happy crafting!

Filed Under: Driftwood Ideas Tagged With: Accessories, Driftwood, Eco-friendly, Handmade, Jewelry

Driftwood Shell Wall Art

June 27, 2024 by admin

In the world of DIY decor, nothing captures the essence of coastal charm quite like driftwood shell wall art. Imagine adorning your home with pieces that embody the soothing vibes of the beach, using natural elements like weathered driftwood and delicate seashells. This guide will inspire you to create your own driftwood shell wall art, transforming simple materials into beautiful, personalized masterpieces that bring the serene beauty of the seaside right into your living space. Have you ever strolled along the beach, picking up intriguing pieces of driftwood and shells, and wondered how you could transform those treasures into a beautiful piece of art for your home? If so, you’re in the right place! Creating driftwood shell wall art is a delightful way to bring the serene beauty of the seaside into your living space.

The Allure of Driftwood and Shells

Nature offers some of its most exquisite art in the form of driftwood and shells. These natural materials are not only captivating to look at but also have sentimental value, often serving as tangible memories of your beachside adventures.

What Makes Driftwood Special?

Driftwood is wood that has been washed onto the shore by the action of winds, tides, or waves. Each piece is unique, having been shaped and smoothed by the ocean over time. Driftwood pieces can come in various sizes, shapes, and textures, making them perfect for various artistic projects.

The Charm of Shells

Shells, the hard, protective outer layer of sea creatures, come in numerous shapes, sizes, and colors. Like driftwood, no two shells are alike, making them ideal for adding unique touches to your artwork. From spiraled conch shells to tiny, intricate sand dollars, there’s a vast array of options to choose from.

Planning Your Driftwood Shell Wall Art Project

Before you dive into crafting, a bit of planning will go a long way in ensuring your artwork turns out just as you envision it.

Gather Your Materials

Make a checklist of all the materials you’ll need for your project. This can include:

  • Driftwood pieces: Look for various sizes and shapes.
  • Shells: Collect a diverse range of shells.
  • Adhesives: Hot glue gun, epoxy, or craft glue.
  • Backboard: A sturdy surface like a wooden panel or canvas to mount your driftwood and shells.
  • Tools: Pliers, scissors, tweezers, and any other tools you might need.
  • Optional extras: Paint, varnish, or other decorative items.

Here’s a simple table to help you keep track of your materials:

MaterialQuantityNotes
DriftwoodVariousDifferent shapes and sizes
ShellsVariousDiverse types and colors
AdhesivesSufficientHot glue gun, epoxy, craft glue
Backboard1Wooden panel or canvas
ToolsAs neededPliers, scissors, tweezers
Optional ExtrasAs desiredPaint, varnish, decorative items

Choose Your Design

Decide on the design or layout of your artwork. Do you want a symmetrical pattern, an abstract arrangement, or perhaps a scene like a shoreline? Sketching out a rough design on paper can help you visualize your final piece.

Prep Your Supplies

Clean your driftwood and shells thoroughly. Driftwood may need to be soaked in water and scrubbed to remove any salt or sand, while shells can be cleaned with a mixture of water and mild dish soap. Allow all materials to dry completely before you start crafting.

Driftwood Shell Wall Art

Step-by-Step Guide to Creating Driftwood Shell Wall Art

Now that you’re prepared, let’s walk through the process of creating your beautiful driftwood shell wall art.

Step 1: Plan Your Layout

Lay out your driftwood and shells on your work surface in the general arrangement you have in mind. This helps you get a feel for how everything will look once it’s mounted. Don’t be afraid to experiment with different arrangements until you’re satisfied.

Step 2: Prepare Your Backboard

If you’re using a wooden panel or canvas, you may want to paint or varnish it first to give it a more finished look. This is optional, but it can add an extra touch of elegance to your piece.

Step 3: Start Mounting the Driftwood

Begin by adhering the driftwood pieces to your backboard. Use a strong adhesive like a hot glue gun or epoxy to ensure they stay in place. Start with the larger pieces and work your way down to the smaller ones. Hold each piece firmly in place for a few seconds to ensure it adheres properly.

Step 4: Add the Shells

Once your driftwood is securely mounted, start arranging and gluing the shells in your desired pattern. Tweezers or pliers can help you place the smaller shells with precision. Be sure to use enough adhesive to keep the shells in place but avoid over-gluing, which can be messy.

Step 5: Final Touches

After all the driftwood and shells are in place, add any final touches you like. This could be extra decorative elements like small pebbles, sea glass, or even a light coat of varnish to make your artwork shine.

Displaying Your Driftwood Shell Wall Art

Once your piece is complete, it’s time to display it! Here are a few tips for showcasing your new artwork.

Choose the Right Spot

Pick a location where your driftwood shell wall art can be a focal point. This could be a living room wall, above a fireplace, or in a hallway. It’s an excellent conversation starter and adds a natural, beachy vibe to any space.

Securely Hang Your Art

Ensure your art is securely hung to prevent it from falling. Depending on the weight and construction of your piece, you may need heavy-duty picture hangers or wall anchors. Always follow the instructions for any hanging hardware you use.

Complement Your Decor

Your driftwood shell wall art can complement other natural elements in your decor. Consider pairing it with other beach-themed decorations like sand-filled vases, nautical ropes, or a collection of smaller seashells displayed in glass jars.

Driftwood Shell Wall Art

Tips and Tricks for Creating Stunning Driftwood Shell Wall Art

As you become more experienced with creating driftwood shell wall art, you’ll learn some handy tips and tricks that can make the process smoother and more enjoyable.

Experiment with Different Techniques

Don’t be afraid to try new techniques. For example, you might try incorporating other natural materials, like sand or pebbles, into your artwork. You might also experiment with different adhesives to see which works best for your materials.

Mix and Match

Combining driftwood and shells with other artistic elements can lead to unique and visually stunning results. For instance, you could add small pieces of coral, sea glass, or even incorporate some lighting to add a beautiful glow to your artwork.

Personalize Your Art

Adding personal touches to your wall art can make it even more special. Consider including shells you’ve collected from different beaches you’ve visited or pieces of driftwood that hold sentimental value.

Environmental Considerations

When collecting materials for your artwork, it’s essential to be mindful of the environment. Here are some tips to ensure your hobby is eco-friendly.

Responsible Collecting

Only take what you need, and avoid disturbing natural habitats. Remember that driftwood and shells play a crucial role in coastal ecosystems, providing homes and nutrients for various marine life.

Sustainable Alternatives

If you can’t find natural materials or if collecting them is prohibited in your area, consider purchasing sustainably sourced driftwood and shells from reputable suppliers. There are many online stores that sell eco-friendly materials specifically for crafting purposes.

Benefits of Creating Driftwood Shell Wall Art

Engaging in this creative hobby offers numerous benefits, both for you and your living space.

Therapeutic and Stress-Relieving

Crafting can be a wonderful way to relax and unwind. The concentration and creativity involved can take your mind off everyday stresses, providing a therapeutic and enjoyable experience.

Unique Home Decor

Creating your own wall art ensures you have a piece that is truly unique. Unlike mass-produced decor items, your driftwood shell wall art is one-of-a-kind, reflecting your personal style and creativity.

A Hobby with Sentimental Value

Using materials you’ve collected yourself adds sentimental value to your artwork. Each piece can serve as a reminder of happy times spent at the beach, making it more meaningful and special.

Conclusion

In creating driftwood shell wall art, you’re not only making a beautiful piece of decor, but you’re also preserving memories of your beachside adventures. This art form allows you to bring a slice of nature into your home, creating a serene and tranquil environment.

So go ahead, gather your materials, unleash your creativity, and start crafting your own driftwood shell wall art. Not only will you end up with a stunning piece to adorn your walls, but you’ll also enjoy the process of bringing a bit of the ocean’s charm into your living space.

Happy crafting!

Filed Under: Driftwood Ideas Tagged With: Beach Crafts, Driftwood, Handmade, Shell Art, Wall Decor

Driftwood Shark Wall Art

June 27, 2024 by admin

Imagine transforming your living space with a piece of nature’s artistry, crafted from the shores of the sea itself. “Driftwood Shark Wall Art” brings a unique touch of coastal charm to your home, blending rustic driftwood pieces into a striking shark design. Each piece is meticulously handcrafted, ensuring that your wall art is one-of-a-kind, just like the ocean’s treasure it came from. Whether you’re a beach lover or simply someone who appreciates the beauty of natural materials, this stunning wall art will captivate and inspire, giving your home a refreshing seaside vibe. Have you ever walked along the beach and picked up a piece of driftwood, wondering what kind of story it could tell or how you could repurpose it? Driftwood has a natural beauty and history that makes it perfect for creating unique and stunning art pieces. Among the myriad creations possible, one of the most enchanting and popular is Driftwood Shark Wall Art. If you love marine life or rustic, natural decor, this kind of wall art might be just what your home needs.

In this friendly guide, we’ll explore the world of Driftwood Shark Wall Art. You’ll learn about the origins and appeal of driftwood, the steps to create your own driftwood shark masterpiece, and how to incorporate it into your home decor. Get ready to be inspired and maybe even pick up a new hobby!

Driftwood Shark Wall Art

What is Driftwood Shark Wall Art?

Driftwood Shark Wall Art is a specialized form of coastal-themed decor that uses pieces of driftwood to create the shape and form of a shark. It’s a blend of natural elements and artistic expression that results in a truly unique wall decoration. Driftwood itself is a fragment of wood that has been weathered by water and time, giving it character and a story all its own.

Why Driftwood?

The Uniqueness of Driftwood

Each piece of driftwood is distinct. Its shape, size, and texture are influenced by the journey it has taken—from tree, to sea, to shore. This uniqueness adds an extra layer of special to your art piece, making each shark sculpture one of a kind.

Environmental Impact

Using driftwood for art is eco-friendly. Instead of gathering new wood and cutting down trees, you’re giving a new life to a piece that’s been naturally weathered and discarded by the sea. It’s a great way to practice sustainability in your decor.

How to Make Your Own Driftwood Shark Wall Art

Creating your own driftwood shark wall art can be a fun and fulfilling project. Here’s a step-by-step guide to help you through the process.

Materials You’ll Need

MaterialPurpose
Driftwood piecesMain material for the shark
Paint (optional)Adding details and color
Saw and ClippersCutting the driftwood
SandpaperSmoothing rough edges
Glue (wood adhesive)Binding the pieces together
Hooks or WireFor hanging the finished piece
Template or SketchGuiding the shape of the shark

Steps to Create Your Driftwood Shark Wall Art

Step 1: Gather Your Driftwood

Collect pieces of driftwood from the beach. You can also buy driftwood from craft stores or online retailers if you’re not near a coastline. Make sure the pieces vary in size and shape to give your shark depth and character.

Step 2: Clean and Prepare the Driftwood

Clean the driftwood thoroughly to remove any salt, sand, or debris. Soak the pieces in a mixture of water and mild bleach for about an hour. Rinse them well and let them dry completely.

Step 3: Design Your Shark

Sketch out a simple shark template on a piece of paper, or download one online. This will serve as your guide. Lay out your pieces of driftwood on the template to get a sense of how you’ll arrange them.

Step 4: Cut and Shape

Use a saw and clippers to trim the pieces of driftwood so they fit together in a way that resembles a shark. Smooth any rough edges with sandpaper.

Step 5: Assemble Your Art

Start gluing the pieces of driftwood together following your template. You may need to hold pieces in place until the glue sets or use clamps if necessary.

Step 6: Add Details

If you want to add more detail to your shark, consider painting on features like the eyes and gills. Use water-resistant paint if the piece will be displayed outdoors.

Step 7: Attach Hanging Hardware

Once the glue has dried and the shark is fully assembled, attach hooks or wire to the back for easy hanging.

Incorporating Driftwood Shark Wall Art into Your Home Decor

Now that you’ve created your masterpiece, the fun part begins—deciding where to display it! Driftwood Shark Wall Art can fit into various decor styles, whether you have a modern, rustic, or coastal theme.

Living Room

A driftwood shark can be a stunning focal point above a fireplace or couch. It adds a rustic, natural element to the room, catching the eye and sparking conversations.

Bathroom

The bathroom is another ideal spot for coastal-themed decor. A driftwood shark fits in perfectly and can be a subtle nod to the ocean.

Patio or Outdoor Space

Driftwood is naturally weather-resistant, making it a perfect addition to an outdoor space. Whether it’s your patio, garden, or balcony, your driftwood shark art will bring a piece of the beach to your home.

Office

Bring a bit of nature and whimsy to your work environment. A driftwood shark can make your office space feel more relaxed and inspiring.

Driftwood Shark Wall Art

Tips for Maintaining Driftwood Shark Wall Art

Regular Dusting

Driftwood can gather dust just like any other decor item. A soft brush or cloth can help keep it looking clean and fresh.

Avoid Moisture

While driftwood is resilient, excessive moisture can degrade the glue and any painted details. If you’ve placed your art outdoors, try to keep it under a shelter or overhang to protect it from rain.

Handle with Care

Driftwood can be delicate. Handle your art piece gently, especially when moving or hanging it to avoid breaking any thin or fragile parts.

Reapply Finish

If you’ve used a finish on your driftwood shark, like a varnish or sealant, reapply as needed to keep it looking vibrant and protected. Typically, this can be done annually or biannually, depending on exposure to elements.

Driftwood Shark Wall Art: Inspiration and Ideas

If you’re feeling stuck or uninspired, looking at examples and ideas from other creators can give you a fresh perspective. Here are some innovative ideas for your driftwood shark wall art.

Mix Different Materials

Combine driftwood with other natural elements such as shells, sea glass, or pebbles to add texture and interest to your shark.

Go Multicolored

Instead of leaving the driftwood in its natural state, consider painting different pieces in various shades of blue, green, or grey to capture the oceanic feel.

Add Background Elements

Attach your driftwood shark to a background frame, either wooden or canvas, and add additional elements like sea waves, corals, or even other marine creatures to create a complete scene.

Light It Up

Consider adding a small set of L.E.D. lights to your driftwood art to give it an exciting and modern look. Soft blue or white lights can mimic the ambiance of underwater life.

Driftwood Shark Wall Art as Gifts

Driftwood Shark Wall Art can make for exceptionally personalized and thoughtful gifts. Here’s why you should consider giving one to your loved ones.

Personal Touch

Each driftwood shark wall art piece is unique, carrying a personal touch that adds a special meaning behind the gift. It shows effort, thoughtfulness, and creativity.

Perfect for Various Occasions

Whether it’s a birthday, housewarming, or anniversary, driftwood art fits a variety of occasions and is generally appreciated by people of all ages.

Customizable

You can customize the driftwood shark wall art to suit the tastes and preferences of the recipient. Add their favorite colors, themes, or even incorporate their initials into the design.

Where to Buy Driftwood or Driftwood Shark Art

If crafting is not your thing, don’t worry! There are plenty of places where you can purchase beautiful, ready-made driftwood shark wall art. Likewise, if you need materials, there are sources available.

Online Stores

Websites like Etsy, Amazon, and specialized online decor stores offer a wide variety of driftwood shark wall art. You can also find suppliers selling raw driftwood for your DIY projects.

Local Craft Shops

Many local craft stores carry driftwood and other materials you might need. They sometimes even offer classes or workshops on making driftwood art.

Beach Souvenir Shops

If you live near the coast or are visiting, beach souvenir shops often have driftwood art pieces available for sale. This is a great way to bring a little piece of your vacation back home.

Conclusion

Driftwood Shark Wall Art is more than just a decoration; it’s a unique piece of nature art that brings the story of the sea into your home. With its sustainability, unique aesthetic, and the personal touch of handcrafted art, it’s the perfect way to add a coastal charm to any space. Whether you choose to create one yourself or buy one from an artisan, driftwood shark wall art promises to add a sense of wonder and beauty to your living space.

So, the next time you’re strolling along the beach, consider picking up a few pieces of driftwood. Who knows? They might be the start of your next creative endeavor.

Filed Under: Driftwood Ideas Tagged With: Coastal Decor, Driftwood, Handmade, Shark, Wall Art

Driftwood Wall Art Sculptures & Statues

June 26, 2024 by admin

Welcome to the world of Driftwood Wall Art Sculptures & Statues, where natural beauty and artistic creativity come together to transform your living spaces. You’ll discover how these unique pieces, crafted from driftwood collected along serene shorelines, can bring an enchanting, rustic charm to your home. With each sculpture and statue, no two pieces are alike, making your décor truly one-of-a-kind. Dive into the details and feel inspired to incorporate these stunning works of art into your surroundings, reflecting both your love for nature and sophisticated taste. Have you ever found yourself mesmerized by the intricate beauty of driftwood decorations? There’s something captivating about the natural elegance and unique forms these pieces hold. If you’re considering adding a touch of the seaside to your home decor, driftwood wall art sculptures and statues might just be the perfect fit.

Driftwood Wall Art Sculptures  Statues

What Is Driftwood?

Natural Origins

Driftwood refers to pieces of wood that have been washed ashore by the action of winds, tides, or waves. This wood comes from various sources such as trees, branches, and roots, which have spent an extended period in bodies of water like rivers, oceans, and lakes. Over time, the elements of sun, water, and salt wear away the bark and smooth out the rough edges, giving each piece its unique appearance.

Artistic Appeal

The natural beauty of driftwood lies in its weathered texture and organic shapes. No two pieces are alike, which makes driftwood an excellent medium for creating one-of-a-kind art pieces. The wood’s natural imperfections, intricate grains, and knot patterns contribute to its rustic charm.

Driftwood Wall Art

Incorporating Nature Indoors

Driftwood wall art combines nature’s raw beauty with human creativity to bring the outdoors inside your home. These art pieces can range from simple, minimalistic designs to elaborate and intricate sculptures. Whether you prefer a small, subtle piece or a large statement artwork, driftwood can cater to different tastes and styles.

Types of Driftwood Wall Art

To help you better visualize what works for your space, here is a table detailing different types of driftwood wall art:

TypeDescription
Single Piece SculpturesOne piece of driftwood shaped into an artwork, often showcasing its natural form.
Assemblage ArtMultiple pieces of driftwood arranged and joined into a cohesive design.
Functional DecorWall-mounted items with practical use, such as driftwood shelves or hooks.
Abstract ArtArtistic interpretations that may not resemble any particular object.
Themed SculpturesDriftwood crafted to resemble specific figures, like animals or trees.

Sourcing Driftwood

Sourcing driftwood for art can be an adventure in itself. You can find pieces during walks along the beach, riverbanks, or lakeshores. However, keep the following points in mind:

  • Legality: Some areas have restrictions on collecting natural materials from beaches or conservation zones.
  • Sustainability: Ensure you’re not harming the ecosystem by removing large quantities of driftwood.
  • Cleanliness: Clean and dry the wood thoroughly to remove any debris, salt, or potential pests.

Creating Driftwood Wall Art

Tools and Materials

Creating your own driftwood wall art is an excellent way to personalize your space. Here’s a list of essential tools and materials you might need:

Tool/MaterialPurpose
DriftwoodThe main element of your art piece
Sealant/PolyurethaneTo protect and preserve the wood
Heavy-duty GlueTo join pieces together securely
SawFor cutting larger pieces if necessary
SandpaperTo smooth rough edges
DrillFor making holes if hanging pieces or adding fixtures
Paint/StainOptional; for adding color or enhancing the natural grain

Step-by-Step Guide

  1. Select Your Pieces: Choose driftwood pieces that speak to you and fit the envisioned design.
  2. Plan Your Design: Arrange the pieces on the floor or a large table until you’re satisfied with the design.
  3. Prepare the Driftwood: Clean each piece thoroughly and let them dry completely. Sand any rough areas if needed.
  4. Assemble the Art: Use heavy-duty glue or screws to attach the driftwood pieces together. Ensure to let the glue cure as per instructions.
  5. Add Finishing Touches: Apply sealant to protect the wood. Optionally, enhance with stains or paint.
  6. Mounting: Install mounting hardware to hang your artwork securely on the wall.

Driftwood Sculptures & Statues

The Beauty of Driftwood Sculptures

Driftwood sculptures are three-dimensional art pieces that often serve as striking centerpieces for any room. They can be abstract forms or representational figures like animals, people, or objects. The natural twists and bends in driftwood lend themselves to dynamic and fluid sculptures that captivate the eye from every angle.

Popular Themes in Driftwood Sculptures

Here’s a rundown of common themes and motifs found in driftwood sculptures:

ThemeDescription
WildlifeBirds, fish, and other animals crafted from driftwood
Marine LifeSea creatures like dolphins, whales, and seahorses
Human FiguresRepresentations of people, often in dynamic poses or activities
Abstract FormsArtistic, non-representational sculptures that explore form and movement
FantasyImaginative creations, such as dragons or mythical beings

Displaying Sculptures

Where and how you display your driftwood sculpture can significantly impact the ambiance of a room. Place them in areas where they can be admired from multiple angles. If the sculpture is tall, putting it on the floor can work well, while smaller pieces might be better displayed on a shelf or pedestal. Ensure that the setting complements the natural aesthetic of the driftwood.

Driftwood Wall Art Sculptures  Statues

Driftwood Art in Home Decor

Complementing Interior Styles

Driftwood art fits seamlessly into various interior design styles. Here’s a look at how it can complement different decor themes:

Interior StyleHow Driftwood Fits In
CoastalThe natural oceanic origins of driftwood perfectly align with coastal decor
RusticDriftwood’s weathered texture enhances the rugged, hearty feel of rustic styles
ModernMinimalistic driftwood art adds an organic touch to modern interiors
BohemianThe unique and artistic nature of driftwood suits eclectic boho designs
ScandinavianNatural materials like driftwood are core to the simplicity of Scandinavian style

Practical Uses

Apart from being visually appealing, driftwood art pieces can also serve practical purposes. Here are some ideas:

  • Driftwood Shelves: Rustic shelves made from sturdy driftwood can add storage and display space.
  • Clothing Hooks: Driftwood pieces with natural protrusions can be used as wall-mounted hooks.
  • Table Centerpieces: A beautiful driftwood sculpture can be the focal point of a dining or coffee table.
  • Light Fixtures: Driftwood frames around mirrors or lights can create a cozy, inviting atmosphere.

Caring for Driftwood Art

Cleaning and Maintenance

Maintaining the integrity of your driftwood art is essential to ensure its longevity. Here are some tips for caring for your driftwood pieces:

  1. Regular Dusting: Use a soft brush or cloth to remove dust regularly.
  2. Avoid Moisture: Keep driftwood art away from overly humid or wet areas to prevent decay.
  3. Sealants: Periodically reapply a coat of sealant or polyurethane to protect the wood.
  4. Avoid Direct Sunlight: Prolonged exposure to direct sunlight can cause the wood to crack or fade.

Preventing Pests

Although thoroughly cleaned driftwood is typically safe, it’s wise to keep an eye out for pests:

  • Inspection: Regularly check for signs of insects or other pests.
  • Freezing: For smaller pieces, freezing the wood for several days can kill potential pests before incorporating it into art.

The Environmental Impact

Eco-Friendly Art

One of the exceptional qualities of driftwood art is its eco-friendliness. Using repurposed natural materials like driftwood minimizes the demand for new resources, making it a sustainable choice for eco-conscious consumers. Artists often also use non-toxic adhesives and finishes to ensure their work remains environmentally friendly.

Supporting Local Artists

Purchasing driftwood art from local artisans supports sustainable practices and contributes to local economies. Many artisans hand-collect driftwood responsibly, ensuring they don’t disrupt local ecosystems. By buying their creations, you’re fostering a community that values and promotes ecological art forms.

Getting Inspired

Visiting Galleries and Exhibits

If you’re interested in driftwood art but aren’t sure where to start, visiting art galleries or exhibits can offer inspiration. Many galleries feature collections dedicated to natural art forms, including driftwood. Seeing these pieces in person can be incredibly inspiring and give you a better understanding of how they might fit into your own space.

Online Resources and Communities

Online platforms such as Pinterest, Instagram, and Etsy are brimming with examples of stunning driftwood art. These platforms can provide plenty of inspiration and even connect you with artists who create custom pieces or offer workshops. Joining online forums and communities dedicated to driftwood art can also be a great way to learn new techniques and share your creations.

DIY Workshops and Classes

Participating in workshops or classes can deepen your appreciation and skills for creating driftwood art. These events, often held by local artists or community centers, provide hands-on experience and valuable instruction. Plus, they can be a fun and creative way to meet like-minded individuals.

Conclusion

Driftwood wall art sculptures and statues are more than just decor; they are timeless pieces that bring a touch of nature’s beauty into your home. Whether you’re looking to buy a unique piece or create your own, the natural elegance and unique forms of driftwood will undoubtedly add character and charm to any space. So go ahead, embrace the beauty of nature and let driftwood art transform your living spaces into serene, organic sanctuaries.

Feel free to dive into the world of driftwood, and don’t be afraid to let your creativity flow. Whether you’re curating a coastal-themed living room or adding rustic charm to your entryway, driftwood art offers endless possibilities. Happy decorating!

Filed Under: Driftwood Ideas Tagged With: Driftwood, Handmade, Rustic, Sculptures, Statues, Wall Art

Driftwood Mermaid Wall Art

June 25, 2024 by admin

Get your home decor flowing with the enchanting charm of Driftwood Mermaid Wall Art! Imagine a stunning mermaid crafted from nature’s own driftwood, elegantly adorning your wall and infusing your space with a coastal vibe. Whether brightening up your living room or adding a whimsical touch to your bathroom, this unique art piece is bound to catch the eye and spark conversations. With its organic feel and artistic design, Driftwood Mermaid Wall Art will transform any room into a seaside haven, making you feel closer to the ocean with each glance. Dive into the magic of beach-inspired decor and let your imagination swim! Have you ever looked at a piece of driftwood and wondered about its journey? Perhaps it’s washed ashore from a distant land, or it may have been a part of an ancient tree. Whatever the case, driftwood carries a sense of mystery and beauty, which makes it the perfect material for unique and enchanting wall art. One of the most captivating designs you can create is driftwood mermaid wall art, merging the rustic charm of driftwood with the mythical allure of mermaids.

What is Driftwood Mermaid Wall Art?

Driftwood mermaid wall art is a creative form of decoration that uses pieces of driftwood to craft images of mermaids. These pieces celebrate both the natural world and the enchanting folklore of mermaids, making them a unique conversation starter for any room.

The Elements of Driftwood Art

Driftwood art combines several elements, including nature, creativity, and sustainability. Here’s what makes it special:

ElementDescription
NatureUsing natural materials that are often tumbled and smoothed by the sea, making each piece unique.
CreativityThe arranger’s ability to turn seemingly random pieces of wood into a cohesive and captivating design.
SustainabilityUtilizing recycled wood helps in reducing waste, making it an eco-friendly option for home decor.

Why Choose Driftwood for Your Art?

You might be asking yourself, why driftwood? Driftwood has a unique charm that can’t be replicated with manufactured materials. Here’s why this material stands apart:

Uniqueness and Character

No two pieces of driftwood are alike. The wind, water, and elements have shaped each one differently, offering an array of shapes, textures, and colors that can add depth and character to any artwork.

Eco-Friendly Option

Driftwood is a sustainable material. By using pieces already shaped by nature, you’re not only reducing waste but also minimizing the demand for newly processed wood.

Versatility

Driftwood’s natural form makes it versatile for various types of art. Its intricate shapes and textures lend themselves well to both abstract and detailed designs.

Creating Your Driftwood Mermaid Wall Art

Creating driftwood mermaid wall art may seem daunting, but it’s easier than you think. Below is a step-by-step guide to help you through the process.

Materials Needed

Before you dive into the creation process, gather all the materials and tools you will need:

Material/ToolPurpose
Driftwood piecesThe main material for your design
Sketch paper and pencilsFor preliminary sketches and design planning
SandpaperTo smooth rough surfaces
Glue or nailsTo assemble your driftwood pieces
Hooks or hanging wireFor mounting your art on the wall
Paint and brushes (optional)For adding colors and details to your mermaid design

Step-by-Step Guide

Step 1: Conceptualize Your Design

Start by sketching your mermaid. This doesn’t need to be an elaborate drawing, just a basic outline to help guide your assembly of driftwood pieces. Think about the posture of the mermaid, the flow of her hair, and the shape of her tail.

Step 2: Gather Your Driftwood

Collect driftwood that will fit your mermaid design. You can gather these pieces from local beaches or purchase them from craft stores. Remember to choose pieces that vary in size and shape to add dimension to your artwork.

Step 3: Prepare the Driftwood

Clean your driftwood pieces thoroughly to remove any dirt and debris. After cleaning, sand down any rough edges to prevent splinters and to ensure a smoother finish for your art.

Step 4: Assemble the Pieces

Start from the central part of your mermaid (the torso) and work your way out to the extremities. Use your sketch as a reference to place each piece. You can attach the driftwood using glue or small nails.

SectionKey Points to Consider
TorsoChoose a solid piece to serve as the torso.
TailUse elongated pieces to mimic the flow of the tail.
Arms & LegsSmaller pieces work best for limbs.
HairWavy or twisted pieces can represent flowing hair.

Step 5: Add Details and Finishing Touches

Once your mermaid is assembled, you can paint it or add other embellishments such as shells or beads to enhance its appearance. Let your creativity run wild!

Step 6: Mounting Your Artwork

Attach hooks or a hanging wire to the back of your driftwood mermaid. Make sure it’s securely attached and suitable for the weight of your design.

Driftwood Mermaid Wall Art

Benefits of Driftwood Mermaid Wall Art

Creating driftwood mermaid wall art isn’t just about making something beautiful; it also offers several benefits:

Stress Relief

Engaging in a creative activity can be incredibly relaxing and therapeutic. It allows you to focus on the task at hand, providing a welcome distraction from the stresses of everyday life.

Boosts Creativity

Working with driftwood pushes you to think outside the box. The irregular shapes and sizes challenge your creativity, encouraging you to come up with innovative solutions.

Sustainable Art Form

As mentioned, driftwood is an eco-friendly material. By choosing to create art from driftwood, you’re reducing your carbon footprint and helping to promote sustainability.

Popular Driftwood Mermaid Design Ideas

If you’re looking for inspiration, here are some popular design ideas for driftwood mermaid wall art:

Minimalist Mermaid

This design focuses on simplicity. Use a few carefully chosen pieces of driftwood to create an elegant and understated mermaid. This style works best in modern and minimalist interior designs.

Detailed Mermaid

In contrast, a detailed mermaid design involves using many pieces of driftwood to create a more intricate image. This style can capture the flowing hair, scales, and other fine details of a mermaid.

Mixed Media Mermaid

Combine driftwood with other natural materials such as seashells, stones, and sea glass. This approach adds texture and layers to your artwork, making it even more unique and visually appealing.

Design StyleKey Features
MinimalistSimple, elegant, few pieces.
DetailedIntricate, many pieces, captures finer details.
Mixed MediaCombines driftwood with other natural materials.

Driftwood Mermaid Wall Art in Home Decor

Driftwood mermaid wall art can be incorporated into various home decor styles. Here’s how you can fit this unique piece into your space:

Coastal and Beach Themes

Driftwood, by its very nature, complements coastal and beach-themed interiors. The natural texture and color of driftwood evoke the feel of the seaside, making it a perfect addition to beach houses or ocean-themed rooms.

Bohemian Style

Bohemian decor celebrates creativity and individuality. Driftwood mermaid art can seamlessly blend into this style, adding a rustic and whimsical touch.

Rustic and Farmhouse Styles

The raw and natural qualities of driftwood also align well with rustic and farmhouse decor. It adds an earthy element that enhances the cozy and homely feel of these styles.

Modern and Minimalist

Though it might seem counterintuitive, driftwood mermaid art can also fit into modern and minimalist decor. A minimalist mermaid design can serve as a focal point in a room with clean lines and a neutral color palette.

Tips for Maintaining Driftwood Art

Maintaining your driftwood mermaid wall art is relatively simple. Here are a few tips to keep it looking its best:

Regular Dusting

Dust your driftwood art regularly using a soft cloth or a dusting brush. This helps to keep the piece clean and prevents the accumulation of dust.

Avoid Moisture

Driftwood can be sensitive to moisture. Try to keep your artwork away from humid areas or direct water exposure to prevent the wood from warping or deteriorating.

Occasional Treating

Applying a light coat of beeswax or a suitable wood conditioner can keep the wood from drying out and help maintain its natural appearance.

Where to Buy Driftwood Mermaid Wall Art

If you’re not the DIY type or if you’re looking for ready-made driftwood mermaid wall art, there are several places where you can find beautiful pieces:

Online Marketplaces

Websites like Etsy, Amazon, and eBay have a plethora of options available. These marketplaces offer a variety of designs, often crafted by talented artisans from around the world.

Local Craft Fairs

Craft fairs and local artisan markets are great places to find unique driftwood mermaid art. These events often feature one-of-a-kind pieces that you won’t find anywhere else.

Specialty Home Decor Stores

Some home decor stores specialize in coastal and rustic themes and may carry driftwood mermaid wall art. Check both physical stores and their online counterparts to see what’s available.

Conclusion

Incorporating driftwood mermaid wall art into your home decor adds not only a unique and captivating piece of art but also a touch of nature and whimsical charm. Whether you create it yourself or purchase a ready-made piece, this art form celebrates the beauty of both the natural world and the mythical lore of mermaids. So next time you walk along a beach, take a closer look at the driftwood around you—it might just be the perfect starting point for your next artistic creation.

Filed Under: Driftwood Ideas Tagged With: Coastal, Driftwood, Handmade, Mermaid, Wall Art

Driftwood Macrame Wall Art

June 24, 2024 by admin

Dive into the soothing world of coastal decor as you explore the beauty and craftsmanship of Driftwood Macrame Wall Art. Crafted from natural driftwood and intricately woven macrame patterns, this unique wall art brings a touch of serene ocean vibes into your home. Whether you’re aiming to enhance a beach-themed room or simply add a rustic yet elegant focal point, this piece is sure to capture attention and admiration. Let the charm of the sea transform your living spaces with its natural textures and calming presence, effortlessly blending artistry with nature. Have you ever thought about how a piece of driftwood can transform your living space into a peaceful, beach-inspired retreat? Driftwood macrame wall art is an amazing blend of natural elements and intricate craftsmanship, adding a unique and stylish touch to any interior.

Driftwood Macrame Wall Art

What is Driftwood Macrame Wall Art?

Driftwood macrame wall art combines the organic beauty of driftwood with the intricate knots and patterns of macrame. Driftwood is typically found along beaches and rivers, shaped and smoothed by water and time. Macrame, on the other hand, is a crafting technique that involves tying knots to create decorative patterns and designs. When these two elements come together, they create a stunning piece of art that brings a bit of nature indoors.

Why Choose Driftwood Macrame Wall Art?

There are several reasons why this form of wall art is gaining in popularity. For starters, it embodies a sense of serenity and natural beauty, making it an excellent choice for anyone looking to create a calm and cozy atmosphere in their home. Additionally, it’s a fantastic way to recycle and repurpose natural materials, promoting sustainability.

Here are some benefits:

BenefitDescription
Unique DesignNo two pieces of driftwood are alike, ensuring your wall art is one-of-a-kind.
Eco-FriendlyUses repurposed natural materials, making it a sustainable choice.
VersatilityFits well in various decor styles – from bohemian to coastal themes.
Personal TouchYou can customize the macrame pattern to suit your personal taste.

Choosing the Right Driftwood

Before diving into your macrame project, you’ll need to find the perfect piece of driftwood. Here’s how you can identify and select the right driftwood.

Sourcing Driftwood

Driftwood can be found along beaches, rivers, and lakes. When searching for driftwood, look for pieces that are naturally weathered, free of algae or decay, and of a manageable size for your wall art project.

Preparing Driftwood

Once you have found your driftwood, it’s essential to clean and treat it. This process will ensure that your artwork is safe and long-lasting.

  • Cleaning: Soak the driftwood in a mixture of water and bleach (10:1 ratio) to remove any bacteria or algae.
  • Drying: Allow the driftwood to dry completely. This may take several days, depending on the size and thickness.

Materials and Tools Needed

To create your driftwood macrame wall art, you’ll need a few basic materials and tools.

Essential Materials

Here are the primary items you’ll need:

MaterialPurpose
DriftwoodThe base of your wall art
Macrame CordFor tying knots and creating the design
ScissorsFor cutting the macrame cord
Measuring TapeTo measure lengths of macrame cord

Optional Items

These additional items can help enhance your project:

MaterialPurpose
Beads/FeathersTo add decorative elements to your design
Fabric GlueFor securing knots, if necessary
Comb or BrushTo fringe out the macrame cords

Basic Macrame Knots

Macrame involves various types of knots, each contributing differently to the overall design. Here are a few basic knots to get you started:

Lark’s Head Knot

This is a simple and foundational knot used to attach the cord to the driftwood.

  1. Fold the cord in half to create a loop.
  2. Place the loop over the driftwood.
  3. Pull the ends of the cord through the loop, tightening it around the driftwood.

Square Knot

A versatile and commonly used knot in macrame projects.

  1. Arrange four cords: two working cords on the outside and two fillers in the middle.
  2. Cross the left working cord over the fillers and place it under the right working cord.
  3. Take the right working cord under the fillers and pull it through the loop created by the left working cord.
  4. Tighten the knot and repeat the process in the opposite direction.

Double Half Hitch Knot

Perfect for creating intricate patterns and lines.

  1. Take one working cord and place it diagonally across the other cords.
  2. Using another cord, tie a half hitch around the diagonal cord and tighten.
  3. Repeat with the same cord to form a double half hitch.

Driftwood Macrame Wall Art

Step-by-Step Guide to Creating Driftwood Macrame Wall Art

Let’s walk through creating a simple yet beautiful driftwood macrame wall art piece.

Step 1: Prepare Your Work Area

Set up a workspace where you can comfortably lay out your materials and work on your project. Make sure you have good lighting and enough room to maneuver your cords and driftwood.

Step 2: Attach the Cord to the Driftwood

Start by cutting several lengths of macrame cord. The number and length of cords will depend on your design and the size of the driftwood.

  • Use the Lark’s Head knot to attach each cord to the driftwood.

Step 3: Begin Knotting

With your cords attached, begin tying your chosen macrame knots. You can follow a specific pattern or create your own design.

  • Use Square Knots for a simple and structured pattern.
  • Incorporate Double Half Hitch knots for a more detailed design.

Step 4: Add Decorative Elements

If desired, you can include beads, feathers, or other decorations to enhance your design. Simply thread these onto your cords as you knot or attach them using fabric glue.

Step 5: Finish and Trim

Once you’re satisfied with your design, make sure all knots are securely tightened. Trim any excess cord to give your piece a clean and polished look.

Step 6: Hang Your Artwork

Find the perfect spot to display your driftwood macrame wall art. Use a sturdy nail or hook to hang your piece securely.

Caring for Your Driftwood Macrame Wall Art

Proper care will keep your wall art looking beautiful for years to come.

Cleaning

To clean, lightly dust the driftwood and cords with a soft brush or cloth. For deeper cleaning, use a vacuum with a brush attachment.

Maintenance

Check periodically to ensure that the knots remain secure. If any knots become loose, simply retighten them.

Inspiration and Styles

Driftwood macrame wall art can take on various styles, depending on the macrame techniques and additional elements you choose to include.

Bohemian Style

Characterized by an eclectic mix of colors and textures, bohemian-style macrame often incorporates beads, feathers, and varying thicknesses of cord.

Minimalist Style

Minimalist macrame focuses on clean lines and simple patterns, often using a monochromatic color scheme and fewer decorative elements.

Coastal Style

Inspired by the beach, coastal-style macrame features soft, natural colors and often includes seashells or other ocean-themed decorations.

DIY or Purchase: Which is Right for You?

While creating your own driftwood macrame wall art is fulfilling and allows for personalization, purchasing a pre-made piece can be a convenient alternative.

DIY Benefits

  • Personalization: You can create a design that perfectly matches your taste and decor.
  • Satisfaction: Completing a DIY project can be incredibly rewarding.

Purchasing Benefits

  • Time-Saving: Buying a pre-made piece saves time and effort.
  • Professional Quality: Pre-made pieces often feature professional craftsmanship and intricate designs.

Conclusion

Driftwood macrame wall art is a beautiful and unique way to bring nature and artistry into your home. Whether you choose to create your own piece or purchase one, this type of wall art will surely add a touch of elegance and serenity to any space. So why not try your hand at this wonderful craft and see how a simple piece of driftwood can transform your living space? With a little creativity and effort, you can create a stunning work of art that reflects your personal style and love for nature.

Filed Under: Driftwood Ideas Tagged With: Bohemian Decor, Driftwood, Handmade, Macrame, Wall Art

  • « Previous Page
  • Page 1
  • …
  • Page 15
  • Page 16
  • Page 17
  • Page 18
  • Page 19
  • Page 20
  • Next Page »

Primary Sidebar

Driftwood4us.com, is a participant in the Amazon Services LLC Associates Program, an affiliate advertising program designed to provide a means for sites to earn advertising fees by advertising and linking to amazon.com.