• Skip to main content
  • Skip to primary sidebar
  • Terms and Conditions
  • Privacy Policy
  • Contact

Driftwood 4 Us

Just About Driftwood

home decor

Make Your Own Driftwood

October 1, 2024 by admin

Have you ever wondered how to create your own driftwood? Maybe you love the natural, weathered look of driftwood and want to use it for home décor or art projects. Driftwood has an enchanting quality that makes it highly desirable for various decorative uses. The good news is that you can make your own driftwood at home, and it’s easier than you might think.

Make Your Own Driftwood

Introduction to Driftwood

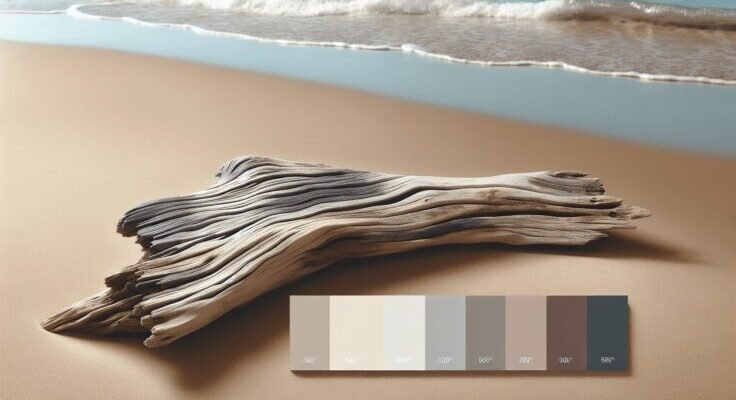
Driftwood is often found along shorelines, where it has been naturally weathered by water, wind, and the sun. This natural process can take years, but with a few simple steps, you can accelerate the aging process and create your own driftwood in a matter of days or weeks.

Why Create Your Own Driftwood?

There are ample reasons why you might choose to make your own driftwood:

  1. Sustainability: You don’t have to disrupt natural habitats by collecting driftwood from beaches or rivers.
  2. Customization: Control the size, shape, and type of wood you start with.
  3. Accessibility: No need to live near a body of water.

Materials You’ll Need

To create driftwood, you’ll need the following materials:

  • Raw wood pieces (branches, logs, etc.)
  • Plastic or metal containers
  • Bleach (optional)
  • Baking soda (optional)
  • A stiff brush
  • Sandpaper
  • A protective mask and gloves
  • Water source

Step-by-Step Guide to Making Driftwood

Step 1: Selecting the Wood

Choose raw wood pieces that you would like to turn into driftwood. These can be sourced from your backyard, a nature trail, or even purchased from a local store. Opt for hardwoods like oak or cedar for the best results.

Step 2: Preparing the Wood

Before starting the treatment process, you’ll need to prep the wood:

  • Remove Bark: Use a sharp knife or a chisel to remove excess bark. The wood shouldn’t be too green or fresh. Older, drier wood works best.
  • Cut to Size: Trim the wood to your desired sizes and shapes.

Step 3: Cleaning the Wood

Wash the wood thoroughly to remove any dirt and debris. Use a stiff brush and water to scrub the surface clean.

Step 4: Bleaching the Wood

To accelerate the weathering process, you can bleach the wood. This will not only lighten the wood but also help remove any pests or bacteria.

Bleaching Solution:

IngredientQuantity
Bleach1 part
Water10 parts
  1. Mix the bleach and water in a container large enough to submerge the wood pieces.
  2. Soak the wood in the bleach solution for 24 hours.
  3. After 24 hours, remove the wood and rinse it thoroughly with water.

Note: Use gloves and a mask when handling bleach.

Step 5: Sun-drying the Wood

Place the wood in a sunny spot to dry. This can take a few days to a week, depending on the thickness and type of wood. The sun will help to naturally weather the wood, giving it a more authentic driftwood appearance.

Step 6: Baking Soda Method (Optional)

For a more weathered look, you can use baking soda:

  • Make a baking soda paste by mixing baking soda with water.
  • Apply the paste to the wood and let it sit for 24 hours.
  • Rinse the wood and let it dry in the sun.

Step 7: Sanding and Finishing

Once the wood is dry, sand it down to smooth out rough patches. You can use varying grits of sandpaper, starting with a coarse grit and finishing with a finer grit.

Tips for Achieving Different Driftwood Looks

Light Driftwood

To achieve a lighter driftwood appearance, increase the soaking time in the bleach solution. This will help to bleach the wood more thoroughly and give it that worn, sun-bleached look.

Weathered and Textured Driftwood

For a more rustic, textured look, you can use multiple bleaching and sun-drying cycles. This method layers the effects, giving the wood a naturally aged appearance.

Natural-Looking Driftwood

Skip the bleach and use only natural elements like sun, wind, and water to age the wood. This will take longer but provides the most authentic driftwood appearance.

Make Your Own Driftwood

Common Mistakes and How to Avoid Them

Over-Bleaching

Too much bleach can weaken the wood fibers, making it brittle. Always start with less bleach and increase the concentration gradually if required.

Not Rinsing Properly

Failing to rinse the wood thoroughly after bleaching can leave behind chemical residues that could be harmful.

Inadequate Drying

Make sure the wood is completely dry before sanding or using it for projects to prevent mold and mildew growth.

Creative Uses for DIY Driftwood
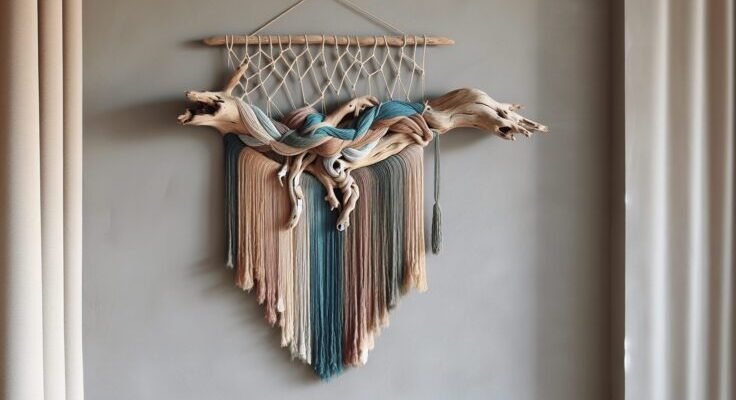
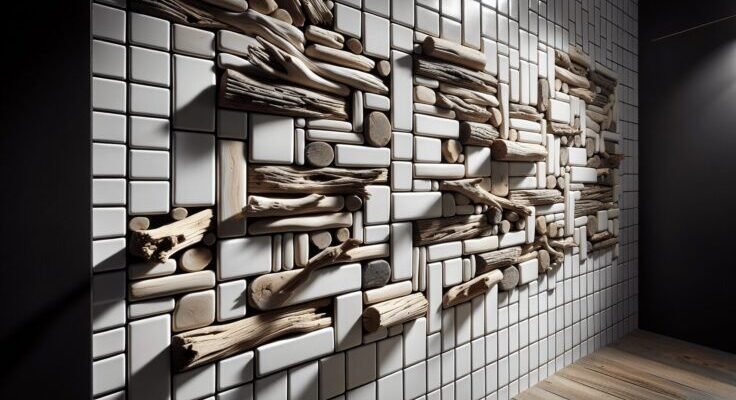
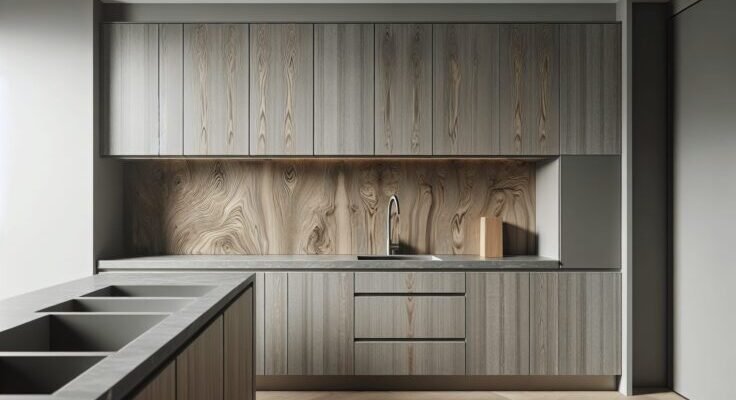
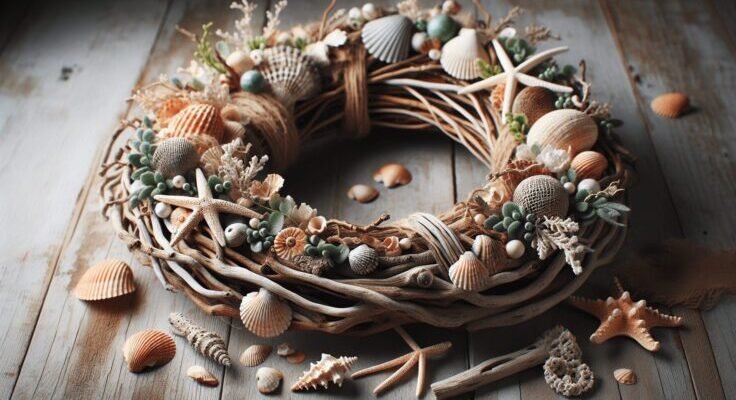
Home Décor

Use your driftwood to create stunning pieces of home décor. From mirror frames to shelves, the possibilities are endless.
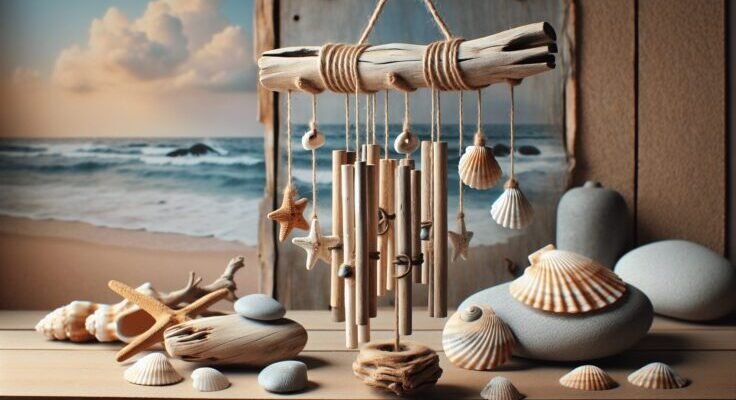
Craft Projects

Create unique driftwood crafts such as candle holders, table centerpieces, and jewelry stands.

Outdoor Projects

Driftwood can be used in gardens for edging, garden fences, or even as part of a water feature.

Benefits of Making Your Own Driftwood

Cost-Effective

Making your own driftwood is much cheaper than buying it from stores or online retailers.

Eco-Friendly

By creating your own driftwood, you help reduce the demand for naturally sourced driftwood, preserving natural habitats and ecosystems.

Personalized Touch

You have complete control over the look and feel of the driftwood, ensuring it matches your specific style and project needs.

Additional Tips for Working with Driftwood

Sealing the Wood

To preserve your driftwood projects, consider sealing them with a clear wood sealant. This will protect the wood from further weathering and keep it looking fresh.

Safety Precautions

Always wear protective gear such as gloves and masks when handling bleach or other chemicals. Work in a well-ventilated area to avoid inhaling fumes.

Experimenting with Different Woods

Different types of wood will react differently to the bleaching and weathering process. Experiment with various types of wood to see which ones yield the best results.

Frequently Asked Questions

How Long Does it Take to Make Driftwood?

The time required can vary based on the method used and the type of wood. Generally, you can create decent driftwood in about one to two weeks.

Can Driftwood be Used Indoors?

Absolutely! Driftwood is versatile and can be used for both indoor and outdoor projects.

Is it Safe to Use Bleach?

Yes, but take proper precautions to ensure your safety. Use gloves, masks, and work in a ventilated area.

Conclusion

Creating your own driftwood at home is a fun, rewarding project. Not only is it cost-effective and eco-friendly, but it also allows you to craft unique, personalized pieces for your home or garden. With the right materials and a bit of patience, you can transform ordinary wood into beautiful, weathered driftwood that adds a touch of nature and rustic charm to any setting. So why not give it a try?

Filed Under: Driftwood Ideas Tagged With: crafting, Driftwood, Handmade, home decor, nature projects

Driftwood Yarn Wall Hanging Diy

September 30, 2024 by admin

Have you ever looked at an empty wall in your home and wondered what you could do to make it more inviting and personal? One great way to add a touch of rustic charm and creativity to your space is by creating a driftwood yarn wall hanging. This do-it-yourself project is not only fun and easy but also allows you to express your artistic side.

Why Choose Driftwood Yarn Wall Hangings?

Driftwood yarn wall hangings bring together the natural beauty of wood and the cozy texture of yarn, offering a timeless decor piece that fits with many interior styles. Whether you have a coastal-themed living room or a modern, minimalist bedroom, this DIY project can be customized to complement your home perfectly.

Benefits of DIY Wall Hangings

Creating your own wall hanging has several advantages over purchasing one.

BenefitExplanation
Personal TouchIt allows you to add a personal touch and create something truly unique.
Cost-EffectiveDIY projects are often more affordable than store-bought decor items.
Relaxing ActivityCrafting can be a relaxing way to spend your free time and is a great hobby.
CustomizableYou can tailor the design, colors, and size to fit your particular taste and space.

Materials Needed

Before you begin, you’ll need to gather some materials. Here’s a list of what you’ll need:

ItemPurpose
DriftwoodActs as the main support structure
Yarn (various colors)Used to create the hanging strands
ScissorsFor cutting the yarn
Ruler or Measuring TapeTo measure each yarn strand
Hooks or NailsTo hang the final piece on the wall
Glue (optional)To secure the yarn in place if needed

Choosing the Right Driftwood

Finding the perfect piece of driftwood is a crucial step. You can either collect driftwood from a nearby beach or purchase it from a craft store. Make sure the driftwood is sturdy and free of mold or excessive cracking.

Driftwood Yarn Wall Hanging Diy

Step-by-Step Guide

Now that you have all your materials ready, let’s dive into the steps to create your driftwood yarn wall hanging.

Step 1: Preparing the Driftwood

  • Clean the Driftwood: Use a brush or cloth to clean off any sand, dirt, or debris.
  • Dry the Driftwood: Allow it to dry completely if it’s wet. You can leave it out in the sun for a few hours.

Step 2: Measuring and Cutting the Yarn

  • Decide on Lengths: Determine how long you want each yarn strand. A common length is about 2-3 feet.
  • Cut the Yarn: Use your scissors to cut multiple pieces of yarn to the desired length. You can vary the lengths for a more dynamic look.

Step 3: Attaching the Yarn to the Driftwood

  • Fold Yarn in Half: Take one piece of yarn and fold it in half.
  • Loop Around Driftwood: Place the fold over the driftwood, then pull the loose ends through the loop and tighten.
  • Repeat: Continue this process until the entire driftwood piece is covered with yarn loops.

Step 4: Arranging and Trimming the Yarn

  • Comb Through: Use your fingers to comb through the yarn strands and ensure they’re hanging straight.
  • Trim: Trim the bottom ends of the yarn to your desired shape. You can opt for a straight line, a wave, or any other pattern you prefer.

Step 5: Hanging Your Creation

  • Add Hooks or Nails: Attach hooks or nails to the wall where you want to hang your creation.
  • Hang the Driftwood: Simply hang the driftwood on the hooks or nails, ensuring it’s level.

Creative Variations

While the basic driftwood yarn wall hanging is beautiful on its own, you can add a few variations to make it even more special.

Adding Beads or Feathers

  • Beads: Thread beads onto the yarn strands before attaching them to the driftwood.
  • Feathers: Add feathers to the ends of some yarn strands for a more bohemian look.

Using Different Types of Yarn

Experiment with different textures and thicknesses of yarn to add more visual interest. Mix and match wool, cotton, and even metallic yarns for a unique effect.

Incorporating Colors

Choose a color scheme that matches your room decor. You can use a gradient effect with multiple shades of one color or go for a bold, multicolored pattern.

Driftwood Yarn Wall Hanging Diy

Tips and Tricks

To ensure your DIY project goes smoothly, keep these tips in mind:

  • Test the Yarn: Before cutting all your yarn, cut a single piece and make sure it hangs correctly.
  • Check Stability: Make sure the driftwood is robust enough to hold all the yarn without breaking.
  • Adjust Hanging Position: Sometimes, the driftwood might need slight adjustments to hang symmetrically. Don’t hesitate to make those tweaks for the perfect look.

Common Mistakes to Avoid

  • Using Wet Driftwood: Always make sure the driftwood is fully dry to avoid mold.
  • Uneven Yarn Lengths: Measure carefully to ensure all strands are similar lengths, unless you’re going for an intentionally varied look.
  • Overloading the Driftwood: Too much yarn can weigh down the driftwood and cause it to break.

Maintenance of Your Wall Hanging

Once your driftwood yarn wall hanging is up on the wall, you’ll want to keep it looking fresh and neat.

Regular Dusting

Dust your wall hanging regularly to prevent the yarn from collecting dust and dirt. You can use a feather duster or even a vacuum cleaner with an upholstery attachment.

Spot Cleaning

If any of the yarn strands get stained, gently spot clean them with a mild detergent and water. Be careful not to soak the yarn, as it could cause discoloration or weakening.

Conclusion

Creating a driftwood yarn wall hanging is a wonderful way to bring a touch of handmade charm into your home decor. With just a few materials and some creativity, you can craft a piece that’s uniquely yours. Enjoy the process, and before you know it, you’ll have a beautiful, custom wall hanging that adds a personal touch to any room.

Filed Under: Driftwood Ideas Tagged With: Driftwood, Handmade, home decor, Wall Hanging, Yarn

Driftwood Yarn

September 30, 2024 by admin

Have you ever wondered how something as simple as driftwood can become a unique and fascinating type of yarn? Driftwood yarn is a remarkable blend that combines the natural beauty of driftwood with the craft of knitting and crocheting. This blend of two arts brings together the raw elegance of nature and the refined skill of textile creation.

Driftwood Yarn

What is Driftwood Yarn?

Driftwood yarn isn’t literally yarn made out of driftwood, but rather, it’s a unique type of yarn inspired by the colors, textures, and patterns found in driftwood. It often features earthy tones, including shades of brown, beige, grey, and sometimes muted blues and greens.

Characteristics of Driftwood Yarn

The primary features of driftwood yarn include:

  • Colors: Earthy and natural tones that reflect the muted palette of driftwood.
  • Texture: Depending on the material, it can range from a smooth finish to a more rustic, uneven texture, reminiscent of the varied surface of driftwood.
  • Material: Usually natural fibers such as wool, cotton, or blends that seek to emulate the softness and ruggedness of driftwood.

Types of Driftwood Yarn

There are multiple types of driftwood yarn, each with its own unique characteristics. Below is a table summarizing some common types:

TypeDescriptionBest Use Cases
Wool BlendSoft, warm, and slightly heavySweaters, scarves, hats
Cotton BlendLight, breathable, and slightly rough textureSummer garments, market bags
Silk BlendSmooth, shiny, with a luxurious feelShawls, special occasion garments
Acrylic BlendVersatile, affordable, and easy to care forEveryday wear, children’s clothing

The Origin of Driftwood Yarn

Natural Inspiration

The idea of driftwood yarn draws from the natural artistry of the coastlines where driftwood is found. There’s something inherently beautiful about the weathered and aged appearance of driftwood, shaped and polished by the sea. This aesthetic is captured in the fibers and colors of driftwood yarn.

Influence of Coastal Culture

Coastal cultures have long had a special relationship with the sea and its gifts. Driftwood has often been used in art and craft, from sculpture to home décor. The concept of driftwood yarn is a contemporary extension of these traditions, adapting the natural charm of driftwood into the textile arts.

How Driftwood Yarn is Made

Creating driftwood yarn involves a meticulous process to ensure that the final product embodies the essence of actual driftwood. Let’s look at the step-by-step process:

1. Material Selection

The first critical step is choosing the right materials. Natural fibers like wool, cotton, and sometimes silk are preferred. These materials must be of high quality to create a durable and aesthetically pleasing yarn.

2. Dyeing Process

To replicate the colors of driftwood, the yarn goes through a specialized dyeing process. This involves using natural dyes to achieve the earthy tones of driftwood. Each batch is carefully monitored to ensure consistency in color.

3. Spinning

Once dyed, the fibers are spun into yarn. The spinning process may be adjusted to give the yarn an uneven texture, mimicking the rough, rustic feel of driftwood. This step is crucial to ensure the yarn has the right balance of softness and texture.

4. Quality Control

Finally, the yarn undergoes quality control to check for any inconsistencies in texture, color, or strength. Only the best quality yarn is packaged and sold under the label of driftwood yarn.

Uses of Driftwood Yarn

Driftwood yarn can be used in a variety of knitting and crocheting projects. Its unique appearance and texture make it suitable for a range of creations from wearable items to home décor.

Clothing

Due to its natural colors and comfortable texture, driftwood yarn is perfect for creating cozy and stylish clothing. This includes:

  • Sweaters: Provides warmth and a rustic look.
  • Scarves and Shawls: Adds a touch of elegance with a natural vibe.
  • Hats: Keeps you warm while maintaining a chic aesthetic.

Home Decor

The earthy tones of driftwood yarn complement various home décor styles:

  • Blankets and Throws: Adds a cozy, natural element to any room.
  • Cushions: Enhances the texture and comfort of living space.
  • Wall Hangings: Brings in a coastal, boho style.

Accessories

Driftwood yarn is also excellent for making unique accessories:

  • Bags: Perfect for market totes or stylish handbags.
  • Socks: Comfortable and uniquely patterned to keep your feet warm.
  • Jewelry: Bracelets, necklaces, and more using knit or crochet techniques.

Driftwood Yarn

Caring for Driftwood Yarn Creations

Caring for items made from driftwood yarn is essential to maintain their beauty and longevity. Here are some tips to help you ensure your handmade creations last:

Washing

The first rule is to always follow the care instructions provided by the yarn manufacturer. Generally, items made from natural fibers should be hand-washed with mild detergent and lukewarm water. Avoid wringing them out, as this can distort the shape and texture of the yarn.

Drying

Lay your driftwood yarn creations flat to dry, preferably on a clean towel. This helps retain their shape and prevents stretching.

Storing

Store your items in a cool, dry place away from direct sunlight to avoid fading and weakening of fibers. Moth repellents such as lavender sachets can help keep your yarn and creations safe from pests.

Patterns and Projects

If you’re eager to start a project with driftwood yarn but are unsure where to begin, here are a few pattern ideas to spark your creativity:

Driftwood Sweater

A cozy sweater that mirrors the weathered look of driftwood would be an excellent project for intermediate knitters. Look for patterns that feature a mix of stitches to highlight the yarn’s texture.

Driftwood Shawl

Using a lace or openwork pattern can make a beautiful shawl that reflects the delicate, yet rugged aesthetic of driftwood. This could be a perfect accessory for an evening beach walk.

Driftwood Cushion Covers

These can be a simple but rewarding project. Use driftwood yarn to create cushion covers with a tactile surface, incorporating cable knits or moss stitch to add a touch of elegance to your living space.

Driftwood Tote Bag

For those who love to crochet, a driftwood yarn tote bag can be both stylish and practical. Use a sturdy pattern that shows off the yarn’s natural beauty while providing durability.

Finding Driftwood Yarn

When it comes to finding authentic driftwood yarn, local crafts stores or online marketplaces might be your first stop. Here’s a quick guide to help you find and choose the best driftwood yarn:

Local Fiber Stores

Visiting a local fiber or yarn store allows you to touch and feel the yarn, giving you a better sense of its texture and quality.

Online Marketplaces

Websites like Etsy, Amazon, and specialized yarn retailers often carry driftwood yarn. Reading reviews and checking product descriptions can help you find high-quality options.

Yarn Festivals

Yarn and fiber festivals are excellent places to find unique yarns, including driftwood yarn. These events also provide opportunities to meet artisans and learn more about the product.

Conclusion

Driftwood yarn introduces a blend of natural beauty and textile art that can transform your knitting and crocheting projects into unique, rustic pieces. Whether you’re creating a cozy sweater, an elegant shawl, or charming home décor, this type of yarn adds a touch of nature’s elegance in every stitch. Happy crafting as you explore the endless possibilities of driftwood yarn!

Filed Under: Driftwood Ideas Tagged With: crafting, Driftwood, home decor, Yarn

Driftwood Grout Color

September 29, 2024 by admin

Have you ever pondered the impact that grout color can have on your overall home aesthetic? If not, you might be surprised by the difference it can make. One particularly elegant and versatile option to consider is driftwood grout color. Whether you’re renovating your kitchen, sprucing up the bathroom, or undertaking any other tiling project, the choice of grout can significantly enhance your final design.

What is Driftwood Grout Color?

Driftwood grout color is inspired by the natural, weathered wood found washed ashore. This color typically exhibits shades of soft brown and gray, reminiscent of the coastal elements. It brings a sophisticated, earthy feel to your tiled surfaces that complements both rustic and modern decor styles.

Why Choose Driftwood Grout Color?

Versatility

Driftwood grout color offers immense versatility. The grayish-brown hue can seamlessly blend with various tile colors and textures. Whether you have stone, ceramic, or porcelain tiles, driftwood grout will likely enhance their appearance rather than clash with it.

Aesthetic Appeal

One of the most appealing aspects of driftwood grout is its ability to add depth and dimension to your tiled surfaces. The muted tones can make your tiles stand out and create a visually compelling space without overwhelming other design elements.

Durability

Besides its visual appeal, driftwood grout color is known for its durability. When choosing a grout, you want something that can withstand moisture, resist staining, and remain easy to clean. Driftwood grout often meets these criteria while providing a long-lasting finish.

Driftwood Grout Color

Where to Use Driftwood Grout Color?

Kitchens

In the kitchen, driftwood grout can work wonders with a variety of tiles, from subway to mosaic. Imagine pairing it with white or patterned tiles; the result is both striking and timeless. The grout’s earthy tones can also add warmth, making your kitchen a more inviting space.

Bathrooms

Bathrooms are another area where driftwood grout shines. Its durability and ability to resist moisture make it perfect for showers, floors, and backsplashes. Driftwood grout pairs beautifully with both light and dark tiles, creating a serene and spa-like atmosphere.

Living Spaces

Don’t limit driftwood grout to kitchens and bathrooms alone. It’s equally effective in other living areas where tiles are used. Think of a stylish tiled fireplace or a chic hallway floor. The driftwood color adds sophistication and brings out the natural beauty of your tiles.

How to Choose the Right Driftwood Grout

Choosing the perfect driftwood grout involves considering several factors. Here are some tips to ensure you make the best decision:

Tile Type and Color

Assess the type and color of your tiles first. Driftwood grout pairs exceptionally well with neutral and earth-toned tiles. However, it can also provide a striking contrast with bolder colors like navy or emerald.

Room Lighting

Lighting plays a significant role in how the grout color will look once applied. Natural lighting can bring out the warmer tones in driftwood grout, while artificial lighting might highlight cooler shades. Take a sample piece and see how it looks in different lighting conditions of your space.

Grout Finish

The finish of the grout can also affect its overall look. A matte finish can give a more understated and natural feel, while a glossy finish might add a touch of modernity. Consider what complements your overall design vision.

Sample Testing

Never skip sample testing. Apply a small section of driftwood grout to a tile sample and see how it dries. This test will give you a more accurate representation of how it’ll look in your space and help you make an informed decision.

Driftwood Grout Color

Installation Tips for Driftwood Grout

Preparation

Before starting any tiling project, thorough preparation is crucial. Make sure the surface where the tiles will be installed is clean, dry, and level. Any debris or unevenness can affect the bonding of the grout.

Mixing

Follow the manufacturer’s instructions for mixing the grout properly. Achieving the right consistency is essential for a smooth application. It’s often best to mix in smaller batches to prevent the grout from drying out too quickly.

Application

Use a grout float to apply the grout at a 45-degree angle, pressing it into the joints to ensure full coverage. Work in small sections to manage the drying time effectively. Remove the excess grout by holding the float at an almost flat angle.

Cleaning Up

After the grout has set for about 10-15 minutes, use a damp sponge to wipe away the excess on the tile surfaces. Be gentle to avoid pulling the grout from the joints. Rinse the sponge frequently and ensure it is only damp, not soaking wet.

Sealing

Once the grout has fully cured, typically after 24-48 hours, apply a grout sealer. This step is crucial for protecting the grout from moisture and staining, ensuring its longevity.

Maintenance of Driftwood Grout

Maintaining the pristine appearance of your driftwood grout is simple with regular care and attention.

Regular Cleaning

To keep your grout looking fresh, clean it regularly with a mild cleaner and warm water. Avoid harsh chemicals, as they can damage the grout over time. Using a grout brush can help remove any embedded dirt.

Cleaning TipsDescription
Use Mild CleanersStick to mild cleaners to prevent any damage to the grout.
Warm WaterWarm water combined with the cleaner works effectively.
Grout BrushA grout brush helps in tackling embedded dirt in the grout lines.

Periodic Sealing

Even though you sealed the grout after installation, periodic sealing every six to twelve months helps maintain its protective barrier. This step is especially important in high-moisture areas like bathrooms and kitchens.

Addressing Stains Immediately

If you spill something, clean it up as quickly as possible to prevent staining. Driftwood grout is generally resistant, but immediate action always helps.

Inspections

Perform regular inspections to catch any small cracks or issues before they become bigger problems. Repairing minor damages early can save you from costly repairs down the road.

Potential Drawbacks

While driftwood grout color offers many benefits, it’s essential to consider some potential drawbacks to make an informed decision.

Initial Cost

High-quality driftwood grout may come with a higher initial cost compared to other colors. However, its durability and aesthetic appeal often make it worth the investment.

Maintenance Commitment

While not overly demanding, maintaining the grout’s appearance requires a bit of regular upkeep. If neglected, it could lose some of its visual appeal over time.

Expert Opinions on Driftwood Grout

Professionals in the industry often have valuable insights that can guide you in your decision-making.

Interior Designers

Many interior designers favor driftwood grout for its versatility and natural aesthetic. They often recommend it for spaces aiming for a cozy, yet elegant feel.

Contractors

Contractors appreciate the durability and workability of driftwood grout. They find it easy to apply and believe it holds up well over time, making it a reliable choice for various projects.

Homeowners

Homeowners who have opted for driftwood grout frequently mention their satisfaction with the results. They often highlight the unique and refined look it brings to their spaces.

Case Studies

Modern Kitchen Makeover

A homeowner in California recently renovated her modern kitchen. She chose white subway tiles paired with driftwood grout. The subtle hues of the grout offered a perfect blend of contrast and harmony, resulting in a modern yet warm kitchen space.

Spa-like Bathroom Retreat

In a luxury bathroom renovation, the homeowners opted for driftwood grout with marble tiles. The outcome was a serene, spa-like retreat that is both functional and aesthetically stunning. The driftwood grout not only complemented the marble but also added a layer of sophistication and elegance.

Project TypeTile TypeOutcome Description
Modern KitchenWhite Subway TilesAchieved a modern yet warm feel through a subtle contrast and harmony.
Luxury BathroomMarble TilesCreated a serene, spa-like atmosphere with added sophistication.

FAQs about Driftwood Grout Color

Here, let’s address some frequently asked questions to clarify any remaining doubts you might have about driftwood grout.

Is Driftwood Grout Suitable for Outdoor Use?

Yes, driftwood grout can be used outdoors, provided it is sealed correctly to withstand the elements. Its natural tones blend well with outdoor settings, adding a touch of elegance to patios or outdoor kitchens.

Can I Use Driftwood Grout with Decorative Tiles?

Absolutely. Driftwood grout can enhance decorative tiles without overshadowing their designs. Its neutral tones allow the tile’s patterns and colors to be the focal point.

How Does Driftwood Grout Compare to White Grout?

While white grout offers a crisp, clean look, it can show dirt and stains more readily than driftwood grout. Driftwood’s natural hues are more forgiving, making it an excellent choice for areas prone to grime and spills.

Do I Need Special Tools for Applying Driftwood Grout?

No special tools are required beyond the basic grout application tools like a grout float, sponge, and sealer. However, ensuring proper mixing and application techniques is crucial for the best results.

How Long Does Driftwood Grout Last?

With proper installation and maintenance, driftwood grout can last many years. Regular cleaning, periodic sealing, and prompt repairs will extend its lifespan.

Conclusion

Choosing the right grout color can significantly influence the look and feel of your tiled surfaces. Driftwood grout color stands out for its versatility, aesthetic appeal, and durability. Whether for kitchens, bathrooms, or other living spaces, it offers a refined, sophisticated touch that enhances your home’s overall design. By considering factors like tile type, lighting, and maintenance, you can ensure that driftwood grout is the perfect fit for your next tiling project.

Make your spaces more inviting and visually cohesive with the timeless elegance of driftwood grout color.

Filed Under: Driftwood Ideas Tagged With: Driftwood Grout, Grout Color, home decor, Tile Installation

Driftwood Yarn Wall Hanging

September 28, 2024 by admin

Have you ever thought about adding a unique touch of nature and artistry to your home decor? If you are looking for a project that’s both aesthetically pleasing and easy to create, a Driftwood Yarn Wall Hanging might just be the perfect addition to your living space. Whether you’re a seasoned crafter or new to DIY projects, this rustic and elegant craft combines natural elements with colorful yarn in a way that’s sure to captivate anyone who sees it.

What is a Driftwood Yarn Wall Hanging?

A driftwood yarn wall hanging is an art piece made using naturally weathered driftwood and various types of yarn. This unique wall decor item blends the softness of yarn with the rugged beauty of driftwood, creating an eye-catching centerpiece. These hangings can be as simple or as intricate as you desire, offering endless possibilities for personalization.

The Appeal of Driftwood

Driftwood has a unique charm that comes from its natural, weathered look. Found on shores around the world, these wooden pieces have been sculpted by water and wind, resulting in an organic and rustic appearance. Using driftwood in crafts adds a touch of nature to your decor, making each piece truly one-of-a-kind.

The Versatility of Yarn

Yarn offers a vast array of colors, textures, and types, making it an incredibly versatile material. Whether you prefer chunky wool, delicate cotton, or shimmering metallic fibers, you can mix and match to create various patterns and designs. This versatility allows you to tailor your wall hanging to your personal aesthetic.

Materials You’ll Need

Before you get started, gather all the necessary materials. Here’s a list to keep things simple:

MaterialPurpose
DriftwoodBase for the hanging
Yarn of various colors and texturesDecorative elements
ScissorsCutting yarn
Measuring tapeEnsuring even lengths
Glue (optional)Securing knots
Comb or brushFor fringe ends
Clear fishing line or strong threadFor hanging the driftwood

You can find driftwood at a local beach, purchase it online, or even use a branch if driftwood is hard to come by.

Driftwood Yarn Wall Hanging

Choosing Your Driftwood

Selecting the right piece of driftwood is crucial for the overall look of your wall hanging. Look for a piece that is approximately 12-24 inches long, straight but naturally textured, and free from cracks that might weaken it.

Sourcing Driftwood

If you live near a coastline, take a walk along the beach and look for driftwood pieces that catch your eye. Ensure that collecting driftwood is allowed in your area. Alternatively, online craft stores and artisans often sell pre-cleaned driftwood.

Preparing Driftwood

Once you’ve selected your driftwood, clean it thoroughly. Rinse it with water to remove any sand, salt, and debris, then let it dry completely. If desired, you can seal the driftwood with a clear varnish to preserve its color and texture. This step is optional but recommended if you want to ensure longevity.

Selecting Yarn

Choosing the right yarn can elevate your wall hanging from simple to stunning. Consider different textures and colors that will complement each other and your existing decor.

Types of Yarn

  • Wool: Adds a cozy, warm touch
  • Cotton: Lightweight and versatile
  • Acrylic: Budget-friendly and comes in numerous colors
  • Metallic: Adds a touch of glamour

Colors and Patterns

Stick to a color palette that complements your decor. Neutral tones give a minimalist feel, while bold colors can make your wall hanging a statement piece. Play with patterns such as ombre effects, stripes, or even random placements for a more eclectic look.

Driftwood Yarn Wall Hanging

Creating Your Driftwood Yarn Wall Hanging

Now that you have all your materials, it’s time to create your wall hanging. Below are the steps broken down for easy understanding.

Step 1: Cut Your Yarn

Decide the length you want your yarn to hang. For a standard project, each piece of yarn can be cut to about 36-48 inches. Fold each piece in half before attaching it to the driftwood, so it hangs in two strands.

Step 2: Attach the Yarn to the Driftwood

Attach each cut piece of yarn to the driftwood with a lark’s head knot. To do this, fold the yarn in half, place the loop over the driftwood, and pull the two loose ends through the loop. Pull tight to secure.

StepDescription
Fold YarnFold the yarn piece in half
Loop Over DriftwoodPlace the looped end over the driftwood
Pull Ends ThroughPull the loose ends through the loop and tighten

Step 3: Pattern and Design

Work from the center of the driftwood outward, deciding on your pattern as you go. You can alternate colors, create blocks of color, or even mix various textures for added depth.

Step 4: Trim and Finish

Once all the yarn is attached, trim the ends to your desired length and shape. You can create a straight cut, a V-shape, or even a fringe effect by separating the yarn strands with a comb or brush.

Step 5: Secure Knots (Optional)

If you’re worried about the knots coming loose, a small dot of glue can be applied to each knot to ensure they stay in place.

Step 6: Hang Your Work

Attach a piece of clear fishing line or thread to the ends of the driftwood for hanging. Ensure that it is balanced and straight when hanging on the wall.

Creative Variations

Feel free to experiment with different materials and techniques to make your driftwood yarn wall hanging uniquely yours.

Beads and Charms

Adding beads, charms, or small tassels can give your wall hanging an extra touch of personality. Simply string these onto the yarn before attaching it to the driftwood.

Mixed Media

Incorporate other elements like feathers, fabric strips, or lace to add variety and texture to your piece. Mixing media can make your wall hanging even more intriguing.

Dyeing Yarn

Custom dye your yarn for a personalized color palette. Natural dyes can be made from plants, fruits, and vegetables, offering a unique, eco-friendly way to add color.

Maintaining Your Wall Hanging

Although driftwood yarn wall hangings are generally low maintenance, a little care can go a long way in preserving their beauty.

Cleaning

To clean your wall hanging, gently dust it with a feather duster or a gentle vacuum attachment. Avoid using water or cleaning solutions as they might damage the yarn and wood.

Preventing Damage

Keep your wall hanging out of direct sunlight to prevent the yarn colors from fading. Avoid humid areas like bathrooms as well, as excess moisture can affect both the driftwood and yarn.

Conclusion

Creating a driftwood yarn wall hanging is a rewarding project that brings natural beauty and a personalized touch to your home decor. With a bit of creativity and a few basic materials, you can design a piece that reflects your style and complements any room. This project not only provides a creative outlet but also results in a stunning piece of art that you can be proud of.

By following the steps and tips outlined in this article, you’ll be well on your way to crafting a breathtaking driftwood yarn wall hanging that’s sure to be a conversation starter in any home. Happy crafting!

Filed Under: Driftwood Ideas Tagged With: DIY Project, Driftwood, home decor, Wall Hanging, Yarn Art

Enhance Your Outdoor Space with Driftwood Gray Deck Stain

September 27, 2024 by admin

Have you ever stood in your backyard and wondered how you could elevate its aesthetic appeal? There is something magical about creating a space that is both beautiful and functional. When you think about enhancing your outdoor space, consider the idea of using driftwood gray deck stain. Not only does it add a touch of rustic charm, but it also provides the practical benefits you need to maintain your deck for years to come.

Enhance Your Outdoor Space with Driftwood Gray Deck Stain

Understanding Driftwood Gray Deck Stain

Deck staining isn’t just a utilitarian task; it’s an art form that can transform your outdoor living area. Driftwood gray deck stain is a particularly popular choice for those who want to combine elegance with practicality.

What is Driftwood Gray Deck Stain?

Driftwood gray deck stain is a semi-transparent stain that gives your wood a weathered, natural look, reminiscent of driftwood found on the beach. The hue is subtle yet impactful, providing a neutral tone that works well with various décor styles.

Benefits of Choosing Driftwood Gray

When you choose driftwood gray deck stain, you get more than just a visually appealing surface. You gain protection against the elements, improve the longevity of your wood, and create a welcoming environment. Here’s a quick look at the benefits:

BenefitDescription
Aesthetic AppealOffers a naturally rustic and elegant appearance.
UV ProtectionShields your deck from the harmful effects of the sun.
Moisture ResistancePrevents water from seeping into the wood, protecting it from rot.
Easy MaintenanceMakes cleaning your deck straightforward and hassle-free.

Preparing Your Deck for Staining

Before you get started with applying the stain, proper preparation is crucial. It ensures that the driftwood gray stain adheres well to the wood and delivers long-lasting results.

Cleaning the Surface

The first thing you need to do is thoroughly clean your deck. Any dirt, mildew, or old stains must be removed for the new stain to stick properly.

  1. Sweep the Deck: Get rid of leaves, dirt, and debris.
  2. Wash the Deck: Use a deck cleaner or a mixture of water and dish soap. Scrub using a stiff-bristle brush.
  3. Rinse Thoroughly: Make sure no soap residue is left; it can affect the stain’s adherence.

Sanding Your Deck

Sanding is essential for creating a smooth surface. It helps remove any splinters and opens up the wood pores to absorb the stain better.

  1. Choose the Right Sandpaper: Use medium-grit sandpaper (80-100 grit).
  2. Sanding Process: Sand in the direction of the wood grain to avoid scratches.
  3. Clean Up: Remove all the dust with a vacuum or a leaf blower.

Choosing the Right Stain

Not all stains are created equal. Selecting the appropriate stain for your specific needs is vital to achieving the best results.

Types of Stains

There are various types of stains to consider. Each has its pros and cons:

TypeDescriptionProsCons
Oil-BasedPenetrates deeply into the wood grain.Rich color, long-lasting protectionStrong odor, longer dry time
Water-BasedSits on top of the wood surface.Quick drying, easy cleanupMay not last as long, can raise the wood grain
Gel StainThick and ideal for vertical surfaces.Good control, less dripNot optimal for large flat surfaces

Best Brands to Consider

While there are many brands available, here are a few that stand out due to their quality and longevity:

BrandFeaturesAverage Price
BehrGood UV protection, wide color range.$35-$45 per gallon
CabotDurability and rich pigment.$25-$40 per gallon
Thompsons WaterSealExcellent water resistance.$20-$30 per gallon
Rust-OleumVersatile and easy to apply.$30-$50 per gallon

Application Process

Now that you have your driftwood gray deck stain and your deck is prepped and ready, it’s time for the main event—staining your deck.

Tools You’ll Need

Gather all the tools you’ll need beforehand to ensure a smooth application process:

  • Paintbrushes
  • Roller or stain pad applicator
  • Painter’s tape
  • Drop cloths
  • Paint tray

Step-by-Step Guide

  1. Test the Stain: Before committing, do a test patch on a small, inconspicuous area.
  2. Edge Work: Use a paintbrush to stain edges and tight spots first.
  3. Main Application: Use a roller or stain pad for larger areas. Apply in long, even strokes.
  4. Drying Time: Check the manufacturer’s instructions for specific drying times. Usually, it’s around 24-48 hours.

Second Coat

A second coat can enhance the color and protection. Make sure the first coat is completely dry before applying the second.

Enhance Your Outdoor Space with Driftwood Gray Deck Stain

Maintenance Tips

A properly stained deck requires minimal maintenance, but keeping it in top shape will extend its lifetime and maintain its beauty.

Regular Cleaning

Regular cleaning will prevent the buildup of grime and mildew.

  • Monthly Sweeping: Helps to keep debris from sitting on the deck.
  • Bi-Annual Washing: Use a mild soap solution and rinse thoroughly.

Annual Inspection

An annual check-up can help you catch minor issues before they become big problems.

  • Look for Wear and Tear: Check for any peeling or fading.
  • Touch-ups: Address any small areas that may need a new coat of stain.

Long-Term Care

For long-term maintenance, occasionally resealing the deck can add extra protection and prolong the life of your stain.

  • Reapply Sealant: Every 2-3 years, apply a sealant to add an extra layer of protection.
  • Furniture Care: Use protective pads under heavy furniture to prevent scratches.

Enhancing Your Space Further

Once your deck is beautifully stained, you can think about other ways to enhance your outdoor space.

Furniture Selection

Choose furniture that complements the driftwood gray look. Neutral colors, such as beige or white, often work well.

Lighting

Outdoor lighting can drastically improve the ambiance of your space. Consider options like string lights, lanterns, or solar pathway lights.

Plants and Decor

Adding plants and decor can make your space more inviting.

  • Potted Plants: Go for a mix of large and small pots for visual interest.
  • Outdoor Rugs: Rugs can add a cozy feel to your deck.
  • Throw Pillows: Choose durable, weather-resistant fabrics.

Final Thoughts

Enhancing your outdoor space with driftwood gray deck stain can offer both practical benefits and aesthetic appeal. It’s a versatile choice that suits many styles and can transform your backyard into a beautiful, inviting retreat. By following these guidelines on preparation, staining, and maintenance, you can enjoy a stunning, long-lasting deck for years to come.

If you’re still contemplating whether driftwood gray is the right choice for your outdoor space, think about the timeless elegance it brings and the protection it offers. Moreover, consider how this choice can harmonize with your overall outdoor decor. The result is a perfect blend of beauty and durability that not only elevates your space but also provides a haven for countless cherished moments.

Filed Under: Driftwood Ideas Tagged With: Deck Stain, DIY, Driftwood Gray, home decor, Outdoor Space

Driftwood Grout White Subway Tile

September 26, 2024 by admin

Have you ever wondered how to achieve a timeless yet contemporary look in your kitchen or bathroom? If you’ve been pondering over what tiles and grout combinations to use for your home renovation, you’re in the right place. Today, we’ll be discussing the ins and outs of using Driftwood Grout with White Subway Tiles—a combination that has gained popularity for its aesthetic appeal and durability.

Why Choose White Subway Tiles?

Timeless Aesthetic

White subway tiles have been a classic choice in interior design for years. Their clean, simple lines and neutral color make them a versatile option that can blend seamlessly into various design styles, from traditional to modern.

Easy to Clean

One of the main reasons homeowners gravitate towards white subway tiles is their ease of maintenance. These tiles can be easily wiped down, ensuring that your space remains spotless with minimal effort.

Cost-Effective

Another advantage is the cost. White subway tiles are generally affordable and available at most home improvement stores, making them an excellent option for budget-conscious projects.

The Role of Grout in Tile Installation

Structural Integrity

Grout plays a crucial role in tile installation, helping to hold the tiles in place and prevent them from shifting. It fills the spaces between tiles, ensuring a stable and durable surface.

Aesthetic Value

Beyond its functional role, grout also has a significant impact on the overall look of your tiles. The color of grout can either blend seamlessly with the tiles or create a striking contrast, depending on the desired effect.

Driftwood Grout White Subway Tile

What Is Driftwood Grout?

Unique Color Tones

Driftwood grout is a popular choice for those looking to add a subtle, earthy tone to their tiling. The color resembles natural driftwood, offering a soft grayish-brown hue that can enhance the aesthetic of your tiles.

High-Quality Material

Typically composed of high-quality materials, driftwood grout is known for its durability and longevity. It’s resistant to cracking and shrinking, making it an ideal choice for both kitchens and bathrooms.

Why Use Driftwood Grout with White Subway Tiles?

Contrast and Depth

One of the primary reasons to use driftwood grout with white subway tiles is the contrast it provides. The soft, earthy tones of the driftwood grout bring out the crisp, clean lines of the white tiles, adding depth and dimension to your space.

Versatility

This combination is incredibly versatile and works well with a variety of design themes. Whether you’re aiming for a rustic, farmhouse look or a sleek, modern aesthetic, driftwood grout with white subway tiles can meet your design needs.

Driftwood Grout White Subway Tile

Installation Guide

Materials Needed

ItemPurpose
White Subway TilesMain tiling material
Driftwood GroutFills gaps and provides aesthetic contrast
Tile AdhesiveSecures tiles to the surface
Grout FloatUsed to apply grout
SpongeCleans excess grout from tiles
Tile CutterCuts tiles to size
SpacersEnsures even spacing between tiles
SealantProtects grout and tiles

Step-by-Step Instructions

  1. Preparation: Ensure the surface where you plan to install the tiles is clean and dry. Measure the area to determine how many tiles you’ll need.

  2. Applying Tile Adhesive: Spread tile adhesive evenly on the surface using a notched trowel. Place the white subway tiles onto the adhesive, pressing firmly.

  3. Using Spacers: Insert spacers between the tiles to ensure even spacing. Allow the adhesive to set for at least 24 hours.

  4. Mixing Driftwood Grout: Prepare the driftwood grout according to the manufacturer’s instructions. Mix until you achieve a consistent, smooth texture.

  5. Applying Grout: Use a grout float to apply the grout, pressing it into the spaces between tiles. Make sure to cover all gaps.

  6. Cleaning Excess Grout: After applying the grout, use a damp sponge to wipe away any excess from the surface of the tiles. Be careful not to remove grout from the gaps.

  7. Sealing: Once the grout has cured, apply a sealant to protect both the grout and tiles. This step is crucial for areas exposed to moisture, like kitchens and bathrooms.

Maintenance Tips

Regular Cleaning

Regular cleaning is essential to maintain the aesthetic appeal and durability of your tiles and grout. Use a mild detergent and clean water to wipe down the tiles and grout lines.

Immediate Stain Removal

Driftwood grout, although durable, can still stain if exposed to certain substances. Clean up any spills immediately to prevent stains from setting.

Re-Sealing

Over time, the sealant on your grout may wear off. It’s recommended to re-seal your grout every 1-2 years, depending on the amount of wear and tear.

Frequently Asked Questions

Can I use Driftwood Grout with other types of tiles?

Yes, driftwood grout can be used with various types of tiles, including ceramic, porcelain, and natural stone. Its versatile color complements a wide range of tile styles and colors.

Is Driftwood Grout suitable for high-moisture areas?

Absolutely! Driftwood grout is highly durable and resistant to moisture, making it an excellent choice for bathrooms and kitchens.

How easy is it to repair Driftwood Grout?

Repairing driftwood grout is relatively straightforward. If you notice any cracks or gaps, simply remove the damaged grout and apply new grout in its place.

Will Driftwood Grout change color over time?

High-quality driftwood grout is designed to maintain its color over time. However, applying a sealant can further protect against discoloration.

Comparing Driftwood Grout with Other Grout Colors

Grout ColorAdvantagesDisadvantages
Driftwood GroutAdds warmth, natural aesthetic, versatileMay not suit all color schemes
White GroutBlends effortlessly with white tiles, crisp lookProne to showing stains quickly
Black GroutHigh contrast, modern lookCan make spaces feel smaller
Gray GroutNeutral, works with most color schemesLess striking than driftwood

Design Inspiration

Modern Minimalism

For a sleek, modern look, pair white subway tiles and driftwood grout with stainless steel appliances and minimalist fixtures. The neutral tones will enhance the modern aesthetic.

Rustic Farmhouse

Create a cozy, rustic feel by combining this tile and grout combination with wooden elements and vintage accessories. The driftwood grout complements natural wood beautifully.

Coastal Chic

Achieve a breezy, coastal vibe by pairing these tiles with light blue or seafoam green accents. The driftwood grout will evoke the natural beauty of driftwood on the beach, adding to the overall theme.

Conclusion

Choosing the right tile and grout combination can drastically alter the look and feel of your space. Driftwood grout with white subway tiles offers a versatile, durable, and aesthetically pleasing option for various design styles. Whether you’re updating your kitchen, bathroom, or any other area of your home, this combination is sure to provide that perfect balance of timeless elegance and contemporary flair. Happy renovating!

Filed Under: Driftwood Ideas Tagged With: Driftwood Grout, home decor, Interior Design, Tiling, White Subway Tile

Driftwood Wind Chime

September 24, 2024 by admin

Have you ever thought about how you can bring a touch of the serene and natural beauty of the beach right into your home? Imagine the gentle sound of the wind blending with the unique allure of driftwood, creating an enchanting melody and a soothing atmosphere. Crafting a driftwood wind chime might just be the perfect project for you to attempt.

Driftwood Wind Chime

What is Driftwood?

Driftwood refers to wood that has been washed onto the shore by waves. It could come from fallen trees, broken branches, or even wooden objects lost at sea. Over time, the elements weather the wood, giving it a smooth and unique texture.

Benefits of Using Driftwood

Driftwood not only boasts a rustic and natural aesthetic but also has ecological benefits. It’s a form of recycling, giving life to pieces that might otherwise remain waste material. Driftwood is often used in various DIY projects because of its unique appearance and durability.

Why Choose a Driftwood Wind Chime?

Creating a driftwood wind chime allows you to embrace creativity while crafting something that brings a natural and soothing sound into your space. It’s a great way to add a touch of coastal charm to your home or garden.

Aesthetic Appeal

Driftwood wind chimes have a unique beauty that blends well with various styles of decor. Whether you prefer a more rustic, bohemian, or minimalist look, driftwood can adapt beautifully to your design preferences.

Relaxing Ambient Sound

The gentle clinking and rustling of the wind chime can create a relaxing atmosphere. This sound can be reminiscent of the beach, making your space feel more serene and tranquil.

Personal Satisfaction

Crafting your own wind chime provides a sense of achievement. It allows you to put a personal touch on your decor and showcases your creativity and skills.

Materials Needed

Before you begin, gather all the necessary materials. Here’s a table to help you organize your checklist:

MaterialDescription
DriftwoodVarious sizes and shapes, preferably with holes or pre-drilled ones
String or WireDurable strings, twines, or wire to hang the driftwood pieces together
ScissorsTo cut the string or twine
HooksS-hooks or eye screws for larger driftwood pieces
Beads or ShellsOptional decorative elements to add flair
DrillFor making holes in driftwood pieces if needed
SandpaperTo smoothen the edges of the driftwood pieces
Clear SealantProtects the wood from further weathering (optional)

Step-by-Step Guide to Making a Driftwood Wind Chime

Building a driftwood wind chime is an enjoyable project that might take a couple of hours, depending on the complexity and the design. Here’s a detailed guide to assist you.

Step 1: Collecting Driftwood

Collect various pieces of driftwood. You can find them on beaches, riversides, or purchase them from craft stores. Look for pieces of different lengths and thicknesses to add variety to your wind chime.

Step 2: Preparing the Driftwood

Clean the driftwood thoroughly to remove any sand, dirt, or salt. Use a brush and water if needed. Let them dry completely before proceeding. You can use sandpaper to smooth out any rough edges or splinters.

Step 3: Drilling Holes

If your driftwood pieces don’t already have holes, you’ll need to drill them. Carefully drill small holes at the points where you want to attach the string. Make sure the holes are evenly spaced for balance.

Step 4: Assembling the Pieces

Start arranging your driftwood pieces in a sequence that you find visually appealing. Arrange them from largest to smallest, or randomly, based on your preference. Cut strings or wires to the required lengths.

Step 5: Attaching the String or Wire

Tie the string or wire through the holes, knotting securely. Attach additional pieces such as beads or shells if desired. Ensure the strings are of appropriate length and the knots are tight to avoid the chime falling apart.

Step 6: Final Touches

Attach a larger piece of driftwood horizontally at the top to act as the support. Ensure all the hanging pieces are balanced well. Apply a clear sealant to protect the driftwood from further weathering if you’re placing it outdoors.

Step 7: Hanging Your Chime

Attach a hook or eye screw to the top piece, and your driftwood wind chime is ready to hang. You can place it in your garden, on your porch, or even indoors near a window where it can catch a soft breeze.

Driftwood Wind Chime

Creative Ideas and Variations

There are countless ways to personalize your driftwood wind chime. Here are some creative ideas to consider:

Adding Unique Elements

Incorporate other natural elements such as sea glass, shells, or pebbles. These can add a splash of color and different textures to your chime.

Using Colored Threads

Instead of plain string or wire, you can use colored threads that complement your home’s decor. This adds a subtle yet significant visual appeal.

Experimenting with Shapes and Sizes

Not all driftwood pieces need to be standard sizes. Play around with larger and smaller pieces, round or flat shapes, and create an interesting visual clatter.

Personal Messages

Engrave or paint personal messages, quotes, or names on the driftwood pieces. This makes your wind chime truly unique and personal.

Maintenance and Care

To keep your driftwood wind chime looking great and prolong its life, a little maintenance goes a long way.

Regular Cleaning

Dust or rinse the wind chime occasionally to keep it clean. If it’s outdoor, a gentle rinse with water helps remove any built-up dirt or salt.

Protecting from Extreme Weather

If the wind chime is placed outdoors, consider protecting it from extreme weather conditions by moving it to a sheltered spot during heavy rain or snow.

Retightening String or Wire

Over time, the knots might loosen. Periodically check and retighten any loose strings or wires to prevent the chime from falling apart.

Sustainability and Ethical Considerations

When collecting driftwood, it’s essential to consider the environmental impact. Ensure you’re gathering materials responsibly and not disturbing wildlife habitats.

Responsible Collection

Collect driftwood from areas where it is abundant and not part of protected environments. Avoid taking wood from habitats that serve as shelters for wildlife.

Eco-Friendly Materials

Opt for eco-friendly materials like natural fibers and non-toxic sealants. This reduces the environmental footprint of your craft project.

Supporting Local Artisans

You can also purchase driftwood or related materials from local artisans who sustainably gather and sell such items. This supports local businesses and promotes ethical sourcing practices.

Troubleshooting Common Issues

Sometimes, creating a driftwood wind chime might pose a few challenges. Here are potential issues and their solutions:

Uneven Balancing

If your wind chime isn’t hanging straight, check the lengths of the strings and the points of attachment. Adjust them until the chime hangs evenly.

Fragile Driftwood

If any driftwood pieces are too fragile, avoid using them or reinforce them with a sealant. If broken pieces occur, replace them with sturdier ones.

Rusting Wire

If you used metal wire and it starts rusting, consider replacing it with rust-resistant alternatives or natural fibers like jute or hemp.

The Beauty of Driftwood Wind Chimes

Creating your driftwood wind chime is not only a beautiful addition to your home but also a fulfilling project that connects you with nature. The soft melodies produced by the wind chime can transform your space, adding a touch of the outdoors to your indoor environment.

Driftwood wind chimes stand out because they are crafted from materials that have been shaped by nature itself. Every piece carries a story of its journey through water and weather, adding to the charm and character of your wind chime.

Conclusion

Crafting a driftwood wind chime is a rewarding and creative endeavor that can bring a piece of the outside world into your home. From collecting driftwood to assembling the final product, every step is an opportunity to express your artistic vision. Whether you place your wind chime in a garden, on your porch, or indoors, it will serve as a constant reminder of nature’s beauty and tranquility.

By following this guide, you’ll not only have a stunning piece of decor but also a handcrafted item that provides a sense of accomplishment and peace. So go ahead, gather your materials, and start your driftwood wind chime project today. Embrace the process and enjoy the serenity it brings to your space.

Filed Under: Driftwood Ideas Tagged With: Craft Project, Driftwood, Handmade, home decor, Wind Chime

Stylish Driftwood Grey Kitchen Cabinets

September 23, 2024 by admin

Have you ever wondered how to transform your kitchen into a chic, modern space with minimal effort? Adopting the look of driftwood grey kitchen cabinets might just be your answer. Driftwood grey is gaining popularity rapidly in the world of interior design, particularly in kitchen spaces. This color exudes sophistication while maintaining a certain level of warmth and approachability, making it perfect for almost any kitchen style.

Stylish Driftwood Grey Kitchen Cabinets

What Are Driftwood Grey Kitchen Cabinets?

Driftwood grey is a soft, muted shade that often mimics the natural appearance of aged wood. When incorporated into kitchen cabinets, this color not only adds a touch of elegance but also brings a coastal, tranquil feel to the space. Unlike pure grey, driftwood grey has subtle undertones that can vary from warm to cool, allowing it to complement a wide variety of color schemes and design themes.

Characteristics of Driftwood Grey

  1. Natural Look: Mimics aged, weathered wood for a rustic yet modern feel.
  2. Versatile Undertones: Can have warm or cool undertones to match different color palettes.
  3. Soft and Muted: Provides a calm, neutral backdrop without being overpowering.

Why Choose Driftwood Grey Kitchen Cabinets?

Driftwood grey stands out because it manages to blend seamlessly with numerous styles and eras of design. Whether you’re going for a contemporary, farmhouse, or coastal interior, driftwood grey can fit right in. Additionally, this shade offers a timeless appeal, ensuring that your kitchen won’t feel outdated after a few years.

Benefits of Driftwood Grey Cabinets

BenefitDescription
Timeless AppealDriftwood grey has a classic elegance that remains stylish over time.
VersatilityMatches various design themes from modern to rustic.
Neutral BackdropMakes it easy to add pops of color through accessories.
Low MaintenanceHides smudges and fingerprints better than darker or lighter shades.

How to Incorporate Driftwood Grey Cabinets into Your Kitchen

If you’re sold on the idea of driftwood grey kitchen cabinets, here are some tips to make the most of this beautiful shade.

Pairing with Countertops

The choice of countertops can either enhance or clash with driftwood grey cabinets. Popular countertop materials that pair well include:

  • Quartz: Opt for shades of white, beige, or even a subtle marbled pattern to create a harmonious look.
  • Granite: Grey or white granite with delicate veins can match the subtle elegance of driftwood grey.
  • Butcher Block: For a rustic or farmhouse feel, butcher block countertops add warmth and contrast.

Choosing the Right Hardware

Hardware can make or break the look of your cabinets. The right handles and knobs can elevate the overall aesthetic.

  • Brushed Nickel: Complements both cool and warm undertones in driftwood grey.
  • Antique Bronze: Adds a vintage feel, ideal for rustic or farmhouse kitchens.
  • Matte Black: Provides a modern and sleek contrast.

Backsplash Ideas

A well-chosen backsplash can tie together the entire kitchen design. Some ideas include:

  • Subway Tiles: Classic white or light grey subway tiles offer a clean, timeless look.
  • Mosaic Tiles: Incorporate various shades of grey, white, and blue for a coastal vibe.
  • Natural Stone: Adds texture and enhances the natural look of driftwood grey.

Flooring Options

The right flooring will ensure a cohesive design. Consider the following:

  • Hardwood: Warmer tones can soften the coolness of driftwood grey.
  • Tile: Large-format tiles in neutral colors can emphasize the modernist appeal.
  • Vinyl Planks: For a budget-friendly yet stylish option, vinyl planks in a natural wood finish work well.

Maintenance and Care for Driftwood Grey Cabinets

Driftwood grey cabinets are relatively low maintenance, but understanding how to care for them will preserve their beauty.

Cleaning Tips

  • Regular Dusting: Use a microfiber cloth to regularly remove dust and minor spills.
  • Mild Cleaners: Stick to mild, non-abrasive cleaners to avoid damaging the finish.
  • Avoid Moisture: Ensure to dry any spills promptly to avoid water stains and damage.

Preventive Measures

  • Use Cabinet Liners: Protect your cabinet interiors from spills and stains.
  • Add Corner Protectors: Prevent chips and cracks on the edges.

Stylish Driftwood Grey Kitchen Cabinets

Case Studies: Real Homes with Driftwood Grey Cabinets

To give you a better idea of how driftwood grey cabinets can transform a kitchen, let’s look at some inspiring real-life examples.

Case Study 1: Modern Coastal Kitchen

In this kitchen, the homeowners combined driftwood grey cabinets with white quartz countertops and a blue mosaic tile backsplash. The result is a bright, airy space with a coastal vibe.

Case Study 2: Rustic Farmhouse Kitchen

Here, driftwood grey cabinets were paired with butcher block countertops and a subway tile backsplash. Antique bronze hardware further emphasized the rustic feel, creating a cozy, inviting kitchen.

Frequently Asked Questions (FAQs)

Can driftwood grey cabinets work in a small kitchen?

Absolutely! Driftwood grey can make a small kitchen feel more open and airy, thanks to its neutral and soft tone. Just ensure your lighting is sufficient to keep the space bright.

Are driftwood grey cabinets suitable for modern kitchens?

Yes, driftwood grey cabinets can fit perfectly in modern kitchens. Pair them with sleek hardware and minimalist accessories for a contemporary look.

How do I keep my driftwood grey cabinets from looking too cold?

Incorporate warm elements like wooden countertops, warm-toned backsplashes, or bronze hardware to balance out the cool undertones.

Can driftwood grey cabinets be customized?

Most cabinet manufacturers offer customization options, allowing you to choose the exact shade, finish, and hardware to suit your preferences.

Conclusion

Choosing driftwood grey kitchen cabinets brings a unique blend of elegance and versatility to your home. The soft, muted tones can adapt to various styles, from modern to rustic, ensuring your kitchen is always in vogue. With the right pairing of countertops, hardware, backsplash, and flooring, your kitchen can truly become a stylish sanctuary. Whether you are renovating your current space or designing a new kitchen from scratch, driftwood grey cabinets can provide the perfect foundation for a beautiful and functional kitchen.

Take the plunge and opt for driftwood grey kitchen cabinets – your future self will thank you for this timeless and stylish choice.

Filed Under: Driftwood Ideas Tagged With: Cabinets, Driftwood Grey, home decor, Interior Design

Crafting a Beautiful Driftwood Wreath

September 22, 2024 by admin

Crafting a Beautiful Driftwood Wreath

Have you ever wondered how to bring a touch of coastal charm into your home? If so, making a driftwood wreath might just be the perfect project for you. Not only does it allow you to get creative, but it also brings a bit of nature’s beauty indoors. This guide will walk you through everything you need to know about crafting your own stunning driftwood wreath.

Crafting a Beautiful Driftwood Wreath

Why Choose Driftwood for Your Wreath?

Driftwood has a natural, rustic charm that captivates many. Its unique textures and weathered appearance lend themselves perfectly to a variety of home decor projects, especially wreaths. Another perk is that driftwood is environmentally friendly, as it’s a form of recycling natural wood that has been smoothed and shaped by water.

The Benefits of Using Driftwood

Using driftwood is not only environmentally conscious but also budget-friendly if you gather it yourself. Here’s why you’ll love crafting with driftwood:

  • Sustainability: Driftwood is a renewable material, making it an eco-friendly option.
  • Unique Aesthetics: Each piece is distinct, adding character and uniqueness to your wreath.
  • Cost-effective: You can often find driftwood on beaches, making it a cost-effective choice.
  • Durability: Driftwood is naturally strong and resistant to decay.

Collecting Your Driftwood

Before you begin crafting, you’ll need to gather your materials. While you can purchase driftwood online or at craft stores, collecting it yourself adds an extra layer of personalization to your wreath.

Where to Find Driftwood

Driftwood can be found on the shores of oceans, lakes, and rivers. It’s often scattered along the high tide mark, where it washes up after storms. Here are some pointers for collecting driftwood:

  • Local Beaches: Coastal areas are rich sources of driftwood, especially after a storm.
  • Rivers and Lakes: Inland bodies of water can also provide beautiful pieces.
  • Safety First: Wear gloves and check for critters hidden within the wood.
  • Respect Nature: Only take what you need and make sure it’s legal to collect driftwood in the area.

Selecting the Right Pieces

When collecting driftwood for your wreath, you’ll want to look for pieces that have a consistent size and similar tone. Here’s what to consider:

  • Sizes: Aim for pieces that are 3-6 inches long and relatively flat for easy assembling.
  • Shapes: Choose a mix of straight and curved pieces to add texture and variety.
  • Conditions: Ensure the wood is dry, free from rot, and not too fragile.

Preparing Your Driftwood

Once you’ve gathered your driftwood, it’s crucial to clean and preserve it before beginning your project.

Cleaning Your Driftwood

Driftwood often comes with dirt and debris that need to be cleaned away. Here’s a step-by-step guide for cleaning your driftwood:

  1. Rinse: Use a hose or large bucket to rinse away loose dirt.
  2. Soak: Soak the wood in a mixture of water and mild bleach (one part bleach to nine parts water) for 24 hours. This helps disinfect the wood.
  3. Scrub: Use a brush to remove any stubborn debris.
  4. Rinse Again: Thoroughly rinse the wood to remove any bleach residue.
  5. Dry: Let your driftwood dry completely. This can take several days, so place it in a sunny, well-ventilated area.

Preserving Your Driftwood

To ensure your wreath lasts, consider applying a wood preservative to protect against bugs and decay. Natural wood oils like teak oil can also bring out the grain and add a slight sheen. Apply according to the product instructions and let dry completely.

Tools and Materials Needed

Gather all your materials and tools before starting your project. Here’s what you’ll need:

MaterialsTools
Driftwood piecesHot glue gun
Wire wreath formGlue sticks
Floral wireWire cutters
Ribbon or string (optional)Scissors
Decorative items (optional)Needle-nose pliers

Crafting a Beautiful Driftwood Wreath

Crafting Your Driftwood Wreath

Now that you have everything ready, it’s time to start crafting your driftwood wreath. Follow these steps for a beautiful and sturdy wreath.

Building the Base

The base of your wreath can be made from a wire wreath form, which provides support and shape.

  1. Lay Out Your Design: Before gluing anything, lay out your driftwood pieces on the form to envision how you want the final wreath to look. This is your opportunity to experiment with different layouts.
  2. Attaching Driftwood: Begin attaching the driftwood pieces to the form using the hot glue gun. Apply glue generously to each piece for a strong hold.
  3. Wiring for Extra Support: For larger pieces, you may need additional support. Secure these pieces with floral wire, wrapping it around the wreath form and the driftwood.
  4. Layering Pieces: Continue to build layers by overlapping the pieces. This adds depth and fullness to your wreath. Make sure there are no visible gaps.

Adding Decorative Elements

While a driftwood wreath is beautiful on its own, you can add decorative elements to suit your style or seasonal themes.

  1. Flowers and Greenery: Artificial flowers, succulents, or leaves add a pop of color. Attach these with hot glue or floral wire.
  2. Seashells and Stones: Enhance the coastal vibe with natural elements like seashells and small stones.
  3. Ribbon and Bows: For a festive touch, consider adding a bow or streamers. Choose colors that complement your driftwood.
  4. Personal Touches: Add any other personal touches that make the wreath uniquely yours, such as small ornaments or charms.

Final Steps

Once you’ve glued and wired all your pieces and decorations, let everything dry completely. Check for any loose pieces and secure them with additional glue or wire as needed.

Hanging Your Wreath

To display your beautiful new wreath:

  1. Choose a Location: Decide where you want to hang your wreath. It could be on your front door, a window, or a wall.
  2. Hanging Mechanism: Use a sturdy ribbon, string, or wire to hang the wreath. If it’s heavy, ensure whatever you use is strong enough to support its weight.
  3. Adjust and Secure: Once hung, adjust any pieces that might have shifted to ensure everything looks perfect.

Maintenance Tips

To keep your driftwood wreath looking great, consider the following maintenance tips:

  • Indoor Display: If possible, display your wreath indoors to protect it from the elements.
  • Dust Regularly: Use a soft brush or cloth to dust the wreath periodically.
  • Avoid Moisture: Keep the wreath dry to prevent mold or decay.

Frequently Asked Questions

How Long Does a Driftwood Wreath Last?

A well-made and properly maintained driftwood wreath can last for many years. Keeping it indoors and away from moisture will help preserve its beauty and durability.

Can I Use Other Types of Wood?

Yes, you can use other types of wood for a wreath, but driftwood is particularly popular due to its unique appearance and texture. Ensure any wood you use is dry and treated to prevent decay.

Is It Safe to Collect Driftwood?

While collecting driftwood is generally safe, always check local regulations and guidelines. Don’t take wood from protected or environmentally sensitive areas.

Can I Use Live Plants on My Wreath?

While live plants can add a fresh and vibrant touch, they will require regular maintenance and watering, which may not be ideal for a driftwood wreath. Consider using realistic artificial plants instead.

Conclusion

Crafting a beautiful driftwood wreath is a rewarding and enjoyable project that allows you to bring a piece of nature into your home. Whether you prefer a minimalist look or a wreath brimming with decorative elements, the result is sure to be a unique and charming addition to your decor. With the steps and tips provided, you now have everything you need to create your own stunning driftwood wreath. Happy crafting!

Filed Under: Driftwood Ideas Tagged With: DIY, Driftwood, Handmade, home decor, Wreath

  • « Previous Page
  • Page 1
  • …
  • Page 11
  • Page 12
  • Page 13
  • Page 14
  • Page 15
  • …
  • Page 30
  • Next Page »

Primary Sidebar

Driftwood4us.com, is a participant in the Amazon Services LLC Associates Program, an affiliate advertising program designed to provide a means for sites to earn advertising fees by advertising and linking to amazon.com.