• Skip to main content
  • Skip to primary sidebar
  • Terms and Conditions
  • Privacy Policy
  • Contact

Driftwood 4 Us

Just About Driftwood

home decor

Driftwood Diy

July 20, 2024 by admin

Welcome to “Driftwood DIY”! If you’ve ever strolled along the beach and marveled at the beauty of weathered driftwood, this guide is for you. You’ll discover how to transform those unique, natural pieces into stunning home decor. From crafting rustic picture frames to creating one-of-a-kind wall art, the possibilities are endless with driftwood DIY projects. Get ready to bring a touch of the seaside into your home with these creative and easy-to-follow ideas. Have you ever walked along a beach and stumbled upon a piece of driftwood? There’s something incredibly enchanting about how the ocean transforms a simple piece of wood into a smooth, worn, and unique artistic canvas. If you’ve ever thought about incorporating these beautiful pieces into your home decor, then this guide on “Driftwood DIY” is for you!

Driftwood Diy

Why Choose Driftwood for DIY Projects?

Driftwood offers unrivaled charm and versatility. Not only does it possess a natural, rustic elegance, but it also carries a sense of history and adventure, having journeyed through the waterways before landing on shore. Plus, working with driftwood is a sustainable way to bring a piece of nature into your living space.

Finding and Preparing Your Driftwood

Where to Find Driftwood

You can typically find driftwood on the shores of oceans, rivers, and lakes. Walking along these bodies of water will put you in the perfect position to discover a variety of shapes and sizes of driftwood pieces suitable for various projects.

Inspect the Driftwood

Before collecting driftwood, make sure it’s dry, free of mold, and not infested with insects. Inspect each piece carefully to ensure it’s suitable for your DIY project.

Cleaning Your Driftwood

Here’s a simple, friendly guide to cleaning your driftwood:

  1. Rinse: Use fresh water to rinse off dirt and sand.
  2. Soak: Submerge the driftwood in a water and bleach solution (1 part bleach to 10 parts water) for 24 hours.
  3. Rinse Again: Rinse thoroughly to remove any bleach residue.
  4. Dry: Allow the driftwood to air dry completely, preferably in a sunny spot.

Final Touches Before Using

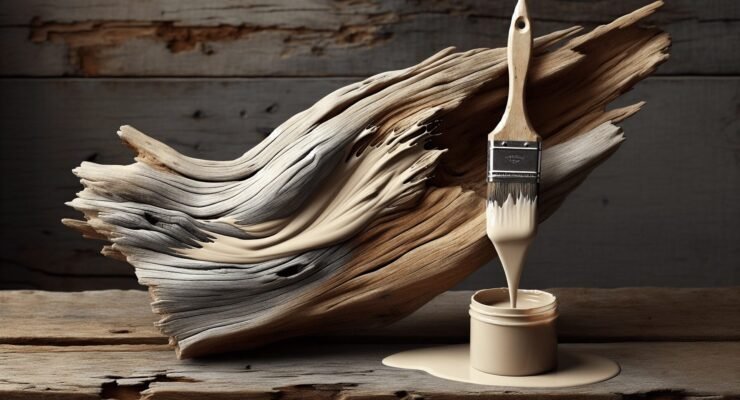
Sanding down any sharp edges and polishing the wood can also help accentuate the driftwood’s natural beauty. Optionally, you can apply a clear sealant to protect it and bring out its colors.

Easy Driftwood DIY Projects for Beginners
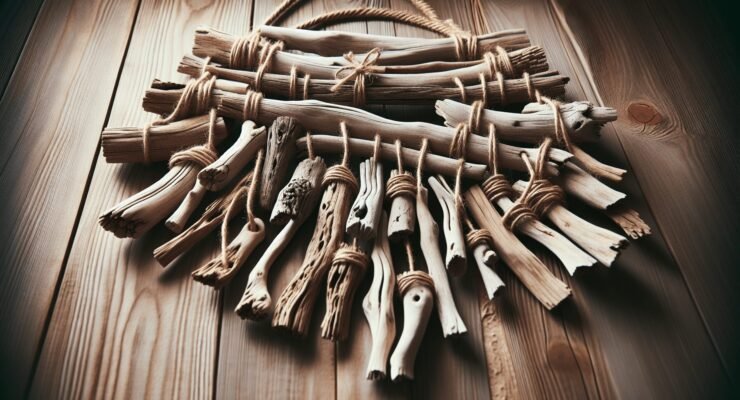
Driftwood Wall Art

Creating driftwood wall art is a fun and straightforward project. Here’s how you can make a stunning piece:

Materials Needed:

  • Driftwood pieces
  • Hot glue gun or heavy-duty glue
  • Backing board or canvas for support

Steps:

  1. Lay out your pieces on the backing board in a design you like.
  2. Once you are satisfied with the arrangement, glue each piece in place.
  3. Allow the glue to dry completely before hanging your masterpiece.

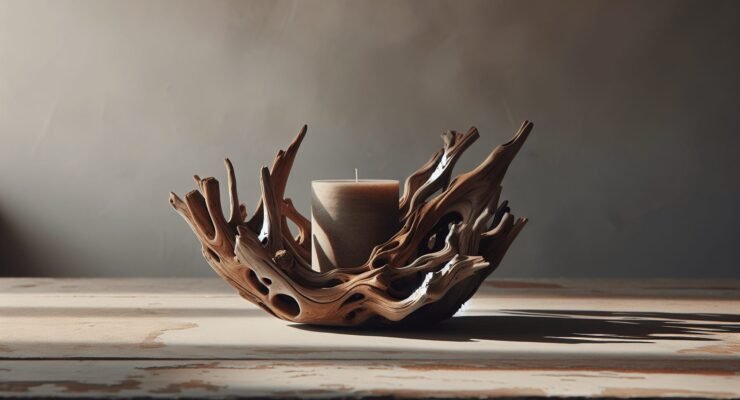
Driftwood Candle Holders

These add a lovely, rustic touch to your home decor and are quite simple to make:

Materials Needed:

  • Small, flat pieces of driftwood
  • Tea light candles
  • Drill with a spade bit

Steps:

  1. Mark the spot where you want to place the tea light.
  2. Using the drill and spade bit, carve out a hole the size of the tea light.
  3. Place the tea light candle in the hole, and you’re all set!

Advanced Driftwood DIY Projects

As you get more comfortable working with driftwood, you can tackle more complex projects that require a bit more time and expertise.

Driftwood Furniture

Creating furniture from driftwood can be incredibly rewarding. Imagine a driftwood coffee table or a rustic driftwood chair adding character to your living room.

Materials Needed:

  • Larger pieces of driftwood
  • Screws and nails
  • Power drill and screwdriver
  • Wood glue

Steps:

  1. Plan your design carefully, ensuring all pieces will create a stable structure.
  2. Securely attach the driftwood pieces using screws, nails, and wood glue.
  3. Sand down any rough edges and protect the final piece with a clear sealant.

Driftwood Lamp

A driftwood lamp can be the perfect combination of function and style.

Materials Needed:

  • Driftwood
  • Lamp kit
  • Drill
  • Strong adhesive

Steps:

  1. Choose a sturdy piece of driftwood with a stable base.
  2. Drill a hole through the driftwood for the lamp wiring.
  3. Assemble the lamp kit according to the instructions, and thread the wiring through the hole.
  4. Secure the lamp components to the driftwood using strong adhesive.
  5. Attach the light bulb and lampshade, and you’re ready to light up your space!

Driftwood Diy

Caring for Your Driftwood Creations

Dusting

Regular dusting will help maintain the beauty of your driftwood projects. Use a soft cloth or a duster.

Avoiding Moisture

While driftwood is naturally resilient, it’s best to avoid prolonged exposure to moisture to prevent mold and decay.

Touch-Up Polishing

Periodically re-apply a clear wood sealant to keep your driftwood creations looking fresh and vibrant.

Why Crafting with Driftwood is Good for You

Crafting with driftwood is not just about creating beautiful decor; it’s also an enriching experience:

Eco-Friendly

Using driftwood is a great way to incorporate sustainable practices into your craft. You’re recycling materials that have naturally found their way to the shore.

Stress-Relieving

Working with natural materials like driftwood can be an excellent way to reduce stress. The creative process allows you to express yourself and can be incredibly fulfilling.

Final Thoughts

Driftwood DIY projects offer a perfect blend of creativity, sustainability, and natural beauty. Whether you’re a beginner looking to make a centerpiece or an experienced crafter ready to tackle furniture, the possibilities are endless. Enjoy the process, and let your imagination run wild!

Happy crafting!

Filed Under: Driftwood Ideas Tagged With: crafting, Driftwood, Handmade, home decor, natural materials

How To Get Pottery Barn Driftwood Finish

July 17, 2024 by admin

Ready to transform your furniture with the charming, coastal appeal of Pottery Barn’s driftwood finish? This guide will walk you through the steps to achieve that weathered, rustic look on your own pieces, whether you’re working with new or old wood. From prepping your materials to applying the final touches, you’ll discover tips and tricks to create a beautiful and durable finish that mimics the rich texture and color of driftwood. Get ready to give your home a fresh, beachy vibe with this easy-to-follow tutorial on achieving the perfect Pottery Barn driftwood finish. Have you ever fallen in love with the timeless and rustic elegance of the Pottery Barn Driftwood finish? Whether it’s a gorgeous console table, a sophisticated dresser, or a set of driftwood frames, the unique blend of natural charm and crafty sophistication can make any furniture piece stand out. But if buying new isn’t in your budget, or you are feeling a bit crafty, don’t worry! You can achieve this beautiful finish yourself with a few simple steps and materials.

How To Get Pottery Barn Driftwood Finish

Understanding the Driftwood Finish

The driftwood finish is all about replicating the natural aging process that wood undergoes when exposed to the elements over time. It gives pieces a weathered, sun-bleached look that’s perfect for coastal and rustic décor. Before we dive into the ‘how-tos,’ it helps to understand why the driftwood finish is so enchanting.

Benefits of Driftwood Finish

Beyond its aesthetic appeal, the driftwood finish comes with several benefits:

  • Timeless Appeal: It fits various décor styles, from coastal to rustic to shabby chic.
  • Versatility: Works on different types of wood and a variety of furniture pieces.
  • DIY Friendly: You can achieve professional results with basic tools and materials.

Materials You’ll Need

Gathering the right materials is the first step to achieving the Pottery Barn driftwood finish. Here’s what you’ll need to get started:

MaterialPurpose
Sandpaper (120 and 220 grit)For sanding the wood surface
White vinegar and steel woolTo create the aging solution
Paintbrushes and ragsFor applying varnish and stains
Gray stain and whitewash paintFor achieving the signature driftwood color
Clear matte finish sealantTo protect the finished piece
Painter’s tapeTo protect areas not intended for finishing

Preparing Your Furniture

Preparation is key to ensure that the finish adheres well and looks fantastic. Here’s a step-by-step guide on how to prepare your furniture piece.

Clean the Surface

Start by cleaning the surface of your furniture thoroughly. Remove any dirt, grease, or old paint using a mixture of water and mild soap. Make sure the wood is completely dry before moving on to the next step.

Sand the Surface

Using 120-grit sandpaper, sand the entire surface of the furniture lightly. This ensures that the wood will absorb the stain evenly. Once you’ve completed the initial sanding, switch to 220-grit sandpaper for a smoother finish. Always sand in the direction of the wood grain to avoid scratches.

Creating the Aging Solution

A significant part of the driftwood effect comes from the aged look of the wood. You can easily create an aging solution at home using white vinegar and steel wool.

Making the Solution

  1. Prepare the Steel Wool: Take a piece of steel wool (preferably the finest grade) and tear it into smaller pieces.
  2. Combine with Vinegar: Place the steel wool pieces into a jar and pour white vinegar over them, ensuring they are fully submerged.
  3. Let it Sit: Secure the jar with a lid and let the mixture sit for at least 24 hours. The vinegar will break down the steel wool, creating a dark, iron-infused solution.

Applying the Aging Solution

Once your solution is ready:

  1. Strain the Solution: Use a coffee filter or cheesecloth to strain out any remaining steel wool fragments.
  2. Apply to Wood: Using a paintbrush or a rag, generously apply the solution to the wood. Let it dry completely. The wood should take on a naturally aged, grayish tint.

How To Get Pottery Barn Driftwood Finish

Achieving the Driftwood Color

Now comes the fun part—layering stains and washes to achieve the perfect driftwood look.

Applying Gray Stain

  1. Choose the Right Stain: Select a gray wood stain that closely resembles the driftwood color.
  2. Apply the Stain: Using a paintbrush, apply the gray stain evenly across the surface. Make sure to follow the wood grain.
  3. Wipe Excess: After about 5-10 minutes, use a clean rag to wipe off any excess stain. Let it dry for at least 24 hours.

Whitewashing the Wood

The whitewash step adds to the weathered essence of driftwood.

  1. Dilute the Paint: Mix white latex paint with water at a ratio of approximately 1:1 to create a whitewash.
  2. Apply Thinly: Using a paintbrush, apply a light coat of the whitewash over the stained wood. Allow it to sit for a few minutes before wiping off any excess with a clean rag.
  3. Layer if Needed: If the whitewash is too light, apply another thin layer until you achieve the desired effect.

Sealing the Finish

To protect your newly finished piece and give it a long-lasting appeal, it’s crucial to apply a sealant.

Choosing the Right Sealant

For a natural look, opt for a clear matte finish sealant. It will protect the wood without making it overly glossy.

Application Steps

  1. Prepare: Ensure your piece is clean and free of dust.
  2. Apply Sealant: Using a clean brush, apply the sealant evenly across the surface.
  3. Multiple Coats: For best results, apply 2-3 coats, allowing each coat to dry thoroughly according to the manufacturer’s instructions.

Troubleshooting Common Issues

Even with the best preparations, you might encounter a few issues along the way. Here’s how to troubleshoot common problems:

IssueSolution
Stain Isn’t Absorbing EvenlySand the surface more thoroughly to open up the wood grain.
Finish Looks Too DarkLightly sand the surface and reapply a diluted whitewash.
Blotchy AppearanceApply a pre-stain conditioner before staining.

Fixing Uneven Stain Absorption

If the stain isn’t absorbing evenly, there might be a coating or residue on the wood surface. Lightly sanding the affected areas and reapplying the stain can help improve absorption.

Adjusting the Tone

If the finish looks too dark, you can lighten it by lightly sanding and applying another layer of diluted whitewash. On the contrary, if it’s too light, adding another coat of the aging solution or gray stain can darken it.

Dealing with Blotchy Results

Blotchy appearances can be minimized by using a pre-stain wood conditioner. This step ensures more even stain absorption, especially on softer woods.

Maintaining Your Driftwood Finished Furniture

To keep your driftwood-finished pieces looking their best, some regular maintenance is required.

Cleaning Tips

  • Dust Regularly: Use a soft cloth to remove dust and debris.
  • Avoid Harsh Chemicals: Clean with mild soap and water to avoid damaging the sealant.

Reapplying Sealant

Over time, the protective sealant may wear off.

  • Inspect Regularly: Check your furniture for wear and tear signs.
  • Reapply Sealant: When needed, lightly sand the surface and reapply a fresh coat of clear matte finish sealant.

Frequently Asked Questions

1. Can I use this technique on all types of wood?

While this technique works best on porous woods like pine, oak, and cedar, you can also use it on other types of wood by ensuring rigorous sanding to open up the grain.

2. How long will this finish last?

With proper care and maintenance, your driftwood finish can last many years. Regular cleaning and occasional reapplication of the sealant can keep it looking fresh.

3. Can I skip the aging solution?

The aging solution helps achieve the authentic, weathered look. While you can skip it, the results might not be as naturally textured.

4. Is it possible to reverse the driftwood finish?

Reversing this finish involves sanding down the wood and starting fresh. It can be labor-intensive but not impossible.

5. Can I use this finish on outdoor furniture?

While you can use this technique on outdoor furniture, ensure you use a weather-resistant sealant to protect it from the elements.

Conclusion

Achieving the Pottery Barn driftwood finish is a rewarding and enjoyable DIY project. Not only do you get to create a piece of furniture that’s uniquely yours, but you also imbue your home with a touch of rustic elegance that you can be proud of. With patience, the right materials, and a bit of elbow grease, you can transform any wooden piece into a stunning driftwood masterpiece.

So grab your sandpaper and brushes, and get ready to bring the beauty of driftwood into your home! Feel free to experiment and make the finish your own—after all, that’s the charm of DIY projects. Enjoy the process, and happy crafting!

Filed Under: Driftwood Ideas Tagged With: DIY, Driftwood Finish, home decor, Pottery Barn

Driftwood Benjamin Moore

July 17, 2024 by admin

You’re about to discover the timeless appeal of Driftwood by Benjamin Moore, a versatile and elegant paint shade that effortlessly brings a cozy, coastal vibe to any space. Whether you’re sprucing up your living room, refreshing your bedroom, or reimagining your kitchen cabinets, Driftwood’s subtle blend of gray and beige provides the perfect neutral backdrop. This shade harmonizes beautifully with natural elements and bold accents alike, ensuring your home remains warm and inviting. Dive into the world of Driftwood by Benjamin Moore, and watch as your spaces transform with an effortless touch of sophistication. Have you ever stood in a room and felt the need for a color transformation, something that brings a balance of sophistication and tranquility? Choosing the right paint color can be daunting, and you are certainly not alone in this quest. There are so many options out there, but you might find your match with Driftwood by Benjamin Moore. It’s a hue that has captured the attention of homeowners, interior designers, and DIY enthusiasts alike. Let’s dive into the world of Driftwood Benjamin Moore—a harmonious blend that could be exactly what your space needs.

Driftwood Benjamin Moore

What Is Driftwood Benjamin Moore?

Driftwood by Benjamin Moore is a paint color that has been gaining popularity due to its versatility and unique shade. This soft, neutral color belongs to the beige and gray family, often referred to as “greige.” It offers a perfect balance between warm beige and cool gray, making it a sophisticated and adaptable choice for your home.

The Color Composition

Driftwood has a unique undertone that can adapt to various lighting conditions, enhancing its flexibility in different rooms. Its RGB (Red, Green, Blue) values are 198, 190, and 176, respectively, and it has a LRV (Light Reflectance Value) of 42.99. The LRV signifies how much light a color reflects; the higher the number, the lighter the color.

ComponentValue
Red198
Green190
Blue176
LRV42.99

Driftwood’s understated elegance makes it a great backdrop for various design elements, whether you prefer modern minimalism or cozy, traditional decor.

Why Choose Driftwood Benjamin Moore?

When selecting a paint color, you’re making a decision that will set the tone for your space, influence your mood, and complement your decor. Let’s explore why Driftwood Benjamin Moore could be the perfect choice for your next project.

Versatility

One of the strongest attributes of Driftwood is its versatility. This color can seamlessly fit into various spaces, whether it’s a living room, bedroom, kitchen, or bathroom. Its neutral tone makes it compatible with an array of color palettes and decor styles.

Mood Enhancement

Colors can significantly impact how you feel in a room. Driftwood’s balanced tones can create a calming and relaxing environment, making your home a sanctuary. Imagine winding down after a long day in a Driftwood-painted room—it’s like being cradled by the gentle hues of nature.

Timeless Elegance

Trends come and go, but neutral colors like Driftwood have a timeless appeal. Choosing this shade ensures that your space remains stylish and inviting for years to come.

Ideal Pairings

To create a cohesive and visually appealing space, it’s vital to consider complementary colors and design elements. Driftwood pairs wonderfully with a range of colors and materials.

Color Coordinations

Driftwood can be paired with both warm and cool colors to create a harmonious look. Here are some excellent options:

  • White: Creates a crisp, clean contrast.
  • Soft Blues: Adds a serene touch.
  • Dark Browns: Provides depth and richness.
  • Greens: Brings in a natural, outdoor feel.

Material Pairings

Driftwood’s neutral palette makes it suitable for a variety of materials:

  • Wood: Both light and dark woods bring out different facets of Driftwood.
  • Metal: Brushed nickel or brass fixtures look striking against Driftwood walls.
  • Fabric: Soft linens and velvets in complementary colors boost the room’s coziness.
MaterialEffect
WoodEnhances warmth and natural feel
MetalAdds contrast and modern touch
FabricBoosts comfort and coziness

Application Tips

Getting the best results from Driftwood Benjamin Moore involves some preparation and technique. Here are a few tips to ensure your project turns out beautifully.

Surface Preparation

Before you start painting, ensure your walls are clean and free from any imperfections. Sand rough areas and apply a primer if necessary, especially if you’re covering a dark color or a wall with stains.

Tools and Techniques

Using the right tools can make a significant difference. High-quality brushes and rollers designed for interior painting will give you a smoother finish. For edges and corners, consider using painter’s tape to achieve clean lines.

Multiple Coats

While Driftwood provides excellent coverage, applying at least two coats can enhance its depth and richness. Allow adequate drying time between coats to ensure a flawless finish.

Driftwood Benjamin Moore

Real-life Examples

Seeing is believing, and there’s nothing like real-life examples to spark your creativity. Let’s look at how Driftwood has been used in various spaces.

Living Room

In a living room, Driftwood can offer a neutral canvas that allows your furniture and accessories to shine. Pair it with a plush, dark sofa and light drapes to create a cozy yet sophisticated ambiance.

Bedroom

For a bedroom, Driftwood brings a sense of tranquility. Complement it with soft bedding in blues or greens, and add wooden nightstands for a touch of nature.

Kitchen

Driftwood in the kitchen can be groundbreaking. It makes cabinets stand out, whether they are white, dark wood, or even a bold color like navy blue.

Bathroom

In the bathroom, Driftwood creates a spa-like atmosphere. Pair it with white tiles and green foliage for a refreshing, clean look.

RoomUse-Case Example
Living RoomNeutral backdrop with plush, dark furniture
BedroomTranquil, paired with soft blues and wooden accents
KitchenEnhances cabinets, works well with navy and white
BathroomSpa-like atmosphere with white tiles and green foliage

Comparisons with Other Neutrals

While Driftwood stands out, comparing it with other popular neutral shades can help you decide if it’s the right choice for you.

Driftwood vs. Revere Pewter

Revere Pewter by Benjamin Moore is another popular greige. It’s slightly darker and cooler than Driftwood, offering a more pronounced gray tone. Driftwood, on the other hand, provides a warmer feel.

FeatureDriftwoodRevere Pewter
UndertoneWarmerCooler
LRV42.9955.05
Suitable RoomsVersatile, cozy spacesModern, sleek areas

Driftwood vs. Edgecomb Gray

Edgecomb Gray is lighter and airier compared to Driftwood. It has a higher LRV (63.09), making it a better option if you want a brighter, more open feel.

FeatureDriftwoodEdgecomb Gray
UndertoneBalanced warm and coolSlightly warm
LRV42.9963.09
Suitable RoomsCozy, sophisticated areasAiry, spacious rooms

Customer Reviews

When considering a new paint color, it’s always a good idea to hear from others who have used it. Here are some insights from people who have embraced Driftwood in their homes.

Positive Feedback

Many customers rave about Driftwood’s versatility and timeless appeal. They appreciate how it complements various decor styles and brings a sense of calm to their spaces.

Constructive Criticism

A few users noted that lighting conditions significantly impact how Driftwood appears. It’s essential to test the paint in your home’s lighting before committing to ensure it meets your expectations.

User Tips

  • Use larger paint swatches to see how Driftwood looks in different rooms.
  • Combine it with white trim for a crisp, clean look.
  • Experiment with accent colors to create your desired mood.

Environmental Impact

Benjamin Moore is committed to sustainability, and Driftwood is no exception. The company offers paint options with low VOC (Volatile Organic Compounds), ensuring a healthier environment for your family and the planet.

VOC Levels

Low VOC paints release fewer harmful chemicals into the air, making them a better choice for indoor air quality. Benjamin Moore’s eco-friendly paints, including Driftwood, meet stringent environmental standards.

Sustainable Practices

Benjamin Moore engages in sustainable practices, from sourcing raw materials to manufacturing processes. By choosing their paints, you’re not only enhancing your home but also contributing to environmental preservation.

Final Thoughts

Driftwood Benjamin Moore is more than just a paint color; it’s a versatile, timeless choice that can transform any space into a sophisticated sanctuary. Whether you’re revamping your living room, bedroom, kitchen, or bathroom, Driftwood offers a balanced, elegant backdrop that enhances your decor and elevates your mood.

So, are you ready to give Driftwood a try? With its unique blend of warm and cool undertones, this color promises to bring a sense of balance and tranquility to your home. Experiment with different pairings and see how Driftwood by Benjamin Moore could be the perfect fit for your space. Happy painting!

Filed Under: Driftwood Ideas Tagged With: Benjamin Moore, Color, Driftwood, home decor, Paint

Driftwood Birdhouse

July 16, 2024 by admin

You’re about to discover the charm of creating your very own Driftwood Birdhouse. In this article, you’ll learn how to transform found pieces of driftwood into a unique and inviting haven for birds. Not only is this craft project a fantastic way to recycle natural materials, but it also adds a touch of rustic beauty to your outdoor space. Whether you’re an experienced DIY enthusiast or trying your hand at crafting for the first time, you’ll find that building a driftwood birdhouse is both fun and rewarding. So, gather your supplies, let your creativity flow, and prepare to welcome some feathered friends into your backyard. Ever thought about adding a touch of coastal charm to your garden or backyard? Building a driftwood birdhouse is a fantastic way to introduce a bit of seaside magic into your outdoor space. Don’t worry if you’ve never built anything before – this guide will walk you through the process step-by-step.

Driftwood Birdhouse

What is Driftwood?

Driftwood refers to wood that has been washed onto the shore by tides, waves, or winds. This weathered wood has a unique texture and appearance, which makes it perfect for DIY projects, especially birdhouses.

Understanding Driftwood Characteristics

Driftwood tends to be lightweight and has a seasoned patina that you won’t find in freshly cut wood. The natural wear and tear give it a rustic, organic look that birds and nature enthusiasts love.

Benefits of Using Driftwood

Using driftwood for your birdhouse not only creates an aesthetically pleasing structure but also promotes recycling and sustainability. By repurposing materials found along the shore, you’re giving new life to what could have been waste.

Tools and Materials

Before you begin, gather your tools and materials. Having everything on hand will make the process smoother and more enjoyable.

Required Tools

Here’s a list of tools you might need:

ToolPurpose
Saw (hand or electric)Cutting driftwood to size
DrillMaking holes for screws and bird entrance
ScrewdriverAssembling the birdhouse
SandpaperSmoothing rough edges
Measuring tapeAccurate measurements
PencilMarking wood before cutting

Materials Needed

You’ll need the following materials:

MaterialQuantity
Driftwood piecesVaries depending on the size of the birdhouse
Screws or nailsEnough to assemble the birdhouse
Wood glueFor added stability
Birdhouse accessoriesHooks, perches, and waterproof sealant

Designing Your Driftwood Birdhouse

The design of your birdhouse can be as simple or intricate as you wish. The unique shapes and sizes of driftwood pieces provide endless design possibilities.

Choosing the Right Driftwood

When selecting driftwood pieces, consider their size, shape, and stability. Ensure the wood pieces are free from any harmful chemicals or nails that could be dangerous for birds.

Basic Design Ideas

Start with simple designs such as:

  1. Traditional Box Design: A basic rectangle with an entrance hole.
  2. A-Frame Design: Two pieces of driftwood forming a triangular roof.
  3. Creative Shapes: Use driftwood to create birdhouses in various whimsical shapes.

Sketching Your Design

Sketch a rough design on paper, including measurements of each piece. This will help you visualize the final product and make the assembly process easier.

Building the Birdhouse

Now that you have your design ready, let’s get down to building!

Cutting the Driftwood

Cut the driftwood pieces according to your sketch. Use a saw for this step and sand the edges to smooth out any splinters.

Assembling the Base

Start by assembling the base of your birdhouse. Ensure that the base is sturdy as it will support the weight of the remaining structure.

  1. Lay Out the Pieces: Arrange the base pieces on a flat surface.
  2. Glue and Screw: Apply wood glue along the edges and screw or nail the pieces together.

Constructing the Walls

Attach the walls to the base. Each wall should be securely fastened to both the base and adjacent walls.

  1. Attach Two Opposing Walls First: This will provide stability as you continue to build.
  2. Secure the Remaining Walls: Ensure all corners are tightly joined.

Adding the Roof

Now, it’s time to add the roof. This can be a simple flat roof or an A-frame, depending on your design.

  1. Align the Roof Pieces: Make sure they fit well together.
  2. Secure the Roof: Use screws or nails, and add wood glue for extra stability.

Creating the Entrance Hole

Drill a hole in one of the walls to serve as the entrance. The size of the hole will depend on the type of birds you wish to attract.

  1. Mark the Spot: Use a pencil to mark where you will drill.
  2. Drill Carefully: Make sure the hole is smooth and free of splinters.

Driftwood Birdhouse

Finishing Touches

Your birdhouse is nearly complete! Here are some final touches to make it perfect.

Smoothing and Finishing Edges

Use sandpaper to smooth out any rough edges. This will make the birdhouse safe for the birds and give it a professional finish.

Adding Perches and Hooks

Add a small perch below the entrance hole to give birds a place to land. You can also add hooks to the roof for easy hanging.

Waterproofing

Apply a waterproof sealant to protect your birdhouse from the elements. Driftwood is already weathered but adding an extra layer of protection is always a good idea.

Placing Your Birdhouse

Choosing the right location for your birdhouse is crucial for attracting birds.

Ideal Locations

  1. Quiet Areas: Birds prefer locations that are not too noisy or busy.
  2. Height: Place the birdhouse at a safe height to protect from predators.
  3. Shelter: Find a spot sheltered from strong winds and direct sunlight.

Mounting Options

You can mount your birdhouse in various ways:

  1. Hooks: Hang it from a tree or a dedicated birdhouse pole.
  2. Posts: Attach it to a post secured in the ground.
  3. Suction Cups: Stick it to a window if you want an up-close view of your bird guests.

Maintaining Your Birdhouse

Regular maintenance ensures your birdhouse remains a safe and attractive home.

Cleaning

Clean the birdhouse at the end of each breeding season to prevent pests and diseases.

  1. Open Access: If possible, design your birdhouse with a hinged side or roof for easy cleaning.
  2. Remove Debris: Clear out old nests and any debris.

Inspect for Damage

Periodically check your birdhouse for damage. Repair any broken parts immediately to keep it safe.

  1. Check Joints and Screws: Ensure everything is still securely fastened.
  2. Look for Rot: Replace any pieces that show signs of severe wear or rot.

Attracting Birds

To get birds to settle in your driftwood birdhouse, consider these tips.

Bird Feeders and Water Sources

Place bird feeders and water sources nearby. Birds are more likely to nest in areas where they can easily find food and water.

Native Plants

Planting native vegetation can attract birds. These plants provide additional food and shelter.

Avoid Pesticides

Using pesticides can harm birds. Opt for natural pest control methods to keep your garden bird-friendly.

Common Issues and Solutions

Here are some common issues you may encounter and how to fix them.

No Birds Visiting

If birds aren’t visiting your birdhouse, consider these possibilities:

  1. Location: Move it to a quieter or more sheltered spot.
  2. Entrance Size: Make sure the entrance hole is the right size for the birds you want to attract.
  3. Too Close to Humans: Birds may avoid areas with too much human activity.

Pests

Pests can be a problem. Keep them at bay with these tips:

  1. Regular Cleaning: Clean out the birdhouse regularly to deter insects.
  2. Ant Traps: Place ant traps nearby but out of birds’ reach.

Sharing Your Driftwood Birdhouse

Show off your handiwork by sharing your driftwood birdhouse with friends and family.

Social Media

Post photos on social media platforms like Instagram or Facebook to inspire others. Use hashtags related to birdhouses and DIY projects.

Community Events

Consider participating in local craft fairs or community events. You might even find a market for selling driftwood birdhouses!

Conclusion

Building a driftwood birdhouse is a rewarding project that combines creativity, sustainability, and a love for nature. With just a few tools and materials, you can create a beautiful home for your feathered friends, all while adding a unique touch to your outdoor space. So why wait? Gather some driftwood and start building today!

Feel free to revisit your sketch, adapt as you go, and most importantly, have fun with the process. Your new feathered neighbors will thank you for the cozy and charming new home!

Filed Under: Driftwood Ideas Tagged With: DIY, Driftwood, home decor, Woodworking

Driftwood Angels

July 16, 2024 by admin

In your magical exploration of “Driftwood Angels,” you delve into a serene world where each piece of driftwood, sculpted by the hands of nature, embodies a celestial beauty. As you journey through the coastline, you’ll encounter unique creations that resemble angelic forms, showcasing the delicate balance between the sea’s powerful forces and its gentle artistry. Embracing this ethereal vision, you discover the quiet charm and inspirational aura of driftwood angels, connecting with the tranquil whispers of the ocean and the stories captured in each weathered sculpture. Have you ever stumbled across a piece of driftwood on the beach and wondered about its journey or what it could become? Driftwood is not just the residue of wooden debris washed onto the shore; it can transform into something magical, like a driftwood angel. These handmade creations hold both aesthetic beauty and a story within their grains. Today, you’re going to learn all about these enchanting forms of art and how you can create your very own driftwood angels.

Driftwood Angels

What is Driftwood?

Driftwood refers to pieces of wood that have been washed up on shores by the action of waves, tides, and winds. It starts as tree limbs, branches, or roots that have broken off and fallen into rivers, lakes, or the ocean. Over time, the wood becomes smooth and weathered by the constant motion of water and exposure to the elements.

The Journey of Driftwood

The journey of driftwood is truly fascinating. It begins its life in forests, often in areas far from the coast. Once it falls into a river or stream, it can travel hundreds of miles, being shaped and sculpted by the water. As it finally arrives at the beach, it’s completed a transformation that can span seasons, or even years.

Types of Driftwood

Not all driftwood is created equal. The variety is immense, depending on the type of wood, the length of time it has spent in the water, and the environmental conditions it has encountered. Some common types of driftwood include:

TypeCharacteristics
HardwoodDense, dark, and heavy; takes longer to erode.
SoftwoodLighter and more porous; faster to weather.
Saline WoodExposed to saltwater, often encrusted with salt.
Freshwater WoodFound near rivers and lakes without salt exposure.

Why Use Driftwood?

Driftwood is not only beautiful but also eco-friendly. By utilizing this natural material, you are repurposing something that would otherwise contribute to environmental clutter. Plus, each piece is unique, offering a one-of-a-kind look to your creations.

Driftwood Angels: What Are They?

Driftwood angels are artistic creations made from driftwood, typically designed to resemble angels. They are a beautiful blend of natural materials and artistic expression, often featuring driftwood as the body, sticks for arms, and various additional elements for wings and halos.

The History and Popularity

Creating figures from driftwood is an art form that dates back centuries. People have always been fascinated by the shapes and forms driftwood can take. Driftwood angels have become particularly popular in beachside communities and among those who appreciate natural, rustic decor.

Variations and Styles

Driftwood angels come in various styles and sizes. Some are miniature figurines suitable for Christmas trees, while others can be life-sized sculptures displayed in gardens or homes. The styles can vary from minimalist designs using simple shapes to elaborate pieces that include intricate details and additional ornaments.

How to Gather and Prepare Driftwood

Before you can create your driftwood angels, you will need to gather and prepare your materials. Here’s how you can do it:

Where to Find Driftwood

The best places to find driftwood are along beaches, riverbanks, and lakeshores. Coastal areas are particularly rich in driftwood due to the constant motion of tides and currents. Look for pieces that have interesting shapes and are weathered enough to give them character.

Responsible Harvesting

It’s essential to collect driftwood responsibly. Some areas may have regulations regarding the removal of natural materials. Always check local guidelines to ensure that you are not disrupting the ecosystem. Only take what you need, and avoid areas marked as protected.

Cleaning Driftwood

Once you’ve collected your driftwood, the next step is to clean it. Driftwood may carry salt, sand, and microorganisms that you don’t want to bring into your home. To clean the driftwood:

  1. Rinse with fresh water: Use a hose to remove surface debris.
  2. Soak in a bleach solution: Mix one part bleach with nine parts water and soak the wood for 24 hours. This helps kill any bacteria or fungi.
  3. Dry thoroughly: Allow the driftwood to dry completely in the sun. This may take a few days, depending on the size and density of the wood.

Tools You Will Need

Creating driftwood angels doesn’t require many specialized tools, but having some basic supplies will make the process easier. Here’s a list of what you might need:

ToolPurpose
SawTo cut the driftwood into the desired shapes and sizes.
SandpaperTo smooth rough edges and surfaces.
DrillFor making holes to insert arms, wings, or other elements.
GlueTo attach various parts of the angel together.
WireFor additional support and to create halos.
PaintOptional, for adding color or details.

Steps to Create a Driftwood Angel

Now comes the fun part – creating your driftwood angel! There are no strict rules, so let your creativity flow. Here are some steps to guide you through the process:

Step 1: Gather Your Materials

Once your driftwood is cleaned and dry, gather all your materials and tools. Lay them out in a workspace where you have plenty of room to move around and access everything easily.

Step 2: Select and Arrange the Driftwood Pieces

Choose the pieces of driftwood that will form the body, arms, and wings of your angel. Arrange them to get a sense of how they will fit together. Don’t be afraid to try different combinations until you find one that looks right.

Step 3: Attach the Body Parts

Use glue, screws, or wire to attach the various parts of your angel together. Start with the body and then add the arms and wings. If you’re using a drill, make small pilot holes first to prevent the wood from splitting.

Step 4: Add Details

Details like halos, eyes, and additional ornaments can bring your driftwood angel to life. Use wire to create a halo, and small pebbles or beads for eyes. You can also add paint, ribbons, or other decorative elements to give your angel a unique personality.

Step 5: Finishing Touches

Once everything is assembled, take a final look to ensure all pieces are securely attached and that you’re happy with the arrangement. You might want to sand down any rough edges and apply a coat of varnish to protect the wood and give it a polished look.

Driftwood Angels

Displaying Your Driftwood Angels

After putting in the time and effort to create your driftwood angels, you’ll want to display them proudly. Here are a few ideas for showing off your creations:

Indoor Display Ideas

  • Mantelpieces: Place your driftwood angel on a mantel for a rustic, nautical touch.
  • Bookshelves: Add it to a bookshelf to complement other beach-themed decor.
  • Table Centerpieces: Use your angel as a centerpiece for a dining table or coffee table.

Outdoor Display Ideas

  • Garden Stakes: Attach your angel to a garden stake and place it among your plants.
  • Porch Decor: Hang your driftwood angel from the roof of your porch or a tree branch.
  • Fence Art: Secure it to a fence or wall to create a unique outdoor art piece.

Seasonal Display Ideas

Driftwood angels are wonderfully versatile and can be adapted for different seasons. During the holidays, you could add festive ribbons or ornaments to make them extra special. In the summer, pair them with seashells and starfish for a beachy vibe.

The Symbolism of Angels

Angels are often seen as symbols of protection, guidance, and comfort. Creating a driftwood angel can be more than just a fun project; it can also be a meaningful way to express your feelings or commemorate a special person or event.

Angels in Different Cultures

Angels appear in various forms in many cultures around the world. In Christianity, angels are messengers of God, while in other traditions, they may be guardians or agents of divine forces. Your driftwood angel can embody whatever symbolic meaning resonates with you.

Personal Significance

Creating a driftwood angel can also hold personal significance. It can be a way to remember a loved one, celebrate a milestone, or simply bring a little bit of peace and tranquility into your life. The process itself can be meditative and fulfilling, offering a chance to connect with nature and your own creativity.

Tips for Success

Here are some additional tips to help ensure your driftwood angel project is a success:

Patience is Key

Don’t rush the process. Take your time to find the right pieces of driftwood and to assemble them carefully. Enjoy the journey as much as the final product.

Embrace Imperfection

Driftwood is naturally imperfect, and that’s where its beauty lies. Don’t worry about making your angel look “perfect.” Embrace the irregularities and unique characteristics of each piece of wood.

Safety First

When using tools like saws and drills, always prioritize safety. Wear safety goggles and gloves, and work in a well-ventilated area. If you’re new to using these tools, consider doing a practice run on a scrap piece of wood first.

Experiment and Have Fun

Feel free to experiment with different designs and styles. Look for inspiration online or in nature, but don’t be afraid to put your own spin on things. After all, the best part of creating art is making it uniquely yours.

The Environmental Impact

One of the beautiful things about using driftwood is its positive environmental impact. By repurposing wood that has naturally fallen and washed ashore, you are contributing to a cycle of reuse that benefits the environment.

Sustainability

Creating driftwood art is a form of sustainable crafting. It utilizes materials that do not require additional manufacturing or deforestation, making it an earth-friendly hobby.

Minimal Waste

Since each piece of driftwood is unique and can be used in many different ways, there’s minimal waste involved in the process. Any leftover wood can often be used in future projects, ensuring that nothing goes to waste.

Getting Involved in the Driftwood Community

You’re not alone in your love for driftwood angels! There is a growing community of artists and enthusiasts who share this passion.

Online Communities

Many online forums and social media groups are dedicated to driftwood art. Joining these communities can provide inspiration, tips, and a platform to share your creations. Sites like Pinterest, Instagram, and Facebook have vibrant driftwood art communities where you can connect with others.

Workshops and Classes

Look for local workshops or classes where you can learn more about driftwood art and improve your skills. These can range from beginner to advanced levels and often provide all the materials needed, making them an excellent way to dive deeper into the craft.

Exhibiting Your Work

Once you feel confident in your creations, consider exhibiting your work at local art shows, craft fairs, or even online galleries. Sharing your driftwood angels with others can be incredibly rewarding and can even turn into a niche business.

Conclusion

Driftwood angels are more than just decorative pieces; they are a testament to the beauty of nature and the power of human creativity. Whether you’re crafting one as a gift, a home decor piece, or a personal project, each angel carries a unique story within its wooden form.

By gathering and preparing the driftwood, thoughtfully designing your angel, and carefully assembling it, you can create something truly special. And as you embark on this creative journey, remember to enjoy each step, embrace the imperfections, and find joy in transforming simple pieces of wood into enchanting driftwood angels.

So next time you’re walking along the beach and come across a piece of driftwood, you’ll know the potential it holds. Pick it up, take it home, and let your imagination guide you in creating a driftwood angel that reflects both the beauty of nature and the depth of your creativity. Happy crafting!

Filed Under: Driftwood Ideas Tagged With: Angels, DIY, driftwood art, Handicrafts, home decor

Driftwood General Finishes Milk Paint

July 15, 2024 by admin

You’ll love the elegance and versatility that Driftwood General Finishes Milk Paint brings to your DIY projects. This high-quality paint offers a stunning and smooth finish that’s perfect for furniture, cabinetry, and more. With its beautiful driftwood color, it effortlessly adds a touch of rustic charm to any piece. Plus, its durable and easy-to-apply formula ensures that your creations will look amazing and last for years to come. Dive into the world of Driftwood General Finishes Milk Paint, and transform your home with ease and style! Have you ever looked at a piece of furniture and imagined the possibilities of giving it a fresh, elegant look with minimal effort? If so, you’re in the right place! Driftwood General Finishes Milk Paint might be just what you need to transform your favorite pieces into timeless treasures.

What is Driftwood General Finishes Milk Paint?

Driftwood General Finishes Milk Paint is a premium quality, modern version of traditional milk paint. It offers a soft, neutral hue that captures the essence of aged wood, delivering a sophisticated, rustic charm to any project. Its unique formulation makes it perfect for furniture, cabinets, and decorative items.

The Benefits of Milk Paint

You might be wondering why choose milk paint over other types. Well, here are some compelling reasons:

  • Easy Application: It can be applied with a brush, roller, or sprayer.
  • Durability: When sealed correctly, it provides a long-lasting finish.
  • Low VOC: It is environmentally friendly and safe to use indoors.
  • Self-Leveling: Ensures a smooth finish with minimal brush marks.

What Makes Driftwood Color Special?

The Driftwood hue from General Finishes is particularly distinctive due to its subtle, earthy gray tones. This color is highly versatile, making it suitable for both modern and classic home decor styles. It beautifully mimics the naturally weathered wood look, providing elegance and warmth to any space.

How to Use Driftwood General Finishes Milk Paint

Let’s dive into the process of using this amazing paint to give your furniture a makeover.

Preparation

Good preparation is key to a successful painting project. Here’s what you need to do:

  • Clean the Surface: Remove any dirt, grease, or grime from the surface with a mild detergent.
  • Sand the Surface: Lightly sand the surface to ensure better adhesion of the paint. Use a fine-grit sandpaper for this purpose.
  • Remove Dust: Wipe away any dust with a damp cloth and let it dry completely.

Application Process

You’ll need a few tools before you get started:

Tools NeededPurpose
Brushes or RollersFor applying the paint
Sandpaper (fine-grit)For surface preparation and sanding
Drop ClothsTo protect the surrounding area
Gloves and ApronTo keep yourself clean

Step-by-Step Guide

  1. Stir the Paint: Ensure the paint is well-mixed. Stir it with a paint stick for a minute or two.
  2. First Coat: Apply the first coat using smooth, even strokes. Don’t worry if the first coat looks a bit thin.
  3. Drying Time: Let the first coat dry completely, which typically takes around 2-4 hours.
  4. Second Coat: Apply a second coat for a richer color and more even coverage.
  5. Final Sanding: After the paint has dried completely, lightly sand the surface to remove any imperfections.
  6. Sealing: Apply a top coat (General Finishes High Performance Top Coat or General Finishes Flat Out Flat) to protect the paint and enhance its durability.

Tips for Best Results

  • Temperature and Humidity: Ensure you paint in a well-ventilated area with moderate humidity and temperature between 60°F (15°C) and 80°F (27°C).
  • Test Patch: Always try a test patch on a small area before committing to the entire piece to see how the color looks when dry.
  • Thinning the Paint: If the paint seems too thick, you can thin it with a bit of water. Start with a small amount and mix thoroughly.

Driftwood General Finishes Milk Paint

Caring for Your Painted Furniture

After putting in the effort to paint your furniture, you’ll want to ensure it stays looking great. Here are some tips on maintaining your finished piece:

Cleaning

  • Gentle Cleaning: Use a damp cloth to wipe the surface. Avoid abrasive cleaners which can damage the finish.
  • Spills: Clean up spills immediately to prevent staining.

Protection

  • Coasters and Placemats: Use coasters under drinks and placemats during meals to protect your surface from heat and moisture.
  • Avoid Direct Sunlight: Prolonged exposure to direct sunlight can fade the paint over time.

Creative Ideas Using Driftwood General Finishes Milk Paint

One of the exciting aspects of using Driftwood General Finishes Milk Paint is the ability to explore various creative projects. Here are some ideas to get you started:

Revamp Old Furniture

Give old furniture pieces a new lease of life with a coat of Driftwood Milk Paint. Whether it’s a dresser, nightstand, or dining table, the subtle gray tones can bring a modern rustic charm to any room.

Kitchen Cabinets Makeover

Transform your kitchen space without the need for a full renovation. Painting your kitchen cabinets with Driftwood Milk Paint can significantly enhance the kitchen’s overall look.

Decorative Items

Don’t limit milk paint to furniture alone. Use it on picture frames, wooden crates, and shelves to add a cohesive style throughout your home.

Combination with Other Colors

Driftwood pairs beautifully with various colors. Combine it with darker hues like black or navy for a striking contrast, or with softer tones like white or pastel colors for a serene ambiance.

Driftwood General Finishes Milk Paint

Troubleshooting Common Issues

Even with the best products and preparation, issues might occasionally arise. Here’s how to troubleshoot some common problems using Driftwood General Finishes Milk Paint:

Paint Drips or Runs

If you notice drips while painting:

  • Smooth Out Immediately: Use a brush to smooth out drips as soon as they appear.
  • Sand After Drying: Once dried, lightly sand the area and touch it up with more paint.

Uneven Coverage

Uneven coverage can occur if the surface wasn’t prepped correctly or the paint wasn’t applied evenly:

  • Proper Preparation: Ensure surfaces are clean, sanded, and dry.
  • Apply Even Coats: Use even strokes and avoid overloading your brush or roller with paint.

Brush Marks

To minimize brush marks:

  • Self-Leveling: Utilize the self-leveling nature of milk paint by applying thinner coats.
  • Sand Between Coats: Lightly sand between coats to smooth out any imperfections.

Additional Tips for Success

Achieving a professional finish sometimes requires some additional techniques:

Wet Sanding

Wet sanding can provide an ultra-smooth finish:

  1. After Final Coat: Once your final paint coat is dry, lightly spray the surface with water.
  2. Wet Sand: Use fine-grit wet/dry sandpaper to wet sand the surface gently.

Using a Sealer

Using a sealer will give your project added protection and durability:

  • Choice of Sealer: General Finishes offers various top coats like High Performance and Flat Out Flat.
  • Application: Apply with a clean brush in smooth, even strokes.

Why Choose General Finishes

General Finishes has been a trusted name in the paint and finishes industry for years. Here’s why you might consider this specific brand:

FeatureDescription
QualityKnown for high-quality, durable finishes.
VarietyWide range of colors and products available.
Eco-Friendly FormulationContains low VOCs, making it safer to use.
User-FriendlyEasy application with excellent self-leveling properties.

Conclusion

Transforming your furniture with Driftwood General Finishes Milk Paint can be a rewarding and transformative home project. From its ease of use to its exquisite finish, this milk paint offers a variety of benefits for DIY enthusiasts and professionals alike. By following the guidelines and tips provided, you’ll be well on your way to creating stunning, durable pieces that breathe new life into your home.

So go ahead, grab that brush, and let the Driftwood hue inspire your next big project. You might be amazed at the difference a coat (or two) of this exceptional paint can make!

Filed Under: Driftwood Ideas Tagged With: Driftwood, Furniture Painting, General Finishes, home decor, Milk Paint

Driftwood Hanging Art Diy

July 4, 2024 by admin

Looking for a fun and creative project to brighten up your living space? Driftwood Hanging Art DIY might just be what you need! In this friendly and easy-to-follow guide, you’ll discover how to transform ordinary pieces of driftwood into unique and eye-catching decorations. With just a few simple materials and a dash of inspiration, you can create stunning hanging art that showcases the natural beauty of driftwood. Whether you’re a seasoned DIY enthusiast or a beginner looking for a new hobby, you’ll find this project both rewarding and enjoyable. Get ready to bring a touch of coastal charm to your home with your very own driftwood masterpiece! Have you ever stumbled upon a piece of driftwood during a beach walk and thought, “I could make something amazing with this”? If so, you’re not alone! Driftwood has a special charm that connects us to the natural world, and creating driftwood hanging art can be a fantastic way to bring a bit of that beachy magic into your home. Let’s dive into the fun and easy world of creating your own driftwood hanging art.

Why Driftwood?

The Beauty of Driftwood

Driftwood is nature’s artwork. Each piece has its own unique texture, color, and shape, shaped over time by water, wind, and sun. When you incorporate driftwood into art, you’re using a material that has a story of its own.

Environmentally Friendly

Using driftwood is also an eco-friendly choice. By repurposing fallen wood, you’re not contributing to deforestation. Plus, collecting driftwood from beaches helps keep natural spaces clean!

Gathering Your Materials

Finding Driftwood

The first step is, of course, to find your driftwood. Beaches, rivers, and lakes are great places to look. Always check local regulations regarding driftwood collection to ensure it’s permitted.

Tools and Supplies

You’ll need a few basic tools and supplies to create your driftwood hanging art:

ToolsSupplies
Saw (if resizing)Driftwood pieces
SandpaperString, cord, or wire
Drill (if needed)Hanging hardware
Glue Gun/Craft GlueOptional embellishments

Making sure you have everything on hand will save you time and make the process smoother.

Driftwood Hanging Art Diy

Preparing Driftwood

Cleaning

Once you’ve gathered your driftwood, the first step is to clean it. This can involve a good scrub with a brush and soapy water. Rinse thoroughly and let it dry completely.

Sanitizing

If you’re worried about any bacteria or pests, you can sanitize the driftwood by soaking it in a bleach solution (1 cup of bleach to 5 gallons of water) for about an hour. Rinse well and let it dry in the sun.

Smoothing the Surface

Sometimes driftwood can have rough patches or splinters. Use sandpaper to smooth the surface, making it easier to handle and more aesthetically pleasing.

Designing Your Art

Inspiration and Planning

Think about what you want to create— a wall hanging, a mobile, a wall sculpture? Browse online or check out nature-themed art for inspiration. Sketch out your design if it helps you visualize the final product.

Arranging the Pieces

Lay out your driftwood pieces in the desired arrangement before you start attaching anything. This allows you to adjust the positioning and ensure the composition flows well. Experiment with different configurations and take photos to compare.

Driftwood Hanging Art Diy

Assembling Your Driftwood Art

Drilling and Cutting

If some pieces need resizing, use a small saw. If you need to create holes for string or wire, use a drill. Ensure all tools are used safely and appropriate protective gear is worn.

Attaching the Pieces

This can be done in various ways depending on your design:

Using String or Cord

Cut lengths of string or cord to attach the driftwood pieces. This method works well for mobiles or wall hangings. Simply tie knots around the driftwood, securely fastening them together.

Using Glue

For a more rigid structure, a strong craft glue or a hot glue gun can be used. Apply small amounts of glue at joints, making sure each connection is secure before moving on.

ProsCons
Strong bondsLess flexibility
Clean appearanceLonger drying time

Adding Embellishments

This is the fun part where you can personalize your driftwood art. Consider adding seashells, beads, feathers, or even painting sections of the driftwood for a splash of color.

Hanging and Displaying

Choosing the Location

Decide where you want to display your driftwood art. It could be a focal point in your living room, a serene addition to a bedroom, or a lively piece for your patio.

Hanging Hardware

Install the appropriate hardware for your piece. For wall hangings, strong wall hooks or nails will suffice. For mobiles, ensure you have a sturdy ceiling hook.

Admiring Your Creation

Once your piece is secure, step back and admire your handiwork. Driftwood art has a calming, natural presence that can transform any space.

Maintaining Your Driftwood Art

Dusting

Regularly dust your art piece to keep it looking fresh. Use a soft cloth or brush.

Spot Cleaning

If a deeper clean is needed, gently wipe with a damp cloth. Avoid soaking the wood as it can weaken the structure over time.

Troubleshooting and Tips

Driftwood Won’t Stay Together

If pieces of driftwood seem to shift or come loose, reinforce them with additional ties or glue. Ensure each joint is secure before moving on to the next section.

Balancing Mobiles

Creating a balanced mobile can be tricky. Adjust the positioning of each piece until the mobile hangs evenly. Patience and trial-and-error will pay off!

Conclusion

Creating driftwood hanging art is not only a rewarding DIY project but also a beautiful way to bring nature into your home. With a few simple tools, some creativity, and a bit of effort, you can transform those weather-worn pieces of driftwood into stunning works of art. Happy crafting, and may your driftwood journey be filled with inspiration and joy!

Filed Under: Driftwood Ideas Tagged With: DIY, Driftwood, Handmade, Hanging Art, home decor

Driftwood Jewelry Tree

July 4, 2024 by admin

Discover the charm of nature with the Driftwood Jewelry Tree, a unique and stylish way to organize and display your favorite accessories. Imagine the elegance of weathered driftwood gracefully holding your necklaces, bracelets, and earrings, each piece telling a story of its own. This handcrafted treasure not only keeps your jewelry in order but also adds an earthy and artistic touch to your room décor, blending the beauty of the beach with the practicality of a jewelry stand. Perfect for those who appreciate the rustic allure of natural materials, the Driftwood Jewelry Tree is a beautiful fusion of functionality and aesthetic appeal. Have you ever found yourself captivated by the serene and rustic beauty of driftwood? Maybe you’ve come across a piece on the beach and wondered how you could incorporate it into your home decor. Well, guess what? You can use that beautiful piece of nature to make a stunning Driftwood Jewelry Tree! Not only is it functional, but it’s also a conversation piece that brings a bit of nature indoors.

Driftwood Jewelry Tree

What is a Driftwood Jewelry Tree?

A Driftwood Jewelry Tree is a decorative and functional art piece made from driftwood. Driftwood, for those who might not know, is wood that has been washed onto a shore or beach by the action of winds, tides, or waves. When gathered and cleaned, driftwood becomes an exceptional medium for various crafts, including making a jewelry tree where you can hang and organize your necklaces, bracelets, rings, and more.

Benefits of Making Your Own Driftwood Jewelry Tree

Creating your own Driftwood Jewelry Tree comes with several benefits.

  1. Personal Touch: You get to customize it according to your taste and needs.
  2. Eco-Friendly: Using natural materials like driftwood is an eco-friendly choice.
  3. Therapeutic: Crafting is known to be a therapeutic activity, reducing stress and boosting creativity.

Materials You’ll Need

Gathering the right materials is the first step in making your Driftwood Jewelry Tree. Here’s a list of what you will need:

MaterialDescription
DriftwoodVarious sizes and shapes that appeal to you.
BaseA sturdy piece of wood or rock to mount the driftwood on.
Screws/GlueFor attaching the driftwood pieces to the base.
SandpaperTo smoothen the driftwood pieces.
Paint (Optional)For those who want to add a touch of color.
VarnishTo protect and finish the driftwood.
HooksTo hang jewelry on your tree.
DrillFor making holes in both the base and driftwood.
Twine/RopeFor additional ornamentation or stability.

Step-by-Step Guide to Making Your Driftwood Jewelry Tree

Ready to get started? Follow this simple step-by-step guide to create your very own Driftwood Jewelry Tree.

Step 1: Collecting Driftwood

First things first, you need to collect driftwood pieces. Head to your local beach or riverbank and look for interesting pieces of driftwood. Make sure to choose pieces that are dry, sturdy, and free from excessive rot. A variety of sizes and shapes will give your tree a unique look.

Step 2: Cleaning Your Driftwood

Once you’ve collected your driftwood, it’s time to clean it. Rinse each piece under running water to remove dirt and debris. If the wood is particularly dirty, use a brush to scrub it clean. Let the driftwood pieces soak in a mixture of water and bleach for a few hours to kill any bacteria or pests. After soaking, rinse them again and let them dry completely in the sun.

Step 3: Preparing the Base

Your base needs to be strong enough to support the driftwood branches and the jewelry that will hang on them. Choose a piece of wood, rock, or any other sturdy material. Sand down any rough edges to prevent splinters. If you wish, you can paint or stain the base to match your decor.

Step 4: Arranging Your Driftwood

This is where your creativity comes into play. Arrange the driftwood pieces to form the branches of your tree. Play around with different configurations until you find one that you’re happy with. Don’t be afraid to break or trim the driftwood to fit your design.

Step 5: Attaching the Driftwood to the Base

Once you have your design in mind, start attaching the driftwood pieces to the base using screws or strong adhesive. For a sturdier structure, drilling holes into the driftwood and the base before inserting screws can be helpful. If you prefer a more natural look, use a high-quality wood glue.

Step 6: Adding Hooks for Jewelry

Now, drill small holes into the driftwood where you will attach hooks for hanging jewelry. Space them out evenly or in whatever pattern you prefer. Screw in the hooks securely.

Step 7: Finishing Touches

After assembling the tree, it’s time for the finishing touches. Sand any rough spots and apply a varnish for a polished, protective finish. If you prefer a pop of color, you can paint the driftwood or base before varnishing. Adding a bit of twine or rope around the base or branches can also give it an extra rustic look.

How to Display and Use Your Driftwood Jewelry Tree

Finding the perfect spot for your Driftwood Jewelry Tree is crucial for both functionality and aesthetics.

Choosing the Right Location

Consider the following factors when choosing a location for your jewelry tree:

  • Accessibility: Ensure it’s easily accessible so you can quickly grab your jewelry.
  • Lighting: Natural or good artificial light will make it easier to see and select your jewelry.
  • Décor: Choose a spot where the tree complements your room’s overall décor.

Organizing Your Jewelry

Use the hooks and branches to hang different pieces of jewelry in an organized fashion. For example:

  • Necklaces: Hang them from longer branches to avoid tangling.
  • Bracelets: Use shorter branches or lower hooks.
  • Rings: Hang or slide them onto smaller branches or hooks.
  • Earrings: Attach them directly to smaller hooks or loops you’ve added.

Example of Simple Organization:

Jewelry TypeRecommended Placement
NecklacesLong branches on top
BraceletsMiddle branches and hooks
RingsSmaller branches or individual hooks
EarringsHooks or perforated sections

Driftwood Jewelry Tree

Maintaining Your Driftwood Jewelry Tree

Like any piece of art or furniture, your Driftwood Jewelry Tree will require some maintenance to keep it looking its best.

Regular Dusting

Dust your driftwood tree regularly to keep it clean. Use a soft cloth or a duster to gently remove dust from the branches and hooks.

Inspections

Periodically inspect your driftwood tree for any loose screws or hooks and tighten them as needed. Check the wood and base for signs of wear or damage and address any issues promptly to maintain its sturdiness.

Avoiding Moisture

Since wood can be susceptible to moisture, it’s best to keep your jewelry tree away from humid areas. If you notice any mold or mildew, clean it promptly with a mixture of water and vinegar.

Adding Personal Touches

Your Driftwood Jewelry Tree can be more than just a functional piece; it can also be a personal expression of your style.

Decorations

Feel free to decorate your tree with additional elements. Add small seashells, beads, or crystals to enhance its beauty. You could also wrap fairy lights around the branches for a whimsical touch.

Custom Paintwork

If you’re artistically inclined, you can paint designs on your driftwood tree or base. Using paint pens or small brushes, add flowers, geometric patterns, or even metallic accents.

FAQs About Driftwood Jewelry Trees

Can I use any type of driftwood?

While driftwood from any source can work, it’s best to choose pieces that are sturdy and free from excessive rot.

How do I stabilize the base if it wobbles?

If your base wobbles, ensure it’s level. You can sand it down or add small, non-slip pads to the bottom to provide stability.

Is it okay to skip the varnish?

Skipping the varnish is an option; however, varnish helps protect the wood and gives it a finished look. If you prefer an all-natural appearance, you can leave the wood unvarnished but expect it to weather and age over time.

Conclusion

Creating a Driftwood Jewelry Tree is a fun and rewarding DIY project that blends nature with functionality. Not only will you have a beautiful piece to display your jewelry, but you’ll also have a unique, handcrafted item that you made yourself. From selecting and preparing your driftwood to assembling and decorating your tree, every step allows you to express your creativity and craft a piece that’s truly your own. So, next time you’re out for a beach stroll, keep an eye out for that perfect piece of driftwood – your future jewelry tree awaits!

Filed Under: Driftwood Ideas Tagged With: crafting, Driftwood, Handmade, home decor, Jewelry Holder, tutorial

Diy Driftwood Jewelry Stand

July 3, 2024 by admin

You’re about to discover a delightful project that effortlessly combines functionality with natural beauty. In this guide to creating your very own DIY Driftwood Jewelry Stand, you’ll learn how to transform a simple piece of driftwood into a charming and unique jewelry display. Perfect for showcasing your favorite pieces, this stand adds a touch of coastal elegance to your space while keeping your accessories neatly organized. Dive into the steps and enjoy the satisfaction of crafting a stand that is as practical as it is beautiful. Have you ever stumbled upon a beautiful piece of driftwood during a beach stroll and wondered what you could do with it? If so, let me introduce you to the perfect project: a DIY Driftwood Jewelry Stand! This easy and creative endeavor not only puts those lovely pieces of naturally sculpted wood to good use but also adds a unique, rustic charm to your home decor. Plus, it provides a practical solution for organizing your jewelry.

In this guide, you’ll learn everything you need to know to create your very own driftwood jewelry stand. Let’s get started!

Why Choose Driftwood for a Jewelry Stand?

Driftwood is a versatile and aesthetically pleasing material that can add a touch of nature and personality to any space. It’s sturdy enough to support hanging items, yet light and whimsical in appearance. Each piece of driftwood is unique, so your jewelry stand will truly be one-of-a-kind. Moreover, collecting driftwood can be an enjoyable outdoor activity, allowing you to reconnect with nature.

Benefits of Using Driftwood

Using driftwood for your jewelry stand offers several benefits:

  • Eco-Friendly: Repurposing driftwood is a form of recycling and reduces waste.
  • Cost-Effective: Driftwood can often be collected for free, making it an economical choice.
  • Aesthetic Appeal: The natural look of driftwood adds a rustic and organic charm to your decor.
  • Customizable: Each piece of driftwood is unique, giving you the opportunity to create a stand that reflects your personal style.

Materials You’ll Need

Once you’ve secured your piece of driftwood, the next step is gathering the necessary materials. Here’s a handy list to get you started:

MaterialsPurpose
DriftwoodMain structure of the jewelry stand
SandpaperFor smoothing out rough edges on the driftwood
Small hooks or nailsUsed to hang jewelry
Wooden base (optional)Provides extra stability for your stand (if necessary)
Screws and screwdriverFor attaching the driftwood to its base if using one
Paint or wood stain (optional)For adding color or protecting the wood
Small saw or rotary tool (optional)For modifying the driftwood
Measuring tape or rulerTo ensure proper placement of hooks/nails
Pencil or markerFor marking placements
Sealant (optional)To protect the wood from further wear and tear

Preparing the Driftwood

Preparation is key to making sure your driftwood is clean, smooth, and ready for use.

  1. Cleaning: Rinse the driftwood under fresh water to remove any dirt, salt, or debris. If it’s particularly dirty, you can use a soft brush and mild soap.
  2. Drying: Allow the driftwood to dry completely. This could take a few days, so be patient.
  3. Sanding: Use sandpaper to smooth out rough or sharp edges. Be careful not to over-sand, as you want to preserve the natural look and feel of the wood.
  4. Cutting: If necessary, use a small saw or rotary tool to trim the driftwood to your desired shape and size.

Diy Driftwood Jewelry Stand

Designing Your Stand

Now, for the fun part – designing your stand! Think about the type and amount of jewelry you plan to display. Will you need more hooks for necklaces and bracelets, or a flat area to hold rings and earrings? Visualize your ideal stand and sketch a rough design if that helps.

Placement of Hooks or Nails

Careful planning and placement of hooks or nails will ensure your jewelry stand is both functional and visually appealing.

  1. Marking: Use a pencil or marker to mark where each hook or nail will go. Even spacing is key to avoid a cluttered look.
  2. Measuring: Use a measuring tape or ruler to maintain symmetry and balance. This step is especially important if you’re a perfectionist!
  3. Installing: Screw in the hooks or hammer the nails into the marked spots. Make sure they are secure enough to hold the weight of your jewelry.

Optional Base

If your piece of driftwood is not stable enough to stand on its own, consider adding a base.

  1. Choosing a Base: Select a flat, sturdy piece of wood that complements the driftwood.
  2. Attaching the Driftwood: Use screws and a screwdriver to attach the driftwood to the base. Make sure the attachment is strong and stable.
  3. Finishing Touches: Sand and paint or stain the base to match or complement the driftwood.

Adding Color and Protection

While natural driftwood has its own charm, you might want to add some color or a protective finish.

  1. Painting: Choose a paint color that matches your decor. Use a brush to apply a thin, even coat. Allow it to dry, and add additional coats if necessary.
  2. Staining: If you prefer a more natural look, consider using a wood stain. Apply using a cloth or brush, following the direction of the wood grain.
  3. Sealing: To protect your jewelry stand from wear and tear, consider applying a wood sealant. This will also enhance the natural beauty of the driftwood.

Assembly and Final Adjustments

With all parts prepared, it’s time to assemble your jewelry stand. Double-check all connections and make sure everything is secure. Place it in the desired location and make any final adjustments.

Testing

Test the stability and functionality of your stand by hanging a few pieces of jewelry. Make any necessary tweaks to ensure it meets your needs.

Displaying Jewelry

Arrange your jewelry on the stand in a way that showcases your favorite pieces. This is your chance to get creative and have fun with your new stand!

Diy Driftwood Jewelry Stand

Maintenance Tips

Although driftwood is relatively low-maintenance, a few simple steps can keep your stand looking its best:

  1. Dust Regularly: Use a soft cloth to dust the driftwood and jewelry.
  2. Avoid Moisture: Keep the stand in a dry area to prevent any potential warping or mold growth.
  3. Re-seal if Needed: If you notice the wood looking dull or worn, consider applying another coat of sealant.

Additional Ideas for Customization

Once you’ve created your driftwood jewelry stand, you might want to explore more ways to customize it. Here are some ideas:

  • Add Beads or Shells: Glue shells, beads, or other small decorations to the driftwood for a beachy vibe.
  • Include a Mirror: Attach a small mirror to the base or to a branch of the driftwood for added functionality.
  • Incorporate Lighting: Wrap a string of fairy lights around the driftwood for a whimsical look that highlights your jewelry.

Troubleshooting Common Issues

Creating something by hand often comes with its own set of challenges. Here are a few common issues you might encounter and how to solve them:

IssueSolution
Driftwood is unstableMake sure the base is flat and secure, or use a heavier base
Hooks or nails are looseEnsure they are tightened properly, or use a stronger adhesive
Uneven placement of hooksMeasure again and adjust as needed
Paint or stain not adheringSand the surface lightly and reapply

Inspiration and Variations

The classic driftwood jewelry stand is just one way to use driftwood creatively. Here are some variations and inspiration:

Driftwood Wall Hanger

Instead of a stand, create a driftwood wall hanger.

  1. Flat Driftwood Piece: Choose a relatively flat piece of driftwood.
  2. Wall Mounting: Attach hooks to the driftwood and mount it on the wall.
  3. Decorative Hooks: Use decorative hooks that match your room’s theme.

Driftwood Earring Holder

This version focuses exclusively on earrings.

  1. Drill Small Holes: Drill small holes in the driftwood to insert earring posts.
  2. Hanging Display: String a wire or thin rope through the driftwood to hang it.

Combination Stand

For those with lots of jewelry, combine features of different designs.

  1. Multiple Branches: Use a piece of driftwood with several branches.
  2. Mixed Hooks and Holes: Incorporate both hooks and drilled holes.
  3. Base and Wall Mount: Use both a base for stability and wall mounting for added strength.

Conclusion

Creating a DIY Driftwood Jewelry Stand is an enjoyable and rewarding project that combines creativity, practicality, and a touch of nature. It’s a fantastic way to organize your jewelry while showcasing the unique beauty of driftwood. From choosing the perfect piece of driftwood and preparing it properly to adding custom touches and ensuring its stability, every step offers a chance to infuse your personal style into the project.

Now that you have all the knowledge you need, it’s time to roll up your sleeves and start crafting! Whether it’s for your own use or as a thoughtful, handmade gift, a driftwood jewelry stand is sure to be a cherished piece.

Happy crafting!

Filed Under: Driftwood Ideas Tagged With: craft, Driftwood, Handmade, home decor, Jewelry Stand

Diy Driftwood Jewelry Hanger

July 2, 2024 by admin

DIY Driftwood Jewelry Hanger

Creating your own driftwood jewelry hanger is an enjoyable and straightforward project that combines natural beauty with practicality. By using a piece of driftwood, some hooks, and a bit of creativity, you can craft a stunning display for your favorite accessories. This DIY project not only adds a rustic, coastal charm to your space but also helps you keep your jewelry organized and easily accessible. So grab your materials and let your imagination run wild – your new favorite accessory holder awaits! Have you ever found yourself struggling to find the perfect way to organize and display your jewelry? If so, you’re not alone. Many of us have jewelry scattered across our dressers or stowed away in boxes where they can easily tangle and become damaged. But don’t worry, I have a solution for you: a DIY Driftwood Jewelry Hanger.

Diy Driftwood Jewelry Hanger

Why Choose a Driftwood Jewelry Hanger?

Driftwood can add a unique and rustic touch to your decor, giving your space an organic and natural feel. Plus, creating a jewelry hanger from driftwood is a fun and environmentally friendly way to organize your beautiful pieces. This project is simple and allows you to customize it to your taste and needs.

Unique and Natural Aesthetic

Driftwood brings the beauty of nature into your home. Its natural contours and textures can turn your jewelry hanger into a piece of art. Each piece of driftwood is unique, so you’re guaranteed to have a one-of-a-kind creation that reflects your personality and style.

Environmental Friendliness

Using driftwood is an eco-friendly choice because it repurposes natural materials that have already been washed ashore. By taking on this DIY project, you’re not only creating functional art but also contributing to environmental sustainability.

Easy and Customizable

One of the best parts about this project is how easily you can customize it. Whether you prefer a minimalistic look or something more elaborate, you can adapt this DIY to meet your personal aesthetic and storage needs.

Materials You’ll Need

Before diving into the steps, let’s make sure you have all the materials you need. Here’s a handy table to keep everything organized:

MaterialPurpose
DriftwoodThe main body of your jewelry hanger
Hooks or PegsTo hang your jewelry
Screws and NailsTo secure the hooks/pegs and driftwood
Drill and Drill BitsFor making holes
Measuring TapeFor accurate measurements
SandpaperTo smooth out the driftwood
Sealer or VarnishOptional, to protect the driftwood
Wall AnchorsTo mount the hanger securely
Pencil and RulerFor marking measurements

Optional Decorative Materials

  • Paints or wood stains
  • Ribbons or fabric
  • Small decorative elements like shells or beads

Finding the Perfect Piece of Driftwood

The journey to creating your DIY Driftwood Jewelry Hanger begins with finding the perfect piece of driftwood. Here are some tips to help you in your search:

Location

Beaches, lakeshores, and riverbanks are excellent places to find driftwood. Take a leisurely stroll along these natural sources, and you might stumble upon that perfect piece.

Size and Shape

Consider the space where you’ll hang your jewelry organizer. Measure your wall space to determine the appropriate size of your driftwood. Also, think about how you want your jewelry to be displayed. A longer piece might allow for multiple hooks, while a shorter, more intricate piece can serve as a focal point with a few specialty hooks.

Condition

Select driftwood that is relatively dry, sturdy, and free from rot. It’s also helpful if the wood already has some natural holes or knots, which can serve as natural spots for hooks.

Preparing Your Driftwood

Once you’ve selected your driftwood, some preparation is needed to ensure your jewelry hanger is both attractive and functional.

Cleaning

Clean your driftwood thoroughly to remove any dirt, salt, or organisms. Here’s a simple way to clean your driftwood:

  1. Soak: Let your driftwood soak in a mixture of water and bleach (roughly 10:1 ratio) for 24 hours. This will kill any bacteria and remove any residual dirt.
  2. Rinse: Rinse the driftwood thoroughly with fresh water.
  3. Dry: Let the driftwood dry completely in a well-ventilated area. This may take several days.

Sanding

Use sandpaper to smooth out any rough edges or surfaces. This will prevent any jewelry from getting scratched. Focus particularly on areas where you will be handling the wood or hanging jewelry.

Sealing (Optional)

If you want to give your driftwood a longer lifespan, consider applying a sealer or varnish. Choose a sealer that suits your desired finish, whether it’s matte, glossy, or natural-looking.

Diy Driftwood Jewelry Hanger

Design and Layout

Before you start attaching hooks and assembling your jewelry hanger, it’s essential to plan your design. This step ensures that your final product will be both functional and aesthetically pleasing.

Marking the Measurements

Use a pencil and ruler to mark where each hook or peg will go. Consider the types of jewelry you’ll be hanging (necklaces, bracelets, earrings, etc.) and space them accordingly. Here’s a basic guideline:

Type of JewelrySuggested Spacing
Necklaces2-3 inches apart
Bracelets1-2 inches apart
Earrings1 inch apart

Symmetry and Balance

Ensure that your hooks are evenly spaced so that the hanger looks balanced. If your piece of driftwood has natural curves and shapes, use them to your advantage to create an organic and flowing design.

Assembling Your Jewelry Hanger

Now that the planning is done, it’s time to start assembling your driftwood jewelry hanger.

Drilling Holes

Using a drill and appropriate drill bits, make small holes where you marked your measurements. These pilot holes will make it easier to screw in the hooks or pegs.

Attaching Hooks or Pegs

Screw in your hooks or pegs into the pre-drilled holes. Ensure they’re secure but not too tight, as this could crack the driftwood. You can use a variety of hooks depending on your needs—a combination of S hooks, cup hooks, or even tiny nails can work well.

Adding Decorative Elements (Optional)

If you want to get creative, now is the time to add any decorative elements you might have. Whether it’s a splash of paint, some attached seashells, or a ribbon, these additions can make your driftwood jewelry hanger truly unique.

Mounting Your Jewelry Hanger

The final step is to mount your driftwood jewelry hanger on the wall.

Choosing the Right Spot

Ensure you choose a spot that is easily accessible and gets good light. This not only makes it easier to choose your jewelry but also highlights the beauty of your hanger.

Using Wall Anchors

To securely mount your jewelry hanger, especially if it’s heavy, use wall anchors. Here’s a quick guide:

  1. Mark the spots on the wall where the screws will go.
  2. Drill holes in these spots and insert wall anchors.
  3. Align your driftwood with the wall anchors and screw it into place.

Maintenance Tips

To keep your driftwood jewelry hanger looking its best, it may need occasional maintenance.

Dusting and Cleaning

Regularly dust your driftwood jewelry hanger to prevent buildup. Use a soft cloth or a feather duster to gently clean it.

Checking the Hooks

Make sure the hooks or pegs remain secure over time. If they become loose, tighten them to ensure they can safely hold your jewelry.

Reapplying Sealer

If you chose to apply a sealer, it might wear off over time, especially in humid conditions. Check every few months and reapply if necessary.

Creative Variations

There are endless ways to customize and vary your driftwood jewelry hanger.

Multi-Layered Hangers

For those with a large jewelry collection, consider creating a multi-layered hanger using multiple pieces of driftwood. Stack them at different heights to create a tiered effect.

Mixed Material Hangers

Combine driftwood with other materials like metal rods or leather strips for a mixed-media approach. This can add different textures and elements to your design.

Seasonal Themes

Change the look of your jewelry hanger seasonally by adding temporary decorations like fall leaves, winter berries, or spring flowers. This keeps your jewelry hanger fresh and festive all year round.

Personal Stories and Testimonials

Still unsure if this project is for you? Here are a few personal stories from individuals who have undertaken this DIY driftwood jewelry hanger project:

Rachel’s Story

“I found a beautiful piece of driftwood on a family beach trip and decided to turn it into a jewelry hanger. It now hangs in my bedroom and reminds me of that special day every time I look at it. Plus, my jewelry is so much more organized!”

Tom’s Story

“As someone who loves working with my hands, creating this jewelry hanger was incredibly rewarding. My wife loved it, and now she has a beautiful way to display her necklaces. The project was straightforward, and we added some shells from our honeymoon to make it extra special.”

Amelia’s Story

“I always had issues finding the right way to store my earrings. This DIY project was a game-changer. I never realized how easy it would be to make something so functional and beautiful. The natural look of driftwood fits perfectly with my room’s decor.”

Final Thoughts

Creating your own DIY Driftwood Jewelry Hanger is a fantastic way to combine functionality with creativity. It’s a project that connects you to nature and contributes to sustainability while solving a common household problem. Plus, it’s rewarding to see your jewelry displayed in such a beautiful and personal way.

So, why not give it a try? Take a stroll on the beach, find your perfect piece of driftwood, and transform it into a stunning jewelry hanger that will bring joy to your daily routine. Happy crafting!

Filed Under: Driftwood Ideas Tagged With: craft, Driftwood, Handmade, home decor, Jewelry Hanger

  • « Previous Page
  • Page 1
  • …
  • Page 16
  • Page 17
  • Page 18
  • Page 19
  • Page 20
  • …
  • Page 30
  • Next Page »

Primary Sidebar

Driftwood4us.com, is a participant in the Amazon Services LLC Associates Program, an affiliate advertising program designed to provide a means for sites to earn advertising fees by advertising and linking to amazon.com.