• Skip to main content
  • Skip to primary sidebar
  • Terms and Conditions
  • Privacy Policy
  • Contact

Driftwood 4 Us

Just About Driftwood

home decor

Driftwood Macrame Projects

May 31, 2024 by admin

You’re about to dive into the delightful art of crafting with “Driftwood Macrame Projects.” Imagine weaving your thread of creativity into the rugged charm of driftwood, transforming it into stunning, ocean-inspired decor for your home. This article will guide you through the basics of macrame, offering easy-to-follow steps and inspiring ideas to combine this nostalgic art form with nature’s own masterpiece—driftwood. Whether you’re a seasoned crafter or a curious beginner, you’ll find joy in these beautiful, handmade creations that add a personal touch to any space. Have you ever wondered how to bring the tranquility of the seaside into your home? Driftwood macrame projects might just be the answer! Combining the natural beauty of driftwood with the art of macrame creates stunning, one-of-a-kind pieces that can transform any space. Let’s dive into the world of driftwood macrame through this guide.

Why Choose Driftwood for Your Macrame Projects?

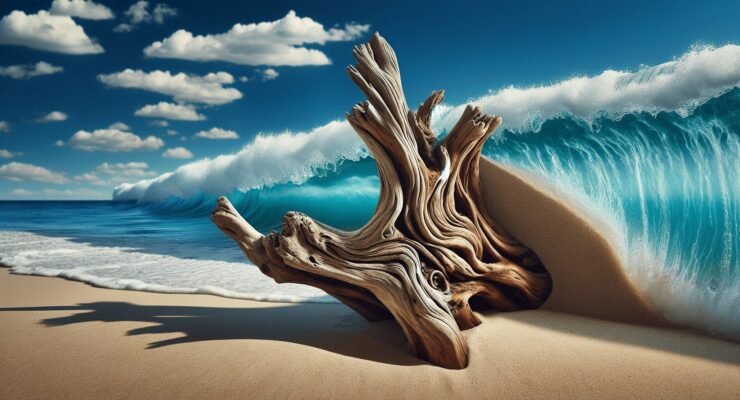
Driftwood holds a special allure due to its unique shapes and weathered appearance. Every piece tells a story of its journey through the elements. Incorporating driftwood into your macrame projects not only adds a touch of nature to your décor but also a personal touch that highlights your creativity.

Benefits of Driftwood Macrame

  • Natural Aesthetic: Driftwood and macrame both enhance a natural, bohemian aesthetic.
  • Environmentally Friendly: Driftwood is often collected from beaches, meaning you’re upcycling and making eco-friendly choices.
  • Durability: Driftwood is sturdy, making it a lasting base for your macrame designs.

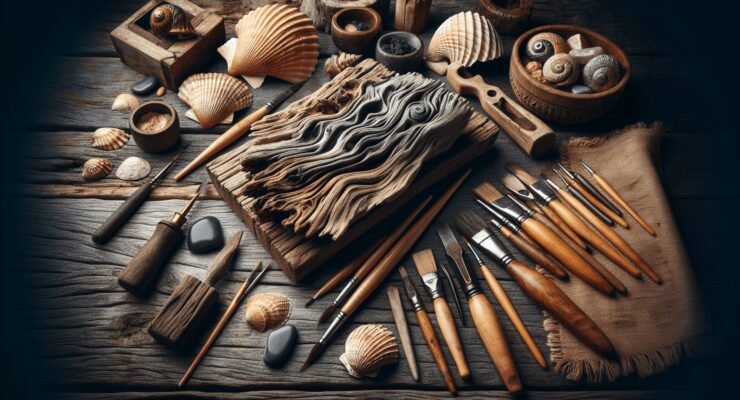
Essential Supplies for Driftwood Macrame Projects

Before starting any new project, it’s important to gather all necessary supplies. Here’s a handy table to help you prepare:

ItemDescription
DriftwoodSelect pieces based on size, shape, and sturdiness.
Macrame CordCotton or hemp cords are popular choices for their natural look and feel.
ScissorsSharp scissors to cut your macrame cord efficiently.
Measuring TapeEssential for measuring the lengths of cords needed.
Hooks or RingsUseful for attaching your macrame pieces securely to your driftwood.
Beads and CharmsOptional, but great for adding a personal touch to your projects.
CombA comb to fray the ends of your cord for a softer look.

Driftwood Macrame Projects

Step-by-Step Guide to Your First Driftwood Macrame Project

Step 1: Choose Your Driftwood

When selecting driftwood, look for pieces that are smooth and free of splinters. The size will depend on your project. For a wall hanging, a piece that’s about 1-2 feet long works well.

Step 2: Prepare Your Materials

Measure and cut your macrame cord. A typical beginner project like a small wall hanging might require about 100-150 feet of cord.

Step 3: Basic Macrame Knots

Familiarize yourself with these basic knots:

  • Lark’s Head Knot: Used to attach the cord to the driftwood.
  • Square Knot: A staple knot in macrame that you’ll use quite often.
  • Half Hitch Knot: Great for creating rows and spirals.

Step 4: Start Your Project

Attach your cords to the driftwood using Lark’s Head Knots. Divide the cords into sections and start knotting. Follow a basic pattern like square knots for the body of your wall hanging.

Step 5: Add Personal Touches

Incorporate beads or charms if desired. Finish off by combing out the ends of the cords to create a fringed effect.

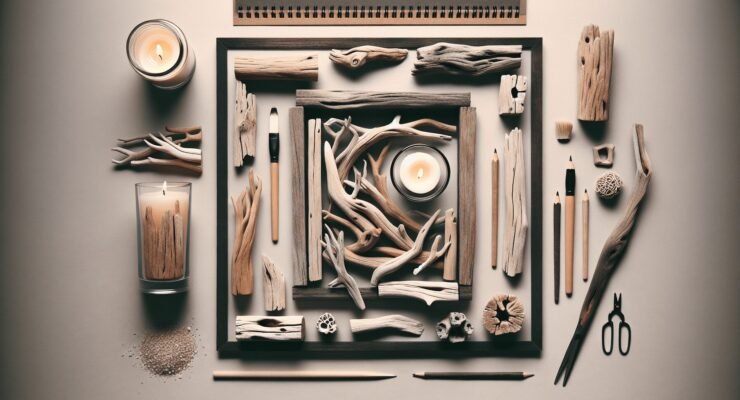
Popular Driftwood Macrame Project Ideas

Turn your driftwood macrame masterpieces into functional and decorative pieces for your home. Here are some fantastic ideas to get you started:

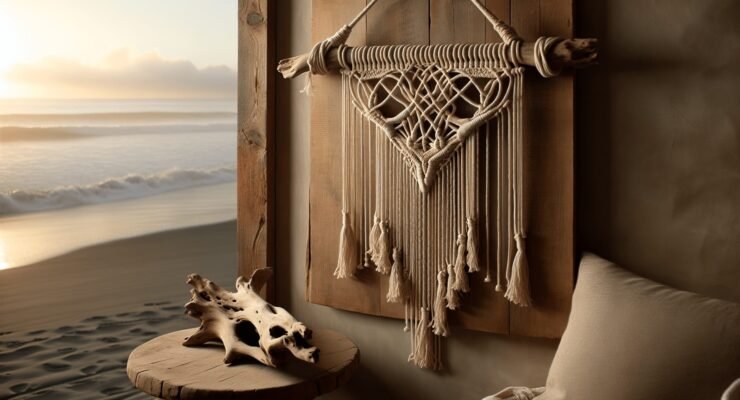
Driftwood Macrame Wall Hanging

Wall hangings are one of the most popular driftwood macrame projects. They can be simple or intricate, depending on your macrame skill level. Use a combination of different knots, beads, and charms to create a unique piece.

Driftwood Plant Hangers

Using driftwood as the base for a plant hanger adds a rustic touch to your indoor garden. Craft a sturdy macrame net to hold the pot and securely attach it to your driftwood piece.

Driftwood Key Holder

A smaller, simpler project like a key holder is perfect for beginners. Knot short lengths of cord into a design that includes hooks or small loops for holding keys.

Driftwood Shelving

Combine the functionality of shelves with the aesthetic of macrame and driftwood. Use strong knots and cords to create a sturdy shelf attached to a large piece of driftwood.

Driftwood Macrame Projects

Driftwood Macrame Project Tips & Tricks

Choosing the Right Cord

The type of macrame cord you choose can significantly affect the appearance and durability of your project. Here’s a quick comparison:

TypeBenefitsDrawbacks
CottonSoft, easy to work with, natural lookCan accumulate dust, less durable
HempDurable, eco-friendly, rustic lookRough texture, limited color choices
SyntheticDurable, variety of colorsLess eco-friendly, less natural look

Knot Techniques

Practicing different knot techniques can elevate your macrame projects:

Lark’s Head Knot

  1. Fold your cord in half.
  2. Place the loop over the driftwood.
  3. Pull the ends through the loop and tighten.

Square Knot

  1. Divide four cords: left, fillers, and right.
  2. Place the left cord over the fillers and under the right cord.
  3. Place the right cord under the fillers and through the loop created by the left cord. Pull tight.
  4. Repeat with the right cord to complete the square.

Half Hitch Knot

  1. Take one cord and wrap it around an adjacent cord.
  2. Pull through the loop and tighten.
  3. Repeat to create a row or spiral effect.

Finishing Touches

  • Secure loose ends with a dab of glue.
  • Comb out and trim fringes for a polished look.
  • Experiment with dyeing your cords for added color.

Common Mistakes and How to Avoid Them

Embarking on driftwood macrame projects is rewarding, but beginners can encounter some common mistakes:

Uneven Cord Lengths

Always measure your cords generously. Extra length can be trimmed, but if a cord is too short, you might have to start over.

Slippery Knots

Make sure your knots are tight, but not so tight that they distort the pattern. Practice will help you find the right balance.

Inadequate Driftwood Preparation

Ensure your driftwood is thoroughly cleaned and dried before starting. This prevents issues with odors and bugs.

Inspiration from Driftwood Macrame Artists

Let the work of inspiring artists fuel your creativity. Some to look out for include:

Windy Chien

Known for her intricate designs and innovative use of materials, Windy Chien’s work demonstrates how versatile macrame can be.

Emily Katz

Emily’s book “Modern Macrame” offers a wealth of inspiration and guides on contemporary macrame projects.

Fibers & Forest

This Instagram account showcases stunning driftwood and macrame pieces, perfectly blending rustic and modern aesthetics.

Final Thoughts

Driftwood macrame projects can be as simple or complex as you desire, making them perfect for crafters of all skill levels. They offer a wonderful way to incorporate natural elements into your home while indulging in a creative and meditative hobby. Integrating driftwood with macrame not only accentuates your living space but also brings a piece of nature’s serenity into your daily life.

Whether you’re new to macrame or a seasoned artist, the unique combinations and endless possibilities of driftwood macrame will provide infinite projects to explore. So grab your driftwood, some cord, and get knotting – your next beautiful creation awaits!

Filed Under: Driftwood Ideas Tagged With: Art Projects, DIY, Driftwood, Handmade, home decor, Macrame

Modern Driftwood Projects Unique

May 31, 2024 by admin

Welcome to a world where nature’s beauty meets contemporary design with “Modern Driftwood Projects Unique.” In this captivating article, you’ll delve into innovative ways to transform humble driftwood into striking pieces of art and decor. Whether you’re a seasoned crafter or a DIY enthusiast, you’ll find inspiration and practical tips to create one-of-a-kind projects that showcase the raw, organic charm of driftwood with a modern twist. Get ready to infuse your living space with coastal vibes and refined rustic elegance through these amazing, unique driftwood creations. Have you ever gazed at a piece of driftwood and wondered about the stories it could tell or the dazzling projects it could become? Driftwood, with its unique shapes and textures, opens the door to creative and modern designs.

Modern Driftwood Projects Unique

The Allure of Driftwood

Driftwood carries an enigmatic charm. Weathered by the forces of nature, each piece is a work of art in itself. It connects you with nature and can transform your living space with its organic and rustic appeal. But beyond its aesthetic value, driftwood is also a sustainable material, making it a perfect choice for eco-conscious projects.

Why Use Driftwood?

Using driftwood in your projects brings a slice of nature indoors. Each piece is unique, which means your creation will be one-of-a-kind. Furthermore, driftwood is incredibly versatile; it can be shaped, painted, or left in its natural beauty.

Where to Find Driftwood

While beachcombing is the most traditional way to find driftwood, there are other sources as well. Some artists and suppliers sell gathered driftwood pieces, often seasoning them for months to ensure they’re ready for use. You can also find driftwood in lakes or riverbeds, each giving their unique characteristics based on their origin.

Getting Started with Driftwood Projects

Starting with driftwood can seem daunting, but don’t worry, you’re going to love the process. Here’s a simple guide to help you embark on this exciting journey.

Selecting the Right Driftwood

Not all driftwood is suitable for every project. Small, smooth pieces are great for crafting jewelry or ornaments, while larger, more rugged pieces make excellent sculptures or furniture.

Driftwood Characteristics

FeatureSuitable ForExamples
Small and SmoothJewelry, OrnamentsDriftwood necklaces, Christmas decorations
Medium-sizedWall art, FramesDriftwood mirrors, photo frames
Large and TexturedFurniture, SculpturesCoffee tables, abstract art pieces

Preparing Driftwood

Before you can start any project, you need to prepare your driftwood. This involves cleaning, seasoning, and sometimes treating it to ensure durability and safety.

Cleaning Driftwood

Submerge the driftwood in fresh water for a few days to remove salt and any residual debris. Change the water regularly until it runs clear. For an extra step, you can scrub the wood with a brush to ensure it’s thoroughly clean.

Seasoning Driftwood

Once clean, allow the driftwood to dry completely. This process can take several weeks but is essential to prevent warping and ensure the wood’s durability.

Tools You’ll Need

Working with driftwood requires some basic tools. Depending on your project, you might need:

  • Sandpaper
  • A handsaw or jigsaw
  • Wood glue
  • Screws and nails
  • Paint and finishing supplies

Unique Driftwood Projects

Now that you’re ready to start, here are some unique driftwood projects that add a modern yet rustic touch to any space.

Driftwood Wall Art

Creating wall art with driftwood is a fantastic way to bring natural textures into your home. You can design beautiful compositions that range from abstract designs to more structured patterns.

How to Make Driftwood Wall Art

  1. Gather several pieces of driftwood that complement each other in size and shape.
  2. Arrange them on a flat surface until you’re happy with the design.
  3. Glue or nail the pieces together.
  4. Add hanging hardware to the back to easily mount it on a wall.

Driftwood Frames

A driftwood frame can add a rustic charm to your photographs or artwork.

Creating a Driftwood Frame

  1. Measure and cut driftwood pieces to fit around your photo or art.
  2. Sand the edges to smooth out any rough spots.
  3. Glue the pieces together at the corners and let them dry.
  4. Attach a backing and any hanging hardware needed.

Driftwood Mirrors

A mirror framed with driftwood is both functional and decorative.

Making a Driftwood Mirror

  1. Select a mirror size and gather driftwood pieces that will frame it.
  2. Arrange the driftwood around the mirror to form a frame.
  3. Secure the driftwood using strong adhesive or screws.
  4. Add backing to support the mirror and frame structure.

Driftwood Furniture

Transform larger pieces of driftwood into impressive furniture items like coffee tables, shelves, and benches.

Building Driftwood Furniture

  1. Select a solid base piece of driftwood.
  2. Use smaller pieces to create legs or additional structural support.
  3. Attach the pieces securely using wood screws and glue.
  4. Sand and finish the wood to ensure a smooth surface.
ProjectMaterialsTools
Wall ArtVarious small-to-medium driftwood piecesSandpaper, Glue, Hanging hardware
FramesDriftwood pieces, photo/artHandsaw, Sandpaper, Glue, Photo frame backing
MirrorsDriftwood, MirrorAdhesive, Screws, Finishing materials
FurnitureLarge driftwood piecesDrill, Screws, Sandpaper, Wood finish

Enhancing Your Driftwood Projects

For a more polished look, you can enhance your driftwood projects with various finishing techniques.

Staining and Painting

While the natural look of driftwood is appealing, staining or painting can add a touch of sophistication. Consider using natural, earth-toned stains to retain the rustic charm or go bold with vibrant colors.

Adding Accessories

Incorporate elements like shells, stones, or other natural materials to complement your driftwood projects. These can be glued on or embedded into the wood to create intricate designs.

Sealing

Sealing your driftwood projects is crucial for longevity, especially if they will be outdoors or in humid environments. Use a clear sealant to protect the wood without altering its appearance.

Types of Sealants

Sealant TypeBest ForDurability
Clear PolyurethaneIndoor useHigh
Marine VarnishOutdoor useVery High
Natural Oils (e.g., Tung, Linseed)Indoor decorative itemsModerate

Lighting Integration

Driftwood can be used to create stunning, unique lighting fixtures. Imagine a driftwood lamp or chandelier casting warm, natural light in your home.

How to Integrate Lighting

  1. Choose a suitable piece of driftwood as the base.
  2. Decide on the type of lighting fixture you want (e.g., string lights, LED).
  3. Drill holes or carve channels where necessary to lay wiring.
  4. Secure the lights into the driftwood and conceal wires for a clean look.

Modern Driftwood Projects Unique

Innovative Ideas Using Driftwood

Thinking outside the box can lead to new and innovative driftwood projects.

Driftwood Garden Features

Bring driftwood into your outdoor spaces by using it in gardens. It can be used to create unique planters, edging for garden beds, or even whimsical garden sculptures.

Garden Driftwood Projects

ProjectDescription
Driftwood PlanterUse hollowed-out driftwood to create planters.
Garden EdgingLine driftwood along garden beds for a rustic border.
SculpturesCreate abstract sculptures for garden decor.

Functional Art

Driftwood can be transformed into functional pieces of art, such as hooks and stands.

Functional Driftwood Projects

ProjectDescription
Driftwood HooksAttach hooks to driftwood for use as coat or key hangers.
Driftwood StandsCreate stands for holding books, tablets, or other items.

Driftwood Decor for Special Occasions

Use driftwood to add a natural touch to weddings or other events. Create centerpieces, signage, or even a unique backdrop.

Event Decor Ideas

ProjectDescription
CenterpiecesArrange small driftwood pieces with candles or flowers.
SignagePaint or carve into driftwood for unique event signs.
BackdropsCreate a large driftwood backdrop for photo ops.

Maintaining Driftwood Projects

To ensure your driftwood projects stand the test of time, regular maintenance is vital. Here are some tips to keep your creations looking fresh and beautiful.

Cleaning

Dust and clean your driftwood items periodically with a soft cloth. For deeper cleaning, use a damp cloth and mild soap.

Handling Repairs

Over time, driftwood pieces may loosen or develop minor cracks. These can usually be fixed with a touch of glue or by securing with additional screws.

Reapplying Sealant

Depending on use and exposure, you might need to reapply a sealant every few years. This helps maintain the driftwood’s integrity and appearance.

Conclusion

Creating modern driftwood projects is not only a fulfilling activity but also a way to bring a piece of nature into your home. Every project tells a unique story, endowed by the natural beauty and history of the driftwood itself. Whether you’re making wall art, frames, furniture, or even functional pieces, you’re bound to end up with something truly unique. Happy crafting, and may your DIY adventures with driftwood be as inspiring as the ocean waves that shaped it!

Filed Under: Driftwood Ideas Tagged With: DIY, Driftwood, home decor, Modern Design, Unique Crafts

Driftwood Projects Mirrors

May 30, 2024 by admin

Discover the magical world of driftwood projects and how you can transform ordinary mirrors into stunning, rustic centerpieces for your home. This guide on “Driftwood Projects Mirrors” will inspire you to embrace nature’s beauty while showcasing your creative flair. Learn tips and techniques to craft your unique driftwood mirrors, adding charm and character to any room. Get ready to dive into a fun and rewarding DIY adventure that combines the timeless appeal of driftwood with the functionality of mirrors. Have you ever strolled along a beach, feeling the sand between your toes and wondered what beautiful object you could create using the pieces of driftwood scattered around? Driftwood has a unique charm and character that makes it ideal for various DIY projects, especially when creating mirrors. In this article titled “Driftwood Projects Mirrors,” you’ll discover loads of inspiration, tips, and step-by-step guides to craft your own stunning driftwood mirrors.

Driftwood Projects Mirrors

What is Driftwood?

Before diving deeply into projects, understanding what driftwood is will be helpful. Driftwood is essentially wood that has been washed ashore by waves, typically after floating in the sea or river for an extended period. This wood boasts a rustic appearance and a weathered texture, lending itself perfectly to artistic and natural-themed decor.

Why Use Driftwood for DIY Projects?

You might be wondering why driftwood is so popular for DIY projects, especially mirrors. Here are some compelling reasons:

  1. Unique Aesthetic: Each piece of driftwood is unique, boasting different shapes, sizes, and textures.
  2. Environmental Impact: Using driftwood is an eco-friendly way to upcycle wood that might otherwise go to waste.
  3. Versatile: Driftwood can be used for multiple projects, from minimalist mirrors to intricate designs.

Essential Tools and Materials

Creating a beautiful driftwood mirror is easier than you might think, especially if you have the right tools and materials. Here’s a checklist of what you’ll need:

ToolsMaterials
Hot glue gunDriftwood pieces
Miter sawMirror base
SandpaperWood glue
PaintbrushOptional: Paint or stain
Measuring tapeMounting hardware
ClampsProtective finish

Where to Find Driftwood

Natural driftwood can be found along coastlines, riverbanks, and lakeshores. If you don’t live near these areas, don’t worry! You can find driftwood at craft stores or purchase them online.

Preparing Your Driftwood

Before you start attaching driftwood to your mirror, you will need to prepare the pieces. This involves cleaning, drying, and sometimes sanding the wood to ensure it’s ready for use.

Cleaning Driftwood

  1. Rinse thoroughly: Remove sand, dirt, and grime by rinsing the driftwood under running water.
  2. Soak: Soak the wood in a mixture of water and mild bleach for 24 hours to kill any mold or pests.
  3. Dry: Allow the wood to dry completely in a sunny spot for at least a week.

Sanding and Shaping

Once dry, inspect the driftwood. Use sandpaper to smooth any rough edges. If needed, use your miter saw to cut pieces into your desired shapes and lengths.

Basic Driftwood Mirror Project

Let’s start with a simple, straightforward driftwood mirror project. This project involves creating a border made from driftwood around a round or rectangular mirror base.

Step-by-Step Guide

  1. Measure and Cut: Measure the mirror base to determine how much driftwood you’ll need. Cut the pieces accordingly.
  2. Arrange Pieces: Lay out your driftwood pieces around the mirror to get an idea of the final look. Feel free to mix up lengths and shapes for a natural vibe.
  3. Attach Driftwood: Use a hot glue gun to attach each piece of driftwood to the mirror base. Work your way around until the entire frame is covered.
  4. Secure and Dry: Once all pieces are glued, use clamps to secure the driftwood while the glue dries.
  5. Finishing Touches: Apply a protective finish with a paintbrush, letting it dry completely before mounting your mirror.

Optional: Staining or Painting

If you prefer, you can stain or paint the driftwood to match your decor. Use a paintbrush to apply the stain or paint, and then allow it to dry thoroughly. This step is optional but adds a personalized touch to your project.

Driftwood Projects Mirrors

Advanced Driftwood Mirror Projects

Once you’re comfortable with the basics, you can move on to more intricate designs. These projects may require additional tools and materials, but the results are worth the extra effort.

Driftwood Sunburst Mirror

A sunburst mirror radiates elegance and is an impressive addition to any room. Here’s how to create one using driftwood:

  1. Materials Needed:

    • Small circular mirror base
    • Driftwood pieces in various lengths
    • Hot glue gun
    • Wood glue
    • Measuring tape
    • Compasses for drawing circles
    • Mounting hardware
  2. Instructions:

    • Draw Circles: Place the small circular mirror base at the center of a larger piece of wood or cardboard. Draw concentric circles around it, marking where the driftwood pieces will go.
    • Arrange Driftwood: Lay out your driftwood pieces from the center to the outer edges, resembling the rays of the sun. Make sure the pieces vary in length for a more natural look.
    • Glue Pieces: Use wood glue to attach each driftwood piece to the frame. Apply a bead of glue along the edge of the mirror base and press each piece firmly.
    • Final Touches: Allow the glue to dry, then attach mounting hardware to the back of your mirror. Hang it and enjoy your stunning creation.

Driftwood Mosaic Mirror

For a more artistic and contemporary design, try creating a driftwood mosaic mirror. This project requires smaller pieces and allows for a lot of creativity in the arrangement.

  1. Materials Needed:

    • Mirror base (any shape)
    • Small driftwood pieces and chips
    • Hot glue gun
    • Wood glue
    • Measuring tape
    • Sandpaper
    • Optional: Paint or stain
  2. Instructions:

    • Prepare Pieces: Sand the small driftwood pieces to remove any rough edges. If you wish, paint or stain the pieces before assembly.
    • Layout Design: Arrange the pieces around the mirror in a mosaic pattern, leaving slight gaps between each piece.
    • Attach Driftwood: Use a hot glue gun to attach the driftwood pieces to the mirror base one by one. Ensure they stick firmly without shifting.
    • Finish: Let the mirror dry completely. Apply a protective finish if desired.

Maintenance and Care for Driftwood Mirrors

Driftwood mirrors are relatively low-maintenance, but keeping them clean and ensuring they remain beautiful for years to come is essential.

Cleaning Tips

  1. Dust Regularly: Use a soft, dry cloth to dust the driftwood frame regularly. This prevents buildup and keeps the wood looking fresh.
  2. Avoid Water: Keep water away from the driftwood as much as possible. If it must be cleaned, use a damp cloth lightly and dry it immediately.
  3. Protective Finish: Applying a protective finish when you first create the mirror can make it easier to clean and protect it from wear and tear.

Rehydrating Driftwood

Over time, driftwood can appear dry and brittle. To keep it looking its best:

  1. Apply Oil: Use a natural wood oil, like linseed or teak oil, to rehydrate the wood. Apply a small amount with a cloth, rubbing it into the wood, and allow it to absorb.
  2. Wipe Off Excess: After letting the oil soak in, use a clean cloth to wipe off any lingering oil.

Inspiration From Professional Driftwood Artists

Feeling inspired yet? If you’d like to take your projects to the next level, looking at professional driftwood artists’ work can spark new ideas.

Artist Profiles

  1. Debra Bernier: Known for her intricate driftwood sculptures that often include faces and figures, Debra’s work combines the natural beauty of driftwood with human artistic expression.
  2. Jeffro Uitto: Specializing in elaborate furniture and art pieces made from driftwood, Jeffro’s work showcases what’s possible with dedication and craftsmanship.

Steal These Ideas

  1. Mixed Media: Combine driftwood with other natural materials like shells, stones, or even metal pieces to create a truly eclectic mirror frame.
  2. Layered Depths: Experiment with layering multiple pieces of driftwood to add depth and texture to your design.

Selling Your Driftwood Mirrors

If you find yourself particularly skilled at creating driftwood mirrors, why not turn it into a small business or side hustle?

Setting Up Shop

  1. Online Marketplaces: Websites like Etsy, eBay, and local classifieds are excellent platforms for selling handmade driftwood mirrors.
  2. Local Craft Fairs: Participating in craft fairs and local markets can help you build a local customer base and get direct feedback on your art.

Pricing Your Work

Pricing handmade items can be tricky. Here are some pointers to get you started:

  1. Cost of Materials: Calculate the total cost of your materials and tools.
  2. Labor: Consider the time and effort you put into each piece. A good rule of thumb is to pay yourself an hourly wage.
  3. Market Demand: Look at what similar driftwood mirrors are being sold for and adjust your prices accordingly.

Conclusion

Creating driftwood mirrors is not only a fulfilling DIY project but also an excellent way to add a touch of nature to your home decor. From basic designs to more advanced projects, the possibilities are endless with driftwood. You now have all the knowledge and inspiration needed to embark on your own driftwood mirror projects. So, go gather some driftwood, roll up your sleeves, and start creating something beautiful today!

Filed Under: Driftwood Ideas Tagged With: DIY Projects, Driftwood, home decor, Mirrors

Driftwood Projects Unique Table Lamps

May 30, 2024 by admin

In “Driftwood Projects Unique Table Lamps,” you’ll embark on a delightful journey of creativity and craftsmanship. This article explores the art of transforming humble driftwood into stunning, one-of-a-kind table lamps that add a touch of natural elegance to any room. You’ll discover the beauty of repurposing nature’s offerings, and how each piece of driftwood carries its own story, texture, and charm. Dive in and be inspired by the innovative designs and detailed steps, ensuring you can create your own unique driftwood lamp that will surely become a conversation starter in your home. Have you ever stumbled upon a piece of driftwood during a beach stroll and wondered what you could transform it into? If crafting unique table lamps out of driftwood piques your interest, you’re in for a treat! Driftwood, with its natural, weathered appearance, offers an endless array of creative possibilities. In this friendly guide, we’ll walk you through the intriguing world of driftwood projects, focusing on creating stunning, unique table lamps.

Why Choose Driftwood for Your Projects?

Aesthetic Appeal

Driftwood has this innate, rustic beauty that can’t be replicated. Each piece is uniquely shaped and textured, making it a standout material for decorative items such as table lamps.

Eco-Friendly

Reusing driftwood is a fantastic way to embrace sustainable living. Instead of contributing to waste, you’re giving new life to nature’s masterpieces.

Easy to Work With

Driftwood is lightweight yet sturdy, making it an excellent choice for DIY projects. Plus, it’s relatively easy to manipulate into different forms.

So, gather your materials and lets set out on a creative journey to craft your own driftwood table lamps!

Materials Needed for Driftwood Table Lamps

Before we dive into the step-by-step process, let’s get you geared up with the necessary materials.

MaterialPurpose
Driftwood PiecesMain structure of the lamp
Lamp Kit (socket, wiring, plug)The electrical components needed for lighting
Lamp ShadeTo diffuse the light and complete the lamp design
SandpaperFor smoothing rough edges
Wood GlueFor attaching pieces together
Varnish or SealantTo protect the wood and give it a finished look
Base (wood or metal)To stabilize the lamp
Drill with BitsFor creating holes for the wiring and assembly
Screws and ScrewdriverTo secure the base and other components
Protective Gear (gloves, safety glasses)To ensure your safety during crafting

Driftwood Projects Unique Table Lamps

Step-by-Step Guide to Crafting Your Driftwood Table Lamp

Step 1: Selecting and Preparing Your Driftwood

The first step is finding the right pieces of driftwood. Look for driftwood that is dry, free of pests, and not overly brittle.

Pro Tip: Larger stores often have a wider selection of driftwood, but don’t overlook small and unique pieces; they can add character.

  1. Clean the Driftwood: Remove any dirt, sand, or algae using a brush and soapy water. Rinse well and let it dry completely.
  2. Sand the Wood: Use sandpaper to smooth out rough edges. This makes the wood easier to handle and prevents potential splinters.
  3. Seal the Wood: Applying a coat of varnish or sealant will help preserve the wood and enhance its natural beauty.

Step 2: Designing Your Lamp

Think about the overall look you want to achieve. Do you envision a simple, minimalist lamp, or something more elaborate and artistic?

  1. Sketch Your Design: Take a moment to sketch your design. This doesn’t need to be perfect but should give you a general idea of what your final lamp will look like.
  2. Plan the Layout: Decide how your pieces of driftwood will be arranged. Consider the height and stability of your lamp.

Step 3: Assembling the Lamp Structure

Now comes the fun part—putting it all together!

  1. Drill Holes for Wiring: Carefully drill a hole through the center of your main piece of driftwood enough to fit the lamp cord through. If your design includes multiple pieces, you’ll need to ensure your wiring can navigate through all of them.
  2. Attach the Base: Secure the driftwood to your chosen base using screws. A stable base is crucial for ensuring your lamp stands upright.
  3. Glue Smaller Pieces: If you have smaller pieces of driftwood that add character, glue these onto the main structure.

Step 4: Wiring the Lamp

Safety first! Make sure you’re comfortable working with electrical components or consult someone who is.

  1. Feed the Cord: Guide the lamp cord through the hole you drilled earlier.
  2. Attach the Socket: Follow the lamp kit instructions to correctly connect the wiring to the socket. Make double sure all connections are secure for safety.
  3. Install the Bulb: Once your wiring is complete, screw in a bulb to test your work.

Step 5: Adding the Finishing Touches

Your lamp is almost ready! Now, it’s time to add those final touches.

  1. Install the Lamp Shade: Choose a lamp shade that complements your driftwood base. Attach it following the lamp kit’s instructions.
  2. Final Seal: If you didn’t do this earlier, now is a good time to apply a final coat of varnish or sealant.

Creative Variations & Tips

Don’t be afraid to get creative! Here are some additional ideas to make your lamp truly one-of-a-kind.

Adding Decorative Elements

Consider adding seashells, small stones, or other natural elements to your lamp. These can be glued onto the driftwood for added visual appeal.

Using Different Lamp Shades

The type of lamp shade you choose can drastically alter the look of your lamp. From rustic burlap to elegant silk, the options are endless.

Incorporating Multiple Driftwood Pieces

If you have several pieces of driftwood, consider stacking or intertwining them for a more complex and fascinating design.

Playing with Light Bulbs

Experimenting with different types of bulbs—such as Edison bulbs or colored bulbs—can create various moods and atmospheres in your space.

Driftwood Projects Unique Table Lamps

Driftwood Lamp Maintenance

Regular Dusting

Keep your lamps looking fresh by regularly dusting them. A soft, dry cloth usually does the trick.

Reapplying Sealant

Over time, the finish on your driftwood lamp might dull. Reapplying a coat of sealant every year or so will help maintain its beauty.

Checking Electrical Components

It’s always a good idea to periodically check the wiring and components of your lamp to ensure everything stays safe and functional.

Embracing the Imperfections

One of the most charming aspects of driftwood is its imperfections. Knots, splits, and weathered textures all contribute to the distinctive look of your lamp. Don’t strive for perfection; celebrate the uniqueness of each piece you create.

Inspiration From Other Driftwood Projects

Besides table lamps, driftwood has found its way into many other forms of home decor. Here are a few ideas to spark your creativity:

Project IdeaDescription
Driftwood ShelvesCombine functionality with rustic beauty by creating floating shelves
Driftwood Wall ArtArrange pieces of driftwood in artistic patterns to adorn your walls
Photo FramesFrame your cherished memories with driftwood for a natural touch
Candle HoldersCreate charming, beach-inspired candle holders using smaller pieces

Sharing Your Driftwood Masterpiece

You’ve put in the work, now it’s time to showcase your creation!

Social Media

Sharing photos of your driftwood lamp on platforms like Instagram or Pinterest can inspire others and connect you with fellow crafters.

Craft Fairs

Consider participating in local craft fairs or markets to exhibit and even sell your driftwood creations.

Gift Giving

A handmade driftwood lamp makes for a thoughtful and unique gift. It’s a wonderful way to share a piece of your creativity with loved ones.

Troubleshooting Common Issues

Even the most seasoned DIY-ers encounter hiccups along the way. Here are some common issues and how to fix them:

Uneven Lamp Base

If your lamp seems wobbly, you can add small felt pads to the bottom of the base to help level it out.

Loose Driftwood Pieces

Should any driftwood pieces come loose, a bit of strong wood glue usually does the trick to reattach them securely.

Electrical Problems

If your lamp doesn’t light up, recheck all your electrical connections. Make sure all wiring is properly secured and that the bulb you’re using is functional.

Conclusion

Creating unique table lamps from driftwood not only allows you to craft something beautiful but also sustainable. From selecting the perfect pieces to designing and assembling your lamp, the process is both rewarding and enjoyable. Remember, every piece of driftwood is a natural work of art, making each lamp a unique masterpiece. So, what are you waiting for? Gather your materials and start crafting your very own driftwood lamp today!

Happy crafting!

Filed Under: Driftwood Ideas Tagged With: Driftwood, Handmade, home decor, Table Lamps, Unique Projects

Large Driftwood Projects Unique

May 30, 2024 by admin

Welcome to “Large Driftwood Projects Unique,” where your creativity finds its perfect companion in nature’s artistry. In this article, you’ll uncover the beauty and versatility of large driftwood pieces, and how they can become stunning centerpieces or functional additions to your home. From impressive sculptures to rustic furniture, you’ll be inspired by unique project ideas that blend seamlessly with any décor. Embrace the natural charm of driftwood and transform ordinary spaces into extraordinary ones! Have you ever walked along a serene beach, collected driftwood, and wondered about the vast creative potential it holds? Driftwood, nature’s sculpted artwork, offers an endless array of possibilities for unique and impactful projects that can transform any space. Whether you are a seasoned craftsman or someone simply looking to add a creative touch to your home, large driftwood projects can bring a natural and rustic appeal to your surroundings.

Large Driftwood Projects Unique

Why Choose Driftwood for Your Projects?

Driftwood is not only aesthetically pleasing but also sustainable and versatile. Its unique texture, shape, and weathered look make it a favorite among artisans and DIY enthusiasts. Let’s explore some compelling reasons why you should consider driftwood for your next big project.

Sustainability and Eco-Friendliness

Using driftwood is an excellent way to incorporate eco-friendly materials into your lifestyle. Driftwood is a natural resource that has washed ashore and doesn’t require additional logging or harvesting, which means you are using a resource that’s already available and minimizing environmental impact.

Unique Aesthetic Appeal

Each piece of driftwood is unique, having been shaped and weathered by nature over time. This individuality ensures that your projects will have a one-of-a-kind look, making them stand out. The natural shapes and textures can give a rustic, artistic feel to your decor.

Versatility

Driftwood can be used in a variety of ways, from large furniture pieces to intricate art projects. Its versatility makes it an ideal material for a wide range of projects, catering to different tastes and styles. Whether you’re aiming for a contemporary, rustic, or even a coastal look, driftwood adapts well.

Getting Started with Driftwood Projects

Before diving into specific projects, it’s important to gather some basic tools and materials. Preparing your driftwood properly is also crucial to ensure the longevity of your creations.

Tools and Materials

Here is a list of essential tools and materials you might need for working with driftwood:

Tool/MaterialPurpose
Driftwood PiecesCentral material for your projects
SawCutting driftwood to desired sizes
SandpaperSmoothing surfaces
Wood GlueAdhering pieces together
Screws and BoltsSecuring larger structures
DrillCreating holes for screws and bolts
Paint and FinishesAdding color or protecting the wood
Protective GearSafety while working (gloves, goggles, mask)

Preparing Driftwood

  1. Cleaning: Wash the driftwood thoroughly to remove any debris, sand, or salt residue. You can use a brush and soapy water for this purpose.
  2. Drying: Allow the driftwood to dry completely in the sun for several days. This helps prevent mold and ensures the wood is ready for use.
  3. Sanding: Sand the surfaces to remove any rough edges and splinters, making it easier to work with and handle.
  4. Treatment: Apply a wood preservative to prevent decay and protect against pests. This step is optional but recommended for long-lasting projects.

Top Large Driftwood Projects

Driftwood can be transformed into stunning large-scale projects that not only serve a functional purpose but also elevate the aesthetic appeal of your space. Here are some top ideas to inspire you.

Driftwood Furniture

Creating furniture pieces out of driftwood can be a rewarding endeavor. The natural curves and organic shapes can add a unique character to your home.

Driftwood Coffee Table

A driftwood coffee table is a perfect centerpiece for your living room. Its rustic charm can complement both modern and traditional interiors.

Steps to Create:

  1. Select the Base: Choose a large, sturdy piece of driftwood for the base.
  2. Top Surface: Secure a piece of glass or a reclaimed wood slab on top to create a flat surface.
  3. Assembly: Use screws and wood glue to attach the top securely.
  4. Finishing Touches: Sand any rough edges and apply a protective finish to the wood.

Driftwood Shelves

Shelves made of driftwood bring a touch of nature indoors and can be used in various spaces, from kitchens to living rooms.

Steps to Create:

  1. Find Suitable Pieces: Look for flat, elongated pieces of driftwood that can support weight.
  2. Brackets and Supports: Use metal brackets or other sturdy supports to mount the shelves on the wall.
  3. Assembly: Attach the driftwood planks to the brackets using screws.
  4. Finishing: Sand edges and apply any desired finish.

Driftwood Art Installations

Large art pieces crafted from driftwood can serve as striking focal points in any room.

Driftwood Wall Art

This involves creating a large, intricate design with various pieces of driftwood.

Steps to Create:

  1. Design: Sketch out your design on paper.
  2. Layout: Arrange the driftwood pieces on the floor to match your design.
  3. Assembly: Once satisfied with the layout, use wood glue and nails to secure the pieces onto a wooden or metal frame.
  4. Mounting: Securely mount the frame on the wall.

Driftwood Sculptures

Sculptures can range from simple to complex, depending on your skill level and creativity.

Steps to Create:

  1. Choose a Theme: Decide on a theme or design for your sculpture.
  2. Gather Pieces: Collect driftwood pieces that fit your design concept.
  3. Assembly: Start assembling the pieces, using wood glue and screws to secure them.
  4. Finishing: Sand any rough edges and apply a finish if desired.

Driftwood Garden Projects

Enhancing your garden with driftwood can create a natural and serene environment.

Driftwood Planters

Using driftwood to create planters can add an earthy touch to your garden decor.

Steps to Create:

  1. Select Driftwood: Choose pieces that can form a container shape.
  2. Assembly: Use nails and wood glue to assemble the driftwood into a planter shape.
  3. Lining: Line the inside with a waterproof material to hold soil.
  4. Planting: Add soil and your choice of plants.

Driftwood Garden Paths

Creating a garden path with driftwood pieces can add a whimsical touch to your outdoor space.

Steps to Create:

  1. Layout: Plan the path layout in your garden.
  2. Preparation: Dig shallow trenches where the driftwood will be placed.
  3. Placement: Arrange driftwood pieces in the trenches.
  4. Finishing: Fill gaps with soil or gravel to stabilize the path.

Tips for Working with Large Driftwood Projects

Large driftwood projects can be challenging, but with the right approach, they can be incredibly rewarding. Here are some tips to keep in mind.

Safety First

Always prioritize safety when working with large pieces of wood. Wear gloves, goggles, and a mask to protect yourself from dust and sharp edges. Make sure your work area is well-ventilated and free from hazards.

Stabilize Your Projects

Large driftwood pieces can be heavy and unwieldy. Ensure that your projects are stable by securing them properly with screws, bolts, and wood glue. For larger installations, consider additional supports or brackets.

Embrace Imperfections

One of the unique aspects of driftwood is its natural imperfections. Embrace these features as they add character and authenticity to your projects. Rather than trying to make everything perfect, let the natural beauty of the wood shine through.

Experiment with Finishes

Experiment with different finishes to achieve your desired look. Whether you prefer a natural, unfinished look or something more polished, finishing techniques can greatly enhance the final product.

Large Driftwood Projects Unique

Benefits of Large Driftwood Projects

Large driftwood projects can offer numerous benefits beyond their visual appeal.

Personal Satisfaction and Accomplishment

Completing a large-scale driftwood project can provide a great sense of achievement. The process of designing, creating, and finishing a piece is rewarding and can be a great way to spend your time.

Enhancing Home Décor

Driftwood projects can significantly enhance your home’s decor. The unique aesthetic of driftwood can complement various design styles and add a natural, rustic element to your space.

Conversation Starters

Unique driftwood pieces can serve as excellent conversation starters when you have guests. They can pique interest and admiration, providing you with an opportunity to share the stories and processes behind your creations.

Eco-Friendly and Sustainable

Using driftwood for your projects is an environmentally friendly choice. It repurposes natural materials, reducing waste and minimizing the need for new resources. This sustainability aspect is particularly appealing in today’s eco-conscious world.

Conclusion

Large driftwood projects are not just about creating items for your home; they are about embracing the beauty and uniqueness of nature. From crafting stunning pieces of furniture to intricate art installations and garden enhancements, the possibilities are endless.

By following the tips and ideas provided in this article, you can embark on your driftwood projects with confidence. Whether you are seeking to add a touch of rustic charm to your home or simply want to engage in a creative and sustainable hobby, working with driftwood can be incredibly fulfilling.

So the next time you find yourself wandering along the beach, remember the potential that lies in those weathered pieces of wood. Pick them up, bring them home, and let your imagination soar as you create unique, impactful driftwood projects. Happy crafting!

Filed Under: Driftwood Ideas Tagged With: Coastal Decor, Driftwood, home decor, Large Projects, Unique Crafts

Driftwood Log Projects

May 30, 2024 by admin

If you love adding a touch of nature and rustic charm to your home, “Driftwood Log Projects” is just the inspiration you need. This guide brims with creative ideas to transform washed-up wood into stunning decor pieces. Imagine crafting unique candle holders, picture frames, or even furniture that tell a story of their own. Your living space will get an instant upgrade, all while showcasing the natural beauty of driftwood. Get ready to unleash your inner artist and let these driftwood projects breathe new life into your home.

Driftwood Log Projects

Have You Ever Thought About Getting Creative with Driftwood?

Driftwood is more than just debris washed ashore. It’s nature’s gift to creatives, crafters, and DIY enthusiasts. Whether you regularly scour beaches for interesting finds or just stumbled upon a beautiful driftwood piece, transforming it into something remarkable is incredibly satisfying.

In this article, you’ll explore a wide range of driftwood log projects. These projects not only add a rustic touch to your home decor but also help in recycling and upcycling natural material. So why not give it a try?

Driftwood Log Projects

Why Choose Driftwood?

If you’re wondering why driftwood makes such a great material for DIY projects, think about its unique appearance. Each piece comes with its own shape, texture, and history. Driftwood is eco-friendly, readily available (especially if you live near a coast or a lake), and versatile. Plus, it’s an excellent conversation starter!

Benefits of Using Driftwood

Here are some compelling reasons to incorporate driftwood into your next project:

  • Sustainability: Driftwood is an excellent option for eco-conscious crafters looking to reduce their impact on the environment.
  • Unique Aesthetic: No two pieces are alike, which means your creations will always be one-of-a-kind.
  • Durability: Properly treated and finished, driftwood can last for many years.
  • Versatility: Driftwood works well in various projects ranging from small crafts to large furniture pieces.

Preparing Driftwood for Projects

Finding the Right Piece

Not all driftwood pieces are suitable for crafting. Look for wood that’s sturdy, dry, and free from pests or rot. Ensure the piece has the right texture and shape for the project you have in mind.

Cleaning Driftwood

Before you start your project, it’s crucial to clean your driftwood properly. Here’s how you can do it:

  1. Rinse Thoroughly: Use a garden hose to rinse off any sand, salt, or dirt.
  2. Soak in a Bleach Solution: Mix one-part bleach with nine parts water in a large container. Submerge the driftwood for 24 hours. This step will kill bacteria, pests, and spores.
  3. Rinse Again: After soaking, rinse the driftwood thoroughly to remove any bleach residue.
  4. Dry Completely: Let the driftwood dry in a sunny spot for several days until it’s completely dry.

Easy Driftwood Projects

If you’re new to driftwood crafting, start with these simple but beautiful projects. They won’t require extensive tools or experience, but they’ll definitely provide a great introduction to working with this material.

Driftwood Coasters

Driftwood coasters are a charming and functional addition to any coffee table. Here’s how you can make them:

Materials:

  • Small, flat pieces of driftwood
  • Sandpaper
  • Varnish or wood sealant

Steps:

  1. Clean and dry your pieces of driftwood.
  2. Sand the pieces to achieve a smooth surface.
  3. Apply a coat of varnish or wood sealant for protection.
  4. Let them dry completely before use.

Driftwood Candle Holders

Creating driftwood candle holders adds a cozy, rustic touch to your decor. Here’s a quick guide:

Materials:

  • Driftwood logs with a flat side
  • Tea light candles
  • Drill with a hole saw attachment

Steps:

  1. Clean and dry the driftwood.
  2. Use the hole saw to drill candle-sized holes into the wood, ensuring they’re evenly spaced.
  3. Insert the tea light candles into the drilled holes.
  4. Optionally, you can varnish the wood for added protection.

Intermediate Driftwood Projects

Once you feel comfortable handling driftwood, you can move on to some intermediate projects. These will require a bit more skill and tools but are still manageable for most DIY enthusiasts.

Driftwood Wall Art

Creating driftwood wall art can be as simple or as complex as you want it to be. Here’s a straightforward way to get started:

Materials:

  • Assorted driftwood pieces
  • Hot glue gun
  • Sturdy backing (canvas or plywood)
  • Wall mounting hardware

Steps:

  1. Plan your design by laying out the driftwood pieces on your backing material.
  2. Once you’re happy with the layout, use the hot glue gun to adhere the driftwood pieces to the backing.
  3. Let the glue dry completely.
  4. Attach the wall mounting hardware to the back and hang your creation.

Driftwood Shelves

Driftwood shelves are both functional and decorative. Here’s how to make them:

Materials:

  • Large, flat pieces of driftwood
  • Brackets
  • Screws
  • Drill

Steps:

  1. Clean and dry your driftwood pieces.
  2. Attach the brackets to the driftwood using screws.
  3. Mount the shelves on your wall, ensuring they’re level and securely fastened.

Driftwood Log Projects

Advanced Driftwood Projects

If you’re ready to dive deeper into driftwood crafting, these advanced projects will challenge your skills and creativity. They might require specialized tools or techniques, but the results are incredibly rewarding.

Driftwood Furniture

Creating furniture from driftwood is a fantastic way to make a statement piece for your home. Here’s a project to get you started:

Driftwood Coffee Table

Materials:

  • Large, sturdy driftwood logs
  • Glass tabletop
  • Wood screws
  • Drill
  • Sander

Steps:

  1. Select and Clean: Choose logs that are similar in height. Clean and sand them thoroughly.
  2. Create the Base: Arrange the logs into a stable formation to create a base for the glass tabletop.
  3. Secure the Logs: Use wood screws to secure the logs together. Make sure they’re tightly fastened and stable.
  4. Add the Tabletop: Place the glass tabletop onto the secured base. You can attach it using silicone adhesive if you want it to be more stable.

Driftwood Headboard

Making a driftwood headboard can give your bedroom a unique, coastal vibe. Here’s how to do it:

Materials:

  • Large, flat pieces of driftwood
  • Wood screws
  • Drill
  • Sandpaper
  • Varnish (optional)

Steps:

  1. Plan the Layout: Plan the arrangement of the driftwood pieces to fit the width of your bed.
  2. Prepare the Wood: Clean, sand, and optionally varnish the pieces.
  3. Assembly: Attach the pieces to each other using wood screws and a drill. Ensure it’s sturdy enough to stand upright.
  4. Install: Mount the headboard securely to the wall or the bed frame.

Creative Driftwood Decor Ideas

Sometimes it’s the little touches that make a space feel special. These driftwood decor ideas are perfect for adding unique accents to your home.

Driftwood Wind Chimes

Wind chimes made from driftwood create soothing sounds and add a whimsical touch to your garden or patio.

Materials:

  • Assorted small driftwood pieces
  • Fishing wire or strong thread
  • Metal ring or wooden circle

Steps:

  1. Prepare: Clean all driftwood pieces thoroughly.
  2. Drill Holes: Carefully drill small holes in each driftwood piece.
  3. String Them Together: Thread the fishing wire or strong thread through the holes and tie them to the metal ring or wooden circle.
  4. Hang: Suspend the wind chime in a place where it can catch the breeze.

Driftwood Mirrors

Adding a frame of driftwood to a mirror can turn an ordinary item into a focal point in any room.

Materials:

  • Driftwood pieces
  • Mirror
  • Hot glue gun
  • Hanging hardware

Steps:

  1. Clean the Driftwood: Make sure all pieces are clean and dry.
  2. Arrange the Pieces: Lay out the design around the mirror before gluing.
  3. Glue: Use a hot glue gun to attach the driftwood pieces around the mirror’s edge.
  4. Hang: Install hanging hardware on the back of the mirror and display it on your wall.

Driftwood in the Garden

Driftwood can easily be integrated into your outdoor spaces. Here are a couple of projects that will make your garden stand out.

Driftwood Planters

Driftwood planters add a rustic charm to your garden and are perfect for succulents and small plants.

Materials:

  • Hollow driftwood logs or large driftwood pieces with indentations
  • Potting soil
  • Plants (succulents, small herbs, etc.)

Steps:

  1. Prepare the Driftwood: Clean and hollow out the driftwood if needed.
  2. Add Soil: Fill the hollowed-out areas with potting soil.
  3. Plant: Place your plants in the soil and pat it down firmly.
  4. Water: Water the plants lightly, being careful not to overwater.

Driftwood Garden Sculpture

Creating a driftwood sculpture can serve as a unique statement piece for your garden.

Materials:

  • Assorted driftwood pieces
  • Metal rods or stakes (for support)
  • Drill
  • Screws

Steps:

  1. Design: Plan your sculpture design on paper.
  2. Preparation: Clean and dry all driftwood pieces.
  3. Assembly: Begin assembling your sculpture, drilling holes to join pieces with screws. Use metal rods or stakes for added support in the soil.
  4. Install: Place your sculpture in the garden and ensure it’s stable.

Tips for Working with Driftwood

Safety First

When working with any type of wood, especially driftwood, safety should be a priority. Always wear gloves when handling driftwood to avoid splinters. When cutting or sanding, use protective eyewear and a mask to avoid inhaling dust particles.

Tools You Might Need

Here are some tools that can make your driftwood projects easier and more efficient:

  • Drill: Useful for making holes and securing pieces together.
  • Saw: For cutting driftwood to the desired length or shape.
  • Sandpaper or Sander: To smooth out rough edges.
  • Hot Glue Gun: Handy for smaller projects.
  • Varnish or Sealant: To protect your driftwood creations.

Storage and Maintenance

Driftwood, like any natural material, can degrade over time if not properly cared for. If you have leftover driftwood, store it in a dry place to prevent mold and rot. For driftwood projects that will be kept outside, consider applying a weather-resistant finish to protect them from the elements.

Final Thoughts

Transforming driftwood into beautiful creations can be a rewarding experience. Not only do you get to create something unique and personal, but you also contribute to sustainable crafting by repurposing natural materials. Whether you’re looking to start small with coasters or go big with furniture, there’s a driftwood project for everyone.

So, next time you find yourself on a beach or lake shore, keep an eye out for interesting pieces of driftwood. Your next great project might just be waiting to be discovered!

Happy crafting!

Filed Under: Driftwood Ideas Tagged With: crafts, Driftwood, home decor, Upcycling, Woodworking

Driftwood Projects Unique Decorative Jars

May 29, 2024 by admin

Welcome to the world of driftwood projects! In this delightful article, you’ll discover how you can transform humble pieces of driftwood into stunning, unique decorative jars that bring a touch of nature into your home. Imagine showcasing your beautifully weathered finds, each with its own story to tell, in jars that become the centerpiece of your décor. You’ll learn tips and tricks for selecting the perfect driftwood, crafting the jars with care, and adding those personal touches that make each piece truly one-of-a-kind. Get ready to unleash your creativity and bring a piece of the great outdoors into your living space!

Driftwood Projects Unique Decorative Jars

Have you ever found yourself strolling along the shore, gazing at the countless pieces of driftwood scattered along the beach, and wondered how you could repurpose them into something unique and beautiful? Driftwood, with its natural, weathered look, presents a fantastic opportunity to create one-of-a-kind decorative jars that can add a rustic charm to your home.

What is Driftwood?

Driftwood consists of wood that has been washed onto western shores of rivers, lakes, or the sea due to strong winds, tides, or waves. Over time, this wood becomes polished and worn, creating a variety of fascinating shapes and textures. It’s more than just debris; driftwood can be a material artist’s dream, offering uniqueness that cannot be replicated.

Why Use Driftwood for Decoration?

Using driftwood in your DIY projects not only helps in upcycling a naturally occurring material but also produces distinctive decorative items. Each piece is unique in its texture, shape, and color due to the natural elements it has been exposed to, contributing to the individuality of the final product.

Getting Started with Driftwood Projects

To begin creating decorative jars with driftwood, you will need basic tools and materials. Here’s an overview of what you’ll need and how to get started.

Materials You Will Need

These are the fundamental materials required for driftwood decorative jar projects:

MaterialPurpose
Driftwood PiecesBase material, comes in various sizes and shapes for aesthetic uniqueness
Mason JarsFoundation for your decorative jars
Strong AdhesiveBonds driftwood pieces to the mason jar
SandpaperSmooths the driftwood surface
Paint (optional)Adds color to the driftwood or jar
Varnish or Sealant (optional)Protects the wood and preserves the look
Decorative items (optional)Adds flair, such as ribbons, beads, or shells

Tools Required

Besides materials, the following tools will make your crafting process smoother:

ToolPurpose
Hot Glue GunSecures driftwood pieces to the jar
PliersHelps in holding and placing small driftwood pieces
Small Saw or ClippersCuts driftwood to size

Step-by-Step Guide

  1. Collect and Prepare Driftwood:

    • Collection: Gather driftwood pieces from beaches or riverbanks. Ensure they are free from pests and significant decay.
    • Cleaning: Wash the pieces in mild soapy water and scrub to remove dirt and residue. Rinse thoroughly and let them dry completely.
    • Sanding: Use sandpaper to smooth rough edges.
  2. Prepare Mason Jars:

    • Clean the jars thoroughly to ensure the driftwood adheres well.
    • If you wish to paint the jar, do it now and let it dry.
  3. Arrange Driftwood Pieces:

    • Plan your design by arranging the driftwood around the jar before gluing. This step helps you visualize how the final piece will look.
  4. Attach Driftwood to Jar:

    • Using a hot glue gun or strong adhesive, attach each piece of driftwood to the jar. Press firmly to ensure a strong bond.
  5. Add Decorative Elements (Optional):

    • Enhance your jar with additional decorative elements like ribbons, shells, or beads. Secure them with glue if necessary.
  6. Seal Your Creation (Optional):

    • Apply varnish or sealant to protect the driftwood and preserve its natural look.

Tips and Tricks

  • Variety of Sizes: Use a mix of small and large driftwood pieces for a more dynamic and interesting look.
  • Consistency: If you want a uniform look, choose driftwood pieces that are similar in color and texture.
  • Themed Designs: Create themed jars by incorporating elements like seashells for a beach theme or autumn leaves for a seasonal touch.

Driftwood Projects Unique Decorative Jars

Creative Ideas for Driftwood Decorative Jars

Here are some project ideas to inspire your creativity:

Beach-Inspired Jar

  • Materials: Driftwood, mason jar, blue paint, seashells, sand
  • Steps:
    1. Paint the mason jar with a light blue color and let it dry.
    2. Glue driftwood pieces vertically around the jar.
    3. Add seashells and sand inside the jar for a beachy touch.
    4. Optionally, wrap a piece of twine around the jar’s neck for added detail.

Rustic Candle Holder

  • Materials: Driftwood, mason jar, votive candle, sandpaper, varnish
  • Steps:
    1. Select driftwood pieces that are fairly even and flat.
    2. Sand the edges if necessary for a smoother finish.
    3. Glue the driftwood around a wide-mouthed mason jar.
    4. Apply varnish to give a polished look.
    5. Place a votive candle inside the jar to create a cozy, rustic ambiance.

Nature Garden Jar

  • Materials: Driftwood, moss, small succulents, mason jar, stones
  • Steps:
    1. Glue driftwood pieces around the jar.
    2. Inside the jar, layer stones at the bottom for drainage.
    3. Add soil and plant small succulents or moss.
    4. Mist the plants lightly and place the jar in indirect sunlight.

Boho Chic Jar

  • Materials: Driftwood, paint, mason jar, bohemian decorative items (feathers, beads, etc.)
  • Steps:
    1. Paint some driftwood pieces in bright, bohemian colors.
    2. Attach the painted driftwood around the jar.
    3. Add feathers, beaded strings, and other boho decorations using glue.
    4. Use the jar as a pen holder, vase, or simply a decorative piece.

Safety Considerations

Safety is essential when working on any DIY project. Here are some tips to keep in mind:

  • Ventilation: Work in a well-ventilated area, especially when using adhesives or paint.
  • Protective Gear: Wear gloves to protect your hands when using glue, saws, or sandpaper.
  • Tool Safety: Use tools as intended and follow safety instructions provided by the manufacturer.

Driftwood Projects Unique Decorative Jars

Sustainable Crafting

Driftwood is a sustainable material because it reuses naturally fallen trees that would otherwise decay. Here are some ways to ensure your crafting remains eco-friendly:

Responsible Collection

  • Legal Considerations: Ensure collecting driftwood is permitted in your area. Some regions may have restrictions to protect ecosystems.
  • Minimal Impact: Collect only what you need and avoid disturbing habitats.

Eco-Friendly Materials

  • Biodegradable Adhesives: Consider using adhesives that are less harmful to the environment.
  • Natural Decor: Opt for natural decorations like stones, shells, and plants rather than synthetic options.

Conclusion

Creating unique decorative jars with driftwood can be a fulfilling and artistic endeavor. It allows you to utilize natural materials to make charming and personalized home decor. Whether you’re dreaming of a beach-themed jar, a rustic candle holder, or a boho chic masterpiece, the only limit is your imagination. Gather your materials, follow the steps, and watch your creativity come to life with these distinctive driftwood projects.


By tapping into the beauty of driftwood, you contribute to upcycling and creating sustainable decor for your home. So next time you find yourself at the beach, be sure to collect some driftwood for your next creative project!

Filed Under: Driftwood Ideas Tagged With: Decorative Jars, Driftwood, Handmade, home decor, Upcycling

Driftwood Projects Unique Ideas

May 29, 2024 by admin

Welcome to “Driftwood Projects Unique Ideas,” where you’ll discover imaginative and delightful ways to transform weathered driftwood into stunning pieces of art. Whether you’re an experienced crafter or just looking for a relaxing new hobby, you’ll find inspiration here to create everything from rustic home décor to personalized gifts. Each project is designed to bring out the natural beauty of driftwood, offering you a unique and enchanting addition to your living space. Dive in and let your creativity flourish with these innovative and easy-to-follow ideas!

Driftwood Projects: Unique Ideas

Driftwood Projects Unique Ideas

Have You Ever Considered Using Driftwood for Creative Projects?

Driftwood has a unique appeal. Weathered by nature’s elements and polished by time and water, each piece tells a different story. Whether you’re a DIY enthusiast or looking for a new hobby, working with driftwood can be incredibly rewarding. Let’s dive into some unique driftwood projects that will add a touch of rustic charm to your home.

Why Choose Driftwood?

Before diving into the projects, it’s critical to understand why driftwood is such an amazing material. Driftwood is versatile, eco-friendly, and inherently beautiful. Here are a few reasons why you should consider using it:

Eco-friendly

Using driftwood helps in recycling natural materials. Instead of letting pieces of wood wash up and deteriorate, you can transform them into something useful and beautiful.

Unique

No two pieces of driftwood are the same. This means that each creation you make will be one-of-a-kind, adding a unique touch to your decor.

Versatile

Driftwood fits seamlessly into various design styles, from rustic and coastal to modern and bohemian. Its versatility allows for a wide range of creative possibilities.

Cost-effective

Since driftwood is often found washed up on beaches or riversides, it’s generally free. This makes it an economical option for home decor projects.

Driftwood Projects Ideas

Now, let’s get into the fun part—what you can actually create with driftwood. Here are some unique and inspiring project ideas that you can try.

Driftwood Wall Art

Creating a piece of wall art using driftwood can be incredibly fulfilling. Here’s how you can do it:

  1. Gather Your Materials: Driftwood pieces, nails, screws, a saw, and sandpaper.
  2. Design Your Layout: Arrange your driftwood pieces on the ground until you find a layout you love.
  3. Attach the Pieces: Use nails or screws to secure the pieces together.
  4. Finalize the Design: Sand edges to smooth out any rough patches.

This type of wall art can be personalized with paint, shells, or other natural elements.

Driftwood Coffee Table

A driftwood coffee table is not only functional but also a conversation starter. Here’s a basic guide to creating one:

  1. Select Your Driftwood: Choose large, sturdy pieces.
  2. Prepare the Wood: Clean and dry the driftwood pieces.
  3. Construct the Base: Arrange and secure the pieces to create a stable base.
  4. Add a Glass Top: Place a custom-cut glass top over the base.

This unique piece will stand out in any living room and blend seamlessly with multiple decor styles.

Driftwood Mirror Frame

Mirrors are a staple in home decor. Adding a driftwood frame can make an ordinary mirror extraordinary:

  1. Find a Mirror: Choose a mirror without a frame.
  2. Select Driftwood Pieces: Smaller pieces work best for this project.
  3. Attach the Wood: Use industrial glue to secure the driftwood around the mirror’s edges.

This creates a rustic, beach-inspired look that can brighten up any room.

Driftwood Lighting Fixtures

Lighting can dramatically transform a space. Driftwood can be used to create stunning light fixtures:

  1. Choose the Type of Light: Decide whether you want to create a chandelier, floor lamp, or table lamp.
  2. Gather Supplies: Lamp wiring kit, light bulb, and driftwood pieces.
  3. Assemble the Fixture: Follow basic wiring guidelines and secure the driftwood around the light source.

This adds a natural and warm glow to your home.

Driftwood Shelves

Shelves made from driftwood are not only functional but also stylish. Here’s a simple way to get started:

  1. Select Driftwood: Thick, flat pieces work best.
  2. Clean and Dry: Prepare the driftwood by cleaning and letting it dry.
  3. Attach Brackets: Secure the driftwood to the wall with sturdy brackets.

These shelves can be used to display plants, books, and decorative items.

Driftwood Candle Holders

Enhance your home’s ambiance with driftwood candle holders. Here’s a quick project:

  1. Select Driftwood: Smaller branches or pieces work well.
  2. Make Candle Holes: Use a drill to create holes that fit your chosen candles.
  3. Smooth the Edges: Sand the drilled holes to avoid splinters.

These rustic candle holders can be used as centerpieces or accent pieces around your home.

Driftwood Wind Chimes

If you love the soothing sound of wind chimes, why not create one with driftwood?

  1. Gather Small Pieces: Varied sizes and shapes work best.
  2. Drill Holes: Make small holes in each piece.
  3. Assemble: String the pieces together using strong twine or fishing line.

These wind chimes can add a peaceful aura to your patio or garden.

Driftwood Planters

For plant lovers, driftwood planters offer a unique way to showcase your greenery:

  1. Choose Driftwood: Hollow pieces or pieces that can be hollowed out work best.
  2. Prepare the Wood: Clean and treat the driftwood.
  3. Plant Your Greenery: Fill with soil and your choice of plants, succulents work particularly well.

These planters can be a fantastic addition to both indoor and outdoor spaces.

Driftwood Coasters

Coasters are practical and can be easily made out of driftwood:

  1. Choose Flat Pieces: Select flat and small pieces of driftwood.
  2. Cut to Size: Use a saw to cut them into uniform pieces.
  3. Sand and Seal: Smooth the edges and seal with a non-toxic clear coat.

These coasters are a great way to add a rustic touch to your dining table.

Driftwood Christmas Tree

For a unique holiday decoration, consider making a Christmas tree out of driftwood:

  1. Gather Pieces: Various sizes work best.
  2. Drill and Assemble: Drill holes in the center and stack the pieces vertically.
  3. Decorate: Add ornaments, lights, and a tree topper.

This eco-friendly Christmas tree is sure to be a hit during the holiday season.

Driftwood Jewelry

If you love accessorizing, why not create some unique pieces of driftwood jewelry?

  1. Choose Small Pieces: Find small, smooth pieces of driftwood.
  2. Drill Holes: Make small holes to thread jewelry wire.
  3. Assemble: Combine with beads, shells, and other findings.

These pieces can be necklaces, bracelets, or earrings that carry a piece of nature with you.

Driftwood Picture Frame

A driftwood picture frame can add a rustic touch to your cherished memories:

  1. Choose a Frame Base: Start with a plain frame.
  2. Select Driftwood: Gather small, flat pieces.
  3. Attach Wood: Use industrial glue to attach the wood around the frame.

This project is simple but can transform any photo.

Driftwood Garden Features

Driftwood can also be used to enhance your outdoor space:

  1. Create a Garden Fence: Use larger pieces to build a rustic fence.
  2. Make a Garden Path: Lay flat pieces in a stepping stone pattern.
  3. Design a Trellis: Secure pieces together to support climbing plants.

These features can add a touch of nature to your garden.

Driftwood Signage

Custom signs made from driftwood can be great for home decor or gifts:

  1. Choose Wood Pieces: Find driftwood that can be easily written on.
  2. Design Your Text: Use stencils or freehand your text.
  3. Attach Hanging Hardware: Add hooks or a backing to hang your sign.

Personalized signs can be used for welcome signs or inspirational quotes.

Driftwood Wine Rack

For wine enthusiasts, a driftwood wine rack can be both functional and stylish.

  1. Choose Large Pieces: Select pieces large enough to hold bottles.
  2. Drill Bottle Holes: Create holes that fit wine bottles securely.
  3. Mount: Attach to the wall or create a freestanding rack.

This unique wine rack is sure to impress guests.

Driftwood Curtain Rod

A driftwood curtain rod can add a natural element to your window treatments:

  1. Find a Straight Piece: Choose a piece that is relatively straight.
  2. Prep the Wood: Clean and smooth the driftwood.
  3. Mount: Use curtain rod brackets to install it above your window.

This simple project can elevate your room’s decor instantly.

Driftwood Sculpture

For those with an artistic flair, creating a sculpture from driftwood can be an expressive project:

  1. Gather Various Pieces: Select a variety of shapes and sizes.
  2. Plan Your Design: Lay out your pieces before assembly.
  3. Use Industrial Glue: Secure the pieces together according to your design.

This project allows for endless creativity and can become a centerpiece in your home.

Tips for Working with Driftwood

Before you dive into your projects, here are some tips to help ensure success:

Cleaning Driftwood

Driftwood should be thoroughly cleaned to remove any salt, sand, and debris. You can soak it in water mixed with bleach for a few days, then rinse and let it dry completely.

Selecting the Right Pieces

Not all driftwood is created equal. Choose pieces that are structurally sound and free from excessive rot or damage.

Tools and Materials

Basic tools such as a saw, drill, sandpaper, and industrial glue are usually sufficient for most projects. For more complex projects, you may need additional tools and hardware.

Safety First

Always wear safety gear like gloves and goggles when cutting or drilling driftwood to protect yourself from splinters and debris.

Driftwood Projects Unique Ideas

Benefits of Driftwood Projects

Eco-conscious Crafting

By using driftwood, you’re recycling natural materials and reducing waste, making your projects environmentally friendly.

Unique Home Decor

Each piece of driftwood is unique, which means your creations will have a one-of-a-kind appeal that can’t be replicated.

Therapeutic Experience

Crafting with driftwood can be a calming and fulfilling experience. The hands-on activity and connection with nature can be incredibly therapeutic.

Customizable

Driftwood projects are highly customizable. You can paint, stain, or combine them with other natural elements to suit your personal style.

Conclusion

Working with driftwood offers endless possibilities for creating unique and beautiful home decor items. Whether you’re crafting wall art, a coffee table, or a simple candle holder, each project carries a piece of nature’s story. By following the tips and ideas outlined in this article, you’ll be well on your way to creating stunning driftwood projects that are not only eco-friendly but also uniquely yours. So, gather your driftwood pieces and let your creativity flow!

Feel free to experiment and come up with your own unique ideas. The beauty of driftwood lies in its versatility and the endless creative potential it offers. Happy crafting!

Filed Under: Driftwood Ideas Tagged With: DIY, Driftwood, home decor, projects, Unique Ideas

Projects With Driftwood Diy Ideas

May 29, 2024 by admin

Welcome to “Projects With Driftwood DIY Ideas”! Imagine transforming your home into a coastal paradise with the simple addition of driftwood—nature’s artwork. In this article, you’ll discover a variety of creative and charming DIY projects that incorporate driftwood, from crafting unique picture frames to designing rustic candle holders. With these easy-to-follow ideas, you can bring a touch of the beach to your living space, all while enjoying the satisfaction of crafting something uniquely yours. Let’s dive into these inspiring projects and let your creativity flow like the tides!

Projects With Driftwood DIY Ideas

Have you ever come across a piece of driftwood on the beach and wondered what you could create with it? Driftwood, sculpted by nature’s elements, holds a unique charm that can be harnessed for a variety of DIY projects. From home decor to functional items, the possibilities are endless, and each piece of driftwood brings its own story and character to your creations.

In this article, we’ll explore a range of projects you can create with driftwood, guiding you through the process and offering some handy tips along the way. Whether you’re a seasoned DIYer or just getting started, there’s something here for everyone. So, let’s dive into the world of driftwood DIY ideas!

Projects With Driftwood Diy Ideas

What Is Driftwood?

Driftwood refers to pieces of wood that have been washed ashore by rivers, lakes, and oceans. The wood is often weathered and smoothed by the natural elements, giving it a distinctive look that’s perfect for various crafting projects. Its unique textures and organic shapes make it a favorite among artists and DIY enthusiasts.

Why Use Driftwood?

Using driftwood in your DIY projects not only adds a natural and rustic touch to your creations but also promotes recycling and sustainability. Each piece of driftwood is unique, ensuring that every project you make is one-of-a-kind.

Preparing Driftwood for Projects

Before embarking on your driftwood DIY adventures, it’s important to prepare the wood properly. Here are some steps to ensure your driftwood is ready for crafting:

Cleaning

Soak the driftwood in a mixture of water and bleach (ratio 9:1) for 24 hours to kill any bacteria and remove the salt. Rinse thoroughly with fresh water. Let the wood dry completely, preferably in the sun.

Sanding

Sanding helps to smooth any rough edges and remove any residual dirt or bark. Use a fine-grit sandpaper for best results.

Sealing

Sealing the driftwood can preserve its look and protect it from further damage. Apply a coat of clear polyurethane or wood sealant.

Once your driftwood is prepped and ready, it’s time to get creative! Here are some fantastic DIY ideas to inspire you.

Driftwood Wall Art

One of the most popular uses for driftwood is creating wall art. It’s a perfect way to bring a piece of nature indoors and add a rustic charm to your space.

Driftwood Mirror

A driftwood-framed mirror can be a stunning focal point in any room. Here’s how you can craft one:

Materials:

  • Driftwood pieces
  • Mirror
  • Strong adhesive glue
  • Saw
  • Measuring tape
  • Sandpaper

Steps:

  1. Measure your mirror and determine the size of the frame.
  2. Cut driftwood pieces to fit around the mirror.
  3. Sand the edges of the driftwood pieces.
  4. Arrange the driftwood around the mirror to form a frame.
  5. Secure the driftwood pieces with strong adhesive glue.
  6. Let the glue dry completely before hanging the mirror.

Driftwood Wall Hanging

Create a unique wall hanging with the natural shapes and textures of driftwood.

Materials:

  • Driftwood pieces of various sizes
  • Strong cord or twine
  • Drill with small bit
  • Measuring tape

Steps:

  1. Lay out your driftwood pieces to determine the design.
  2. Drill small holes in the driftwood pieces where necessary.
  3. Thread the cord or twine through the holes, knotting it to secure each piece in place.
  4. Hang your driftwood wall hanging on a hook or nail.

Driftwood Furniture

Driftwood can be used to design stunning and unique pieces of furniture. Here are some ideas to get you started.

Driftwood Coffee Table

A coffee table made from driftwood can be a beautiful and functional addition to your living room.

Materials:

  • Driftwood pieces (large and sturdy)
  • Glass tabletop
  • Strong adhesive glue or screws
  • Saw
  • Measuring tape
  • Sandpaper

Steps:

  1. Select sturdy pieces of driftwood for the table legs and base.
  2. Measure and cut the driftwood pieces to the desired length.
  3. Sand the edges for a smooth finish.
  4. Arrange the driftwood to form the base of the table.
  5. Secure the pieces together using strong adhesive glue or screws.
  6. Place the glass tabletop on the driftwood base.
  7. Ensure the tabletop is secure before using the table.

Driftwood Shelf

Driftwood shelves are perfect for showcasing books, plants, or other decorative items.

Materials:

  • Driftwood pieces (long and sturdy)
  • Brackets
  • Screws
  • Wall anchors
  • Drill
  • Measuring tape
  • Level

Steps:

  1. Measure and cut the driftwood to the desired length.
  2. Sand the edges for a smooth finish.
  3. Attach brackets to the driftwood pieces.
  4. Use a level to ensure the shelf will be even.
  5. Drill holes into the wall and insert wall anchors.
  6. Secure the brackets and driftwood shelf to the wall.

Driftwood Candle Holders

Create a warm and cozy ambiance with driftwood candle holders. They’re simple to make and add a natural touch to any space.

Single Candle Holder

Materials:

  • Small driftwood piece
  • Drill with hole saw bit
  • Tea light candle

Steps:

  1. Select a small piece of driftwood that can stand upright.
  2. Drill a hole in the top of the driftwood to fit the tea light candle.
  3. Insert the tea light candle into the hole.

Multiple Candle Holder

Materials:

  • Long driftwood piece
  • Drill with multiple hole saw bits
  • Tea light candles

Steps:

  1. Choose a long piece of driftwood that lies flat.
  2. Drill multiple holes along the length of the driftwood to fit the tea light candles.
  3. Insert the tea light candles into the holes.

Driftwood Coat Rack

A driftwood coat rack can be both functional and aesthetically pleasing. Here’s how to make one:

Materials:

  • Long driftwood piece
  • Coat hooks
  • Screws
  • Drill
  • Measuring tape
  • Sandpaper

Steps:

  1. Select a long piece of driftwood that can serve as the base for the coat rack.
  2. Sand the edges for a smooth finish.
  3. Measure and mark where you want the coat hooks to be placed.
  4. Drill holes and attach the coat hooks with screws.
  5. Mount the driftwood coat rack on the wall using screws and wall anchors.

Projects With Driftwood Diy Ideas

Driftwood Centerpiece

Driftwood centerpieces can be elegant and add a touch of nature to your dining or coffee table.

Simple Driftwood Centerpiece

Materials:

  • Medium driftwood pieces
  • Decorative items (like seashells, candles, or flowers)
  • Strong adhesive glue

Steps:

  1. Arrange the driftwood pieces to form a base for the centerpiece.
  2. Use strong adhesive glue to secure the pieces together.
  3. Add decorative items to the driftwood base.
  4. Place the centerpiece on your table.

Driftwood Succulent Planter

Materials:

  • Long driftwood piece with natural holes or grooves
  • Small succulents
  • Potting soil
  • Small rocks for drainage

Steps:

  1. Choose a driftwood piece with natural holes or grooves.
  2. Fill the holes or grooves with potting soil.
  3. Plant the succulents in the soil.
  4. Add small rocks around the plants for drainage and decoration.

Driftwood Jewelry Holder

A driftwood jewelry holder can help keep your accessories organized while adding a rustic touch to your decor.

Materials:

  • Long driftwood piece
  • Small hooks or nails
  • Screws
  • Drill
  • Measuring tape
  • Sandpaper

Steps:

  1. Select a long piece of driftwood that can serve as the base for the jewelry holder.
  2. Sand the edges for a smooth finish.
  3. Measure and mark where you want the hooks or nails to be placed.
  4. Drill small holes and attach the hooks or nails.
  5. Mount the driftwood jewelry holder on the wall using screws and wall anchors.
  6. Hang your jewelry on the hooks or nails.

Driftwood Lamps

Driftwood lamps can add a warm and cozy ambiance to any room. Here’s how you can make one:

Driftwood Table Lamp

Materials:

  • Medium driftwood piece with a flat base
  • Lamp kit (including socket, cord, and bulb)
  • Drill
  • Saw
  • Measuring tape
  • Strong adhesive glue
  • Sandpaper

Steps:

  1. Select a medium piece of driftwood with a flat base for stability.
  2. Sand the edges for a smooth finish.
  3. Drill a hole through the center of the driftwood for the lamp cord.
  4. Thread the lamp cord through the hole and attach the socket.
  5. Secure the bulb to the socket.
  6. Use strong adhesive glue to ensure the lamp is stable.
  7. Plug in the lamp and enjoy the warm glow.

Driftwood Floor Lamp

Materials:

  • Large driftwood piece for the base
  • Lamp kit (including socket, cord, and bulb)
  • Lamp stand (optional)
  • Drill
  • Saw
  • Measuring tape
  • Strong adhesive glue
  • Sandpaper

Steps:

  1. Select a large piece of driftwood for the base of the floor lamp.
  2. Sand the edges for a smooth finish.
  3. Drill a hole through the center of the driftwood for the lamp cord.
  4. Thread the lamp cord through the hole and attach the socket.
  5. Secure the bulb to the socket.
  6. Use strong adhesive glue to ensure the lamp is stable.
  7. Attach the driftwood to a lamp stand if desired.
  8. Plug in the lamp and enjoy the warm glow.

Driftwood Garden Decor

Incorporate driftwood into your garden to add a touch of natural beauty. Here are some ideas:

Driftwood Garden Fence

Create an eye-catching garden fence using driftwood.

Materials:

  • Long driftwood pieces
  • Support posts
  • Screws or nails
  • Drill
  • Measuring tape
  • Sandpaper

Steps:

  1. Select long pieces of driftwood for the fence panels.
  2. Sand the edges for a smooth finish.
  3. Arrange the driftwood pieces between the support posts.
  4. Secure the driftwood to the support posts with screws or nails.

Driftwood Planter

A driftwood planter can add a rustic touch to your garden.

Materials:

  • Large driftwood piece with natural grooves or hollows
  • Potting soil
  • Plants or flowers

Steps:

  1. Choose a large piece of driftwood with natural grooves or hollows.
  2. Fill the grooves or hollows with potting soil.
  3. Plant your chosen plants or flowers in the soil.
  4. Place the driftwood planter in your garden or patio.

Driftwood Birdhouse

Invite birds into your garden with a charming driftwood birdhouse.

Materials:

  • Driftwood pieces
  • Nails or screws
  • Drill
  • Saw
  • Measuring tape
  • Sandpaper
  • Strong adhesive glue

Steps:

  1. Select driftwood pieces to form the birdhouse’s base, walls, and roof.
  2. Sand the edges for a smooth finish.
  3. Arrange the driftwood pieces to form the shape of the birdhouse.
  4. Secure the pieces together with screws, nails, and strong adhesive glue.
  5. Drill a small hole for the entrance.
  6. Attach a small perch near the entrance.
  7. Mount the birdhouse in your garden on a stand or tree.

Driftwood Christmas Decorations

Bring a touch of rustic charm to your holiday decor with these driftwood Christmas decorations.

Driftwood Christmas Tree

Create an alternative Christmas tree with driftwood.

Materials:

  • Driftwood pieces of various sizes
  • Strong cord or twine
  • Drill
  • Measuring tape
  • Strong adhesive glue

Steps:

  1. Select driftwood pieces of various sizes to form the tree’s branches.
  2. Sand the edges for a smooth finish.
  3. Arrange the driftwood pieces in descending order of size, from largest to smallest.
  4. Drill small holes through the center of each piece.
  5. Thread the cord or twine through the holes, knotting after each piece to secure it in place.
  6. Hang or stand your driftwood Christmas tree and decorate as desired.

Driftwood Ornaments

Create unique and rustic ornaments for your Christmas tree.

Materials:

  • Small driftwood pieces
  • Drill
  • Strong cord or twine
  • Paint or other decorative items (optional)

Steps:

  1. Select small pieces of driftwood for the ornaments.
  2. Sand the edges for a smooth finish.
  3. Drill small holes in the driftwood pieces for hanging.
  4. Thread cord or twine through the holes and knot to secure.
  5. Decorate the driftwood with paint or other items if desired.
  6. Hang the ornaments on your Christmas tree.

Driftwood Star

Create a beautiful driftwood star to hang on your wall or above the fireplace.

Materials:

  • Driftwood pieces of similar length
  • Strong adhesive glue
  • Measuring tape
  • Sandpaper

Steps:

  1. Select driftwood pieces of similar length to form the star’s points.
  2. Sand the edges for a smooth finish.
  3. Arrange the driftwood pieces to form a star shape.
  4. Use strong adhesive glue to secure the pieces together.
  5. Let the glue dry completely before hanging the star.

Tips for Working with Driftwood

To ensure your driftwood projects turn out beautifully, here are some helpful tips:

  • Safety First: Wear gloves and safety glasses when handling and working with driftwood to avoid splinters and eye injuries.
  • Work in a Well-Ventilated Area: When using strong adhesive glue or sealants, make sure to work in a well-ventilated area or outdoors.
  • Be Creative: Don’t be afraid to experiment with different designs and arrangements. Driftwood’s natural shapes and textures offer endless possibilities.
  • Mix and Match: Combine driftwood with other natural materials like stones, shells, and plants for a more dynamic and interesting look.
  • Practice Patience: Some driftwood projects may take time to complete, especially if you’re waiting for glue or sealant to dry. Patience will ensure a higher-quality end product.

Conclusion

Driftwood is a versatile and beautiful material that can be transformed into a variety of stunning DIY projects. Whether you’re looking to add a rustic touch to your home decor or create unique garden features, driftwood offers endless possibilities. By following the ideas and tips in this article, you can create one-of-a-kind pieces that bring the beauty of nature into your everyday life.

So next time you’re on a beach walk and come across a piece of driftwood, take it home and let your creativity flow. Happy crafting!

Filed Under: Driftwood Ideas Tagged With: Beach Crafts, craft ideas, DIY, Driftwood, home decor

Drift Wood Projects Driftwood Ideas

May 28, 2024 by admin

Welcome to “Drift Wood Projects Driftwood Ideas,” a delightful guide brimming with creative ways to transform simple pieces of driftwood into stunning decorations and functional items for your home. Imagine the rustic charm and natural beauty you can bring into your space by crafting unique art pieces, cozy home accents, or even practical objects like shelves and coat racks. This article is your treasure trove of inspiration, guiding you through various projects that not only repurpose driftwood but also infuse your home with a touch of nature’s elegance. Get ready to let your creativity flow and discover how driftwood can add a magical, coastal vibe to your living area.

Drift Wood Projects Driftwood Ideas

Have you ever stumbled upon a piece of driftwood washed up on the shore and wondered what you could create with it? Driftwood has a natural beauty and charm that can add a rustic touch to any home decor. Plus, it’s an eco-friendly way to repurpose materials that have been shaped by nature itself. In this article, we’ll explore various driftwood projects and ideas that you can easily incorporate into your craft repertoire.

Why Driftwood?

Driftwood is more than just a piece of wood; it’s a material that’s been weathered and shaped by natural elements over time. This creates unique textures and shapes, making each piece one-of-a-kind. Plus, working with driftwood is a sustainable craft choice, helping you reduce, reuse, and recycle in a creative way.

Unique Aesthetic

Driftwood boasts a naturally distressed look that can’t be easily replicated with other materials. Its organic, weathered appearance makes it perfect for adding rustic and coastal vibes to your space.

Eco-Friendly

Repurposing driftwood helps in reducing waste and gives you a chance to work with materials that are naturally renewable. It’s an excellent example of sustainable living.

Versatility

From furniture pieces to small decorative items, driftwood can be used in a variety of projects. This versatility makes it a favorite among crafters and DIY enthusiasts.

Getting Started: Collecting Driftwood

Before diving into driftwood projects, you need to collect your materials. However, it’s important to do so responsibly.

Where to Find Driftwood

Driftwood can be commonly found on beaches, riversides, and lakeshores. Always ensure you’re collecting driftwood from legal areas where it’s allowed to do so. Avoid protected areas like national parks or wildlife reserves where removing natural objects might be prohibited.

Choosing the Right Pieces

When selecting driftwood, keep an eye out for pieces that are dry, mildew-free, and relatively lightweight. You’ll want pieces that are well-weathered, as fresh driftwood can still carry a lot of moisture, making it difficult to work with.

Cleaning and Preparing Driftwood

Before using driftwood in any project, it’s crucial to clean it thoroughly. Here’s a simple process to get you started:

  1. Rinse: Rinse the driftwood with fresh water to remove any salt and debris.
  2. Soak: Soak it in a mixture of water and a bit of bleach (roughly 1 part bleach to 9 parts water) to kill off any pests or bacteria.
  3. Rinse Again: Rinse thoroughly to remove any bleach residue.
  4. Dry: Allow the driftwood to dry completely, which may take a few days.

Drift Wood Projects Driftwood Ideas

Driftwood Projects: Ideas to Inspire You

Ready to dive into some driftwood projects? Here are several categories of items you can create, complete with examples to spark your creativity.

Driftwood Home Decor

Decorating your home with driftwood can create a serene and natural ambiance. Here are some ideas to get you started:

Driftwood Wall Art

Create an eye-catching piece of wall art using reclaimed driftwood. Here’s an easy project to try:

Materials Needed

  • Several small pieces of driftwood
  • Hot glue gun or wood glue
  • Canvas or wooden board as a base
  • Optional: paint and brushes

Steps

  1. Arrange the driftwood pieces on your canvas or board in a pattern you like.
  2. Once you’re satisfied with the arrangement, glue the pieces in place.
  3. For a splash of color, you can paint certain parts of the driftwood, or leave it natural for a more rustic look.
  4. Allow the glue to dry completely, and your unique piece of art is ready to hang!

Driftwood Mirrors

A driftwood frame around a mirror adds a rustic charm. This project is simple yet elegant.

Materials Needed

  • Mirror
  • Assorted pieces of driftwood
  • Strong adhesive or mirror epoxy
  • Hanging hardware

Steps

  1. Lay the mirror flat and arrange the driftwood around the edges, ensuring the pieces fit tightly together.
  2. Once the design is set, glue each piece in place.
  3. Allow to dry thoroughly before mounting the mirror on your wall.

Driftwood Furniture

If you’re up for a bigger project, consider making your own driftwood furniture.

Driftwood Coffee Table

A driftwood coffee table can become a centerpiece in your living room, combining functionality with natural beauty.

Materials Needed

  • Large, flat piece of driftwood or a collection of smaller pieces
  • Glass tabletop
  • Table legs (or driftwood supports)
  • Screws and strong adhesive

Steps

  1. Securely assemble the driftwood to form a stable base. This might involve screwing smaller pieces together or using larger, more stable pieces as the main support.
  2. Attach the glass tabletop using appropriate adhesive if needed.
  3. Make sure the table is level and sturdy before using it.

Driftwood Shelves

Incorporating driftwood shelves into your home decor adds both storage and aesthetic appeal.

Materials Needed

  • Straight, long pieces of driftwood
  • Brackets and screws
  • Sandpaper

Steps

  1. Select pieces of driftwood that are straight and long enough to be functional shelves.
  2. Sand down rough edges to prevent splinters.
  3. Securely attach the brackets to the wall and then mount the driftwood on the brackets using screws.

Driftwood Garden Projects

Driftwood is also a fantastic material for enhancing your garden.

Driftwood Plant Hangers

Combine your love for plants and driftwood by creating unique plant hangers.

Materials Needed

  • Small to medium pieces of driftwood
  • Twine or rope
  • Small pots or planters
  • Optional: hooks or nails for mounting

Steps

  1. Cut twine or rope to your desired length and attach it securely to the pieces of driftwood.
  2. Hang the driftwood horizontally or vertically, attaching the plants securely to the wood.
  3. Use hooks or nails to mount your driftwood plant hanger in your garden or balcony.

Driftwood Garden Sculptures

Create a focal point in your garden with a driftwood sculpture.

Materials Needed

  • Large pieces of driftwood
  • Outdoor wood adhesive
  • Paint or outdoor sealant (optional)

Steps

  1. Arrange the driftwood pieces in a design that pleases you, from abstract shapes to animal forms.
  2. Glue the pieces securely together and allow to dry completely.
  3. Optionally, add a coat of paint or sealant to protect the sculpture from the elements.

Driftwood Household Items

Driftwood can also be used to create everyday household items that are both practical and beautiful.

Driftwood Candle Holders

Make a rustic candle holder that adds a cozy touch to any room.

Materials Needed

  • Small to medium pieces of driftwood
  • Drill
  • Tea light candles or small votive candles

Steps

  1. Select pieces of driftwood that are flat and stable enough to hold a candle.
  2. Use a drill to create a hole the size of your candle.
  3. Insert the candle into the hole and light up your home!

Driftwood Key Holder

Never lose your keys again with a stylish driftwood key holder.

Materials Needed

  • Flat piece of driftwood
  • Hooks or small knobs
  • Screws and screwdriver
  • Hanging hardware

Steps

  1. Attach hooks or knobs evenly spaced along the driftwood piece.
  2. Secure hanging hardware to the back of the driftwood.
  3. Mount it near your doorway, and you have a practical and decorative key holder.

Tips and Tricks

To make your driftwood projects even more successful, here are some additional tips and tricks:

Choosing the Right Driftwood for Your Projects

  • Size and Shape: Match the size and shape of the driftwood to the scale of your project. Smaller pieces work well for decor items, while larger ones are better suited for furniture.
  • Texture: The natural texture of driftwood adds to the appeal of your project. Look for pieces with interesting grain patterns and natural imperfections.

Preserving Driftwood

  • Sealant: Use a clear wood sealant to protect your driftwood projects, particularly if they will be placed outdoors.
  • Polishing: A light sand and polish can enhance the natural beauty of the driftwood without taking away its rustic charm.

Tools of the Trade

  • A sturdy pair of gloves can protect your hands while working with driftwood.
  • A small hand saw and a drill can be extremely useful for more intricate projects.
  • Sandpaper is essential for smoothing out rough edges and splinters.

Drift Wood Projects Driftwood Ideas

Troubleshooting Common Issues

Like any craft project, working with driftwood has its challenges. Here are some common issues and how to solve them:

  • Wood Splitting: If the driftwood splits while drilling, try drilling a pilot hole first with a smaller bit before using the final sized drill bit.
  • Mold and Mildew: Ensure your driftwood is thoroughly dried and cleaned before use to avoid mold and mildew.
  • Structural Integrity: For larger furniture projects, ensure that your driftwood is sturdy and stable. Reinforce joints with screws or wood adhesive as needed.

Conclusion

Creating driftwood projects is not only a fun and rewarding hobby but also a great way to bring a touch of nature into your home. Whether you’re making a simple candle holder or a complex piece of furniture, the unique characteristics of driftwood will make each project special.

So next time you find yourself walking along the beach, think about the potential each piece of driftwood holds. Why not pick up a piece or two, bring them home, and see what you can create? Happy crafting!

Filed Under: Driftwood Ideas Tagged With: crafts, Driftwood, home decor, ideas, projects

  • « Previous Page
  • Page 1
  • …
  • Page 20
  • Page 21
  • Page 22
  • Page 23
  • Page 24
  • …
  • Page 30
  • Next Page »

Primary Sidebar

Driftwood4us.com, is a participant in the Amazon Services LLC Associates Program, an affiliate advertising program designed to provide a means for sites to earn advertising fees by advertising and linking to amazon.com.