• Skip to main content
  • Skip to primary sidebar
  • Terms and Conditions
  • Privacy Policy
  • Contact

Driftwood 4 Us

Just About Driftwood

home decor

Driftwood Branches For Sale

January 6, 2025 by admin

Have you ever been intrigued by the unique beauty and rustic charm of driftwood? These naturally weathered pieces of wood, shaped and textured by the forces of nature, bring a slice of the beach into your home. Driftwood branches aren’t just random pieces of wood; they’re art created by the sea, the sun, and time. Whether you’re a DIY enthusiast, an interior designer, or someone who simply loves incorporating natural elements into your living space, driftwood branches offer endless possibilities. Let’s embark on a journey to discover more about these fascinating natural artifacts and explore why you might be interested in finding the perfect driftwood branches for sale.

Driftwood Branches For Sale

What is Driftwood?

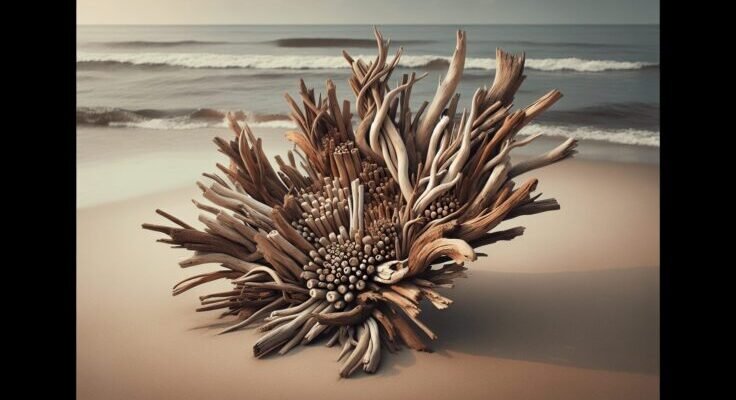
Driftwood is wood that has been washed onto shore by the forces of winds, tides, or waves. As trees and branches fall into rivers or oceans, they embark on a journey through water before finding their way to the shore. This journey smooths their edges and gives them a unique shape and texture. Driftwood can be found along coastlines, riverbanks, and lake shores. It’s prized for its rustic appeal and the myriad stories it seems to carry from its time spent in water.

Types of Driftwood

Driftwood isn’t just a singular category; it comes in various shapes and sizes, each with its unique characteristics.

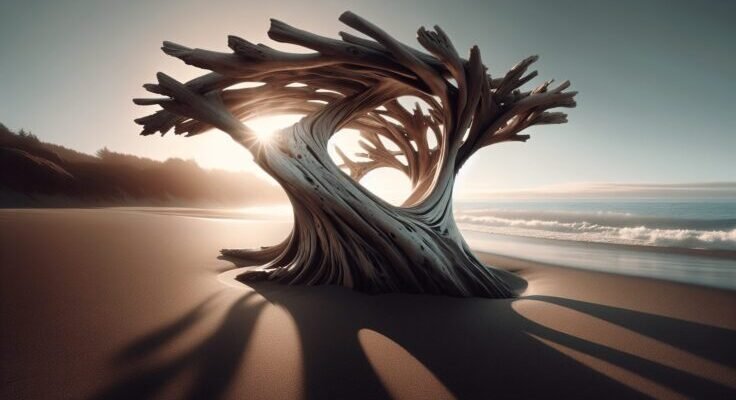
  1. Root Driftwood: These are pieces with intricate and complex formations, often looking like abstract sculptures. Ideal for aquascaping or as statement pieces in a room.

  2. Branch Driftwood: Slim, elongated, and versatile, ideal for crafts, decorations, or creating minimalist installations.

  3. Heart Driftwood: More compact and often used for smaller art pieces or as a part of mixed media works.

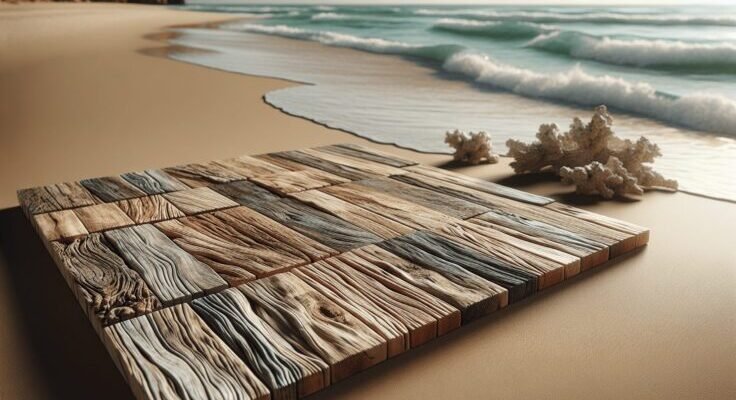
  4. Weathered Driftwood: Pieces that have had more exposure to the elements, resulting in a very smooth texture and bleached color.

Understanding these types can help you choose the right piece for your purpose.

Uses of Driftwood Branches

Driftwood branches are incredibly versatile and can be used in various projects. They capture the essence of nature and allow for creativity in home décor.

Home Decor

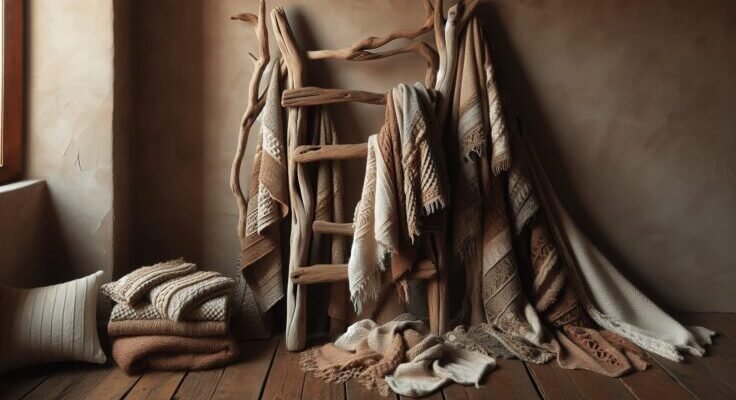
Incorporating driftwood into home décor can add an earthy and rustic touch to any space.

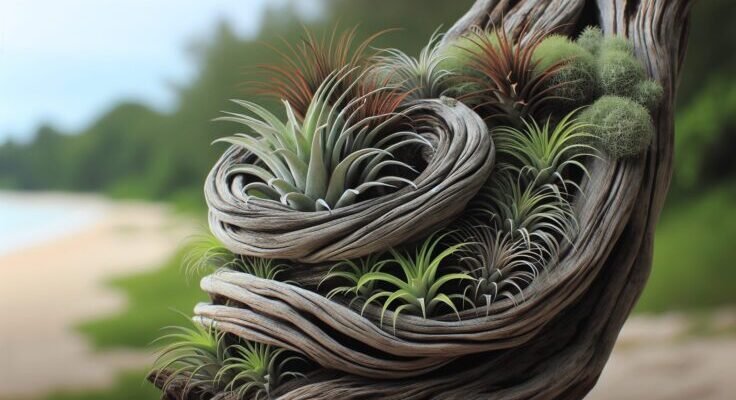
  • Wall Art: Use driftwood branches as a base for wall installations. They can serve as a foundation for hanging photos, small plants, or even lights.
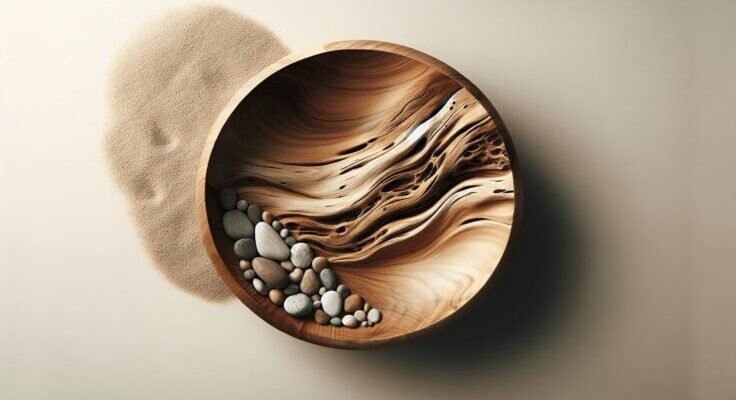
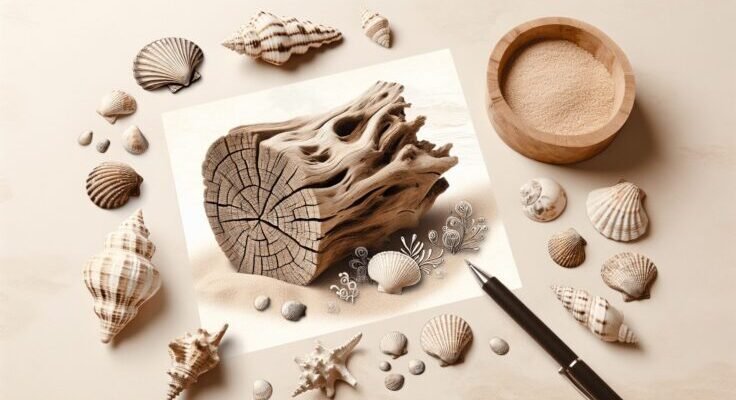
  • Centerpieces: Create stunning table centerpieces by combining driftwood with other natural elements such as moss, stones, or shells.
  • Furniture Designs: Transform larger driftwood branches into bases for coffee tables, benches, or even bed frames.
  • Shelving Units: Whittle driftwood branches into unique shelving supports.

Garden and Outdoor Projects

Driftwood doesn’t have to be confined to indoor use. It can be a welcome addition to your outdoor spaces as well.

  • Garden Sculptures: Create outdoor sculptures or features that blend beautifully with nature.
  • Pathway Edging: Use driftwood branches to line garden paths for a natural look.
  • Fencing or Trellises: Construct decorative garden fences or trellises.

Craft Projects

For those who love to craft, driftwood is an excellent material to work with.

  • Candle Holders: Carve small sockets in driftwood branches for candle placement.
  • Driftwood Wind Chimes: String together small pieces to hang.
  • Christmas Trees: Assemble pieces vertically to create a driftwood tree.

The Environmental Impact of Collecting Driftwood

When sourcing driftwood, it is vital to consider its environmental impact. Driftwood plays a role in natural ecosystems by providing habitats for many species and stabilizing coastal landforms. Therefore, responsible sourcing is key.

Responsible Collection

  • Permits and Regulations: Always check local guidelines regarding driftwood collection from natural reserves or protected areas.
  • Sustainable Practices: Gather driftwood in moderation, leaving some for wildlife that might depend on it for shelter.
  • Private Sources: Prefer sourcing driftwood from commercial vendors who legally harvest and replenish.

By being mindful, you can enjoy driftwood’s beauty while preserving its ecological benefits.

Where to Buy Driftwood Branches

If collecting driftwood is not feasible for you, purchasing it from reputable sellers is a great option. Many retailers offer a range of driftwood branches suitable for all kinds of projects.

Online Retailers

The convenience of online shopping makes it easy to find driftwood, and many online stores cater specifically to driftwood enthusiasts.

RetailerOfferingsShipping
Driftwood Art SuppliesVariety of shapes and sizesWorldwide
Natural Elements StoreBulk purchase optionsFree shipping on orders over $50
EcoCraft DriftwoodsSustainable sourcing certificationNational shipping

Online retailers often provide diverse options, allowing you to choose the perfect piece without leaving home.

Local Craft Stores

Many local craft stores carry driftwood, especially if they are near coastal areas or lakes.

Artisan Markets

Check out artisan markets for unique, handcrafted driftwood pieces. These often come with the charm of being locally sourced and artistically treated.

Driftwood Branches For Sale

Pricing of Driftwood Branches

When buying driftwood branches, prices can vary based on size, type, and uniqueness.

Factors Influencing Price

  1. Size and Weight: Heavier and larger pieces obviously cost more due to higher shipping fees and their increased potential for use in various applications.

  2. Rarity and Uniqueness: Particularly unique or rare pieces might command a higher price.

  3. Finishing and Preparation: Driftwood that has been prepared (cleaned, bleached, or treated for insects) is usually more expensive than raw pieces.

Typical Price Range

For a basic idea, a simple branch driftwood might start at around $5 for a small piece, ranging up to $200 or more for larger or unique shapes suitable for big installations.

Care and Maintenance

To preserve the beauty and longevity of your driftwood, some care and maintenance are needed.

Cleaning and Preparing Driftwood

Proper cleaning is essential before incorporating driftwood into your home or garden.

  1. Rinsing: Thoroughly rinse your driftwood with fresh water to remove any salt, sand, or debris.

  2. Soaking: Soak in freshwater for a few days, changing the water daily to help remove any tannins that can stain.

  3. Drying: Allow the driftwood to dry completely in the sun to prevent mold and ensure it is pest-free.

  4. Sealing: Depending on its intended use, sealing with a clear wood finish can help preserve its integrity.

Long-term Maintenance

Regular dusting and occasional re-sealing or oiling can keep your driftwood looking vibrant. Avoid exposing your driftwood to excessive moisture to prevent warping or mold growth.

The Aesthetic Appeal of Driftwood

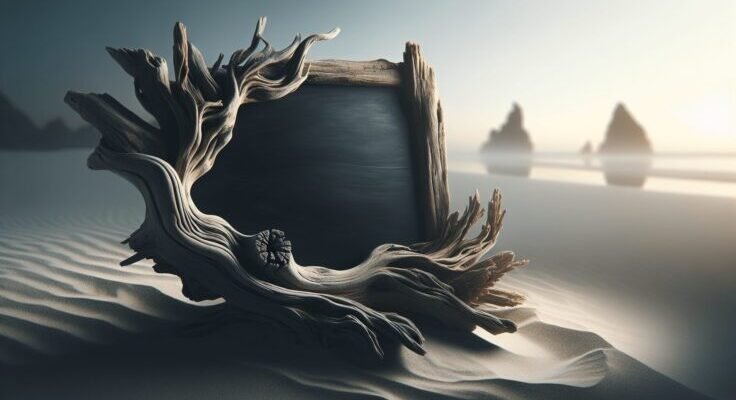
Driftwood’s aesthetic appeal lies in its natural, minimalist beauty. The tactile quality of driftwood, its sandy hues, and organic forms provide a sense of calm and connection to nature, bringing serene energy to any interior or exterior.

Design Styles that Incorporate Driftwood

Driftwood pairs beautifully with various design styles, such as:

  • Coastal: Perfect for beach-inspired homes and nautical themes.
  • Rustic: Complements wood, stone, and rustic elements.
  • Minimalist: Provides a focal point with its stark simplicity.
  • Bohemian: Blends well with an eclectic mix of textures and patterns.

Whatever your style, driftwood can adapt, enhance, and transform spaces effectively.


Incorporating driftwood into your life isn’t just about a design choice; it’s embracing the natural beauty that our environment offers. Whether you’re enjoying the satisfaction of crafting your own piece or the gratitude of supporting sustainable sources, driftwood branches present a multitude of options to express your creativity. As you consider purchasing driftwood branches for sale, reflect on how each piece can uniquely contribute to your artistic vision or living environment.

Filed Under: Driftwood Ideas Tagged With: branches, Craft Supplies, Driftwood, home decor, natural materials

Driftwood Bouquet

January 4, 2025 by admin

Have you ever wondered how nature can transform simple, weathered wood into something beautiful and evocative? Driftwood, with its unique shapes and textures, is a perfect example of nature’s artistry. In this article, you might just discover a new hobby or inspire an artistic project you hadn’t yet considered. Known for its natural beauty and rustic charm, driftwood can be transformed into various decorative items, including stunning bouquets that can adorn your home or a special event with elegance and individuality.

What is Driftwood?

Driftwood refers to pieces of wood washed onto the shore by winds, tides, or waves. Over time, saltwater wears down these remnants, smoothing out their rough edges and creating intricate textures and forms. This naturally aged wood carries with it a history—from the trees it originated from to its journey across waters. It’s more than just debris; it’s a canvas crafted by nature, offering endless possibilities for creativity.

The Beauty of Driftwood in Decoration

Driftwood’s unique aesthetics make it a popular choice in interior design and art projects. Its neutral color palette—ranging from soft grays to earthy browns—complements any decor style. Each piece tells its own story through distinct contours and weathered surfaces, adding warmth, character, and a touch of the natural world to your space. When combined with flowers, it creates a driftwood bouquet that’s not only stunning but symbolic of nature’s harmony.

Benefits of Using Driftwood

The appeal of driftwood goes beyond its appearance. It is an eco-friendly material, as repurposing driftwood doesn’t contribute to deforestation or other environmental issues associated with cut lumber. By utilizing naturally washed-up wood, you contribute to a sustainable approach to crafting and decorating. Additionally, each piece’s uniqueness ensures that your projects are one-of-a-kind, as no two driftwood pieces are identical.

Driftwood Bouquet

Creating a Driftwood Bouquet

Creating a driftwood bouquet involves an exciting blend of nature’s raw beauty with floral elements. This craft allows you to express your creativity while producing a truly unique decorative piece. Whether you are a seasoned crafter or a curious beginner, making driftwood arrangements is an enjoyable process with ample room for personalization.

Materials Needed

To start your driftwood bouquet project, gathering the right materials is essential. Here’s a simplified list:

MaterialDescription
Driftwood PiecesSelect shapes and sizes that appeal to you, preferably ones with branches.
WireFloral wire to secure flowers to the driftwood.
FlowersFresh or dried flowers based on your preference.
GlueHot glue or a strong adhesive for securing heavier items.
ScissorsFor trimming flowers and cutting wire.
Varnish (optional)To preserve the wood’s appearance and protect it from further decay.

Step-by-Step Guide to Making a Driftwood Bouquet

  1. Select Your Driftwood: Start by choosing driftwood that suits your desired bouquet size. Pieces with unique shapes and extensions can add volume and intrigue to your arrangement.

  2. Prepare the Driftwood: Clean the wood with soap and water to remove any debris. If desired, apply a varnish to enhance its natural look and preserve it longer.

  3. Arrange Your Flowers: Decide on a color theme and arrange your floral selections. Dried flowers work wonderfully with driftwood, providing a lasting arrangement that doesn’t require maintenance.

  4. Attach Flowers Using Wire: Secure each flower stem to the driftwood with floral wire, twisting it around both the stem and the wood. This ensures the flowers are held in place firmly.

  5. Enhance with Accessories: Consider adding small decorative accessories, such as shells or beads, to your bouquet for added visual interest.

  6. Finalize Your Bouquet: Review the arrangement, adjusting and securing sections as necessary. Ensure that the bouquet is balanced and stable.

Displaying Your Driftwood Bouquet

Once you’ve created your bouquet, consider how you’ll display it to enhance its beauty:

  • Vases: A clear glass vase allows the beauty of both the driftwood and flowers to shine.
  • Wall Mounts: Use hooks or a dedicated stand to mount larger bouquets as wall art.
  • Tables: As a centerpiece, your creation will be a conversation starter at any event or gathering.

Caring for a Driftwood Bouquet

Though low-maintenance, some care can keep your bouquet looking its best, especially if it includes fresh flowers.

Preserving Dried Flowers

If you’ve opted for dried flowers, they require minimal upkeep. Keep them away from direct sunlight and humidity to prevent fading and deterioration.

Preserving Fresh Flowers

For fresh flowers, change the water regularly (if arranged in a vase), and trim the stems periodically to prolong their lifespan. Consider refreshing with dry flowers if you wish to maintain the bouquet indefinitely.

Driftwood Bouquet

Driftwood Bouquet Inspirations

Ready to dive into creativity? Here are some themes and ideas to spark your driftwood bouquet designs.

Seasonal Bouquets

  • Spring: Combine light pastel flowers and blossoms with delicate moss accents for a fresh look.
  • Summer: Bright, bold flowers paired with seashells bring a coastal vibe.
  • Fall: Use autumn leaves with earthy, tonal flowers for a warm, cozy feel.
  • Winter: Pinecones, greens, and white blooms create a wintry forest feel.

Themed Bouquets

  • Nautical: Blue, white, and sea green flowers, styled with nautical rope or small ship wheels.
  • Rustic: Earth tones, including sunflowers or wildflowers, with burlap or lace additions.
  • Modern: Minimalist steel or wire accents, with monochrome floral selections.

The Therapeutic Benefits of Crafting with Driftwood

Beyond the aesthetic rewards, crafting with driftwood can provide therapeutic benefits. Engaging in the creative process can reduce stress, encourage relaxation, and foster mindfulness. The tactile experience of working with natural materials reconnects you with nature, providing a soothing distraction from daily life’s hustle and bustle.

Tips for Collecting Driftwood

When sourcing your driftwood in the wild, practice responsible and ethical collecting:

  1. Check Local Regulations: Ensure local rules permit driftwood collection on the site you’re visiting.
  2. Be Mindful of Eco Systems: Avoid disrupting wildlife habitats and sensitive ecosystems.
  3. Gather Only What You Need: Appropriately estimate the amount of driftwood required for your projects.

Driftwood Bouquet as Gifts

Handcrafted gifts carry a personal touch that store-bought items cannot replicate. Creating a driftwood bouquet for a loved one allows you to present a piece of your creativity, thoughtfulness, and time. Tailor colors and flowers to the recipient’s tastes for a truly bespoke gift.

Conclusion

Your exploration into the art of creating a driftwood bouquet offers a unique blend of nature, creativity, and personal expression. By recycling driftwood into beautiful arrangements, you not only breathe new life into a piece of nature but also contribute to sustainable decorating practices. Whether you choose to embark on this craft as a hobby, a new decor project, or a heartfelt gift, the potential of your driftwood bouquet is as boundless as the sea from which it came. Embrace the imperfections, celebrate the unique stories of each piece, and let your imagination sail into uncharted artistic territories.

Filed Under: Driftwood Ideas Tagged With: Bouquet, DIY, Driftwood, home decor, natural materials

Driftwood Bowl Diy

January 3, 2025 by admin

Have you ever found yourself strolling along a beach, noticing the various pieces of driftwood washed ashore, and wondered what you could create with such natural beauty? Driftwood’s unique shapes and weathered textures have made it a favorite for crafting enthusiasts and nature lovers alike. Creating a driftwood bowl is not just a DIY project; it’s an art form that allows you to bring a piece of the ocean into your home, creating a rustic yet elegant decor item.

Driftwood Bowl Diy

Understanding Driftwood: A Natural Treasure

Before you start your DIY project, it’s essential to know a bit about the material you’re working with. Driftwood is wood that has been washed onto a shore or beach of a sea, lake, or river by the action of winds, tides, or waves. Each piece of driftwood tells its own story, shaped by time and tides.

Characteristics of Driftwood

Driftwood is appreciated for its weathered appearance and unique shapes. Factors such as the type of wood, the length of time it has been in the water, and the environment in which it has been drifting contribute to its distinct character. Understanding these characteristics can help you select the best pieces for your project.

Why Use Driftwood for DIY Projects?

Using driftwood is not only cost-effective but also environmentally friendly. It allows you to repurpose an otherwise discarded material into something beautiful and functional. Its natural charm and uniqueness make it an appealing material for home decor, adding an organic, rustic touch.

Gathering Your Materials

Crafting a driftwood bowl requires some basic materials and tools. Being well-prepared will help make the process smoother and more enjoyable.

Materials Needed

Here’s what you’ll need to create your driftwood bowl:

MaterialDescription
Driftwood PiecesVarious sizes and shapes, cleaned and dried
Strong AdhesiveEpoxy or wood glue that can handle weight and moisture
Bowl MoldA template or form to shape the bowl, e.g., another bowl, aluminum foil
SandpaperMedium to fine grit for smoothing edges
Paint or Wood Finish(Optional) For sealing and adding a sheen

Tools Required

In addition to materials, having the right tools will ensure precision in your craft:

  • Scissors or Utility Knife
  • Measuring Tape
  • Paintbrush (if finishing)
  • Clamps (to hold pieces in place while drying)

Step-by-Step Guide to Creating Your Driftwood Bowl

Now that you’re ready with your materials and tools, let’s get into the crafting process. Making a driftwood bowl can be a rewarding experience, allowing you to explore your creativity while crafting something functional.

Step 1: Selecting and Preparing the Driftwood

Begin by selecting the driftwood pieces that will form the base and sides of your bowl. Look for pieces that are relatively flat or slightly curved, as these will be easier to work with.

Preparation:

  • Clean the driftwood by soaking it in a solution of water and bleach (10:1 ratio) to kill any bacteria, mold, or insects.
  • Rinse thoroughly with fresh water and allow it to dry completely, ideally in a sunny spot.

Step 2: Designing the Bowl Structure

Using another bowl as a guide, begin arranging and layering your driftwood pieces. This stage involves a lot of creative freedom, allowing you to decide the size and shape of your bowl.

  • Base Construction: Lay your choice of larger pieces to form a stable base.
  • Layering Sides: Start with smaller pieces, overlapping them slightly to create the sides of the bowl.

Step 3: Securing the Driftwood Pieces

Once you’re satisfied with your arrangement, it’s time to start adhering the pieces together using your chosen adhesive.

Adhesion Tips:

  • Apply glue at the contact points between driftwood pieces.
  • Work in sections to ensure stability, using clamps to hold pieces while the glue cures.
  • Allow the glue to dry completely, preferably overnight, before proceeding.

Step 4: Finishing Touches

After the glue has dried, it’s time to refine your driftwood bowl.

  • Sanding:
    Smooth any rough edges with sandpaper to prevent splinters and enhance the bowl’s appearance.

  • Finishing:
    Apply a wood finish or paint for added protection and visual appeal. This step will also enhance the natural colors and grain patterns of the driftwood.

Step 5: Curing and Displaying Your Piece

Allow the bowl to cure completely after finishing. Once cured, find the perfect spot in your home to display your handcrafted driftwood bowl.

Trouble Shooting Common Issues

As with any DIY project, you may encounter some challenges. Here are a few common issues and their solutions:

Driftwood Not Adhering Properly

If you find that the driftwood pieces are not sticking together:

  • Ensure both surfaces are clean and dry before applying adhesive.
  • Try roughening the surfaces slightly with sandpaper for better grip.
  • Reinforce with additional adhesive or small screws if needed.

Bowl is Unstable

If your bowl feels wobbly or unstable:

  • Check for gaps in the base or sides that could affect balance.
  • Add additional support pieces at weak points.
  • Consider using a heavier object to weigh it down while drying.

Driftwood Bowl Diy

Creative Variations

The beauty of a driftwood bowl is its adaptability. Once you’ve mastered the basics, here are some ideas to customize your design:

Mixed Media Bowls

Incorporate other natural elements, such as stones, shells, or seaglass, to add texture and interest.

Sculptural Designs

Experiment with intricate patterns or layers, creating a more ornamental piece that acts as a focal point.

Functional Additions

Consider personalizing with handles or a small lid, transforming it into a functional storage piece.

The Environmental Impact and Ethical Sourcing

Being mindful of the environment while collecting driftwood is crucial. Ensure you collect responsibly:

  • Check Regulations: Some areas have rules about collecting driftwood, particularly in protected environments.
  • Minimize Impact: Avoid taking wood that might be habitat for wildlife or plays a crucial role in the ecosystem.

Caring for Your Driftwood Bowl

To ensure your driftwood bowl lasts, some simple care instructions will keep it looking its best.

Regular Cleaning

Dust the bowl with a dry cloth regularly. Avoid using harsh chemicals, which can damage the wood’s surface.

Avoiding Moisture

Driftwood can absorb moisture, leading to mold issues. Keep your bowl in a dry place, ensuring good air circulation.

Retouching Finish

Over time, the finish may require touch-ups. Light sanding followed by a fresh coat of wood finish can revive its shine and protect the wood.

Inspirations From Nature: What Driftwood Represents

Driftwood symbolizes resilience and adaptability as it transforms through its journey in water. By crafting a driftwood bowl, you’re capturing a piece of that journey, forever commemorating nature’s artistry within your home.

Whether it serves as a centerpiece at your table, a vessel for your treasures, or a simple decorative piece, a driftwood bowl brings a touch of coastal charm into your living space, making every glance a reminder of its unique origins.

Final Thoughts: Embrace the Imperfections

Crafting a driftwood bowl is about embracing the unique imperfections and surprises that driftwood offers. Each piece is unlike any other, much like the individual style you’re bringing to your creation. The process is as rewarding as the result, and your handmade piece will reflect your creativity and connection to nature. Enjoy the art of creation, and let the beauty of driftwood inspire you.

Filed Under: Driftwood Ideas Tagged With: Craft Project, Driftwood, Handmade, home decor, Woodworking

Driftwood Blackboard

December 31, 2024 by admin

Have you ever wondered what stories a piece of driftwood could tell? Imagine its journey through turbulent waters, finally coming ashore, worn yet filled with character. Driftwood holds a certain allure with its organic shapes and textures, conjuring visions of distant shores and endless stories. But what if that piece of driftwood could serve another purpose, a practical one that combines nature with functionality? Introducing the concept of a Driftwood Blackboard.

Understanding Driftwood

The Journey of Driftwood

When we speak of driftwood, we’re not just talking about any piece of wood. Driftwood begins its journey as part of a tree, sometimes uprooted by natural elements like wind or water. This wood is carried along by rivers and oceans, buffeted and smoothed by the forces of nature. This unique journey gives each piece its distinct look and feel, creating an object that is as much a work of art as it is a piece of nature.

The Aesthetic Appeal

Driftwood’s weathered appearance can range from smooth and polished to rugged and textured, with hues that vary from light tan to deep brown. This diversity makes it an attractive material for artistic and functional purposes. Its raw, untouched beauty represents nature’s ability to transform the ordinary into the extraordinary.

The Concept of a Driftwood Blackboard

Combining Nature and Functionality

A driftwood blackboard is essentially a chalkboard framed with driftwood. This concept marries the natural beauty of driftwood with the simplicity and utility of a blackboard. You get the charm of a rustic, handcrafted object alongside the practicality of a writing surface. It’s both an art piece and a useful addition to any home or workspace.

Where to Use It

Think of the spaces where a driftwood blackboard could shine. From your kitchen for keeping track of grocery lists, to your office for brainstorming sessions, or even in a classroom to engage young minds with a touch of nature. A driftwood blackboard fits seamlessly into various settings, adding an element of intrigue and a unique design statement.

Driftwood Blackboard

Crafting Your Own Driftwood Blackboard

Selecting the Driftwood

Look for driftwood pieces that are solid and free of extensive decay or rot. They should be dry and free of salt. If you’re collecting driftwood yourself, it might be a good idea to let it dry out completely before using it. Size and shape will depend on your personal preference and the space available where you intend to display the blackboard.

Preparing the Driftwood

Once you have your driftwood, clean it to remove any dirt or debris. Use a gentle brush and water. If the wood is heavily soiled, a mild soap might help. Make sure it’s thoroughly dry before proceeding to the next step.

Choosing a Blackboard Surface

You can purchase a pre-cut blackboard surface or paint a surface with chalkboard paint. The size should be slightly smaller than your driftwood frame, allowing the wood to encase the blackboard entirely. Consider the material’s durability and how it will hold up to regular use.

Assembling the Blackboard

Lay out your driftwood to frame the blackboard surface. Use wood glue or small nails to attach the pieces together. Make sure everything is secure and stable. You might want to add a backing for additional support, especially for larger blackboards.

Maintaining Your Driftwood Blackboard

Regular Cleaning

Keeping your blackboard clean is essential for maintaining its functionality. Wipe the surface with a damp cloth to remove old chalk before writing anew. Periodically dust the driftwood frame to preserve its appearance.

Preservation of Driftwood

Over time, driftwood can become dry or brittle. To prolong its life, consider treating it with a clear, matte finish to seal in the natural moisture and protect it from further wear without altering its natural look.

Driftwood Blackboard

The Driftwood Blackboard in Everyday Life

Bringing Nature Indoors

Incorporating natural elements like driftwood into your home can create a sense of connection with the outdoors. A driftwood blackboard invites nature into everyday life, creating a calming and organic feel in any room.

Encouraging Creativity

From doodling sketches to jotting down spontaneous thoughts, a blackboard provides a blank canvas. The driftwood frame adds an artistic element, encouraging creativity not just in content but also in its presentation.

Functional and Stylish

A driftwood blackboard isn’t just about aesthetics; it’s about blending form and function. It suits various decors, from modern minimalist to cozy coastal themes, always providing a stylish focal point.

Exploring Different Styles

Natural Looks

Driftwood naturally complements a rustic style. It looks right at home amongst other natural materials like stone, wood, and metal. A natural driftwood blackboard adds warmth and texture to your space.

Painted and Treated

If raw wood isn’t in line with your aesthetic, consider painting or treating the driftwood. A subtle whitewash can add a coastal feel, while darker stains may suit a more sophisticated or contemporary look.

Sustainable and Eco-Friendly Choice

Sustainable Material

Driftwood is an eco-friendly alternative to manufactured materials. Repurposing it into a functional piece like a blackboard minimizes waste and makes use of what nature provides.

Supporting the Environment

By using driftwood, you reduce the demand for newly harvested wood products, promoting the health of our world’s forests and the intricate ecosystems they support.

Driftwood Blackboard and Educational Settings

Engaging the Classroom

For educators, a driftwood blackboard can serve as an engaging tool. The unique frame might capture students’ imaginations, making learning more engaging and visually stimulating. It serves not only as a teaching tool but also as a conversation piece.

Different Learning Environments

Not just confined to traditional classrooms, driftwood blackboards can be useful in homeschooling environments, community centers, or anywhere education happens. They embody creativity and resourcefulness.

The Artistic Touch

Creating a Unique Piece

Since no two pieces of driftwood are the same, each blackboard you create is a one-of-a-kind masterpiece. This individuality can be a source of pride and personal expression in your craft.

Adding Personal Elements

Consider incorporating other elements into your blackboard design. Seashells, small carvings, or inscriptions can personalize the piece, connecting it to personal memories or stories.

Troubleshooting Common Issues

Warping and Cracking

Wood is susceptible to changes in humidity and temperature. To avoid warping, keep your driftwood blackboard in a stable environment, away from direct sunlight or heat sources.

Chalkboard Surface Wear

With extensive use, a chalkboard might wear out. If this occurs, a fresh coat of chalkboard paint can renew the surface, prolonging its utility.

Where to Find Driftwood

Coastal Walks

If you’re lucky enough to live near the coast, you might find driftwood during a leisurely walk on the beach. Each piece you collect carries with it the memory of that day, enhancing its personal value.

Online Retailers

For those without easy access to natural driftwood, numerous online retailers specialize in selling driftwood sourced from sustainable locations. Just be sure to verify the source to ensure ethical collection practices.

Driftwood Blackboard: A Conclusion

Drawing upon nature’s beauty and resilience, a driftwood blackboard not only enhances your surroundings but also tells a story of its own. From its sea-worn journey to its practical use in your home or workspace, it merges aesthetics with functionality in a way that few materials can. Whether you’re crafting one to boost creativity or engage students, or simply to appreciate its raw elegance, a driftwood blackboard is more than an object—it’s a living piece of art that celebrates the harmony of nature and design.

Filed Under: Driftwood Ideas Tagged With: Blackboard, craft, DIY, Driftwood, home decor

Driftwood Blanket Ladder Diy

December 28, 2024 by admin

Have you ever thought about bringing a touch of the seaside into your home décor? A Driftwood Blanket Ladder can be a perfect way to blend the rustic charm of driftwood with functional design. Whether you’re a seasoned DIY enthusiast or a complete beginner, creating a driftwood blanket ladder is a project that can easily be accomplished over a relaxing weekend. In this guide, we’ll walk you through everything you need to know to craft your very own piece of coastal artistry.

Understanding Driftwood

Before you start your project, it’s essential to have a basic understanding of driftwood. Driftwood is wood that has been washed onto a shore or beach of a sea, river, or lake by the action of winds, tides, or waves. It often has a weathered, bleached appearance because of exposure to the elements. This natural erosion process makes each piece unique in texture, shape, and color.

Sourcing Driftwood

Finding the perfect driftwood for your project can be part of the fun. You can source driftwood from local beaches, riversides, or even lakes. Keep in mind, though, that some areas have restrictions on collecting driftwood, so always check local regulations. Alternatively, if it’s challenging to find natural driftwood, you can purchase driftwood logs from craft stores or online marketplaces.

Selecting the Right Pieces

When selecting driftwood for a blanket ladder, look for pieces that are straight and robust enough to bear a bit of weight. Typically, you’ll want two longer pieces for the side rails and several shorter pieces for the rungs. The character of the driftwood—such as knots or slight curves—can add to the aesthetic appeal.

Preparing Your Wood

After collecting or purchasing your driftwood, the next step is preparation. While driftwood’s naturally weathered appearance is part of its charm, it might also harbor salt, sand, or even small pests.

Cleaning the Driftwood

Start by scrubbing your driftwood with a stiff brush to remove any loose debris or sand. If the driftwood is heavily soiled, you might want to rinse it under running water. After cleaning, allow it to dry thoroughly in a well-ventilated area. This may take several days depending on the humidity and temperature.

Treating the Wood

For longevity, it’s a good idea to treat the driftwood. Soaking it in a mixture of bleach and water (one part bleach to nine parts water) can kill any insects or bacteria. Be sure to rinse it well and dry completely after soaking. Sanding the wood lightly with fine-grit sandpaper will smooth rough spots and prepare the surface for finishing.

Driftwood Blanket Ladder Diy

Planning Your Driftwood Blanket Ladder

Now that you have prepared your driftwood, it’s time to plan your ladder. Planning will involve deciding on the ladder’s dimensions, layout, and design style.

Determining Ladder Dimensions

Typically, a blanket ladder stands between five to six feet tall and has four to five rungs spaced evenly apart. Your ladder’s width will depend on the length of your shorter driftwood pieces, generally between 16 to 20 inches wide.

FeatureTypical Measurement
Height5 to 6 feet
Width16 to 20 inches
Number of rungs4 to 5

Design and Style

Think about how you want your blanket ladder to look. Driftwood has a rustic quality that can be enhanced or subdued, depending on your home décor style. Consider whether you want to leave the driftwood in its natural state for a rustic look or apply a clear sealant to give it a subtle shine. You could also stain the wood if you prefer a different color.

Assembling Your Driftwood Blanket Ladder

Once you have your pieces, dimensions, and design plan ready, you can begin assembling your blanket ladder. This part is where your blanket ladder starts taking shape.

Tools You Might Need

Here’s a list of tools and supplies that will help make the assembly process smooth:

  • A drill with a bit slightly smaller than screws
  • Wood screws (preferably rust-resistant)
  • A measuring tape
  • A screwdriver
  • A wood sealer or stain (optional)

Step-by-Step Assembly

1. Arrange Your Pieces

Lay the two longer pieces parallel to each other. Place each shorter piece (your rungs) between these, spaced evenly apart. Ensure your driftwood rungs are as level as possible.

2. Pre-Drill Holes

To avoid splitting the driftwood, pre-drill holes where you’ll be fixing the rungs to the side rails. This is a crucial step as driftwood can be quite brittle.

3. Attach the Rungs

Using wood screws, attach each rung to the side rails through the pre-drilled holes. Ensure the screws are countersunk slightly so they don’t stick out, which could damage blankets.

4. Secure the Ladder

Once all rungs are attached, gently stand the ladder up to check its stability. If needed, adjust the screws or sand certain areas to achieve a steady, balanced ladder.

Driftwood Blanket Ladder Diy

Finishing Touches

Adding a finishing touch to your driftwood blanket ladder can enhance its look and durability. This is a step that can make your project uniquely yours.

Sealing and Staining

Applying a wood sealant will protect your driftwood blanket ladder from moisture and wear. Use a clear finish to keep the natural look or a light wood stain if you prefer a different hue. Always test your chosen finish on a small, inconspicuous piece of wood first to ensure you like the result.

Adding Decorative Elements

Consider adding personal touches like hanging small ornaments or wrapping twine around the rungs for a boho-chic look. These elements can make the ladder a real statement piece in your home.

Placing Your Driftwood Blanket Ladder

Once your ladder is finished, consider where to place it. You’ll want it to be easily accessible while adding to the room’s décor.

Choosing the Right Spot

Place your blanket ladder in a living room corner or beside a sofa for easy blanket access. Bedrooms or guest rooms are also good options. Ensure it’s in a spot where it can lean securely against the wall.

Coordinating with Home Decor

Your driftwood blanket ladder will naturally complement other coastal or rustic décor pieces. Consider using earthy tones, nautical motifs, or vintage items nearby to create a cohesive look.

Troubleshooting Common Issues

Every DIY project can present challenges. Here are quick fixes for common problems you might encounter:

Uneven Rungs or Rails

If the rungs are uneven, double-check your measurements and adjust as necessary. Re-drilling might be needed, but sanding the uneven sections can also help.

Stability Problems

If the ladder isn’t stable, you may need to reposition it or trim one side slightly to balance it out. Adding non-slip pads to the bottom can also enhance stability.

Conclusion

Crafting a driftwood blanket ladder is not only a fun DIY project but also a wonderful way to introduce the laid-back elegance of coastal living into your home. By following these steps, you can create a functional and decorative piece that adds both charm and practicality to any space. Enjoy your handcrafted ladder, and the tranquil vibe it brings to your surroundings.

Filed Under: Driftwood Ideas Tagged With: Blanket Ladder, crafting, Driftwood, home decor, Woodworking

Driftwood Beach Flooring

December 23, 2024 by admin

Have you ever envisioned bringing the serene essence of the ocean into your living space? Driftwood beach flooring might be the enchanting solution you’re looking for! This unique type of flooring not only captures the natural beauty of weathered beach wood but also introduces a calming, coastal atmosphere into your home. Whether you’re in the process of renovating or building anew, driftwood beach flooring could be the transformative touch that your home needs.

What is Driftwood Beach Flooring?

Driftwood beach flooring is a style of flooring that mimics the look of naturally aged and weathered wood found along the seashore. This type of flooring is designed to reflect the beauty and rustic charm of wood that has been shaped over time by the elements. It’s characterized by its grayish-brown tones, textures, and grain patterns that resemble driftwood. The appeal of driftwood flooring lies in its ability to bring a sense of peace, relaxation, and connection to nature into your home.

Characteristics of Driftwood Beach Flooring

Driftwood beach flooring comes with a variety of characteristics that make it unique. It’s typically available in a range of colors that mimic natural driftwood, with shades often including soft grays, sandy taupes, and weathered browns. The texture can vary from smooth to hand-scraped or wire-brushed, giving each piece a distinct look and feel. The grain patterns found in driftwood flooring often include knots, swirls, and other imperfections, adding to the rustic and authentic appearance.

When selecting driftwood beach flooring, you will notice that it comes in different materials. You can choose from real wood options, or opt for wood-look alternatives like laminate or luxury vinyl that replicate the driftwood style.

Benefits of Driftwood Beach Flooring

Opting for driftwood beach flooring comes with a wealth of benefits that can enhance both the aesthetics and functionality of your living space.

Aesthetic Appeal

One of the primary draws to driftwood beach flooring is its beautiful and natural appearance. The weathered, grayish hues can complement a range of interior styles, including coastal, rustic, contemporary, and minimalist designs, bringing a touch of nature indoors.

Versatility

Driftwood beach flooring is incredibly versatile. It can be used in almost any room in the house, from living rooms and bedrooms to kitchens and bathrooms. Its neutral tones make it easy to pair with different color schemes and decor elements.

Durability

If you choose quality materials, driftwood beach flooring can be highly durable. Options such as engineered wood or luxury vinyl plank (LVP) not only replicate the look of real driftwood but also resist wear and tear, moisture, and stains.

Ease of Maintenance

Driftwood beach flooring is generally easy to maintain. Regular sweeping and occasional damp mopping are generally all it takes to keep it looking beautiful. This ease of maintenance makes it a great choice for busy households.

Driftwood Beach Flooring

Materials Used in Driftwood Beach Flooring

When considering driftwood beach flooring, it’s important to understand the different materials available, as they each come with their own pros and cons.

Real Driftwood

True driftwood flooring is made from reclaimed wood collected from the seashore or sources that simulate this weathered look. It provides an authentic style and unique history to a space but can be more expensive and difficult to install.

Engineered Wood

Engineered wood is a popular option because it combines a real wood veneer with a stable plywood base. This offers the look of genuine wood with increased resistance to humidity and temperature changes.

Laminate

Laminate flooring offers a cost-effective driftwood look using a photographic layer beneath a protective coating. It’s more budget-friendly and easier to install, making it an appealing choice for DIY enthusiasts.

Luxury Vinyl Plank (LVP)

LVP is another alternative that successfully mimics the appearance of driftwood while being highly resistant to water and damage. It’s an excellent choice for areas prone to moisture like bathrooms and basements.

Installation Considerations

To ensure safety and optimal performance, properly install driftwood beach flooring based on the specific type and material you select. Here are some considerations to keep in mind:

Subfloor Preparation

Before installing, ensure your subfloor is clean, dry, and level. This is crucial for avoiding any imperfections that could shadow through the new flooring.

Acclimatization

Allow time for the flooring materials to acclimate to the conditions of the room where they will be installed. Generally, this means leaving the product in the space a few days before installation to adapt to temperature and humidity levels.

Hiring a Professional vs. DIY

The choice between hiring a professional for installation versus attempting a DIY project can depend on your budget and expertise. Some types of flooring, like click-lock laminate, are suitable for DIY installation. However, materials like real wood may require professional skills to ensure a successful finish.

Driftwood Beach Flooring

Caring for Driftwood Beach Flooring

After installation, it’s important to maintain your driftwood beach flooring to preserve its beauty and durability.

Routine Cleaning

A soft-bristled broom or vacuum can effectively remove debris without scratching the surface. For deeper cleans, use a slightly damp mop with a mild detergent. Avoid harsh chemicals that might damage the finish.

Protecting the Surface

Use felt pads under furniture legs to prevent dents and scratches. Area rugs and runners can also help protect high-traffic areas.

Handling Spills

Quickly attend to any spills to avoid stains. Use a soft cloth to blot the spill, and avoid rubbing as this can spread the liquid or damage the surface.

Trends in Driftwood Beach Flooring

Design trends continuously evolve, and driftwood beach flooring is no exception. Being aware of these trends can help you choose a style that is both timeless and contemporary.

Wide Planks

Wide plank flooring is becoming increasingly popular for bringing a modern, spacious feel to rooms. It provides fewer seams, creating a cleaner look that enhances the driftwood style.

Mixed-Width Planks

Using mixed-width planks can add visual interest and more closely mimic the varied sizes found in natural driftwood. This approach creates a more dynamic and textured appearance.

Gray and White-Washed Tones

Besides natural driftwood tones, gray and white-washed finishes have gained popularity for their ability to bright rooms and complement a variety of color palettes.

Cost and Budgeting for Driftwood Beach Flooring

Setting a budget for your driftwood beach flooring project is essential to ensure you achieve your desired look without overspending.

Factors Affecting Cost

Several factors influence the cost of driftwood beach flooring, such as the material choice, square footage, and installation complexity. Real wood may command a premium price compared to laminate or vinyl options.

Cost Comparison:

Material TypeCost Range (per sq. ft.)
Real Driftwood$10 – $20+
Engineered Wood$4 – $12
Laminate$2 – $5
Luxury Vinyl$3 – $7

Considering Total Expenses

Remember to factor in additional costs such as underlayment, delivery, and professional installation fees if applicable. It’s always a good idea to set aside an extra 10-15% for unforeseen expenses.

Environmental Impact

Being mindful of the environmental impact of your flooring choice is an important consideration for many homeowners.

Sustainable Sourcing

Look for flooring options that are certified by environmental standards like the Forest Stewardship Council (FSC) to ensure responsible sourcing.

Recycled Materials

Some driftwood floorings, particularly those made from vinyl and laminate, may contain recycled materials, reducing the ecological footprint.

Conclusion

Driftwood beach flooring offers an exquisite way to incorporate the calming beauty of the coast into your home. Its aesthetic versatility, durability, and ease of maintenance make it an excellent choice for a spectrum of interior designs. Whether you opt for real driftwood, engineered wood, laminate, or luxury vinyl, you can create a charming and tranquil environment reflective of the sea’s timeless allure. As you contemplate your home improvement journey, consider the many advantages of driftwood beach flooring to craft the perfect seaside sanctuary right at home.

Filed Under: Driftwood Ideas Tagged With: Driftwood, flooring, home decor, Interior Design

Driftwood Awning

December 16, 2024 by admin

Have you ever wandered along a beach and stumbled upon a piece of driftwood, its journey and origins a mystery, compelling you to ponder the stories etched within its weathered surface? Driftwood, with its enchanting textures and forms, sparks creativity and is a beautiful addition to various forms of art or decor in your home. Imagine bringing a piece of nature into your living space by creating a driftwood awning — a unique blend of functionality and aesthetics.

What Is a Driftwood Awning?

A driftwood awning can transform any window or outdoor space into an artwork reflecting the beauty of the natural world. This rustic and artistic structure provides shade and shelter while adding character and charm to your surroundings. Driftwood awnings are made by assembling pieces of driftwood, often sourced from beaches or rivers, using various techniques to create a canopy or overhang.

The Aesthetic Appeal

The aesthetic appeal of driftwood lies in its natural tones and intricate textures, enhanced by the elements it has weathered. When used in an awning, driftwood’s organic shapes and varied hues create a warm, inviting atmosphere. Each piece is unique, adding character and redefining traditional architecture with a touch of whimsy and nature-infused elegance.

Functional Aspects

Beyond its beauty, a driftwood awning is also practical. It offers protection from the sun and rain, making outdoor areas more usable throughout the year. Such structures can be tailored to fit your needs, providing just the right amount of shade while allowing for airflow and natural light.

Sourcing Driftwood

Finding the right pieces of driftwood is the first step in crafting your awning. The search itself can be an adventure.

Where to Search

Driftwood can often be found on beaches, riverbanks, and lakeshores. Each environment will offer unique pieces shaped by local conditions. While beachcombing, look for areas where debris tends to accumulate after high tides or storms.

Legal and Ethical Considerations

Before collecting driftwood, it’s important to check local laws and regulations. Some areas may protect driftwood as part of their natural ecosystem. Always gather responsibly, respecting nature and the landscapes you are sourcing from to ensure minimal environmental impact.

Selecting Driftwood

When selecting driftwood for your awning, consider pieces that are sturdy, weathered, and have interesting shapes. You’ll want a variety of lengths and diameters for structural integrity and aesthetic variation. Avoid pieces that are too brittle or decayed, as they may not withstand weather exposure.

Driftwood Awning

Design and Planning

Once you’ve gathered your driftwood, it’s time to plan your awning’s design. Thoughtful consideration of form and function will ensure a successful project.

Sketching Your Design

Start with a sketch to visualize the final structure. Consider the size of the space and how much coverage you need. Your design should also account for how the awning will attach to your building and support itself structurally.

Tools Required

For constructing a driftwood awning, some basic tools will be needed:

  • Saw: To cut driftwood to the desired length.
  • Drill: For making holes for screws or bolts.
  • Sandpaper: To smooth rough edges.
  • Weatherproof screws and brackets: For assembly and attachment.

Necessary Materials

Besides driftwood, you might need some supplementary materials:

  • Metal brackets or chains: To enhance stability, especially for larger or elevated awnings.
  • Weatherproof finish or sealant: To protect against moisture and prolong the wood’s life.

Structural Considerations

Consider the weight and balance of the awning. Driftwood, being irregular, can challenge to work with. Ensure your design distributes weight evenly to prevent stress on any single piece or point of attachment.

Assembly and Construction

With your materials ready and plans in place, construction can begin. This process is where your creativity truly takes shape into a functional structure.

Preparing Driftwood

Before assembly, prepare your driftwood. Clean each piece using a brush or water to remove sand and debris. Sand any rough edges that could potentially cause injury or splinter.

Building the Frame

  1. Start with a Base Frame: Create the base frame that will support the driftwood. Use the sturdiest pieces for this foundation, ensuring a balanced and level structure.
  2. Positioning the Support: Secure the frame to your house or an existing structure. Use appropriate screws or brackets suitable for the material of your building.

Attaching the Driftwood

  1. Arrange for Balance and Beauty: Start positioning your driftwood pieces on the frame. Pay attention to aesthetic balance; mix sizes and shapes for visual interest.
  2. Securing Pieces: Drill the necessary holes before screwing or bolting pieces into place. This preemptive step prevents splitting or cracking.
  3. Reinforce if Necessary: Larger structures might require reinforcement with additional brackets or metal chains.

Finishing Touches

Consider applying a weatherproof sealant to protect your awning from the elements. This will help maintain its appearance and integrity over time and add an extra layer of protection from UV damage and moisture.

Driftwood Awning

Maintenance and Care

Your driftwood awning, like any outdoor structure, will require regular maintenance to ensure its longevity and aesthetic appeal.

Protecting from the Elements

Regularly inspect your awning for any signs of wear or damage. Apply a weatherproof sealant annually to maintain the driftwood’s resistance to moisture and other environmental factors.

Cleaning

Clean your awning periodically to remove any accumulated debris. Use a soft brush or cloth to gently clean the surface without dislodging or damaging the structure.

Seasonal Checks

Check for any necessary repairs or replacements, particularly after severe weather events. Tighten any loose screws and replace any driftwood pieces that have deteriorated substantially.

Creative Customizations

Once your basic awning is complete, consider adding unique touches to further personalize your creation.

Integrating Other Natural Elements

Consider integrating other natural elements such as sea shells, stones, or small hanging plants to enhance the natural theme. These elements can be attached using fishing line or thin wire, offering subtle natural adornments.

Lighting

Incorporate LED fairy lights or solar lanterns to create a magical atmosphere, especially during the evening. Attach lights carefully to avoid damaging the wood or interfering with the structure’s stability.

Seasonal Decorations

Embrace the changing seasons by updating decorations. Add festive touches during holidays or special occasions, like small seasonal decorations or garlands, to keep your awning dynamic and reflective of your style.

Benefits of a Driftwood Awning

Creating a driftwood awning offers more than just shade. It spreads benefits across aesthetics, personal satisfaction, and environmental stewardship.

Environmental Impact

By using driftwood, you are upcycling a natural material, showcasing your commitment to sustainable practices. Driftwood requires no fresh timber, reducing your project’s carbon footprint.

Personal Satisfaction

Completing a DIY project like a driftwood awning provides a sense of satisfaction and achievement. Building with natural materials using your hands and creativity connects you to both project and place.

Added Property Value

Besides enhancing the look of your living space, an artistic, unique feature like a driftwood awning can increase its value. The distinctive character of such features may appeal to potential future buyers looking for a touch of rustic charm.

Common Challenges and Solutions

Building a driftwood awning can present challenges, but being prepared will help you overcome these hurdles.

Irregular Shapes

Working with asymmetrical and irregular pieces can complicate construction, necessitating patience and creative problem-solving. Consider laying out all pieces before starting to see how they best fit together.

Weathering

Driftwood is naturally weathered, and it’s important to ensure durability. Constant exposure to the elements could further the weathering; applying a sealant and performing regular maintenance will prolong its life.

Stability

Ensuring the awning is stable and secure is crucial. Use robust supports and test the structure by gently applying pressure before deeming it finished.

Conclusion

A driftwood awning can bring a touch of nature’s artistry into your home, blending the beauty of the outdoors with functional architecture. From choosing pieces of wood that tell their unique stories to creating a structure that provides protection and charm, this project celebrates creativity and connection with the natural world. With careful planning and attention to detail, you can craft an enduring piece that reflects not only your personal style but also a respect for the environment — all while enjoying the beauty and protection it provides.

Filed Under: Driftwood Ideas Tagged With: Awning, DIY, Driftwood, home decor, Outdoor Design

How To Attach Driftwood

December 10, 2024 by admin

How often have you admired the rustic, natural beauty of driftwood and wished you could incorporate it into your home or garden decor? Incorporating driftwood into your space can add just the right touch of nature and tranquility. Attaching driftwood properly ensures it becomes a lasting piece of art. Let’s journey through this process together, learning how to secure driftwood in the most effective way.

Understanding Driftwood: Nature’s Artist

Before we get into the nitty-gritty of attaching driftwood, it’s important to understand what driftwood is. Driftwood is usually wood that has been washed ashore by the tides, sanded by the sea, and bleached by the sun over time. It has a distinct bleached and weathered look that varies from piece to piece. Bringing driftwood into your living space is like bringing a piece of the ocean itself, offering both aesthetic and calming benefits.

Why Driftwood is Valuable

The value of driftwood goes beyond its aesthetic appeal. Each piece tells its own story of where it came from, its journey through the sea, and the transformations it underwent. Driftwood can be used in many creative ways—from sculptures to furniture to decorative accent pieces. Its neutral tones and unique texture make it adaptable to various design styles, enhancing the natural atmosphere of any setting.

Sourcing and Preparing Driftwood

Depending on where you live, you might be able to find driftwood at a nearby beach. If not, many craft and hobby stores sell driftwood for crafting purposes. In either case, once you’ve found a piece you like, it’s a good idea to prepare and clean it thoroughly. This ensures that it’s free of any unwanted organisms and ready for your project.

Preparing Driftwood for Attachment

Preparation is crucial for ensuring that your driftwood pieces stay secured in whatever arrangement you choose. Proper cleaning and treatment will also help prevent any premature degradation of the wood.

Cleaning Driftwood

Step 1: Initial Rinse
Begin by rinsing the driftwood with fresh water to remove any sand, salt, or loose debris. For smaller pieces, soak them in water for a few days, changing the water daily to leach out the salt.

Step 2: Bleaching (Optional)
To sanitize the wood, you can use a bleach solution. Mix one part bleach to ten parts water and soak the driftwood for 24 hours. This helps kill any remaining bacteria or algae. Remember to rinse the piece thoroughly afterward to eliminate any bleach residue.

Step 3: Drying
Allow the driftwood to dry completely. You can let it dry in the sun, which will also help to give it a sun-bleached look. Make sure the wood is completely dry before moving on to the next steps, as moisture can hinder adhesion and influence the integrity of your attachment.

How To Attach Driftwood

Tools and Materials for Attaching Driftwood

Having the right tools on hand will make your task easier and more efficient. Depending on the nature of your project, here’s a handy list of essentials for attaching driftwood:

Tool/MaterialPurpose
Wood GlueFor bonding glue-compatible surfaces
Epoxy ResinFor strong, durable adhesion
Drill and ScrewsFor securing driftwood to surfaces
Fishing Line or WireFor hanging driftwood pieces
L-bracketsFor mounting on walls or surfaces
SandpaperFor smoothing surfaces prior to attachment

Choosing the Right Adhesive

Not all adhesives are created equal, especially when working with nature’s own material like driftwood. Depending on the weight of your driftwood and what you’re attaching it to, different adhesives may be appropriate.

Wood Glue

Wood glue is perfect for lighter pieces of driftwood or for projects where you’ll be attaching the wood to other wooden surfaces.

Epoxy Resin

For heavier driftwood or when attaching to non-wooden surfaces such as glass or metal, epoxy resin is your best bet. It creates a durable bond and fills gaps, making it ideal for the irregular surfaces common in driftwood pieces.

Methods for Attaching Driftwood

There’s no one-size-fits-all method when it comes to attaching driftwood, largely because each piece of driftwood is unique. However, several effective methods can help you securely integrate driftwood into your decor.

Attaching with Adhesives

  1. Surface Preparation: Ensure both surfaces (the driftwood and the object to which it will attach) are clean and dry. Lightly sand both surfaces to create a rough area for better adhesion.

  2. Applying Adhesive: Apply a generous amount of your chosen adhesive to one surface. For epoxy resin, mix according to the package instructions before application.

  3. Positioning: Press the driftwood piece firmly against the surface. You may need to hold it in place for the adhesive to bond effectively; consider using clamps or weights if necessary.

  4. Drying Time: Allow ample time for the adhesive to dry and cure fully. This could range from a few hours to a full day, depending on the product used.

Screws and Drilling

For a mechanical attachment, especially for larger or load-bearing applications, screws can provide a more secure hold.

  1. Choosing Screws: Select screws that are slightly longer than the thickness of the driftwood to ensure they penetrate the surface it’s being attached to.

  2. Pre-drilling: Pre-drill holes in the driftwood to avoid splitting. Use a drill bit slightly smaller than the screw’s diameter.

  3. Securing: Use a power drill to drive the screws through the pre-drilled holes into the receiving surface. Be cautious not to over-tighten, as this can crack or split the driftwood.

Using Brackets

L-brackets can be very effective for stabilizing driftwood pieces against walls or flat surfaces.

  1. Position the Bracket: Align the bracket where you want the piece to rest, ensuring that it will hold the weight of your driftwood.

  2. Attaching the Bracket: Secure the bracket to the wall or desired surface with screws, and then place the driftwood onto the bracket. Depending on your aesthetic preference, you can either leave the bracket exposed or conceal it with decorative elements.

Hanging with Wire or Fishing Line

For hanging driftwood pieces, using wire or fishing line can be an artistic and less intrusive way to display your driftwood.

  1. Determine Length: Cut the wire or line to your desired length, ensuring it can hold the weight of the driftwood.

  2. Secure the Line: Loop the line around the driftwood, knotting it securely. For additional strength, you may use two or more strands.

  3. Hanging: Attach the other end to a stable hook or nail. Ensure the anchor point (such as in the wall or ceiling) can bear the driftwood’s weight reliably.

How To Attach Driftwood

Creative Ideas for Using Driftwood

Now that you’ve mastered the techniques for attaching driftwood, let’s look at some creative applications to inspire you.

Incorporating Driftwood into Interior Decor

  1. Wall Art: Attach smaller pieces of driftwood to form a driftwood collage or a central focal piece such as a driftwood heart or star.

  2. Furniture: Use larger pieces as bases or legs for tables and chairs, adding a unique twist to conventional furniture pieces.

  3. Shelves: Install driftwood as floating shelves. Mount the wood securely with brackets or screws for a minimalist, rustic look.

Driftwood in Garden and Outdoor Spaces

  1. Planters: Create a driftwood planter by using driftwood to encase potted plants.

  2. Garden Borders: Use driftwood as natural borders around flower beds or pathways.

  3. Birdhouses and Feeders: Construct birdhouses or feeders by attaching additional wood pieces, creating a natural feeding environment for birds.

Troubleshooting Common Problems

Even with careful preparation and maintenance, things can occasionally go awry. Here are some tips on what to do if issues arise with your driftwood projects:

Loose Attachments

If a piece of driftwood isn’t holding as securely as you’d like, consider reinforcing it with additional screws or a stronger adhesive. Double-check that the surfaces were properly cleaned and sanded before attachment.

Splintering Driftwood

Splintering can occur if driftwood is dry or too brittle. Regularly check the condition of your driftwood and be prepared to sand and retouch finishes to maintain their integrity.

Environmental Deterioration

Outdoor driftwood can degrade if exposed to extreme weather. Consider sealing the driftwood with a clear outdoor sealant to protect it from the elements while preserving its natural beauty.

Conclusion: Crafting with Driftwood

Attaching driftwood to various surfaces and incorporating it into your decor is a satisfying and rewarding endeavor. It allows you to bring the beauty of nature into your personal space, whether indoors or outdoors. By understanding the characteristics of driftwood, preparing it correctly, and using the appropriate methods and tools, you can create stunning and durable works of art. Remember, every piece of driftwood is unique, and with a little creativity and care, you can transform any piece into something that’s perfectly you.

Filed Under: Driftwood Ideas Tagged With: crafting, DIY Projects, Driftwood, home decor, Woodworking

Driftwood Ideas Diy

December 9, 2024 by admin

Have you ever wandered along the beach and wondered what to do with the pieces of driftwood scattered along the shore? Driftwood has a unique charm and character, which makes it a perfect material for creative DIY projects. Its naturally weathered texture and variations in shape can add a touch of rustic elegance to your home decor or serve as one-of-a-kind functional art.

Driftwood Ideas Diy

What is Driftwood?

Driftwood is wood that has been washed onto a shore or beach by the action of winds, tides, or waves. Originating from various sources—such as trees, bushes, or man-made structures—driftwood undergoes natural processes that give it a distinctive look. This makes it highly appealing for many DIY enthusiasts and artists seeking to bring a bit of nature into their creations.

Characteristics of Driftwood

Driftwood’s characteristics make it appealing for various projects. Its natural texture, varied shapes, and the presence of knots and knots can become the centerpiece of a creative piece. Depending on where it’s found, driftwood can be bleached by the sun or darker in tone due to water exposure. Its lightweight yet sturdy structure makes it an excellent choice for constructing decorative items.

Preparing Driftwood for DIY Projects

Before starting your project, it’s crucial to prepare your driftwood properly. This ensures it’s safe and durable for whatever you plan to create.

Cleaning Driftwood

To clean driftwood, first, give it a good rinse with fresh water to remove any sand, salt, or debris. Based on its size, you might soak the wood in a solution of one-part vinegar to nine parts water for a day or two, which will help eliminate any bacteria or insects. After soaking, rinse again and allow it to dry completely, which may take a couple of weeks, depending on your climate.

Optional: Bleaching Driftwood

If you prefer a lighter look, you can bleach your driftwood. Mix a bleach solution (one part bleach to ten parts water) and soak the driftwood overnight. However, bleaching can weaken the wood, so ensure it’s only lightly submerged, or just brush the solution onto the surface.

Drilling and Cutting Driftwood

Driftwood is generally easy to cut and drill. Use a fine-toothed saw to make cuts, should you need to shape the driftwood. For drilling, use a drill bit suitable for wood, and proceed slowly to avoid cracking or splitting. Dulled bits are perfect for this task as they reduce the risk of breaking fragile sections.

Driftwood DIY Project Ideas

Driftwood’s adaptability means it can be used for a wide variety of DIY projects. Here are some ideas to get you started:

Driftwood Wall Art

Create stunning wall art by assembling smaller pieces of driftwood into a pattern or design on a canvas or a plywood backing. This could be an abstract piece, or you could create specific shapes, like a heart or a landscape scene. Use a strong adhesive to secure each piece in place.

Driftwood Candle Holders

Magnify the natural beauty of driftwood by creating unique candle holders. You can drill holes into larger pieces that match the circumference of tealight candles, or affix smaller branches together to cradle glass votives.

Driftwood Mirrors

Use driftwood pieces to frame a mirror. Arrange the wood around the edges, overlapping for an organic feel. This provides a unique and rustic touch to a bathroom or hallway. Ensure the mirror is securely fastened before attaching the driftwood around it.

Driftwood Mobiles

Create a driftwood mobile by hanging various sizes of driftwood pieces with fishing line or thin wire. Add seashells, stones, or other natural elements to enhance its beauty. Suspend it near a window or in an outdoor area to enjoy the subtle movements as it catches the breeze.

Driftwood Plant Hangers

For a novel way to display air plants, use small pieces of driftwood. Affix a clear fishing line or wire to driftwood and hang it from the ceiling or ceiling hook. Alternatively, drill small indentations to hold tiny air plants directly.

Driftwood Furniture

For the more adventurous DIYer, consider crafting driftwood into functional furniture pieces like coffee tables or stools. You’ll need to select sturdy pieces for the legs and supports, and you can use a glass tabletop to showcase the intricate design of the wood.

Driftwood Lamps

Construct a base for a lamp using a larger piece of driftwood. There are lamp kits available which make it easier to affix lightbulbs and shades, resulting in stunning, conversation-starting home lighting.

Driftwood Shelves

Use longer, flat pieces of driftwood as unique shelves. Secure them to the wall using brackets. Enhance the rustic feel by using antiqued metal fixtures.

Driftwood Garland

Create a garland out of small to medium driftwood pieces, strung together using a strong cord or twine. Use your driftwood garland as decoration for a mantel, around a doorframe, or for outdoor events.

Tips for Successful Driftwood Projects

While driftwood is pleasingly adaptable for projects, there are some essential tips you should follow for the best results.

Choosing the Right Driftwood

Look for pieces that are dry and free of large fissures or cracks. Smaller, knot-filled pieces offer interesting character and might work well for art projects, whereas larger, sturdier pieces are more suited for furniture.

Tools and Safety

Always protect yourself when using tools to cut or sand driftwood. Wear safety goggles and a mask to avoid splinters or inhaling dust. Always cut in a well-ventilated area.

Preserve Your Creation

To make your driftwood project last, consider treating it with a sealant or clear wood finish. This will help protect it from wear and environmental factors, particularly if you plan to use it outdoors.

Driftwood Ideas Diy

Benefits of Using Driftwood in DIY

Using driftwood in DIY projects is beneficial beyond its naturally appealing look. Its versatility means you can tailor projects to fit your space, style, and skills. It’s also an eco-friendly choice; by using driftwood, you’re repurposing natural material that might otherwise be discarded. Plus, crafting with driftwood can be a relaxing way to bring a piece of the beach into your home and showcase your creativity. So why not see what treasures your next beach trip could lead to?

Filed Under: Driftwood Ideas Tagged With: crafting, Driftwood, Handmade, home decor, Upcycling

Attaching Air Plants To Driftwood

December 9, 2024 by admin

Have you ever admired the whimsical beauty of air plants attached to driftwood and wondered how you could replicate that stunning display in your own space? You’re in the right place! Creating a captivating combination of natural elements doesn’t require a green thumb; just a little guidance and creativity. In this article, you’ll learn the steps for attaching air plants to driftwood, transforming an ordinary piece into a magical showcase of nature’s artistry.

Attaching Air Plants To Driftwood

Understanding Air Plants

Before diving into the process, it’s important to understand a bit about air plants, also known as Tillandsias. These unique plants are part of the bromeliad family and are native to forests, mountains, and deserts in Central and South America, and some regions of the southern United States. They’re called air plants because they draw nutrients and moisture not from soil but from the air. This fascinating ability allows them to thrive in environments where other plants cannot.

Care and Requirements

While air plants are pretty independent, understanding their basic needs will help ensure your driftwood display remains vibrant and healthy. Air plants require:

  • Light: Bright, indirect sunlight is ideal. Avoid harsh direct sunlight as it can scorch the leaves.
  • Water: Mist your air plants 2-3 times a week or soak them in water for about 20-30 minutes once a week. Adjust this routine according to the humidity levels in your area.
  • Air Circulation: Good air circulation is key to preventing mold and rotting. Ensure they have plenty of space around them to promote airflow.

Selecting the Ideal Driftwood

Choosing the right piece of driftwood is an essential step in crafting your display. Driftwood tells its own unique story with each piece bringing individual character and texture.

Types of Driftwood

There are various types of driftwood you might consider:

  • Softwood: Generally lighter and can have interesting knot patterns. However, be aware it may deteriorate faster than hardwood.
  • Hardwood: Denser and more robust, making it a durable choice. It can support several air plants while maintaining its integrity over time.

When picking your driftwood, consider its shape, size, and the natural crevices that can cradle your air plants. These nooks not only provide stability but also enhance the aesthetic appeal of your arrangement.

Tools and Materials Needed

Embarking on this project requires a few simple tools and materials. These will ensure a secure attachment of your air plants to the driftwood and help you present your artwork beautifully. Here is a list of essentials:

Tool/MaterialPurpose
DriftwoodThe base structure for your arrangement
Air PlantsThe main feature, select varying sizes for dimension
Waterproof AdhesiveSecures the air plant to the driftwood (e.g., clear silicone glue)
WireAn alternative to glue, offers a natural look with added stability
ScissorsUsed to trim excess wire or roots from the plants
Fishing LineUseful if you want to create a hanging display

Preparing Your Driftwood and Air Plants

Now that you’ve gathered your materials, it’s time to prepare your driftwood and air plants for assembly. Proper preparation ensures the longevity and health of your display.

Cleaning the Driftwood

While driftwood can come with charming imperfections, it’s important to clean it before use:

  1. Rinse Thoroughly: Use fresh water to rinse any salt, sand, or organic matter.
  2. Disinfect: Soak the driftwood in a bleach solution (1 part bleach to 9 parts water) for 24 hours to eliminate any potential pests or bacteria.
  3. Dry Completely: Allow the driftwood to dry fully, preferably in the sun, to ensure all moisture is removed which could otherwise lead to decay.

Air Plant Preparation

Your air plants also need a little pampering before they take their place on the driftwood:

  • Remove Damaged Leaves: Trim away any brown or dead leaves using scissors.
  • Water Them: Give the air plants a good soak for about 20-30 minutes, as they should be well-hydrated before attaching them.

Attaching Air Plants To Driftwood

Attaching Air Plants to Driftwood

With everything prepared, you can move on to the fun part: attaching the air plants to your driftwood. This is where your creativity really comes into play as you design your living art piece.

Placement and Design

Consider the visual balance:

  • Grouping: Create groups of air plants in different sections of the driftwood for a lush, full appearance.
  • Height: Vary the heights of each plant group to add dimension and depth to your arrangement.
  • Symmetry vs. Asymmetry: Decide on a symmetrical look for a more formal arrangement, or go for asymmetry for a more natural, organic feel.

Methods of Attachment

  • Using Adhesive: Apply a small amount of waterproof adhesive to the base of each air plant. Press it gently into position on the driftwood, holding it for a few minutes as the adhesive sets.
  • Using Wire: Wrap thin wire around the base of the air plant and secure it to the driftwood. This method might require a bit more finesse but can offer a more natural look.

Whichever method you choose, ensure the plants are securely attached but not crushed.

Maintenance Tips for Lasting Beauty

Your air plant and driftwood display will need ongoing care to keep it looking its best. Here are some tips to maintain your masterpiece:

Regular Watering

Mist your air plants regularly or submerge them in water as needed. Always allow them to dry upside-down to prevent water from collecting in their bases, which can lead to rot.

Adjust Lighting

Monitor the lighting conditions and adjust the placement of your driftwood display if necessary. Ensure your plants are getting enough indirect light without being exposed to direct sunlight.

Inspect for Pests

Occasionally check your air plants for signs of pests like mealybugs. If you find any, they can often be removed with a gentle spray of water or with houseplant-specific pest control products.

Creating Beautiful Displays

With your newfound skill, consider experimenting with different display ideas to showcase your air plants and driftwood arrangement. Whether they remain a centerpiece on a table, hang from the ceiling, or complement a shelf, your options are endless.

Tabletop Displays

A large piece of driftwood can serve as a striking centerpiece on your dining or coffee table. Pair it with smaller decorative items like candles or stones to enhance the natural beauty.

Hanging Displays

Utilizing fishing lines, you can hang your driftwood in front of a window to catch the light. Consider using different lengths of line to create a tiered effect, adding an extra layer of interest.

Wall-Mounted Art

Transform your driftwood and air plants into wall art by securing it onto a frame or mounting it directly on the wall, bringing nature indoors in a sophisticated way.

Troubleshooting Common Problems

Sometimes, even with the best care, issues can arise. But don’t worry, most can be resolved with a little patience and know-how.

Browning Tips

If you notice the tips of your air plants turning brown, it might be a sign of insufficient watering or too much direct sunlight. Adjust your watering routine and monitor the lighting conditions.

Mold or Rot

Mold or rot may occur if air plants do not dry properly. Ensure there is ample air circulation and allow the plants to dry upside-down after watering.

Poor Growth

Slow growth can be attributed to low light levels. If your air plants seem stagnant, consider moving them to a brighter location with indirect sunlight.

Conclusion

Attaching air plants to driftwood is a delightful blend of nature and design that can elevate any space. By understanding the basics of air plant care, selecting the perfect driftwood, and creatively attaching your plants, you can create a beautiful, living art piece that sparks joy and conversation. As you nurture this display, you’ll enjoy the satisfaction of watching your creation thrive and transform over time. So, with these tips at your disposal, take on the challenge with confidence and let your creativity flourish!

Filed Under: Driftwood Ideas Tagged With: Air Plants, Driftwood, home decor, Plant Art, Plant Care

  • « Previous Page
  • Page 1
  • …
  • Page 7
  • Page 8
  • Page 9
  • Page 10
  • Page 11
  • …
  • Page 30
  • Next Page »

Primary Sidebar

Driftwood4us.com, is a participant in the Amazon Services LLC Associates Program, an affiliate advertising program designed to provide a means for sites to earn advertising fees by advertising and linking to amazon.com.