Diy Driftwood Garden Sink Stand
One man’s beach debris is another man’s $500 garden workstation.
[affiai]Stop looking at beach debris as a cleanup project and start seeing it as free industrial-grade infrastructure. This weekend, we’re turning ‘rubbish’ into the ultimate heavy-duty potting station that will outlast any plastic alternative.
The modern garden market is flooded with flimsy, injection-molded plastic tables and “weather-resistant” pine that begins to warp before the first frost. Real grit requires real materials. We are going back to basics, sourcing timber that has been salt-cured and sun-bleached by the elements to build something with soul and stamina.
Building a workstation from driftwood is not just about saving money. It is about claiming a piece of the coast and repurposing it for the hard work of the soil. This guide will walk you through the transformation of raw, ocean-scoured timber into a functional, plumbing-integrated masterpiece.
Diy Driftwood Garden Sink Stand
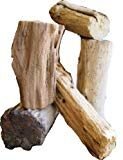
A Diy Driftwood Garden Sink Stand is a heavy-duty outdoor workstation constructed from wood salvaged from shorelines, riverbanks, or coastal areas. Unlike standard lumber, driftwood has undergone a natural “durability assembly line” of sun, salt, and water. This process often strips away the soft outer bark and leaches out the sugars that typically attract wood-boring insects, leaving behind a dense, resilient core that is remarkably stable.
In practical terms, this stand serves as the headquarters for your outdoor chores. It provides a waist-high surface for repotting plants, a basin for scrubbing root vegetables, and a dedicated spot to clean muddy tools without tracking grit into the house. In homesteading and serious gardening circles, these stands are prized for their unique aesthetics; no two pieces of driftwood are identical, meaning your workstation is a one-of-a-kind functional sculpture.
Beyond its utility, the driftwood sink stand represents a philosophy of extreme resourcefulness. It exists at the intersection of environmental cleanup and high-end craftsmanship. While a high-quality cedar or teak potting bench can easily cost several hundred dollars, a driftwood stand utilizes free raw materials that are often more durable than commercial softwoods. It is used in coastal homes, off-grid cabins, and urban gardens alike as a testament to the idea that industrial-grade infrastructure doesn’t always come from a factory.
How to Build Your Driftwood Workstation
Building with irregular, weathered timber requires a different mindset than working with squared-off 2x4s from the local hardware store. The process begins long before you pick up a drill.
Phase 1: The Scavenge and Selection
Finding the right timber is the foundation of the project. Focus on pieces that are “bone dry” and heavy for their size. If a piece of wood feels light or spongy, the salt and water have moved past curing and into the realm of rot. Look for structural members: thick, straight-ish logs for the legs (at least 3 to 4 inches in diameter) and flatter, wider planks or sturdy branches for the frame.
Always check local regulations before you start loading your truck. Many public beaches and national parks have strict rules against removing natural materials. In the UK, small-scale beachcombing is generally permitted, while in places like Queensland, Australia, anything below the high-tide mark is considered protected habitat.
Phase 2: Prepping the Timber
Salt is a preservative for wood, but it is a poison for your garden plants and a corrosive for your tools. You must clean the wood thoroughly. Start by hosing off the loose sand and debris. Once the surface is clear, soak the wood in a large trough of fresh water for 24 to 48 hours. This draws the salt out of the fibers.
If you suspect the wood is harboring hitchhikers like spiders or fungi, a solution of one part bleach to ten parts water will act as a disinfectant. After cleaning, let the wood dry in a sunny, well-ventilated spot. This may take several days or even weeks depending on the thickness. Rushing this step leads to wood movement after the stand is built, which can crack your sink basin or loosen your joints.
Phase 3: Framing the Stand
Standard counter height is between 34 and 36 inches. Measure your four sturdiest logs for the legs and cut them to length. Because driftwood is rarely perfectly straight, use a level on the top of the legs during assembly rather than assuming the cuts are uniform.
Construct a rectangular frame to support the sink. If you are using a reclaimed stainless steel sink or a galvanized tub, measure its “lip” carefully. The frame should be slightly smaller than the outer rim of the sink so the basin can drop in and be supported by the wood. Use 3-inch or 4-inch stainless steel lag bolts for the primary structural connections. Standard deck screws often lack the shear strength needed for heavy, irregular timber.
Phase 4: Plumbing the Basin
You do not need a master plumber’s license to get running water in your garden. The simplest method is a “hose-fed” system.
- The Faucet: Mount a basic hose bib or a dedicated outdoor faucet to the back of the stand. You can use galvanized pipe for a rugged, industrial look.
- The Supply: Use a Y-splitter at your main garden spigot. Run a potable-water-rated hose from the splitter to the back of your sink stand. Connect it to the faucet using a 1/2-inch pipe-to-hose adapter.
- The Drain: Avoid the complexity of a septic connection. Attach a short length of flexible hose to the sink’s drain and directed it into a 5-gallon bucket or a large watering can. This “grey water” from rinsing veggies or hands is perfect for watering non-edible ornamental plants or the compost pile.
Benefits of a Driftwood Workstation
The primary advantage of this approach is the sheer resilience of the material. Driftwood has already survived the harshest conditions the planet can throw at it. It has been pounded by waves, baked in UV rays, and soaked in brine. If it hasn’t fallen apart on the beach, it won’t fall apart in your backyard.
Cost is the most obvious benefit. By scavenging the primary structure, you can allocate your budget toward high-quality hardware. Using 316-grade stainless steel screws and a high-end brass faucet ensures that the moving parts of your station last as long as the wood. You are essentially building a $500–$800 workstation for the cost of a few bolts and a second-hand sink.
Environmental impact cannot be overlooked. Every piece of driftwood you recover for a permanent structure is a piece of debris removed from the ecosystem. Furthermore, you are bypassing the carbon footprint associated with logging, pressure-treating, and transporting commercial lumber. You are participating in a closed-loop system of resource recovery.
Finally, there is the ergonomic and aesthetic value. A custom-built stand allows you to set the height perfectly for your own frame, preventing the back strain common with low-profile potting benches. The silver-grey patina of weathered wood blends into a garden landscape far more naturally than the bright green tint of chemical-treated pine or the clinical look of plastic.
Challenges and Common Mistakes
The greatest challenge in building with driftwood is the toll it takes on your equipment. Driftwood is often impregnated with fine silica sand and microscopic salt crystals. These act like sandpaper on your saw blades and drill bits. If you value your high-end woodworking chisels, keep them away from raw driftwood. Use “beater” blades or carbide-tipped tools that you can sharpen or replace without heartbreak.
A common mistake is failing to account for the weight and balance of the wood. Driftwood is often deceptively heavy. If your frame is top-heavy and your legs are placed too narrowly, the stand will be a tipping hazard once the sink is full of water and soil. Always flare the legs slightly outward or add a heavy lower shelf to act as a counterweight.
Structural integrity is another pitfall. Just because a piece of wood looks solid doesn’t mean the core is sound. Always perform a “thump test” with a mallet. A solid piece will produce a clear, high-pitched “crack,” while a rot-compromised piece will sound like a dull thud. Never use wood with visible “honeycombing” on the ends, as this indicates internal rot that will fail under the weight of a full sink.
Limitations of Driftwood Construction
The most significant limitation is the lack of uniformity. You cannot simply follow a set of blueprints found in a magazine. Every joint must be custom-fitted. This often requires “scribing”—the process of marking one piece of wood to match the irregular curve of another. If you are looking for a project that you can knock out in two hours with a circular saw, driftwood is not the right choice.
Environmental constraints also play a role. If you live in a landlocked area, the cost of transporting large pieces of driftwood may negate the “free” aspect of the project. Furthermore, if your garden is in a very humid, shaded area with poor airflow, even the most salt-cured wood can eventually fall prey to local moss and rot if it isn’t elevated off the damp ground.
Legal boundaries are a hard limitation. In many regions, driftwood provides critical habitat for insects and birds, and acts as a natural breakwater to prevent coastal erosion. Stripping a beach of its wood can lead to heavy fines and ecological damage. This project is intended for the recovery of scattered debris, not the systematic harvesting of coastal defenses.
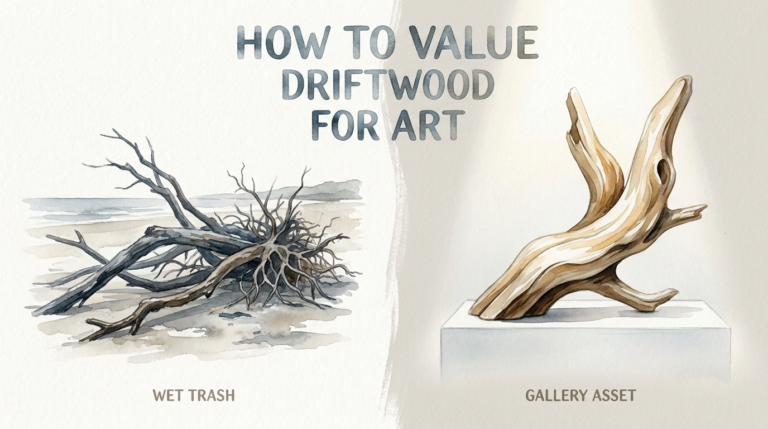
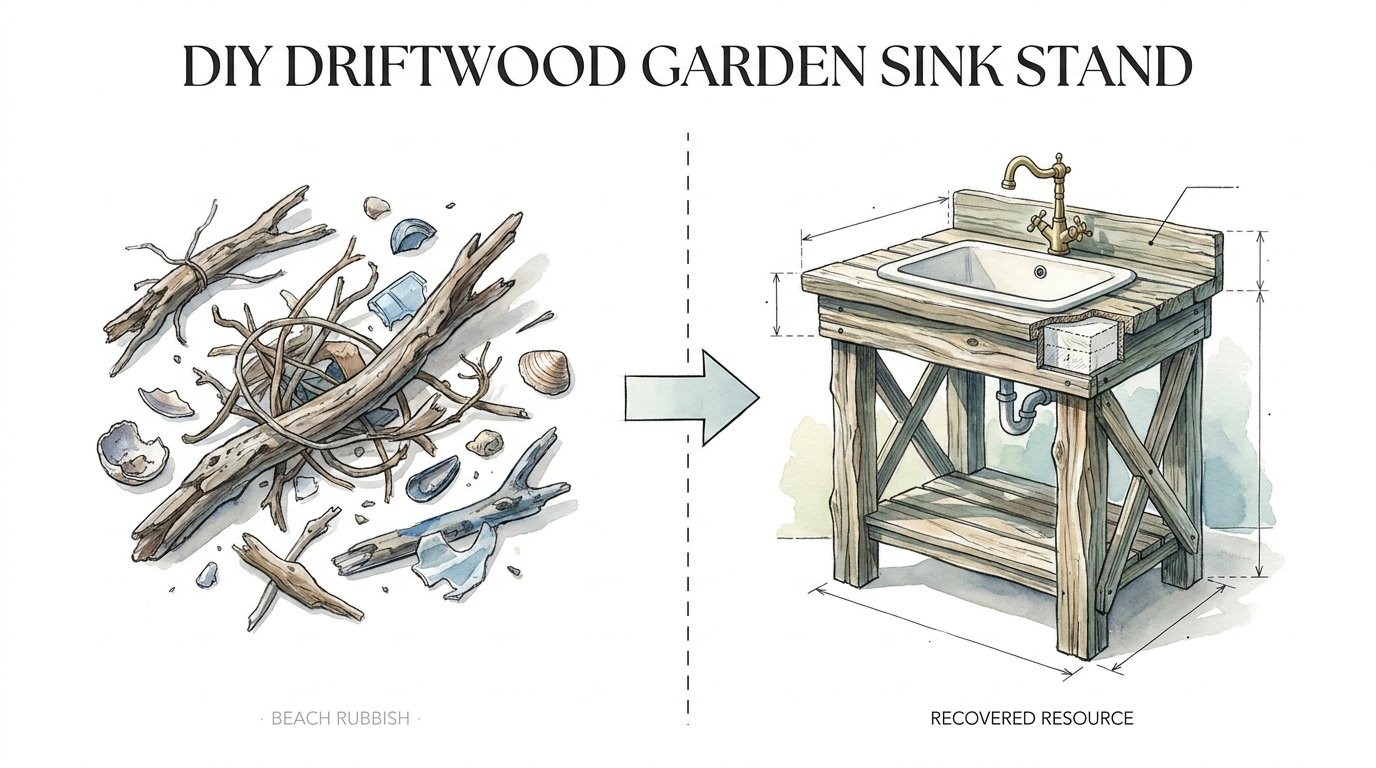
Beach Rubbish vs. Recovered Resource
The difference between rubbish and a resource is entirely in the processing. Raw debris is a liability; a processed resource is an asset.
| Feature | Beach Rubbish (Raw) | Recovered Resource (Processed) |
|---|---|---|
| Salt Content | High; Corrosive to plants & tools | Leached; Safe for garden use |
| Pest Risk | Potential for termites/spiders | Sterilized; Pest-free |
| Appearance | Dirty, bleached, uneven | Silver patina, cleaned, sculpted |
| Stability | Subject to warping as it dries | Seasoned; Structurally stable |
| Utility | Coastal debris/Fire hazard | High-end garden infrastructure |
Practical Tips and Best Practices
Always use stainless steel or hot-dipped galvanized hardware. Standard zinc-plated screws will react with the trace amounts of salt remaining in the wood and the tannins in the timber, leading to black streaks and eventual structural failure. Spend the extra money on 316-grade stainless steel; it is the only way to ensure the joints outlast the wood.
When assembling the stand, avoid using wood glue. Traditional wood glues require flat, clean surfaces to create a bond. Since driftwood is irregular, glue will only provide a false sense of security. Rely on mechanical fasteners—bolts, lag screws, and timber ties. If you must use an adhesive, choose a high-quality polyurethane construction adhesive that can gap-fill the uneven spaces between the timbers.
Leveling the stand on garden soil can be a nightmare. Instead of trying to cut the legs to the perfect length, place each leg on a flat “footing” stone or a buried concrete paver. This prevents the wood from wicking up moisture from the ground and allows you to adjust the level by simply adding or removing a bit of sand under the stone.
Advanced Considerations
For those who want to take their workstation to the next level, consider integrating a grey water filtration system. Instead of just draining into a bucket, you can pipe the sink into a “mulch basin”—a shallow trench filled with woodchips and gravel. This naturally filters the water and delivers it directly to the root zones of nearby fruit trees or ornamental shrubs.
Lighting is another high-value upgrade. Because these stands are often located away from the house, visibility can be an issue during evening chores. Install a small, solar-powered LED light under the top frame or on a vertical driftwood “mast.” This provides task lighting for cleaning harvest at dusk without requiring you to run electrical lines through the garden.
Consider the “Modular Worktop” approach. Instead of a fixed wooden top, create a recessed frame where you can swap out different inserts. You might have a stainless steel sink for washing, a wire mesh screen for sifting compost and cleaning root crops, and a solid butcher-block insert for heavy potting work. This versatility makes the stand a year-round tool rather than a single-purpose table.
Scenarios and Examples
Imagine a homestead in the Pacific Northwest. The gardener has reclaimed three large cedar logs washed up after a winter storm. These serve as the tripod legs for a massive, waist-high potting station. A reclaimed double-basin kitchen sink is dropped into the center. One side is used for soaking bare-root trees, while the other is used for rinsing mud off carrots. The grey water drains through a 1-inch PVC pipe into a nearby rain garden filled with moisture-loving ferns.
In a smaller urban setting, a gardener uses sun-bleached river wood to build a compact, 2-foot-wide sink stand on a balcony. A small, round bar sink is integrated into the top, and the water is supplied by a coiled “Pocket Hose” hidden behind a driftwood screen. This setup allows for mess-free container gardening in a space where a traditional garden hose would be unsightly.
In both cases, the success of the project hinges on the transition from “found object” to “engineered structure.” The logic remains the same: identify the load-bearing requirements, clean the material, and use the best possible hardware to bind the irregular pieces together.
Final Thoughts
The Diy Driftwood Garden Sink Stand is more than just a place to wash dirt off your hands. It is a functional monument to the idea that the best materials for a project aren’t always found in a cardboard box at a big-box retailer. By looking at the “rubbish” on our shorelines with a pioneer’s eye, we can build infrastructure that is as resilient as it is beautiful.
This project demands patience. You must wait for the wood to soak, wait for it to dry, and spend the time required to fit each joint by hand. However, the reward is a workstation that feels like a natural extension of the landscape. It is a heavy-duty, industrial-grade tool that will stand in your garden for decades, weathering the seasons just as it did the ocean waves.
Start small if you must. Find a few sturdy branches and build a simple wash-up station. Once you understand how driftwood behaves under a drill and a saw, you will never look at a beach cleanup the same way again. You are not just cleaning the coast; you are harvesting the future of your garden.
Sources
1 wordpress.com (https://mikesdriftwood.wordpress.com/why-driftwood/) | 2 thisoldhouse.com (https://www.thisoldhouse.com/gardening/how-to-build-a-potting-bench) | 3 parklanejewelry.com (https://www2.parklanejewelry.com/how-to-clean-driftwood/) | 4 tnnursery.net (https://tnnursery.net/blogs/garden-blog/driftwood-has-many-uses) | 5 bonnieplants.com (https://bonnieplants.com/blogs/diy-garden-projects/build-outdoor-sink) | 6 youtube.com (https://www.youtube.com/watch?v=_UnbP5_-eWA) | 7 decoroutdoor.com (https://decoroutdoor.com/blog/outdoor-furniture-materials-guide-frames-tabletops-wood/) | 8 dksstores.com (https://dksstores.com/blog-post67) | 9 quora.com (https://www.quora.com/Is-it-illegal-to-take-driftwood-from-a-beach) | 10 openskykitchen.com (https://openskykitchen.com/diy-outdoor-sink-build/) | 11 wallacesgardencenter.com (https://wallacesgardencenter.com/blogs/gardening/diy-potting-bench-plans) | 12 diywoodhaven.com (https://diywoodhaven.com/wood-joinery-techniques-10-must-know-types-for-diy-projects/) | 13 familyhandyman.com (https://www.familyhandyman.com/list/outdoor-sink-ideas/) | 14 thestatedhome.com (https://blog.thestatedhome.com/types-of-wood-joints/) | 15 youtube.com (https://www.youtube.com/watch?v=rv8Rz7y3vCs)