Natural Driftwood Sound Diffuser Diy
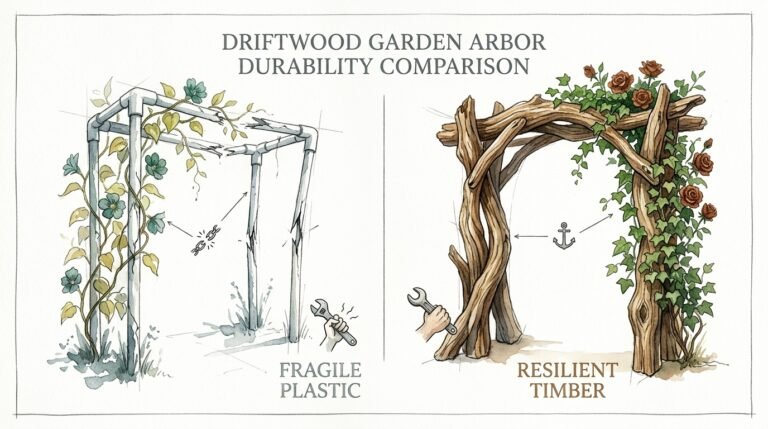
Your ears can tell the difference between a plastic filter and a natural forest. Why surround yourself with petroleum-based foam when the ocean has already carved the perfect acoustic geometry? These driftwood sound clouds don’t just kill the echo; they bring a warm, organic ‘breath’ to your room that synthetic materials can’t replicate.
[affiai]Most modern acoustic treatments rely on mass-produced chemicals that off-gas into your creative space. Choosing a natural path means trading those gray wedges for something with history and grit. This guide is for the person who wants a room that sounds as honest as it looks.
Natural Driftwood Sound Diffuser Diy
A natural driftwood sound diffuser is a functional piece of art designed to scatter sound waves throughout a room. Unlike flat walls that bounce sound back like a mirror, or foam that simply kills the energy, a diffuser breaks the sound apart. It uses the varied depths and densities of sun-bleached wood to create a more immersive, balanced listening environment.
Think of a sound wave like a wave in a pool. If that wave hits a flat concrete wall, it splashes back with full force. If it hits a pile of irregular rocks, the energy is broken up and dispersed in a dozen directions. This dispersion is what makes a room feel ‘live’ without being ‘echoey.’ Driftwood is uniquely suited for this task because the sea has already spent years stripping away the softest parts of the grain, leaving behind a dense, irregular skeleton.
In a real-world home studio or listening room, these diffusers are typically placed on the back wall or at the first reflection points on the side walls. They turn a small, boxy-sounding room into a space that feels much larger and more natural. Musicians often prefer wood because it maintains the ‘sparkle’ of high frequencies while smoothing out the harshness that can ruin a recording.
How Acoustic Diffusion Actually Works
Understanding the physics of sound helps you build a better panel. Sound travels in waves, and when those waves hit a surface, they either reflect, get absorbed, or get diffused. Most people focus entirely on absorption—stuffing corners with fiberglass or foam. While absorption is necessary to control bass, over-doing it makes a room feel dead, claustrophobic, and unnatural.
Diffusion is the antidote to a dead room. It uses a mathematical concept called a Schroeder Diffuser, often based on prime numbers. By placing pieces of wood at specific, varied depths, you create a phase-shifting surface. When a sound wave hits these different depths, parts of the wave are reflected back at different times. This prevents the wave from bunching up into a ‘standing wave’ or creating a sharp, metallic ‘slap echo.’
Driftwood adds a layer of complexity to this math. Because no two pieces of driftwood are the same shape, you get a ‘randomized’ diffusion that is often more pleasing to the ear than a perfectly calculated machine-cut panel. The varied density of the wood also provides a small amount of high-frequency absorption, which takes the ‘edge’ off without sucking the life out of the performance.
Step-by-Step: Sourcing and Seasoning Your Materials
Building with driftwood requires a different mindset than buying lumber from a big-box store. You are working with a material that has survived the elements. Preparation is the most critical stage of the process. If you skip the cleaning phase, you might find your acoustic cloud becoming a home for unwanted guests or developing a musty smell that lingers for years.
First, head to the shoreline after a storm. Look for pieces that are dense and ‘clinky’ when tapped together. Avoid wood that feels spongy or light; this is rot, and it won’t reflect sound waves effectively. You want wood that has been stripped of its bark and smoothed by the tide. Gather enough pieces to fill a frame, typically 24 inches by 48 inches for a standard wall panel.
Once you have your haul, you must sanitize it. Fill a large basin with a solution of one part bleach to nine parts water. Submerge the wood completely and let it soak for at least 24 hours. This kills any bacteria, mold spores, or microscopic critters living in the grain. After the soak, rinse the wood thoroughly with fresh water and set it in a well-ventilated area to dry.
Drying is a test of patience. Driftwood can hold a surprising amount of internal moisture. If you build with damp wood, it will shrink and crack as it dries inside your home, potentially ruining your assembly. Let it sit for at least two to three weeks. If you are in a rush, you can use a low-heat oven (around 150 degrees Fahrenheit) for several hours, but air-drying produces the best long-term stability.
The Build: Constructing the Acoustic Cloud
After your wood is dry and clean, it is time to assemble the frame. A heavy-duty plywood backer is the best foundation. Since driftwood is heavier than standard pine, use a 3/4-inch piece of birch or maple plywood for the back. This provides the mass needed to ensure the entire panel doesn’t vibrate along with your speakers.
Layout is where the magic happens. Start by sorting your driftwood pieces by length and thickness. To mimic the effect of a professional Quadratic Residue Diffuser (QRD), you want a mix of depths ranging from one inch to five inches. Place the thicker, deeper pieces near the center and scatter the thinner pieces toward the edges. This creates a convex shape that helps spread sound wider across the room.
Use a high-quality construction adhesive and a brad nailer to secure each piece to the backer. Glue is essential here; mechanical fasteners alone can rattle over time when subjected to loud bass. Apply a generous bead of glue to the flat side of each driftwood piece and press it firmly into the plywood. If you have gaps between the pieces, don’t worry. These small crevices actually help trap and dissipate high-frequency energy.
Benefits of Organic Diffusion
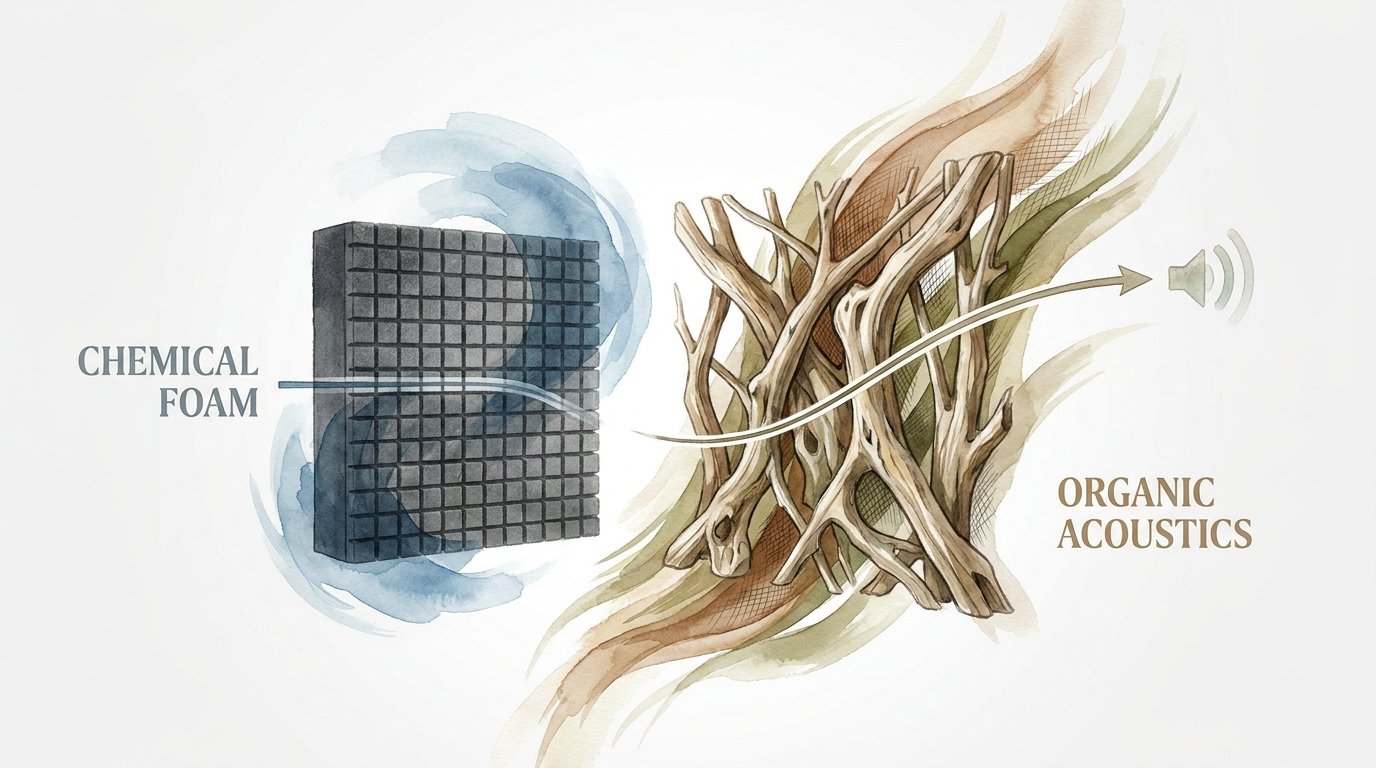
The primary advantage of using driftwood is the tonal quality. Synthetic foam is a porous material that absorbs sound by converting acoustic energy into heat. While effective, it often absorbs ‘unevenly,’ sucking out the high-end and leaving the muddy mid-range behind. Wood is a reflective material. It preserves the energy but changes its timing and direction. This results in a room that sounds bright and clear but never harsh.
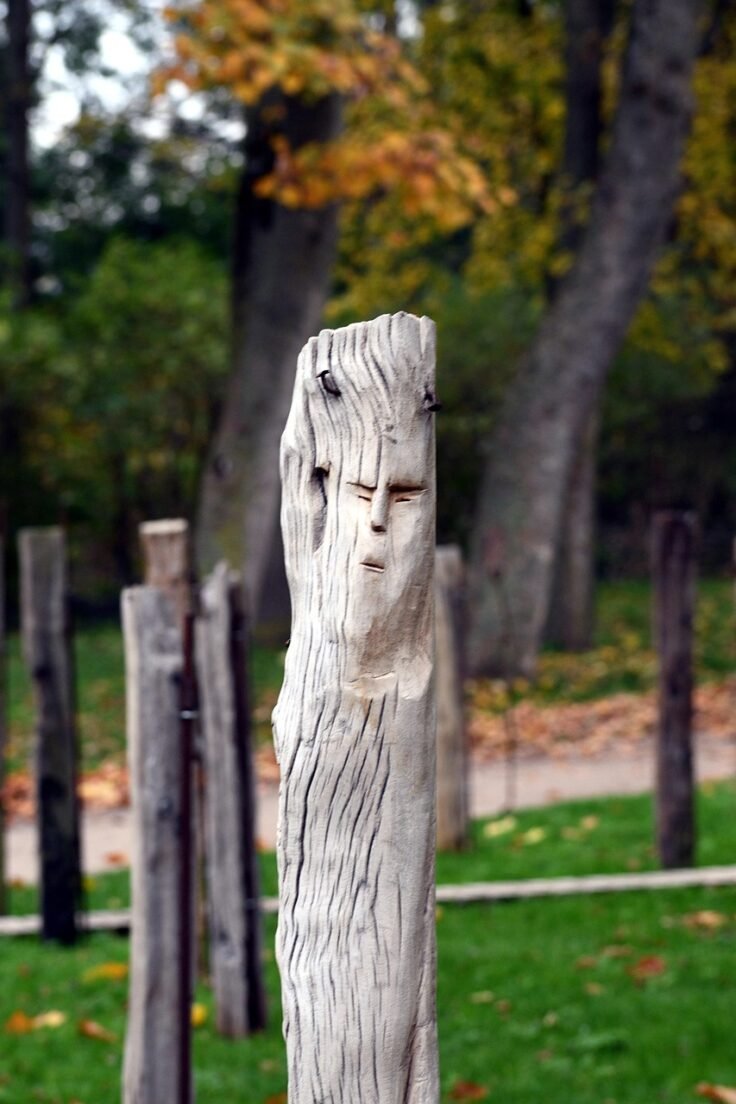
Aesthetic impact is the second major benefit. In a world of sterile, professional studios, a driftwood diffuser stands out as a piece of heritage. It tells a story of the coast and the passage of time. For many creators, the visual environment is just as important as the acoustic one. A room that feels organic and connected to the natural world can spark a level of creativity that a windowless room covered in gray foam simply cannot.
Health and air quality should also be considered. Chemical foam products are often made from polyurethane, which can emit Volatile Organic Compounds (VOCs) for months after installation. For anyone spending eight to ten hours a day in a small recording booth, air quality matters. Driftwood is a zero-VOC material. Once cleaned and dried, it is as safe and inert as the trees in your backyard.
Challenges and Common Mistakes
One of the most frequent errors in DIY diffusion is choosing wood that is too soft. If the wood is punky or decaying, it won’t reflect sound waves; it will just vibrate. You need a hard surface to bounce those waves. If you find a piece of driftwood you love but it feels a bit soft, you can stabilize it by brushing on a thin coat of wood hardener or a diluted wood glue mixture.
Weight is another challenge. A 2-foot by 4-foot panel filled with dense driftwood can easily weigh 50 to 70 pounds. Many people try to hang these with simple picture hooks, only to have the panel come crashing down in the middle of the night. You must use heavy-duty French cleats screwed directly into the wall studs. A French cleat distributes the weight evenly across the width of the panel and ensures it stays flush against the wall.
Over-treating the room is a common pitfall for beginners. Diffusion is a powerful tool, but a room entirely covered in diffusers can sound ‘phasey’ and disorienting. The goal is to balance absorption and diffusion. Start with the back wall. If the room still feels too echoey, add a few panels to the side walls. Listen to the room after every new addition. Your ears are the ultimate measurement tool.
Limitations: When Driftwood May Not Be Ideal
Despite its beauty, a driftwood diffuser is not a magic fix for every acoustic problem. If your main issue is low-frequency ‘boom’ or bass buildup in the corners, a diffuser will do almost nothing. Bass waves are massive—often 10 to 20 feet long. To affect them, you need thick, porous mass like rock wool or dedicated bass traps. Diffusers are high-frequency and mid-range tools.
Environmental constraints also play a role. Driftwood is a natural material that reacts to humidity. If you live in an extremely humid climate and your studio isn’t climate-controlled, the wood can expand and contract. This might lead to small cracks or the glue joints failing over time. If you notice the wood shifting, you may need to apply a clear matte sealant to lock in the moisture levels.
Space is the final limitation. For a diffuser to work properly, there needs to be a certain distance between the panel and the listener. Sound waves need space to ‘unfold’ after they hit the diffuser. If you are sitting two feet away from a deep-well diffuser, you might actually hear the individual reflections, which can be distracting. Generally, you want at least six to eight feet of space between the listening position and the diffuser panel.
CHEMICAL FOAM vs ORGANIC ACOUSTICS
Choosing between these two approaches depends on your goals, your budget, and how much you care about the environment you work in. While foam is the ‘industry standard’ for budget setups, organic wood treatments are the hallmark of high-end acoustic design.
| Feature | Chemical Foam | Organic Driftwood |
|---|---|---|
| Primary Function | Absorption only | Diffusion and scattering |
| Tonal Signature | Dead, dark, compressed | Warm, bright, airy |
| Longevity | Crumbles over 5-10 years | Lasts a lifetime |
| Air Quality | Potential VOC off-gassing | Zero-VOC (natural) |
| Visual Appeal | Industrial/Utilitarian | Custom/Fine Art |
| DIY Difficulty | Very Low (Peel and stick) | Moderate (Carpentry skills) |
Practical Tips and Best Practices
Placement is the most important factor after the build is complete. The ‘Rear Wall’ is almost always the best place for a diffuser. In most rooms, sound travels from the speakers, past your ears, and hits the back wall. If that wall is flat, the sound bounces straight back into your ears, causing timing issues. Placing a driftwood diffuser there scatters that energy, making the rear of the room ‘disappear’ acoustically.
When it comes to finishing the wood, less is more. Avoid thick, glossy varnishes. A heavy coat of plastic-like finish can actually change the way high frequencies bounce off the wood. Stick to a light application of linseed oil or a matte water-based sealer. This protects the wood while keeping the surface ‘open’ enough to maintain its natural acoustic properties.
If you find your panel is reflecting too much high-frequency energy, you can ‘tune’ it. Tuck small pieces of acoustic felt or even bits of old wool clothing into the deeper crevices between the driftwood pieces. This hybrid approach gives you the scattering benefits of the wood with a touch of extra absorption for a more controlled sound.
Advanced Considerations: 1D vs 2D Diffusion
As you get more comfortable with the process, you can experiment with the direction of the diffusion. Most driftwood panels are ‘one-dimensional’ (1D), meaning the pieces are all oriented vertically or horizontally. Vertical orientation scatters sound left and right, which is great for widening the soundstage. Horizontal orientation scatters sound up and down, which helps control ceiling reflections.
‘Two-dimensional’ (2D) diffusion, often called a ‘Skyline’ diffuser, is more complex. This involves mounting blocks of wood of various heights in a grid pattern. With driftwood, this means cutting the wood into short ‘pucks’ and mounting them end-grain out. This scatters sound in all directions simultaneously. While harder to build, a 2D driftwood panel is one of the most effective ways to treat a ceiling ‘cloud’ above a mixing desk.
Density variations are another advanced trick. Using different species of driftwood—some hardwood like oak and some softer like pine—creates a more complex reflection pattern. The different speeds at which sound travels through different wood densities adds a subtle ‘shimmer’ to the room’s reverb tail. This is the kind of detail that professional studio designers spend thousands of dollars to achieve.
Example: The Garage Studio Transformation
Imagine a standard two-car garage converted into a home office and podcast studio. The walls are bare drywall, and the floor is concrete. When the creator speaks, the room rings with a metallic echo that makes the recording sound like it was made in a bathroom.
The creator starts by adding two 4-foot driftwood diffusers to the wall directly behind the desk. Immediately, the ‘slap’ from the voice hitting the wall is gone. Instead of the sound bouncing back harshly, it is scattered around the room. The voice sounds fuller and more ‘expensive’ on the microphone.
Next, the creator builds a large driftwood cloud for the ceiling. By mounting the wood at varied angles, they break up the floor-to-ceiling standing waves. The room no longer feels like a box. Even though the physical dimensions of the garage haven’t changed, the ‘acoustic size’ of the room has doubled. This is the power of switching from a system that simply swallows sound to one that manages it with intent.
Final Thoughts
Building your own acoustic treatments is a rite of passage for any serious audio enthusiast. It forces you to stop looking at gear and start looking at the environment that gear lives in. A driftwood sound diffuser is more than just a functional tool; it is a commitment to a specific kind of sound—one that is rooted in the natural world rather than a chemical factory.
Patience is the currency of this project. From the long walks on the beach to the weeks of drying and the meticulous gluing of each piece, every step adds to the character of the final product. You are not just building a panel; you are curing a room. The result is a space that doesn’t just sound better, but feels more grounded and alive.
Take the time to experiment. Try different wood thicknesses, play with the layout, and move the panels around the room until you find the sweet spot. Sound is a fluid thing, and your room is its container. By using the irregular, weathered geometry of the sea, you give that sound a place to breathe, dance, and eventually, find its perfect balance.
Sources
1 soundproofyourstudio.com (https://www.soundproofyourstudio.com/podcasts/soundproof-your-studio/episodes/2148365676) | 2 acousticsfirst.info (https://acousticsfirst.info/2016/04/13/diy-wood-diffusion-panel-artdiffusor-trim/) | 3 acousticalsolutions.com (https://acousticalsolutions.com/diy-acoustic-diffusers) | 4 wikihow.com (https://www.wikihow.com/Preserve-Driftwood) | 5 thepointofcreation.com (https://www.thepointofcreation.com/blog/do-it-yourself-skyline-diffuser-build/) | 6 diydriftwood.com (https://diydriftwood.com/how-to-clean-driftwood/) | 7 parklanejewelry.com (https://www2.parklanejewelry.com/how-to-wash-driftwood/) | 8 aeco-sound.com (https://aeco-sound.com/en-us/blogs/soundproofing/material-wood) | 9 massloadedvinyldirect.com (https://massloadedvinyldirect.com/guides/natural-vs-synthetic-acoustic-treatment/) | 10 acousticfields.com (https://www.acousticfields.com/easy-homemade-sound-diffuser-build/) | 11 funasinsulations.com (https://www.funasinsulations.com/blog/sound-insulation-foam-vs-acoustic-panels.html)