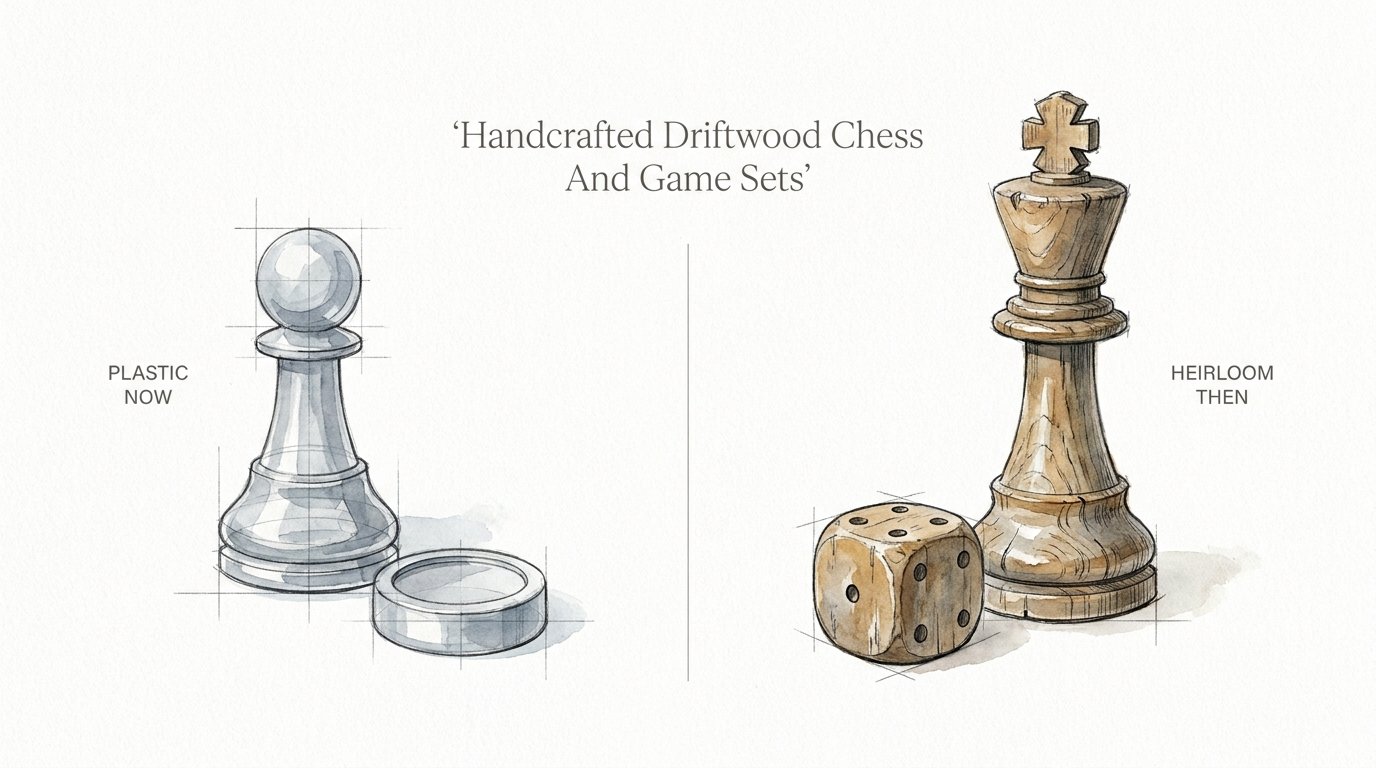
Handcrafted Driftwood Chess And Game Sets
Will your family games end up in a landfill, or will they be passed down through generations? Modern games are designed to be disposable—made of thin plastic that cracks and fades. But a game set forged from the ocean’s bones is built for eternity. Discover how to turn storm-tossed timber into a heavy, tactile legacy that your grandchildren will one day master.
[affiai]Handcrafting a game set from driftwood is not merely a woodworking project; it is an act of reclamation. You are taking a piece of history that has been seasoned by salt, sun, and tide, and giving it a permanent home on your table. This process requires patience and a willingness to work with the wood’s natural imperfections rather than fighting against them.
Every piece of timber found on a shoreline has a story written in its grain. Some pieces spent years bobbing in the Pacific, while others were recently torn from a riverbank during a spring flood. When you carve a chess piece or a backgammon board from this material, you are anchoring that wandering spirit into a functional heirloom.
Building something of value takes time, especially when your primary material comes from the wild. You cannot rush the seasoning of sea-soaked oak or the desalination of ancient cedar. This guide will walk you through the grit and the glory of creating a handcrafted driftwood game set that stands as a silent witness to the passage of time.
Handcrafted Driftwood Chess And Game Sets
A handcrafted driftwood chess or game set is a functional work of art created from wood that has been naturally weathered by water. Unlike lumber from a big-box store, driftwood possesses a unique patina and a hardened density caused by the constant cycle of saturation and drying. These sets exist at the intersection of maritime history and traditional craftsmanship.
In real-world terms, these sets are often the centerpiece of a coastal home or a rugged cabin. They are used by those who value the weight of a piece in their hand and the story behind the material. A driftwood knight is not just a game piece; it is a fragment of a cedar root that survived a thousand-mile journey down a rocky river and months in the surf.
Visualizing the concept is easy if you think of the “bones of the ocean.” When wood stays in the water long enough, the soft sapwood rots away, leaving behind the dense, twisted heartwood. This remaining “skeleton” is incredibly durable and holds carving details with surprising precision. It is the perfect medium for a game meant to last a century.
These sets are often used in environments where natural textures are celebrated. They fit perfectly on a heavy timber coffee table or a stone mantle. Because no two pieces of driftwood are identical, every set is a one-of-a-kind creation that can never be replicated by a machine or a factory mold.
How To Prepare And Carve Ocean Timber
Creating a game set begins with the search. Sourcing the right timber is half the battle, and you must look for “sound” wood that hasn’t succumbed to deep rot. Once you have gathered your material from the shoreline, the real work of transformation begins in the workshop.
Step 1: Desalination and Cleaning
Salt is the enemy of your tools and your finish. You must soak your driftwood in a large bin of fresh water to draw out the salt. Change the water daily for at least a week, or until the water no longer tastes of brine. After the soak, use a stiff nylon brush to scrub away sand, silt, and loose fibers that cling to the surface.
Step 2: Disinfection
Bugs and bacteria love the crevices of weathered wood. Submerge the cleaned pieces in a solution of one part bleach to nine parts water for at least six to twelve hours. This kills any hitchhiking pests and prevents future rot. If you prefer a lighter, sun-bleached look, you can leave the wood in the solution longer, though excessive bleaching can weaken the outer fibers.
Step 3: The Long Dry
Moisture trapped inside a game piece will cause it to crack once you move it into a climate-controlled home. Place your wood in a dry, shaded area with plenty of airflow for at least 30 days. For larger boards, seal the end grain with wax to prevent “checking” or splitting as the wood contracts. Patience here is mandatory; carving wet wood is a recipe for a warped board.
Step 4: Rough Shaping the Board
Select a flat, stable slab for your game board. If the driftwood is irregular, you may need to use a hand plane or a drawknife to create a level playing surface. You don’t need a perfectly square factory edge. The charm of a driftwood set often lies in the “live” or “waney” edges that follow the natural contour of the log.
Step 5: Carving the Playing Pieces
Use a sharp whittling knife or a rotary tool to shape your pieces. For a chess set, start with the pawns to build your rhythm. Driftwood can be brittle, so make shallow, deliberate cuts. If you encounter a knot, work around it or incorporate it as a feature of the piece—perhaps a knot becomes the eye of a knight or the crown of a king.
Step 6: Inlaying and Gridding
To create the grid for a chess or checkers board, you can use a wood-burning tool (pyrography) to sear the lines into the timber. For a more sophisticated look, consider inlaying squares of a contrasting wood or even sea glass. This adds physical depth to the board and ensures the grid will never fade or rub away after years of play.
The Advantages Of Reclaimed Timber
Choosing driftwood over traditional lumber offers several practical benefits that go beyond simple aesthetics. The most obvious advantage is the pre-stressed nature of the wood. Because the timber has already survived extreme environmental conditions, the fibers that remain are exceptionally tough and resistant to further weathering.
Environmental sustainability is another core benefit. You are not contributing to deforestation or the carbon footprint of industrial logging. Instead, you are cleaning a shoreline and repurposing a waste product of the natural world. This gives the set a “clean” history that adds to its value as a gift or an heirloom.
Tactile feedback is something plastic games can never replicate. Driftwood has a density and a “clink” when two pieces touch that feels substantial. In a world of digital screens and hollow plastic, the heavy weight of a driftwood queen provides a sensory connection to the physical world that makes the game more engaging.
Resistance to rot and pests is also higher in driftwood that has been properly treated. The salt that once saturated the wood, followed by your bleach treatment, creates a core that is inhospitable to most wood-boring insects. This ensures the set will not crumble into dust while sitting in a closet for twenty years.
Challenges And Common Pitfalls
Working with driftwood is notoriously hard on your equipment. The primary challenge is embedded grit and sand. Over years of tumbling in the surf, sand particles are driven deep into the wood’s pores. If you take a high-end chisel or a power saw to raw driftwood, you will dull your blade within minutes. Always use an air compressor or a wire brush to clear as much debris as possible before your first cut.
Internal rot is another frequent error. A piece of wood may look solid on the outside but be “punky” or soft in the center. Always test the density of your wood by pressing a fingernail or a screwdriver into the surface. If it sinks in easily, the wood is too far gone for a fine carving and should be relegated to a decorative role rather than a functional one.
Salt leaching is a common mistake made by beginners who skip the desalination step. If you apply an oil or a varnish to wood that still contains salt, the finish will eventually turn cloudy or “bloom” with white spots. The salt will also absorb moisture from the air, making the wood feel perpetually damp. Never skip the freshwater soak.
Symmetry is difficult to achieve with irregular material. Trying to make thirty-two identical chess pieces from thirty-two different twigs is an exercise in frustration. Instead, embrace “organic symmetry.” Aim for consistent heights and base widths, but let the individual character of each branch dictate the final shape of the pieces.
Limitations Of Driftwood Craftsmanship
Driftwood has realistic constraints that every practitioner must accept. First, it is not a material suited for mass production. Sourcing, cleaning, and seasoning take weeks of manual labor before a single cut is made. This makes a handcrafted set expensive in terms of time and effort, which is why they are rarely found in commercial retail stores.
Geographic limitations also play a role. If you live in a landlocked desert, finding high-quality “ocean bones” requires travel or expensive shipping. Furthermore, the species of wood available to you is entirely dependent on what grows in the surrounding river basins. You may want to carve in mahogany, but if you live in the Pacific Northwest, you will likely be working with cedar and fir.
Structural integrity can be a trade-off. While the wood is dense, it often contains micro-cracks from hitting rocks in the surf. These cracks may not be visible until you are halfway through a delicate carving. You must be prepared to start over or use stabilizing resins to save a piece that begins to split under your knife.
Driftwood vs. Manufactured Hardwood
When deciding whether to build a set from driftwood or purchase standard kiln-dried hardwood, consider the following factors: cost, character, and labor. While driftwood is “free” to collect, the labor required to make it workable often exceeds the cost of buying a premium board of walnut or cherry.
| Factor | Driftwood (Reclaimed) | Kiln-Dried Hardwood |
|---|---|---|
| Material Cost | Zero (sourcing time only) | High (market price) |
| Prep Labor | Extensive (desalination, drying) | Minimal (ready to use) |
| Tool Wear | High (sand and salt) | Normal |
| Aesthetic | Weathered, unique, historical | Uniform, clean, predictable |
| Stability | Variable (requires stabilization) | High (pre-dried) |
If your goal is precision and speed, kiln-dried hardwood is the superior choice. However, if your goal is to create a legacy piece with a deep connection to the natural world, driftwood is the only material that satisfies that need. The “cost” of driftwood is paid in patience, not currency.
Practical Tips For A Professional Finish
Achieving a professional look on a rugged material requires specific techniques. Driftwood is incredibly porous and will “drink” your finish, so you must be prepared to apply multiple layers. These tips will help you preserve the natural look while ensuring the set is comfortable to play with.
- Use Shellac as a Sealer: Shellac is one of the few finishes that will adhere to wood that might still have traces of salt or wax. It acts as a barrier, preventing odors or salt leaching from ruining your final topcoat.
- Avoid High-Gloss Polyurethane: A thick, shiny plastic coating looks out of place on weathered timber. Use a matte or satin finish to protect the wood while maintaining its tactile, “dry” appearance.
- Stabilize with Thin Cyanoacrylate (CA) Glue: If you find a small crack in a chess piece, drip a few drops of thin CA glue into it. This will wick into the fibers and bond them together, preventing the crack from growing.
- Sand with the Grain: Even on weathered wood, sanding marks are visible. Use 220-grit sandpaper and follow the natural flow of the grain to avoid “cross-grain” scratches that look amateurish.
- Identify Your Species: Smell the wood as you sand it. Cedar has a spicy, resinous scent; oak is more neutral; and pine smells like a forest. Knowing the species helps you understand how it will react to different oils and stains.
Advanced Considerations For Serious Makers
For those who have mastered the basics of carving and want to elevate their game sets, consider the use of epoxy resin stabilization. Vacuum chambers can be used to pull resin deep into the pores of driftwood pieces that would otherwise be too soft to carve. This creates a “hybrid” material that looks like ancient wood but has the structural strength of acrylic.
Inlaying materials like sea glass or crushed oyster shells into the game board adds a layer of coastal narrative. You can carve out the “black” squares of a chess board and fill them with a mixture of dark sand and clear epoxy. This maintains the nautical theme while providing a perfectly flat, durable playing surface.
Scaling up to larger games like Backgammon or Cribbage requires a focus on structural joinery. Driftwood is rarely straight, so you must learn to use “butterfly” or “bow-tie” joints to hold together slabs that want to pull apart. These joints, when made from a contrasting wood like ebony or dark walnut, become decorative elements themselves.
Example Scenario: The Storm-Tossed Backgammon Set
Imagine finding a large, flat slab of red cedar driftwood after a winter storm on the Oregon coast. The wood is saturated and heavy, covered in barnacles and dried kelp. Most people would see firewood, but a maker sees a backgammon board.
The slab is first soaked in a stock tank for ten days to remove the salt. After a bleach bath, it is placed in a garage for six weeks until the moisture content drops to 10%. The maker uses a drawknife to peel away the remaining bark, revealing a deep, sun-bleached silver exterior and a rich, reddish-pink core.
Instead of cutting the slab into a perfect rectangle, the maker keeps the irregular, wave-like edges. The “points” of the backgammon board are carved directly into the wood using a V-gouge, then filled with crushed turquoise and resin. The playing stones are sliced from a smaller branch of the same tree, sanded smooth, and finished with beeswax. The result is a set that looks as if it was pulled directly from the seabed, yet it plays with the precision of a professional tournament board.
Final Thoughts
Creating a game set from driftwood is a commitment to quality and a rejection of the “plastic now” culture. It forces you to slow down, to listen to the material, and to work with your hands in a way that connects you to the earth and the sea. You are not just making a game; you are building a bridge between the wild elements and your family’s history.
The time you spend desalinating, carving, and finishing these pieces will be reflected in the weight and feel of the final product. There is a profound satisfaction in seeing a guest reach for a piece and ask, “Where did this come from?” only for you to tell the story of the beach where it was found and the labor that brought it to the table.
Do not be afraid of the imperfections. Every crack, knot, and grey streak in the wood is a mark of character. As you refine your skills, you will find that the ocean provides an endless supply of inspiration. Start small with a simple set of checkers, and soon you will find yourself searching the tideline for the perfect timber to build a legacy.
Sources
1 carvingisfun.com (https://carvingisfun.com/complete-guide-to-carving-a-chess-set/) | 2 rockler.com (https://vertexaisearch.cloud.google.com/grounding-api-redirect/AUZIYQGcyoFGc2UAcSk0SJI0Pr1XCoCHo89-D1o51AswKQSYone-Yo_0qmZgKoeI0nASSbZsnnBHPsIHcYu5SKt-Hm0jWFkoQtVofFctwk7BbZZukuraO-Cb-mI-XHpexPolnL0PYbxtpiQIesVFXwDsof-m4leZcr_p_A==) | 3 beavercrafttools.com (https://beavercrafttools.com/blogs/wood-for-carving/driftwood-carving-a-completed-guide) | 4 youtube.com (https://www.youtube.com/watch?v=aFWLyAPowMA) | 5 theknottylumberco.ca (https://theknottylumberco.ca/blogs/hardwoods-101/wood-identification-guide) | 6 wikihow.com (https://www.wikihow.com/Preserve-Driftwood)