• Skip to main content
  • Skip to primary sidebar
  • Terms and Conditions
  • Privacy Policy
  • Contact

Driftwood 4 Us

Just About Driftwood

crafting

How To Make Driftwood Jewelry

July 1, 2024 by admin

Welcome to the wonderful world of creating driftwood jewelry! In “How To Make Driftwood Jewelry,” you’ll discover the charm of transforming nature’s coastal treasures into stunning, handmade accessories. This guide walks you through selecting the perfect pieces of driftwood, preparing them for crafting, and incorporating additional elements like beads, wire, and clasps to design unique earrings, necklaces, and bracelets. Whether you are a seasoned crafter or a complete novice, this article will inspire your creativity and help you bring a touch of the ocean’s magic to your personal collection. Have you ever wondered how to transform simple pieces of driftwood into stunning, unique jewelry? If you love crafting and have a passion for creating one-of-a-kind accessories, making driftwood jewelry can be a fulfilling and rewarding project. Not only is it eco-friendly, but it also allows you to carry a little piece of nature with you wherever you go.

Creating driftwood jewelry involves a mix of creativity, basic woodworking, and a love for natural aesthetics. In this guide, we’ll walk through the process step-by-step, making it easy for you to follow along and create your very own collection of driftwood treasures.

How To Make Driftwood Jewelry

Gathering Your Materials

Before you begin, you need to gather all the necessary materials. Each item plays a crucial role in the creation process, so let’s explore what you’ll need.

Driftwood

Driftwood is the star of the show. Find small pieces at beaches, lakeshores, or riverbanks. The wood should be clean, dry, and free from mold or excessive grime.

Tools

A set of basic tools will come in handy. Here’s a list of what you’ll need:

ToolPurpose
Small saw or hand jigsawCutting driftwood to size
Sandpaper (various grits)Smoothing edges and surfaces
Drill with fine bitsMaking holes for jewelry findings
Craft knifeDetailing and shaping
PliersBending and attaching findings
Safety gogglesEye protection while cutting and drilling

Jewelry Findings

These are essential components like hooks, clasps, and jump rings that turn pieces of driftwood into wearable jewelry.

Finding NameTypePurpose
Jump ringsMetalConnecting pieces and findings
Earring hooksMetalCreating earrings
ClaspsMetalFastening necklaces or bracelets
WireMetalWrapping and decorating

Decorative Elements

Consider adding beads, shells, or small stones to accentuate your pieces. These add extra flair and uniqueness to your jewelry.

Preparing Your Driftwood

Before you can begin crafting, you’ll need to prepare your driftwood. Proper preparation ensures that your pieces are safe to wear and look their best.

Cleaning the Wood

First, scrub the driftwood with water and a brush to remove any dirt or sand. Let the wood dry completely. This might take a few days if the wood is thick or very moist.

Cutting and Shaping

Once your driftwood is dry, decide on the shapes and sizes you want for your jewelry. Use your saw or hand jigsaw to carefully cut the wood into smaller, more manageable pieces.

After cutting, use various grits of sandpaper to smooth the edges and surfaces, starting with a coarse grit to get rid of large imperfections and moving to finer grits for a smooth finish.

Drilling Holes

Holes are necessary for threading wire or attaching findings. Mark the spots where you want the holes to go using a pencil. When drilling, go slowly to avoid splitting the wood. Wear safety goggles to protect your eyes from wood shavings.

Crafting Your Jewelry

Now comes the part where your creativity shines! With your prepared driftwood and materials ready, you can start crafting your jewelry.

Making Driftwood Earrings

Earrings are a great way to start because they’re simple yet elegant. Here’s a basic guide:

  1. Select two similar pieces of driftwood.
  2. Drill a small hole at the top for the hook.
  3. Insert a jump ring into each hole and attach an earring hook.
  4. Add beads or decorative elements if desired, using wire to wrap them around the driftwood.

Creating Driftwood Necklaces

Necklaces can be as simple or elaborate as you like. Here’s a simple method:

  1. Choose a piece of driftwood for the pendant.
  2. Drill a hole at the top for the cord or chain.
  3. Thread the cord or chain through the hole and secure it with a clasp.
  4. Decorate with beads, shells, or stones using wire or additional findings.

Designing Driftwood Bracelets

Bracelets are a bit more advanced but equally rewarding. Here’s a basic process:

  1. Collect several small pieces of driftwood.
  2. Drill holes at both ends of each piece.
  3. Connect the pieces with jump rings, creating a chain.
  4. Add a clasp to complete the bracelet.
  5. Optional: Decorate each piece of driftwood with mini beads or wire wraps for added flair.

Finishing Touches

Once you have crafted your pieces, there are a few more steps to ensure they look polished and professional.

Sealing the Wood

Sealing the wood protects it from moisture and enhances its natural beauty. Use a clear wood sealant or a natural oil finish. Apply it with a brush and let it dry fully before wearing your jewelry.

Adding Decorations

When adding decorations like beads or wire wraps, consider using complementary colors and textures to highlight the natural beauty of the driftwood. Attach these elements securely so they can withstand regular wear.

Testing for Wearability

Before wearing or gifting your driftwood jewelry, test the durability and comfort. Make sure all findings are securely attached, and there are no sharp edges or points that might cause discomfort.

How To Make Driftwood Jewelry

Tips and Tricks for Success

Creating driftwood jewelry can be a learning process. Here are some tips to help you along the way:

Selecting Driftwood

Look for driftwood that is lightweight yet sturdy, and avoid pieces with cracks or deep grooves that might weaken the jewelry.

Sanding Patience

Take your time when sanding, moving from coarse to fine grits for the best finish. This ensures that your jewelry is smooth and comfortable to wear.

Experimenting with Designs

Don’t be afraid to experiment! Driftwood jewelry allows for endless creativity. Try different combinations of wood, beads, and wire to create unique designs.

Troubleshooting Common Issues

If you encounter problems while making your driftwood jewelry, don’t worry. Here are solutions to some common issues:

Splitting Wood

If your driftwood splits while drilling, try drilling more slowly or choosing a finer drill bit. You can also reinforce the wood with a drop of wood glue if necessary.

Loose Findings

If your findings feel loose, ensure you are using the correct size jump ring or clasp. You can also use a small dab of epoxy to secure findings in place.

Uneven Shapes

Uneven shapes can be part of the charm of driftwood jewelry. However, if you need more uniform pieces, consider using a template to guide your cuts and sanding.

Caring for Your Driftwood Jewelry

To ensure your driftwood jewelry lasts, you’ll need to take good care of it. Here’s how:

Avoid Excess Moisture

Driftwood can absorb water, which may weaken it or cause discoloration. Avoid wearing your jewelry in the shower or while swimming.

Store Properly

Store your driftwood jewelry in a dry place, away from direct sunlight, to prevent fading and deterioration.

Gentle Cleaning

If your jewelry gets dirty, clean it gently with a damp cloth and dry it immediately. Avoid using harsh chemicals or soaking the wood.

Sharing and Selling Your Jewelry

If you’ve come to love making driftwood jewelry, why not share it with others? You can give pieces as gifts, or even start selling them.

Craft Fairs and Markets

Local craft fairs and markets are great places to showcase your work. Make sure to display your pieces nicely and have business cards or flyers to hand out.

Online Platforms

Platforms like Etsy, Instagram, and Pinterest can help you reach a wider audience. Take high-quality photos of your jewelry and write detailed descriptions to attract buyers.

Building a Brand

Creating a consistent brand around your jewelry will help it stand out. Think about your packaging, logo, and even a catchy shop name to make a memorable impression.

Conclusion

Making driftwood jewelry is a delightful blend of creativity and craftsmanship. Each piece tells a story, embodying the natural beauty of driftwood and your artistic vision. With this guide, you now have the knowledge and tools to start crafting your own unique pieces of driftwood jewelry. Enjoy the process, and let your creativity flow!

Filed Under: Driftwood Ideas Tagged With: crafting, DIY Projects, Driftwood, Handmade, Jewelry Making

Driftwood Crafts Jewelry Holder

June 30, 2024 by admin

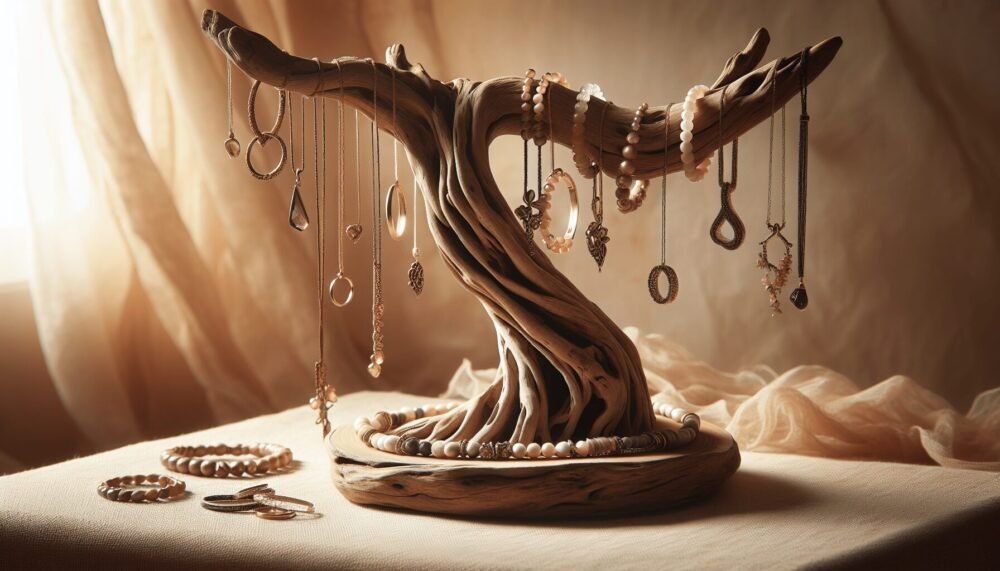
Creating a unique and beautiful jewelry holder from driftwood is a delightful way to merge practicality with artistry, offering a rustic charm to any space. In the article “Driftwood Crafts Jewelry Holder,” you’ll discover how to transform a simple piece of driftwood into an eye-catching display for your treasured accessories. By following these easy steps, you’ll not only craft a functional piece to organize your jewelry but also capture a bit of coastal magic, bringing a touch of nature’s elegance into your home. Have you ever found yourself searching for that one piece of jewelry, only to find it’s tangled up with all the others? If you’re nodding yes, it might be time to consider a new way to organize your jewelry collection. And what better way to do it than with a beautiful, handmade driftwood crafts jewelry holder?

[Read more…] about Driftwood Crafts Jewelry Holder

Filed Under: Driftwood Ideas Tagged With: crafting, Driftwood, Handmade, home decor, Jewelry Holder

Driftwood Jewelry Holder Diy

June 30, 2024 by admin

Creating a charming and functional piece for your home has never been easier with this Driftwood Jewelry Holder DIY guide. You’ll discover step-by-step instructions to transform a simple piece of driftwood into a beautiful, rustic display for your favorite jewelry. Not only will you learn to craft a stunning holder that complements any decor, but you’ll also enjoy the satisfaction of making something unique with your own hands. Let’s dive into this delightful project and add a touch of nature to your organizing essentials! Have you ever found yourself with an abundance of beautiful jewelry and not nearly enough space to organize it? There’s something uniquely satisfying about incorporating natural elements into your home décor, and a driftwood jewelry holder might just be the perfect solution for your needs! Not only will it provide a whimsical but functional space for your favorite adornments, but it also adds a touch of nature-inspired elegance to your room. In this friendly and detailed guide, we’ll walk you through everything you need to know to create your very own driftwood jewelry holder.

Materials You’ll Need

To start, let’s gather all the materials and tools needed for this DIY project. It’s a flexible list depending on your personal tastes and the specific look you’d like to achieve.

Essential Materials:

  1. Driftwood Piece: Choose a piece of driftwood that is sturdy and has interesting, natural shapes. Ensure it is free from mold or decay.
  2. Hooks or Small Nails: These will be used to hang your jewelry.
  3. Strong Adhesive or Drill: Depending on how you plan to attach the hooks, you will need either a strong adhesive or a drill.
  4. Sandpaper: For smoothing out rough edges on the driftwood.
  5. Clear Sealant (Optional): If you wish to protect the wood and bring out its natural beauty.

Optional Materials:

  1. Paint or Stain: To give the wood a particular color or finish.
  2. Decorative Items: Think shells, beads, or small stones to personalize your holder.
  3. Twine or Ribbon: To add some visual interest.

Tools:

  1. Screwdriver or Hammer: Depending on the type of hooks or nails you use.
  2. Measuring Tape: To ensure evenly spaced hangers.
  3. Pliers: Handy for bending and securing hooks.

Step 1: Preparing the Driftwood

Before you start working on your jewelry holder, you need to prepare the driftwood. Start by cleaning your piece thoroughly to remove any dirt, mold, or salt residue.

Cleaning Driftwood:

  1. Rinse with Fresh Water: Use a hose or a bathtub.
  2. Scrub: Gently scrub with a brush to remove any debris or soft areas.
  3. Dry: Let the driftwood dry completely, which can take 24-48 hours depending on the size of the piece.

Sanding:

Once it’s clean and dry, use sandpaper to smooth out any rough areas. This will make it safer to handle and help your jewelry stay in good shape.

Driftwood Jewelry Holder Diy

Step 2: Designing Your Jewelry Holder

Now that your driftwood is prepped, it’s time to think about the design. This step is all about utilizing your creativity.

Choosing the Placement of Hooks:

  1. Balance: Aim for a balanced spread of hooks to accommodate different lengths and types of jewelry.
  2. Spacing: Use your measuring tape to ensure even spacing. A common rule of thumb is to space hooks around 1-2 inches apart for necklaces and bracelets.

Adding Personal Touches:

  1. Paint or Stain: Apply paint or stain if desired and allow it to dry thoroughly.
  2. Decorative Elements: This is the perfect opportunity to add shells or beads to complement your driftwood’s natural aesthetics.

Step 3: Assembling Your Jewelry Holder

With your design in place, it’s time to bring it all together.

Attaching the Hooks:

  1. Drilling Holes: If you’re using screws or hooks that require drilling, go ahead and carefully drill evenly spaced holes.
  2. Adhesive Hooks: Alternatively, you can apply strong adhesive to hooks and press them firmly in place.

Securing Your Decorative Items:

If you’ve chosen to add additional decorative items like shells or beads, now is the time to affix them using adhesive or twine.

Driftwood Jewelry Holder Diy

Step 4: Installing Your Jewelry Holder

Once the assembly is complete, the final step is to secure your driftwood jewelry holder in your desired location.

Wall Mounting:

  1. Selecting the Spot: Choose a convenient and visible location.
  2. Mounting Tools: Depending on your driftwood’s weight, use appropriate wall anchors and screws.
  3. Securing the Holder: Attach your holder to the wall, ensuring it’s level and stable.

Alternative Displays:

If you prefer not to mount it on the wall, consider placing the driftwood on a flat surface or securing it between two brackets on a shelf.

Tips and Tricks for the Perfect Jewelry Holder

You’ve done an amazing job making your own driftwood jewelry holder! Here are a few additional tips and tricks to make the most out of your new creation:

Ensuring Stability:

Make sure your driftwood is securely fastened if it’s wall-mounted. Consider using heavy-duty wall anchors for extra security.

Maximizing Space:

If you have a lot of jewelry, consider adding multiple rows of hooks or including a small vertical section to hang earrings.

Maintenance:

Keep your driftwood looking great by occasionally wiping it down with a damp cloth and checking for any loose components.

Benefits of Using a Driftwood Jewelry Holder

You might be wondering why choose driftwood over a conventional jewelry holder. Here are a few impressive benefits:

Environmentally Friendly:

Using driftwood is an eco-friendly option as it repurposes natural material that would otherwise go to waste.

Unique and Personal:

Each piece of driftwood is unique, creating a one-of-a-kind jewelry holder customized to your tastes.

Aesthetic Appeal:

Incorporating natural elements like driftwood can enhance the aesthetic appeal of your living space, adding a rustic and serene vibe.

Cost-Effective:

Creating your own jewelry holder is often more cost-effective than buying one, and it’s an excellent way to spend an enjoyable DIY day.

Commonly Asked Questions

Here are answers to some frequently asked questions about driftwood jewelry holders:

What Type of Driftwood Should I Use?

Look for driftwood that is sturdy and free from decay. It should be a size and shape that suits your space and needs.

Can I Buy Driftwood Instead of Finding It?

Absolutely! Some craft stores and online retailers sell pre-cleaned and dried driftwood.

How Many Hooks Should I Include?

This depends on the amount of jewelry you have. Typically, around 10-20 hooks are sufficient for most collections.

Is there a Way to Make the Driftwood Shine?

Yes, applying a clear sealant can give the driftwood a polished appearance while protecting its surface.

What’s the Best Way to Hang Heavy Jewelry?

Ensure that the hooks or nails you use are sturdy and properly secured to handle the weight of heavier pieces.

Conclusion

Congratulations on taking the initiative to create a beautiful and functional driftwood jewelry holder! This DIY project not only gives you a handy place to keep your jewelry organized but also adds a unique element to your home décor. Whether you’ve kept it simple or decked it out with plenty of decorative touches, your new jewelry holder is sure to be a conversation starter. So go ahead, hang your trinkets, and admire your handiwork—after all, you’ve earned it!

Filed Under: Driftwood Ideas Tagged With: crafting, DIY Projects, Driftwood, Homemade, Jewelry Holder

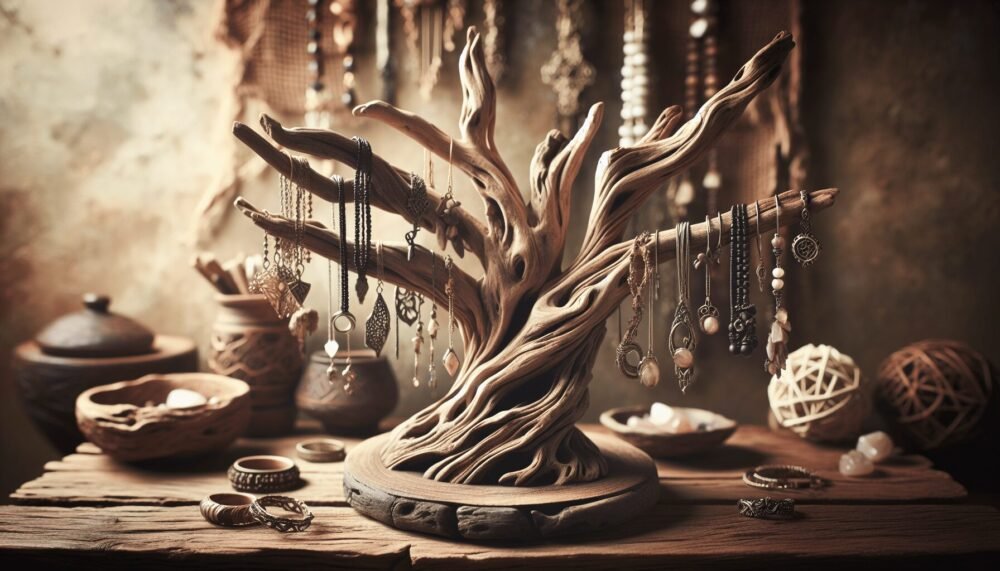
Driftwood Jewelry Stand

June 29, 2024 by admin

Get ready to add a touch of coastal charm to your home with the Driftwood Jewelry Stand! This unique piece isn’t just about aesthetics; it’s also a practical solution for organizing your beloved accessories. Imagine showcasing your favorite necklaces, earrings, and bracelets on a beautifully weathered piece of driftwood that brings the serenity of the sea right to your bedroom. Easy to assemble and brimming with natural beauty, this jewelry stand combines functionality with a rustic, stylish appeal, making it a perfect addition to your décor. Have you ever looked at your beautiful collection of jewelry and thought, “I need a better way to display these treasures”? If so, you’re not alone! Many of us struggle to find both a functional and aesthetically pleasing way to showcase our jewelry. Enter the Driftwood Jewelry Stand—a charming solution that brings a touch of nature into your space while keeping your jewelry organized and easily accessible. Let’s dive into how you can create your own driftwood jewelry stand and the many benefits of having one.

Driftwood Jewelry Stand

What is a Driftwood Jewelry Stand?

A driftwood jewelry stand is essentially a display piece made from driftwood—wood that has been washed onto the shore by the action of waves and tides. The natural weathering process gives driftwood a unique look, with each piece having its distinct texture, shape, and color. When fashioned into a jewelry stand, it creates a rustic, natural aesthetic that beautifully complements various home décor styles, from bohemian to coastal and even modern minimalist themes.

Why Choose a Driftwood Jewelry Stand?

You might be curious as to why a driftwood jewelry stand over other types. Here are several compelling reasons:

Eco-Friendly

By using driftwood, you’re repurposing a natural material, thereby reducing waste and your environmental footprint. Driftwood is a renewable resource that isn’t manufactured through industrial processes.

Unique Design

Each piece of driftwood is distinct, meaning no two jewelry stands will ever be identical. This uniqueness adds a personal touch to your jewelry display.

Versatility

Driftwood jewelry stands complement virtually any type of home décor. Whether your rooms are decorated with modern, rustic, or traditional themes, driftwood can blend seamlessly, adding a touch of nature and elegance.

Materials You’ll Need

Driftwood

Start with a piece of driftwood that suits the size and shape you want for your stand. You can find driftwood along beaches, lakeshores, or even purchase them from craft or home décor stores.

Hooks and Hangers

Select hooks and hangers that match your style. Brass, silver, or antique finishes all work well.

Base

You’ll need a sturdy base to support your driftwood. Materials such as wooden planks, tiles, or even rocks can serve as good bases.

Tools

Having the right tools is crucial for creating a reliable driftwood jewelry stand.

  • Drill: To make holes for the hooks.
  • Screws: To attach the driftwood to the base.
  • Sandpaper: To smooth out rough edges.
  • Saw: If you need to adjust the size of the driftwood.
  • Screwdriver: For attaching components.

Optional Add-Ons

Feel free to get creative with other elements, such as paint, varnish, or additional decorations like shells and stones to further personalize your stand.

Step-by-Step Guide to Making a Driftwood Jewelry Stand

Step 1: Selecting the Driftwood

The first step in creating your jewelry stand is choosing your piece of driftwood. When looking for a piece, consider its size, shape, and stability. Ideally, it should have multiple branches or hooks naturally occurring, but don’t worry if it doesn’t—you can always add hangers later.

Step 2: Cleaning the Driftwood

Ensure your driftwood is clean and free of debris. Here’s how:

  1. Rinse the driftwood: Use fresh water to remove sand and grime.
  2. Scrub: Use a stiff brush to scrub the wood.
  3. Soak: If the wood is heavily stained, soak it in a bleach and water solution (ratio of 1:10) for about 24 hours.
  4. Dry: Allow the wood to thoroughly dry, preferably under the sun.

Step 3: Preparing the Base

Your base needs to be sturdy enough to support the driftwood and the weight of your jewelry. If you’re using a wooden plank or a tile, ensure it is the right size and shape. Sand it down if necessary to smooth any rough edges.

Step 4: Drilling and Mounting

Once your driftwood and base are ready, follow these steps to assemble:

  1. Drill Holes: Drill holes into the driftwood where you plan to attach hooks or hangers.
  2. Attach Screws: Secure the screw into the base and driftwood to firmly attach them together. Ensure it’s stable by gently shaking it.
  3. Add Hooks: Install your hooks and hangers in the pre-drilled holes.

Step 5: Finishing Touches

Sand down any rough edges on your driftwood to ensure no splinters remain. You can also paint or varnish the driftwood if desired, although many people prefer to keep its natural look.

Driftwood Jewelry Stand

Popular Styles and Designs

Minimalist

A single piece of driftwood with a few strategically placed hooks can create a minimalist yet functional jewelry stand. This style is elegant and doesn’t take up much space, making it perfect for smaller rooms or apartments.

Rustic

For a more rustic look, leave the driftwood in its natural state and use antique-finished hooks. Add some natural elements like small stones or twine for that extra touch.

Bohemian

Add colorful elements like beads, feathers, and shells to your driftwood. This type of stand not only functions as a jewelry holder but also as an eye-catching piece of art.

Coastal

If you’re a fan of beach décor, aim for a coastal theme by incorporating seashells, sand dollars, and a light whitewash finish to your driftwood.

Caring for Your Driftwood Jewelry Stand

Driftwood is fairly low maintenance, but a little care can go a long way in preserving its beauty:

  • Dust Regularly: Use a soft cloth or feather duster to remove accumulated dust.
  • Avoid Moisture: Driftwood can get moldy if exposed to damp conditions. Keep it in a dry place.
  • Sealing: Optionally, you can seal your driftwood with a clear varnish to protect it from wear and tear.

Tips and Tricks for a Successful Project

Selecting the Right Driftwood

Not every piece of driftwood is suitable for a jewelry stand. Look for wood that is large enough to be stable but has enough branches or protrusions to hang jewelry from.

Balancing Aesthetics and Functionality

While it’s tempting to focus solely on how beautiful your driftwood jewelry stand will look, remember it also needs to be functional. Make sure there are enough hooks to accommodate your jewelry collection.

Securing the Base

Your base is crucial for stability. Don’t skimp on this part, as it will bear the weight of the jewelry and the driftwood.

Getting Creative

Feel free to think outside the box when it comes to decorations and additional features. Driftwood is incredibly versatile and can be customized to suit your personal style.

Benefits of Making Your Own Driftwood Jewelry Stand

Personalized Touch

Making your own jewelry stand means you get a piece that reflects your personality and style. It’s a unique add-on that store-bought stands can’t offer.

Cost-Effective

Many of the materials required can be sourced for free or at a low cost. This makes it a budget-friendly project that offers great returns in terms of functionality and decoration.

Therapeutic Process

Crafting something with your hands can be very therapeutic. The process of creating your own driftwood jewelry stand can be a wonderful way to unwind and engage in a productive hobby.

Frequently Asked Questions

Where Can I Find Driftwood?

You can find driftwood along the shores of oceans, lakes, and rivers. Some craft and home décor stores also sell pre-cleaned and treated driftwood.

How Strong is Driftwood?

Driftwood is surprisingly strong, though it varies by type. When selecting your piece, ensure it’s sturdy enough to hold your jewelry without bending or breaking.

Can I Use Other Types of Wood?

While driftwood offers a unique, naturally weathered look, you can use any type of wood for this project. Just keep in mind that you may need to artificially treat it to achieve a similar aesthetic.

How Do I Clean and Maintain Driftwood?

Cleaning involves rinsing, scrubbing, and sometimes soaking in a bleach solution. For maintenance, regular dusting and keeping it in a dry environment are usually sufficient.

Can I Repaint or Varnish My Stand?

Absolutely! Paint or varnish can add an extra layer of protection and customize the look further. Just make sure to use finishes that are safe for the type of wood you’re using.

How Do I Make It More Stable?

Ensuring the base is heavy and well-secured will increase the stability of your driftwood jewelry stand. You can also use longer screws or additional supports if necessary.

By now, you should have a thorough understanding of how to create, customize, and care for your own driftwood jewelry stand. Happy crafting!

Conclusion

The driftwood jewelry stand is a functional art piece that serves both practical and decorative purposes. Not only does it provide an eco-friendly and unique way to display your jewelry, but it also adds a touch of natural beauty to your home. With the right materials and a bit of creativity, you can craft a stand that perfectly matches your décor style and meets your needs. So why wait? Start collecting your materials, let your creativity flow, and build your very own driftwood jewelry stand today. You’ll love how it turns out, and your jewelry will thank you for the beautiful display!

Filed Under: Driftwood Ideas Tagged With: crafting, Driftwood, Handmade, home decor

Driftwood Furniture Diy

June 27, 2024 by admin

Driftwood Furniture DIY

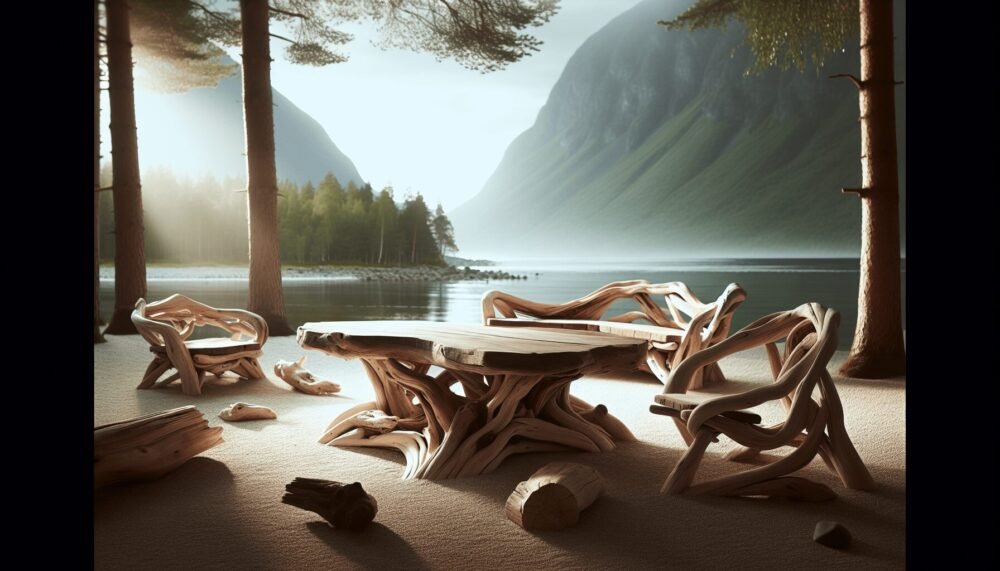
Imagine transforming found treasures from nature into stunning pieces that adorn your home. In this article, you’ll discover the art of crafting bespoke furniture using driftwood, combining rustic charm with unique character. From gathering the perfect pieces along your favorite beach to sanding and assembling them into coffee tables, shelves, or statement decor, this guide walks you through each step with easy-to-follow instructions. You’ll not only learn the practical aspects of working with driftwood but also gain inspiration to infuse your space with a touch of coastal beauty, all created by your own hands. Have you ever strolled along a beach and found yourself captivated by the artistry of nature-worn driftwood? If so, you’re not alone! This natural treasure has a unique charm, making it a perfect candidate for DIY furniture projects. Whether you’re a seasoned DIY enthusiast or just getting started, creating driftwood furniture can be both rewarding and enjoyable. In this guide, we’ll walk you through everything you need to know to get started with your own driftwood furniture DIY projects.

What is Driftwood?

Driftwood is wood that has been washed ashore by the forces of tides, currents, and waves. This type of wood usually originates from trees that have been uprooted and carried into bodies of water. Over time, the water and elements smooth the wood, giving it a beautiful, rustic appearance that’s perfect for furniture making.

The Appeal of Driftwood

Driftwood’s natural weathering process results in unique shapes, textures, and colors. Each piece is a one-of-a-kind find, adding character and charm to your furniture. Plus, using driftwood in your projects contributes to sustainable practices by recycling nature’s bounty into functional art.

Where to Find Driftwood

Before you can start creating, you’ll need to gather materials. Driftwood can be found along beaches, riverbanks, and lakeshores. Always be sure to check local regulations regarding the collection of driftwood to ensure you’re in compliance. Some areas have restrictions to protect natural habitats.

Planning Your Project

Before diving into your DIY driftwood project, it’s crucial to plan properly. This includes selecting the right kind of furniture to make, sourcing materials, and deciding on a design.

Choosing Your Project

Begin by deciding what type of furniture you want to create. Here are some ideas to get your creative juices flowing:

  • Coffee Tables: Use driftwood pieces as legs or a base.
  • Shelves: Create rustic shelves with pieces of driftwood as supports.
  • Headboards: Construct a unique driftwood headboard to give your bedroom a coastal feel.
  • Chairs and Benches: Make a statement piece for your patio or living room.

Sketch Your Design

Having a plan on paper helps visualize the project and serves as a useful guide during construction. Sketch a simple drawing of your desired furniture piece, noting the dimensions and where each piece of driftwood will go.

Driftwood Furniture Diy

Gathering Your Materials

Aside from your driftwood, you’ll need a variety of tools and materials to bring your project to life. Here are some essentials:

Basic Tools and Materials

Tool/MaterialPurpose
SandpaperSmoothes rough edges
SawCuts driftwood to the desired length
DrillCreates holes for screws or dowels
ScrewsSecures pieces together
Wood GlueProvides additional hold
Finishing OilEnhances the wood’s natural beauty
ClampsHolds pieces together while drying

Safety Gear

It’s important to prioritize safety. Here’s what you’ll need:

  • Gloves: To protect your hands from splinters.
  • Goggles: To shield your eyes from dust and debris.
  • Mask: To avoid inhaling dust particles.

Preparing the Driftwood

Once you have gathered your materials and tools, the next step is preparing the driftwood. Proper preparation ensures that your furniture will be both beautiful and durable.

Cleaning the Driftwood

Begin by thoroughly cleaning your driftwood pieces. Use a stiff brush to remove sand, dirt, and any loose bark. If the driftwood is still dirty, soak it in a mixture of water and mild detergent for a few hours, then rinse and let it dry completely.

Sanding and Cutting

Once the driftwood is clean, use sandpaper to smooth out any rough edges. This will make the wood safer to handle and give it a finished look. If you need to cut the driftwood to specific lengths or shapes, use a saw at this point. Carefully measure and cut as required by your design.

Driftwood Furniture Diy

Constructing Your Furniture

With your materials prepped and your design in hand, it’s time to start building. This is the most exciting part of any DIY project!

Assembling Pieces

Follow your sketched design as you begin assembling the pieces of your furniture. Use a combination of screws and wood glue to secure the driftwood. Clamps can be incredibly helpful to hold pieces together as the glue dries.

Drilling and Dowel Pins

For added stability, you may want to use dowel pins in addition to screws. Drill holes where the pieces will connect and insert wooden dowels, securing them with glue. This will provide extra strength to your furniture.

Checking for Stability

Before moving on to finishing touches, ensure that your furniture is stable and all parts are securely fastened. Give it a few shakes and make any necessary adjustments.

Finishing Your Driftwood Furniture

The finishing touches will enhance the natural beauty of the driftwood and help protect your furniture.

Cleaning Up

Before applying any finish, make sure your furniture is clean and free of dust. A tack cloth or a damp rag can be used to wipe away any remaining particles.

Applying Finishing Oil

Using a good quality finishing oil will bring out the natural colors and textures of the driftwood. Apply the oil with a clean cloth, following the grain of the wood. Allow it to soak in and then buff away any excess with a dry cloth. This will leave a smooth, polished surface.

Adding Protective Coatings

For extra protection, especially for outdoor furniture, consider adding a clear sealant. This will protect the wood from moisture and UV rays, prolonging the life of your furniture.

Tips and Tricks

Every DIY project comes with its own set of challenges. Here are some tips to help you along the way:

Selecting the Right Driftwood

  • Size and Shape: Look for pieces that match the dimensions you need.
  • Condition: Avoid driftwood that is rotten or has extensive damage.
  • Texture: The more unique the texture, the more character your furniture will have.

Making Adjustments

  • Flexibility: Be prepared to adjust your design based on the pieces you find.
  • Extra Material: Always collect more driftwood than you think you’ll need. This gives you more options during construction.

Enhancing Natural Beauty

Use natural oils and minimal coatings to maintain the rustic look of the driftwood. Too many layers of finish can take away from the wood’s natural charm.

Budget Considerations

DIY projects can be quite cost-effective, especially when using materials like driftwood that you gather yourself. However, there are still costs to consider.

Budget Breakdown

ItemEstimated Cost
DriftwoodFree (if collected yourself)
Basic Tools$50 – $100
Screws and Dowels$10 – $20
Wood Glue$5 – $10
Finishing Oil$10 – $20
Safety Gear$20 – $40

Saving Money

  • Thrift Stores: Check for second-hand tools and materials.
  • Sales and Discounts: Look for sales at hardware stores.
  • Borrow or Rent: If you don’t plan on making furniture often, consider borrowing or renting tools.

Inspiration and Ideas

Sometimes, seeing what others have created can spark your own creativity. Look for inspiration online or in coastal living magazines. Here are a few ideas to get you started:

Driftwood Picture Frames

A driftwood picture frame adds a touch of coastal charm to any room. Simply collect smaller pieces of driftwood, cut them to size, and attach them around a basic frame.

Driftwood Mirrors

Similar to picture frames, driftwood mirrors are visually stunning and can become a focal point in your home. Attach driftwood pieces around the perimeter of a mirror for a rustic appeal.

Driftwood Candleholders

Create simple candleholders by attaching a few pieces of driftwood together with glue and placing a small candle on top. These can be used as table centerpieces or decorative accents.

Troubleshooting Common Issues

Even with meticulous planning, issues can arise. Here are some common problems and how to address them:

Uneven Surfaces

Driftwood often has uneven surfaces that can make assembly challenging. Use a sander or planer to even out the areas where the pieces will connect.

Structural Weakness

If you find that your furniture is wobbly or unstable, reinforce the joints with additional screws or dowels. Ensure that all connections are tight and secure.

Finish Issues

If your finish isn’t coming out as expected, it might be due to residual dust or dirt. Clean the wood thoroughly before applying the finish, and always follow the manufacturer’s instructions.

Conclusion

Creating your own driftwood furniture can be an incredibly rewarding experience. Not only do you end up with a unique, eye-catching piece, but you also gain the satisfaction of crafting something with your own hands. With careful planning, the right materials, and a bit of patience, you’ll have beautiful driftwood furniture that brings a touch of nature into your home.

So what are you waiting for? Grab your tools, head to the beach, and start collecting that driftwood. Your next DIY project awaits, and who knows – it might just be your best one yet!

Filed Under: Driftwood Ideas Tagged With: crafting, DIY, Driftwood, furniture, home decor

Driftwood Branch Wall Art

June 17, 2024 by admin

Imagine transforming a plain wall into a captivating natural masterpiece with driftwood branch wall art. In the article, “Driftwood Branch Wall Art,” you’ll discover the enchanting beauty and rustic charm that driftwood brings to your living spaces. You’ll learn how each uniquely weathered piece tells a story of its journey through water and time, making your decor as unique as your personal style. Get ready to dive into the world of driftwood and find inspiration for creating one-of-a-kind art that will make your home feel cozy, serene, and naturally beautiful. Have you ever wandered along a beach, picked up a piece of driftwood, and wondered what you could create with it? Driftwood branch wall art might be just the DIY project you need to bring a touch of nature into your home décor. This rustic yet elegant art form transforms simple weathered wood into stunning pieces of wall art. Whether you’re an avid DIY enthusiast or just looking for a new creative outlet, driftwood branch wall art offers endless possibilities to express your artistic flair.

What is Driftwood Branch Wall Art?

Driftwood branch wall art is an art form that uses driftwood, often found along beaches or riverbanks, to create decorative wall pieces. The natural, weathered look of driftwood gives each piece a unique character that can’t be replicated by machine-made products. Driftwood’s soft, worn texture often carries a sense of history and mystery, evoking the journey it took to get to you.

Driftwood branch wall art can range from simple, minimalist designs to complex, intricate patterns. Whether you hang a single, beautifully weathered branch on your wall or create an elaborate driftwood sculpture, each piece has its own story and distinct charm.

Why Driftwood?

Connection to Nature

Creating driftwood branch wall art allows you to bring a touch of nature into your home. Driftwood is not only beautiful but also sustainable, as using it for art repurposes a material that would otherwise be considered waste.

Unique Aesthetic

No two pieces of driftwood are alike. The variations in color, texture, and shape make each piece of driftwood branch wall art a one-of-a-kind creation. This uniqueness adds a personal touch to your home décor that mass-produced items simply can’t provide.

Therapeutic and Fun

Working with driftwood can be a relaxing and meditative process. The act of collecting driftwood can be an enjoyable outdoor activity that connects you with nature, while the crafting process allows you to express your creativity.

Driftwood Branch Wall Art

Where to Find Driftwood

Local Beaches and Riverbanks

One of the most common places to find driftwood is along beaches and riverbanks. Driftwood is often washed ashore by tides and currents, collecting in nooks and crannies along the waterfront. Walking along these areas can yield a variety of shapes and sizes perfect for your art projects.

Online Marketplaces

If you’re not near a natural source of driftwood, you can find it on online marketplaces like Etsy, eBay, or specialized websites that sell driftwood for crafts. These pieces are often cleaned and ready to use, which can save you some preparation time.

Craft Stores

Some craft stores carry driftwood in their natural décor section. While these pieces might be more uniform in shape and size, they can still serve as excellent materials for your wall art.

Preparing Driftwood for Art

Once you’ve collected your driftwood, it’s essential to prepare it before turning it into a piece of art.

Cleaning the Driftwood

The driftwood might have dirt, algae, or other marine life attached to it. Cleaning is an essential step to ensure your art piece is hygienic and long-lasting.

  1. Rinse the Driftwood: Use freshwater to rinse off any dirt or debris.
  2. Soak in Bleach Solution: Soak the driftwood in a solution of nine parts water to one part bleach for 24 hours to kill any remaining bacteria or organisms.
  3. Rinse Again: Rinse thoroughly to remove any bleach.
  4. Dry: Allow the driftwood to dry completely, preferably in the sun, to ensure it’s ready for crafting.

Inspecting for Stability

Before starting your project, check each piece of driftwood for stability. Make sure there are no weak sections or cracks that could break during the crafting process. Stable pieces will ensure the longevity and integrity of your finished wall art.

Final Sanding

A light sanding can help to smooth out any rough or sharp edges. Use fine-grit sandpaper to preserve the natural texture while making the wood safer to handle.

Driftwood Branch Wall Art

Design Ideas for Driftwood Branch Wall Art

Minimalist Designs

If you prefer a simple yet elegant approach, consider creating minimalist designs. A single piece of driftwood, carefully chosen for its unique shape, can make a striking statement when mounted against a plain wall.

Driftwood Collage

For a more intricate piece, gather several branches and arrange them in a collage. You can place them horizontally, vertically, or in a more random, natural pattern. This type of wall art can serve as an eye-catching centerpiece in any room.

Combined with Other Natural Elements

Driftwood pairs beautifully with other natural elements like shells, stones, or feathers. Creating a mixed-media piece can add depth and complexity to your art.

Themed Designs

Consider creating themed designs based on your interests or décor style. For instance, you could craft a nautical-themed piece with driftwood, rope, and seashells, or a forest-inspired design with pieces that resemble branches and leaves.

Functional Art

Driftwood is not only for decoration. You can create functional pieces like coat racks, key holders, or shelving using driftwood branches. These items combine utility with rustic beauty, adding both style and functionality to your home.

Step-by-Step Guide to Creating Driftwood Branch Wall Art

Materials Needed

MaterialDescription
DriftwoodCollected or purchased, clean and dry
SandpaperFine-grit for smoothing rough edges
SawIf you need to trim the driftwood to fit your design
Screws/NailsFor mounting pieces together
WireFor hanging the finished piece
DrillFor making holes if necessary
GlueStrong adhesive for securing smaller pieces
VarnishOptional, to finish and seal the wood
Protective GearGloves, eye protection, mask (for sanding)

Planning Your Design

  1. Visualize the Layout: Before you start attaching pieces together, lay out your driftwood on the floor or a large table to visualize the final design.
  2. Sketch It Out: Draw a rough sketch of your intended design to guide you through the construction process. This helps in determining which pieces fit best and where.

Constructing the Art

  1. Attach Base Pieces: If your design has a base, start by attaching the largest or main driftwood pieces. Use screws or nails for secure attachment.
  2. Add Smaller Pieces: Gradually add smaller pieces according to your design, attaching them securely with glue or screws.
  3. Allow Time for Drying: If using glue, ensure each piece is fully dry before moving on to prevent shifting or misalignment.

Finishing Touches

  1. Sand Rough Edges: After constructing the piece, sand any remaining rough edges to ensure a smooth finish.
  2. Apply Varnish: If you prefer a polished look, apply a coat of varnish to seal and protect the wood. This can also enhance the wood’s natural grain and color.
  3. Attach Hanging Hardware: Securely attach wire or other hanging hardware to the back of the piece, ensuring it can support the weight of your art.

Tips for Displaying Driftwood Branch Wall Art

Choosing the Right Wall

Select a wall that complements the natural aesthetic of driftwood. Neutral colors often work best, allowing the wood’s unique features to stand out. A well-lit area will highlight the textures and nuances of your art.

Height and Placement

Consider the height at which you hang your art. Eye level is typically the most effective for large pieces, while smaller pieces can be grouped together in a gallery-style arrangement. Ensure the placement allows for easy viewing and appreciation.

Lighting Effects

Proper lighting can enhance the beauty of your driftwood branch wall art. Use soft, diffused lighting to cast gentle shadows and highlight the textures. Avoid harsh direct light that can create glare and reduce the natural appeal.

Caring for Your Driftwood Art

Regular Dusting

Dust your driftwood art regularly using a soft cloth or brush. This prevents buildup that can dull the wood’s natural beauty.

Avoid Humidity

Excessive humidity can affect the wood’s stability. Ensure your driftwood art is displayed in a well-ventilated area to maintain its condition over time.

Occasional Inspection

Periodically inspect your art for any signs of wear or damage. Tighten screws or reapply glue if necessary to keep your piece in good shape.

Selling Your Driftwood Art

If you find yourself creating multiple pieces of driftwood branch wall art, you might consider selling them. Here are some tips to get started:

Online Platforms

Platforms like Etsy, eBay, and Amazon Handmade are great places to sell your driftwood art. These websites have a large audience of customers looking for unique, handcrafted items.

Art and Craft Fairs

Local art and craft fairs can be excellent venues to showcase your work. These events allow you to interact directly with customers and receive feedback on your art.

Social Media

Social media platforms like Instagram and Pinterest are perfect for visual art. Regularly post high-quality photos of your driftwood art to attract followers and potential buyers.

Pricing Your Art

When pricing your driftwood art, consider the cost of materials, time spent, and the uniqueness of each piece. Research similar items to ensure your pricing is competitive yet fair.

Conclusion

Driftwood branch wall art is a unique and versatile way to bring a piece of nature into your home. Each piece of driftwood carries its own story and history, adding a touch of rustic charm and elegance to your décor. Whether you create minimalist designs or intricate collages, driftwood offers endless possibilities for creative expression. Not only is this art form visually stunning, but it also provides a therapeutic and sustainable outlet for your creativity.

So next time you find yourself by the water, take a closer look at the driftwood lying at your feet. With a bit of imagination and effort, you could transform that simple piece of wood into a beautiful work of wall art, turning the forgotten into the unforgettable. Happy crafting!

Filed Under: Driftwood Ideas Tagged With: crafting, DIY, Driftwood, Rustic Decor, Wall Art

Projects With Driftwood

June 3, 2024 by admin

In “Projects With Driftwood,” you’ll discover the beauty and simplicity of crafting with one of nature’s most evocative materials. This article guides you through an array of creative projects that allow you to transform driftwood into stunning home décor pieces. From wall art to functional furniture, each idea harnesses the natural charm and rustic elegance of driftwood. You’ll find inspiration and step-by-step instructions that are perfect for both beginner and seasoned crafters. Get ready to bring a touch of seaside magic into your home with these captivating driftwood creations! Have you ever wondered what you could make with those beautiful pieces of driftwood you’ve collected on your beach outings? Driftwood, with its unique forms and textures, offers endless possibilities for creative projects. In this article, we’ll guide you through various projects you can do with driftwood, right from simple decorations to functional furniture pieces.

Why Choose Driftwood for Your Projects?

Driftwood is not only free and abundantly available but it also carries a natural beauty that adds a rustic charm to any craft. Each piece is unique, shaped by the elements as it journeys through rivers and oceans, finally washing up on shore. This natural aspect makes every driftwood project one-of-a-kind.

Benefits of Using Driftwood

  • Natural and Eco-Friendly: Using driftwood is an excellent way to repurpose nature’s gifts, making it a sustainable choice.
  • Unique Aesthetic: Each piece of driftwood has its own distinct form, texture, and color, offering character to your creations.
  • Durability: Driftwood has been weathered and conditioned by nature, making it a sturdy material for various crafts.

Getting Started with Driftwood Projects

Before you jump into creating driftwood masterpieces, it’s important to prepare your materials and tools. Preparation will ensure that your projects not only look good but also last long.

Collecting Driftwood

First things first, you need to collect some driftwood. This can be a fun activity in itself. Look for pieces that catch your eye in terms of shape and texture. Remember to respect local and environmental guidelines while collecting driftwood.

Cleaning and Preparing Driftwood

Once you’ve collected your pieces, it’s crucial to clean them thoroughly. Soak the driftwood in a mixture of water and bleach for 24 hours to kill any bacteria, molds, or insects. Rinse it off well and let it dry completely. Sand down any rough areas to avoid splinters.

Tools You’ll Need

Depending on the complexity of your project, you might need a variety of tools. Here are some basics:

ToolUse
SandpaperSmoothens rough edges and surfaces
Wood GlueGreat for adhering small pieces together
Electric DrillUseful for making holes or joining pieces
SawFor cutting larger pieces to the desired size
Paint and BrushesOptional, for adding color or finish to your driftwood
Finishing SprayAdds a protective layer to preserve your project

Projects With Driftwood

Driftwood Projects to Try

Now that you’re all set, let’s explore some exciting projects you can create with driftwood. We’ll cover a range of ideas, from simple decorative items to more complex furniture pieces.

Driftwood Wall Art

One of the simplest yet most stunning projects you can undertake is driftwood wall art.

Materials Needed

  • Driftwood
  • Wood Glue
  • Picture Hangers

Instructions

  1. Design Your Layout: Arrange pieces of driftwood on the ground to create a pattern or scene.
  2. Glue the Pieces: Once you’re satisfied with your design, glue the pieces together and let them dry.
  3. Add Picture Hangers: Attach picture hangers to the back and it’s ready to be displayed on your wall.

Driftwood Candle Holders

A driftwood candle holder can be a charming addition to any home or garden.

Materials Needed

  • Driftwood pieces
  • Tea lights or small candles
  • Electric drill

Instructions

  1. Select Your Wood: Choose a piece of driftwood that suits the size of the candles you want to use.
  2. Drill Holes: Drill shallow holes in the wood to fit the tea lights snugly.
  3. Finish: Optionally, sand the edges around the holes for a smoother finish.

Driftwood Coat Rack

A practical project like a driftwood coat rack can bring both utility and beauty to your hallway.

Materials Needed

  • Long piece of driftwood
  • Coat hooks
  • Screws and electric drill
  • Wall mounts

Instructions

  1. Prepare the Driftwood: Clean and sand your driftwood piece.
  2. Attach Coat Hooks: Screw in the coat hooks at evenly spaced intervals.
  3. Mount on the Wall: Attach wall mounts to the back and secure the coat rack to the wall.

Driftwood Mirror Frame

Enhance a simple mirror by adding a unique driftwood frame.

Materials Needed

  • Mirror
  • Assorted pieces of driftwood
  • Industrial-strength glue
  • Hanging hardware

Instructions

  1. Design the Frame: Arrange the driftwood pieces around the mirror to form a frame.
  2. Attach the Pieces: Glue the pieces to the mirror’s edge.
  3. Allow to Dry: Let the glue dry completely before hanging the mirror.

Driftwood Furniture

For those who are more ambitious, making furniture out of driftwood can be an immensely rewarding project. Here’s how to make a driftwood coffee table.

Materials Needed

  • Large flat piece of driftwood (for the tabletop)
  • Driftwood sticks (for the legs)
  • Screws and electric drill
  • Sandpaper

Instructions

  1. Prepare Wood Pieces: Clean, sand, and cut your driftwood to size.
  2. Assemble the Table: Attach the legs to the tabletop using screws.
  3. Finish: Sand any rough edges and apply a finishing spray.

Advanced Techniques

Once you’re comfortable with basic projects, you might want to try some advanced techniques to elevate your driftwood creations.

Carving

Carving driftwood can transform a simple project into a detailed and intricate piece of art.

Tips for Carving

  • Use Proper Tools: Invest in a set of quality carving tools.
  • Stay Patient: Carving can be time-consuming, so patience is key.
  • Practice on Scrap: Practice your skills on smaller, less significant pieces before working on your main project.

Wood Burning

Wood burning, or pyrography, can add beautiful designs and patterns to your driftwood projects.

Tips for Wood Burning

  • Use a Low Heat Setting: Driftwood is often softer than other woods, so a lower heat setting will give you better control.
  • Sketch First: Lightly sketch your design on the driftwood before burning.
  • Ventilation: Ensure you work in a well-ventilated area to avoid inhaling fumes.

Adding Plants

Incorporating plants into your driftwood projects can breathe life and freshness into your creations. One popular idea is to create a driftwood planter.

Materials Needed

  • Driftwood piece
  • Air plants or succulents
  • Moss and glue

Instructions

  1. Prepare Driftwood: Clean and dry your driftwood piece.
  2. Add Plants: Attach air plants or succulents using glue. You can also add moss for extra greenery.
  3. Maintenance: Remember that air plants require occasional misting, and succulents need minimal watering.

Projects With Driftwood

Maintenance of Driftwood Projects

Maintaining your driftwood creations ensures they last longer and continue to look beautiful over time.

Regular Cleaning

Dust your driftwood projects regularly using a soft brush or cloth. Avoid using harsh chemicals as they can damage the wood.

Periodic Inspection

Check periodically for any signs of wear, mold, or insect infestation. If you notice any issues, address them immediately to prevent further damage.

Protective Finish

Consider applying a protective finish to your driftwood projects. This can be a waterproof sealant or a wood finish that enhances the color and grain.

Driftwood Projects for Special Occasions

Driftwood projects are not just for everyday decor; they can be especially meaningful for special occasions like weddings, birthdays, and anniversaries.

Wedding Decor

Consider creating driftwood centerpieces, table numbers, or even an archway for a beach-themed wedding. Driftwood adds a rustic, natural touch that complements a seaside or outdoor setting.

Personalized Gifts

Driftwood can be transformed into personalized gifts such as name plaques, photo frames, or custom sculptures. These thoughtful gifts can carry sentimental value, especially if you collect the driftwood from a place with special memories.

Safety Tips

While working with driftwood is generally safe, it’s always good to follow some safety guidelines.

  • Wear Protective Gear: Gloves can protect your hands from splinters, and safety goggles can prevent debris from getting into your eyes.
  • Ventilation: Ensure good ventilation if you are using adhesives, sealants, or paints.
  • Tool Safety: Handle tools with care, especially power tools like drills and saws.

Conclusion

Getting creative with driftwood opens up a world of rustic, artistic possibilities. From simple wall art to intricate furniture pieces, the unique charm of driftwood can transform everyday items into works of art. Plus, you’ll have the satisfaction of knowing you created something beautiful and sustainable.

So go ahead, gather your driftwood, prepare your tools, and let your creativity flow. Who knows? Your next driftwood project could be the centerpiece of your home or the perfect handmade gift for someone special.

We hope this guide has inspired you to create something amazing with driftwood. Happy crafting!

Filed Under: Driftwood Ideas Tagged With: crafting, Driftwood, home decor, projects, Woodworking

Diy Driftwood Projects Sculptures & Statues

June 2, 2024 by admin

Immerse yourself in the world of DIY driftwood projects, where you can transform simple pieces of driftwood into stunning sculptures and statues. This guide is your perfect companion for embarking on this creative journey. You’ll discover ideas and inspiration to create unique art pieces that reflect nature’s beauty and your personal touch. Whether you’re a beginner or a seasoned DIY enthusiast, you’ll find plenty of tips and techniques to help you bring your driftwood visions to life. From intricate designs to minimalist creations, the possibilities are endless when you let your imagination fuel your projects. Have you ever stumbled upon a beautiful piece of driftwood during a beach walk and wondered how you could transform it into a stunning home decor piece? If so, you’re in for a treat! Creating DIY driftwood projects, sculptures, and statues is not only a fun and creative endeavor but also a fantastic way to add unique, natural beauty to your living space.

Diy Driftwood Projects Sculptures  Statues

Why Choose Driftwood?

Driftwood holds a special allure with its weathered textures and intricate shapes molded by the sea. Each piece of driftwood tells a story of its journey and offers a unique form that can be turned into art. Plus, using driftwood is an eco-friendly option; it’s a fantastic way to recycle and repurpose natural materials.

Getting Started with Driftwood Projects

Finding the Perfect Driftwood

The first step to any driftwood project is finding the right pieces. Ideally, you’ll want pieces that are already dry and smooth. Beachcombing is a great activity for collecting driftwood, but you can also explore rivers, lakes, and even forests where wood has been weathered by natural elements.

Cleaning Your Driftwood

Before you start crafting, it’s crucial to clean your driftwood to remove any salt, sand, or small critters. Here’s a simple cleaning method:

  1. Soak the Driftwood: Immerse your driftwood in a bucket of water with a bit of bleach (1/2 cup bleach per gallon of water). Leave it soaking for 1-3 days.
  2. Scrub Away: After soaking, use a brush to scrub away any debris.
  3. Rinse Thoroughly: Rinse the driftwood in fresh water until the bleach smell is gone.
  4. Dry: Let the driftwood dry completely, which can take several days depending on the size and thickness of the wood.

Tools and Materials You’ll Need

Having the right tools and materials ensures a smooth crafting process. Here are some essentials:

  • Drill and Bits: For making holes or adding fixtures.
  • Saw: For cutting driftwood into your desired shapes and sizes.
  • Sander or Sandpaper: For smoothing rough edges.
  • Glue (Epoxy or Wood Glue): To piece parts together.
  • Wire and Nails: For attaching pieces or adding structural support.
  • Finish (Wax or Sealant): To protect and enhance the natural beauty of the wood.

Popular DIY Driftwood Projects

Driftwood Candle Holders

Creating candle holders is a simple way to start with driftwood projects. These candle holders add a rustic charm to any space.

Steps:

  1. Choose a flat piece of driftwood.
  2. Measure and mark where you want your candles to sit.
  3. Drill shallow holes to fit the base of your candles.
  4. Sand the edges for a smooth finish.
  5. Optionally, coat with a sealant to protect the wood.

Driftwood Mirrors

Driftwood mirrors can become a centerpiece in your home. They’re elegant and give a coastal vibe.

Steps:

  1. Find a small or large mirror, depending on your preference.
  2. Collect various pieces of driftwood of different sizes.
  3. Arrange the driftwood around the mirror frame until you find a design you like.
  4. Use strong glue or a nail gun to attach the driftwood pieces.
  5. Allow it to dry and sand any rough edges.

Driftwood Sculptures

Creating sculptures from driftwood can be a more advanced project but incredibly rewarding. The sky’s the limit when it comes to design.

Steps:

  1. Select your driftwood pieces with interesting shapes and lengths.
  2. Sketch a rough design or layout for your sculpture.
  3. Drill holes and use wire or nails to connect pieces together.
  4. Ensure the structure is stable; reinforce joints if necessary.
  5. Sand and finish with a protective coat.

Driftwood Wall Art

Wall art utilizing driftwood is both eye-catching and a beautiful way to use larger pieces of wood.

Steps:

  1. Lay out your driftwood pieces on the floor to plan your design.
  2. Once satisfied, begin attaching the pieces together using small nails or strong adhesive.
  3. Optionally, add other natural elements like shells or stones.
  4. Hang your art using strong wall mounts.

Driftwood Furniture

If you’re handy with tools and have larger pieces of driftwood, making furniture can be a magnificent project.

Steps:

  1. Gather large, sturdy pieces of driftwood.
  2. Design your furniture piece, such as a coffee table or chair.
  3. Cut and shape the driftwood as needed.
  4. Secure pieces together, ensuring stability.
  5. Sand all surfaces smooth and finish with a sealant for durability.

Expert Tips for Advanced Driftwood Projects

Making Secure Connections

For larger projects like furniture and sculptures, ensuring secure connections is paramount. Use dowels, screws, and wood glue for joints that need extra strength.

Finishing Techniques

Different finishing techniques can bring out various aspects of the driftwood:

  • Natural Look: Clear sealant or beeswax will enhance the wood’s natural color and grain.
  • Weathered Look: A diluted white paint wash can give a bleached, coastal appearance.
  • Smooth Finish: Sanding between coats of varnish can give a sleek, polished look.

Combining Materials

Don’t be afraid to combine driftwood with other materials. Metals, stones, and glass can add contrast and interest to your driftwood projects.

Diy Driftwood Projects Sculptures  Statues

Troubleshooting Common Issues

Splitting and Cracking

Wood tends to split or crack, especially if not dried properly. To minimize this:

  • Gradually dry the driftwood in a shaded area.
  • Avoid rapidly changing temperatures.
  • Inject wood filler into small cracks before they expand.

Wood Pests

Sometimes, driftwood can harbor wood pests. Cleaning and thoroughly drying can often prevent this, but if you notice any issues:

  • Use a wood-safe insecticide.
  • Regularly check and maintain your finished projects.

Stability Problems

If your project, especially furniture, isn’t stable:

  • Reassess the joints and connections.
  • Reinforce structures with additional support.
  • Consider the weight distribution and balance.

Inspiring Driftwood Project Ideas

Driftwood Chandeliers

Creating a chandelier from driftwood can add a dramatic focal point to your space. Use thin, branched pieces that light can filter through for a striking effect.

Driftwood Christmas Trees

For a seasonal project, fashion a Christmas tree from various lengths of driftwood stacked vertically around a central pole. Decorate with lights and ornaments for a festive, eco-friendly holiday decor.

Driftwood Garden Sculptures

Bring the beauty of driftwood to your garden with sculptures that can weather the elements. Birdhouses, planters, and even garden paths made from driftwood can blend seamlessly with natural surroundings.

Driftwood Headboards

For a unique bedroom makeover, create a headboard from large driftwood pieces. Attach pieces securely to a wooden backing and mount them behind your bed.

Driftwood Picture Frames

Fashioning picture frames from driftwood adds a personal touch to your photos. Simply arrange smaller pieces around a plain frame, securing them with glue.

Conclusion: Bringing Your Driftwood Visions to Life

The beauty of DIY driftwood projects lies in the endless possibilities for creativity and personalization. Whether you’re crafting small decor items or embarking on larger furniture projects, each piece you create is one-of-a-kind. The natural, rustic charm of driftwood can enhance any space, and the process of creating these pieces is both fulfilling and fun.

So, get out there, gather some driftwood, and start crafting! You’ll find that transforming these natural elements into art not only beautifies your home but also provides a gratifying creative outlet. Happy crafting!

Filed Under: Driftwood Ideas Tagged With: crafting, Driftwood, home decor, Sculptures, Statues

Diy Large Driftwood Projects

May 29, 2024 by admin

Welcome to a world of creativity and natural beauty with “DIY Large Driftwood Projects.” In this article, you’ll discover the joys of transforming pieces of driftwood into remarkable home decor and functional items. From crafting rustic coffee tables to designing charming wall art, each project embraces the unique, weathered character of driftwood, bringing a touch of the outdoors inside. Whether you’re an experienced DIY enthusiast or just starting out, you’ll find inspiration and practical tips to turn ordinary driftwood into extraordinary pieces that reflect your personal style and love for nature.

DIY Large Driftwood Projects

Have You Ever Wondered About Creating Stunning Driftwood Projects?

Driftwood, shaped, and smoothed by water and time, is a versatile resource that can be transformed into stunning decor for your home or garden. It offers a rustic, natural aesthetic that adds warmth and special character to any space. Whether washed up on a beach or found along a riverbank, each piece of driftwood tells a story. But how do you tap into its potential to create something beautiful and functional?

This guide will walk you through various DIY large driftwood projects, share tips and techniques, and inspire you to embark on your own creative journey.

Understanding Driftwood

What Is Driftwood?

Driftwood refers to any wood that has been washed onto a shore or beach of a sea, river, or lake by the action of winds, tides, or waves. The wood becomes weathered through a process of natural wear, which imbues it with unique textures and shapes.

Why Use Driftwood?

Driftwood is an eco-friendly and sustainable material, often freely available along coastlines. Its intrinsic weathered look adds a natural, rustic charm to your projects. Additionally, driftwood items stand out as unique art pieces since no two pieces of driftwood are identical.

Diy Large Driftwood Projects

Steps to Prepare Driftwood for Projects

Before jumping into DIY projects, it’s crucial to prepare your driftwood thoroughly.

Collecting Driftwood

One of the joys of working with driftwood is the search itself. Beachcombing can be a serene, rewarding activity. However, check local regulations, as removing driftwood from certain protected areas may be restricted.

Cleaning and Sanitizing

Since driftwood often comes with dirt, sand, and possibly sea creatures, it’s essential to clean it well. Soak the driftwood in a solution of one-part bleach to nine-parts water for 24 hours. Scrub off any remaining debris and rinse it thoroughly.

Drying

Allow the driftwood to dry completely, which may take several days or even weeks, depending on the thickness of the wood and the ambient conditions. Keep it in a well-ventilated dry area for the best results.

Essential Tools and Supplies

To kickstart your DIY driftwood projects, having the right tools and supplies is vital.

ToolPurpose
SawFor cutting driftwood to desired lengths and shapes.
SandpaperTo smoothen rough surfaces.
Wood GlueTo bond pieces of driftwood together.
DrillFor making holes or for attaching screws and nails.
Screws and NailsFor assembling different pieces.
Wood Finish/SealantTo protect and preserve the finished piece.
Safety Gear (gloves, goggles)To ensure you work safely, especially when cutting or drilling wood.

Diy Large Driftwood Projects

Stunning DIY Large Driftwood Projects

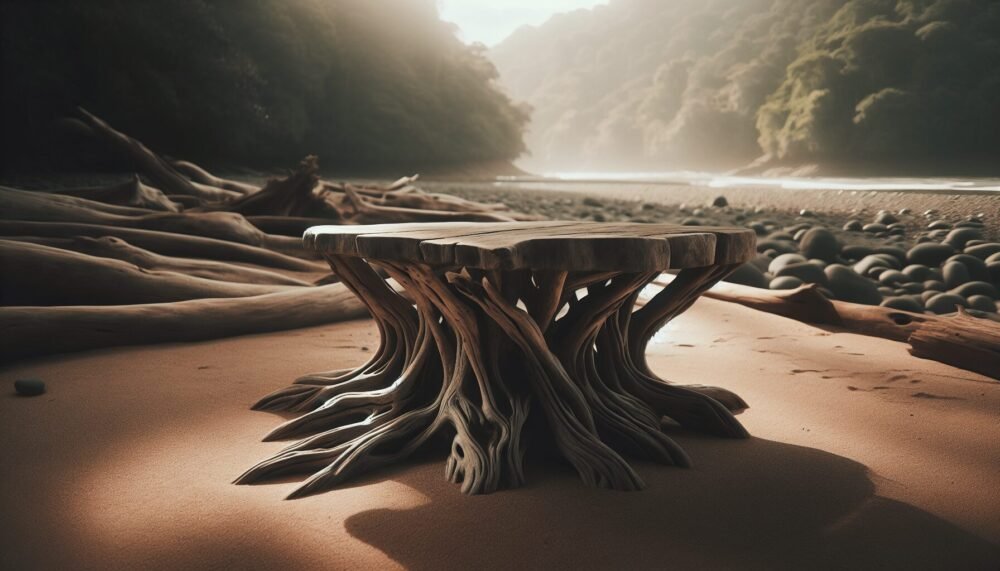
Driftwood Table

Imagine a rustic table that adds a touch of nature to your living or dining room.

  1. Collect Large Driftwood Pieces: Ensure they are sturdy enough to support a tabletop.
  2. Tabletop Base: Arrange the driftwood pieces in a pattern that balances aesthetics and stability.
  3. Secure the Pieces: Use wood glue, screws, or nails to hold the pieces together.
  4. Attach a Tabletop: Place a glass or wooden tabletop on the base. Glass works well because it showcases the intricate patterns of the driftwood base.

Driftwood Headboard

Transform your bedroom with a stunning driftwood headboard.

  1. Measure Your Bed: Determine the dimensions of the headboard.
  2. Select Driftwood: Choose medium to large pieces, ensuring they provide adequate coverage.
  3. Arrange Creatively: Lay the pieces out in a pattern that suits your style.
  4. Fix to Backing Board: Secure the driftwood pieces to a plywood sheet using screws or nails.
  5. Install: Attach the finished headboard to your bed frame or wall.

Driftwood Mirror Frame

A large mirror framed with driftwood can become an eye-catching focal point in any room.

  1. Select a Mirror: Choose a mirror size that fits your space—larger mirrors work best for this project.
  2. Choose Driftwood Pieces: These should be slender yet sturdy.
  3. Design the Layout: Arrange the pieces around the mirror, ensuring they overlap slightly for a seamless look.
  4. Attach the Driftwood: Secure the pieces to the mirror frame using wood glue or a strong adhesive.
  5. Seal and Preserve: Apply a wood sealant to protect the driftwood frame.

Driftwood Garden Trellis

Create a rustic garden trellis that doubles as support for climbing plants.

  1. Select Sturdy Driftwood: Look for long, straight pieces that can form the vertical and horizontal supports.
  2. Design the Trellis: Sketch a simple grid pattern.
  3. Assemble: Join the vertical and horizontal pieces using screws or wood glue.
  4. Install in Garden: Secure the trellis firmly in the ground where you plan to grow climbing plants.

Tips for Working with Driftwood

While working with driftwood, here are some tips to ensure your projects turn out beautifully and last long:

  1. Test Stability: Always ensure the assembled pieces are stable and secure, especially for furniture items.
  2. Use Protective Gear: Safety first! Wear gloves, goggles, and masks when sanding or cutting driftwood.
  3. Creative Arrangements: Don’t shy away from experimenting with different arrangements and combinations. Driftwood’s natural shapes can lead to unexpected and beautiful results.

Conclusion

DIY large driftwood projects offer a perfect blend of creativity and nature, providing unique and aesthetically pleasing decor for your home or garden. Whether it’s a table, headboard, mirror frame, or garden trellis, each project tells a story, adding a touch of rustic elegance to your space. So, why not head out on your next beachcombing adventure, find some beautiful driftwood, and start creating? Your next stunning piece awaits!

By incorporating these DIY driftwood projects into your home, you not only create unique decor but also form a connection to nature. Enjoy the creative process and the beautiful results that come from working with this wonderful material.

Filed Under: Driftwood Ideas Tagged With: crafting, DIY Home Decor, Driftwood, Large Projects, Woodworking

Driftwood Epoxy Projects

May 25, 2024 by admin

Welcome to the captivating world of “Driftwood Epoxy Projects,” where your creativity can bloom and your hands can bring life to nature’s most weathered treasures. You’ll discover how to combine age-old driftwood with modern epoxy resin to create stunning, one-of-a-kind pieces for your home. Whether it’s a rustic table, a unique piece of wall art, or a mesmerizing centerpiece, you’ll be inspired to turn your newfound skills into lasting memories. Let’s dive in and transform ordinary driftwood into extraordinary art!

Driftwood Epoxy Projects

Have You Thought About Incorporating Driftwood in Your Next DIY Project?

Driftwood has a unique beauty only nature can provide. Its weathered texture, interesting shapes, and natural appeal make it a perfect element for a variety of DIY projects. Combined with epoxy resin, driftwood transforms into stunning art pieces, functional items, and eye-catching decor. Intrigued? Let’s dive into the world of driftwood epoxy projects and discover how you can create your own masterpieces.

Why Driftwood?

Unique Aesthetics

When you use driftwood, you’re incorporating a piece of nature that has been shaped by the elements. The wood has unique textures and patterns that can’t be replicated. Driftwood’s aesthetic value is its singularity; no two pieces are alike, making your project one of a kind.

Environmental Impact

Using driftwood is eco-friendly. You’re repurposing wood that has washed ashore, rather than cutting down trees. It’s a great way to contribute to sustainability while creating beautiful objects. Driftwood projects allow you to bring a piece of nature indoors without harming the environment.

Driftwood Epoxy Projects

Why Use Epoxy Resin?

Durability

Epoxy resin is incredibly strong and durable once it cures. This makes it ideal for projects that need to withstand daily wear and tear, such as tables, countertops, and coasters. When combined with driftwood, the strength of epoxy ensures your project will last for many years.

Aesthetic Versatility

Epoxy resin can be clear, colored, or even embedded with objects like stones, shells, or glitter. This versatility allows you to customize your driftwood projects to fit your style and taste. You can achieve a variety of finishes, from glossy and smooth to matte and textured.

Protection and Preservation

One of the great benefits of using epoxy is that it encapsulates the driftwood, protecting it from further decay and damage. The resin preserves the wood in its current state, ensuring that its unique textures and beauty remain intact over time.

Getting Started: Materials and Tools

Basic Materials

Before you start your project, you need to gather the essential materials. Here is a list to get you started:

MaterialDetails
DriftwoodChoose pieces that appeal to you; shape, size, and texture vary widely
Epoxy ResinPurchase high-quality resin suitable for the specific project
HardenerComes with the epoxy resin and necessary for curing

Essential Tools

You’ll also need some basic tools to handle the materials and complete your project. Here’s what you’ll need:

ToolPurpose
SandpaperFor smoothing the wood before applying resin
Mixing CupsFor blending resin and hardener in the correct proportions
Stirring SticksTo mix the epoxy thoroughly to avoid bubbles
Brushes or SpreadersTo apply the epoxy resin evenly over the wood
Gloves and Safety GearTo protect your skin and eyes while working with the resin
Heat Gun or TorchTo remove bubbles from the epoxy surface during curing

Optional Items

Depending on your project, you might also want these additional materials:

ItemUse
Color PigmentsTo tint the epoxy resin and add color variations
MoldsFor shaping resin into specific forms like coasters or small art pieces
EmbellishmentsItems like shells, stones, or glitter to embed in the resin

Driftwood Epoxy Projects

Popular Driftwood Epoxy Projects

Driftwood Epoxy Tables

One of the most popular uses for driftwood and epoxy is creating tables. These tables can be statement pieces in your home. Let’s break down how you can make one.

Materials Needed

  1. Driftwood piece (larger, flat pieces work well)
  2. Epoxy Resin and Hardener
  3. Table legs (metal, wood, or another material)
  4. Sandpaper
  5. Mixing cups and stirrers
  6. Brushes or spreaders
  7. Heat gun or torch

Steps to Create

  1. Select Your Driftwood: Choose a piece of driftwood with a shape you like and enough surface area.
  2. Prep the Wood: Sand the driftwood to remove any rough edges.
  3. Mix the Epoxy: Follow the instructions on your epoxy product to mix the resin and hardener.
  4. Apply a Base Coat: Use a brush to apply a thin layer of epoxy to the wood, sealing the surface. This helps to prevent bubbles.
  5. Embed the Driftwood: Place the driftwood on a flat surface and pour the epoxy over it. Use a heat gun or torch to remove any bubbles that form.
  6. Cure Time: Allow the epoxy to cure for at least 24 hours.
  7. Attach Legs: Once cured, attach the table legs to complete your table.

Driftwood Epoxy Coasters

If you’re looking for a smaller project to start with, consider making driftwood epoxy coasters.

Materials Needed

  1. Driftwood pieces (small, flat pieces)
  2. Epoxy Resin and Hardener
  3. Molds (coaster size)
  4. Sandpaper
  5. Mixing cups and stirrers
  6. Heat gun or torch

Steps to Create

  1. Select Your Driftwood: Pick smaller pieces that fit well into your molds.
  2. Prep the Wood: Sand down any rough edges.
  3. Position in Molds: Place the driftwood pieces in your molds.
  4. Mix the Epoxy: Follow the product instructions to mix resin and hardener.
  5. Pour into Molds: Pour the mixed epoxy into the molds, ensuring the driftwood is well embedded.
  6. Remove Bubbles: Use a heat gun or torch to get rid of bubbles.
  7. Cure Time: Allow the epoxy to cure fully.
  8. Finish: Once cured, remove the coasters from the molds and sand the edges if necessary.

Driftwood Epoxy Wall Art

Wall art can be a striking way to display the beauty of driftwood combined with epoxy resin.

Materials Needed

  1. Driftwood pieces (varied sizes and shapes)
  2. Epoxy Resin and Hardener
  3. A wooden frame or panel
  4. Sandpaper
  5. Brushes or spreaders
  6. Mixing cups and stirrers
  7. Heat gun or torch

Steps to Create

  1. Select Your Driftwood: Choose pieces that form an appealing composition.
  2. Prep the Wood: Sand the pieces to smooth any rough areas.
  3. Arrange on Frame: Lay out your design on the wooden frame or panel.
  4. Mix the Epoxy: Follow the resin and hardener instructions for mixing.
  5. Apply the Resin: Apply a layer of epoxy over the pieces, ensuring they are covered and secured.
  6. Remove Bubbles: Use a heat gun or torch to remove bubbles as the resin sets.
  7. Cure Time: Let the epoxy cure for the recommended time.
  8. Mounting: Once cured, the wall art is ready to be hung or displayed.

Tips and Tricks for Working with Driftwood and Epoxy

Preparing Driftwood

Before using driftwood, it’s essential to clean and prep it properly:

  1. Cleaning: Remove any sand, bark, or organic material. You can soak the wood in a mixture of water and bleach to kill any remaining bacteria or insects.
  2. Drying: Ensure the driftwood is completely dry before using it in epoxy projects. This may require several days of air drying.
  3. Sanding: Sand the surface to smooth out any rough textures and make the wood easier to work with.

Working with Epoxy

Using epoxy resin can be tricky, but these tips can help:

  1. Mix Thoroughly: Ensure that you mix the resin and hardener well to avoid inconsistencies in curing.
  2. Temperature Matters: Work in a controlled environment where the temperature is stable to avoid bubbles and improper curing.
  3. Degassing: Use a heat gun or torch to remove bubbles and achieve a smooth finish.
  4. Protective Gear: Always wear gloves and safety glasses when handling epoxy to protect your skin and eyes.

Embellishments and Coloration

Adding unique touches to your driftwood epoxy projects can make them even more personalized:

  1. Color Pigments: Add pigments to your epoxy mix to create colored resin. This can enhance the natural beauty of the driftwood.
  2. Embedded Objects: Consider embedding small objects like shells, stones, or dried flowers to add another layer of interest.
  3. Metallic Effects: You can incorporate metallic powders or leafing for a luxurious finish.

Troubleshooting Common Issues

Bubbles in Epoxy

Bubbles can be a frustrating issue when working with epoxy. Here are some solutions:

  • Pre-seal the Wood: Apply a thin base coat of epoxy to seal the wood before the final pour.
  • Mix Slowly: Mix the resin and hardener slowly to minimize air infusion.
  • Use Heat: A heat gun or torch can help to release trapped air bubbles.

Curing Problems

Sometimes epoxy doesn’t cure as expected. This could be due to:

  • Incorrect Ratios: Ensure you’re mixing the resin and hardener in the recommended proportions.
  • Environmental Conditions: Temperature and humidity can affect curing times.
  • Mixing Inconsistency: Thoroughly mix the components to ensure even curing.

Resin Overflow

To avoid resin overflow:

  • Proper Molds: Use the correct size molds or frames to contain the epoxy.
  • Measure Carefully: Ensure that you measure the right amount of epoxy to avoid overflow.
  • Edges and Boundaries: Apply a barrier or tape around the edges to contain the resin.

Inspiration and Ideas

Seasonal Decor

Seasonal decor pieces like festive ornaments, candle holders, or centerpiece trays can all be made more unique with the use of driftwood and epoxy. Whether it’s for summer, winter, autumn, or spring, incorporating natural elements can bring a piece of the outdoors into your home.

Personalized Gifts

Handmade gifts like custom coasters, framed wall art, or small tables made with love and driftwood epoxy are treasured presents. You can personalize these items with embedded names, dates, or other significant symbols.

Functional Household Items

Functional items like driftwood epoxy cutting boards, key holders, or lamp bases can be both practical and beautiful. These pieces add a unique touch to everyday items, making them stand out.

Safety Considerations

Epoxy Safety

Working with epoxy resin requires some safety precautions:

  • Ventilation: Always work in a well-ventilated area to avoid inhaling fumes.
  • Protective Gear: Use gloves, safety glasses, and, if necessary, masks.
  • Spills and Clean-up: Clean up any spills immediately to avoid skin contact and ensure a safe workspace.

Wood Safety

When preparing and working with driftwood:

  • Safe Tools Usage: Use sanders and saws carefully to avoid accidents.
  • Wood Treatment: Ensure the driftwood is free from contaminants by cleaning and bleaching if necessary.
  • Splinters: Be cautious of splinters when handling un-sanded wood.

Final Words: Let Your Creativity Flow

Working with driftwood and epoxy resin opens up endless opportunities for creative expression. From tables to coasters and wall art to functional household items, there’s no limit to what you can create.

So why not take a piece of driftwood and let your imagination guide you? Whether you are an experienced DIY enthusiast or a novice looking to try something new, driftwood epoxy projects offer a rewarding experience. You get to craft items that not only showcase your skills but also bring the beauty of nature into your living space. Enjoy the process, take your time, and most importantly, have fun crafting your unique driftwood epoxy masterpieces. Happy crafting!

Filed Under: Driftwood Ideas Tagged With: crafting, Driftwood, Epoxy, Handmade, projects

  • « Previous Page
  • Page 1
  • …
  • Page 4
  • Page 5
  • Page 6
  • Page 7
  • Next Page »

Primary Sidebar

Driftwood4us.com, is a participant in the Amazon Services LLC Associates Program, an affiliate advertising program designed to provide a means for sites to earn advertising fees by advertising and linking to amazon.com.