• Skip to main content
  • Skip to primary sidebar
  • Terms and Conditions
  • Privacy Policy
  • Contact

Driftwood 4 Us

Just About Driftwood

DIY

Driftwood Floral Arrangements

July 25, 2024 by admin

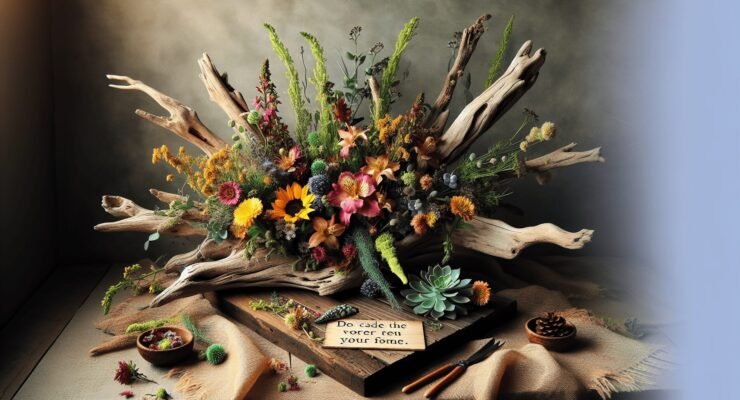
Creating “Driftwood Floral Arrangements” combines the rugged beauty of natural driftwood with the vibrant elegance of flowers to craft unique, eye-catching displays for your home. Imagine taking a walk along the beach, finding pieces of driftwood that have been polished smooth by the ocean waves, and then integrating these treasures into your floral designs. You’ll not only bring a touch of the seaside into your living space but also create stunning centerpieces that captivate attention. This approach harmonizes rustic charm with floral sophistication, resulting in artful arrangements that resonate with both nature lovers and design enthusiasts alike. Have you ever wondered how you can bring a piece of the beach into your home without lugging buckets of sand or seashells? If yes, then driftwood floral arrangements might be the perfect solution for you. They combine the natural beauty of driftwood with the vibrant elegance of flowers, offering a unique and aesthetically pleasing addition to any living space.

Driftwood Floral Arrangements

What is Driftwood?

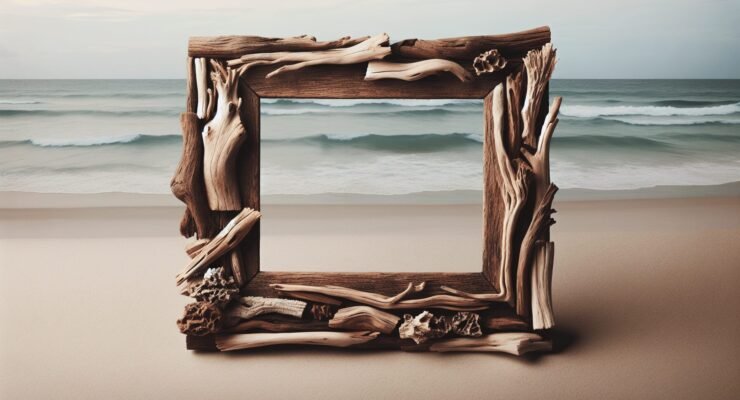
Driftwood refers to wood that has been washed onto the shore by the action of winds, tides, or waves. Over time, seawater and the elements soften the wood, giving it a uniquely weathered appearance. Driftwood has been used in various forms of art and décor for many years, and its naturally rustic charm makes it ideal for floral arrangements.

Types of Driftwood

There are various types of driftwood, each with its unique texture and color. Here are a few common types:

TypeDescription
HardwoodDurable, heavier, and often richer in color. Oak and maple are common examples.
SoftwoodLighter and often paler in color, such as pine and cedar.
Weathered WoodCharacterized by its aged, smooth appearance and may include different types of wood that have been exposed to the elements for extended periods.

Benefits of Using Driftwood

Using driftwood in your floral arrangements has several benefits:

  • Natural Aesthetic: The wood’s natural wear and tear provide a rustic, organic look that complements various floral arrangements.
  • Eco-Friendly: Repurposing driftwood is an excellent way to recycle natural materials.
  • Versatility: Driftwood can fit into different styles, from boho chic to coastal décor.

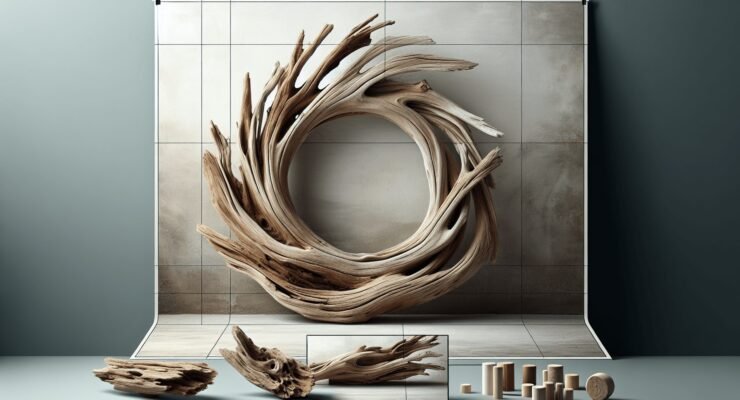
Choosing the Right Driftwood

Not all driftwood is created equal, so it’s crucial to select pieces that will work well for your intended design.

Sourcing Driftwood

You can find driftwood along beaches, lakes, and riverbeds. Remember to check local regulations about collecting driftwood as it may be protected in certain areas. Alternatively, specialized craft stores and online marketplaces also offer pre-cleaned and polished driftwood.

Selecting the Perfect Piece

When choosing driftwood, consider the following factors:

  • Size: Ensure that the size of the driftwood matches your floral arrangement.
  • Texture: Smooth or rugged textures can add different aesthetics to your arrangement.
  • Color and Shape: Choose pieces that complement the flowers and the overall design.

Preparing Driftwood

Before using driftwood in your arrangements, it’s essential to clean and prepare it properly to ensure durability and hygiene.

Cleaning Driftwood

  1. Rinse: Wash the driftwood thoroughly to remove any dirt, sand, and salt. Use a high-pressure hose if necessary.
  2. Soak: Soak the driftwood in a mixture of water and mild bleach for several hours to kill any bacteria or parasites.
  3. Rinse Again: After soaking, rinse the driftwood thoroughly to remove any bleach residue.
  4. Dry: Let the driftwood air dry completely, which may take a few days.

Sealing Driftwood

To maintain the driftwood’s appearance and durability, consider sealing it with a clear wood sealer. This step is essential if the arrangement will be in a humid environment.

Types of Driftwood Floral Arrangements

Driftwood floral arrangements can vary widely, allowing for endless creativity. Here are a few popular styles:

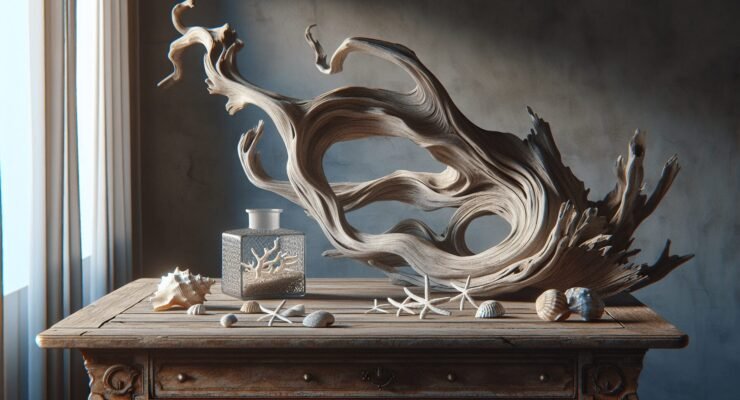
Driftwood Centerpieces

A driftwood centerpiece can serve as a stunning focal point on your dining table or coffee table. Pair a striking piece of driftwood with your favorite flowers for an eye-catching effect.

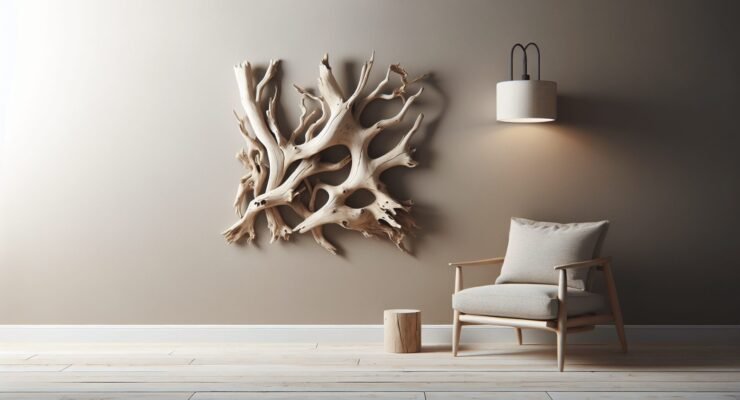
Driftwood Wall Hangings

Consider attaching small flower vases or floral foam to driftwood pieces for a beautiful wall hanging. This arrangement can serve as a unique piece of wall art.

Driftwood Terrariums

Driftwood adds an extra dimension to terrariums. Combined with succulents, air plants, and small flowers, a driftwood terrarium brings a little bit of the natural world indoors.

Driftwood Planters

Using large pieces of driftwood as planters is another creative idea. Hollow out sections of the wood to create natural containers for your plants, making your garden or indoor plant area stand out.

Driftwood Floral Arrangements

Creating Your Own Driftwood Floral Arrangement

Now that you know the basics, let’s dive into a step-by-step guide to creating your own driftwood floral arrangement.

Materials Needed

  • Selected driftwood piece
  • Fresh or artificial flowers
  • Floral foam or vases
  • Floral wire and tape
  • Pruning shears
  • Wood sealer (optional)

Step-by-Step Guide

  1. Choose Your Driftwood: Start with a clean, dry piece of driftwood that suits your aesthetic needs.
  2. Prepare the Flowers: Trim the stems of your flowers and remove any unwanted leaves.
  3. Attach Floral Foam or Vases: Secure floral foam or small vases to your driftwood using floral wire and tape.
  4. Insert Flowers: Begin arranging your flowers in the floral foam or vases, starting with larger blooms and filling in with smaller flowers and greenery.
  5. Secure the Arrangement: Use floral wire to secure any loose flowers or greenery in place.
  6. Final Touches: Step back and assess your arrangement, making any necessary adjustments to ensure balance and harmony.

Tips and Tricks for Stunning Arrangements

Creating a jaw-dropping driftwood floral arrangement requires a bit of artistry. Here are some tips to help you get started:

Color Coordination

  • Contrast is Key: Pair light-colored driftwood with vibrant flowers for a striking contrast.
  • Monochromatic Harmony: Using flowers in various shades of one color can create a harmonious and elegant look.

Balance and Symmetry

  • Asymmetry for Interest: Asymmetric designs can be more visually interesting and dynamic.
  • Even Distribution: Make sure flowers are evenly distributed to avoid any lopsidedness.

Choosing the Right Flowers

  • Seasonal Blooms: Use seasonal flowers for a fresh and current look.
  • Longevity: Consider the longevity of your flowers; some blooms last longer than others.

Maintaining Your Arrangement

To ensure your arrangement stays beautiful, follow these maintenance tips:

Caring for Fresh Flowers

  • Watering: Ensure the floral foam remains moist, as it provides water to the fresh flowers.
  • Replacing Blooms: Replace any wilted flowers promptly to keep the arrangement looking fresh.
  • Location: Keep the arrangement away from direct sunlight and heat sources to prolong the life of the flowers.

Caring for Artificial Flowers

Artificial flowers require less maintenance but occasional dusting will keep them looking their best.

Inspiring Ideas and Trends

Keeping up with the latest trends can provide inspiration for your next project. Here are some trending ideas in driftwood floral arrangements:

Minimalist Designs

Minimalism is on the rise, and a simple arrangement of driftwood and a few carefully selected flowers can make a powerful statement.

Boho Chic

Combine driftwood with a variety of wildflowers and foliage to achieve a boho-chic look that’s both relaxed and stylish.

Mixed Media

Incorporate other natural elements like shells, stones, or moss for a more layered and textured arrangement.

Conclusion

Driftwood floral arrangements are a fantastic way to bring the beauty of nature into your home. They offer limitless possibilities for creativity, combining the rustic charm of driftwood with the vibrant elegance of flowers. Whether you are a seasoned florist or a beginner, these arrangements are accessible and enjoyable to create.

By following the steps and tips outlined in this guide, you will be well on your way to creating stunning driftwood floral arrangements that will impress your friends and family, and bring a touch of the shore into your living space.

Enjoy crafting your driftwood floral arrangements and let the natural world inspire your designs!

Filed Under: Driftwood Ideas Tagged With: DIY, Driftwood, Floral Arrangements, Home Design, Natural Decorations

General Finishes Driftwood Painted Furniture

July 24, 2024 by admin

Welcome to the world of General Finishes Driftwood Painted Furniture, where timeless elegance meets modern design. With its stunning, weathered-gray finish, this line of furniture brings a touch of coastal charm and sophisticated style to any room. You’ll discover how the durable, high-quality paint transforms ordinary pieces into extraordinary statement-makers, perfect for your home decor. Whether you’re looking to refresh an old dresser or add a unique touch to a new piece, General Finishes Driftwood Painted Furniture offers versatile and beautiful solutions that will enhance your living space effortlessly. Have you ever looked at a piece of furniture and thought about how it could be transformed into a stunning centerpiece for your home? If so, you’re not alone. The art of refurbishing furniture has taken the DIY world by storm and for good reason. One of the most beloved products in this community is General Finishes Driftwood Paint—a versatile, high-quality paint that can bring new life to old and worn-out furniture.

General Finishes Driftwood Painted Furniture

What is General Finishes Driftwood Paint?

General Finishes Driftwood Paint is a water-based paint known for its superior durability and ease of use. What sets this paint apart is its chic and versatile driftwood color, which provides a beautiful, muted gray tone that can work in various decor styles, from rustic farmhouse to modern minimalist. If you’re looking to achieve a sophisticated yet understated look, this is your go-to product.

The History of General Finishes

Before diving deeper into the paint itself, it might interest you to know a little about the company behind it. General Finishes has been a trusted name in the woodworking and painting industry for over a century. Founded in 1928, this Wisconsin-based company has spent decades perfecting its formulas and earning a loyal customer base. The brand prides itself on producing environmentally friendly products without sacrificing quality, and their Driftwood Paint is no exception.

Why Choose Driftwood Paint?

You might be wondering why you should choose this particular paint over others. The answer lies in its unique features and benefits:

FeatureBenefit
Water-based formulaEasy cleanup with soap and water
Low VOCSafer for indoor use and eco-friendly
Self-leveling propertiesFew visible brush strokes, leading to a professional-looking finish
Fast drying timeLess waiting between coats and quicker project completion

Using General Finishes Driftwood Paint can save you time, effort, and money, while also allowing you to enjoy a top-quality finish.

How to Use General Finishes Driftwood Paint

To get the best results with General Finishes Driftwood Paint, you’ll need to follow a few key steps. Although the process is straightforward, paying attention to detail can make a significant difference in the final result.

Preparation

The first and most crucial step in any painting project is preparation. Your paint job will only be as good as the surface you start with.

  1. Clean the Surface: Use a damp cloth and mild soap to remove any dirt, grease, or grime. For stubborn spots, a mixture of water and vinegar can be effective.

  2. Sand the Surface: Lightly sand the surface to remove any existing finish and to create a texture that the paint can adhere to. Use fine-grit sandpaper (220 grit works well).

  3. Remove Dust: Clean the sanding dust off with a tack cloth or a damp cloth. Any leftover dust can cause imperfections in your paint job.

Priming (Optional but Recommended)

Although General Finishes Driftwood Paint is known for its excellent coverage, using a primer can ensure an even better result. A high-quality, water-based primer will seal the wood, prevent stains from bleeding through, and create an ideal surface for the paint to adhere to.

Painting

  1. First Coat: Apply a thin coat using a high-quality brush or foam roller. This paint is self-leveling, so visible brush strokes are minimized.

  2. Drying Time: Allow the first coat to dry for about 2-4 hours. Drying times can vary depending on humidity and temperature.

  3. Second Coat: Apply a second thin coat for full coverage. In most cases, two coats are sufficient. If needed, a third coat can be applied, following the same drying times.

Finishing Touches

While General Finishes Driftwood Paint is durable on its own, you may choose to apply a topcoat for added protection. General Finishes produces excellent water-based topcoats that can provide additional resistance to scratches and wear.

Creative Ideas for Using Driftwood Paint

You don’t have to limit yourself to painting just furniture. The versatility of General Finishes Driftwood Paint allows you to think outside the box.

Painted Cabinets

Updating your kitchen or bathroom cabinets can be labor-intensive and expensive if you opt for a full replacement. However, using General Finishes Driftwood Paint can be a cost-effective way to refresh these spaces. The soft gray color is perfect for creating a neutral yet elegant look.

Accent Walls

While not commonly used on walls, using Driftwood paint for an accent wall can create a stunning focal point in any room. Its unique color and finish can complement various design elements, from rustic wood furniture to sleek, modern decor.

Home Decor Items

Smaller items like picture frames, shelves, or even plant pots can get a chic makeover with Driftwood Paint. These small projects are perfect for using up leftover paint and can tie together the overall aesthetic of a room.

Outdoor Furniture

Driftwood Paint is also suitable for outdoor furniture, as long as it’s properly sealed with a water-resistant topcoat. Imagine lounging in your garden on a beautifully painted Adirondack chair, enjoying the mellow, calming tones of driftwood gray.

Troubleshooting Common Issues

Even with the best products and preparation, you might run into some issues. Here are some common problems and how to solve them:

IssueSolution
Streaky FinishMake sure you’re applying thin, even coats and allowing adequate drying time between them. Also, check your brush quality; a good brush can make a big difference.
Paint Not AdheringDouble-check your preparation process. Make sure the surface is clean and sanded properly. Applying a primer can also help with adhesion.
Bubbling or CrackingThis can happen if the previous coat wasn’t dry before applying the next one. Ensure proper drying times and consider sanding lightly between coats.

General Finishes Driftwood Painted Furniture

Frequently Asked Questions About General Finishes Driftwood Paint

Is General Finishes Driftwood Paint Safe for Indoor Use?

Yes, it is. This paint is low in volatile organic compounds (VOCs), making it safer for indoor use compared to high-VOC oil-based paints. However, it’s always a good idea to ensure good ventilation while painting.

Can I Use Driftwood Paint on Metal or Plastic?

While Driftwood Paint is primarily formulated for wood, it can be used on other surfaces if properly primed. Always use a primer suited to the material you’re painting.

How Long Does the Paint Last?

The durability of the paint will depend on the usage and location of the item. Painted indoor furniture can remain in excellent condition for years, especially if protected with a topcoat. Outdoor furniture may require occasional touch-ups or reapplication of the topcoat for optimal longevity.

Is it Necessary to Sand Between Coats?

While it’s not absolutely necessary, lightly sanding between coats can give you a smoother, more professional finish. Use fine-grit sandpaper (220 grit) for this purpose.

User Testimonials and Reviews

Still not convinced? Here’s what some users have to say about their experiences with General Finishes Driftwood Paint:

NameReview
Sarah M.“I refurbished an old dresser using Driftwood Paint, and it turned out gorgeous. The self-leveling property is a game-changer!”
John K.“I was skeptical about painting my kitchen cabinets, but Driftwood Paint made the project easy and the results were fantastic.”
Linda P.“I used this paint for an accent wall in my bedroom, and it completely transformed the space. Highly recommend!”

Conclusion

In the world of DIY and home improvement, General Finishes Driftwood Paint is a standout product. Its unique features, versatility, and ease of use make it a favorite among both amateur crafters and professional decorators. Whether you’re looking to revamp an old piece of furniture, freshen up your cabinets, or create a stunning accent wall, Driftwood Paint offers the perfect solution.

So, next time you find yourself staring at a tired piece of furniture or a dull room, consider giving General Finishes Driftwood Paint a try. With a bit of effort and creativity, you can transform any item into a beautiful, timeless piece.

Ready to start your next DIY project? Grab a can of General Finishes Driftwood Paint and make your home more beautiful, one brushstroke at a time.

Filed Under: Driftwood Ideas Tagged With: DIY, Driftwood, General Finishes, home decor, Painted Furniture

Driftwood Frame

July 24, 2024 by admin

Welcome to the world of rustic charm with your very own driftwood frame! Crafted from beautifully weathered pieces of driftwood, this unique and eco-friendly decor piece effortlessly brings the calming essence of the beach right into your home. Displaying your cherished memories in a driftwood frame adds a touch of natural beauty and coastal flair to any room. Whether you’re framing family photos, stunning landscapes, or even your own artwork, this driftwood frame promises to be a delightful addition to your space, radiating warmth and inviting vibes. Have you ever looked at a piece of driftwood on the beach and wondered how you could turn it into something beautiful for your home? If so, you’re not alone. Many people are drawn to the unique textures and shapes of driftwood, which can be transformed into stunning works of art. In this article, we’ll dive into the world of driftwood frames, discussing their appeal, how you can make one yourself, and ways to incorporate them into your home décor.

Driftwood Frame

What is Driftwood?

Driftwood is wood that has been washed onto the shore by the action of waves, tides, or wind. The journey through various natural elements gives driftwood its unique, weathered appearance, marked by smooth surfaces, unusual shapes, and rich textures. This natural process often strips the wood of bark and finishes, leaving behind a raw, organic look that is incredibly appealing for home décor.

Types of Driftwood

While all driftwood shares some common characteristics, there are several types that you might encounter:

TypeCharacteristics
Softwood DriftwoodGenerally lighter and easier to shape.
Hardwood DriftwoodHeavier, more durable, and robust.
Root DriftwoodOften intricate, with tangled roots and tendrils.
Branch DriftwoodStraight or slightly crooked, suitable for frames.

Knowing the type of driftwood you’re working with can help you choose the best pieces for your project.

Why Driftwood Frames?

So, why are driftwood frames so popular? The answer lies in their rustic charm and the story they tell. Driftwood frames bring a touch of nature into your home and can complement various styles—from coastal to rustic chic. Plus, they are an eco-friendly way to repurpose natural materials that would otherwise go to waste.

Gathering Driftwood

Before you can start crafting your driftwood frame, you need to gather your materials. This is often one of the most enjoyable parts of the project, as it involves spending time outdoors and exploring beautiful places.

Best Locations

Driftwood can be found in various locations, but certain spots are more likely to yield high-quality pieces. Here are some suggestions:

  • Beaches: Look for driftwood along the shorelines, especially after a storm.
  • Riverbanks: River currents can carry wood downstream, depositing it along the banks.
  • Lakeshores: Similar to rivers, lakes can also be great places to find driftwood.

Legal Considerations

Before you start collecting, it’s important to know the rules and regulations regarding the removal of driftwood in your area. Some places have restrictions in place to protect the environment, so always check with local authorities.

Tips for Collecting

Here are some tips to ensure you gather the best driftwood:

  1. Look for Quality Wood: Choose pieces that are sturdy and free of rot.
  2. Select Various Sizes: Having a range of sizes can help you create a more interesting and dynamic frame.
  3. Consider the Shape: Think about how the shape of each piece will fit together in your frame.

Preparing Driftwood

Once you’ve gathered your driftwood, it’s time to prepare it for crafting. This step is crucial to ensure your frame is clean, safe, and durable.

Cleaning

Driftwood often carries salt, sand, and small organisms, so it needs a thorough cleaning. Here’s how to do it:

  1. Rinse: Use a hose to rinse off sand and debris.
  2. Scrub: Use a brush and mild detergent to scrub the wood.
  3. Soak: Soak the wood in a mixture of water and bleach (1:9 ratio) for 24 hours to kill any remaining organisms.

Drying

After cleaning, the wood needs to dry completely:

  1. Rinse Again: Rinse the wood thoroughly to remove any bleach residue.
  2. Air Dry: Let the wood dry in a well-ventilated area. This can take several days depending on the humidity and temperature.

Sanding

Sanding helps to smooth out rough edges and prepare the wood for assembly:

  1. Coarse Sandpaper: Start with coarse sandpaper to remove larger imperfections.
  2. Fine Sandpaper: Finish with fine sandpaper to achieve a smooth surface.

Crafting Your Driftwood Frame

Now that your driftwood is prepared, you’re ready to start crafting your frame. This process can be as simple or as complex as you like, depending on your skill level and the tools you have available.

Tools and Materials

Before you begin, make sure you have the following:

  • Driftwood Pieces: Various sizes and shapes.
  • Saw: For cutting the wood to size.
  • Sandpaper: For smoothing edges.
  • Wood Glue: For assembling the frame.
  • Clamps: To hold pieces together while the glue dries.
  • Backing Board: For the back of the frame.
  • Glass Insert: If you want to protect the artwork or photo.
  • Hanging Hardware: To mount your frame on the wall.

Step-by-Step Instructions

  1. Design Your Frame: Lay out the pieces in the shape you want for your frame. Take time to arrange them in a way that looks balanced and aesthetically pleasing.
  2. Cut to Size: Use a saw to cut the pieces to the desired lengths. Make sure the cuts are straight.
  3. Sand the Ends: Sand the ends of the cut pieces to ensure they fit together smoothly.
  4. Glue and Clamp: Apply wood glue to the ends and clamp the pieces together. Let them dry for at least 24 hours.
  5. Attach Backing Board: Once the frame is dry, attach the backing board using glue or small nails.
  6. Insert Glass and Artwork: If you’re using a glass insert, place it in the frame, followed by your artwork or photo.
  7. Add Hanging Hardware: Attach the hanging hardware to the back of the frame.

Driftwood Frame

Decorating with Driftwood Frames

A driftwood frame can be a stunning addition to various rooms in your home. Here are some ideas on how to incorporate them into your décor:

Living Room

Place a large driftwood frame above the fireplace or sofa. Choose a piece of artwork or a family photo that complements the rustic theme.

Bedroom

Use smaller driftwood frames on your bedside tables or as part of a gallery wall. They add a touch of warmth and coziness to the room.

Bathroom

Driftwood frames can bring a spa-like feel to your bathroom. Use them for mirrors or as a unique way to display shells and other beachcombing finds.

Entryway

Create a memorable first impression by hanging a driftwood frame in your entryway. It sets a welcoming tone and introduces guests to your style.

Caring for Your Driftwood Frame

To keep your driftwood frame looking its best, a little care goes a long way.

Regular Dusting

Dust your frame regularly with a soft cloth to keep it looking clean.

Avoid Direct Sunlight

Prolonged exposure to direct sunlight can cause driftwood to fade. Try to place your frame in a spot with indirect light.

Sealing

If you want to protect your frame from the elements, consider applying a clear wood sealant. This step can help preserve the color and texture of the wood.

Benefits of Using Driftwood Frames

Choosing driftwood frames offers several benefits beyond their aesthetic appeal:

Eco-Friendly

Using driftwood is a great way to recycle natural materials and reduce waste. It’s a sustainable choice for environmentally-conscious decorators.

Unique Design

No two pieces of driftwood are the same, which means every frame is a one-of-a-kind work of art.

Versatile

Driftwood frames can complement a variety of décor styles, from beachy and coastal to rustic and farmhouse.

Cost-Effective

If you live near a coastline or river, collecting driftwood can be a free or low-cost way to create beautiful home décor.

Conclusion

Creating a driftwood frame is a rewarding DIY project that allows you to bring a piece of the natural world into your home. Whether you’re an experienced crafter or a beginner, this project offers the opportunity to express your creativity while making a unique and eco-friendly decoration. By following the steps outlined in this article, you’ll be able to craft a driftwood frame that truly reflects your style and adds a touch of rustic charm to any space. So, the next time you find yourself wandering along a beach or riverbank, keep an eye out for driftwood—you never know what kind of beautiful creation it might inspire.

Filed Under: Driftwood Ideas Tagged With: craft, DIY, Driftwood, Frame, Rustic

Driftwood Furniture

July 24, 2024 by admin

Driftwood Furniture offers a unique blend of natural beauty and creative craftsmanship, transforming pieces of driftwood into stunning furniture and decor that bring a touch of the ocean’s charm into your home. As you explore the elegant designs and innovative techniques, you’ll discover how each piece invites the serenity of the shoreline into your living space, creating a warm and inviting atmosphere. Have you ever looked at a piece of driftwood and wondered about its potential to be transformed into something beautiful and functional for your home? If so, you’re not alone. Driftwood furniture has become increasingly popular as both a creative project and a stylish addition to any living space. It brings an element of nature indoors and provides a rustic, seaside charm that is both appealing and unique.

Driftwood Furniture

What is Driftwood?

Driftwood is wood that has been washed ashore by the action of waves, tides, and wind. It can come from a variety of trees and plants and has been naturally weathered by the elements. This gives each piece of driftwood its own unique shape, texture, and sometimes even color. Unlike regular lumber, which is cut and shaped into uniform dimensions, driftwood offers endless opportunities for creative expression.

Origin and Types

Driftwood is commonly found along shorelines, riverbanks, and lakes. It can originate from various sources:

  • Tree Branches: Often, parts of trees break off due to storms or erosion and find their way into water bodies.
  • Logs: Larger pieces of driftwood can be sections of tree trunks or larger branches.
  • Roots: In some cases, you may find intricate and twisted root systems.

Each type offers different possibilities when it comes to making furniture. The key is to select pieces that fit your project’s design and dimensions.

Benefits of Using Driftwood

Choosing to work with driftwood for your furniture projects comes with numerous benefits:

  1. Eco-Friendly: Using driftwood is an excellent way to recycle natural resources.
  2. Unique Aesthetics: Each piece of driftwood is one-of-a-kind.
  3. Cost-Effective: Driftwood can often be sourced for free if you know where to look.
  4. Lightweight: Despite its durability, driftwood tends to be lighter than other types of wood.

The Appeal of Driftwood Furniture

Driftwood furniture stands out for its aesthetic charm and versatility. Here’s why it’s capturing the hearts of DIY enthusiasts and designers alike.

A Unique Look

No two pieces of driftwood furniture are the same. The natural weathering process crafts each piece of wood into a work of art, complete with unique grains, textures, and shapes. This uniqueness ensures that any furniture you create is a true original.

Versatility

Driftwood can be transformed into various kinds of furniture. From coffee tables and stools to bed frames and shelves, the possibilities are virtually endless. It can fit into many different interior design styles, including:

  • Coastal: Perfect for beach homes or rooms with a seaside theme.
  • Rustic: Complements a farm-style or country-inspired decor.
  • Modern: Oddly enough, driftwood can add a striking contrast to sleek, contemporary designs.

Easy to Work With

Driftwood is generally easy to shape and join, making it a favorite among both novice and experienced woodworkers. With a few tools and a bit of creativity, you can create stunning pieces.

Gathering and Preparing Driftwood

Before you can start building furniture, you need to gather and prepare your driftwood. This process ensures that your materials are clean and suitable for use in your home.

Where to Find Driftwood

Driftwood can be found in several natural settings. Here are a few places to look:

  1. Beaches: Coastal areas are the most common places to find driftwood.
  2. Lakeshores: Lakes often have driftwood along their margins.
  3. Riverbanks: Rivers can carry wood for long distances, depositing it along their banks.

Remember to check local regulations before gathering driftwood, as some areas may have restrictions to protect natural habitats.

Cleaning and Treating Driftwood

Once you’ve gathered your driftwood, it’s important to clean and treat it to ensure it’s safe and long-lasting.

Cleaning Steps:

  1. Rinse Thoroughly: Use a hose to wash off any salt, sand, or dirt from the wood.
  2. Soak in Fresh Water: Place the driftwood in a large tub of fresh water for several days to remove salt and other impurities.
  3. Scrub: Use a brush to scrub away any remaining dirt or debris.

Drying and Treating:

  1. Sun-Dry: Allow the driftwood to dry in direct sunlight. This process can take several days to several weeks, depending on the size of the wood.
  2. Kiln-Dry (Optional): For faster results, you can opt to dry the wood in a kiln.
  3. Seal: Apply a wood sealer to protect the driftwood from future decay and pests.

Creating Driftwood Furniture

Now that your driftwood is prepared, you can start creating furniture. Below, we’ll outline the steps for making some popular driftwood pieces.

Driftwood Coffee Table

A driftwood coffee table can be a stunning centerpiece for your living room. Here’s how to make one.

Materials Needed:

  • Driftwood pieces
  • Tabletop (glass or reclaimed wood)
  • Wood glue or epoxy
  • Screws and a drill

Steps:

  1. Plan Your Design: Sketch out your coffee table design, considering the sizes and shapes of your driftwood pieces.
  2. Assemble the Base: Lay out the driftwood pieces to create the table’s base. Use epoxy or wood glue to join the pieces together.
  3. Attach the Tabletop: Secure the tabletop to the driftwood base using screws or adhesive.
  4. Finish: Apply any finishings such as sanding rough edges or adding a sealant for extra durability.

Driftwood Shelves

Driftwood shelves can add a rustic touch to any room. They’re functional and aesthetically pleasing.

Materials Needed:

  • Driftwood planks or branches
  • Brackets
  • Screws and a drill

Steps:

  1. Select Driftwood: Choose pieces that are relatively flat and long enough to serve as shelves.
  2. Clean and Treat: Ensure your chosen driftwood pieces are clean and dry.
  3. Install Brackets: Secure the brackets to your wall, ensuring they are level.
  4. Mount Shelves: Place the driftwood planks on the brackets and screw them into place for stability.

Driftwood Bed Frame

Creating a driftwood bed frame can be more complex but highly rewarding. It’s perfect for adding a natural touch to your bedroom.

Materials Needed:

  • Large driftwood logs or branches
  • Drill and screws
  • Measuring tape

Steps:

  1. Measure Your Bed: Determine the dimensions of your bed to ensure your frame will fit.
  2. Cut the Driftwood: Cut the driftwood to match the dimensions of the bed. Ensure the pieces are robust enough to support weight.
  3. Assemble Frame: Use screws to join the pieces, creating a sturdy frame.
  4. Secure: Add additional support beams if necessary to ensure the bed frame is stable.

Driftwood Furniture

Maintaining Driftwood Furniture

Like any natural material, driftwood requires some care to keep it looking its best. Here are some tips for maintaining your driftwood furniture.

Regular Cleaning

Regular cleaning will help keep your driftwood furniture looking pristine. Dust your furniture regularly and wipe it down with a slightly damp cloth as needed.

Avoid Excess Moisture

While driftwood is generally more resistant to moisture than other woods, it’s still important to avoid exposing it to excessive humidity or water. Use coasters to protect surfaces and avoid placing driftwood furniture in overly damp environments.

Reapply Sealant

Depending on the sealant you used, you may need to reapply it periodically to maintain the wood’s protection. Check the manufacturer’s guidelines for the best results.

Driftwood Furniture Ideas

If you’re looking for some inspiration, here are a few more ideas for creating driftwood furniture:

Furniture PieceDescription
Driftwood LampsUse driftwood as the base for a lamp, either standing or table-style.
Mirrors with Driftwood FramesFrame a mirror with small pieces of driftwood for a coastal look.
Driftwood ChairsCraft chair frames from sturdy pieces of driftwood for unique seating.
Outdoor FurnitureCreate benches, planters, or garden swings using larger driftwood logs.

Driftwood Furniture in Interior Design

Incorporating driftwood furniture into your interior design can elevate the ambiance of any space. Here are some tips for seamlessly integrating driftwood pieces into various design styles.

Coastal Living

If you’re going for a coastal theme, pairing driftwood furniture with light, neutral colors and nautical elements can create a serene, beach-like environment. Think blues, whites, and sandy beiges to complement the wood’s natural tones.

Rustic Charm

For a rustic setting, driftwood’s natural wear and rugged texture are perfect. Combine it with other rustic elements like stone, leather, and antique accessories to bring warmth and character to your space.

Modern Minimalism

Surprisingly, driftwood can also work in modern, minimalist designs. Its organic, irregular forms contrast beautifully with sleek, clean lines and monochromatic color schemes.

Conclusion

Driftwood furniture is not only a way to bring a touch of nature into your home, but it also allows for limitless creativity and customization. Whether you’re an experienced woodworker or a DIY beginner, there’s a driftwood project out there for you. By carefully selecting, preparing, and assembling your driftwood, you can create unique pieces that are both functional and decorative.

So next time you find yourself wandering along the beach, keep an eye out for those beautiful pieces of driftwood. They just might be the perfect ingredient for your next home furniture project. Happy crafting!

Filed Under: Driftwood Ideas Tagged With: DIY, furniture, Interior Design, Rustic

Driftwood Epoxy Table

July 23, 2024 by admin

Creating your own Driftwood Epoxy Table is an exciting journey that combines the raw beauty of nature with the sleek elegance of modern design. Imagine the satisfaction of transforming natural driftwood into a stunning centerpiece for your living room. This article will guide you through each step, offering tips and tricks to ensure your project is both enjoyable and successful. From selecting the perfect piece of driftwood to applying the epoxy resin flawlessly, you’ll learn everything you need to know to craft a unique table that’s sure to impress. So, roll up your sleeves and get ready to bring a touch of nature into your home with your very own handmade masterpiece. Have you ever wanted to bring a touch of the seaside into your home, combining the raw beauty of driftwood with the modern elegance of epoxy? If so, a driftwood epoxy table could be the perfect project for you! Whether you’re a seasoned woodworker or a curious DIY enthusiast, you’ll find the journey both rewarding and surprisingly manageable.

Driftwood Epoxy Table

What Is a Driftwood Epoxy Table?

A driftwood epoxy table is a stunning piece of furniture that merges the rustic charm of driftwood with the contemporary sleekness of epoxy resin. This type of table is unique because it often features pieces of driftwood encased in clear or colored epoxy, creating the illusion that the wood is floating or suspended within the table itself.

Why Choose Driftwood?

Driftwood is naturally weathered wood that has spent a significant amount of time in the water. Its distinctive look and unique texture make it a sought-after material for various decorative projects, especially furniture. Driftwood carries a bit of history with it, making each piece entirely unique.

Why Use Epoxy Resin?

Epoxy resin is a versatile material that, when cured, forms a hard, clear, and durable surface. It brings out the natural beauty of the wood while providing a high-gloss finish. Epoxy resin is also incredibly durable, making it ideal for use in furniture that will experience everyday wear and tear.

Benefits of a Driftwood Epoxy Table

Choosing to build a driftwood epoxy table offers several advantages:

  1. Uniqueness: No two pieces of driftwood are the same, and the epoxy allows for endless customization.
  2. Durability: Epoxy resin provides a tough, damage-resistant surface.
  3. Aesthetic Appeal: The combination of driftwood and epoxy resin creates a stunning visual contrast.
  4. Conversation Piece: This type of table is often a focal point of any room due to its distinctive look.

Materials You Will Need

To get started on your driftwood epoxy table, you’ll need the following materials:

MaterialPurpose
DriftwoodMain aesthetic element
Epoxy ResinTo encapsulate the driftwood and form the table surface
Mold/FrameTo hold the epoxy and wood in place while it cures
Mixing CupsFor measuring and mixing the epoxy resin
Stir SticksFor mixing the resin and hardener
Safety GearGloves, goggles, and respirator for protection
SandpaperFor smoothing the finished surface
Release AgentTo prevent the epoxy from sticking to the mold
LevelTo ensure the table is even
Heat GunTo remove bubbles from the epoxy

Step-by-Step Guide

Step 1: Gathering Your Driftwood

First things first, you need to source your driftwood. You can find driftwood at beaches, lakeshores, or even purchase it from stores and online vendors. Look for pieces that are dry, relatively clean, and free of rot.

Step 2: Preparing the Driftwood

Before you start working with your driftwood, make sure it is thoroughly cleaned and dried. Use a wire brush to remove any dirt, and wash it with mild soap and water. Allow it to dry completely, which may take several days.

Step 3: Designing Your Table

Sketch out a design for your table. Decide how you want the driftwood to be arranged and the size and shape of your table. This is your chance to get creative! You can build a simple rectangular table, a round coffee table, or even an intricate design.

Step 4: Building the Mold

Construct a mold using plywood or MDF (Medium Density Fiberboard) to hold the epoxy in place while it cures. Line the inside of your mold with a release agent, such as packing tape or a commercial mold release spray, to prevent the epoxy from sticking.

Step 5: Arranging the Driftwood

Place your cleaned, dried driftwood pieces into the mold according to your design. Make sure to secure the driftwood, as it might float when you pour the epoxy resin.

Step 6: Mixing the Epoxy Resin

Follow the manufacturer’s instructions to mix the epoxy resin and hardener in the correct ratio. Use your mixing cups and stir sticks to ensure a thorough mix. Make sure to wear your safety gear during this process, as the chemicals can be hazardous.

Step 7: Pouring the Epoxy Resin

Slowly pour the mixed epoxy resin into the mold, starting from one end and working your way across. This helps to minimize air bubbles. Use a heat gun to eliminate any bubbles that do form by gently waving it over the surface of the resin.

Step 8: Letting It Cure

Allow the epoxy to cure according to the manufacturer’s instructions. This usually takes about 24-72 hours. Make sure your work area is level, as you don’t want the epoxy to set unevenly.

Step 9: Sanding and Finishing

Once the epoxy has fully cured, remove the table from the mold. Sand the surface with fine-grit sandpaper to remove any imperfections and achieve a smooth finish. You can polish the table to bring out a high-gloss shine or apply a finish of your choice.

Step 10: Attaching Legs

If you haven’t already, now is the time to attach legs to your table. You can purchase pre-made legs or build your own, depending on your design and skill level. Make sure they are securely attached and your table is stable.

Driftwood Epoxy Table

Tips for Success

  • Work in a Ventilated Area: Epoxy resin fumes can be potent.
  • Measure Accurately: Precise measurements ensure the epoxy cures properly.
  • Take Your Time: Rushing can lead to mistakes or imperfections in the epoxy.
  • Level Ground: Ensure your mold sits on a flat, level surface to avoid uneven curing.
  • Safety Gear: Always wear gloves, goggles, and a respirator.

Common Mistakes and How to Avoid Them

Mistake 1: Bubbles in Epoxy

Bubbles can ruin the look of your table. Use a heat gun or torch to pass over the surface of the epoxy after pouring to remove bubbles.

Mistake 2: Poor Wood Preparation

Not cleaning and drying the driftwood properly can cause issues with the epoxy bond. Ensure your driftwood is thoroughly prepared before encapsulating it in epoxy.

Mistake 3: Improper Mixing

Not following the correct resin-to-hardener ratio can result in an epoxy that doesn’t cure properly. Always measure and mix according to the instructions.

Mistake 4: Inadequate Mold Release

If you forget to apply a release agent to your mold, your table may stick to it. Line your mold well to prevent this.

Creative Variations

One of the best things about making a driftwood epoxy table is the sheer range of creative possibilities. Here are some ideas to inspire you:

Color Pigments

Add color pigments to your epoxy resin to create a vivid or translucent effect. Colors like blue or turquoise can impart a beach-like feel that complements the driftwood.

Embedded Objects

Consider embedding objects such as shells, stones, or even small trinkets into the epoxy resin to add more visual interest.

LED Lighting

For a truly unique piece, consider adding LED lights within the epoxy. This can create a mesmerizing effect, especially in low light settings.

Sustainable Practices

Using repurposed driftwood is an excellent way to embrace sustainability in your DIY projects. Here are some ways to make your project even more eco-friendly:

  • Local Sourcing: Collect driftwood locally to minimize your carbon footprint.
  • Eco-Resin: Choose eco-friendly epoxy resins that are less harmful to the environment.
  • Recycled Materials: Use reclaimed wood or recycled materials wherever possible.

Frequently Asked Questions

How Long Does It Take to Make a Driftwood Epoxy Table?

The entire process, from preparing your driftwood to the final touches, can take around one to two weeks. This timeline can vary depending on factors like drying times, curing times for the epoxy, and your level of experience.

Can I Use Any Type of Epoxy Resin?

Not all epoxy resins are the same. Look for those specifically labeled for casting and deep pour projects. These types are designed to cure well even in thicker layers, reducing the risk of overheating.

How Do I Maintain My Driftwood Epoxy Table?

To keep your table in tip-top shape, regularly clean it with a soft cloth. Avoid harsh chemicals and always use coasters to prevent scratches and stains.

Conclusion

By following this comprehensive guide, you can create a beautiful and unique driftwood epoxy table that will be a standout piece in any room. The combination of rustic driftwood and glossy epoxy resin is stunning and timeless. Plus, every table you make will carry its own unique character and history, making it much more than just a piece of furniture. So grab your materials and let your creativity flow – the perfect driftwood epoxy table is waiting for you!

Filed Under: Driftwood Ideas Tagged With: DIY, Driftwood, Epoxy, Handmade, Table

Driftwood Decor Ideas

July 21, 2024 by admin

Welcome to “Driftwood Decor Ideas”! Imagine transforming your space with the rustic charm of driftwood, turning weathered pieces into beautiful decor that captures the essence of coastal living. Whether you’re looking to create a stunning centerpiece, craft unique wall art, or design functional furniture, this guide will provide you with inspiring ideas and practical tips. Dive into the world of driftwood decor and discover how you can effortlessly bring nature’s beauty into your home, creating a warm and inviting atmosphere. Let’s get started on your creative journey with driftwood decor! Have you ever strolled along a beach, picked up a piece of driftwood, and wondered how you could use it in your home decor? Driftwood, with its natural, rustic charm, offers endless possibilities for creating unique and stylish decor pieces. Whether you have a seaside home or just want to bring a touch of the coast to your space, incorporating driftwood into your decor can add warmth, character, and a sense of history to any room.

Why Choose Driftwood Decor?

Driftwood has become an increasingly popular choice for home decor, and it’s easy to see why. It embodies the natural, weathered look that many interior designers and homeowners find appealing. Plus, using driftwood can be a sustainable choice if you’re upcycling wood that’s been naturally aged and shaped by the elements.

Sustainability

One of the most compelling reasons to use driftwood in your home decor is sustainability. This wood has already served its time in nature and is typically collected from beaches where it might otherwise go unused or become waste. By incorporating driftwood into your decor, you’re giving it a new life and reducing the need for newly manufactured items.

Unique Aesthetic

Every piece of driftwood is unique. Its irregular shape, texture, and color variations are the result of natural processes, and no two pieces are exactly the same. This makes driftwood a perfect material for adding a distinctive touch to your home.

Driftwood Decor Ideas for Different Spaces

Living Room

The living room often serves as the heart of the home, making it a perfect place to showcase your driftwood decor.

Driftwood Coffee Table

A driftwood coffee table can be a stunning focal point in your living room. You can either purchase or make your own by attaching a glass top to a sturdy piece of driftwood. The combination of glass and wood creates a modern yet earthy look.

Wall Art

Turn pieces of driftwood into beautiful wall art. You can arrange smaller pieces in a frame to create a driftwood mosaic, or use larger pieces to create a dramatic statement piece. Add some paint or stain to the wood to match your existing color scheme if you like.

Driftwood Art IdeasDescription
Driftwood MosaicArrange smaller pieces in a frame or on a board to create a unique pattern.
Statement PieceUse larger pieces to make a focal point on your wall.
Painted DriftwoodAdd color using paint or stain to match your decor.

Bedroom

Your bedroom is your sanctuary, so why not add some natural elements to make it even more relaxing?

Headboard

A driftwood headboard can add a rustic yet elegant touch to your bedroom. You can attach large pieces of driftwood together or use a single large piece as a headboard. This creates a dramatic backdrop for your bed and adds texture to the room.

Bedside Lamps

Transform driftwood into the base of a bedside lamp. The natural shape of the wood works well with a simple lampshade. This can be a fun DIY project if you enjoy crafting.

Kitchen

The kitchen is another great space to incorporate driftwood for a touch of natural beauty.

Shelving

Use driftwood to create open shelves in your kitchen. These shelves can be used to display dishes, cookbooks, or decorative items. The wood’s natural texture and color pair well with both modern and rustic kitchen designs.

Cutting Boards

Driftwood can even be used to make cutting boards. While this requires some woodworking skills, a driftwood cutting board can be a functional and beautiful addition to your kitchen.

Bathroom

Driftwood can add a spa-like feel to your bathroom, turning it into a calming retreat.

Mirrors

Frame your bathroom mirrors with pieces of driftwood. This can make a standard mirror look custom and high-end. The contrasting textures of the mirror and wood create a balanced look.

Towel Racks

Craft a towel rack from a piece of driftwood. This simple addition can add a significant amount of charm to your bathroom. You can use hooks or rings to hang the towels on the driftwood.

Driftwood Decor Ideas

DIY Driftwood Projects

If you’re a fan of DIY projects, driftwood can be an exciting material to work with. Here are some step-by-step ideas to get you started.

Driftwood Candle Holders

Materials Needed:

  • Small pieces of driftwood
  • Drill with a large bit
  • Tea light candles

Steps:

  1. Select Driftwood: Choose pieces of driftwood that are relatively flat and stable.
  2. Drill Holes: Use the drill to make holes for the tea lights. Make sure the holes are large enough but not too deep.
  3. Insert Candles: Place the tea lights into the holes. Adjust as needed to ensure they fit snugly.

Driftwood Plant Hangers

Materials Needed:

  • Long pieces of driftwood
  • Rope or twine
  • Hanging plants

Steps:

  1. Select Driftwood: Choose sturdy, long pieces of driftwood.
  2. Attach Rope: Tie the rope securely around each end of the driftwood.
  3. Hang Plants: Attach the plants to the rope and hang them at your desired height.

Caring for Driftwood Decor

To maintain the natural beauty of your driftwood decor, it’s important to take proper care of it.

Cleaning

Regular dusting can keep your driftwood looking fresh. If it gets particularly dirty, you can clean it with a damp cloth but avoid soaking it, as too much moisture can cause the wood to weaken.

Sealing

To protect your driftwood, consider applying a sealant. This can help to preserve the wood and enhance its natural color. Use a clear, matte finish for a natural look, or a glossy finish if you prefer a shinier appearance.

Driftwood Decor Ideas

Where to Find Driftwood

Beachcombing

One of the best ways to find driftwood is to go beachcombing. Walk along the shoreline and look for pieces that catch your eye. Just be sure to check local regulations regarding the collection of driftwood, as some areas may have restrictions.

Specialty Stores

If beachcombing isn’t an option, there are many stores that specialize in selling driftwood. These can be found both online and in some physical stores. This is a convenient way to find the perfect pieces for your projects.

DIY Retailers

Some DIY and craft stores also sell driftwood. This can be a good option if you’re looking for specific sizes or shapes for your projects.

Driftwood Decor in Different Design Styles

Driftwood isn’t just for coastal or rustic decor. It can be incorporated into a variety of design styles.

Modern

In modern interiors, driftwood can add a touch of warmth and texture. Look for pieces with clean lines and pair them with sleek furniture and minimalist decor.

Scandinavian

Scandinavian design often features natural materials, making driftwood a perfect fit. Combine driftwood with light, neutral colors and simple, functional furniture for a cozy, inviting space.

Bohemian

Bohemian decor celebrates individuality and creativity, making driftwood a great addition. Mix it with colorful textiles, eclectic art, and plenty of plants for a vibrant, personal look.

Conclusion

Using driftwood in your home decor is a fantastic way to bring a touch of nature indoors. Whether you create your own DIY projects or purchase ready-made pieces, driftwood can add warmth, character, and a unique flair to your space. So, next time you’re near the ocean or thinking about freshening up your home, consider the timeless beauty and endless possibilities of driftwood decor. Happy decorating!

Filed Under: Driftwood Ideas Tagged With: craft ideas, DIY, Driftwood, Interior Design, Natural Decor

Driftwood Decor Wall

July 20, 2024 by admin

If you’re looking to bring the serenity of the seaside into your home, a Driftwood Decor Wall might just be your ticket to creating a calming and unique living space. By incorporating pieces of naturally weathered wood, you’ll add an earthy, rustic charm that effortlessly ties together the beauty of nature and the comfort of coastal living. Whether it’s in your living room, bedroom, or even a cozy reading nook, a Driftwood Decor Wall can serve as a stunning focal point, sparking conversations and exuding a sense of tranquility. So, get ready to transform your walls into storytelling canvases with the timeless elegance of driftwood. Have you ever walked along the beach and marveled at the way the sand, sea, and sky blend into a picture-perfect view? What if I told you that you could bring a piece of that natural beauty into your home with a driftwood decor wall?

Driftwood Decor Wall

Driftwood Decor Wall: Bringing Nature Inside

Creating a driftwood decor wall allows you to capture the essence of the beach and incorporate it into your home. Whether you’re a fan of beach chic, rustic charm, or modern minimalism, driftwood can bring a touch of natural elegance to any interior. Let’s explore how you can craft your own driftwood decor wall and enjoy the beauty of nature every day.

What is Driftwood?

Driftwood refers to wood that has been washed onto the shore by rivers, lakes, or the ocean. Over time, exposed to the elements, the wood becomes weathered, creating unique textures and colors that make each piece one-of-a-kind.

Why Choose Driftwood for Decor?

Choosing driftwood for your decor isn’t just about aesthetics. Here are some compelling reasons why driftwood can be a fantastic addition to your home:

  • Eco-Friendly: Using driftwood helps to recycle and repurpose natural materials that would otherwise go to waste.
  • Unique Appearance: Each piece of driftwood has its own unique texture, color, and shape, ensuring your wall is a true original.
  • Versatility: Driftwood can complement a range of interior styles from modern to rustic to coastal.
  • Easy to Work With: Driftwood is relatively lightweight and easy to cut, making it suitable for DIY projects.

Getting Started: Planning Your Driftwood Decor Wall

Inspiration and Design

Before you dive in, start by gathering some inspiration. Use Pinterest, home decor magazines, or even visit a local beach to collect ideas. Think about the vibe you want to create—do you prefer a full wall covered in driftwood slats, or maybe a more subtle design with driftwood accents?

Materials You’ll Need

To create a driftwood decor wall, you’ll need the following:

MaterialPurpose/Reason
DriftwoodMain material for the wall
Wood GlueTo adhere driftwood pieces to the wall
Nails and HammerFor additional support and security
SawTo cut driftwood to the desired size
SandpaperTo smooth out rough edges
Measuring TapeTo ensure accurate measurements
LevelTo keep the driftwood pieces straight
Paint/Stain (Optional)To customize the look of your driftwood
Safety GearGloves and goggles to protect yourself

Selecting the Right Driftwood

Collecting driftwood can be an adventure in itself! When choosing pieces, look for variety in shape and texture but ensure they are sturdy enough to work with. If collecting from the wild, check local regulations to ensure it’s allowed and safe. You can also purchase driftwood from craft stores if needed.

Preparing Driftwood for Use

Cleaning the Driftwood

Driftwood often comes with salt, sand, and algae. Clean it by soaking it in a mixture of water and bleach (approximately a 1:9 ratio of bleach to water) to sanitize it. Let it soak for a day, then scrub and rinse with clean water. Allow it to dry completely for a week or so.

Cutting and Sanding

Once the driftwood is clean and dry, you can start preparing it for installation. Measure and cut the pieces to the sizes needed for your design using a saw. Sand any rough edges to avoid splinters and ensure a smooth finish.

Optional: Staining or Painting

If you want to customize the color of your driftwood, you can stain or paint it. Many prefer the natural look, but adding a stain can highlight the wood’s grain or help it match other decor elements.

Installing Your Driftwood Decor Wall

Prepping the Wall

Before attaching the driftwood, prepare your wall. Ensure it is clean and dry. If you’re covering a whole wall, you might want to paint the wall a neutral color that complements the driftwood.

Laying Out the Design

Lay out your pieces on the floor before starting installation to get a sense of the final look. This will help you visualize the placement and make adjustments easily.

Attaching the Driftwood

  1. Starting Point: Begin at the bottom and work your way up. This helps to better manage any irregularities in the driftwood.
  2. Adhesion: Apply wood glue to the back of each piece and press it against the wall. Use a level to ensure each piece is straight.
  3. Additional Support: Use nails or screws for additional support. Position nails at both ends of each driftwood piece for stability.
  4. Final Touches: Once all pieces are in place, do a final check to ensure everything is secure.

Creative Driftwood Decor Ideas

Frames and Mirrors

Incorporate driftwood into frames for pictures or mirrors. Simply glue pieces of driftwood around the edges to create a rustic, beach-inspired look.

Shelves and Mantelpieces

Create simple and functional shelves with larger pieces of driftwood. They can serve as unique mantelpieces or standalone shelves in any room.

Wall Art

Craft wall art by arranging smaller pieces of driftwood into shapes or patterns. You can use additional materials like shells or pebbles to enhance the design.

Driftwood Signage

Turn driftwood into creative signage. Use paint or wood-burning tools to write inspirational quotes, family names, or directional signs.

Maintaining Your Driftwood Decor Wall

Regular Cleaning

Driftwood is relatively easy to maintain. Dust the wall regularly with a dry cloth to keep it looking fresh. Avoid using harsh chemicals as they can damage the wood.

Addressing Wear and Tear

Over time, some pieces may loosen. Check periodically and reapply wood glue or nails as needed to maintain the integrity of the wall.

Conclusion: Embrace the Beauty of Driftwood

Creating a driftwood decor wall is an enriching project that brings a sense of tranquility and natural beauty into your home. From collecting the driftwood to designing and installing your masterpiece, each step is a chance to connect with nature and express your creativity. So, why not take the plunge? Bring the coast to your living room and enjoy the timeless elegance of a driftwood decor wall.

Filed Under: Driftwood Ideas Tagged With: Coastal Decor, DIY, Driftwood, Handmade, Wall Art

General Finishes Driftwood

July 20, 2024 by admin

General Finishes Driftwood” beautifully captures the essence of coastal living in a can, transforming your furniture and woodworking projects with its muted, cool-toned hues. By choosing this particular finish, you give your pieces a charmingly worn, beachy aesthetic that invites comfort and relaxation into your home. Whether you’re revamping an old dresser or creating a new centerpiece, General Finishes Driftwood provides an easy-to-apply, durable coat that ensures your handiwork stands out. Embrace the serene vibes of driftwood and enjoy a touch of seaside elegance no matter where you are. Have you ever looked at an old piece of furniture and wished you could give it a new lease on life? If you’re nodding your head, then you might be interested in discovering the magic of General Finishes Driftwood. This unique product can transform mundane, dated wood into stylish, chic pieces worthy of any magazine spread.

What is General Finishes Driftwood?

General Finishes Driftwood is a premium water-based wood stain with a versatile gray color that’s perfect for a modern, rustic look. This shade mimics the naturally weathered wood you’d find along a beach, with a beautiful combination of cool and warm undertones.

Features and Benefits

The driftwood stain from General Finishes offers several standout features that make it a go-to product for DIY enthusiasts and professionals alike.

FeatureBenefit
Water-based formulaEasy clean-up; eco-friendly
Fast dryingShorter project time; fewer interruptions
Self-levelingSmooth, professional-looking finish
VersatileSuitable for many types of wood surfaces

These features collectively contribute to making General Finishes Driftwood a user-friendly and high-quality option for your staining projects.

How to Apply General Finishes Driftwood

Getting the best results from your driftwood stain involves a few steps. Here’s a guide to making sure your project turns out as planned.

Step 1: Preparation

You can’t just slap a coat of stain on wood and expect it to look perfect (though we all wish it were that easy!). Begin with thorough preparation.

  1. Clean the Surface: Start by cleaning your wood surface to remove any dust, grease, or residue. A simple solution of soap and water usually does the trick.
  2. Sand the Wood: Use sandpaper (150 to 220 grit) to smooth out any rough spots and open up the wood grain, making it more receptive to the stain.
  3. Remove Dust: Wipe down the surface with a tack cloth to remove any sanding dust. Dust can interfere with the stain’s ability to penetrate the wood evenly.

Step 2: Applying the Stain

Now comes the fun part—applying the General Finishes Driftwood stain.

  1. Stir the Stain: Make sure to stir the stain well to evenly distribute the pigments.
  2. Apply the Stain: Use a foam brush, cloth, or spray gun to apply a thin coat of stain. Remember, it’s better to apply multiple thin layers than one thick layer.
  3. Wipe Off Excess: After allowing the stain to sit for a few minutes, wipe off any excess with a clean cloth. This helps achieve an even color.
  4. Let it Dry: Allow the stain to dry for several hours. Follow the manufacturer’s guidelines for the best results.

Step 3: Finishing Up

To protect your newly stained wood and add a professional touch, apply a topcoat.

  1. Choose a Topcoat: Options include water-based and oil-based finishes. Water-based topcoats are more eco-friendly and dry faster, while oil-based options offer a richer finish.
  2. Apply the Topcoat: Use a brush or spray to apply the topcoat evenly. Follow the instructions for drying times and number of coats.
  3. Final Sanding: For an ultra-smooth finish, lightly sand between coats of the topcoat with fine-grit sandpaper (320-400 grit).

General Finishes Driftwood

Tips and Tricks for Best Results

While the process is straightforward, a few insider tips can elevate your project from great to stunning.

Test First

Always test your stain on a small, inconspicuous area of the wood. Wood types and previous treatments can affect how the stain appears, so it’s good to get a preview.

Work in a Well-Ventilated Area

Staining wood in a well-ventilated area helps not only with your safety but also ensures quicker drying times and a more even application.

Maintain Consistent Techniques

Whether you’re using a brush, cloth, or spray gun, consistency in your technique is key. Uneven application can result in blotchy finishes.

Versatility of General Finishes Driftwood

One of the things you’ll love about General Finishes Driftwood is its versatility. From furniture to décor items, this stain opens up endless possibilities.

Furniture Makeovers

Revamping old furniture pieces can save you money and reduce waste. General Finishes Driftwood is a popular choice for:

  • Cabinets: Give outdated kitchen cabinets a modern farmhouse makeover.
  • Tables: Rejuvenate dining tables, coffee tables, or end tables with a chic driftwood finish.
  • Chairs: Update wooden chairs to match your new table or other furniture pieces.

Home Décor

Beyond furniture, think about other areas where this stain could elevate your home décor.

  • Picture Frames: Add a rustic touch to your pictures.
  • Shelves: Driftwood-stained shelves can tie together a room’s aesthetic.
  • Accent Walls: Create a feature wall that becomes an instant focal point in any room.

General Finishes Driftwood

Cleaning and Maintenance

Keeping your driftwood-stained projects looking their best requires some upkeep. Fortunately, maintaining them is straightforward.

Routine Cleaning

Dust the surface regularly to keep it free from dirt and grime. For more thorough cleaning, a damp cloth with mild soap and water should do the trick. Avoid abrasive cleaners or harsh chemicals.

Reapplying Stain

Over time, areas subject to heavy use (like tabletops) might need a refresh. Simply sand the area lightly and apply another coat of General Finishes Driftwood followed by a topcoat.

Common Issues and Troubleshooting

Even with the best preparations, you might encounter some issues. Here’s how to troubleshoot common problems.

Blotchy Finish

Blotchy finishes can be caused by uneven sanding or not cleaning the wood thoroughly. Fix this by sanding the area again and reapplying the stain.

Uneven Color

If your color isn’t as even as you’d like, it might be due to the wood type or stain application. Make sure to test the stain beforehand and consider applying multiple thin coats for better coverage.

Sticky Surface

A sticky surface usually means the stain hasn’t fully dried. Give it more time and ensure your working environment has good airflow.

Why Choose General Finishes Driftwood?

With so many wood stains on the market, you might wonder why you should choose General Finishes Driftwood. Here are some reasons that set it apart.

High Quality

General Finishes is a trusted brand known for its high-quality products. Its driftwood stain is no exception, delivering consistent, professional results.

User-Friendly

You don’t have to be a professional to achieve great results. The easy application and water-based formula make it accessible for DIY projects.

Aesthetic Appeal

The cool, neutral gray of driftwood stain adds a contemporary and timeless look to any piece, making it a versatile choice for various styles and settings.

Environmental Considerations

In today’s world, being eco-conscious is more important than ever. General Finishes Driftwood is a water-based stain, meaning it’s low in VOCs (Volatile Organic Compounds). This makes it a more environmentally friendly option compared to oil-based stains.

Safe Disposal

Dispose of any leftover stain and cleaning materials responsibly. Check with your local waste disposal services for guidelines on hazardous waste to ensure you’re following best practices.

Customer Testimonials

Still on the fence? Let’s hear what other users have to say about General Finishes Driftwood.

“I used General Finishes Driftwood on an old dresser, and the results were amazing. It completely transformed the piece into something that looks like it belongs in a high-end store!” – Sarah T.

“The versatility of this stain is fantastic. I’ve used it on everything from kitchen cabinets to picture frames, and it never disappoints.” – John D.

“I love how easy this stain is to work with. The water-based formula means clean-up is a breeze, and I don’t have to worry about harsh chemicals.” – Kim R.

These testimonials highlight the product’s quality, ease of use, and stunning results.

Conclusion

Transforming old or plain wooden items with General Finishes Driftwood is a rewarding project that yields beautiful, professional-quality results. Whether you’re an experienced woodworker or a DIY novice, this stain offers a straightforward, environmentally friendly, and versatile solution for a variety of applications.

So why wait? Dive into your next wood-staining project with confidence and style, knowing that General Finishes Driftwood will help you achieve stunning and enduring results.

Happy staining!

Filed Under: Driftwood Ideas Tagged With: DIY, Driftwood Finish, Furniture Restoration, General Finishes, Wood Stain

Driftwood Decor

July 20, 2024 by admin

Welcome to the enchanting world of Driftwood Decor! Imagine transforming your living space into a coastal paradise with the natural beauty of driftwood. This captivating article will guide you through creative ideas and tips on incorporating driftwood into your home, from stunning wall hangings to rustic furniture pieces. Embrace the calming essence of the seaside and let your decor tell a story of sun, sea, and sand. Have you ever strolled along the beach and noticed the bits of weathered wood strewn across the shore? What if I told you that these naturally polished pieces of driftwood can be transformed into stunning decor for your home? Driftwood decor is a rising trend in interior design, known for its charming rustic appeal and eco-friendly nature. Let’s dive into the enchanting world of driftwood decor and discover how you can incorporate these marine treasures into your living space to create an inviting and stylish environment.

What is Driftwood?

Driftwood is wood that has been washed onto the shore by the action of winds, tides, or waves. Typically found on beaches, lakeshores, and riverbanks, this wood often exhibits a unique weathered texture, making it a superb medium for various decorative pieces. The natural polishing process that driftwood undergoes gives it a distinct character that manufactured wood simply can’t replicate.

The Appeal of Driftwood Decor

So why are so many people drawn to driftwood decor? Driftwood brings a touch of nature indoors, providing earthy textures and tones that can be incredibly soothing. It’s also an excellent choice for those who are looking to adopt more sustainable practices in their home decor.

Here are some benefits of driftwood decor:

BenefitDescription
Eco-FriendlyUtilizing driftwood helps reduce waste and encourages the reuse of natural materials.
Unique AestheticEach piece of driftwood is unique, offering one-of-a-kind designs for your home.
VersatileFrom rustic to modern, driftwood can be styled to fit various interior design aesthetics.
Low MaintenanceDriftwood decor is typically durable and requires minimal upkeep.

Types of Driftwood Decor

The versatility of driftwood means you have countless options when it comes to decorating your home. Let’s explore some popular types of driftwood decor that can add a special touch to your living space.

Driftwood Sculptures

Driftwood sculptures can be an extraordinary focal point in any room. You can find artists who create intricate designs, or try your hand at crafting your own masterpiece. Think of using single large pieces or arranging multiple smaller bits to form a unique sculpture.

Driftwood Mirrors

A driftwood-framed mirror can add a coastal and elegant charm to your home. The irregular shapes and sizes of driftwood pieces can make a simple mirror look like a handcrafted work of art. These mirrors work well in bathrooms, entryways, or as a statement piece in your living room.

Driftwood Furniture

From coffee tables to benches, driftwood can be transformed into functional yet stylish furniture. The natural texture of the wood adds character to any piece, making it a great conversation starter. Imagine a driftwood coffee table in your living room, surrounded by cozy seating.

Driftwood Shelves

Driftwood shelves can be particularly eye-catching, offering both functionality and artistry. They can serve as a stunning display for your books, plants, or other decorative items. The organic lines and weathered look make them perfect for a rustic or nautical-themed space.

Driftwood Wall Art

Why not use driftwood to add some unique wall art to your home? Whether it’s a simple arrangement of driftwood pieces or a more intricate design, it’s sure to make a statement. Wall art made from driftwood can be a subtle nod to your love for nature and the sea.

Driftwood Candle Holders

A driftwood candle holder can bring both warmth and a touch of nature to your home. Simple yet elegant, these pieces can add a cozy ambiance to your living space. They’re perfect for dining tables, mantelpieces, or even as a centerpiece for special occasions.

Driftwood Decor

DIY Driftwood Decor Projects

If you’re a fan of DIY projects, driftwood offers endless possibilities. Here are a few DIY ideas that you can try to incorporate driftwood decor into your home.

DIY Driftwood Jewelry Display

A piece of driftwood can make a perfect rustic jewelry display. Simply clean the driftwood, and add some hooks or small knobs to hang your necklaces, bracelets, and earrings. You can mount it on the wall or place it on your vanity.

Driftwood Photo Frame

Making a driftwood photo frame is quite simple and is a great way to showcase your favorite memories. Start with a basic frame and glue pieces of driftwood around the edges. You can arrange the pieces in a neat fashion or go for a more natural, whimsical look.

Driftwood Wind Chime

A driftwood wind chime can bring a relaxing, coastal vibe to your home. Gather a few pieces of driftwood, drill small holes at the ends, and string them together with fishing line or twine. Add some seashells or small bells for extra charm.

Driftwood Tree

Create a stunning driftwood tree as a seasonal decoration or a year-round centerpiece. Collect pieces of driftwood of varying lengths and arrange them in a tree shape. You can either glue them together or use a central rod to stack them. Decorate with small ornaments or fairy lights for added effect.

Sourcing Driftwood

Before you start your driftwood decor projects, you’ll need to find the perfect pieces. But where exactly can you source driftwood?

Beaches and Lakeshores

The best place to find driftwood is often along the shores of beaches and lakes. Look for areas where tides or currents deposit natural debris. Just be mindful of local regulations, as some regions have restrictions on collecting driftwood.

Online Marketplaces

If you’re not near a beach or lake, don’t worry! You can find driftwood on various online marketplaces. Websites like Etsy offer a wide range of driftwood pieces that you can purchase for your projects.

Local Craft Stores

Some craft stores may carry driftwood or driftwood-inspired items. Check their inventory, or ask if they can order some for you.

Driftwood Decor

Caring for Driftwood

Once you’ve collected your driftwood, it’s essential to clean and preserve it before using it in your home decor. Driftwood can harbor salt, sand, and other debris that can be damaging over time.

Cleaning Driftwood

Cleaning driftwood is a relatively simple process. Here’s what you need to do:

  1. Rinse: Rinse the driftwood pieces in fresh water to remove any sand or grime.
  2. Soak: Soak the driftwood in a solution of water and bleach (ratio of 10:1) for a few hours to disinfect it.
  3. Scrub: Use a brush to scrub off any stubborn dirt.
  4. Dry: Lay the driftwood out in the sun to dry completely. This also helps to bleach the wood further.

Sealing Driftwood

To preserve the driftwood and protect it from further wear, you might consider sealing it. You can use a clear wood sealer or a matte polyurethane finish to keep the wood looking fresh while maintaining its natural texture.

Incorporating Driftwood Decor into Different Interior Styles

Driftwood decor isn’t just limited to coastal-themed homes. It can be integrated into various interior styles, adding a unique touch to your design.

Coastal Style

In a coastal-themed home, driftwood is a natural fit. Think about using driftwood furniture, wall art, and accessories to bring the seaside indoors. Complement the look with a palette of blues, whites, and sandy neutrals.

Rustic Style

For a rustic vibe, driftwood can add that natural, weathered look that complements other rustic elements. Driftwood shelves or a driftwood coffee table can add a cozy touch to your living space. Pair it with farmhouse-style furniture and earthy tones.

Bohemian Style

In a bohemian setting, driftwood can contribute to the eclectic and free-spirited feel. Use driftwood decor such as candle holders, sculptures, or dreamcatchers to enhance the boho vibe. Mix and match with colorful textiles, plants, and vintage finds.

Modern Style

Even in a modern home, driftwood can be an unexpected yet stylish element. Opt for sleek driftwood sculptures or minimalist wall art to add an organic contrast to clean lines and contemporary furniture.

Scandinavian Style

Scandinavian design is known for its simplicity and connection to nature. Driftwood fits seamlessly with this style, offering a touch of rustic charm without overpowering the minimalist aesthetic. Consider driftwood candle holders or simple driftwood shelves.

Driftwood Decor for Special Occasions

Driftwood decor isn’t just for everyday use; it can also be a unique touch for special occasions or celebrations.

Weddings

Incorporating driftwood into wedding decor can add a natural and romantic element to the event. Use driftwood arches, centerpieces, or table numbers to create a memorable and enchanting setting.

Holiday Decor

Driftwood can be used to create seasonal decorations, such as Christmas trees, wreaths, or ornaments. These handmade pieces can add a cozy and personal touch to your holiday celebrations.

Parties and Gatherings

For parties or gatherings, driftwood decor can set a relaxed and inviting atmosphere. Use driftwood as serving trays, candle holders, or table centerpieces to impress your guests.

Driftwood Decor Tips

To ensure your driftwood decor projects turn out beautifully, here are some tips:

  1. Choose the Right Pieces: Look for driftwood that is sturdy and free from major cracks or holes. The best pieces have interesting shapes and textures.
  2. Balance Natural and Polished: While the natural look of driftwood is part of its charm, don’t be afraid to sand or polish it slightly to fit better with your decor.
  3. Mix and Match: Combine driftwood with other natural materials like stone, glass, or seashells for a harmonious look.
  4. Be Mindful of Placement: Ensure that larger pieces of driftwood decor don’t overwhelm your space. Use them as focal points rather than crowding the room.
  5. Safety First: If you’re using driftwood near candles or other heat sources, ensure they are properly treated and won’t catch fire.

Conclusion

Driftwood decor offers a unique and sustainable way to bring the beauty and tranquility of the seaside into your home. Whether you’re incorporating driftwood into a coastal-themed room or adding a rustic touch to your modern space, these natural elements can enhance the aesthetic and ambiance of any setting. With endless possibilities for DIY projects and a variety of styles to explore, driftwood decor allows you to express your creativity while embracing eco-friendly practices.

So, next time you find yourself near a beach or lake, take a closer look at those pieces of driftwood—nature’s artwork waiting to be transformed into beautiful, distinctive decor. Happy decorating!

Filed Under: Driftwood Ideas Tagged With: Coastal Decor, crafts, DIY, Driftwood, Interior Design

Driftwood Christmas Decorations

July 19, 2024 by admin

Imagine transforming your cozy living space into a festive wonderland with the rustic charm of driftwood Christmas decorations. In this article, you’ll discover creative ways to use the unique textures and natural beauty of driftwood to craft stunning holiday decor. From elegant wreaths to whimsical ornaments, these eco-friendly designs will not only warm your heart but also bring a touch of seaside magic to your holiday celebrations. Get ready to be inspired and to start your own driftwood DIY projects that will impress your friends and family this Christmas season! Have you ever wondered how you can incorporate natural elements into your holiday décor in a stylish and unique way? If so, you’re in for a treat! Let’s dive into the magical world of Driftwood Christmas Decorations.

What is Driftwood?

Driftwood, in its essence, is pieces of wood that have washed ashore after floating in water for some time. Waves, currents, and even wildlife can shape and smooth out these pieces, giving them a distinctive, weathered appearance. Their unique forms and textures can make stunning additions to your holiday decorations, infusing your home with an eco-friendly, rustic charm.

Why Choose Driftwood for Christmas Decorations?

Driftwood is more than just a piece of wood you find on the beach. Here’s why you should consider it for your Christmas decorations:

  • Sustainability: Utilizing driftwood helps repurpose natural materials, reducing the need to buy new, mass-produced decorations.
  • Uniqueness: No two pieces of driftwood are alike! You can ensure that your decorations are one-of-a-kind.
  • Aesthetic Appeal: Driftwood offers a rustic, beachy vibe that can complement both modern and traditional Christmas décor styles.

Collecting and Preparing Driftwood

Before you get started on your creative journey, you need to gather your materials. Finding the perfect driftwood is an adventure in itself!

Where to Find Driftwood

  • Beaches and Lakeshores: The best places to search for driftwood are along the coastlines. However, lakeshores can also be a goldmine for finding beautifully weathered pieces.
  • Riverbanks: Rivers can also carry wood, particularly near their mouths where they meet larger bodies of water.

Always be mindful of local laws and regulations regarding the collection of natural elements. Some places have rules about what can be taken from their shores.

Cleaning and Preparing Driftwood

Once you’ve collected your driftwood, it’s time to clean and prepare it for use. Here’s a simple guide:

  1. Rinse: Start by rinsing off any sand, dirt, or salt with freshwater.
  2. Soak: Submerge the driftwood in a mixture of water and vinegar for 24-48 hours. This helps to remove any remaining salt and kill off any bacteria or insects.
  3. Scrub: Use a stiff brush to scrub the wood, ensuring all debris and residues are gone.
  4. Dry: Allow the driftwood to dry completely in the sun. This could take several days, depending on the size of the wood.

Cleaning and proper preparation ensure that your driftwood is safe and ready for crafting.

Driftwood Christmas Decorations

Driftwood Christmas Decorations Ideas

Now that you have your driftwood prepared, let’s explore some creative ways to incorporate it into your Christmas decorations.

Driftwood Christmas Trees

One of the most popular uses of driftwood during the holiday season is building a rustic Christmas tree.

Materials Needed

  • Various sizes of driftwood pieces
  • A wooden dowel or metal rod
  • Strong glue or nails
  • A sturdy base

Instructions

  1. Select Pieces: Choose pieces of varying lengths to represent each tier of your Christmas tree.
  2. Drill Holes: Make a hole in the center of each piece of driftwood.
  3. Assemble: Slide the pieces onto the dowel or rod, starting with the longest piece at the bottom and the shortest at the top.
  4. Secure Base: Attach the dowel or rod to the sturdy base to ensure the tree stands upright.
  5. Decorate: You can leave the tree as-is or decorate it with fairy lights, small ornaments, or natural elements like pinecones and berries.

Driftwood Wreaths

Driftwood wreaths are elegant and bring natural beauty to any door or wall.

Materials Needed

  • Small to medium-sized driftwood pieces
  • Wreath form (metal or foam)
  • Hot glue gun
  • Additional decorative items (optional)

Instructions

  1. Arrange Pieces: Lay out your driftwood pieces around the wreath form to get an idea of how they fit together.
  2. Attach Pieces: Using the hot glue gun, start attaching the driftwood pieces to the wreath form, ensuring they overlap slightly for stability.
  3. Add Decorations: If desired, add extra decorations like ribbons, ornaments, or lights for added flair.

Driftwood Candle Holders

Candle holders made from driftwood can bring a warm, cozy glow to your holiday nights.

Materials Needed

  • Small driftwood pieces
  • Tea light candles or small candles
  • Drill
  • Mod Podge (optional)

Instructions

  1. Drill Holes: Carefully drill holes into the driftwood pieces that are just large enough to snugly fit the candles.
  2. Sand Edges: Sand the edges of the holes to ensure the candles sit securely.
  3. Seal (Optional): Apply a coat of Mod Podge to protect the wood and give it a slight sheen.
  4. Place Candles: Insert the candles into the drilled holes.

Driftwood Table Centerpiece

Using driftwood as a centerpiece on your dining table can be a unique conversation starter.

Materials Needed

  • Driftwood pieces
  • Greenery (like fir or pine branches)
  • Ornaments
  • Fairy Lights
  • Strong adhesive

Instructions

  1. Assemble Wood: Arrange the driftwood pieces in the center of the table, securing them with adhesive if necessary.
  2. Decorate: Add greenery, ornaments, and fairy lights around and on the driftwood for a festive look.

Tips and Tricks for Crafting with Driftwood

Working with natural materials can be a bit different from store-bought supplies. Here are some tips to make your crafting experience smoother:

  • Choose the Right Tools: Make sure you have sturdy tools like a drill with various bit sizes, strong adhesives, and clamps to hold things in place.
  • Plan Your Design: Before you start gluing or nailing, lay out your design to see how everything fits together.
  • Preserve the Wood: Consider sealing the wood with a natural finish to keep it looking fresh throughout the holiday season.
  • Mix and Match: Don’t be afraid to combine driftwood with other natural elements or even chic, store-bought decorations.

Driftwood Christmas Decorations

Safety Considerations

While driftwood decorations are beautiful, it’s essential to consider safety, especially if you have pets or young children at home.

Securing Decorations

  • Stable Base: Ensure that all standing structures, like trees or candle holders, have a stable base to prevent tipping.
  • Avoid Sharp Edges: Sand down any sharp edges or protruding splinters that could cause injury.

Fire Safety

  • Candle Placement: Be cautious with candle holders; never leave burning candles unattended and ensure they are placed away from flammable materials.
  • Lights: If using lights, opt for LED options which are less likely to overheat.

Conclusion

Driftwood Christmas Decorations offer a stunning, eco-friendly way to celebrate the holiday season. By incorporating these natural elements into your décor, you not only create a unique aesthetic but also contribute to a more sustainable holiday tradition. From driftwood Christmas trees to elegant wreaths and cozy candle holders, the possibilities are endless. So, the next time you find yourself strolling along a beach, keep an eye out for that perfect piece of driftwood to turn into your next holiday masterpiece.

Happy crafting!

Filed Under: Driftwood Ideas Tagged With: christmas, crafts, Decorations, DIY, Driftwood

  • « Previous Page
  • Page 1
  • …
  • Page 26
  • Page 27
  • Page 28
  • Page 29
  • Page 30
  • …
  • Page 41
  • Next Page »

Primary Sidebar

Driftwood4us.com, is a participant in the Amazon Services LLC Associates Program, an affiliate advertising program designed to provide a means for sites to earn advertising fees by advertising and linking to amazon.com.