• Skip to main content
  • Skip to primary sidebar
  • Terms and Conditions
  • Privacy Policy
  • Contact

Driftwood 4 Us

Just About Driftwood

DIY

Driftwood Birdhouse

July 16, 2024 by admin

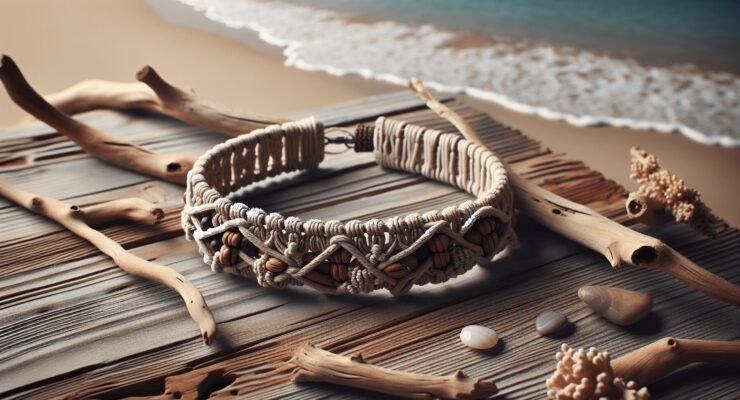
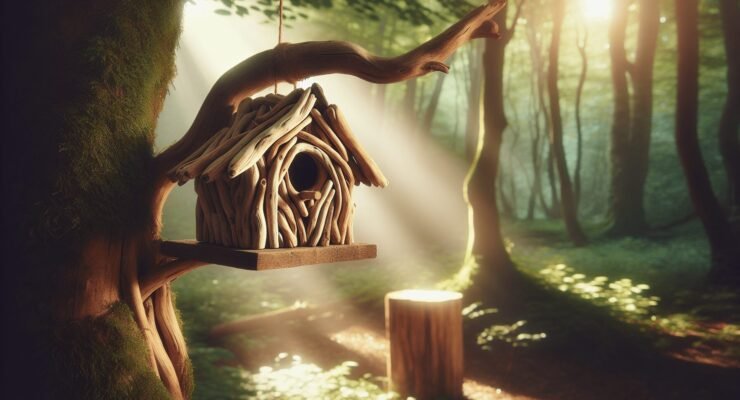
You’re about to discover the charm of creating your very own Driftwood Birdhouse. In this article, you’ll learn how to transform found pieces of driftwood into a unique and inviting haven for birds. Not only is this craft project a fantastic way to recycle natural materials, but it also adds a touch of rustic beauty to your outdoor space. Whether you’re an experienced DIY enthusiast or trying your hand at crafting for the first time, you’ll find that building a driftwood birdhouse is both fun and rewarding. So, gather your supplies, let your creativity flow, and prepare to welcome some feathered friends into your backyard. Ever thought about adding a touch of coastal charm to your garden or backyard? Building a driftwood birdhouse is a fantastic way to introduce a bit of seaside magic into your outdoor space. Don’t worry if you’ve never built anything before – this guide will walk you through the process step-by-step.

Driftwood Birdhouse

What is Driftwood?

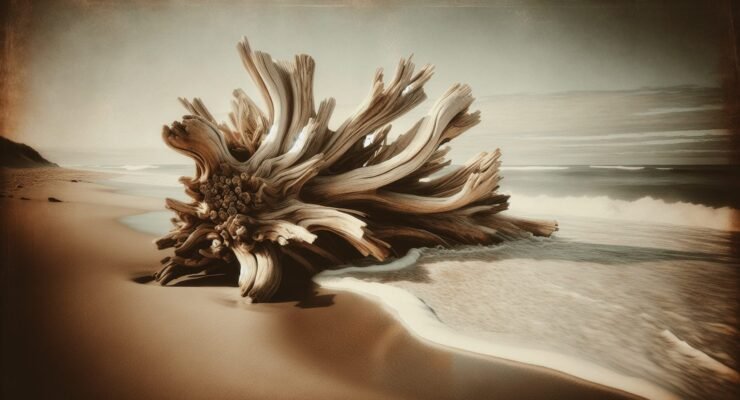
Driftwood refers to wood that has been washed onto the shore by tides, waves, or winds. This weathered wood has a unique texture and appearance, which makes it perfect for DIY projects, especially birdhouses.

Understanding Driftwood Characteristics

Driftwood tends to be lightweight and has a seasoned patina that you won’t find in freshly cut wood. The natural wear and tear give it a rustic, organic look that birds and nature enthusiasts love.

Benefits of Using Driftwood

Using driftwood for your birdhouse not only creates an aesthetically pleasing structure but also promotes recycling and sustainability. By repurposing materials found along the shore, you’re giving new life to what could have been waste.

Tools and Materials

Before you begin, gather your tools and materials. Having everything on hand will make the process smoother and more enjoyable.

Required Tools

Here’s a list of tools you might need:

ToolPurpose
Saw (hand or electric)Cutting driftwood to size
DrillMaking holes for screws and bird entrance
ScrewdriverAssembling the birdhouse
SandpaperSmoothing rough edges
Measuring tapeAccurate measurements
PencilMarking wood before cutting

Materials Needed

You’ll need the following materials:

MaterialQuantity
Driftwood piecesVaries depending on the size of the birdhouse
Screws or nailsEnough to assemble the birdhouse
Wood glueFor added stability
Birdhouse accessoriesHooks, perches, and waterproof sealant

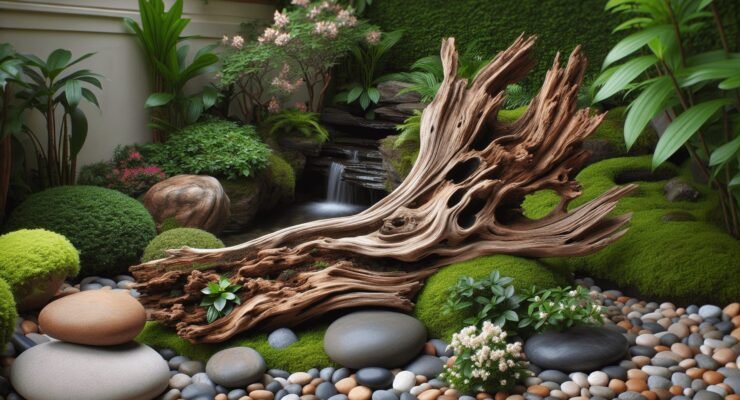
Designing Your Driftwood Birdhouse

The design of your birdhouse can be as simple or intricate as you wish. The unique shapes and sizes of driftwood pieces provide endless design possibilities.

Choosing the Right Driftwood

When selecting driftwood pieces, consider their size, shape, and stability. Ensure the wood pieces are free from any harmful chemicals or nails that could be dangerous for birds.

Basic Design Ideas

Start with simple designs such as:

  1. Traditional Box Design: A basic rectangle with an entrance hole.
  2. A-Frame Design: Two pieces of driftwood forming a triangular roof.
  3. Creative Shapes: Use driftwood to create birdhouses in various whimsical shapes.

Sketching Your Design

Sketch a rough design on paper, including measurements of each piece. This will help you visualize the final product and make the assembly process easier.

Building the Birdhouse

Now that you have your design ready, let’s get down to building!

Cutting the Driftwood

Cut the driftwood pieces according to your sketch. Use a saw for this step and sand the edges to smooth out any splinters.

Assembling the Base

Start by assembling the base of your birdhouse. Ensure that the base is sturdy as it will support the weight of the remaining structure.

  1. Lay Out the Pieces: Arrange the base pieces on a flat surface.
  2. Glue and Screw: Apply wood glue along the edges and screw or nail the pieces together.

Constructing the Walls

Attach the walls to the base. Each wall should be securely fastened to both the base and adjacent walls.

  1. Attach Two Opposing Walls First: This will provide stability as you continue to build.
  2. Secure the Remaining Walls: Ensure all corners are tightly joined.

Adding the Roof

Now, it’s time to add the roof. This can be a simple flat roof or an A-frame, depending on your design.

  1. Align the Roof Pieces: Make sure they fit well together.
  2. Secure the Roof: Use screws or nails, and add wood glue for extra stability.

Creating the Entrance Hole

Drill a hole in one of the walls to serve as the entrance. The size of the hole will depend on the type of birds you wish to attract.

  1. Mark the Spot: Use a pencil to mark where you will drill.
  2. Drill Carefully: Make sure the hole is smooth and free of splinters.

Driftwood Birdhouse

Finishing Touches

Your birdhouse is nearly complete! Here are some final touches to make it perfect.

Smoothing and Finishing Edges

Use sandpaper to smooth out any rough edges. This will make the birdhouse safe for the birds and give it a professional finish.

Adding Perches and Hooks

Add a small perch below the entrance hole to give birds a place to land. You can also add hooks to the roof for easy hanging.

Waterproofing

Apply a waterproof sealant to protect your birdhouse from the elements. Driftwood is already weathered but adding an extra layer of protection is always a good idea.

Placing Your Birdhouse

Choosing the right location for your birdhouse is crucial for attracting birds.

Ideal Locations

  1. Quiet Areas: Birds prefer locations that are not too noisy or busy.
  2. Height: Place the birdhouse at a safe height to protect from predators.
  3. Shelter: Find a spot sheltered from strong winds and direct sunlight.

Mounting Options

You can mount your birdhouse in various ways:

  1. Hooks: Hang it from a tree or a dedicated birdhouse pole.
  2. Posts: Attach it to a post secured in the ground.
  3. Suction Cups: Stick it to a window if you want an up-close view of your bird guests.

Maintaining Your Birdhouse

Regular maintenance ensures your birdhouse remains a safe and attractive home.

Cleaning

Clean the birdhouse at the end of each breeding season to prevent pests and diseases.

  1. Open Access: If possible, design your birdhouse with a hinged side or roof for easy cleaning.
  2. Remove Debris: Clear out old nests and any debris.

Inspect for Damage

Periodically check your birdhouse for damage. Repair any broken parts immediately to keep it safe.

  1. Check Joints and Screws: Ensure everything is still securely fastened.
  2. Look for Rot: Replace any pieces that show signs of severe wear or rot.

Attracting Birds

To get birds to settle in your driftwood birdhouse, consider these tips.

Bird Feeders and Water Sources

Place bird feeders and water sources nearby. Birds are more likely to nest in areas where they can easily find food and water.

Native Plants

Planting native vegetation can attract birds. These plants provide additional food and shelter.

Avoid Pesticides

Using pesticides can harm birds. Opt for natural pest control methods to keep your garden bird-friendly.

Common Issues and Solutions

Here are some common issues you may encounter and how to fix them.

No Birds Visiting

If birds aren’t visiting your birdhouse, consider these possibilities:

  1. Location: Move it to a quieter or more sheltered spot.
  2. Entrance Size: Make sure the entrance hole is the right size for the birds you want to attract.
  3. Too Close to Humans: Birds may avoid areas with too much human activity.

Pests

Pests can be a problem. Keep them at bay with these tips:

  1. Regular Cleaning: Clean out the birdhouse regularly to deter insects.
  2. Ant Traps: Place ant traps nearby but out of birds’ reach.

Sharing Your Driftwood Birdhouse

Show off your handiwork by sharing your driftwood birdhouse with friends and family.

Social Media

Post photos on social media platforms like Instagram or Facebook to inspire others. Use hashtags related to birdhouses and DIY projects.

Community Events

Consider participating in local craft fairs or community events. You might even find a market for selling driftwood birdhouses!

Conclusion

Building a driftwood birdhouse is a rewarding project that combines creativity, sustainability, and a love for nature. With just a few tools and materials, you can create a beautiful home for your feathered friends, all while adding a unique touch to your outdoor space. So why wait? Gather some driftwood and start building today!

Feel free to revisit your sketch, adapt as you go, and most importantly, have fun with the process. Your new feathered neighbors will thank you for the cozy and charming new home!

Filed Under: Driftwood Ideas Tagged With: DIY, Driftwood, home decor, Woodworking

Driftwood Angels

July 16, 2024 by admin

In your magical exploration of “Driftwood Angels,” you delve into a serene world where each piece of driftwood, sculpted by the hands of nature, embodies a celestial beauty. As you journey through the coastline, you’ll encounter unique creations that resemble angelic forms, showcasing the delicate balance between the sea’s powerful forces and its gentle artistry. Embracing this ethereal vision, you discover the quiet charm and inspirational aura of driftwood angels, connecting with the tranquil whispers of the ocean and the stories captured in each weathered sculpture. Have you ever stumbled across a piece of driftwood on the beach and wondered about its journey or what it could become? Driftwood is not just the residue of wooden debris washed onto the shore; it can transform into something magical, like a driftwood angel. These handmade creations hold both aesthetic beauty and a story within their grains. Today, you’re going to learn all about these enchanting forms of art and how you can create your very own driftwood angels.

Driftwood Angels

What is Driftwood?

Driftwood refers to pieces of wood that have been washed up on shores by the action of waves, tides, and winds. It starts as tree limbs, branches, or roots that have broken off and fallen into rivers, lakes, or the ocean. Over time, the wood becomes smooth and weathered by the constant motion of water and exposure to the elements.

The Journey of Driftwood

The journey of driftwood is truly fascinating. It begins its life in forests, often in areas far from the coast. Once it falls into a river or stream, it can travel hundreds of miles, being shaped and sculpted by the water. As it finally arrives at the beach, it’s completed a transformation that can span seasons, or even years.

Types of Driftwood

Not all driftwood is created equal. The variety is immense, depending on the type of wood, the length of time it has spent in the water, and the environmental conditions it has encountered. Some common types of driftwood include:

TypeCharacteristics
HardwoodDense, dark, and heavy; takes longer to erode.
SoftwoodLighter and more porous; faster to weather.
Saline WoodExposed to saltwater, often encrusted with salt.
Freshwater WoodFound near rivers and lakes without salt exposure.

Why Use Driftwood?

Driftwood is not only beautiful but also eco-friendly. By utilizing this natural material, you are repurposing something that would otherwise contribute to environmental clutter. Plus, each piece is unique, offering a one-of-a-kind look to your creations.

Driftwood Angels: What Are They?

Driftwood angels are artistic creations made from driftwood, typically designed to resemble angels. They are a beautiful blend of natural materials and artistic expression, often featuring driftwood as the body, sticks for arms, and various additional elements for wings and halos.

The History and Popularity

Creating figures from driftwood is an art form that dates back centuries. People have always been fascinated by the shapes and forms driftwood can take. Driftwood angels have become particularly popular in beachside communities and among those who appreciate natural, rustic decor.

Variations and Styles

Driftwood angels come in various styles and sizes. Some are miniature figurines suitable for Christmas trees, while others can be life-sized sculptures displayed in gardens or homes. The styles can vary from minimalist designs using simple shapes to elaborate pieces that include intricate details and additional ornaments.

How to Gather and Prepare Driftwood

Before you can create your driftwood angels, you will need to gather and prepare your materials. Here’s how you can do it:

Where to Find Driftwood

The best places to find driftwood are along beaches, riverbanks, and lakeshores. Coastal areas are particularly rich in driftwood due to the constant motion of tides and currents. Look for pieces that have interesting shapes and are weathered enough to give them character.

Responsible Harvesting

It’s essential to collect driftwood responsibly. Some areas may have regulations regarding the removal of natural materials. Always check local guidelines to ensure that you are not disrupting the ecosystem. Only take what you need, and avoid areas marked as protected.

Cleaning Driftwood

Once you’ve collected your driftwood, the next step is to clean it. Driftwood may carry salt, sand, and microorganisms that you don’t want to bring into your home. To clean the driftwood:

  1. Rinse with fresh water: Use a hose to remove surface debris.
  2. Soak in a bleach solution: Mix one part bleach with nine parts water and soak the wood for 24 hours. This helps kill any bacteria or fungi.
  3. Dry thoroughly: Allow the driftwood to dry completely in the sun. This may take a few days, depending on the size and density of the wood.

Tools You Will Need

Creating driftwood angels doesn’t require many specialized tools, but having some basic supplies will make the process easier. Here’s a list of what you might need:

ToolPurpose
SawTo cut the driftwood into the desired shapes and sizes.
SandpaperTo smooth rough edges and surfaces.
DrillFor making holes to insert arms, wings, or other elements.
GlueTo attach various parts of the angel together.
WireFor additional support and to create halos.
PaintOptional, for adding color or details.

Steps to Create a Driftwood Angel

Now comes the fun part – creating your driftwood angel! There are no strict rules, so let your creativity flow. Here are some steps to guide you through the process:

Step 1: Gather Your Materials

Once your driftwood is cleaned and dry, gather all your materials and tools. Lay them out in a workspace where you have plenty of room to move around and access everything easily.

Step 2: Select and Arrange the Driftwood Pieces

Choose the pieces of driftwood that will form the body, arms, and wings of your angel. Arrange them to get a sense of how they will fit together. Don’t be afraid to try different combinations until you find one that looks right.

Step 3: Attach the Body Parts

Use glue, screws, or wire to attach the various parts of your angel together. Start with the body and then add the arms and wings. If you’re using a drill, make small pilot holes first to prevent the wood from splitting.

Step 4: Add Details

Details like halos, eyes, and additional ornaments can bring your driftwood angel to life. Use wire to create a halo, and small pebbles or beads for eyes. You can also add paint, ribbons, or other decorative elements to give your angel a unique personality.

Step 5: Finishing Touches

Once everything is assembled, take a final look to ensure all pieces are securely attached and that you’re happy with the arrangement. You might want to sand down any rough edges and apply a coat of varnish to protect the wood and give it a polished look.

Driftwood Angels

Displaying Your Driftwood Angels

After putting in the time and effort to create your driftwood angels, you’ll want to display them proudly. Here are a few ideas for showing off your creations:

Indoor Display Ideas

  • Mantelpieces: Place your driftwood angel on a mantel for a rustic, nautical touch.
  • Bookshelves: Add it to a bookshelf to complement other beach-themed decor.
  • Table Centerpieces: Use your angel as a centerpiece for a dining table or coffee table.

Outdoor Display Ideas

  • Garden Stakes: Attach your angel to a garden stake and place it among your plants.
  • Porch Decor: Hang your driftwood angel from the roof of your porch or a tree branch.
  • Fence Art: Secure it to a fence or wall to create a unique outdoor art piece.

Seasonal Display Ideas

Driftwood angels are wonderfully versatile and can be adapted for different seasons. During the holidays, you could add festive ribbons or ornaments to make them extra special. In the summer, pair them with seashells and starfish for a beachy vibe.

The Symbolism of Angels

Angels are often seen as symbols of protection, guidance, and comfort. Creating a driftwood angel can be more than just a fun project; it can also be a meaningful way to express your feelings or commemorate a special person or event.

Angels in Different Cultures

Angels appear in various forms in many cultures around the world. In Christianity, angels are messengers of God, while in other traditions, they may be guardians or agents of divine forces. Your driftwood angel can embody whatever symbolic meaning resonates with you.

Personal Significance

Creating a driftwood angel can also hold personal significance. It can be a way to remember a loved one, celebrate a milestone, or simply bring a little bit of peace and tranquility into your life. The process itself can be meditative and fulfilling, offering a chance to connect with nature and your own creativity.

Tips for Success

Here are some additional tips to help ensure your driftwood angel project is a success:

Patience is Key

Don’t rush the process. Take your time to find the right pieces of driftwood and to assemble them carefully. Enjoy the journey as much as the final product.

Embrace Imperfection

Driftwood is naturally imperfect, and that’s where its beauty lies. Don’t worry about making your angel look “perfect.” Embrace the irregularities and unique characteristics of each piece of wood.

Safety First

When using tools like saws and drills, always prioritize safety. Wear safety goggles and gloves, and work in a well-ventilated area. If you’re new to using these tools, consider doing a practice run on a scrap piece of wood first.

Experiment and Have Fun

Feel free to experiment with different designs and styles. Look for inspiration online or in nature, but don’t be afraid to put your own spin on things. After all, the best part of creating art is making it uniquely yours.

The Environmental Impact

One of the beautiful things about using driftwood is its positive environmental impact. By repurposing wood that has naturally fallen and washed ashore, you are contributing to a cycle of reuse that benefits the environment.

Sustainability

Creating driftwood art is a form of sustainable crafting. It utilizes materials that do not require additional manufacturing or deforestation, making it an earth-friendly hobby.

Minimal Waste

Since each piece of driftwood is unique and can be used in many different ways, there’s minimal waste involved in the process. Any leftover wood can often be used in future projects, ensuring that nothing goes to waste.

Getting Involved in the Driftwood Community

You’re not alone in your love for driftwood angels! There is a growing community of artists and enthusiasts who share this passion.

Online Communities

Many online forums and social media groups are dedicated to driftwood art. Joining these communities can provide inspiration, tips, and a platform to share your creations. Sites like Pinterest, Instagram, and Facebook have vibrant driftwood art communities where you can connect with others.

Workshops and Classes

Look for local workshops or classes where you can learn more about driftwood art and improve your skills. These can range from beginner to advanced levels and often provide all the materials needed, making them an excellent way to dive deeper into the craft.

Exhibiting Your Work

Once you feel confident in your creations, consider exhibiting your work at local art shows, craft fairs, or even online galleries. Sharing your driftwood angels with others can be incredibly rewarding and can even turn into a niche business.

Conclusion

Driftwood angels are more than just decorative pieces; they are a testament to the beauty of nature and the power of human creativity. Whether you’re crafting one as a gift, a home decor piece, or a personal project, each angel carries a unique story within its wooden form.

By gathering and preparing the driftwood, thoughtfully designing your angel, and carefully assembling it, you can create something truly special. And as you embark on this creative journey, remember to enjoy each step, embrace the imperfections, and find joy in transforming simple pieces of wood into enchanting driftwood angels.

So next time you’re walking along the beach and come across a piece of driftwood, you’ll know the potential it holds. Pick it up, take it home, and let your imagination guide you in creating a driftwood angel that reflects both the beauty of nature and the depth of your creativity. Happy crafting!

Filed Under: Driftwood Ideas Tagged With: Angels, DIY, driftwood art, Handicrafts, home decor

Driftwood Aesthetic

July 15, 2024 by admin

Driftwood Aesthetic is all about bringing the serene beauty of nature into your living spaces. You will discover how to effortlessly incorporate pieces of weathered wood and natural elements into your home décor, creating an ambiance that exudes relaxation and coastal charm. This guide will take you through DIY projects, styling tips, and inspiring ideas that celebrate the driftwood aesthetic, helping you transform your home into a tranquil sanctuary filled with natural warmth. Whether you’re near the sea or dreaming of it, embracing the driftwood aesthetic is a wonderful way to invite calm and beauty into your everyday life. Have you ever been captivated by the tranquility and elegance that comes with the driftwood aesthetic? If you’re new to the concept or an enthusiast looking to deepen your understanding, you’ve come to the right place! In this detailed article, we’ll dive into the world of driftwood and explore how this natural material can add a unique, earth-friendly charm to your home decor, garden, or art projects. Let’s embark on this journey to discover the beauty and versatility of driftwood!

What is Driftwood?

Driftwood is essentially wood that has washed ashore on beaches, riverbanks, or lakeshores. It’s often weathered by the elements, giving it a distinctive, rustic look that has captured the hearts of artists, decorators, and nature enthusiasts alike.

How Driftwood is Formed

Driftwood begins its journey as a tree. Branches, trunks, and sometimes entire trees break off and are carried into bodies of water by natural forces like rivers, drainage networks, or tides. Over time, water erodes the wood, smoothing its surface and stripping it of bark and other layers. This natural weathering process gives driftwood its unique characteristics.

Why Driftwood?

You might wonder why driftwood has become such a popular element in decor and art. Its natural, rustic look can fit seamlessly into various design styles, from coastal and beachy to minimalist and modern. Additionally, it’s a sustainable choice as incorporating driftwood into your projects gives new life to material that would otherwise simply decompose.

Driftwood Aesthetic in Home Decor

Decorating With Driftwood

Driftwood can introduce a serene, earthy atmosphere to your home. It can serve as a statement piece or integrate smoothly into existing decor. Here are some ideas for incorporating driftwood into your home:

  1. Furniture: Driftwood can be used to create beautiful, rustic furniture pieces like coffee tables, shelving units, or headboards.
  2. Wall Art: Driftwood wall hangings or sculptures can add a unique flair to your walls.
  3. Lighting: Use driftwood to craft custom light fixtures that bring a touch of nature indoors.
  4. Accessories: Smaller driftwood pieces can be used to make picture frames, coat racks, or candle holders.

Driftwood Color Palette

Driftwood typically features subdued tones such as greys, whites, and light browns. Incorporating these colors can evoke a sense of peace and simplicity.

Common Driftwood Colors and Their Meanings:

ColorMeaning
GreyCalm, neutral, and balanced
WhiteClean, bright, and refreshing
Light BrownWarm, inviting, and earthy

Driftwood in Different Rooms

Each room in your home can be enhanced by the driftwood aesthetic.

Living Room

A driftwood coffee table becomes a focal point, while smaller driftwood accessories add subtle touches. Combine with natural fabrics and plants to amplify the organic feel.

Bedroom

A driftwood headboard paired with neutral-toned bedding can create a relaxing sanctuary. Driftwood lamps and picture frames enhance the cohesive look.

Bathroom

Driftwood shelving or mirrors can provide storage and a serene atmosphere in bathrooms. The natural material can withstand moisture well, making it a practical choice.

Driftwood Aesthetic

DIY Driftwood Projects

Crafting your own driftwood projects can be incredibly fulfilling. Not only do you get to create something unique, but you also get to enjoy the process of working with your hands.

Sourcing Your Driftwood

The first step in any DIY driftwood project is sourcing your materials. You can find driftwood on beaches, lakeshores, or riversides. Just make sure to collect it responsibly, without disturbing the local ecosystem.

Cleaning Driftwood

Once you’ve collected your driftwood, it’s important to clean it thoroughly before using it in projects. Here’s a simple cleaning method:

  1. Rinse: Wash off any sand, dirt, or debris.
  2. Soak: Soak the wood in a mixture of water and bleach (1:9 ratio) for 24 hours to sterilize it.
  3. Rinse Again: Rinse thoroughly to remove any bleach residue.
  4. Dry: Allow the wood to dry completely, which may take several days.

Easy DIY Projects

Driftwood Candle Holders

Materials Needed:

  • Small pieces of driftwood
  • Tea light candles
  • A drill with a forstner bit

Steps:

  1. Select pieces of driftwood that are wide enough to hold a tea light candle.
  2. Drill a hole in each piece to fit the tea light snugly.
  3. Sand any rough edges and insert the candles.

Driftwood Mirror Frame

Materials Needed:

  • Driftwood pieces (various sizes)
  • A plain mirror
  • Strong adhesive or glue gun

Steps:

  1. Lay out the driftwood pieces around the mirror to plan your design.
  2. Attach the driftwood to the mirror frame using strong adhesive.
  3. Allow to dry and mount the mirror on your wall.

Driftwood in the Garden

Driftwood can also make a striking addition to your outdoor spaces. Its natural look can blend seamlessly with plants and other garden elements.

Driftwood Planters

Creating a driftwood planter can be a delightful and functional addition to your garden. Use driftwood pieces to fashion unique planters for succulents, herbs, or flowers.

Garden Art

Use larger driftwood pieces to create garden sculptures or art installations. Let your creativity flow by combining different pieces to form shapes or abstract art.

Pathways and Borders

Driftwood can be effectively used to create borders for garden beds or along pathways, adding a rustic charm and helping to keep soil in place.

Driftwood Aesthetic

Driftwood Art and Crafts

For the artistically inclined, driftwood offers endless possibilities. Here, we’ll explore some creative applications of driftwood in art.

Sculpture

Driftwood’s shapes and textures make it a fantastic medium for sculptures. You can create abstract forms or representational pieces. The beauty lies in the way the driftwood’s natural form is preserved and highlighted.

Driftwood Paintings

Create unique wall art by combining driftwood with paint. You can paint directly onto the driftwood or use it as a frame for canvas work. The juxtaposition of smooth paint and rugged wood can be visually stunning.

Driftwood Mobiles

Driftwood mobiles add movement and tranquility to any space. By suspending driftwood pieces from strings, you can create a mobile that dances gracefully in the breeze.

Maintaining Driftwood Decor

Proper maintenance can extend the life and beauty of your driftwood pieces. Here’s a quick guide on how to maintain your driftwood decor.

Dusting and Cleaning

Regularly dust driftwood pieces using a soft cloth or brush. For deeper cleaning, use a damp cloth; make sure the driftwood dries completely to avoid mold or mildew.

Preventing Damage

Avoid placing driftwood decor in areas with extreme temperatures or humidity. Applying a sealant or finish can also protect the wood, especially for pieces used outdoors.

Repairing Driftwood

If your driftwood piece gets damaged, you can often repair it with wood glue or a similar adhesive. Small cracks or breaks can be filled with wood filler and sanded smooth.

Driftwood and Sustainability

Embracing the driftwood aesthetic also means making a sustainable choice. Driftwood is an eco-friendly material that allows you to bring the beauty of nature into your home without causing harm to the environment.

Benefits of Using Driftwood

  • Recycling: Repurposing driftwood means fewer raw materials are used, and less waste is produced.
  • Natural Beauty: Driftwood requires minimal processing, so its natural beauty is preserved.
  • Eco-Friendly: Sourcing and using driftwood support sustainable practices and an appreciation for nature.

Conclusion

The driftwood aesthetic is not just a style; it’s a way to bring the natural world into your daily life, creating spaces filled with tranquility, beauty, and sustainability. Whether you’re decorating your home, crafting, or enhancing your garden, driftwood offers endless possibilities. Embrace this unique material, and let it inspire you to create your own rustic, natural, and calming environment. So, why not dive into your next driftwood project today? You might just find that the process, as well as the result, brings a touch of nature’s magic into your life!

Filed Under: Driftwood Ideas Tagged With: Aesthetic, Coastal Decor, DIY, Driftwood, Natural elements

Driftwood Garden Ideas Decor

July 5, 2024 by admin

Welcome to the enchanting world of Driftwood Garden Ideas Decor! Imagine transforming your garden into a unique, rustic haven enriched with the natural elegance of driftwood. As you explore this article, you’ll discover creative ways to incorporate driftwood into your outdoor space, turning ordinary garden features into extraordinary focal points. From whimsical sculptures to practical garden planters, let the beauty of driftwood inspire your next gardening project and leave you with a magical retreat right in your backyard. Have you ever wondered how to bring a touch of natural elegance to your garden space? If so, driftwood might just be the perfect solution for you. Driftwood Garden Decor is an increasingly popular trend, merging the raw beauty of nature with artistic design to transform your garden into an enchanting haven.

Driftwood Garden Ideas Decor

What is Driftwood?

Driftwood refers to wood that has been washed ashore by the action of wind, waves, or tides. Its distinctive weathered appearance results from prolonged exposure to water and elements, giving it a unique, rustic charm. Driftwood pieces come in various shapes, sizes, and textures, making each one a unique masterpiece crafted by nature.

The Appeal of Driftwood in Garden Decor

Driftwood adds a natural and rustic charm to garden spaces. Its organic shapes and weathered textures can complement any garden style, from rustic to modern. Using driftwood in your garden not only incorporates elements of nature but also contributes to sustainable gardening, as you’re using recycled and organic materials.

Choosing Your Driftwood

When selecting driftwood for your garden, there are a few key factors to consider to ensure that it fits your design and maintains its alluring features over time.

Types of Driftwood

Different types of wood possess distinct characteristics that influence their suitability for different uses. Here are some common types of driftwood you might encounter:

Type of WoodCharacteristicsBest Uses
OakStrong, dense, heavyStructural features, arches
CedarFragrant, resistant to decayPlant stakes, garden edging
PineLight, soft, and easy to shapeDecorative items, crafts
BirchSmooth, light-colored, peels easilyGarden markers, furniture
Driftwood MixA combination of different types of woodVersatile uses

Sourcing Driftwood

You can find driftwood in various natural settings such as beaches, rivers, and lakeshores. However, it is important to be mindful of local regulations and ecosystems when collecting driftwood. If you prefer a more convenient approach, many garden centers and online stores offer sustainably sourced driftwood.

Cleaning and Preparing Driftwood

Before incorporating driftwood into your garden decor, it’s essential to clean and prepare it. This ensures that the wood is safe to use and prevents any unwanted pests or mold from spreading.

  1. Rinse and Soak: Rinse the driftwood thoroughly to remove sand and debris. Soak it in a saltwater solution for at least 24 hours to kill any potential pests.
  2. Scrub and Dry: Scrub the wood with a brush to remove any remaining dirt or organisms. Allow the driftwood to air dry completely in a well-ventilated area, which may take a few days to a week.

Creating Driftwood Garden Decor

Now that you have your driftwood ready, it’s time to get creative! Here are some wonderful ideas to incorporate driftwood into your garden decor:

Driftwood Planters

Planters made from driftwood add a rustic charm to your garden. You can use a hollow piece of driftwood as a container for succulents, herbs, or flowers. If the driftwood isn’t naturally hollow, you can carve out a portion to create a space for soil and plants.

Driftwood Garden Art

Turn driftwood pieces into stunning garden art. Assemble different pieces into sculptures, abstract art, or figures. You can use natural twine or wire to bind pieces together, creating a cohesive and sturdy structure.

Driftwood Pathways and Edging

Use driftwood logs and branches to create natural pathways or edge garden beds. Lay driftwood pieces end-to-end to form a border around flowerbeds or pathways. This not only provides functional edging but also enhances the aesthetic appeal of your garden.

Driftwood Furniture

Construct rustic garden furniture with driftwood. Benches, chairs, and tables made from driftwood can serve as focal points in your garden. Pair these pieces with cushions or throws for added comfort and style.

Driftwood Trellises and Arbors

Driftwood trellises and arbors can support climbing plants and add vertical interest to your garden. Use driftwood branches to create a sturdy frame and interweave smaller pieces for added support and visual appeal.

Driftwood Garden Markers

Label your plants and herbs with driftwood garden markers. Simply use small pieces of driftwood, write the plant names with a permanent marker or wood-burning tool, and place them in your garden beds.

Driftwood Birdhouses and Bird Feeders

Welcome feathered friends to your garden with driftwood birdhouses and bird feeders. Craft birdhouses from larger pieces of driftwood or assemble smaller twigs to create bird feeders. Hang these creations in trees or on hooks to attract various birds.

Driftwood Fencing

Create low fences or privacy screens with driftwood. Use long, straight pieces for the posts and crossbars, securing them with natural twine or nails. This type of fencing can provide both functional and decorative benefits.

Driftwood Wind Chimes

Make whimsical wind chimes using small pieces of driftwood. Drill holes through the wood, string them together with twine or fishing line, and add other elements like shells, beads, or stones for added charm. Hang them in a breezy spot to enjoy their melodic sounds.

Driftwood Garden Sculptures

If you have an artistic streak, consider crafting more elaborate garden sculptures from driftwood. You can create abstract forms, animals, or even human figures. These sculptures can serve as captivating focal points in your garden.

Benefits of Using Driftwood in Your Garden

Using driftwood in your garden offers several benefits:

  1. Sustainability: Driftwood is a natural and renewable resource. By using driftwood, you’re promoting sustainable gardening practices and reducing the need for synthetic or non-renewable materials.
  2. Aesthetic Appeal: Driftwood’s unique shapes and textures add a visually intriguing element to your garden. Its natural appearance blends seamlessly with plants and stones, creating a harmonious garden design.
  3. Durability: Driftwood is naturally resistant to weathering and decay, making it an excellent material for outdoor use. With minimal maintenance, driftwood can withstand the elements and maintain its beauty for years.
  4. Versatility: Driftwood can be used in countless ways, from functional garden structures to decorative accents. Its versatility allows you to get creative and personalize your garden space.

Driftwood Garden Ideas Decor

Troubleshooting Common Issues

While driftwood is generally low-maintenance, there are a few common issues you might encounter:

Mold and Mildew

If your driftwood develops mold or mildew, it’s important to treat it promptly. Scrub the affected areas with a brush and a mixture of water and vinegar. Ensure the wood dries thoroughly to prevent further mold growth.

Insects

Occasionally, driftwood may harbor insects. To address this, you can either use an insecticide spray or soak the driftwood in a saltwater solution before using it in your garden.

Stability

Ensure that larger driftwood structures, such as benches or trellises, are securely anchored to prevent them from tipping over. You can bury the base of the driftwood in the soil or use stakes and ties for added stability.

Inspiring Driftwood Garden Ideas

Are you ready to infuse your garden with driftwood magic? Here are a few inspiring ideas to spark your creativity:

Seaside Sanctuary

Create a coastal-themed garden by incorporating driftwood with seashells, beach stones, and maritime plants. Arrange driftwood pieces to mimic waves or use them as a backdrop for a beach-inspired seating area.

Woodland Retreat

Transform a shaded garden corner into a woodland retreat using driftwood decor. Use driftwood to create pathways, plant stakes, and a seating area surrounded by ferns, hostas, and other shade-loving plants.

Zen Garden

Driftwood can enhance the serene atmosphere of a Zen garden. Use it to create a natural bridge over a dry riverbed, design minimalist driftwood sculptures, or place driftwood pieces among sand and stones for a tranquil vibe.

Herb Haven

Design an herb garden with driftwood markers, planters, and edging. Let the rustic charm of driftwood enhance the fragrant beauty of your herbs. Consider using driftwood to construct a small potting bench or storage shelf for your gardening tools.

Wildlife Paradise

Use driftwood to create birdhouses, bird feeders, and insect hotels to attract birds, bees, and other beneficial wildlife. Position driftwood sculptures strategically to provide perching spots and nesting areas for garden visitors.

Maintaining Your Driftwood Decor

Regular maintenance will keep your driftwood garden decor looking its best:

  1. Cleaning: Periodically clean your driftwood with a soft brush or cloth to remove dirt and debris. Avoid using harsh chemicals that could damage the wood’s natural appearance.
  2. Sealing: For added protection, you can seal your driftwood with a clear, outdoor wood sealant. This helps preserve the wood’s color and prolong its lifespan.
  3. Inspecting: Regularly inspect your driftwood for signs of decay, mold, or insect damage. Treat any issues promptly to prevent further deterioration.

Conclusion

Incorporating driftwood into your garden decor is a fantastic way to combine natural beauty and craftsmanship. With its unique shapes and textures, driftwood adds a rustic, organic touch to any garden space. Whether you’re using driftwood for planters, pathways, furniture, or art, the possibilities are endless.

So, why not take a stroll by the beach or visit your local garden center to find some driftwood treasures? Let your creativity flow, and transform your garden into a captivating oasis with the timeless charm of driftwood decor.

Filed Under: Driftwood Ideas Tagged With: DIY, Driftwood, garden decor, Outdoor Design, Recycled Materials

Diy Driftwood Garden Art

July 5, 2024 by admin

Discover the enchanting world of DIY Driftwood Garden Art, where your garden transforms into a whimsical haven. You’ll learn to create stunning decorations from naturally found driftwood, adding a rustic charm to your outdoor space. With easy-to-follow steps and creative ideas, you’ll be inspired to turn simple pieces of wood into captivating art. Embrace nature and your artistic flair to craft unique garden features that reflect your personal style and bring a touch of the seaside to your backyard. Have you ever wandered along a beach, picked up a piece of driftwood, and wondered what beautiful art you could create for your garden? Driftwood, with its unique shapes and natural textures, offers endless possibilities for do-it-yourself (DIY) garden art projects. This guide will walk you through the process, inspiring you to transform ordinary driftwood into extraordinary garden decor.

What Is Driftwood?

Driftwood is wood that’s been washed ashore by waves, tides, or winds. Its journey through water and exposure to various elements give it a weathered, natural beauty that is perfect for crafting. Due to its organic and durable nature, driftwood is an ideal medium for outdoor art.

The Charm of Driftwood

Each piece of driftwood is unique, shaped by its environment. This natural variance adds a rustic and artistic charm that can’t be replicated by synthetic materials. The imperfections and weathered appearance make it a perfect fit for garden art, where it can blend seamlessly with the natural world.

Why Use Driftwood for Garden Art?

Driftwood isn’t just visually appealing; it’s also practical for outdoor art. Here are some reasons why:

  • Eco-Friendly: Using driftwood for art repurposes a natural resource that would otherwise go to waste.
  • Durable: Driftwood is naturally resistant to rot and decay, making it perfect for outdoor use.
  • Versatile: Its varied shapes and sizes mean it can be used in countless ways.

Gathering Driftwood

Before you start crafting, you’ll need to gather some driftwood. Here’s how:

Choosing the Right Location

Finding driftwood is often a matter of being in the right place at the right time. Coastal beaches, riverbanks, and lakeshores are excellent places to search. Check local regulations to ensure collecting driftwood is allowed in your chosen area.

Respecting Nature

While gathering driftwood, take care not to disrupt local wildlife or ecosystems. Only collect what’s naturally detached and avoid taking driftwood that creatures are using as homes.

Diy Driftwood Garden Art

Preparing Driftwood for Art

Once you’ve gathered your driftwood, preparation is key to ensuring it’s ready for your garden art projects.

Cleaning Driftwood

  1. Rinse with Fresh Water: Remove salt, sand, and any loose dirt.
  2. Scrub: Use a brush to scrub away any remaining dirt or debris.
  3. Disinfect: Soak the driftwood in a solution of water and bleach (1:9 ratio) for 24 hours to kill any remaining bacteria or pests.
  4. Rinse Again: Rinse thoroughly to remove any bleach residue.
  5. Dry: Let the driftwood air dry completely, ideally for a few days.

Sanding and Smoothing

Use sandpaper to smooth any rough edges. This step is especially important for pieces that will be handled often or have sharp points.

Safety Tips for Working with Driftwood

  1. Wear Gloves: Protect your hands from splinters and rough surfaces.
  2. Use a Mask: When sanding, wear a mask to avoid inhaling dust.
  3. Ventilate: Work in a well-ventilated area, especially when using chemicals like bleach.

DIY Driftwood Garden Art Ideas

Now that you’ve prepared your driftwood, it’s time to get creative! Here are several DIY garden art projects to inspire you:

Driftwood Plant Hangers

Create unique plant hangers using driftwood.

Materials Needed:

  • Driftwood pieces
  • Rope or twine
  • Hooks or screws
  • Plants (e.g., succulents, air plants)

Steps:

  1. Select Sturdy Driftwood: Choose pieces that can support the weight of your plants.
  2. Attach Rope: Securely tie or screw the rope onto the driftwood.
  3. Hang Plants: Attach the plants to the driftwood using hooks or additional rope.
  4. Hang the Art: Find a suitable spot in your garden to display your new plant hanger.

Driftwood Sculptures

Driftwood’s natural shapes make it perfect for creating sculptures.

Materials Needed:

  • Assorted driftwood pieces
  • Waterproof glue or screws
  • Base (if necessary)
  • Finish (optional)

Steps:

  1. Plan Your Design: Lay out your driftwood pieces to visualize your sculpture.
  2. Assemble: Glue or screw the pieces together.
  3. Add a Base: If needed, attach your sculpture to a stable base.
  4. Finish: Optionally, apply a waterproof sealant to protect your sculpture from the elements.

Driftwood Garden Markers

Label your garden plants with rustic driftwood markers.

Materials Needed:

  • Small driftwood pieces
  • Waterproof marker or wood-burning tool
  • Sealant (optional)

Steps:

  1. Prepare Driftwood: Clean and smooth small pieces of driftwood.
  2. Label: Write or burn the names of your plants onto the driftwood.
  3. Seal: Optionally, apply a waterproof sealant to protect the markers.
  4. Place in Garden: Insert the markers into the soil near your plants.

Driftwood Wind Chimes

Add a melodic touch to your garden with driftwood wind chimes.

Materials Needed:

  • Various driftwood pieces
  • Drill and small drill bits
  • Fishing line or string
  • Chime elements (e.g., shells, small metal pieces)

Steps:

  1. Drill Holes: Carefully drill small holes in the driftwood and chime elements.
  2. String Pieces Together: Use fishing line or string to tie the parts together, ensuring they can move freely.
  3. Hang: Suspend the wind chime from a branch or structure in your garden.

Driftwood Garden Borders

Use driftwood to create natural garden borders.

Materials Needed:

  • Long, sturdy pieces of driftwood
  • Stakes or posts (optional)

Steps:

  1. Lay Out Border: Arrange your driftwood along the desired garden border area.
  2. Secure: If needed, use stakes or posts to hold the driftwood in place.
  3. Create Continuity: Ensure the pieces fit together well to create a cohesive look.

Driftwood Birdhouses

Craft charming birdhouses that blend seamlessly with nature.

Materials Needed:

  • Driftwood pieces
  • Waterproof glue or small nails
  • Basic birdhouse structure (optional)

Steps:

  1. Choose a Base: Start with a simple birdhouse structure or build one from driftwood.
  2. Attach Driftwood: Cover the base with driftwood pieces using glue or nails.
  3. Create Openings: Make sure to leave or create openings for birds to enter.
  4. Install: Place the birdhouse in a tree or dedicated space in your garden.

Diy Driftwood Garden Art

Maintaining Driftwood Garden Art

To ensure your driftwood art lasts, regular maintenance is essential.

Regular Inspections

Check your driftwood art periodically for signs of wear or damage. Tighten any loose screws and replace broken pieces as needed.

Resealing

If you used a sealant, reapply it periodically to maintain protection against the elements.

Cleaning

Gently clean your driftwood art with water and a mild soap if it becomes dirty. Avoid using harsh chemicals.

Encouraging Creative Expression

Don’t be afraid to experiment with new ideas and combinations. Driftwood’s versatility means you can always find new ways to incorporate it into your garden. Let your creativity flow and create unique pieces that reflect your personal style.

Mixing Materials

Combine driftwood with other natural elements like stones, shells, and plants to enhance your garden art.

Customizing Designs

Adjust your designs to suit your garden’s theme. Whether it’s a tropical paradise or a rustic retreat, driftwood can adapt to fit your vision.

Involving Family

Get your family involved in your DIY projects. It’s a fun way to spend time together and foster creativity in kids and adults alike.

Understanding Driftwood Symbolism

Driftwood often carries deep symbolism, representing resilience, endurance, and natural beauty. Using driftwood in your garden art not only beautifies your space but also adds a layer of meaning.

Resilience

Driftwood’s journey from tree to shore symbolizes strength and adaptability. Incorporating driftwood into your garden can serve as a reminder of nature’s resilience.

Connection to Nature

Driftwood’s organic origins and natural weathering process keep you connected to nature, grounding your garden space in the natural world.

Inspirational Projects

To spark your creativity, here are a few more driftwood garden art project ideas:

Driftwood Arbors and Trellises

Transform your garden entrance or add a vertical element with driftwood arbors and trellises.

Driftwood Pathways

Create rustic garden paths using long, flat pieces of driftwood laid side by side.

Driftwood Benches

Construct a driftwood bench for a functional and artistic garden seat.

Hanging Mobiles

Design a driftwood mobile with shells, stones, and other natural elements to hang from a tree or pergola.

Seasonal Decorations

Craft seasonal decorations like driftwood wreaths for holidays and special occasions, giving your garden a festive touch.

Fairy Gardens

Build whimsical fairy houses and miniature gardens using smaller pieces of driftwood, creating magical spaces for little imaginations.

Supporting Local Artisans

If crafting isn’t your forte, consider supporting local artisans who create driftwood art. Purchasing from local artists ensures you receive unique, handcrafted pieces while supporting the community.

Crafting with a Conscience

When creating driftwood garden art, it’s important to respect the environment. Only use what you need and ensure your practices are sustainable.

Eco-Friendly Practices

  • Collect Responsibly: Only take driftwood that’s naturally detached and abundant.
  • Recycle and Reuse: Use scraps and leftover pieces for smaller projects.
  • Educate Others: Share your sustainable crafting practices with friends and family.

Conclusion

Driftwood garden art offers a unique and environmentally friendly way to enhance your outdoor space. By crafting your own pieces, you not only create beautiful decorations but also connect with nature in a meaningful way. Whether you’re making plant hangers, sculptures, or birdhouses, each project is an opportunity to express your creativity and bring a touch of the natural world into your garden. So next time you find yourself on a beach, pick up that piece of driftwood and let your imagination run wild!

Filed Under: Driftwood Ideas Tagged With: crafting, DIY, Driftwood, Garden Art, Outdoor Decoration

Driftwood Hanging Art Diy

July 4, 2024 by admin

Looking for a fun and creative project to brighten up your living space? Driftwood Hanging Art DIY might just be what you need! In this friendly and easy-to-follow guide, you’ll discover how to transform ordinary pieces of driftwood into unique and eye-catching decorations. With just a few simple materials and a dash of inspiration, you can create stunning hanging art that showcases the natural beauty of driftwood. Whether you’re a seasoned DIY enthusiast or a beginner looking for a new hobby, you’ll find this project both rewarding and enjoyable. Get ready to bring a touch of coastal charm to your home with your very own driftwood masterpiece! Have you ever stumbled upon a piece of driftwood during a beach walk and thought, “I could make something amazing with this”? If so, you’re not alone! Driftwood has a special charm that connects us to the natural world, and creating driftwood hanging art can be a fantastic way to bring a bit of that beachy magic into your home. Let’s dive into the fun and easy world of creating your own driftwood hanging art.

Why Driftwood?

The Beauty of Driftwood

Driftwood is nature’s artwork. Each piece has its own unique texture, color, and shape, shaped over time by water, wind, and sun. When you incorporate driftwood into art, you’re using a material that has a story of its own.

Environmentally Friendly

Using driftwood is also an eco-friendly choice. By repurposing fallen wood, you’re not contributing to deforestation. Plus, collecting driftwood from beaches helps keep natural spaces clean!

Gathering Your Materials

Finding Driftwood

The first step is, of course, to find your driftwood. Beaches, rivers, and lakes are great places to look. Always check local regulations regarding driftwood collection to ensure it’s permitted.

Tools and Supplies

You’ll need a few basic tools and supplies to create your driftwood hanging art:

ToolsSupplies
Saw (if resizing)Driftwood pieces
SandpaperString, cord, or wire
Drill (if needed)Hanging hardware
Glue Gun/Craft GlueOptional embellishments

Making sure you have everything on hand will save you time and make the process smoother.

Driftwood Hanging Art Diy

Preparing Driftwood

Cleaning

Once you’ve gathered your driftwood, the first step is to clean it. This can involve a good scrub with a brush and soapy water. Rinse thoroughly and let it dry completely.

Sanitizing

If you’re worried about any bacteria or pests, you can sanitize the driftwood by soaking it in a bleach solution (1 cup of bleach to 5 gallons of water) for about an hour. Rinse well and let it dry in the sun.

Smoothing the Surface

Sometimes driftwood can have rough patches or splinters. Use sandpaper to smooth the surface, making it easier to handle and more aesthetically pleasing.

Designing Your Art

Inspiration and Planning

Think about what you want to create— a wall hanging, a mobile, a wall sculpture? Browse online or check out nature-themed art for inspiration. Sketch out your design if it helps you visualize the final product.

Arranging the Pieces

Lay out your driftwood pieces in the desired arrangement before you start attaching anything. This allows you to adjust the positioning and ensure the composition flows well. Experiment with different configurations and take photos to compare.

Driftwood Hanging Art Diy

Assembling Your Driftwood Art

Drilling and Cutting

If some pieces need resizing, use a small saw. If you need to create holes for string or wire, use a drill. Ensure all tools are used safely and appropriate protective gear is worn.

Attaching the Pieces

This can be done in various ways depending on your design:

Using String or Cord

Cut lengths of string or cord to attach the driftwood pieces. This method works well for mobiles or wall hangings. Simply tie knots around the driftwood, securely fastening them together.

Using Glue

For a more rigid structure, a strong craft glue or a hot glue gun can be used. Apply small amounts of glue at joints, making sure each connection is secure before moving on.

ProsCons
Strong bondsLess flexibility
Clean appearanceLonger drying time

Adding Embellishments

This is the fun part where you can personalize your driftwood art. Consider adding seashells, beads, feathers, or even painting sections of the driftwood for a splash of color.

Hanging and Displaying

Choosing the Location

Decide where you want to display your driftwood art. It could be a focal point in your living room, a serene addition to a bedroom, or a lively piece for your patio.

Hanging Hardware

Install the appropriate hardware for your piece. For wall hangings, strong wall hooks or nails will suffice. For mobiles, ensure you have a sturdy ceiling hook.

Admiring Your Creation

Once your piece is secure, step back and admire your handiwork. Driftwood art has a calming, natural presence that can transform any space.

Maintaining Your Driftwood Art

Dusting

Regularly dust your art piece to keep it looking fresh. Use a soft cloth or brush.

Spot Cleaning

If a deeper clean is needed, gently wipe with a damp cloth. Avoid soaking the wood as it can weaken the structure over time.

Troubleshooting and Tips

Driftwood Won’t Stay Together

If pieces of driftwood seem to shift or come loose, reinforce them with additional ties or glue. Ensure each joint is secure before moving on to the next section.

Balancing Mobiles

Creating a balanced mobile can be tricky. Adjust the positioning of each piece until the mobile hangs evenly. Patience and trial-and-error will pay off!

Conclusion

Creating driftwood hanging art is not only a rewarding DIY project but also a beautiful way to bring nature into your home. With a few simple tools, some creativity, and a bit of effort, you can transform those weather-worn pieces of driftwood into stunning works of art. Happy crafting, and may your driftwood journey be filled with inspiration and joy!

Filed Under: Driftwood Ideas Tagged With: DIY, Driftwood, Handmade, Hanging Art, home decor

Driftwood Resin Jewelry

July 3, 2024 by admin

Driftwood Resin Jewelry brings the beauty of nature together with the elegance of refined craftsmanship. As you explore the unique pieces, you’ll discover that each creation tells a story—with driftwood intricately wrapped in resin, preserving the wood’s natural charm while adding a modern, glossy finish. Imagine wearing a piece of art that not only looks stunning but also connects you to the serene shorelines where the driftwood once drifted. From necklaces to earrings, Driftwood Resin Jewelry offers something special for every nature lover and fashion enthusiast. Have you ever thought about transforming something as simple as driftwood into elegant, one-of-a-kind jewelry? In the wonderful world of DIY crafts, you can elevate this seemingly ordinary material using resin to create stunning pieces. Welcome to the fascinating realm of Driftwood Resin Jewelry. Let’s dive into the details of how you can turn beachcombing treasures into wearable art!

Driftwood Resin Jewelry

What is Driftwood Resin Jewelry?

Driftwood: Nature’s Art

Driftwood refers to wood that has been washed ashore by the action of winds, tides, or waves. Each piece is uniquely weathered by natural elements, making them a perfect canvas for creative projects.

The Allure of Resin

Resin is a liquid substance that hardens into a clear, glass-like finish when mixed with a specific hardener. It’s popular in various craft projects due to its durability, versatility, and aesthetic appeal.

The Beautiful Fusion

When you combine driftwood and resin, you get driftwood resin jewelry. This combination has a mesmerizing quality, as the resin can capture and enhance the natural beauty of the driftwood, often embedding other decorative elements such as flowers, glitter, or small objects.

Why Choose Driftwood Resin Jewelry?

Unique and Personalized

Every piece of driftwood is different, which guarantees that your jewelry will be one-of-a-kind. When you create your pieces, you can infuse your personal touch into every design choice. This makes driftwood resin jewelry not only a craft but a reflection of your individuality.

Environmentally Friendly

Using driftwood is an excellent way to recycle natural materials. Instead of letting this beautiful wood remain unused along coastlines, you can give it a new life as a stunning piece of jewelry. The result is an environmentally conscious accessory that also looks fabulous.

Therapeutic Hobby

Crafting driftwood resin jewelry can be incredibly satisfying and therapeutic. The process of selecting, designing, and crafting each piece can be a calming and rewarding experience, providing you with a wonderful outlet for your creativity and helping you unwind after a busy day.

Materials You’ll Need

Sure, you’re ready to embark on your jewelry-making journey, but before you start, it’s crucial to gather all the necessary materials. Here’s a checklist to help you out:

MaterialDescription
DriftwoodPieces of wood found along beaches, cleaned and dried.
ResinTwo-part epoxy resin (resin and hardener).
Silicone MoldsFlexible and reusable molds for shaping the resin and driftwood.
Mixing CupsDisposable or reusable measuring cups for mixing the resin and hardener.
Stirring SticksWooden or plastic sticks for thoroughly mixing the resin and hardener.
GlovesNitrile or latex gloves to protect your hands from resin.
Protective GearSafety goggles and a mask for safe handling of resin.
SandpaperVarious grits for smoothing and polishing the finished pieces.
Jewelry FindingsHooks, chains, clasps, or earring posts to complete your jewelry.
Decorative ElementsOptional: dried flowers, glitter, beads, or other small objects for design.

Preparing the Driftwood

Cleaning

First and foremost, it’s essential to clean the driftwood thoroughly. Soak the pieces in a mixture of water and a little bit of dish soap. After soaking, scrub them with a brush to remove any sand, dirt, or algae. Rinse and let them dry completely, which might take a few days.

Cutting and Shaping

Once dry, you’ll need to decide on the shape and size of the pieces. Use a small saw or a carving knife to cut and shape the driftwood to your liking. Be careful during this step—wood can sometimes be brittle.

Sanding

After you’ve cut the pieces, sand them down to smooth the surfaces. This is important as it ensures that the resin adheres properly. Start with a coarser grit sandpaper and then move to finer grits to achieve a smooth finish.

Driftwood Resin Jewelry

The Resin Process

Mixing the Resin

When you’re ready to work with resin, make sure you are in a well-ventilated area or use a respirator mask. Wear gloves and protective gear. Measure the resin and hardener according to the manufacturer’s instructions and pour them into a mixing cup. Stir thoroughly for at least 2-3 minutes until the mixture becomes clear.

Pouring the Resin

Place your prepared driftwood into a silicone mold. Slowly pour the mixed resin into the mold, ensuring that it covers and envelops the driftwood fully. Tap the mold gently on the work surface to release any trapped air bubbles.

Adding Decorative Elements

If you want to add extra flair, now is the perfect time. You can place small decorative elements like dried flowers, glitter, or tiny beads into the resin. Use a toothpick or a small stick to position these elements precisely where you want them.

Curing

Leave the resin-filled molds undisturbed to cure according to the resin manufacturer’s instructions, typically 24-48 hours. Make sure the curing area is dust-free to avoid imperfections in your finished pieces.

Shaping and Finishing Your Jewelry

Demolding

After the resin has fully cured, carefully pop the pieces out of the molds. They should come out easily if the molds are made of silicone.

Sanding and Polishing

If there are any rough edges or imperfections, sand the pieces with fine-grit sandpaper. Once you’ve achieved the desired smoothness, use a polishing compound to give your jewelry a nice shine. You can do this by hand using a soft cloth or with a small rotary tool.

Drilling Holes

Depending on your design, you might need to drill small holes to attach hooks, jump rings, or other jewelry findings. Use a small hand drill or a rotary tool for precision. Make sure to drill slowly to avoid cracking the resin.

Assembling Your Jewelry

Now that your driftwood and resin pieces are ready, it’s time to assemble your jewelry. Here’s how:

Jewelry TypeAssembly Steps
NecklaceAttach a jump ring through the drilled hole and slide it onto a chain.
EarringsAttach earring hooks to the drilled holes with small jump rings.
BraceletsConnect multiple pieces with jump rings and attach to a chain or cord.
RingsGlue your driftwood resin piece onto a ring base.

Caring for Driftwood Resin Jewelry

Cleaning

To keep your driftwood resin jewelry looking its best, clean it with a soft cloth. Avoid using harsh chemicals or abrasive materials, as these can scratch or dull the resin.

Storage

Store your jewelry in a dry place, away from direct sunlight. Excessive exposure to sunlight can cause the resin to yellow over time.

Handling

While resin is quite durable, it’s still sensitive to extreme temperatures and high impact. Be mindful to keep your jewelry away from harsh conditions.

Sharing Your Creations

Driftwood resin jewelry makes excellent gifts and can even become a small business. Here are a few ways to share your creations:

Personal Gifts

Handmade jewelry carries a level of thoughtfulness that pre-made items often lack. Driftwood resin jewelry, with its unique character, makes for a truly special gift.

Selling Online

With platforms like Etsy or even social media, you can create an online store to sell your handcrafted jewelry. Showcase the unique aspects of each piece to attract buyers who appreciate one-of-a-kind accessories.

Craft Fairs and Markets

Participating in local craft fairs and markets is another great way to sell your pieces. It allows customers to see and feel the jewelry in person, which can be a huge advantage.

Benefits of Crafting Driftwood Resin Jewelry

Flexibility and Creativity

The process of crafting driftwood resin jewelry is incredibly flexible and allows for a vast amount of creativity. You can experiment with different shapes, sizes, and embedded objects to create jewelry that is a true expression of your artistic vision.

Learning New Skills

The process requires you to pick up various new skills—from woodworking and resin mixing to jewelry assembly. Each project becomes an educational journey where you can progressively tackle more complex designs.

Community and Connection

By sharing your creations, either through gifts or selling, you become part of a larger community of crafters and jewelry enthusiasts. It fosters a sense of connection and belonging that is incredibly fulfilling.

Mental Well-Being

Engaging in creative activities like jewelry making is known to improve mental well-being. It serves as a form of meditation, helping you to relax and focus, reducing stress and anxiety.

Conclusion

The magical combination of driftwood and resin opens up endless possibilities for unique, beautiful, and personalized jewelry. From the process of gathering your materials to the final assembly, each step offers a chance to explore your creativity and craft something truly special. So next time you find yourself at the beach, keep an eye out for those special pieces of driftwood—you never know what kind of dazzling jewelry you might be able to create. Happy crafting!

Filed Under: Driftwood Ideas Tagged With: Accessories, DIY, Driftwood, Handcrafted Jewelry, Resin

Driftwood Macrame Jewelry

July 2, 2024 by admin

Driftwood macrame jewelry combines the raw, natural beauty of beach-found driftwood with the intricate, delicate art of macrame to create truly unique wearable pieces. You’ll discover how to blend earthy textures with sophisticated knots, resulting in jewelry that’s both rustic and elegant. Whether you’re a seasoned crafter or a beginner, the joy of working with these two elements is unparalleled. Get ready to indulge in a therapeutic craft that not only expresses your creativity but also connects you with nature’s simplest treasures. Have you ever found yourself walking along the beach, picking up interesting pieces of driftwood, and wondering what you could make with them? If so, you’re in for a treat! Driftwood Macrame Jewelry is a beautiful, eco-friendly way to combine the natural beauty of ocean-weathered wood with the intricate artistry of macrame.

Driftwood Macrame Jewelry

What is Driftwood Macrame Jewelry?

Driftwood Macrame Jewelry is a form of wearable art that incorporates pieces of driftwood with macrame techniques. Driftwood, which is wood that has been naturally weathered by water and washed ashore, offers a unique and rustic charm. Macrame is a crafting technique that uses knots to create decorative patterns. When these two elements are combined, they produce stunning, one-of-a-kind pieces that echo the serenity and beauty of the sea.

The Beauty of Driftwood

Driftwood is more than just ocean debris. Each piece has its own story, shaped by the elements over time. The wood’s weathered texture and unique forms make it an intriguing material for creating jewelry. Plus, using driftwood is environmentally friendly, as it repurposes natural materials that would otherwise go to waste.

The Art of Macrame

Macrame, on the other hand, is an ancient art form that has seen a resurgence in popularity. This knotting technique can be as simple or complex as you want it to be. From basic square knots to intricate patterns, macrame offers endless possibilities for design. Its versatility makes it a perfect complement to the organic shapes and textures of driftwood.

Materials You’ll Need

Creating driftwood macrame jewelry doesn’t require a lot of tools or materials, making it accessible even for beginners. Here’s a list of what you’ll need to get started:

MaterialDescription
DriftwoodCollected pieces that are clean, dry, and free of pests.
Macrame CordCotton or hemp cords are ideal for natural aesthetics.
ScissorsSharp scissors for cutting your macrame cord.
Beads/CharmsOptional adornments to add extra flair to your pieces.
GlueTo secure knots if needed.

Choosing the Right Driftwood

When selecting driftwood for your jewelry, it’s essential to choose pieces that are lightweight and small enough to be worn comfortably. Avoid driftwood that is too bulky or heavy, as it may not work well for this purpose.

Selecting Macrame Cord

The type of macrame cord you choose will affect the overall look and feel of your jewelry. Cotton and hemp cords are popular choices due to their natural appearance. They also come in various thicknesses, so you can tailor your selection to your project’s requirements.

Basic Macrame Knots

Before diving into a project, it’s helpful to familiarize yourself with some basic macrame knots. These fundamental techniques will form the foundation of your jewelry designs.

Square Knot

The square knot is one of the most common and versatile macrame knots. Here’s how to create it:

  1. Cut two lengths of cord.
  2. Fold them in half and attach them to your driftwood using a Lark’s Head knot.
  3. Take the outer left cord and place it over the middle cords, then under the outer right cord.
  4. Take the outer right cord and place it under the middle cords, then over the outer left cord.
  5. Pull tight.
  6. Repeat these steps, alternating sides, to form the square knot.

Spiral Knot

The spiral knot is essentially a series of half-square knots that create a twisting effect. Here’s how to do it:

  1. Begin with a square knot.
  2. Continue making the same half-square knot repeatedly, without alternating sides.
  3. The cord will start to twist naturally, forming a spiral.

Lark’s Head Knot

The Lark’s Head knot is useful for attaching your cords to driftwood. Here’s how to make it:

  1. Fold a length of cord in half.
  2. Place the looped end over your driftwood piece.
  3. Pull the loose ends through the loop, tightening around the driftwood.

Designing Your Jewelry

Designing driftwood macrame jewelry allows for a lot of creativity and personal expression. Whether you prefer the look of minimalist pieces or more elaborate designs, the key is to play around with different knots and arrangements.

Planning Your Design

Before you start knotting, it can be helpful to sketch out your design. Consider the following:

  • Size of the Driftwood: How large is the piece, and how will it fit as a wearable item?
  • Cord Length: Be generous with your cord lengths to ensure you have enough material to work with.
  • Pattern: What kind of knot pattern do you want to follow? Simple or complex?
  • Adornments: Will you add beads or charms to enhance the design?

Creating a Simple Driftwood Macrame Necklace

Let’s walk through the steps of creating a simple driftwood macrame necklace.

  1. Preparation:

    • Gather your materials, selecting a piece of driftwood that is an appropriate size for a pendant.
    • Cut four lengths of macrame cord, each around 3 feet long.
  2. Attach Cord:

    • Fold the cords in half and use Lark’s Head knots to attach them to the middle of the driftwood piece. You should have eight cords hanging from the driftwood.
  3. Knotting:

    • Use the square knot technique to create a pattern below the driftwood. You can make as many or as few knots as you like, depending on the desired length of your necklace.
  4. Adding Beads (Optional):

    • Slide beads onto the cords and secure them with knots.
  5. Finishing:

    • Once you are happy with your design, trim any excess cord.
    • Apply a small amount of glue to the final knots for extra security.
  6. Tying the Necklace:

    • Use the remaining cord to create an adjustable sliding knot or simply tie the ends together to form the necklace.

Creating Bracelets and Earrings

Driftwood macrame isn’t limited to necklaces. Bracelets and earrings can also be made using similar techniques. Simply adapt the size and design to fit the type of jewelry you’re creating.

Driftwood Macrame Bracelet

  1. Preparation:

    • Choose a small piece of driftwood that will sit comfortably on your wrist.
    • Cut two lengths of macrame cord, each around 2 feet long.
  2. Attaching Cord:

    • Use Lark’s Head knots to attach the cords to each end of the driftwood piece.
  3. Knotting:

    • Use a combination of square knots or spiral knots to create a pattern that fits around your wrist.
  4. Finishing:

    • Secure the ends with knots and trim the excess cord.
    • Add an adjustable sliding knot or a clasp to finish the bracelet.

Driftwood Macrame Earrings

  1. Preparation:

    • Select two small, lightweight pieces of driftwood.
    • Cut two lengths of macrame cord, each around 1 foot long.
  2. Attaching Cord:

    • Use Lark’s Head knots to attach the cords to the middle of each driftwood piece.
  3. Knotting:

    • Create a small, delicate pattern below the driftwood using square or spiral knots.
  4. Adding Earring Hooks:

    • Attach earring hooks to the top of the driftwood pieces.
  5. Finishing:

    • Secure knots with glue and trim excess cord.

Driftwood Macrame Jewelry

Tips for Working with Driftwood and Macrame

Creating driftwood macrame jewelry is an enjoyable process, but it can come with some challenges for those new to the craft. Here are some tips to ensure your projects turn out beautifully:

Cleaning and Preparing Driftwood

Before incorporating driftwood into your jewelry, it’s essential to clean and prepare it:

  1. Cleaning:

    • Rinse the driftwood thoroughly with water to remove sand and debris.
    • Scrub it with a brush if necessary.
  2. Drying:

    • Let the driftwood dry completely. This may take several days, depending on its size.
  3. Sealing:

    • Use a natural wood sealer if you want to preserve the wood’s appearance and prevent it from deteriorating over time.

Choosing the Right Knots

The type of knot you choose will affect the overall look and functionality of your jewelry. Experiment with different knots to find what works best for your design.

Securing Knots

To ensure your jewelry is durable, it’s essential to secure your knots:

  • Tightening Knots: Make sure each knot is pulled tight to prevent slipping.
  • Using Glue: Apply a small amount of glue to the final knots for added security.

Experiment with Adornments

Don’t be afraid to add beads, charms, or other embellishments to your designs. These can add a personal touch and make your pieces stand out.

Sustainability and Ethical Considerations

Creating driftwood macrame jewelry not only allows you to express your creativity but also promotes sustainability. By using natural and repurposed materials, you are contributing to the reduction of waste and supporting eco-friendly practices.

Responsible Driftwood Collection

When collecting driftwood, it’s essential to do so responsibly:

  1. Legal Considerations: Some areas have regulations regarding the collection of driftwood. Make sure you are adhering to local laws.
  2. Minimal Impact: Avoid taking large amounts of driftwood from one area. Collect only what you need and leave enough for natural habitats and other beachgoers.

Using Ethical Materials

Choose materials that are sustainable and ethically sourced:

  • Macrame Cord: Look for cords made from organic cotton or hemp.
  • Beads and Charms: Opt for natural or recycled materials when possible.

Promoting Eco-Friendly Practices

By sharing your driftwood macrame creations, you can inspire others to adopt eco-friendly practices and appreciate the beauty of natural materials.

Conclusion

Driftwood macrame jewelry is a delightful way to bring the beauty of nature into your wardrobe. This craft combines the rustic charm of ocean-weathered wood with the intricate artistry of macrame, resulting in unique and sustainable pieces. Whether you’re a seasoned crafter or a beginner, this guide provides everything you need to get started on your journey of creating stunning driftwood macrame jewelry.

So, next time you find yourself strolling along the beach, keep an eye out for interesting pieces of driftwood. With a little creativity and some basic macrame techniques, you can transform these natural treasures into beautiful, wearable art that carries a touch of the sea’s magic wherever you go. Happy crafting!

Filed Under: Driftwood Ideas Tagged With: Accessories, DIY, Driftwood, Handmade, Macrame

Driftwood Jewelry Making

July 2, 2024 by admin

Welcome to the enchanting world of Driftwood Jewelry Making! Imagine strolling along a serene beach, discovering unique pieces of driftwood, and transforming them into stunning, one-of-a-kind pieces of jewelry. You will learn the art of selecting the perfect driftwood, preparing it, and combining it with beads, shells, and other materials to create beautiful, eco-friendly accessories. Whether you’re an experienced artisan or a curious beginner, this guide will inspire you to express your creativity and craft memorable treasures from nature’s bounty. Have you ever strolled along a beach, noticed a piece of driftwood, and wondered about its journey and how it might be transformed into something beautiful? Driftwood jewelry making is an incredibly rewarding craft that allows you to use nature’s debris to create stunning, personalized pieces. This guide will take you through everything you need to know to get started on your own driftwood jewelry making journey.

Driftwood Jewelry Making

What is Driftwood Jewelry?

Driftwood jewelry combines the natural beauty of wood with the aesthetics of accessories to create unique pieces that are as much about storytelling as they are about fashion. Driftwood is wood that has been washed onto shores by rivers, lakes, or oceans. The relentless powers of water and sand have sculpted and smoothed these pieces over time, lending them unique shapes and forms.

Why Choose Driftwood Jewelry Making?

Opting to create driftwood jewelry not only allows you to make one-of-a-kind pieces but also connects you to nature in an intimate way. Beyond the aesthetics, you’re reusing and repurposing material that would otherwise be discarded. Plus, working with driftwood is a soothing, tactile experience that can be meditative and rewarding.

Materials and Tools You’ll Need

Before diving into the craft, let’s gather the necessary materials and tools. Here’s a quick table for easy reference:

MaterialsTools
Driftwood piecesSandpaper
Earring hooks, clasps, and chainsHand drill or rotary tool
Beads, gems, and other embellishmentsPliers (jewelry-specific work best)
Glue (epoxy or resin)Paintbrush (for sealing)
Sealer or varnishSafety goggles and gloves
Wire (for wrapping and setting gems)Measuring tape and ruler

Choosing the Right Driftwood

Not all driftwood is created equal. When selecting pieces for your jewelry, aim for wood that is lightweight yet sturdy. Avoid heavily decayed pieces, as they might crumble under pressure.

  • Texture and Shape: Look for driftwood that has an interesting shape or grain. These natural features can add extra beauty to your final piece.
  • Size: Ensure that the pieces are proportionate to the type of jewelry you’re creating. Small, intricate pieces are suitable for earrings, while larger pieces may work better for pendants and necklaces.

Prepping Your Driftwood

Once you’ve chosen your driftwood, it’s crucial to prepare it properly before transforming it into jewelry. Proper preparation will ensure a smoother crafting process and a more durable final product.

Cleaning

Start by thoroughly cleaning your driftwood to remove any dirt, sand, or salt. Here’s a quick step-by-step:

  1. Rinse: Wash each piece under running water.
  2. Soak: Soak the driftwood in a mixture of water and mild detergent for a few hours.
  3. Scrub: Use a soft brush to scrub the wood, removing all dirt.
  4. Rinse Again: Rinse thoroughly to remove any soap residue.
  5. Dry: Let the wood air-dry completely. This might take a day or two.

Sanding

Sanding your driftwood is essential for a smooth finish. This not only makes the wood safe to handle but also prepares it for any varnish or sealant you may apply later.

  1. Begin with Coarse Sandpaper: Start with a coarse grit (around 80-100). Sand in a circular motion.
  2. Move to Finer Grit: Progress to finer sandpaper (200-220) for a smooth finish.
  3. Final Touch: Wipe the pieces with a damp cloth to remove any residual dust.

Designing Your Jewelry

This is where creativity comes into play. Think about what type of jewelry you’d like to create: earrings, necklaces, bracelets, or even rings.

Sketch Your Ideas

Before you start drilling and assembling, it’s a good idea to sketch your designs. This helps you visualize the final product and make adjustments before committing to a particular layout.

Consider Combinations

Driftwood pairs beautifully with various materials like:

  • Beads: Add a splash of color.
  • Gems: Introduce a touch of elegance.
  • Metal Wire: Create intricate, supportive frames.

Crafting Your Driftwood Jewelry

Once your design is ready, it’s time to bring your vision to life!

Drilling Holes

Drilling is typically required for attaching hooks, clasps, or other elements. Here’s how to do it safely:

  1. Choose the Right Bit: Use a small drill bit that matches the size of your hooks or jewelry findings.
  2. Safety First: Wear safety goggles and gloves.
  3. Secure the Wood: Place your driftwood on a stable surface.
  4. Drill Slowly: Slowly drill holes where needed, taking care not to split the wood.

Attaching Jewelry Findings

After drilling, attach your earring hooks, necklace clasps, or other essential components.

  1. Use Pliers: Carefully open and close jump rings to attach findings.
  2. Secure Tightly: Ensure all attachments are secure to avoid breakage.

Adding Embellishments

Enhance your driftwood pieces with beads, wire wrapping, or other decorative elements.

  1. Glue or Epoxy: Use a strong adhesive to attach beads or gems.
  2. Wire Wrapping: Wrap wire around the driftwood and insert additional adornments as you go, creating a decorative frame or spiral.

Driftwood Jewelry Making

Finishing Touches

Your beautiful piece of driftwood jewelry is almost complete. Now, it’s time for some finishing touches.

Sealing

Seal or varnish your driftwood to protect it from moisture and wear. Here’s how:

  1. Choose a Sealer: Either spray-on or brush-on sealers work well. Ensure it’s suitable for wood.
  2. Apply Evenly: Apply a thin, even layer, making sure to cover all surfaces.
  3. Dry: Allow the sealer to dry completely before handling or wearing the jewelry.

Final Check

Inspect your piece for any rough edges, loose parts, or imperfections. Make any necessary adjustments to ensure durability and comfort.

Caring for Your Driftwood Jewelry

Taking good care of your handcrafted jewelry will keep it looking beautiful for years to come.

Cleaning

Clean your driftwood jewelry with a soft, damp cloth. Avoid soaking it in water or using harsh chemicals, as these can damage the wood.

Storage

Store your pieces in a cool, dry place, away from direct sunlight. Consider using a jewelry box or pouch to protect them from scratches and dust.

Driftwood Jewelry Making Tips for Beginners

As with any craft, practice and patience go a long way. Here are some tips to help you on your driftwood jewelry making journey:

Start Simple

Begin with basic designs and gradually move to more intricate pieces as you gain confidence and skill.

Experiment

Don’t be afraid to experiment with different shapes, sizes, and embellishments. The more you play around, the more unique and interesting your pieces will become.

Take Your Time

Driftwood jewelry making is a process that requires patience. Take your time at each step to ensure high-quality results.

The Benefits of Driftwood Jewelry Making

Creating driftwood jewelry is not just about the end product; it’s also about the journey. Here are some benefits you might enjoy:

Connection to Nature

Gathering driftwood and working with natural materials fosters a deeper connection to the environment.

Stress Relief

The tactile nature of working with wood and the focused attention required can be very meditative and help alleviate stress.

Sense of Achievement

There’s immense satisfaction in creating something beautiful and unique with your own hands.

Popular Driftwood Jewelry Projects

If you’re looking for specific projects to get started, here are some popular options:

Driftwood Earrings

Lightweight and dainty, driftwood earrings are a great starter project. You can keep them simple or embellish with beads and wire for more flair.

Driftwood Necklaces

Pendants made from driftwood pieces can be striking and bold. Use larger pieces and string them on a simple cord or chain.

Driftwood Bracelets

Small driftwood beads can be drilled and strung together to create rustic, earthy bracelets. Combine with other natural materials for added texture.

Driftwood Rings

Though more challenging, driftwood rings can be stunning. Opt for small, sturdy pieces and carefully carve to fit.

Selling Your Driftwood Jewelry

Once you’ve honed your craft, you might consider selling your pieces. Here’s how to get started:

Online Marketplaces

Websites like Etsy and eBay are great for selling handmade jewelry. Make sure to take good-quality photos and write detailed descriptions to attract buyers.

Local Craft Fairs

Craft fairs and markets are excellent opportunities to sell your work and connect with customers face-to-face.

Social Media

Use platforms like Instagram and Facebook to showcase your work and reach a wider audience.

Conclusion

Driftwood jewelry making is a fulfilling and enjoyable craft that allows you to create unique, beautiful pieces while connecting with nature. By following the steps and tips outlined in this guide, you’ll be well on your way to mastering this art form. Whether you’re making jewelry for yourself, as gifts, or to sell, each piece tells a story and carries with it the essence of where it came from. So why not start your driftwood jewelry making journey today? You’ll find it to be a creatively satisfying and deeply rewarding experience.

Filed Under: Driftwood Ideas Tagged With: crafts, DIY, Driftwood, Handmade, Jewelry

Driftwood Furniture Design

July 2, 2024 by admin

Driftwood Furniture Design brings the serene beauty of the coast into your home, offering unique and eco-friendly pieces crafted from reclaimed driftwood. Whether it’s a rustic coffee table that serves as the centerpiece of your living room or a charming mirror adorned with natural textures, each item tells a story of the sea and adds a touch of nature’s elegance to your space. Embrace the warmth and character of handcrafted artistry with Driftwood Furniture Design, and let your home reflect the tranquil essence of the shoreline. Have you ever wandered along a beach and stumbled upon a piece of driftwood, wondering what could be made from this smooth, worn piece of nature? Driftwood furniture design is a captivating way to bring a bit of the serene beach vibe into your home. Not only does it allow you to create unique and stunning pieces, but it also promotes sustainability by repurposing materials that would otherwise be swept away by the tides.

What Is Driftwood?

Driftwood is wood that has been washed onto the shore by rivers, lakes, or oceans. Over time, these pieces of wood are weathered by water, sun, and wind, creating a smooth, textured appearance. The wood can come from various types of trees, leading to diverse textures and colors, which are highly prized in furniture design.

Origins and Journey

The journey of driftwood begins as trees or branches are carried away by streams, rivers, and tides. Exposure to harsh elements over time helps it develop its distinct look. The endless cycles of soaking, drying, and tumbling wear down the wood, giving it a weathered yet beautiful appearance. When you incorporate driftwood into your furniture designs, you capture a piece of nature’s artistry.

Why Choose Driftwood for Furniture?

Opting for driftwood furniture comes with numerous benefits beyond its aesthetic appeal. Here are a few compelling reasons you might consider driftwood for your next furniture piece.

Sustainability

Using driftwood helps in reducing waste and promoting sustainability. Rather than cutting down new trees, you are reclaiming a material already shaped by nature. This practice diminishes your carbon footprint, contributing to environmental conservation.

Unique Character

Every piece of driftwood is a one-of-a-kind find. This uniqueness translates into furniture pieces with individual character and charm that you can’t replicate. Each knot, grain pattern, and twist tells its own story, making each piece a work of art.

Natural and Rustic Appeal

Driftwood brings an inherent rustic and organic feel to any space. Its weathered texture and neutral tones blend seamlessly into various interior design styles, from coastal to bohemian to rustic chic.

Driftwood Furniture Design

Types of Driftwood Used in Furniture Design

Different types of trees contribute to the variety of driftwood available. Each type has its own unique qualities, color, and durability.

Type of DriftwoodCharacteristics
CedarLightweight, aromatic, resistant to decay
OakHeavy, dense, strong
PineSoft, easy to shape, lighter color
MapleHard, versatile, smooth grain
MahoganyRich color, durable, slightly heavier

Cedar Driftwood

Cedar driftwood is prized for its lightweight properties and natural resistance to decay. It has a distinct aroma and is generally available in shades ranging from light amber to a reddish hue.

Oak Driftwood

Oak is known for being dense and heavy, making it incredibly strong and durable. Its driftwood form still retains these qualities but is often softer to the touch due to the smoothing effect of water exposure.

Pine Driftwood

Pine is softer, making it easier to shape, and often comes in lighter colors. It has an understated, simplistic beauty that fits well into minimalist designs.

Popular Driftwood Furniture Pieces

Driftwood can be fashioned into numerous types of furniture, each bringing its own unique flair to your décor.

Driftwood Coffee Tables

A driftwood coffee table can be a stunning centerpiece in your living room. It combines function with natural beauty, offering a conversation piece that showcases the raw and rugged charm of driftwood.

Driftwood Shelves

Perfect for displaying books, plants, or small decorative items, driftwood shelves are both practical and appealing. The natural grain and texture add a warm, earthy touch to any wall.

Driftwood Chairs and Benches

Add a rustic charm to your seating options with driftwood chairs or benches. These pieces often feature a blend of smooth and textured surfaces, providing both comfort and visual interest.

Driftwood Bed Frames

A driftwood bed frame introduces a tranquil, beach-like atmosphere to your bedroom. The unique patterns and colors of the driftwood create a beautiful, calming retreat for your resting space.

Driftwood Mirrors and Picture Frames

For smaller yet impactful pieces, consider driftwood mirrors and picture frames. These items bring a touch of nature to your décor, enhancing the beauty of the images or reflections they surround.

Driftwood Furniture Design

DIY Driftwood Projects

Feeling inspired to create your own driftwood furniture? Here are some basic steps to get you started on a DIY driftwood project.

Collecting Driftwood

The first step involves gathering your driftwood. Make sure to collect it from legal areas and always follow local guidelines regarding collection.

Cleaning and Preparing Driftwood

Proper cleaning is essential to remove any salt, sand, and debris. Soak the driftwood in a mixture of water and vinegar for a few days, then scrub it thoroughly and leave it to dry completely.

Designing Your Piece

Sketch your design and plan the structure of your furniture piece. Take measurements and make sure you have all necessary tools and additional materials.

Assembling the Furniture

Using wood glue, screws, and other fasteners, start putting your piece together. Depending on the design, you might need to drill holes or sand some sections for a better fit. Finish your piece with a protective sealant to ensure longevity.

Driftwood Furniture Care and Maintenance

Maintaining driftwood furniture ensures it remains beautiful and functional for years to come.

Regular Dusting

Dust your driftwood furniture regularly to keep it clean. Use a soft, dry cloth to avoid scratching the surface.

Avoiding Excess Moisture

While driftwood has been shaped by water, it’s best to protect it from prolonged exposure to moisture in your home to prevent any mold or mildew.

Occasional Sealing

Applying a sealant from time to time helps protect your driftwood furniture from wear and tear. Choose a sealant that enhances the wood’s natural color without making it overly shiny.

Incorporating Driftwood Furniture in Different Décor Styles

Driftwood furniture can blend beautifully with various interior design styles, enhancing the overall theme of your space.

Coastal Décor

Driftwood furniture is a natural fit for coastal-themed homes. Combine it with light colors, nautical elements, and plenty of natural light to create a serene, beach-inspired atmosphere.

Rustic Chic

Pair driftwood furniture with other rustic elements like exposed beams, stone walls, and vintage accessories for a cozy, inviting look.

Minimalist

In minimalist designs, driftwood serves as an eye-catching focal point. Its natural beauty stands out against a backdrop of clean lines and neutral colors.

Eclectic Style

In eclectic spaces, driftwood furniture can add texture and interest. Mix and match with colorful textiles, unique art, and diverse materials to create a vibrant, personalized environment.

Where to Buy Driftwood Furniture

If you’re not up for DIY, there are plenty of places to purchase beautiful driftwood furniture.

Local Artisans

Many local craftsmen specialize in driftwood furniture, offering unique, handmade pieces that highlight the natural beauty of the materials.

Online Marketplaces

Websites like Etsy and eBay are treasure troves for driftwood furniture. You can find everything from small decorative items to large furniture pieces.

Home Décor Stores

Some home décor stores and chains carry driftwood furniture, especially those that focus on natural and sustainable materials.

Final Thoughts

Driftwood furniture design isn’t just about creating beautiful, functional pieces for your home. It’s about connecting with nature and embracing sustainability. Each piece of driftwood carries its own history, making every item you create or purchase uniquely yours. Whether you’re a DIY enthusiast or prefer to leave it to the professionals, driftwood furniture offers endless possibilities for bringing a touch of the natural world into your living space.

By choosing driftwood, you’re not just getting a piece of furniture; you’re acquiring a story crafted by nature, one that you’ll cherish and showcase for years to come. So next time you find yourself by the water, keep an eye out for that perfect piece of driftwood. Your next masterpiece might be just a tide away.

Filed Under: Driftwood Ideas Tagged With: DIY, Driftwood, furniture, Interior Design, natural materials

  • « Previous Page
  • Page 1
  • …
  • Page 28
  • Page 29
  • Page 30
  • Page 31
  • Page 32
  • …
  • Page 41
  • Next Page »

Primary Sidebar

Driftwood4us.com, is a participant in the Amazon Services LLC Associates Program, an affiliate advertising program designed to provide a means for sites to earn advertising fees by advertising and linking to amazon.com.