• Skip to main content
  • Skip to primary sidebar
  • Terms and Conditions
  • Privacy Policy
  • Contact

Driftwood 4 Us

Just About Driftwood

DIY

Driftwood Furniture Ideas

June 25, 2024 by admin

Driftwood Furniture Ideas explores the enchanting world of driftwood and its potential to transform your living space into a rustic, coastal haven. Through this article, you’ll discover how to create stunning and unique furniture pieces that not only tell a story but also bring the beauty of nature into your home. From elegant coffee tables to charming headboards, you’ll see how incorporating driftwood can add character and a touch of the sea to your decor. Whether you’re an experienced DIY enthusiast or just starting out, these driftwood furniture ideas will inspire you to get creative and bring a piece of the beach into your everyday life. Have you ever wandered along the beach, admired the weathered pieces of driftwood, and thought about the endless creative possibilities they hold? Driftwood has a unique charm, infused with nature’s artistry, making it an excellent material for furniture. Imagine bringing a piece of the beach into your home! It can add a warm, rustic feel to any space. Wondering how you can incorporate driftwood into your home décor? Let’s dive into some inspiring driftwood furniture ideas that you can try.

Driftwood Furniture Ideas

Why Choose Driftwood?

Driftwood is not only beautiful but offers numerous benefits when used in furniture making. It provides a unique aesthetic that can’t be created through traditional woodworking methods. Each piece of driftwood tells a story of its journey through water, sand, and sun, making your furniture truly one-of-a-kind.

Sustainability

Driftwood furniture is an eco-friendly choice. By repurposing what nature has provided, you help reduce deforestation and minimize environmental impact. Driftwood pieces can often be found easily at beaches, requiring no additional resource-intensive processes to acquire.

Durability

Driftwood is surprisingly durable. The exposure to elements like saltwater and sun hardens the wood, making it robust and long-lasting. It’s perfect for both indoor and outdoor furniture.

Aesthetic Versatility

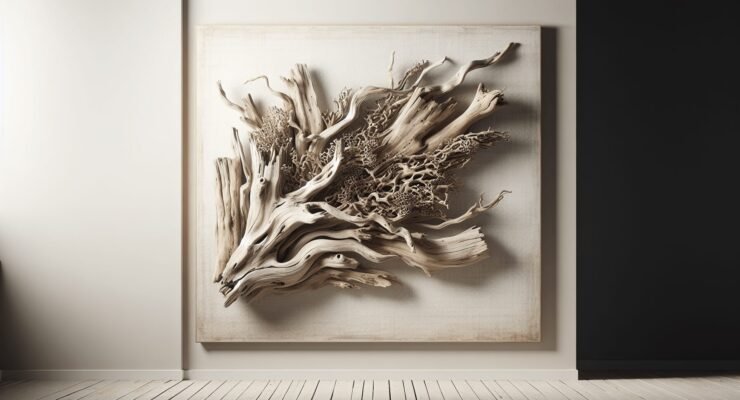
The natural, weathered look of driftwood can enhance various home styles, from rustic and coastal to modern and minimalist. It’s versatile enough to complement a range of décor themes. Plus, the fact that each piece is unique ensures your furniture will be a standout feature in your home.

DIY Projects with Driftwood

You don’t need to be a professional carpenter to create stunning driftwood furniture. Here are some easy-to-follow DIY project ideas that you can try.

Driftwood Coffee Table

A driftwood coffee table can serve as a fantastic centerpiece in your living room. Start by finding a large, flat piece of driftwood for the tabletop. Attach sturdy legs, either made of wood or metal, depending on your style preference. Finish it off with a glass top to protect the wood and provide a smooth, level surface.

Driftwood Wall Shelf

Transform a small or medium piece of driftwood into a unique wall shelf. Securely mount the driftwood to your wall using strong brackets. This shelf can be a beautiful place to display books, plants, or small decorative items.

Driftwood Candle Holder

A driftwood candle holder brings warmth and coziness to any room. Find a piece of driftwood with an interesting shape and drill evenly spaced holes to fit the candles. You can choose to leave the wood natural or give it a light sanding and finish to match your décor.

Driftwood Lamp

Making a driftwood lamp can be an exciting project. You’ll need a long, sturdy piece of driftwood as the lamp base and a lamp kit, which can be found at most hardware stores. Fit the lamp kit through the driftwood and attach a lampshade that complements the natural, rustic look.

Professional Driftwood Furniture Options

If DIY isn’t your thing, there are plenty of ready-made driftwood furniture options available. These pieces often combine driftwood with traditional woodworking techniques to create functional and artistic furniture.

Driftwood Dining Tables

A driftwood dining table can be a stunning feature in your dining area. Many designs incorporate driftwood bases with glass or solid wood tops. The blend of rustic charm with a polished surface can elevate your dining experience.

Driftwood Beds

Imagine lying down on a bed frame made of carefully selected driftwood pieces. Driftwood beds often feature headboards crafted from large, dramatic pieces of driftwood, creating a focal point in the bedroom. Some designs also incorporate driftwood into the footboard and side rails for a cohesive look.
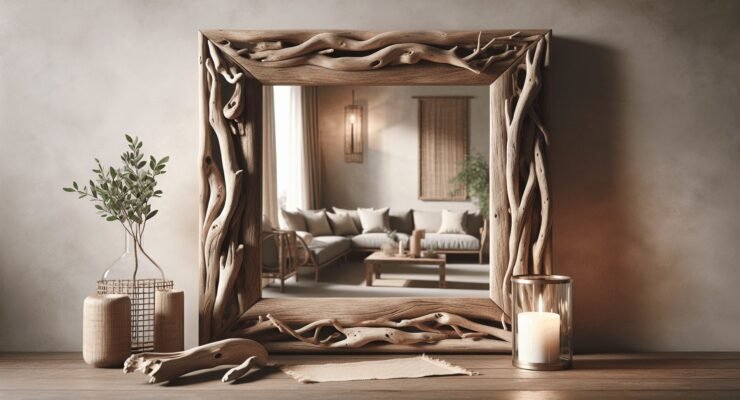
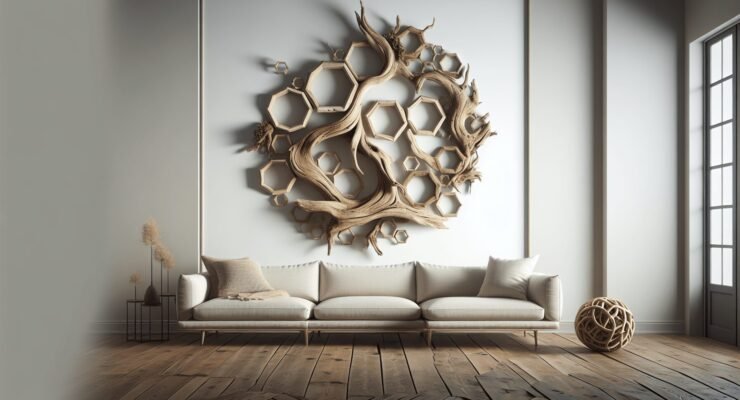
Driftwood Mirrors

Mirrors framed with driftwood can add a unique touch to any room. The natural texture of the driftwood adds character to the reflective surface, making it more than just a functional piece. These mirrors are perfect for hallways, bathrooms, or as part of a gallery wall.
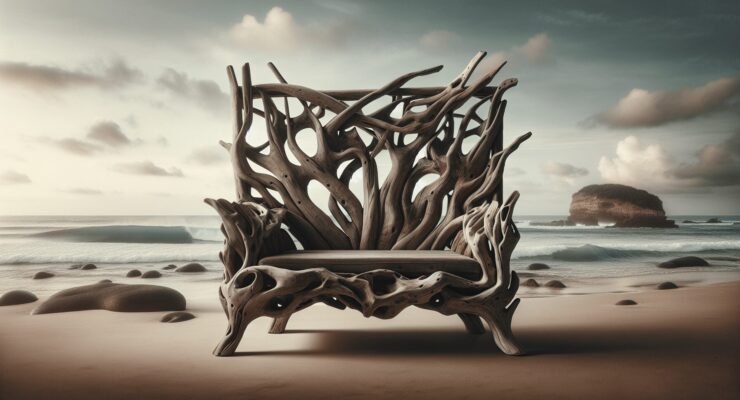
Driftwood Benches

A driftwood bench can be a versatile addition to your home, perfect for entryways, gardens, or living rooms. The sturdy nature of driftwood ensures it can withstand regular use, while its natural beauty makes it a conversation piece.

Driftwood Consoles

Consoles made from driftwood can serve both practical and decorative purposes. Position one in your hallway, living room, or entryway to hold keys, mail, and decorative items. The mix of functionality and artistry that driftwood consoles offer is hard to beat.

Tips for Working with Driftwood

Now that you’re inspired, here are some tips to help you get started on your driftwood furniture journey.

Collecting Driftwood

When collecting driftwood, make sure you’re allowed to take it from the area. Some beaches have restrictions to protect their ecosystems. Look for pieces that are dry, as wet driftwood can be more difficult to work with and may contain moisture that can lead to mold.

Cleaning and Preparing Driftwood

Before you start crafting, it’s important to clean your driftwood thoroughly. Remove any sand, dirt, or salt by scrubbing the wood with a brush and water. Allow the driftwood to dry completely in the sun. You might also want to treat it with a wood preservative to protect against pests.

Tools and Techniques

Basic woodworking tools like saws, drills, and sandpaper are essential. Depending on your project, you might also need brackets, screws, wood glue, or a lamp kit. Driftwood can be unpredictable to work with due to its unique shapes and hardness, so be patient and flexible with your design plans.

Finishing Touches

Consider the finish you want for your driftwood furniture. Some people prefer to leave the wood natural, while others might opt for a light sanding and a protective coat of sealant. A matte finish can preserve the rustic look, while a glossy finish can give the wood a more polished appearance.

Driftwood Furniture Ideas

Combining Driftwood with Other Materials

Driftwood pairs beautifully with various materials, allowing you to create sophisticated and eclectic designs.

Driftwood and Glass

The transparency of glass complements the natural ruggedness of driftwood. Using a glass top on a driftwood base for tables or incorporating glass shelves with driftwood supports can result in stunning contrast and balance.

Driftwood and Metal

Combining driftwood with metal elements can add a modern twist to rustic designs. Metal brackets and legs can enhance the structural integrity of your driftwood furniture while adding a sleek, contemporary touch.

Driftwood and Stone

Stone and driftwood together can evoke a strong natural aesthetic. Consider using stone bases with driftwood table tops or incorporating stone elements into driftwood garden benches. This combination is perfect for creating a natural, earthy vibe in your outdoor spaces.

Driftwood and Upholstery

For pieces like benches and bed frames, incorporating upholstered elements can add comfort and style. Choose fabrics that complement the natural look of driftwood, such as linen or burlap, to maintain a cohesive design.

Where to Purchase Driftwood Furniture

If DIY isn’t your strength or you prefer ready-made pieces, numerous retailers and artisans specialize in driftwood furniture. Here are some tips for finding the best pieces.

Online Marketplaces

Websites like Etsy, eBay, and Wayfair offer a variety of driftwood furniture options. You can find unique, handcrafted items from artisans around the world. Be sure to read reviews and check the seller’s return policy before making a purchase.

Local Artisans

Supporting local artisans can ensure you get a one-of-a-kind piece made with care and attention to detail. Visit local craft fairs, art shows, or furniture stores that showcase handmade items.

Specialty Stores

Some specialty stores focus on coastal and rustic furniture, often featuring driftwood pieces. These stores typically offer higher-quality items and can provide customization options to suit your specific needs.

Caring for Driftwood Furniture

Once you have your beautiful driftwood furniture, proper care will ensure it lasts for years to come.

Regular Cleaning

Dust your driftwood furniture regularly to keep it looking its best. For deeper cleaning, use a damp cloth and mild soap solution. Avoid harsh chemicals that can damage the natural finish of the wood.

Protection from Elements

Even though driftwood is durable, it’s best to protect it from extreme elements. If you have outdoor driftwood furniture, consider using covers when it’s not in use or during harsh weather conditions.

Occasional Re-Sealing

If your driftwood furniture has a protective finish, it might need occasional re-sealing to maintain its appearance and durability. Follow the manufacturer’s recommendations or seek advice from a professional for the best results.

Inspiration from Driftwood Artists

Numerous artists and designers have created stunning driftwood pieces that can inspire your own projects.

James Doran-Webb

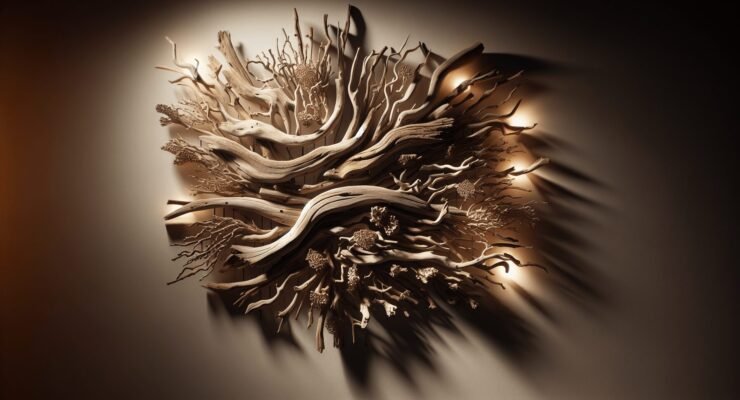
James Doran-Webb is a renowned sculptor known for his lifelike driftwood animal sculptures. His work showcases the potential of driftwood in creating intricate and detailed art.

Heather Jansch

Heather Jansch creates beautiful horse sculptures using driftwood. Her attention to detail and ability to capture motion and form in her work is truly inspiring.

Paul Baliker

Paul Baliker blends driftwood with other natural materials to create large-scale sculptures that often convey environmental messages. His work highlights how art can inspire change and awareness.

Driftwood Furniture in Different Décor Styles

Driftwood furniture can fit seamlessly into various décor styles, adding character and warmth.

Coastal Decor

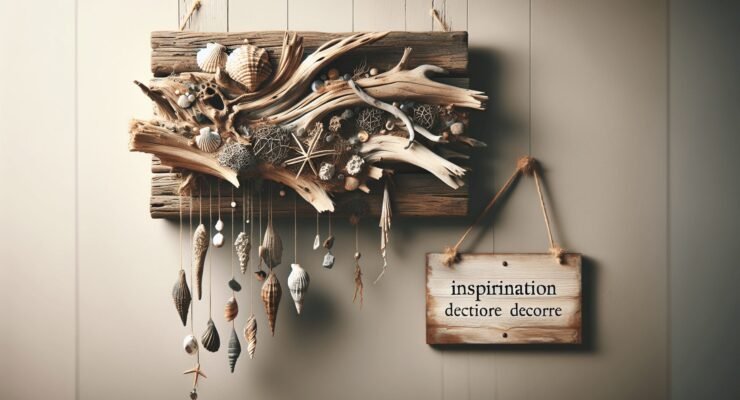
Driftwood is a natural choice for coastal-themed décor. Combine it with light, airy colors, nautical accents, and beach-inspired accessories to create a serene, coastal retreat in your home.
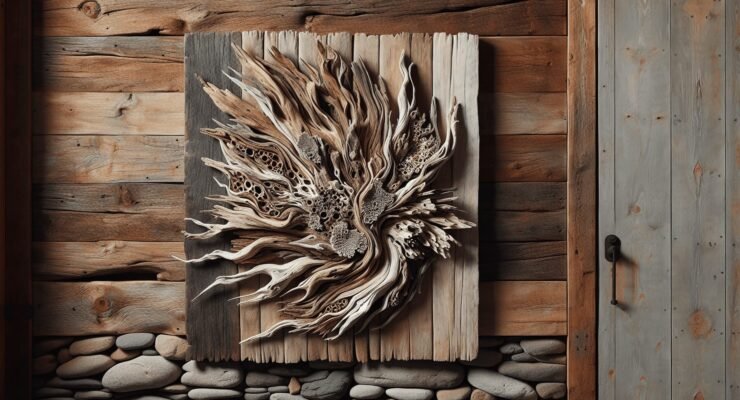
Rustic Decor

Embrace the rustic charm of driftwood by pairing it with earthy tones, natural fibers, and vintage accessories. Driftwood furniture can be the perfect addition to a cozy, rustic cabin or farmhouse-style home.

Modern Decor

Incorporate driftwood into modern décor by combining it with clean lines, minimalist designs, and contemporary materials. Driftwood pieces can add warmth and texture to modern interiors, creating a balanced and inviting space.

Bohemian Decor

The eclectic nature of bohemian décor pairs wonderfully with driftwood furniture. Mix and match vibrant colors, patterns, and textures to create a boho-chic space with a touch of natural beauty.

Final Thoughts

Driftwood furniture is more than just a piece of décor; it’s a piece of nature, history, and art combined. Whether you’re a DIY enthusiast or prefer purchasing ready-made pieces, driftwood offers endless possibilities to enhance your home with its unique charm. From coffee tables and benches to intricate sculptures and practical shelves, there’s no limit to what you can create or find.

By incorporating driftwood furniture into your home, you’re not just adding style and functionality—you’re bringing a piece of the beach, with its story and character, right into your living space. So next time you find yourself on the shore, don’t just admire the driftwood; envision it transforming your home into a rustic, coastal haven.

Filed Under: Driftwood Ideas Tagged With: DIY, Driftwood, furniture, Interior Design, Rustic

Outdoor Driftwood Wall Art

June 25, 2024 by admin

Welcome to the world of Outdoor Driftwood Wall Art, where the beauty of nature meets the creativity of your imagination. In this enchanting journey, you’ll discover how to transform simple pieces of driftwood into stunning, personalized wall art that adds a natural and rustic charm to your outdoor spaces. With just a few tools and a bit of inspiration, you’ll create captivating art pieces that reflect both your artistic spirit and the ever-changing beauty of the outdoors. Dive in and let your creativity flow as you bring the serene and timeless elegance of driftwood into your outdoor decor! Have you ever thought about bringing the beauty of nature into your outdoor space through art? If you have, then outdoor driftwood wall art might just be the perfect addition for you!

Driftwood, shaped by the waves, wind, and salt, can add a rustic yet unique charm to any yard, garden, patio, or deck. Imagine the organic curves and textures of driftwood combined with your creativity to make an aesthetically pleasing piece of art.

Outdoor Driftwood Wall Art

What is Driftwood?

Driftwood refers to any wood that has been washed onto the shore of a sea, river, or lake by the action of winds, tides, or waves. Over time, these pieces of wood tell a story, which is what makes each one unique and fascinating.

Types of Driftwood

The world of driftwood is diverse, and you may encounter various types based on their origin. Here are some common types of driftwood:

TypeSourceCharacteristics
Beach DriftwoodOcean ShoresSmooth and weathered
Lake DriftwoodLakesidesOften lighter and less weathered
River DriftwoodRiverbanksGnarled and intricate shapes

Knowing the type of driftwood you have can help in determining its best use in your wall art.

Why Choose Driftwood for Outdoor Art?

Driftwood is naturally beautiful and can turn any outdoor space into a captivating area. Here’s why driftwood could be an excellent choice for your wall art project:

Eco-Friendly

Using driftwood provides an eco-friendly alternative to other materials. By upcycling wood washed ashore, you’re giving it a second life and helping to clean up the environment.

Unique and Customizable

No two pieces of driftwood are the same. Each piece has its own character, ensuring that your wall art will be one-of-a-kind.

Versatile

Driftwood can be incorporated into various design styles, from rustic and bohemian to modern and minimalist. You can pair it with other materials like metal, fabric, or glass to create different looks.

Gathering Driftwood

Before you can create your driftwood wall art, you’ll need to gather some driftwood. Here’s how you can do it safely and responsibly:

Where to Find Driftwood?

You can typically find driftwood along beaches, rivers, and lakes. Here are some tips for finding high-quality pieces:

  • Tide Schedule: Check the tide schedule, as driftwood is more likely to appear after high tides.
  • Weather Conditions: Look after storms, when the waves have deposited new driftwood on the shore.
  • Remote Locations: Explore less frequented areas to find untouched pieces.

Ethical and Legal Considerations

Not all places allow you to collect driftwood freely. Always make sure to:

  • Check Local Regulations: Ensure it’s legal to collect driftwood in your area.
  • Avoid Protected Areas: Don’t collect from areas where removal is restricted to protect wildlife habitats.

Tools for Collecting Driftwood

Consider taking these items along:

  • Bag or Cart: To carry your finds.
  • Gloves: To protect your hands from splinters.
  • Waterproof Boots: For walking along wet areas.

Preparing Driftwood for Art

Once you’ve gathered your driftwood, you’ll need to prepare it for creating wall art. Here’s how:

Cleaning Driftwood

Driftwood can contain salt, sand, and tiny critters that need to be removed. Here’s a simple cleaning process:

  1. Rinse Thoroughly: Use a hose to remove loose dirt and sand.
  2. Soak: Submerge the wood in a bucket of fresh water for 1-2 weeks, changing the water regularly to remove salts.
  3. Scrub: Use a brush to scrub off any remaining debris.
  4. Dry: Let the driftwood dry completely, preferably in the sun, to prevent mold and mildew.

Sanding and Shaping

Sanding driftwood can enhance its natural beauty and make it easier to work with. You can use:

  • Sandpaper: For gentle smoothing.
  • Electric Sander: For larger pieces or more intricate work.
  • Chisel and Hammer: To shape the wood.

Always wear a mask while sanding to avoid inhaling dust.

Outdoor Driftwood Wall Art

Design Ideas for Driftwood Wall Art

Now that your driftwood is ready, it’s time to get creative. Here are some design ideas to inspire you:

Driftwood Mirrors

Create a unique mirror frame using driftwood pieces. Arrange the wood around a mirror, securing each piece with strong adhesive or nails.

Driftwood Shelves

Attach driftwood to brackets or directly into the wall to create functional yet beautiful shelves.

Driftwood Sculptures

Let your creativity run wild by assembling driftwood pieces into sculptures. Use wood glue or screws to hold the pieces together.

Driftwood Signs

Create personalized signs by painting or carving words into the driftwood. This can be a fun way to add inspirational quotes or welcome signs to your space.

Tools and Materials Needed

Creating outdoor driftwood wall art requires a few basic tools and materials. Here’s a checklist to help you get started:

Tools RequiredMaterials Needed
SawDriftwood
HammerNails or Screws
DrillAdhesive (wood glue, epoxy)
SandpaperMirror (for mirror frame)
BrushPaint (optional)

Step-by-Step Guide to Creating Driftwood Wall Art

Here’s a comprehensive step-by-step guide to help you create your own piece of driftwood art:

Step 1: Planning Your Design

Before you start drilling and nailing, plan what you want your driftwood wall art to look like. Sketch out your ideas or gather inspiration from online sources.

Step 2: Arranging the Driftwood

Lay out your driftwood pieces on the ground or a flat surface to see how they fit together. This is where you can play with composition and find an arrangement that you enjoy.

Step 3: Cutting and Shaping

Trim any pieces as needed using a saw. Shape the ends or surfaces to fit together better. Sand any rough edges to avoid splinters.

Step 4: Assembling the Art

Start assembling your driftwood art piece. Use wood glue or epoxy to adhere smaller pieces together. For larger pieces, use nails or screws to ensure stability.

Step 5: Painting and Finishing

If desired, paint your driftwood or add any finishing touches to enhance its appearance. Consider sealing the wood with a protective coat to ensure it withstands outdoor conditions.

Step 6: Mounting

Secure your finished piece of art to the wall. Use appropriate hardware that can support the weight of the driftwood and withstand outdoor elements.

Caring for Your Driftwood Art

Outdoor art pieces can be exposed to varying weather conditions, so proper care is crucial.

Regular Maintenance

  • Cleaning: Gently clean your driftwood art to remove dirt and debris.
  • Re-sealing: Reapply a protective finish every year to prolong the lifespan of the wood.
  • Inspecting: Regularly check for any signs of damage or wear and repair as needed.

Protecting Against Elements

  • Weatherproof Coating: Apply a weatherproof coating to protect against sun, rain, and humidity.
  • Sheltered Location: Place the art in a sheltered location to reduce direct exposure to harsh weather.

Benefits of Driftwood Wall Art

Creating and displaying driftwood wall art comes with several benefits:

Aesthetic Appeal

Driftwood’s natural texture and unique forms bring a beautiful, organic element to any outdoor space. It can complement garden settings, patios, or outdoor living areas.

Personal Satisfaction

There’s immense satisfaction in creating something beautiful with your own hands. Building driftwood wall art is a rewarding process that allows you to showcase your creativity and craftsmanship.

Conversation Starter

Your custom driftwood art will likely attract attention and curiosity, serving as a great conversation starter when entertaining guests.

Conclusion

Outdoor driftwood wall art combines the raw beauty of nature with artistic creativity, resulting in unique pieces that enhance any outdoor space. By responsibly collecting and preparing driftwood, planning your designs, and using the right tools and materials, you can create stunning artistic displays.

Whether you choose to make a driftwood mirror, shelf, sculpture, or sign, your creation will be a distinctive and personal addition to your outdoor decor. Plus, it’s a fantastic way to connect with nature and upcycle materials, making your art both beautiful and eco-friendly.

So, next time you’re at the beach, river, or lake, keep an eye out for those perfect pieces of driftwood. Happy crafting!

Filed Under: Driftwood Ideas Tagged With: DIY, Driftwood, home decoration, Outdoor Decor, Wall Art

Preserved Moss And Driftwood Wall Art Diy

June 24, 2024 by admin

Creating stunning decor for your home can be a fun and fulfilling project, especially when it involves natural elements! In this article, “Preserved Moss And Driftwood Wall Art DIY,” you’ll discover how to craft a beautiful piece of wall art using preserved moss and driftwood. The step-by-step guide walks you through selecting your materials, preparing your base, and arranging your elements to achieve a captivating and unique design. This hands-on project will not only beautify your space but also bring a touch of nature indoors, making your home feel more serene and inviting. Have you ever walked into a room and felt an immediate sense of calm and tranquility, almost as if you’d been transported to the serene forests and coastlines where nature’s gifts converge? Creating a piece of art using preserved moss and driftwood can bring that special touch to your living space. Plus, it’s an incredibly satisfying DIY project. Ready to infuse your home with the serene beauty of nature? Let’s dive right in!

What is Preserved Moss and Driftwood?

Before you start gathering your materials and tools, it’s important to understand what preserved moss and driftwood are. Preserved moss retains its vibrant color and soft texture through a process that stops its natural growth. This means you get all the aesthetic benefits of moss without the maintenance. Driftwood, on the other hand, is wood that has been naturally eroded by water, giving it a unique texture and appearance that you can’t replicate with manufactured wood.

Benefits of Using Preserved Moss and Driftwood

Preserved moss and driftwood provide several benefits. They are eco-friendly options that bring nature indoors in a sustainable manner. Preserved moss doesn’t require watering, sunlight, or trimming, making it an ideal choice for a low-maintenance art piece. Driftwood, sourced sustainably, repurposes nature’s debris into beautiful decor.

Materials and Tools You’ll Need

If you’re ready to start, the first thing you need is a list of materials and tools. Here is what you will need:

Materials

MaterialDescription
Preserved MossYou can find preserved moss in various colors and textures at craft stores or online.
Driftwood PiecesGather driftwood from a beach, lake, or river. Ensure they’re clean and dry.
Wooden FrameChoose any size or shape that complements your final design.
AdhesiveA strong adhesive like E6000 or hot glue is recommended to ensure everything stays securely in place.
Backing BoardA sturdy yet lightweight material, like plywood, to serve as the base for your art.
Picture Hanging KitTo mount your masterpiece on the wall once it’s finished.

Tools

ToolDescription
ScissorsUseful for trimming moss and cutting other materials to the desired size.
PliersHelpful for manipulating wire or small pieces as needed.
SandpaperSometimes, you’ll need to smooth out or refine the edges of your driftwood pieces.
TweezersIdeal for placing and adjusting small pieces of moss or driftwood.
PaintbrushHelpful for applying adhesive more precisely.

Preserved Moss And Driftwood Wall Art Diy

Step-by-Step Guide to Create Your Artwork

Creating your own DIY preserved moss and driftwood wall art is easier than you might think. Follow these steps, and you’ll soon have a beautiful, nature-inspired piece.

Step 1: Plan Your Design

Begin by envisioning what you want your wall art to look like. It could be an abstract design, a scenic landscape, or a geometric pattern. Sketch your idea on paper. Planning will help you determine how much of each material you’ll need.

Step 2: Prepare Your Frame and Backing

Lay out your backing board and frame. Cut the backing board to fit within the frame if necessary. Secure the backing board to the frame with adhesive or small nails. If you’re adding sides, paint or stain the frame in a color that complements your driftwood and moss.

Step 3: Clean and Arrange Driftwood

Before placing your driftwood, clean it to remove any dirt or debris. You can use soapy water and a brush, then let it dry thoroughly. Arrange the pieces on the backing board based on your design. Don’t glue them immediately; this is just to get a feel for the layout.

Step 4: Attach Driftwood to the Backing

Once you are satisfied with the arrangement, start gluing the driftwood pieces onto the backing board. Use a strong adhesive and press each piece firmly for a few seconds to ensure it’s securely attached.

Step 5: Add Preserved Moss

Now it’s time to add some greenery! Dab a small amount of adhesive onto the back of each piece of preserved moss and place it strategically among the driftwood. Use tweezers for more precision. Try to create depth and variation by layering the mosses and using different colors and textures.

Step 6: Final Touches

Inspect your artwork for any gaps or spaces that need filling. Add smaller pieces of moss or tiny driftwood fragments for intricate details. Let the entire piece dry thoroughly, as per the adhesive’s instructions.

Step 7: Mounting Your Artwork

Attach the picture hanging kit to the back of your frame. Make sure it’s centered and secure to ensure your artwork hangs straight. Finally, proudly display your nature-inspired masterpiece on your wall!

Tips and Tricks for a Stunning Piece

Now that you’ve created your wall art, here are some helpful tips to take your project to the next level.

Choose Diverse Moss and Driftwood

Using a variety of moss types and driftwood shapes will add texture and interest to your artwork. You can mix flat, cushion, and reindeer mosses and look for driftwood in various shapes and sizes.

Add Additional Natural Elements

Consider incorporating other natural elements like small stones, pine cones, or sea glass to enhance your piece. These additional features can provide more depth and interest.

Mind the Adhesive

Be mindful of the type of adhesive you use. A strong, clear-drying adhesive is typically best, as it ensures all elements stay in place without detracting from the natural look.

Lighting Matters

Highlight your artwork with good lighting. Track lighting or an accent light can make a significant difference, making the colors and textures pop.

Preserved Moss And Driftwood Wall Art Diy

Maintenance of Preserved Moss and Driftwood Art

One of the best things about preserved moss and driftwood art is its low maintenance. Here’s how to keep it looking fresh:

Dusting

Occasionally dust your artwork with a soft brush or cloth to remove any surface dust. Avoid using water or cleaning products, as they can damage the preserved moss.

Avoid Direct Sunlight

Keep your wall art out of direct sunlight to prevent fading. Although preserved moss is more resilient compared to live plants, prolonged exposure to sunlight can still cause its vibrant color to diminish.

Control Humidity

Preserved moss does well in stable indoor environments. Avoid placing your artwork in areas with high humidity, such as bathrooms, to prevent mold and mildew.

Frequently Asked Questions

Here are some common questions you might have about preserved moss and driftwood art:

How Long Does Preserved Moss Last?

Preserved moss can last for several years if properly cared for. Keeping it out of direct sunlight and away from moisture will help maintain its vibrant appearance.

Can I Create Outdoor Artwork?

While preserved moss and driftwood art is best suited for indoor use, you can create outdoor versions using more durable materials like live moss and treated wood. Ensure that your frame and backing materials are weather-resistant.

Where Can I Find Preserved Moss and Driftwood?

Preserved moss can be purchased at craft stores, garden centers, or online. Driftwood can often be found at beaches, lakes, rivers, or purchased from specialty stores and online retailers.

Advanced Techniques for Enthusiasts

Once you’ve mastered the basics, you might want to explore more advanced techniques to create even more intricate and stunning pieces.

Creating a 3D Landscape

Take your art to the next level by creating a three-dimensional landscape. Use different thicknesses of backing material to create layers and depth in your artwork, adding hills, valleys, or even waterfalls.

Incorporating LED Lighting

Adding subtle LED lighting behind or within your artwork can create a magical glow and highlight specific areas of your piece. Ensure the lighting is battery-operated and safely installed to avoid any damage to the materials.

Using Colored Preserved Moss

Preserved moss comes in many colors beyond green. Incorporate different colors like red, yellow, or blue to create a vibrant piece of art. Use these colors to depict seasons, patterns, or abstract designs.

Conclusion

Creating preserved moss and driftwood wall art is a fulfilling, creative project that allows you to bring a piece of nature into your home. With the right materials, tools, and a bit of imagination, you can craft a stunning artwork that will be a conversation starter for years to come. Not only will it provide aesthetic beauty, but it will also imbue your space with a serene, calming ambiance. Happy crafting!

Filed Under: Driftwood Ideas Tagged With: DIY, Driftwood, home decor, Preserved Moss, Wall Art

Driftwood Frames Pictures

June 24, 2024 by admin

Driftwood Frames Pictures

Imagine the rustic charm that driftwood can bring to your favorite memories. Driftwood frames pictures offer a unique and natural way to display your cherished photographs, adding a touch of the ocean’s beauty to your home decor. Whether you picked up a piece of driftwood on a beach adventure or simply admire its weathered texture, turning it into a picture frame breathes new life and stories into your space. Crafting these frames can be a delightful project, blending creativity with nature’s artistry. Let your photos bask in a warm, coastal glow with driftwood frames that capture both your memories and the essence of the sea. Have you ever wandered along a sun-kissed beach and stumbled upon a piece of driftwood that seemed to tell a story of its own? Driftwood carries with it the whispers of the ocean and the tales of its journey through the waves. If you’ve ever wondered how to encapsulate these stories and transform them into unique art, you’ve come to the right place.

Driftwood Frames Pictures

What Makes Driftwood Special?

Driftwood is not just any piece of wood; it has spent time floating freely in oceans, rivers, or lakes, gradually being shaped by the elements. The sections of weathered wood often boast unique shapes, textures, and colors that you simply can’t find anywhere else.

Driftwood finds its way to the shore through a combination of natural erosion, wind, and water currents. Each piece is distinct, bearing the marks of its unique journey. The oceanic polish gives it a rustic charm that makes it perfect for crafting decorative items like picture frames.

Natural Beauty

Driftwood’s natural beauty lies in its imperfections. The rustic texture, combined with the varied colors and shapes, makes each piece a work of art. Unlike mass-produced wood, driftwood comes with its own history and character.

Sustainable and Eco-Friendly

Using driftwood is an eco-friendly option. Since this type of wood is naturally sourced and has likely been recycled multiple times before it reaches you, it has a lower environmental impact. By creating driftwood frames, you are not only making something beautiful but also contributing to sustainability.

Why Choose Driftwood for Picture Frames?

Picture frames do more than just hold your most cherished photos; they are a reflection of your personal style. Here’s why driftwood frames stand out:

Unique Designs

No two pieces of driftwood are alike, which means your driftwood frame will be one-of-a-kind. The variability in tone, texture, and shape provides an artisanal quality that mass-manufactured frames simply cannot match.

Durability

Driftwood is surprisingly durable. Having braved the elements, it is robust and long-lasting. Once framed, your pictures will be encased in a sturdy yet beautiful material that stands the test of time.

Versatile and Timeless

Driftwood frames blend seamlessly with various interior design styles, from shabby chic to modern minimalism. Their rustic charm offers a timeless appeal that works well in numerous settings.

How to Make a Driftwood Picture Frame

Making your own driftwood picture frame is not only rewarding but also a fun way to bring the essence of the sea into your home. Here’s a detailed guide on how to create your own:

Materials Needed

Before you start, gather the following materials:

MaterialsQuantity
Driftwood piecesAs needed
Picture frame backing1
Glass pane (optional)1
Ruler or measuring tape1
Saw1
Sandpaper1 piece
Wood glue1 bottle
ClampsAs needed
Nails (optional)As needed
Hammer (optional)1
Paint or varnish (optional)As needed
Brush (if painting/varnishing)1

Step-by-Step Guide

  1. Collect Driftwood: Start by selecting pieces of driftwood. Aim for a variety of shapes and sizes to add character to your frame.

  2. Measure and Cut: Use your ruler to measure the dimensions of your picture. Mark and cut the driftwood to fit the frame size. Ensure the pieces align well when laid out.

  3. Sand the Edges: Lightly sand the edges to remove any splinters or rough parts. This will make the wood easier to handle.

  4. Assemble the Frame: Arrange the driftwood pieces to form a rectangular or square shape. Ensure they align properly and fit snugly together.

  5. Glue and Clamp: Apply wood glue along the connecting edges of the driftwood. Use clamps to hold the pieces in place as the glue dries. Leave it to dry according to the manufacturer’s instructions.

  6. Add Backing: Once the frame is dry, attach the picture frame backing. You might need nails for extra security.

  7. Insert Picture: Place your picture and cover it with a glass pane if you choose to use one. Secure the picture and glass pane to the frame backing.

  8. Finishing Touches: If desired, you can paint or varnish the driftwood to match your decor.

Tips for a Professional Finish

  • Natural Look: Keep the natural look of the driftwood. Avoid over-sanding, which can remove its unique textures.
  • Align Shapes: Try to align the shapes and grains of the driftwood in a visually pleasing manner.
  • Secure Joinery: Make sure to properly glue and clamp the pieces together to ensure they hold up well over time.

Decorating With Driftwood Frames: Creative Ideas

Driftwood frames are versatile and can fit into various settings. Here are some creative ideas to inspire your home decor:

Coastal Theme

Nothing complements a coastal-themed room better than driftwood frames. Pair your frame with pictures of seaside landscapes, shells, or nautical symbols. The earthy texture of the wood adds to the seaside charm.

Rustic Cabin

In a rustic cabin setting, driftwood frames can be used to display wildlife photographs or rustic artwork. The raw and natural aspect of the driftwood harmonizes with the cabin’s rough, cozy feel.

Minimalist Decor

In a minimalist setup, a driftwood frame can serve as a focal point. Choose a piece with a clean, elegant design to highlight a stark photograph or art print. The simplicity of the driftwood adds an understated elegance to your space.

Eclectic Style

For an eclectic room, mix and match driftwood frames of different sizes and shapes. This creates a dynamic, textured gallery wall that’s rich in visual interest.

Driftwood Frames Pictures

Caring for Your Driftwood Frame

A driftwood frame is durable but still requires some care to maintain its beauty and longevity.

Cleaning

Dust your frame regularly using a soft, dry cloth. Avoid using harsh chemicals that might damage the wood’s natural finish.

Protection

If your frame is in a humid environment, consider applying a light coat of varnish to protect it from moisture. This helps in preserving the wood and preventing any potential damp-related issues.

Handling

Handle the frame carefully, especially when cleaning or moving it. Due to its natural formation, some parts may be more brittle than others.

Where to Find Driftwood

Finding the perfect pieces can be an adventure in itself. Here are some places to look:

Beachcombing

The most straightforward way to find driftwood is to visit a beach. Look along the high tide line where driftwood commonly washes up.

Rivers and Lakes

Driftwood can also be found along riverbanks and lakeshores. These places can yield pieces with wonderful unique characteristics.

Online Stores

If you’re not near a body of water, online stores offer a wide selection of driftwood pieces both cleaned and ready for crafting.

Craft Stores

Many craft stores carry driftwood specifically for projects like frame-making. These are usually cleaned and sometimes even pre-cut for easy assembly.

Potential Challenges and Solutions

While creating your driftwood frame, you might encounter some challenges. Here’s how to tackle them:

ChallengeSolution
Uneven PiecesUse sandpaper or a plane to level out uneven edges.
Glue Not HoldingEnsure surfaces are clean and dry; clamp pieces tightly while drying.
Fragile WoodHandle with care; consider reinforcing with nails if necessary.
Difficulty Finding WoodConsider online sources or craft stores for driftwood.
Preserving Natural LookUse clear varnish or wood stain to enhance and protect the wood.

Conclusion

Driftwood frames are a fantastic way to merge art and nature, providing a unique and rustic way to display your cherished memories. The effort you put into crafting each frame will be evident in the outcome, a one-of-a-kind piece that captures the essence of natural beauty and sustainability. Whether you’re accentuating a coastal theme or adding a touch of nature to any room, driftwood frames bring unmatched character and charm.

So next time you’re walking along the beach, keep an eye out for those special pieces of driftwood — you never know what treasures may be waiting to become the perfect frame for your treasured moments. Happy crafting!

Filed Under: Driftwood Ideas Tagged With: DIY, Driftwood, Handmade, Picture Frames, Rustic Decor

Driftwood Wall Art Mirrors

June 24, 2024 by admin

Driftwood Wall Art Mirrors offer a delightful fusion of nature and artistry, bringing a touch of coastal charm to your home. Imagine glancing at your reflection framed by pieces of weathered wood, each whispering stories of the sea and sand. These unique mirrors blend seamlessly with various decor styles, from rustic to contemporary, adding warmth and character to any room. Whether you hang one in your hallway, living room, or bedroom, a driftwood wall art mirror is sure to become a cherished focal point that enhances the natural beauty and tranquility of your space. Have you ever looked at a blank wall in your home and felt it was missing something unique and organic? Driftwood wall art mirrors might just be the perfect solution!

What are Driftwood Wall Art Mirrors?

Driftwood wall art mirrors are mirrors framed with pieces of driftwood. Driftwood consists of wood that has been naturally weathered and shaped by the sea, giving each piece a unique texture and character. These mirrors can add a touch of coastal beauty to any interior, bringing a rustic yet elegant feel to your home. Whether you live by the beach or in the heart of the city, driftwood mirrors can effortlessly blend into various decor styles.

Origins of Driftwood

Driftwood is wood that has been washed onto a shore or beach by the action of winds, tides, or waves. It comes from various sources such as trees, logs, and other wooden objects that have been carried down rivers to the ocean. Over time, the sea polishes and smooths the wood, giving it a unique weathered appearance.

Why Choose Driftwood Wall Art Mirrors?

There are numerous reasons why driftwood mirrors can be a fantastic addition to your home decor:

  1. Sustainability: Driftwood is an eco-friendly material that is naturally recycled by the sea.
  2. Uniqueness: Each piece of driftwood is different, ensuring that your mirror is a one-of-a-kind work of art.
  3. Versatility: Driftwood mirrors can complement a variety of styles, from coastal and cottage to modern and minimalistic.
  4. Natural Beauty: The organic shape and texture of driftwood bring a touch of nature indoors.

The Making of Driftwood Wall Art Mirrors

Creating a driftwood mirror involves several steps, each contributing to the final product’s beauty and uniqueness. Let’s break down the process:

Gathering Driftwood

The first step is collecting driftwood, which can be an enjoyable and rewarding experience. Driftwood can be found along beaches, riverbanks, and lakeshores. While gathering, it’s essential to choose pieces that are dry and free of rot. Look for interesting shapes and textures that will add character to your mirror.

Cleaning Driftwood

Once you’ve gathered your driftwood, it’s crucial to clean it thoroughly:

  1. Soak and Wash: Submerge the driftwood in water for a few days to remove salt and other residues.
  2. Scrub: Use a brush to scrub away any dirt, algae, or loose bark.
  3. Disinfect: Soak the driftwood in a bleach solution (1 part bleach to 9 parts water) for a few hours to kill any bacteria, fungi, or insects.
  4. Dry: Allow the driftwood to dry completely. This can take several days to a couple of weeks, depending on the size and thickness of the wood.

Designing Your Mirror

Designing your driftwood mirror is where your creativity comes into play. Decide on the size and shape of the mirror and the arrangement of the driftwood pieces. You can lay out the pieces in various patterns to see what looks best. Here are some common design ideas:

  1. Circular: Arrange driftwood pieces around a round mirror for a classic, sunburst look.
  2. Rectangular: Use longer pieces to frame a rectangular mirror, creating a rustic, linear design.
  3. Freeform: For a more organic look, use irregularly shaped pieces to frame the mirror without adhering to a symmetrical design.

Assembling the Mirror

To assemble your driftwood wall art mirror, here’s what you’ll need:

  1. Materials: Driftwood pieces, mirror (cut to desired size), plywood backing, glue (epoxy or a strong wood adhesive), hanging hardware.
  2. Tools: Saw (if needed for cutting driftwood), measuring tape, pencil, clamps, and screws.

Step-by-step Guide:

  1. Prepare the Backing: Cut the plywood backing to the same size as your mirror. Sand any rough edges.
  2. Attach the Mirror: Secure the mirror to the center of the plywood using a mirror adhesive.
  3. Arrange the Driftwood: Lay out your driftwood pieces around the mirror, experimenting with different arrangements until you’re satisfied with the design.
  4. Glue the Driftwood: Begin gluing the driftwood pieces to the plywood, starting from one section and working your way around. Use clamps to hold the pieces in place while the glue dries.
  5. Add Hanging Hardware: Attach the hanging hardware to the back of the plywood once the glue has dried and the driftwood is securely in place.

Driftwood Wall Art Mirrors

Displaying Driftwood Wall Art Mirrors

Now that you have your unique driftwood wall art mirror, it’s time to decide where to display it. Here are some ideas:

Living Room

Position your driftwood mirror above the fireplace, sofa, or a console table to create a stunning focal point in the living room. The natural texture of the driftwood adds warmth and character to the space.

Entryway

Make a great first impression by hanging a driftwood mirror in your entryway. It not only provides a practical function but also sets the tone for your home’s decor.

Bathroom

A driftwood mirror can bring a spa-like feel to your bathroom. Place it above the vanity to infuse the space with a peaceful, coastal vibe.

Bedroom

Add a touch of rustic elegance to your bedroom by using a driftwood mirror above a dresser or as a statement piece on an accent wall.

Caring for Your Driftwood Mirror

To maintain the beauty of your driftwood wall art mirror, follow these care tips:

  1. Dust Regularly: Use a soft, dry cloth to dust the driftwood frame regularly. Avoid using water or harsh chemicals, as they can damage the wood.
  2. Avoid Direct Sunlight: Prolonged exposure to direct sunlight can cause driftwood to fade or crack. Place your mirror in a location where it won’t be exposed to intense sunlight.
  3. Check for Loose Pieces: Occasionally check for loose driftwood pieces and re-glue them if necessary to keep the mirror sturdy and secure.

Driftwood Wall Art Mirrors

DIY vs. Purchase: Weighing Your Options

If you’re considering incorporating driftwood wall art mirrors into your decor, you have two main options: making one yourself or purchasing a ready-made mirror. Each option has its pros and cons.

DIY Driftwood Mirrors

Pros:

  1. Customization: You have complete control over the design, size, and arrangement of the driftwood pieces.
  2. Personal Touch: Creating your mirror adds a personal and sentimental value to the piece.
  3. Cost-Effective: DIY projects can often be more affordable than purchasing ready-made items.

Cons:

  1. Time-Consuming: Collecting, cleaning, and assembling the driftwood can be time-consuming.
  2. Skill Level: DIY projects require a certain level of skill and patience. If you’re not comfortable with tools or crafting, it might be challenging.
  3. Materials and Tools: You might need to buy materials and tools if you don’t already have them at home.

Purchasing Driftwood Mirrors

Pros:

  1. Convenience: Buying a ready-made mirror is quick and convenient. You can instantly add it to your decor without any effort.
  2. Professional Craftsmanship: Professional artists and craftsmen create these mirrors, ensuring high quality and attention to detail.
  3. Variety: There is a wide variety of designs, shapes, and sizes available to suit your taste and decor style.

Cons:

  1. Cost: Ready-made driftwood mirrors can be more expensive, especially if they’re made by well-known artists or designers.
  2. Less Personalization: You’ll have less control over the design and might not find a piece that perfectly matches your vision.
CriteriaDIY Driftwood MirrorPurchased Driftwood Mirror
CustomizationComplete control over designLimited to available designs
Personal TouchHigh personal and sentimental valueLess personalized
CostGenerally more affordableCan be more expensive
Time InvestmentTime-consumingQuick and convenient
Required SkillRequires skill and patienceNo skill needed
QualityDepends on your craftsmanshipProfessional craftsmanship

Conclusion

Driftwood wall art mirrors are a beautiful and versatile way to bring the natural, rustic charm of the coast into your home. Whether you decide to embark on a DIY project or purchase a ready-made piece, these mirrors can enhance any room’s decor. The unique texture and character of driftwood bring a touch of nature indoors, creating a warm and inviting atmosphere.

So next time you look at that blank wall, consider adding a driftwood wall art mirror. It’s a simple yet impactful way to enhance your home’s aesthetic while embracing the beauty of nature. Happy decorating!

Filed Under: Driftwood Ideas Tagged With: DIY, Driftwood, Handmade, Mirrors, Wall Art

Large Driftwood Wall Art Decor

June 23, 2024 by admin

Stepping into a room adorned with Large Driftwood Wall Art Decor, you instantly feel a sense of tranquil, coastal charm. This exquisite piece of decor, meticulously crafted from naturally weathered driftwood, brings a rustic elegance to any space. Imagine the gentle waves and the sun-kissed shores, all encapsulated within this art, making your home not just a living space, but a serene retreat. Embrace the beauty of nature right inside your home, and let the organic textures and earthy tones of this driftwood masterpiece transform your interior design into a calming, natural oasis. Have you ever considered how a piece of driftwood could transform your home decor? Large driftwood wall art decor can bring a touch of the coast right into your living space, imbuing it with natural beauty and a rustic charm that’s hard to replicate with other materials.

Large Driftwood Wall Art Decor

What is Driftwood?

Driftwood refers to wood that has been washed onto the shore by action of winds, tides, or waves. Over time, it becomes smoothed and weathered, taking on unique shapes and forms. This natural weathering process gives each piece of driftwood its own character and story, making it an exceptional medium for creating art.

Characteristics of Driftwood

Driftwood’s appeal stems from several distinct characteristics:

  • Texture: The weathering process imparts a smooth, tactile texture.
  • Color: The wood often features a mix of grays, whites, and tans.
  • Shape: Each piece is unique in its bends, curves, and overall form.
  • Durability: Despite its worn appearance, driftwood can be very durable.

Why Choose Large Driftwood Wall Art Decor?

Choosing large pieces of driftwood for wall art can have a significant impact on your home’s aesthetics. Here’s why:

Natural Beauty

Large driftwood wall art seamlessly blends sophistication with nature. The natural contours and textures create an organic feel that can soften modern interiors or enhance rustic decor.

Versatility

Driftwood wall art is incredibly versatile. It fits well in various styles, from coastal and farmhouse to minimalist and bohemian. Whether it’s a centerpiece in your living room or an understated piece in the hallway, driftwood art can adapt beautifully to different spaces.

Eco-friendly

Using driftwood is an eco-friendly choice. It’s a way of reclaiming natural material and reducing waste. Plus, it often involves minimal processing, which means less environmental impact.

Unique Appeal

No two pieces of driftwood are alike. When you incorporate large driftwood wall art, you are adding a one-of-a-kind element to your home.

Styles of Large Driftwood Wall Art Decor

Driftwood can be shaped into a variety of styles. Let’s delve into some popular choices:

Abstract Art

Abstract driftwood pieces are designed to evoke emotions rather than depict tangible subjects. They often consist of multiple pieces of driftwood arranged in a way that prioritizes form and texture.

Sculptural Pieces

Sculptures made from driftwood can range from minimalistic to intricate designs. They might represent animals, human figures, or abstract concepts.

Functional Art

This includes driftwood used in functional pieces like shelves, mirrors, and frames. These items merge utility with aesthetic appeal.

Wall Hangings

These are perhaps the most common forms of driftwood art. Wall hangings might be simple arrangements of driftwood pieces or more elaborate compositions featuring added elements like rope, seashells, or metal accents.

How to Choose the Right Piece for Your Space

Selecting driftwood wall art involves several factors to ensure it complements your home perfectly:

Size

Consider the dimensions of your wall space. Large pieces can serve as focal points, but be mindful of scale so your room doesn’t feel overcrowded.

Style

Look at the existing decor of your home. If you have a modern home, you might want a piece with clean lines and minimalistic design. For a rustic home, more rugged, natural pieces would work well.

Color Scheme

Think about the color palette of the room. Driftwood typically has neutral tones, but some pieces may have variations that either blend in or stand out.

Origin

Some people like to know the origin of their driftwood—whether it’s local or perhaps from a cherished vacation spot.

Large Driftwood Wall Art Decor

DIY Driftwood Wall Art: A Step-by-Step Guide

Creating your own driftwood wall art can be an enriching experience. Here’s a basic guide to get you started:

Materials Needed

  1. Large pieces of driftwood
  2. Sandpaper
  3. Saw (if needed)
  4. Hammer and nails or screws and drill
  5. Wall mount brackets
  6. Optional: additional decor elements like seashells, beads, and rope

Steps:

  1. Collect the Driftwood: Ensure it’s clean and dry. You may want to gather various shapes and sizes.
  2. Design Your Art: Lay out your pieces on the ground to visualize your project. Rearrange as needed until you’re happy with the layout.
  3. Prepare the Wood: Sand the pieces to remove any rough spots or debris.
  4. Assemble: Use nails, screws, or glue to connect your pieces. If making a wall hanging, attach the pieces of driftwood to a backing or frame.
  5. Add Mounts: Attach wall mount brackets to the back.
  6. Decorate (Optional): Add any extra elements like rope, shells, or paint for a customized touch.
  7. Hang on the Wall: Securely mount your art on the wall and step back to admire your handiwork.

Professional Driftwood Artists

If DIY is not your style, there are many talented driftwood artists whose work you can purchase. A few renowned artists include:

ArtistSpecialtyWebsite
Heather JanschDriftwood sculptureswww.heatherjansch.com
Jeffro UittoLarge driftwood pieceswww.jeffrouitto.com
Deborah BridgesMarine-themed sculptureswww.deborahbridges.com

Supporting Local Artists

Consider purchasing from local artisans who often have unique, regionally-inspired pieces. This not only supports local economies but adds a personal touch to your home decor.

Maintaining Your Driftwood Art

Proper maintenance will keep your driftwood art looking fresh and beautiful for years to come:

Dust Regularly

Use a soft cloth or duster to remove dust from the surface.

Avoid Excessive Moisture

While driftwood is naturally weathered, it’s best to avoid placing it in areas with a lot of moisture, like directly above a bathtub or sink.

Treat for Pests

Occasionally, driftwood can harbor pests. If you notice any signs, treat the wood with an appropriate pesticide or consult a professional.

Retouching

If your piece is painted or adorned with other materials, occasional touch-ups may be needed.

Integrating Driftwood Art with Other Decor Elements

Driftwood art can be even more impactful when combined with other decor elements. Here are a few suggestions:

Contrast with Modern Furniture

Pair driftwood with sleek, modern furniture to create a striking contrast that highlights the natural beauty of the wood.

Complement with Other Natural Elements

Combine driftwood with other natural materials like stone, plants, and woven textiles for a cohesive look that brings nature indoors.

Use as a Focal Point

Let your driftwood piece be the star by keeping surrounding decor minimal. This will draw the eye and give your room a serene, uncluttered feel.

Color Accents

While driftwood generally has neutral tones, don’t be afraid to add pops of color with cushions, rugs, or smaller decorative items that complement the wood’s hues.

Conclusion

Large driftwood wall art decor is a remarkable way to bring the beauty of nature into your home. It offers unparalleled uniqueness, versatility, and a touch of sophistication that other materials just can’t match. Whether you choose to create your own piece, buy from a professional artist, or discover a hidden gem from a local artisan, driftwood art will undoubtedly add character and charm to your living space. Dive into the endless possibilities and let your creativity soar.

By following the steps and tips outlined in this guide, you’ll be well on your way to transforming your home with beautiful, meaningful, and eco-friendly driftwood art. Enjoy the process and let the natural beauty of driftwood inspire you.

Filed Under: Driftwood Ideas Tagged With: Coastal Design, DIY, driftwood art, natural materials, Wall Decor

Driftwood Wall Art With Lights

June 23, 2024 by admin

Hey there! Imagine transforming your living space into a cozy haven with a piece of nature’s artistry—driftwood wall art that comes alive with lights. “Driftwood Wall Art With Lights” explores the beauty and creativity of combining organic driftwood pieces with subtle, enchanting lighting. This unique decor not only adds a touch of rustic charm to any room but also creates a warm, inviting ambiance that’s perfect for relaxation. Dive in and discover how you can bring a bit of the outdoors inside, illuminating your home with both style and natural elegance. Have you ever wondered how you can bring a touch of the beach and warm ambiance into your living space? Imagine the serene beauty of coastal shores right within your home. Today, we’re going to talk about something exciting: Driftwood Wall Art With Lights. This unique blend of natural elements and lighting is more than just a trend; it’s a timeless piece of art that can transform any room into a cozy, beach-inspired retreat.

What is Driftwood Wall Art?

Driftwood wall art is a unique and creative way to decorate your living space. Driftwood, often found on beaches, is wood that has been washed ashore by the effects of tides and waves. Over time, this wood gains a weathered and rustic appearance that makes it ideal for various types of artwork. Incorporating lights adds another layer of beauty, highlighting the rich textures and natural charm of the driftwood.

Benefits of Driftwood Wall Art

  1. Natural Aesthetic: Driftwood brings an organic, earthy feel into your home.
  2. Unique and Customizable: Since no two pieces of driftwood are the same, each artwork is unique.
  3. Eco-Friendly: Using driftwood is a sustainable way to decorate, repurposing natural resources.
  4. Versatile Decor: Suits various interior styles—from coastal and bohemian to modern and rustic.

Why Add Lights?

Adding lights to driftwood wall art enhances its beauty and functionality. Lights emphasize the wood’s natural textures and create a captivating focal point in any room. Soft, ambient lighting can also transform your interior into a tranquil sanctuary, perfect for relaxation.

Types of Lights You Can Use

There are various types of lights that you can incorporate into your driftwood wall art. Here’s a quick rundown to help you decide what’s best for your space:

Type of LightDescriptionProsCons
String LightsThin, flexible wire with small bulbs. Available in various colors and styles.Easy to manipulate, low energy.May not provide strong lighting.
LED StripsFlexible and cuttable LED strips with adhesive backing.Bright, energy-efficient.Can be too bright for some.
Fairy LightsTiny LED bulbs on a thin, almost invisible wire.Delicate, magical effect.Fragile, can tangle easily.
SpotlightsSmall, focused lights that can be angled.Good for highlighting areas.Requires precise placement.

Driftwood Wall Art With Lights

Choosing Your Driftwood

Before diving into the creative process, the first step is sourcing your driftwood. This wood can be found along coastal shores, riverbanks, or even purchased online or from craft stores.

What to Look For

  1. Size and Shape: Consider the dimensions of your wall and the space where the artwork will be hung. Small pieces are ideal for intricate designs, while large pieces can make a bold statement.
  2. Texture and Color: Aim for varying textures and organic patterns. Driftwood’s natural shades of gray, brown, and white can complement almost any interior color scheme.
  3. Condition: Ensure the wood is free from pests and structurally sound. Smooth pieces work better for mounting lights.

Preparing Your Driftwood

  1. Cleaning: Begin by scrubbing the wood with a brush to remove sand, dirt, and salt. Soak it in soapy water for several hours and rinse thoroughly.
  2. Drying: Allow the driftwood to dry completely. This can take several days, depending on the size and thickness.
  3. Preserving: Optionally, you can apply a wood preservative to seal and protect the wood from further decay.

Planning Your Design

Now that you have your driftwood ready, it’s time to plan your wall art design. Here are some ideas and tips to guide you:

Inspiration and Themes

  • Coastal Theme: Use seashells, starfish, and marine colors to amplify the beachy vibe.
  • Rustic Charm: Pair driftwood with metal accents or vintage items for a rustic look.
  • Modern Minimalism: Keep the design simple, focusing on clean lines and a neutral palette.

Sketching and Layout

Sketch a rough design before you start assembling your pieces. This helps visualize the final outcome and ensures a balanced composition. Lay out your driftwood pieces and lights on the floor ahead of time, experimenting with different arrangements until you find the one that speaks to you.

Driftwood Wall Art With Lights

Assembling Your Driftwood Wall Art

Tools and Materials

Before you start, gather the necessary tools and materials:

  • Driftwood pieces
  • Lights (string lights, LED strips, etc.)
  • Hot glue gun or wood glue
  • Screws and wall anchors
  • Drill
  • Wire or fishing line (if hanging pieces)
  • Optional: additional decorative elements like seashells or pebbles

Step-by-Step Assembly

  1. Lay Out the Design: Arrange your driftwood pieces as per your sketch on a flat surface.
  2. Attach the Lights: Carefully weave the lights through or around the driftwood. Use clear adhesive or small nails to secure them in place.
  3. Glue or Screw Pieces Together: Use wood glue or screws to attach the driftwood pieces securely. Ensure they are well-fixed to support the weight.
  4. Adding Decorative Elements: This is optional but can enhance your design. Hot glue is excellent for attaching smaller items like seashells.
  5. Mounting Hardware: Attach hanging hardware to the back of your driftwood art. Heavy pieces may require wall anchors for additional support.

Mounting Your Artwork

Hanging your driftwood wall art properly ensures it becomes a focal point rather than an eyesore. Here are some tips:

Finding the Right Spot

  1. Room Choice: Driftwood art works well in living rooms, bedrooms, and even bathrooms.
  2. Wall Space: Ensure there’s enough space for your piece to be appreciated without overcrowding the wall.
  3. Lighting: Wall art with lights can double as ambient lighting, so consider areas where additional light is beneficial.

Hanging Techniques

  1. Measure and Mark: Use a tape measure to determine the exact placement. Mark the spots where you’ll need to place nails or screws.
  2. Leveling: Ensure your artwork is level using a spirit level.
  3. Secure Mounting: For heavy pieces, use wall anchors and screws. For smaller, lighter art, nails or picture hangers may suffice.
  4. Final Touches: Once hung, step back and make sure everything looks balanced and aligned. Adjust if necessary.

Caring for Your Driftwood Wall Art

To maintain the beauty and longevity of your driftwood wall art, follow these simple care tips:

Regular Cleaning

Dust can accumulate on both the driftwood and the lights. Use a soft brush or cloth to gently wipe the surface. Avoid using water or any harsh cleaning agents that could damage the wood or lights.

Light Maintenance

Check the lights regularly to ensure they’re functioning correctly. If using battery-operated lights, replace batteries as needed. For plug-in lights, ensure the cords are intact and not frayed.

Environmental Factors

Keep your driftwood art away from direct sunlight or extreme humidity to prevent the wood from warping or deteriorating. If exposed to moisture, dry it out immediately to avoid rot.

Creative Extensions

Feeling adventurous? Here are some additional creative extensions to take your driftwood wall art to the next level:

Multi-Piece Installations

Create a larger visual impact by designing multiple pieces of driftwood wall art. Arrange them in a cohesive pattern or theme across a wide space, such as behind a sofa or along a hallway.

Seasonal Decor

Decorate your driftwood wall art according to the seasons. Add miniature ornaments and fairy lights for Christmas or adorn it with flowers and pastel shades for spring. This way, your art evolves and brings new life to your interior throughout the year.

Interactive Elements

Incorporate elements like small hooks or shelves into your driftwood design. This can make the art functional, serving as a key holder, coat rack, or a small shelf for trinkets and plants.

Conclusion

Driftwood wall art with lights isn’t just another decorating idea; it’s a splendid way to bring the elegance and serenity of nature into your home. By combining the rustic appeal of driftwood with the warm glow of lights, you can create a stunning piece of art that not only enhances your decor but also tells a story.

So, ready to try your hand at creating your own driftwood masterpiece? With a bit of planning, creativity, and the right materials, your unique wall art can offer a window to the tranquility of the coast, right within your home. Enjoy the process and, most importantly, have fun bringing a bit of nature inside!

Filed Under: Driftwood Ideas Tagged With: DIY, driftwood art, Eco-friendly, Lighting, Wall Decor

Drift Wood Ideas Driftwood Art Wall Hangings

June 23, 2024 by admin

Welcome to the enchanting world of “Drift Wood Ideas: Driftwood Art Wall Hangings.” In this piece, you’ll explore creative and inspiring ways to transform simple driftwood into stunning art pieces that can adorn your walls. From rustic, nature-inspired designs to chic, modern arrangements, discover how you can bring the beauty of the beach into your home with ease. Whether you’re a seasoned DIY enthusiast or just looking to add a unique touch to your décor, this article will guide you through the endless possibilities that driftwood offers. Dive in and let your creativity flow! Have you ever strolled along the beach and stumbled upon a beautiful piece of driftwood, only to wonder how you could incorporate it into your home decor? If so, you’re not alone! Driftwood has a way of sparking creativity and evoking a sense of adventure. With its natural beauty and unique shapes, driftwood can be transformed into stunning art pieces, especially wall hangings.

What is Driftwood?

Driftwood refers to wood that has been washed onto the shore by the action of waves, tides, or wind. Over time, these pieces of wood are naturally weathered and eroded, giving them a distinctive appearance. It’s like Mother Nature’s own art, crafted from broken branches, logs, and trees.

Why Use Driftwood for Art?

There are several reasons why driftwood is a favorite material among artists and DIY enthusiasts:

  • Natural Aesthetic: Driftwood’s organic shapes and textures provide a unique, rustic charm.
  • Sustainability: Using driftwood for art is an eco-friendly way to recycle natural materials.
  • Versatility: Driftwood can be used in various forms of art, from simple wall hangings to intricate sculptures.

Getting Started with Driftwood Art

To begin your journey into the world of driftwood art, you’ll need to consider a few key points.

Collecting Driftwood

First and foremost, you’ll need to collect suitable pieces of driftwood. Here are some tips to help you find the best pieces:

  • Visit Different Beaches: Beaches with rocky shores or near river mouths tend to have more driftwood.
  • Check Tides: Low tide often reveals more driftwood that might be hidden underwater during high tide.
  • Respect the Environment: Be mindful not to disturb wildlife or the natural habitat while collecting driftwood.

Preparing Driftwood

Before you start creating, it’s essential to clean and prepare your driftwood:

  1. Clean: Remove any debris, sand, or seaweed by rinsing the driftwood with fresh water.
  2. Dry: Allow the driftwood to dry completely, either by air drying or using a kiln if available.
  3. Treat: To prevent any mold or pests, you can treat the driftwood with a mixture of water and bleach (90% water, 10% bleach).

Drift Wood Ideas Driftwood Art Wall Hangings

Driftwood Art Wall Hangings

Now that you have your driftwood ready, let’s dive into creating some beautiful wall hangings.

Basic Driftwood Wall Hanging

A basic driftwood wall hanging is a great way to start and acquaint yourself with the material.

Materials Needed:

  • Driftwood pieces
  • Jute or twine
  • Hooks or nails
  • Scissors

Instructions:

  1. Select Pieces: Choose a few pieces of driftwood with interesting shapes and textures.
  2. Arrange Layout: Lay the pieces on a flat surface to decide on the arrangement.
  3. Tie Together: Use jute or twine to tie the driftwood pieces together securely.
  4. Hang: Attach hooks or nails to the wall and hang your driftwood creation.

Driftwood Photo Display

A driftwood photo display adds a personal touch, perfect for showcasing your favorite memories.

Materials Needed:

  • Driftwood branch
  • Small picture frames with clips
  • Hooks or nails
  • Twine or fishing line

Instructions:

  1. Choose a Branch: Select a sturdy driftwood branch.
  2. Attach Frames: Use twine or fishing line to hang picture frames from the branch.
  3. Hang on Wall: Securely attach the driftwood branch to the wall using hooks or nails.
  4. Add Photos: Clip in your favorite photos to complete the display.

Driftwood Mirror Frame

For a functional yet artistic piece, consider making a driftwood mirror frame.

Materials Needed:

  • Plain mirror
  • Driftwood pieces
  • Strong adhesive (like E6000)
  • Hanging hardware

Instructions:

  1. Arrange Driftwood: Lay out the driftwood pieces around the mirror to decide on the design.
  2. Glue Pieces: Apply adhesive to the back of each driftwood piece and press firmly around the mirror.
  3. Secure Hanging: Attach the hanging hardware to the back of the mirror.
  4. Mount on Wall: Hang your new driftwood mirror frame in a place where it can catch light beautifully.

Driftwood Dreamcatcher

Driftwood makes a perfect frame for a unique, coastal-themed dreamcatcher.

Materials Needed:

  • Driftwood ring (or a curved piece of driftwood)
  • Feathers, beads, shells
  • Suede lace or string
  • Scissors
  • Glue

Instructions:

  1. Create the Frame: If you don’t have a ring, bend a curved driftwood piece into a circle and secure the ends with twine.
  2. Weave the Web: Use suede lace or string to weave an intricate web inside the frame.
  3. Add Decorations: Attach feathers, beads, and shells to the bottom of the dreamcatcher.
  4. Hang: Use a piece of string to hang your driftwood dreamcatcher from the wall.

Driftwood Shelf

A functional piece like a driftwood shelf combines practicality with artistry.

Materials Needed:

  • Sturdy driftwood pieces
  • L-brackets
  • Screws
  • Drill
  • Level

Instructions:

  1. Select Wood: Choose driftwood pieces that are sturdy and flat enough to hold objects.
  2. Attach Brackets: Secure L-brackets to the wall at the appropriate height and spacing.
  3. Mount Driftwood: Place the driftwood pieces onto the brackets and secure them in place with screws.
  4. Level and Adjust: Ensure the shelf is level and make adjustments as needed.

Advanced Driftwood Art Techniques

Once you’ve mastered the basics, you can explore more advanced driftwood art techniques.

Combining Driftwood with Other Materials

Incorporate other natural elements, like stones, shells, or sea glass, to create multifaceted art pieces.

Example: Driftwood and Stone Sculpture

  1. Arrange Stones: Select a variety of stones and arrange them alongside your driftwood pieces.
  2. Securely Attach: Use industrial-strength adhesive to attach the stones and driftwood together.
  3. Balance Shapes: Ensure the final piece is balanced and aesthetically pleasing.

Lighting with Driftwood

Adding lighting elements can transform your driftwood art into an enchanting focal point.

Example: Driftwood Lamp

  1. Drill Holes: Drill holes into a sturdy piece of driftwood to accommodate wiring.
  2. Insert Lights: Insert and secure LED string lights or a bulb socket inside the driftwood.
  3. Secure Base: Create a stable base using stones or a platform to prevent tipping.
  4. Plug In: Place your new lamp in your desired location and plug it in to illuminate the room.

Drift Wood Ideas Driftwood Art Wall Hangings

Tips for Selling Driftwood Art

If you become passionate about creating driftwood art, you might consider selling your pieces.

Where to Sell

  • Online Marketplaces: Etsy, eBay, or your own website.
  • Local Markets: Art fairs, farmer’s markets, and craft fairs.
  • Consignment: Local boutiques and home decor stores might accept your pieces on consignment.

Pricing Your Art

Consider the cost of materials, time spent, and the uniqueness of your piece when pricing. It’s important to find a balance between making a profit and offering fair prices.

Marketing

Use social media platforms like Instagram, Facebook, and Pinterest to showcase your work. High-quality photos and engaging posts can help attract potential buyers.

Conclusion

Driftwood art is not just a creative outlet but also a way to bring the beauty of nature into your home. Whether you create simple wall hangings or intricate sculptures, the possibilities are endless. So next time you find yourself on a beach, keep an eye out for those unique pieces of driftwood — they might just become your next masterpiece!

Happy crafting! If you have any unique ideas or would like to share your driftwood creations, feel free to connect. We’d love to see what you make!

Filed Under: Driftwood Ideas Tagged With: Art, DIY, Driftwood, Home Design, Wall Hangings

Rustic Driftwood Wall Art Ideas

June 22, 2024 by admin

Welcome to the world of rustic driftwood wall art! In “Rustic Driftwood Wall Art Ideas,” you’ll explore enchanting possibilities to elevate the aesthetic of your spaces with natural, reclaimed wood. Each idea brings the rugged charm of the coast into your home, offering unique and artistic ways to decorate your walls. From intricate designs to simple, organic shapes, you’ll discover how versatile and beautiful driftwood can be as a centerpiece in your decor. Embrace the rustic elegance and start crafting your perfect coastal haven today! Have you ever wondered how you can bring a slice of the beach into your home? Imagine transforming your living space with the timeless charm of rustic driftwood wall art. Driftwood, weathered and worn by the elements, brings a unique aesthetic to your decor that is both natural and sophisticated. Perfect for those who appreciate the beauty of nature and the appeal of handmade artistry, rustic driftwood wall art offers endless possibilities to express your creativity.

Why Choose Driftwood for Wall Art?

Driftwood carries a story within its grains, having been shaped and smoothed by the ocean’s waves over time. Choosing driftwood for wall art means incorporating a piece of nature into your home decor.

The Natural Aesthetic

Unlike factory-made decor, driftwood retains its natural imperfections, which add character and charm. Its organic textures and shapes make each piece unique, ensuring that your wall art is one-of-a-kind.

Versatility

Driftwood can be used in a myriad of ways, whether you’re aiming for a minimalist or a more elaborate design. Its neutral color palette pairs well with various interior styles, from coastal to rustic to even modern minimalism.

Sustainability

By repurposing driftwood for wall art, you’re embracing eco-friendly practices. You’re not only adding beauty to your home but also contributing to environmental conservation by recycling natural materials.

Basic Tools and Materials

To get started on your rustic driftwood wall art project, you’ll need some basic tools and materials. Here’s a quick rundown:

ToolsMaterials
Hot glue gunDriftwood pieces
Hammer and nailsPicture hanging hardware
SawDecorative elements (shells, beads)
SandpaperSturdy backing (wood panel)
Safety gogglesPaints or sealants (optional)

Rustic Driftwood Wall Art Ideas

Gathering Your Driftwood

Firstly, you’ll need to gather your driftwood. This can be a fun and therapeutic activity, especially if you live near a beach.

Beachcombing Tips

  • Timing: Early mornings after a high tide are the best times to find driftwood.
  • Locations: Areas with fewer visitors tend to have more untouched pieces.
  • Permissions: Always check local regulations to ensure you’re allowed to collect driftwood.

Preparing the Driftwood

Once you’ve collected your driftwood, it’s essential to clean and prepare it.

  1. Cleaning: Rinse the wood to remove sand and debris. You can use a mild detergent if necessary.
  2. Drying: Let the wood dry completely to avoid mold and mildew. This might take a few days, depending on the size and thickness of the pieces.
  3. Sanding: Lightly sand the wood to smooth any rough spots, but be sure not to overdo it, as those imperfections add character.

Easy Driftwood Wall Art Ideas

Here are some simple yet stunning ideas that you can try out at home.

Driftwood Heart

A heart-shaped driftwood art piece can be a lovely addition to any room.

  • Steps:
    1. Arrange your driftwood pieces in a heart shape.
    2. Use a hot glue gun to secure the pieces together.
    3. Attach picture-hanging hardware to the back.

Driftwood Mirror Frame

Give an old mirror a new lease of life with a driftwood frame.

  • Steps:
    1. Arrange driftwood pieces around the existing frame of the mirror.
    2. Use nails or a hot glue gun to attach the wood securely.
    3. Hang the mirror on your wall and admire your handiwork.

Driftwood Shelf

A minimalist driftwood shelf can serve as both a decorative and functional piece.

  • Steps:
    1. Select a sturdy piece of driftwood.
    2. Attach sturdy brackets to the wall where you want the shelf.
    3. Secure the driftwood onto the brackets.

Rustic Driftwood Wall Art Ideas

Advanced Driftwood Projects

If you’re up for more of a challenge, here are some advanced projects to consider.

Driftwood Wall Sculpture

Create a custom wall sculpture that can serve as a statement piece in any room.

  • Steps:
    1. Design your sculpture on paper first.
    2. Lay out the pieces on a flat surface to get a rough idea of the final look.
    3. Secure the pieces using nails or a hot glue gun.
    4. Consider using a wood frame or backing for additional support.

Driftwood Headboard

Upgrade your bedroom with a rustic driftwood headboard.

  • Steps:
    1. Measure the width of your bed to determine the size of the headboard.
    2. Arrange several pieces of driftwood vertically or horizontally, depending on your design preference.
    3. Secure the pieces onto a wooden backing.
    4. Attach the headboard to your bed frame or directly onto the wall.

Driftwood Picture Frame Collage

A collage of driftwood picture frames can make for an eye-catching wall display.

  • Steps:
    1. Collect several small to medium-sized driftwood pieces.
    2. Arrange the pieces into rectangular or square shapes to form frames.
    3. Use glue and nails to secure the frames.
    4. Insert your favorite photos and hang them on your wall.

Accentuating Your Driftwood Art

Once your driftwood creation is complete, you might want to add some finishing touches to make it stand out even more.

Adding Color

While the natural hue of driftwood is lovely, adding a splash of color can make your piece even more striking.

  • Paint: Use acrylic paint for a durable and vibrant finish. You can paint the entire piece or create intricate designs.
  • Stain: Wood stain can enhance the natural grain and color of the driftwood.

Incorporating Additional Elements

Adding other natural elements can enrich your driftwood art.

  • Shells and Stones: Glue shells, stones, or sea glass onto your piece for added texture.
  • Beads and String: Incorporate beads and strings to create a mixed media effect.

Styling Your Home with Driftwood Art

Knowing how to place and style your driftwood art can maximize its impact on your home’s decor.

Focal Points

Use larger pieces of driftwood art as focal points in a room. Place them on main walls or above significant furniture to draw the eye.

Grouping

Smaller driftwood pieces can be grouped together for a cohesive look. This can be done on a gallery wall or a shelf arrangement.

Lighting

Proper lighting can make your driftwood art shine. Use spotlights or adjustable lamps to highlight the texture and form of your pieces.

Complementary Decor

Pair your driftwood art with complementary decor items like beach-themed cushions, neutral-colored rugs, and ceramic vases to create a harmonious look.

Caring for Your Driftwood Art

To ensure your driftwood art lasts, consider these care tips:

  1. Avoid Direct Sunlight: Overexposure to sunlight can cause the wood to crack and fade.
  2. Dust Regularly: Use a soft cloth to dust your art pieces gently.
  3. Use Sealants: Applying a wood sealant can protect your driftwood from moisture and pests.

Conclusion

Incorporating rustic driftwood wall art into your home is a fantastic way to bring a touch of nature indoors. With its unique texture, sustainability, and versatility, driftwood can be molded into various forms of wall art, from simple heart shapes to elaborate headboards. Whether you’re new to DIY projects or a seasoned crafter, working with driftwood opens up endless possibilities. So next time you’re at the beach, consider collecting some driftwood and letting your creativity flow. Your home will thank you for it.

Filed Under: Driftwood Ideas Tagged With: DIY, Driftwood, Home Design, Rustic, Wall Art

Driftwood Decor Interior Design Wall Art

June 22, 2024 by admin

Welcome to a world where nature meets artistry with “Driftwood Decor Interior Design Wall Art.” Picture this: your living spaces transforming into serene retreats, thanks to unique wall art crafted from driftwood. This rustic, coastal-inspired decor adds a touch of organic beauty to any room, with each piece bringing a unique story from the sea. It’s not just decoration; it’s an invitation to feel closer to nature while enhancing the aesthetic of your home! Dive in and discover how driftwood can seamlessly blend into your interior design, making your environment feel warm and welcoming. Have you ever wondered how you can bring a bit of the serene and natural beauty of the beach into your home? Driftwood decor might just be the answer you’re looking for! With its unique textures and organic forms, driftwood can add a rustic yet elegant touch to your interior design. In this article, we’ll dive into the world of driftwood decor, specifically focusing on wall art and how you can incorporate this stunning material into your living space.

Driftwood Decor Interior Design Wall Art

What is Driftwood?

Driftwood is wood that has been washed onto a shore by the actions of tides, waves, or winds. This type of wood can come from a variety of sources, including trees, man-made objects, and even shipwrecks. The exposure to the elements naturally weathers the wood, providing it with a unique aesthetic that can range from smooth and polished to rugged and textured.

The Unique Appeal of Driftwood

Each piece of driftwood is unique, offering different shapes, textures, and colors. This makes it an exceptional material for creating one-of-a-kind decor items. The natural weathering process gives driftwood its charming, aged look that can’t be easily replicated with synthetic materials.

Driftwood Decor in Interior Design

Driftwood decor has become increasingly popular in interior design, especially in coastal-themed or bohemian-style homes. Incorporating driftwood into your home can add a touch of nature, warmth, and character to any space.

Benefits of Using Driftwood in Your Home

  • Eco-friendly: Reusing driftwood is a sustainable decorating option since it repurposes naturally fallen wood.
  • Versatile: Driftwood can be used in various forms, from furniture to small decorative items.
  • Timeless: The natural and rustic charm of driftwood means it never goes out of style.

Popular Driftwood Decor Items

Here are some common driftwood decor items you might consider for your home:

Item TypeDescription
MirrorsDriftwood frames can add a coastal charm to any mirror.
ShelvesPerfect for a rustic touch in any room, particularly useful in bathrooms and kitchens.
Table CenterpiecesA driftwood centerpiece can be a conversation starter and add a unique focal point on any table.
LightingDriftwood lamps and chandeliers can provide a warm, earthy ambiance.

Driftwood Wall Art

Driftwood wall art is one of the most impactful ways to incorporate this natural element into your home. From simple arrangements of pieces to intricate designs, the possibilities are endless.

Types of Driftwood Wall Art

There are various types of driftwood wall art you can create or purchase, depending on your style and skill level:

TypeDescription
Abstract ArrangementsPieces of driftwood arranged in an abstract or random pattern.
SculpturesMore intricate designs that may incorporate additional materials like shells or stones.
Frame ArtDriftwood used to frame other materials such as canvas, photos, or mirrors.
Word ArtDriftwood pieces arranged to form words or phrases.
MosaicsSmall pieces of driftwood arranged to create a larger image or design.

DIY Driftwood Wall Art Projects

Making your own driftwood wall art can be a fun and rewarding project. Here are a few DIY ideas to get you started:

Simple Driftwood Arrangement

  1. Gather your driftwood pieces.
  2. Clean them thoroughly to remove any sand or debris.
  3. Arrange the pieces on a flat surface until you’re happy with the design.
  4. Use strong adhesive or nails to secure the pieces onto a wooden or canvas backing.
  5. Hang your new piece of art on the wall!

Driftwood Heart

  1. Collect smaller, similarly-sized pieces of driftwood.
  2. Clean and dry the pieces.
  3. Arrange them in the shape of a heart on a clean surface.
  4. Use hot glue or small nails to secure the pieces together.
  5. Attach a hanging wire or loop to the back.
  6. Display your driftwood heart art proudly!

Driftwood Word Art

  1. Select pieces of driftwood that can be arranged to form letters.
  2. Clean and dry the pieces.
  3. Lay them out to spell a word or phrase.
  4. Secure the pieces together using strong adhesive.
  5. Attach a backing if necessary and add a hanging mechanism.
  6. Hang it up as an eye-catching focal point in your room.

Tools and Materials for Driftwood Wall Art

To create your own driftwood wall art, you’ll need some basic tools and materials:

Tool/MaterialDescription
AdhesiveA strong glue suitable for wood.
Nails/ScrewsFor securing larger pieces.
WireFor hanging your finished artwork.
SandpaperFor smoothing rough edges.
SawTo cut driftwood to the desired size.
BackingA wooden board or canvas to mount your driftwood arrangement.

Incorporating Driftwood Wall Art into Your Home

It’s one thing to create or buy beautiful driftwood wall art, but another to seamlessly incorporate it into your home’s existing decor. Here are some tips to help you harmonize your new driftwood pieces with your current interior design.

Choosing the Right Spot

When selecting a spot for your driftwood wall art, consider the following factors:

  • Visibility: Choose a place where the artwork can be easily seen and appreciated.
  • Lighting: Natural light can accentuate the textures and shapes of driftwood; however, make sure it’s not exposed to direct sunlight for prolonged periods to avoid potential damage.
  • Complementary Decor: Ensure that the surrounding decor complements the rustic and natural aesthetic of the driftwood.

Pairing with Other Decor Styles

Driftwood wall art can be incredibly versatile and can fit into multiple decor themes:

Decor StyleHow Driftwood Fits
CoastalDriftwood is a natural match for coastal decor, enhancing the seaside vibe.
BohemianIts organic nature complements the eclectic and free-spirited Bohemian style.
RusticDriftwood’s rugged texture aligns well with rustic and country-inspired interiors.
MinimalistIn a minimalist setting, a single piece of driftwood art can serve as a stunning focal point.

Driftwood Decor Interior Design Wall Art

Maintenance and Care for Driftwood Art

Proper care is essential to keep your driftwood wall art looking its best.

Cleaning Driftwood

To clean your driftwood, simply dust it regularly with a soft cloth. For more thorough cleaning, you can gently wipe it with a damp cloth and mild soap. Be sure to dry it completely to prevent any moisture damage.

Preservation Tips

Even though driftwood is naturally weathered, you can take additional steps to preserve it:

  • Sealant: Applying a clear wood sealant can protect the driftwood from further wear and tear.
  • Avoid Moisture: Keep driftwood art away from areas with high humidity or direct water exposure.

Where to Find Driftwood for Your Projects

Finding the right pieces of driftwood for your decor projects can be part of the adventure. Here are some places to look:

Natural Collection

Beaches, lakeshores, and riverbanks are prime locations for finding driftwood. Always check local regulations to ensure that collecting driftwood is permitted in the area.

Purchasing Driftwood

If you’re not near a body of water or prefer a more convenient option, many craft stores, garden centers, and online retailers sell driftwood pieces specifically for decor purposes.

Driftwood Decor Inspirations

To get your creative juices flowing, here are a few inspiring examples of driftwood wall art that have wowed interior designers and home decorators alike.

Driftwood Mirror Frames

A mirror framed with carefully arranged pieces of driftwood can serve as a stunning centerpiece for any room. This type of art adds depth and an organic touch to your space.

Driftwood Sculptures

Intricate driftwood sculptures can act as standalone art pieces, offering a unique mix of natural beauty and artistic craftsmanship.

Driftwood Collages

Combining various elements such as shells, stones, and even metal pieces with driftwood in a collage format can result in a captivating work of art that tells a story.

Seasonal Driftwood Decor

Using driftwood for seasonal decor—like creating driftwood Christmas trees or nautical-themed summer art—can add a festive yet natural feel to your home throughout the year.

Summary

Driftwood decor, particularly driftwood wall art, offers an incredible opportunity to bring a touch of the natural world into your home. With its unique textures and forms, each piece of driftwood tells its own story, adding both beauty and character to your interiors. From DIY projects to professional art pieces, the possibilities are virtually endless.

Key Takeaways

  • Uniqueness: Each piece of driftwood is one-of-a-kind, making your decor exceptional.
  • Eco-Friendly: Using driftwood is a sustainable choice that repurposes natural materials.
  • Versatility: Driftwood wall art can fit into various decor styles, from coastal to minimalist.
  • DIY Potential: Creating your own driftwood art can be a rewarding and creative project.

So why not bring a bit of the beach into your home with some beautiful driftwood wall art? Not only will it add a unique touch to your space, but it will also create a peaceful, natural ambiance that you and your guests can enjoy for years to come.

Filed Under: Driftwood Ideas Tagged With: Coastal Decor, DIY, Driftwood, Interior Design, Wall Art

  • « Previous Page
  • Page 1
  • …
  • Page 30
  • Page 31
  • Page 32
  • Page 33
  • Page 34
  • …
  • Page 41
  • Next Page »

Primary Sidebar

Driftwood4us.com, is a participant in the Amazon Services LLC Associates Program, an affiliate advertising program designed to provide a means for sites to earn advertising fees by advertising and linking to amazon.com.