• Skip to main content
  • Skip to primary sidebar
  • Terms and Conditions
  • Privacy Policy
  • Contact

Driftwood 4 Us

Just About Driftwood

home decor

Diy Driftwood Jewelry Holder

July 1, 2024 by admin

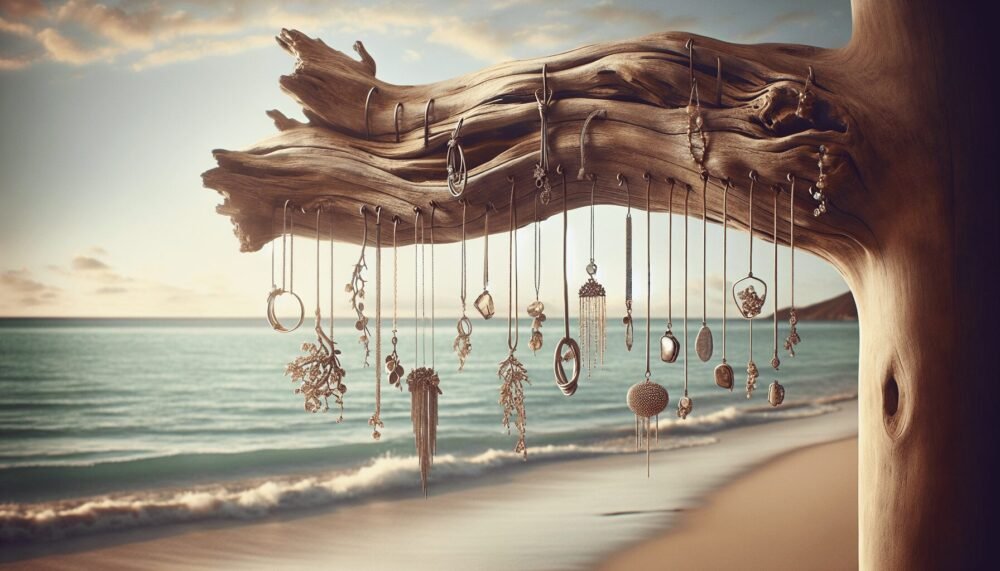
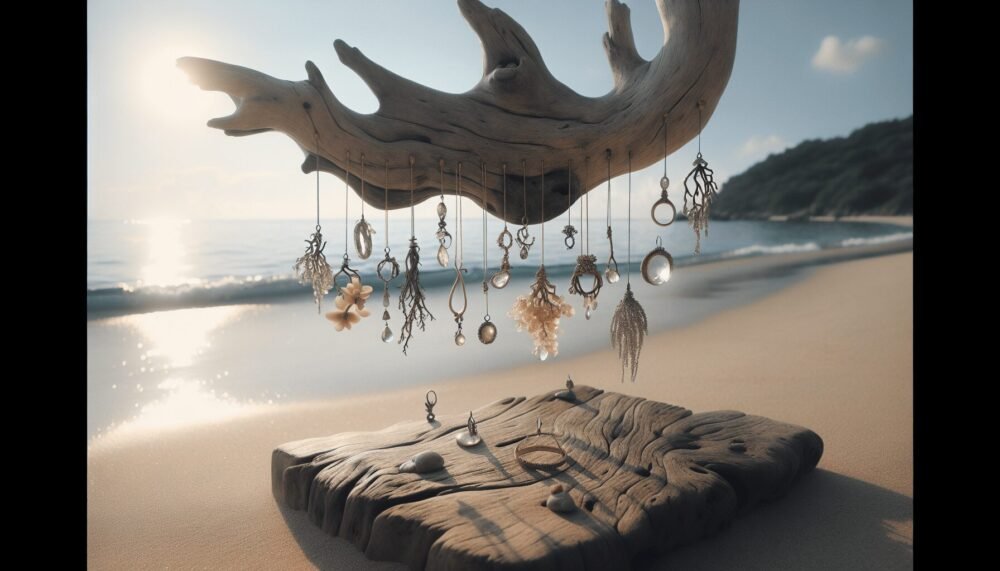
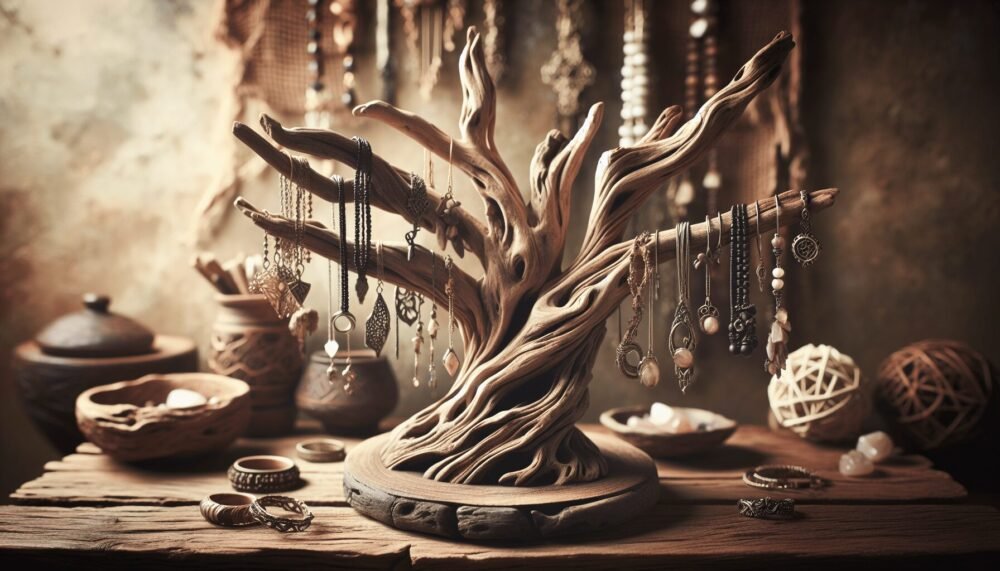
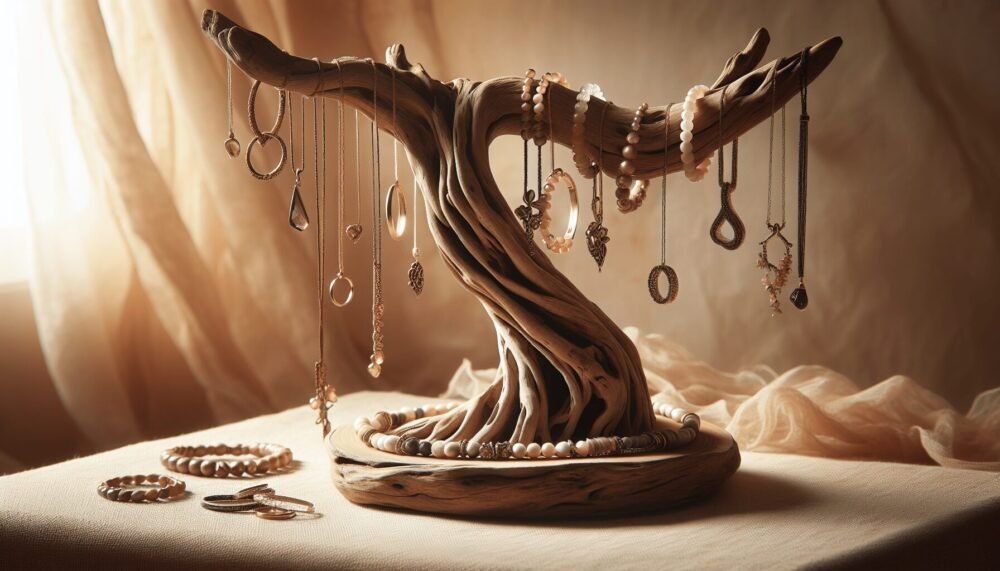
Welcome to your next creative adventure! In this guide, you’ll discover how to craft your very own DIY driftwood jewelry holder. Using nature’s own stunning materials, you’ll transform a simple piece of driftwood into a beautiful and functional display for your favorite jewelry. This project not only adds a touch of rustic charm to your decor but also showcases your unique style and ingenuity. Get ready to roll up your sleeves and bring a piece of the beach into your home with this easy and fun DIY project. Have you ever found yourself frustrated with tangled necklaces, missing earrings, or a cluttered jewelry box? If you’re nodding your head, you’re just like so many of us. But what if I told you that you could turn an afternoon project into an elegant solution that not only organizes your jewelry but also brings a touch of nature into your home décor? Let’s delve into creating a DIY Driftwood Jewelry Holder!

What You’ll Need

Before we get started, it’s essential to gather all the necessary materials. Don’t worry – this project is straightforward, and most of these items can be found at home or sourced easily.

Materials List

Here’s a handy table to list down what you’ll need:

ItemDescription
DriftwoodA piece of driftwood, ideally about 12-18 inches long and sturdy enough to hold jewelry.
Small HooksMetal cup hooks available at any hardware store.
SandpaperOptional, for smoothing out rough edges of your driftwood.
Drill (Optional)To make holes for the hooks if the wood is very hard.
Acrylic Paints (Optional)If you wish to paint or decorate your driftwood.
PaintbrushesFor applying the paint.
Stencils (Optional)For adding designs or patterns to your driftwood.
Twine or Fishing LineTo hang your driftwood if you prefer wall mounting.
Measuring TapeTo help measure spacing for hooks.
PencilTo mark where hooks will go.

Picking the Perfect Driftwood

The star of the show here is undoubtedly the driftwood. You can find driftwood along riverbanks, beaches, or even in some craft or decor stores. Just make sure to choose a piece that is solid enough to hold the weight of your jewelry but is still light enough to hang on a wall if that’s your plan.

Preparing the Driftwood

Now that you have all your materials, let’s prepare the driftwood. Driftwood can have some rough edges or can be dirty, so here’s how to prep it.

Cleaning

First off, clean your driftwood. Use a scrub brush and some soapy water to get rid of any dirt or debris. If your driftwood comes from the ocean, make sure to remove any salt by soaking it in distilled water for a day.

Sanding

While driftwood usually has a naturally beautiful texture, you might want to sand down any rough spots. This will make handling the driftwood easier and ensure that your jewelry won’t snag on any splinters. Use medium to fine-grit sandpaper for this job.

Optional: Adding Paint or Designs

If plain driftwood is too understated for your liking, feel free to get creative!

Painting

Acrylic paints are a fantastic choice for this. You could give your driftwood a faux-dip effect by painting just the ends or cover the entire piece in a uniform color.

Adding Designs

Use stencils to add patterns like polka dots, geometric shapes, or even floral designs. This step is entirely optional but can add a personal touch to your jewelry holder.

Diy Driftwood Jewelry Holder

Installing the Hooks

Once your driftwood is prepped and decorated to your liking, it’s time to add the hooks. These hooks will hold your jewelry, so spacing and installation are essential.

Measuring and Marking

Using a measuring tape, mark the spots where you’ll insert the hooks. A good rule of thumb is to space them 1.5 to 2 inches apart. Use a pencil for marking these spots, and ensure they are evenly spaced.

Drilling Holes (If Necessary)

If your driftwood is particularly hard, you might need to drill small pilot holes where your hooks will go. Use a bit slightly smaller than the width of the hook’s screw end.

Screwing in the Hooks

Using your hand or pliers, screw in the hooks at the marked spots. Make sure they are firmly in place.

Hanging Your Jewelry Holder

Once the hooks are installed, you have a choice: hang it on the wall or place it on a tabletop. Both display methods have their own charm.

Wall Mounting

Twine or Fishing Line

Attach the twine or fishing line to each end of your driftwood. You can do this by drilling small holes in each end and tying the twine/fishing line through them, or by wrapping it around the ends securely.

Mounting Hooks

Hammer nails or hooks into the wall where you want to hang your jewelry holder. Ensure they are level and capable of supporting the weight of the driftwood and your jewelry.

Tabletop Display

If you prefer a tabletop display, simply place the driftwood on your vanity, desk, or dresser. You can use clear adhesive pads on the base if needed to prevent it from sliding.

Diy Driftwood Jewelry Holder

Organizing Your Jewelry

Now comes the fun part – organizing your jewelry! Here are some tips to make the most of your new driftwood holder.

Necklaces

Use the hooks to hang necklaces. This will prevent them from tangling and make it easier to find the one you want to wear.

Earrings

For earrings, especially those with hooks, hang them directly on the metal hooks or, if you have enough space, on the edge of the driftwood itself.

Rings and Bracelets

Bracelets can hang alongside necklaces on the hooks, while rings could be placed on the very ends or just draped over the hooks.

Customizing for Your Needs

If you have a lot of a particular type of jewelry, customize the number of hooks or add additional elements, like wire or extra hooks, to better suit your collection.

Conclusion

Creating a DIY Driftwood Jewelry Holder is not only a practical solution for organizing your jewelry but also a fun, artistic project that adds a rustic charm to your home décor. Whether you prefer a natural look, or a painted, stenciled design, the personalization options are endless.

With just a few materials and an afternoon of crafting, you’ll have a beautiful and functional piece that simplifies your jewelry arrangement and adds a touch of nature-inspired beauty to your space. Happy crafting!
Filed Under: Driftwood Ideas Tagged With: Driftwood, Handmade, home decor, Jewelry Holder

Driftwood Crafts Jewelry Holder

June 30, 2024 by admin

Creating a unique and beautiful jewelry holder from driftwood is a delightful way to merge practicality with artistry, offering a rustic charm to any space. In the article “Driftwood Crafts Jewelry Holder,” you’ll discover how to transform a simple piece of driftwood into an eye-catching display for your treasured accessories. By following these easy steps, you’ll not only craft a functional piece to organize your jewelry but also capture a bit of coastal magic, bringing a touch of nature’s elegance into your home. Have you ever found yourself searching for that one piece of jewelry, only to find it’s tangled up with all the others? If you’re nodding yes, it might be time to consider a new way to organize your jewelry collection. And what better way to do it than with a beautiful, handmade driftwood crafts jewelry holder?

[Read more…] about Driftwood Crafts Jewelry Holder

Filed Under: Driftwood Ideas Tagged With: crafting, Driftwood, Handmade, home decor, Jewelry Holder

Driftwood Furniture Diy Ideas

June 30, 2024 by admin

Are you looking to bring a touch of coastal charm into your home? “Driftwood Furniture DIY Ideas” is packed with inspiring projects that will transform ordinary pieces of driftwood into stunning and functional furniture. This guide offers you easy-to-follow instructions to create beautiful driftwood tables, chairs, and shelves that capture the essence of oceanfront living. Let your creativity flow and craft unique, eco-friendly furniture that tells a story of its own. Have you ever strolled along the beach and stumbled upon a piece of driftwood that seemed to whisper, “Take me home; I have a story to tell”? Driftwood isn’t just a piece of wood; it’s a timeless relic shaped by the rhythm of the waves and kissed by the salt of the sea. Bringing this natural beauty into your home through DIY driftwood furniture projects can be incredibly fulfilling and add a unique touch to your décor.

Driftwood Furniture Diy Ideas

What is Driftwood?

Driftwood is wood that has been washed onto the shore by the sea, rivers, or lakes. It could be fragments of trees, branches, and even entire trees that have been broken down by the natural forces of water, sun, and wind. Each piece is unique, boasting its own texture, shape, and color palette, making it a versatile material for crafting one-of-a-kind furniture pieces.

Why Use Driftwood for DIY Projects?

Ecological Contribution

By repurposing driftwood, you are contributing to a more sustainable and eco-friendly lifestyle. Rather than harvesting new wood, you give new life to something nature has already discarded.

Aesthetic Appeal

Driftwood’s organic, weathered look adds a rustic, coastal touch that is both timeless and contemporary. Its natural shapes and textures easily blend into different interior design styles, whether modern, bohemian, or traditional.

Cost-Effective

Driftwood is generally free if you collect it yourself. This makes it an economical option for DIY enthusiasts looking to save money while still creating beautiful, functional pieces.

How to Prepare Driftwood?

Before diving into your DIY projects, you must prepare your driftwood properly to ensure it is clean, safe, and ready for use.

Cleaning

  1. Rinse Thoroughly: Start by rinsing the driftwood with fresh water to remove any sand, salt, or debris.
  2. Scrub: Use a stiff brush to scrub off any remaining dirt or barnacles.
  3. Rinse Again: Rinse again to ensure it is thoroughly clean.

Disinfection

  1. Soak in a Bleach Solution: Prepare a mixture of one part bleach to nine parts water and soak the driftwood for a minimum of 24 hours. This will help to kill any bacteria, mold, or tiny creatures residing in the wood.
  2. Rinse: Rinse the driftwood thoroughly with fresh water to remove any residual bleach.
  3. Drying: Allow the driftwood to dry completely. This can take anywhere from a few days to a few weeks, depending on the size and moisture content of the wood.

Sanding

Once dry, lightly sand the driftwood to smooth out any rough edges. This step is especially important for pieces that will be touched frequently, like tabletops or seating surfaces.

Driftwood Furniture DIY Ideas

Driftwood Coffee Table

A driftwood coffee table can be the centerpiece of your living room, combining functionality with organic beauty.

Materials Needed

  • A large, flat piece of driftwood or several smaller pieces connected together
  • Table legs or a base (metal or wood)
  • Screws and screwdriver
  • Sandpaper
  • Clear sealant

Steps to Create

  1. Choose Your Driftwood: Select a flat piece of driftwood or arrange several pieces to form your tabletop.
  2. Prepare the Wood: Follow the cleaning, disinfecting, and sanding steps outlined earlier.
  3. Attach Table Legs/Base: Flip the driftwood over and securely attach the legs or base using screws.
  4. Seal the Wood: Apply a clear sealant to protect the wood and enhance its natural colors.

Driftwood Headboard

Add a touch of coastal charm to your bedroom with a driftwood headboard.

Materials Needed

  • Multiple pieces of driftwood
  • Plywood sheet (optional for mounting)
  • Screws and screwdriver
  • Mounting brackets
  • Clear sealant

Steps to Create

  1. Select Driftwood Pieces: Choose pieces of driftwood of varying lengths and textures.
  2. Arrange the Layout: Lay out the pieces on the floor to find a layout that pleases you.
  3. Mount on Plywood (Optional): For added stability, you can mount the driftwood to a sheet of plywood.
  4. Attach to Wall: Using mounting brackets, attach the driftwood assembly to the wall behind your bed.
  5. Seal the Wood: Apply a clear sealant for protection and aesthetic enhancement.

Driftwood Shelves

Driftwood shelves add a rustic element to your walls while providing functional storage space.

Materials Needed

  • Several long, flat pieces of driftwood
  • Wall brackets or shelf mounts
  • Screws and screwdriver
  • Clear sealant

Steps to Create

  1. Select Driftwood: Choose long, flat pieces of driftwood suitable for shelf platforms.
  2. Prepare and Sand: Follow the cleaning and sanding steps to prep the wood.
  3. Mount Brackets: Attach wall brackets or shelf mounts to the wall at your desired height.
  4. Install Shelves: Place the prepared driftwood on the brackets and secure with screws if necessary.
  5. Seal the Wood: Apply a clear sealant to protect the shelves.

Driftwood Mirror Frame

Transform a plain mirror into a statement piece with a driftwood frame.

Materials Needed

  • A plain mirror
  • Driftwood pieces (small to medium-sized)
  • Strong adhesive or mounting putty
  • Clear sealant

Steps to Create

  1. Gather Driftwood: Collect pieces of driftwood small enough to frame your mirror without overwhelming it.
  2. Prepare the Wood: Clean and sand the driftwood as needed.
  3. Arrange Pieces: Lay out the driftwood around the mirror to create your desired pattern.
  4. Attach Driftwood: Use a strong adhesive or mounting putty to attach each piece around the mirror’s edge.
  5. Seal the Wood: Apply a clear sealant to protect the driftwood and add a polished finish.

Driftwood Floor Lamp

Create a unique driftwood floor lamp that brings warmth and character to any room.

Materials Needed

  • Long, sturdy driftwood branch
  • Lamp kit (socket, cord, light bulb)
  • Lamp base (can be purchased separately)
  • Drill
  • Clear sealant

Steps to Create

  1. Select Driftwood: Choose a long, sturdy piece of driftwood that can support a light fixture.
  2. Prepare the Wood: Clean, disinfect, and dry the driftwood.
  3. Drill Hole: Drill a hole through the driftwood for the lamp cord to pass through.
  4. Assemble Lamp Kit: Follow the instructions on your lamp kit to attach the socket and run the cord through the driftwood.
  5. Attach Base: Securely attach the driftwood to the lamp base for stability.
  6. Install Light Bulb: Add the light bulb and plug in your new lamp.
  7. Seal the Wood: Apply a clear sealant to protect your lamp.

Driftwood Coat Rack

A driftwood coat rack is both functional and decorative, providing a natural spot to hang your outerwear.

Materials Needed

  • A sturdy piece of driftwood
  • Coat hooks or pegs
  • Screws and screwdriver
  • Wall mounts or brackets
  • Clear sealant

Steps to Create

  1. Choose Driftwood: Select a sturdy piece of driftwood long enough to accommodate multiple hooks.
  2. Prepare the Wood: Clean, disinfect, and dry your driftwood.
  3. Attach Hooks: Screw the coat hooks into the driftwood at even intervals.
  4. Mount on Wall: Use wall mounts or brackets to secure the driftwood coat rack to the wall.
  5. Seal the Wood: Apply a clear sealant for added protection.

Driftwood Dining Table

A driftwood dining table can be a true conversation starter and a beautiful addition to your home.

Materials Needed

  • Large flat piece of driftwood or several smaller pieces
  • Table legs or base
  • Screws and screwdriver
  • Sandpaper
  • Clear sealant

Steps to Create

  1. Select Driftwood: Choose a large piece of driftwood or arrange several pieces together to create a tabletop.
  2. Prepare and Sand: Clean, disinfect, and sand your driftwood.
  3. Attach Table Legs/Base: Secure the table legs or base to the driftwood tabletop.
  4. Seal the Wood: Apply a clear sealant to protect the wood and enhance its appearance.

Driftwood Candle Holders

These simple yet elegant decorations can add a cozy, rustic charm to any space.

Materials Needed

  • Small pieces of driftwood
  • Tea light holders or small glass containers
  • Strong adhesive
  • Clear sealant

Steps to Create

  1. Select Driftwood: Choose small pieces of driftwood that can hold a tea light holder.
  2. Prepare the Wood: Clean and disinfect the driftwood.
  3. Attach Candle Holders: Use a strong adhesive to attach tea light holders to the driftwood.
  4. Seal the Wood: Apply a clear sealant to protect the driftwood and add a polished look.

Driftwood Picture Frame

Create a memorable frame for your favorite photos using driftwood.

Materials Needed

  • A plain picture frame
  • Small pieces of driftwood
  • Strong adhesive or mounting putty
  • Clear sealant

Steps to Create

  1. Gather Driftwood: Collect small pieces of driftwood to frame your picture.
  2. Prepare the Wood: Follow the cleaning steps to prepare the driftwood.
  3. Attach Driftwood: Use adhesive or putty to secure the driftwood pieces around the frame.
  4. Seal the Wood: Apply a clear sealant to finish your driftwood picture frame.

Driftwood Plant Stand

A driftwood plant stand brings a touch of nature indoors, perfect for showcasing your favorite plants.

Materials Needed

  • Sturdy piece of driftwood
  • Plant holder or pot
  • Screws and screwdriver
  • Clear sealant

Steps to Create

  1. Select Driftwood: Choose a sturdy piece of driftwood that can support your plant holder.
  2. Prepare the Wood: Clean and disinfect the driftwood.
  3. Attach Plant Holder: Secure the plant holder or pot to the driftwood.
  4. Seal the Wood: Apply a clear sealant to protect your plant stand.

Driftwood Furniture Diy Ideas

Tips for Working with Driftwood

Safety First

Always wear protective gear such as gloves and safety glasses when cutting, sanding, or drilling. Driftwood can have sharp edges, splinters, or fastenings embedded in it, which can be hazardous.

Choosing the Right Tools

Use proper tools for cutting and sanding driftwood. Power tools can speed up the process, but hand tools offer more control and precision.

Patience is Key

Preparing and creating with driftwood can be time-consuming. Take your time to clean, disinfect, dry, and assemble each piece to ensure the final product is both beautiful and durable.

Conclusion

Creating DIY driftwood furniture is not just a craft; it’s a way to bring the serenity and charm of the coast into your home. Each piece of driftwood has a story to tell, and by transforming it into furniture, you become part of that story. Whether it’s a simple candle holder or an elaborate dining table, these projects can enrich your living space with natural beauty and a sense of accomplishment.

So the next time you find yourself wandering along the beach, keep an eye out for those special pieces of driftwood. Who knows? Your next home décor masterpiece might just be waiting for you in the sands. Happy crafting!

Filed Under: Driftwood Ideas Tagged With: craft ideas, DIY Projects, Driftwood, furniture, home decor

Driftwood Jewelry Organizer

June 30, 2024 by admin

Imagine transforming a piece of nature into a beautiful and functional addition to your home. With the Driftwood Jewelry Organizer, you can do just that. This charming and rustic piece not only keeps your favorite accessories neatly arranged but also adds a touch of nature-inspired elegance to your space. Whether hanging on your bedroom wall or displayed on your vanity, the driftwood’s organic texture and unique shape make each organizer a one-of-a-kind treasure. Explore how you can bring a slice of the great outdoors inside and elevate your jewelry storage with this delightful and eco-friendly solution. Have you ever found yourself frustrated, searching through tangled necklaces and mismatched earrings? If you’re nodding in agreement, you’re like many who seek a stylish yet practical solution to organize their jewelry. Now, imagine incorporating a piece of nature into your home that not only serves this purpose but also adds a touch of rustic charm. Welcome to the world of driftwood jewelry organizers!

What is a Driftwood Jewelry Organizer?

Understanding Driftwood

Driftwood refers to wood that has been washed onto the shore by rivers, lakes, or the ocean. Over time, it’s shaped and smoothed by water, wind, and sand. Each piece is unique, offering a natural and artistic touch to any decor.

The Concept of Driftwood Jewelry Organizers

A driftwood jewelry organizer is a simple, functional, and aesthetically pleasing way to keep your jewelry neatly displayed. It’s a unique blend of nature and functionality, created by attaching hooks or strings to a piece of driftwood, allowing you to hang your necklaces, bracelets, and earrings.

Why Choose a Driftwood Jewelry Organizer?

Eco-Friendly

Shifting towards eco-friendly and sustainable materials is more important than ever. Driftwood is a naturally occurring resource, and using it for a jewelry organizer reduces the need for plastic and synthetic materials.

Aesthetic Appeal

Driftwood adds a unique, rustic charm to your home decor. Each piece of driftwood is one-of-a-kind, showcasing organic shapes and textures that can transform any space.

Driftwood Jewelry Organizer

Materials You’ll Need

Creating a driftwood jewelry organizer isn’t just eco-friendly; it’s also incredibly easy. Here’s what you’ll need:

MaterialDescriptionPurpose
DriftwoodFound woodThe main structure
HooksSmall, screw-in hooksFor hanging necklaces and bracelets
Nails or ScrewsDepending on your method of attachmentTo secure hooks
Fishing Line / StringStrong and thinFor hanging earrings
DrillOptional, for making holes for screws/hooksTo assist with the attachment process
SandpaperSmooth out the surface of the driftwoodTo ensure a splinter-free experience
Sealer or VarnishOptional, Clear coatTo protect the wood and enhance beauty

Step-by-Step Guide to Making Your Driftwood Jewelry Organizer

Step 1: Select Your Driftwood

Look for a piece of driftwood that suits the quantity of jewelry you have and the space where you plan to mount the organizer. Consider the length, width, and overall aesthetic of the piece.

Step 2: Prepare the Driftwood

Use sandpaper to smooth out any rough or splintered areas. If you want to enhance the wood’s natural color, apply a clear sealer or varnish and let it dry thoroughly.

Step 3: Attach Hooks and String

Determine the arrangement of your jewelry. Screw in hooks for necklaces and bracelets, and attach a few lines of fishing line or string for earrings.

Step 4: Mount Your Organizer

Decide where you’d like to hang your organizer. Use nails or screws to securely mount it onto the wall. Make sure it’s at a convenient height for daily use.

Driftwood Jewelry Organizer

Creative Ideas for Your Driftwood Jewelry Organizer

Incorporating Beads and Charms

Add a personal touch by including beads or small charms to the fishing line or string. This can add a bit of color and personality to your organizer.

Painting and Engraving

If you’re feeling artistic, consider painting your driftwood. You can opt for nature-inspired designs or something more abstract. Engraving initials or a special date can also add a sentimental touch.

Multi-Level Organizers

Use multiple pieces of driftwood to create different levels or sections. This can be especially useful if you own a variety of jewelry types and want to organize them by category.

Taking Care of Your Driftwood Jewelry Organizer

Regular Cleaning

To keep your organizer looking its best, regularly dust and clean it with a damp cloth. Avoid harsh chemicals that could damage the wood or any additional finishes.

Maintaining the Wood

If your organizer starts showing signs of wear, sand it lightly and apply another coat of sealer or varnish. This will extend its life and keep it looking fresh.

Repair and Maintenance

Check periodically that all hooks and strings are securely attached. Tighten any loose screws and replace worn-out strings to ensure your jewelry stays safe.

Benefits Over Traditional Jewelry Boxes

CategoryDriftwood OrganizerTraditional Jewelry Box
AestheticRustic, natural, uniqueClassic, often mass-produced
AccessibilityEasy to see and access jewelryRequires opening drawers/compartments
Eco-FriendlyMade from natural, reclaimed woodOften made from synthetic materials
SetupDIY, customizablePre-made, limited personalization
Space UtilizationWall-mounted, saves desk spaceOccupies surface area

Unique Aesthetic Appeal

With its natural look and feel, a driftwood organizer stands out as a piece of decor, not just a utility item.

Greater Accessibility

Unlike traditional jewelry boxes, where you have to open drawers and compartments, a driftwood jewelry organizer keeps your pieces visible and easily accessible.

Customizing for Personal Style

Types of Hooks and Hangers

You can experiment with different types of hooks and hangers. Consider metallic hooks for a modern look or rustic nails for a vintage feel.

Colors and Finishes

While driftwood naturally has a beautiful finish, you might want to paint it to match your room’s decor. Go for bold colors to make a statement or soft pastels for a subtle touch.

Adding Personal Mementos

Incorporate shells, stones, or other small keepsakes to make your jewelry organizer truly one-of-a-kind. This adds a personal story to your functional piece.

Frequently Asked Questions

How Do I Find Driftwood?

Search local beaches, rivers, or lakesides. Always ensure you’re allowed to collect driftwood in that area.

Can I Use Treated Wood Instead?

While you can, untreated driftwood offers a more authentic, natural feel. Treated wood may have chemicals that aren’t ideal for indoor use.

How Do I Prevent My Driftwood from Warping?

Ensure it’s completely dry and consider applying a wood sealer. Avoid placing it in areas with high humidity.

Is It Safe for All Jewelry Types?

Yes, but make sure the hooks or hangers you choose won’t scratch or damage delicate pieces.

Conclusion

A driftwood jewelry organizer is more than just a functional item; it’s a piece of art that brings the beauty of nature into your home. It helps you stay organized while letting your jewelry be an accessible and beautiful part of your decor. Not to mention, it’s an eco-friendly and customizable project that offers endless possibilities.

So why wait? Get yourself a piece of driftwood and start crafting your unique jewelry organizer today. Your necklaces, bracelets, and earrings will thank you for it!

Filed Under: Driftwood Ideas Tagged With: craft ideas, Driftwood, Handmade, home decor, Jewelry Organizer

Driftwood Jewelry Display Ideas

June 29, 2024 by admin

Welcome to “Driftwood Jewelry Display Ideas”! If you’re a creative soul looking to present your beautiful jewelry creations in a unique and rustic way, this guide is made for you. Imagine transforming humble pieces of driftwood into charming and eye-catching displays that not only showcase your treasures but also bring a touch of nature into your space. With just a few simple steps, you can elevate your jewelry presentation and create a stunning visual impact that will leave everyone in awe. Let’s dive into the world of driftwood and discover endless possibilities for displaying your jewelry with style and grace! Have you ever found yourself marveling at the beauty of driftwood on a stroll along the beach? Its organic shapes and weathered texture are pieces of natural art in their own right. But did you know that driftwood can also serve as a fantastic material for displaying your jewelry? If you’re looking for innovative and aesthetically pleasing ways to showcase your treasured accessories, you’ve come to the right place. Let’s dive into some captivating driftwood jewelry display ideas that will add a rustic charm to your space and elevate your collection.

Driftwood Jewelry Display Ideas

Why Choose Driftwood for Jewelry Displays?

Driftwood isn’t just random wood washed ashore; it’s a stunning material filled with character. Using driftwood for jewelry displays offers numerous benefits:

  • Natural Beauty: Driftwood’s unique shapes and textures make each piece one-of-a-kind.
  • Sustainability: Reusing driftwood helps recycle natural materials, reducing environmental impact.
  • Versatility: Driftwood can complement various decor styles, from coastal and bohemian to rustic and minimalist.

Understanding these benefits is the first step toward embracing driftwood displays. Now, let’s explore some specific ideas to transform your driftwood into eye-catching jewelry displays.

Basic Driftwood Hanger

Sometimes, simplicity is key. A basic driftwood hanger can be a straightforward yet elegant way to organize your jewelry.

Materials Needed

  • A piece of driftwood
  • Hooks or small nails
  • Twine or rope (optional for hanging)

Instructions

  1. Choose the Right Piece: Find a piece of driftwood that fits the space where you intend to hang it.
  2. Attach Hooks: Evenly space small hooks or nails along the driftwood.
  3. Hang the Driftwood: If you’d like, use twine or rope to hang the driftwood on a wall.

This basic design can be customized to display necklaces, bracelets, or even earrings. Its simple charm can bring a bit of the beach into your home while keeping your jewelry organized.

Driftwood Jewelry Stand

For a more substantial piece, consider creating a driftwood jewelry stand. This can be the centerpiece of your vanity or dresser.

Materials Needed

  • A sturdy piece of driftwood
  • Sandpaper
  • Drill
  • Wooden or metal dowels
  • Wood glue
  • Base stand (optional)

Instructions

  1. Prepare the Driftwood: Sand any rough edges to prevent snags.
  2. Drill Holes: Drill evenly spaced holes where you want to insert dowels.
  3. Insert Dowels: Apply wood glue to the ends of the dowels and insert them into the drilled holes.
  4. Add a Base (Optional): Attach the driftwood to a base for added stability.

This stand can hold multiple pieces of jewelry and adds a dynamic, artistic element to your decor.

Driftwood Jewelry Holder with String

For a DIY project that’s a bit more intricate but still accessible, try a driftwood jewelry holder with string.

Materials Needed

  • Driftwood
  • Strong string or fishing line
  • Small hooks or nails
  • Beads (optional)

Instructions

  1. Prepare Your Driftwood: Clean and smooth the driftwood.
  2. Attach Hooks: Evenly space hooks or nails along the driftwood.
  3. String Assembly: Cut pieces of string or fishing line and tie to the hooks.
  4. Enhance with Beads (Optional): Thread beads onto the string for added flair and secure with knots.

This method allows for a varied display, accommodating both lightweight and heavier jewelry pieces.

Driftwood Branch Display

If you have access to larger pieces of driftwood, a branch display can be an eye-catching way to exhibit your jewelry.

Materials Needed

  • Driftwood branch
  • Sand and sealant (optional)
  • Stable base or wall mount
  • Additional hooks or nails for hanging

Instructions

  1. Select a Branch: Choose a robust, appealing branch that can support multiple pieces.
  2. Prepare the Branch: Sand and seal the branch if needed.
  3. Secure the Branch: Attach the branch to a stable base or mount it on the wall.
  4. Add Hooks/Nails: Evenly distribute hooks or nails on the branch.

This design offers a natural, sprawling display that’s perfect for various jewelry items.

Driftwood and Sea Glass Combination

Combining driftwood with other beach finds like sea glass adds a personal touch to your display.

Materials Needed

  • Driftwood
  • Sea glass pieces
  • Strong adhesive
  • Hooks or nails

Instructions

  1. Collect Materials: Gather different shapes and sizes of sea glass and a suitable piece of driftwood.
  2. Design Layout: Arrange the sea glass on the driftwood to your liking.
  3. Attach Sea Glass: Use a strong adhesive to glue the sea glass onto the driftwood.
  4. Add Hooks: Attach hooks or nails for hanging jewelry.

This combination produces a multi-dimensional, beautiful display that’s as unique as your jewelry.

Driftwood Jewelry Display Ideas

Creating a Driftwood Necklace Display

Necklaces often present a challenge for organization, but a dedicated driftwood necklace display can solve this issue.

Materials Needed

  • Long, flat piece of driftwood
  • Small hooks or nails
  • Twine for hanging

Instructions

  1. Select Driftwood: Choose a piece with sufficient length to accommodate your necklace collection.
  2. Attach Hooks: Evenly space hooks along the driftwood.
  3. Mount the Driftwood: Use twine to create a hanging system for your display.

This dedicated necklace display keeps your pieces tangle-free and easily accessible.

Tiered Driftwood Earring Holder

For earring enthusiasts, a tiered driftwood holder offers both functionality and style.

Materials Needed

  • Several pieces of driftwood with flat surfaces
  • Strong twine or thin rope
  • Small hooks

Instructions

  1. Select Driftwood: Find multiple pieces that can be stacked or tiered.
  2. Drill Holes: Drill holes for the twine to connect the tiers.
  3. Assemble the Holder: Thread the twine through the drilled holes to connect the driftwood pieces.
  4. Add Hooks: Attach hooks specifically for hanging earrings.

This tiered design is perfect for showcasing a large earring collection and can be a beautiful focal point in any room.

Mounted Driftwood Ring Display

A mounted driftwood ring display can be a charming way to keep your rings organized.

Materials Needed

  • Flat piece of driftwood
  • Hooks, small nails, or flat-headed nails
  • Wall mount or base

Instructions

  1. Prepare Your Driftwood: Select and clean your piece.
  2. Attach Nails/Hooks: Evenly place nails or hooks for rings.
  3. Mount on Wall/Base: Securely attach the driftwood to a wall or a stable base.

This display keeps your rings easily accessible and adds a rustic element to your decor.

Driftwood Jewelry Organizer Board

Creating a driftwood jewelry organizer board combines utility with aesthetic appeal.

Materials Needed

  • Large flat piece of driftwood or driftwood panel
  • Hooks, nails, knitting needles
  • Paint or wood stain (optional)
  • Wall mount fixtures

Instructions

  1. Prepare the Driftwood: Sand, paint, or stain your driftwood if desired.
  2. Attach Hooks/Nails: Create a layout for your jewelry and attach hooks or nails accordingly.
  3. Wall Mount: Securely mount the organizer board onto your chosen wall.

This organizer board can accommodate various types of jewelry and keeps everything within easy reach.

Driftwood Jewelry Tree

For an artistic and sculptural option, create a driftwood jewelry tree.

Materials Needed

  • Large driftwood piece with branches
  • Sandpaper
  • Strong base (like a wooden board)
  • Strong adhesive or screws

Instructions

  1. Prepare the Driftwood: Sand down rough areas and make sure the branches are sturdy.
  2. Attach to Base: Securely attach the driftwood to your base.
  3. Hang Jewelry: Use the natural branches to hang necklaces, bracelets, and rings.

A driftwood jewelry tree can serve as a striking statement piece on your vanity or dresser.

Customized Driftwood Display for Specific Jewelry Types

Tailoring your driftwood display to specific jewelry types ensures optimal organization and visual appeal.

Materials Needed

  • Driftwood
  • Specific hooks, nails, or dowels
  • Paint, string, or additional decorations (optional)

Instructions

  1. Select Appropriate Driftwood: Choose pieces that best suit the form of jewelry you’re displaying.
  2. Attach the Suitable Fixtures: Use the appropriate hooks, nails, or dowels to cater to different jewelry forms like rings, necklaces, or earrings.
  3. Personalize: Customize with paint or additional decorations to align with your decor style.

This tailored approach makes your jewelry easily accessible and highly organized.

Care for Your Driftwood Jewelry Displays

Maintaining the beauty and functionality of your driftwood displays is essential for long-term use. Here are some care tips:

Cleaning Driftwood

Regularly dust and wipe down the driftwood with a damp cloth to keep it looking fresh.

Securing Hooks and Fixtures

Periodically check that all hooks and fixtures are secure to prevent damage to your jewelry.

Preventing Overcrowding

Avoid overloading your driftwood display to maintain its aesthetic and functional integrity.

By following these maintenance tips, your driftwood displays will remain beautiful and practical additions to your home.

Conclusion

Driftwood jewelry displays offer a unique and charming way to organize and showcase your accessories. From simple hangers and stands to intricate holders and organizers, there is a driftwood display idea to suit every need and style. Embracing the natural beauty of driftwood not only enhances your personal space but also supports sustainable practices. Whether you’re a DIY enthusiast or someone looking for creative solutions, these driftwood jewelry display ideas can transform how you store and admire your jewelry collection.

So, the next time you find a piece of driftwood on the beach, remember its potential beyond just a seaside souvenir. Pick it up, bring it home, and let it add a touch of natural elegance to your world.

Filed Under: Driftwood Ideas Tagged With: craft ideas, DIY Crafts, Driftwood, home decor, Jewelry Display

Driftwood Jewelry Display Diy

June 29, 2024 by admin

Imagine turning a simple piece of driftwood into a stunning display for your cherished jewelry. In this friendly and easy-to-follow guide, “Driftwood Jewelry Display DIY,” you’ll discover how to upcycle your beachcombing treasures into an artistic and functional accessory holder. Whether you’re a seasoned DIY enthusiast or just love a good creative project, this step-by-step guide will walk you through everything you need to know, making it the perfect weekend craft to showcase your unique style and keep your favorite pieces organized and beautifully displayed. Have you ever found yourself mesmerized by the natural beauty of driftwood and wondered how you could incorporate that aesthetic into your home decor? Welcome to the world of DIY driftwood jewelry displays! Whether you’re a beachcomber who loves collecting driftwood or someone who enjoys DIY projects, making your own driftwood jewelry display can be both a functional and decorative addition to your space.

The Allure of Driftwood

Driftwood brings a touch of nature indoors. Its unique textures, forms, and shades tell stories of journeys across the sea, making each piece a one-of-a-kind treasure. Using driftwood in your home decor allows you to bring a piece of the great outdoors inside, adding a rustic yet elegant charm to your space.

Why Driftwood for Jewelry Displays?

Driftwood is not just beautiful; it’s also exceptionally versatile. It can be used to create stunning, eye-catching displays that perfectly showcase your jewelry collection. Plus, incorporating natural elements into your living space has become increasingly trendy, so why not blend beauty with function?

Gathering Your Materials

Before you start the actual DIY project, you’ll need to gather your tools and materials. Here’s a handy list to make sure you have everything ready.

ItemPurpose
Driftwood piecesThe main material for your display
SandpaperSmoothing the driftwood
Hooks, nails, or screwsHanging the jewelry
Drill or screwdriverAttaching hooks or screws
Measuring tapePrecision in placement
Wood sealant (optional)Protecting and preserving the driftwood
Hot glue gun (optional)Attaching decor elements
Paint or wood stain (optional)Customizing the look of your driftwood display

Driftwood Jewelry Display Diy

Choosing the Right Driftwood

Not all driftwood pieces are created equal, so selecting the right pieces for your project is crucial. Consider the following points when choosing your driftwood:

Size and Shape

The size and shape of your driftwood will determine how you’ll use it in your jewelry display. Look for pieces that have interesting shapes and are long enough to hold your jewelry without overcrowding it. Branch-like pieces often work best for hanging earrings, necklaces, and bracelets.

Condition

Make sure the driftwood is in good condition. Avoid pieces that are too fragile or brittle, as they may not hold up well over time. Give it a gentle shake to see if it’s sturdy enough for your project.

Cleaning Your Driftwood

Once you’ve chosen your pieces, it’s time to clean them. Driftwood can harbor sand, dirt, and salt, so cleaning is an essential step.

Simple Cleaning Steps:

  1. Rinse: Rinse the driftwood pieces under fresh water to remove loose debris.
  2. Scrub: Use a mild soap and a brush to scrub away any dirt or grime.
  3. Soak: Soak the driftwood in fresh water for several hours to remove any remaining salt.
  4. Dry: Let it dry completely, either in the sun or in a well-ventilated area.

Preparing the Driftwood

After cleaning, you’ll want to prepare the driftwood for the project. This involves smoothing it out, potentially applying a sealant or paint, and making sure it’s ready to be used in your jewelry display.

Sanding

Sanding your driftwood will remove any rough edges and splinters. Use sandpaper with a medium grit to start, followed by finer grit to smooth it out. Remember to sand along the grain of the wood for the best result.

Sealing (Optional)

Applying a wood sealant can help preserve the driftwood and protect it from moisture. If you prefer a more natural look, you can skip this step.

Staining or Painting (Optional)

If you want to customize the look of your driftwood, now is the time to apply wood stain or paint. Choose a color that complements your decor and let it dry completely before moving on to the next steps.

Driftwood Jewelry Display Diy

Planning Your Jewelry Display Design

Now that your driftwood is clean and prepared, it’s time to design your jewelry display. Think about the types of jewelry you have and how you want to arrange them.

Sketching Your Design

A simple sketch can help you visualize the final product. Drawing your design will give you an idea of where to place hooks, nails, or screws. Consider including different sections for earrings, necklaces, and bracelets.

Measuring and Marking

Using a measuring tape and pencil, mark the spots where you will place hooks or screws. Even spacing will create a balanced look and ensure you have enough room for all your pieces.

Building Your Driftwood Jewelry Display

With your design in mind, you’re ready to start the building process. Follow these steps to create your unique jewelry display.

Attaching Hooks, Nails, or Screws

Depending on your design, you’ll be attaching hooks, nails, or screws to the driftwood.

Steps:

  1. Pre-drill Holes: Pre-drilling holes can prevent the wood from splitting. Use a drill bit that’s slightly smaller than your screws or nails.
  2. Attach Hardware: Screw in hooks or nails at the marked spots. Make sure they are securely fastened and aligned according to your design.

Adding Decorative Elements (Optional)

If desired, you can use a hot glue gun to attach decorative elements like shells, small stones, or beads to your driftwood. This step is entirely optional and allows you to add a personal touch to your display.

Hanging and Using Your Display

Finally, it’s time to hang your driftwood jewelry display. Choose a spot in your home where it will be both functional and eye-catching.

Hanging Your Display

Using sturdy picture hangers or wall anchors, securely attach your driftwood display to the wall. Ensure it is level and can support the weight of your jewelry.

Arranging Your Jewelry

Carefully hang your jewelry pieces on the hooks and nails you’ve attached. Arrange them in a way that is both pleasing to the eye and functional for easy access.

Maintaining Your Driftwood Jewelry Display

To keep your display looking its best, a bit of regular maintenance is required.

Dusting

Regularly dust your display to keep both the driftwood and your jewelry clean. Use a soft cloth to gently wipe down the wood and hardware.

Inspecting Hardware

Periodically check the hooks and nails to ensure they’re still secure. Tighten or replace them as needed.

Seasonal Adjustments

Feel free to update your display with the seasons by adding new decorative elements or rearranging your jewelry. This keeps the display fresh and reflects your current style.

Alternatives and Variations

If you’re feeling adventurous or want to try a different look, there are plenty of variations and alternatives to the basic driftwood jewelry display.

Multi-Tiered Displays

For larger collections, consider creating a multi-tiered display using several pieces of driftwood. You can stack them vertically or arrange them in an artistic pattern on the wall.

Driftwood Stand

If wall space is limited, consider making a driftwood stand. Use a sturdy branch as the main post and attach smaller pieces to create horizontal arms for hanging jewelry.

Combining Materials

Blend driftwood with other natural materials like stone, shells, or even metal for a unique, mixed-media display.

Conclusion

Creating a driftwood jewelry display is a wonderful way to combine functionality with natural beauty. Each step, from selecting the perfect piece of driftwood to designing and building your display, allows you to express your creativity and craft something that’s uniquely yours. Not only will you have a beautiful new addition to your home decor, but you’ll also have a personalized, eco-friendly way to showcase your jewelry collection.

So, next time you find a lovely piece of driftwood on the beach, visualize the stunning jewelry display it could become. Happy crafting!

Filed Under: Driftwood Ideas Tagged With: craft, Driftwood, Handmade, home decor, Jewelry Display

Driftwood Jewelry Stand

June 29, 2024 by admin

Get ready to add a touch of coastal charm to your home with the Driftwood Jewelry Stand! This unique piece isn’t just about aesthetics; it’s also a practical solution for organizing your beloved accessories. Imagine showcasing your favorite necklaces, earrings, and bracelets on a beautifully weathered piece of driftwood that brings the serenity of the sea right to your bedroom. Easy to assemble and brimming with natural beauty, this jewelry stand combines functionality with a rustic, stylish appeal, making it a perfect addition to your décor. Have you ever looked at your beautiful collection of jewelry and thought, “I need a better way to display these treasures”? If so, you’re not alone! Many of us struggle to find both a functional and aesthetically pleasing way to showcase our jewelry. Enter the Driftwood Jewelry Stand—a charming solution that brings a touch of nature into your space while keeping your jewelry organized and easily accessible. Let’s dive into how you can create your own driftwood jewelry stand and the many benefits of having one.

Driftwood Jewelry Stand

What is a Driftwood Jewelry Stand?

A driftwood jewelry stand is essentially a display piece made from driftwood—wood that has been washed onto the shore by the action of waves and tides. The natural weathering process gives driftwood a unique look, with each piece having its distinct texture, shape, and color. When fashioned into a jewelry stand, it creates a rustic, natural aesthetic that beautifully complements various home décor styles, from bohemian to coastal and even modern minimalist themes.

Why Choose a Driftwood Jewelry Stand?

You might be curious as to why a driftwood jewelry stand over other types. Here are several compelling reasons:

Eco-Friendly

By using driftwood, you’re repurposing a natural material, thereby reducing waste and your environmental footprint. Driftwood is a renewable resource that isn’t manufactured through industrial processes.

Unique Design

Each piece of driftwood is distinct, meaning no two jewelry stands will ever be identical. This uniqueness adds a personal touch to your jewelry display.

Versatility

Driftwood jewelry stands complement virtually any type of home décor. Whether your rooms are decorated with modern, rustic, or traditional themes, driftwood can blend seamlessly, adding a touch of nature and elegance.

Materials You’ll Need

Driftwood

Start with a piece of driftwood that suits the size and shape you want for your stand. You can find driftwood along beaches, lakeshores, or even purchase them from craft or home décor stores.

Hooks and Hangers

Select hooks and hangers that match your style. Brass, silver, or antique finishes all work well.

Base

You’ll need a sturdy base to support your driftwood. Materials such as wooden planks, tiles, or even rocks can serve as good bases.

Tools

Having the right tools is crucial for creating a reliable driftwood jewelry stand.

  • Drill: To make holes for the hooks.
  • Screws: To attach the driftwood to the base.
  • Sandpaper: To smooth out rough edges.
  • Saw: If you need to adjust the size of the driftwood.
  • Screwdriver: For attaching components.

Optional Add-Ons

Feel free to get creative with other elements, such as paint, varnish, or additional decorations like shells and stones to further personalize your stand.

Step-by-Step Guide to Making a Driftwood Jewelry Stand

Step 1: Selecting the Driftwood

The first step in creating your jewelry stand is choosing your piece of driftwood. When looking for a piece, consider its size, shape, and stability. Ideally, it should have multiple branches or hooks naturally occurring, but don’t worry if it doesn’t—you can always add hangers later.

Step 2: Cleaning the Driftwood

Ensure your driftwood is clean and free of debris. Here’s how:

  1. Rinse the driftwood: Use fresh water to remove sand and grime.
  2. Scrub: Use a stiff brush to scrub the wood.
  3. Soak: If the wood is heavily stained, soak it in a bleach and water solution (ratio of 1:10) for about 24 hours.
  4. Dry: Allow the wood to thoroughly dry, preferably under the sun.

Step 3: Preparing the Base

Your base needs to be sturdy enough to support the driftwood and the weight of your jewelry. If you’re using a wooden plank or a tile, ensure it is the right size and shape. Sand it down if necessary to smooth any rough edges.

Step 4: Drilling and Mounting

Once your driftwood and base are ready, follow these steps to assemble:

  1. Drill Holes: Drill holes into the driftwood where you plan to attach hooks or hangers.
  2. Attach Screws: Secure the screw into the base and driftwood to firmly attach them together. Ensure it’s stable by gently shaking it.
  3. Add Hooks: Install your hooks and hangers in the pre-drilled holes.

Step 5: Finishing Touches

Sand down any rough edges on your driftwood to ensure no splinters remain. You can also paint or varnish the driftwood if desired, although many people prefer to keep its natural look.

Driftwood Jewelry Stand

Popular Styles and Designs

Minimalist

A single piece of driftwood with a few strategically placed hooks can create a minimalist yet functional jewelry stand. This style is elegant and doesn’t take up much space, making it perfect for smaller rooms or apartments.

Rustic

For a more rustic look, leave the driftwood in its natural state and use antique-finished hooks. Add some natural elements like small stones or twine for that extra touch.

Bohemian

Add colorful elements like beads, feathers, and shells to your driftwood. This type of stand not only functions as a jewelry holder but also as an eye-catching piece of art.

Coastal

If you’re a fan of beach décor, aim for a coastal theme by incorporating seashells, sand dollars, and a light whitewash finish to your driftwood.

Caring for Your Driftwood Jewelry Stand

Driftwood is fairly low maintenance, but a little care can go a long way in preserving its beauty:

  • Dust Regularly: Use a soft cloth or feather duster to remove accumulated dust.
  • Avoid Moisture: Driftwood can get moldy if exposed to damp conditions. Keep it in a dry place.
  • Sealing: Optionally, you can seal your driftwood with a clear varnish to protect it from wear and tear.

Tips and Tricks for a Successful Project

Selecting the Right Driftwood

Not every piece of driftwood is suitable for a jewelry stand. Look for wood that is large enough to be stable but has enough branches or protrusions to hang jewelry from.

Balancing Aesthetics and Functionality

While it’s tempting to focus solely on how beautiful your driftwood jewelry stand will look, remember it also needs to be functional. Make sure there are enough hooks to accommodate your jewelry collection.

Securing the Base

Your base is crucial for stability. Don’t skimp on this part, as it will bear the weight of the jewelry and the driftwood.

Getting Creative

Feel free to think outside the box when it comes to decorations and additional features. Driftwood is incredibly versatile and can be customized to suit your personal style.

Benefits of Making Your Own Driftwood Jewelry Stand

Personalized Touch

Making your own jewelry stand means you get a piece that reflects your personality and style. It’s a unique add-on that store-bought stands can’t offer.

Cost-Effective

Many of the materials required can be sourced for free or at a low cost. This makes it a budget-friendly project that offers great returns in terms of functionality and decoration.

Therapeutic Process

Crafting something with your hands can be very therapeutic. The process of creating your own driftwood jewelry stand can be a wonderful way to unwind and engage in a productive hobby.

Frequently Asked Questions

Where Can I Find Driftwood?

You can find driftwood along the shores of oceans, lakes, and rivers. Some craft and home décor stores also sell pre-cleaned and treated driftwood.

How Strong is Driftwood?

Driftwood is surprisingly strong, though it varies by type. When selecting your piece, ensure it’s sturdy enough to hold your jewelry without bending or breaking.

Can I Use Other Types of Wood?

While driftwood offers a unique, naturally weathered look, you can use any type of wood for this project. Just keep in mind that you may need to artificially treat it to achieve a similar aesthetic.

How Do I Clean and Maintain Driftwood?

Cleaning involves rinsing, scrubbing, and sometimes soaking in a bleach solution. For maintenance, regular dusting and keeping it in a dry environment are usually sufficient.

Can I Repaint or Varnish My Stand?

Absolutely! Paint or varnish can add an extra layer of protection and customize the look further. Just make sure to use finishes that are safe for the type of wood you’re using.

How Do I Make It More Stable?

Ensuring the base is heavy and well-secured will increase the stability of your driftwood jewelry stand. You can also use longer screws or additional supports if necessary.

By now, you should have a thorough understanding of how to create, customize, and care for your own driftwood jewelry stand. Happy crafting!

Conclusion

The driftwood jewelry stand is a functional art piece that serves both practical and decorative purposes. Not only does it provide an eco-friendly and unique way to display your jewelry, but it also adds a touch of natural beauty to your home. With the right materials and a bit of creativity, you can craft a stand that perfectly matches your décor style and meets your needs. So why wait? Start collecting your materials, let your creativity flow, and build your very own driftwood jewelry stand today. You’ll love how it turns out, and your jewelry will thank you for the beautiful display!

Filed Under: Driftwood Ideas Tagged With: crafting, Driftwood, Handmade, home decor

Driftwood Fusion Stain

June 29, 2024 by admin

Discover the magic of Driftwood Fusion Stain—a versatile product that effortlessly transforms your DIY projects into stunning works of art. With its unique blend of earthy tones, Driftwood Fusion Stain brings an authentic, weathered look to any piece of wood, imbuing it with character and depth. Whether you want to refresh an old furniture item or bring a rustic charm to your new creation, this stain is your perfect ally. Dive into the easy application process and enjoy the frustration-free experience of bringing your vision to life with Driftwood Fusion Stain. Have you ever found yourself captivated by the rustic charm of driftwood furniture, wishing you could capture that weathered elegance in your home? If so, you’re in good company. Driftwood adds a unique, coastal ambiance to any space, but achieving that perfect look can be a challenge. That’s where Driftwood Fusion Stain comes in! Let’s dive into the world of Driftwood Fusion Stain, and explore how you can master this technique to bring a touch of the seaside into your living area.

Understanding Driftwood Fusion Stain

Driftwood Fusion Stain is a specialized staining technique that aims to replicate the natural, weathered look of driftwood. This stain is a game-changer for anyone interested in DIY projects, as it allows you to transform ordinary wood into a piece that evokes the beauty of naturally aged driftwood.

What is Driftwood Fusion Stain?

Driftwood Fusion Stain is a type of wood stain formulated with a blend of colors and pigments that mimic the variegated tones and textures of driftwood. Unlike traditional stains, this fusion stain tackles both the aesthetic and protective needs of the wood.

Benefits of Using Driftwood Fusion Stain

  • Natural Aesthetic: The stain provides a gorgeous, natural driftwood appearance without the hassle of finding and preparing actual driftwood.
  • Easy Application: Designed for ease of use, even beginners can achieve stunning results.
  • Durability: It offers not just beauty but also protection, making your furniture last longer.

Why Opt for Driftwood Fusion Stain?

Selecting Driftwood Fusion Stain brings numerous benefits to your woodworking projects. This stain type is not just about color; it’s about creating an atmosphere. Whether it’s for a coffee table, a bookshelf, or even kitchen cabinets, Driftwood Fusion Stain can imbue your furniture with a rustic, coastal vibe that is hard to beat.

Preparation

Before embarking on your Driftwood Fusion Stain project, you need to prepare adequately. Preparation is key to achieving a professional-looking finish. Let’s go over some essential steps:

Choosing the Right Wood

Not all types of wood are created equal. While Driftwood Fusion Stain can work on most types, some woods take stain better than others. Softwoods like pine or poplar are generally good choices.

Wood TypeStain AbsorptionRecommended for Beginners
PineHighYes
PoplarModerateYes
OakLowNo
CherryLowNo

Preparing Your Workspace

A clean, well-ventilated workspace is crucial. The stain can emit strong fumes, so make sure you’re working in an area with good airflow. Lay down some newspapers or drop cloths to protect your surfaces from accidental spills.

Tools and Materials You’ll Need

Before you begin, gather all the necessary tools and materials:

  • Driftwood Fusion Stain
  • Sandpaper (various grits)
  • Brushes or staining pads
  • Gloves
  • Stir sticks
  • Tack cloth
  • Protective finish (optional but recommended)

Driftwood Fusion Stain

Application Techniques

Understanding the proper techniques for applying Driftwood Fusion Stain will significantly enhance the outcome of your project. Let’s break down the steps involved.

Step-by-Step Guide

  1. Sand the Wood: Start by sanding your wood surface. Begin with a rough grit (around 80-grit) to remove any existing finish, then move to a finer grit (220-grit) for a smooth finish.
  2. Clean the Surface: Use a tack cloth to wipe away any dust and debris from sanding.
  3. Stir the Stain: Stir your Driftwood Fusion Stain thoroughly to ensure an even consistency.
  4. Apply the Stain: Use a brush or a staining pad to apply the stain. Always go in the direction of the wood grain for a natural look.
  5. Wipe Off Excess: Allow the stain to sit for 5-15 minutes, then wipe off any excess using a clean cloth.
  6. Let It Dry: Allow the stained piece to dry for at least 24 hours before applying a protective finish.

Tips for a Professional Finish

  • Do a Test Spot: Always test the stain on a small, inconspicuous area to see how it reacts with your wood.
  • Multiple Coats: Apply additional coats if you desire a darker, more textured look.
  • Sand Between Coats: Lightly sanding between coats can help achieve a smoother finish.

Maintenance and Care

Once your project has been stained and completed, taking care of it will ensure it remains beautiful for years to come.

Routine Cleaning

  • Dust Regularly: Use a microfiber cloth to dust your stained furniture regularly.
  • Avoid Excess Moisture: Wipe up any spills immediately to prevent water damage or staining.

Protective Finish

Applying a protective finish like polyurethane or a simple wax coating can extend the life of your stained furniture. It’s an optional step, but highly recommended for pieces that will see frequent use.

Finish TypeDurabilityGloss LevelReapplication Frequency
PolyurethaneHighHighEvery few years
WaxMediumLowAnnually
Linseed OilLowLowEvery six months

Driftwood Fusion Stain

Advanced Techniques and Troubleshooting

Even with the best preparation and application, sometimes things don’t go as planned. Let’s look into advanced techniques and common issues you might encounter.

Creating Texture

To add a more authentic driftwood feel, you can create texture by using methods such as:

  • Wire Brush: Scrape the surface gently with a wire brush to add grain texture.
  • Dry Brushing: Use a dry brush technique with a lighter or darker shade to add depth and variation.

Common Issues and Solutions

  • Blotchy Finish: If your stain appears blotchy, it might be because of uneven staining. Sanding the wood more thoroughly and reapplying a second coat can help.
  • Color Too Dark/Light: Lighten the color by wiping the wood with a damp cloth. If too light, add additional coats of stain until desired color is achieved.

Environmental and Health Considerations

While creating beautiful furniture is exciting, it’s crucial to consider the environmental and health aspects of using stains.

Eco-Friendly Options

Look for Driftwood Fusion Stain brands that focus on low VOC (volatile organic compounds) to reduce your footprint. Water-based stains are typically more environmentally friendly than their oil-based counterparts.

Safety Precautions

  • Ventilation: Ensure you are working in a well-ventilated area.
  • Protective Gear: Wear gloves, masks, and safety glasses to protect yourself from fumes and accidental spills.

Driftwood Fusion Stain Projects and Inspiration

Feeling inspired? Here are some projects you can tackle with Driftwood Fusion Stain to add that coastal charm to your home.

Driftwood-Stained Coffee Table

A coffee table is often the centerpiece of a living room. A Driftwood Fusion Stain can transform a simple wooden table into a rustic focal point.

Bookshelf Makeover

Give your tired old bookshelf a new lease on life with a driftwood feel. It’s a simple project that can dramatically change the look of your space.

Kitchen Cabinets

For those feeling a bit more adventurous, try using Driftwood Fusion Stain on your kitchen cabinets. It creates a coastal vibe that’s perfect for a beach-themed or rustic kitchen.

Conclusion

Driftwood Fusion Stain opens up a world of possibilities for DIY enthusiasts and professional woodworkers alike. It’s an accessible and rewarding way to bring a touch of the sea into your home, offering a blend of natural beauty and durability. From choosing the right wood to mastering the application techniques, we hope this guide sets you on the right path to creating stunning driftwood-stained pieces. Happy staining!

Filed Under: Driftwood Ideas Tagged With: DIY, Driftwood, furniture, home decor, Wood Stain

Driftwood Jewelry Hanger

June 29, 2024 by admin

You’re in for a delightful treat as you discover the charm and utility of the Driftwood Jewelry Hanger. Imagine taking a piece of nature’s artistry, like driftwood, and transforming it into a stunning display for your jewelry collection. This eco-friendly hanger not only keeps your necklaces, bracelets, and earrings neatly organized but also adds a rustic, beachy vibe to your décor. You’ll love how this simple yet elegant solution breathes new life into your space while showcasing your favorite accessories. Dive into the world of the Driftwood Jewelry Hanger and embrace its unique blend of style and functionality! Have you ever wondered about an eco-friendly, rustic, and stylish way to organize and display your jewelry? If so, you’re in luck! A driftwood jewelry hanger might be just what you need to combine practicality with a touch of coastal charm in your home decor. In this article, you’ll learn everything you need to know to create your own driftwood jewelry hanger, from gathering materials to making the final touches.

What Is a Driftwood Jewelry Hanger?

A driftwood jewelry hanger is a piece of driftwood that’s been transformed into an artistic and functional display for your jewelry. These hangers typically use hooks, nails, or other hardware to hold necklaces, bracelets, earrings, and rings.

Why Choose Driftwood?

Driftwood adds a unique, natural element to any room. Each piece of driftwood is one-of-a-kind, with its own shape, texture, and history. Utilizing driftwood for projects like a jewelry hanger helps you repurpose natural materials in a sustainable way. Plus, the overall aesthetic is both stylish and versatile, fitting well into various types of home decor, whether you’re aiming for a coastal, rustic, or bohemian look.

Materials You’ll Need

Before you begin, gather all the necessary materials. Here’s a table to help you keep track:

MaterialDescription
DriftwoodChoose a piece sturdy enough to hold multiple pieces of jewelry
SandpaperTo smooth out rough areas
Hooks or small nailsFor hanging jewelry
Measuring tapeTo ensure even spacing
PencilFor marking drill points and hook placements
DrillTo create holes for hooks or nails
ScrewsFor attaching the driftwood to the wall
Wall AnchorsOptional but recommended for added stability
ScrewdriverTo screw in wall anchors and screws

Choosing the Perfect Piece of Driftwood

When selecting your driftwood, look for a piece that’s sturdy and has a shape you find appealing. It should be large enough to accommodate several pieces of jewelry but small enough to fit comfortably in your chosen location.

Essential Tools

Make sure you have all the tools listed, especially a drill and sandpaper. The drill will be indispensable for making holes for hooks, and the sandpaper will ensure you don’t get any splinters while handling the wood.

Driftwood Jewelry Hanger

Preparing the Driftwood

Preparation is key to making sure your driftwood jewelry hanger turns out perfect.

Cleaning The Driftwood

Begin by thoroughly cleaning the driftwood. Given that it may have been sitting in water for quite some time, it could be home to barnacles, algae, or other debris.

  1. Rinse: Use fresh water to rinse off any loose dirt or debris.
  2. Soak: Submerge the driftwood in a mixture of water and a small amount of bleach for 24 hours to kill any remaining organisms.
  3. Dry: Allow it to air dry completely, which may take a few days.

Sanding The Driftwood

After your driftwood is clean and dry, it’s time to sand it. Smooth out any rough spots to prevent splinters and give the piece a polished look. Lightly sand the surface with medium-grit sandpaper, focusing on areas where you’ll be placing hooks or nails.

Assembling the Jewelry Hanger

Now that your driftwood is prepped, you can move on to the assembly phase.

Planning Hook Placement

Use your measuring tape and pencil to mark where each hook or nail will go. Evenly spaced hooks look most appealing and functional. Here’s a simple guide:

ItemIdeal Separation
Necklaces3 inches
Bracelets1.5 inches
Earrings1 inch

Drilling Holes

Once you’ve marked the placement for the hooks, use the drill to create shallow pilot holes. This will make it easier to screw in hooks or hammer in nails without splitting the wood.

Installing Hooks

Screw in the hooks or hammer in the nails according to your pencil marks. Ensure they’re secure but be careful not to split the wood. As you do this, try to maintain an even look.

Driftwood Jewelry Hanger

Mounting the Driftwood Jewelry Hanger

The final step is to mount your driftwood jewelry hanger securely on the wall.

Choosing a Location

Pick a spot that’s both practical and aesthetically pleasing. Bedrooms, bathrooms, and dressing areas are popular choices.

Installing Wall Anchors

If your chosen spot doesn’t have a stud, use wall anchors for added stability. Mark the spots where the screws will go, then drill holes and insert the wall anchors.

Attaching the Driftwood

Align the screws with the wall anchors or studs, then use a screwdriver to secure the driftwood to the wall. Ensure it’s level and firmly attached.

Finishing Touches

After mounting your driftwood jewelry hanger, you can add some finishing touches to make it perfect.

Decorating the Driftwood

Consider decorating the driftwood to match your room’s decor. You might add small seashells, paint it a color that complements your room, or wrap it in string lights for a bit of sparkle.

Organizing Your Jewelry

Arrange your jewelry on the hooks, taking care to balance the weight evenly. The result will be a beautiful, organized display that makes it easy to find and admire your pieces.

Benefits of a Driftwood Jewelry Hanger

Creating a driftwood jewelry hanger comes with multiple benefits.

Eco-Friendly

Using driftwood means repurposing natural materials, reducing waste, and cutting down on the need for new resources.

Unique and Aesthetic

Each piece of driftwood brings its own unique character, adding to the individuality of your décor.

Functional

Keeps jewelry organized, easily accessible, and tangle-free, saving you time and frustration.

Therapeutic Crafting

The process of creating your driftwood jewelry hanger can be a calming and satisfying activity, giving you a sense of accomplishment.

Maintenance and Care

Maintaining your driftwood jewelry hanger is simple but important to ensure it lasts a long time.

Regular Cleaning

Dust the driftwood regularly to keep it looking its best. Use a soft brush to avoid scratching the surface.

Checking for Stability

Periodically check to make sure hooks and screws are still secure, and tighten them if necessary. This will help prevent your jewelry from accidentally falling.

Avoiding Excessive Moisture

If your hanger is in a bathroom or another area with high humidity, keep an eye out for any signs of wood degrading or rusting hooks. You might occasionally need to reapply a protective finish to the driftwood to keep it in good shape.

Creative Variations

Once you’ve mastered the basics, consider trying some creative variations to make multiple driftwood jewelry hangers or even to give them as gifts.

Themed Decorations

For a coastal theme, add seashells, sand dollars, or small pieces of coral. For a more rustic look, consider adding small pine cones or dried flowers.

Different Sizes

Make smaller ones for just a few necklaces or larger ones that include shelving for additional storage options.

Combination Displays

Combine your driftwood hanger with a small mirror or picture frame to create a multifunctional wall piece.

Troubleshooting Tips

Even the best-laid plans encounter issues. Here are solutions to common problems you might face.

Uneven Hook Placement

If the hooks didn’t line up as planned, consider removing them and filling the holes with wood filler, then sanding and repainting that section before trying again.

Splitting Wood

If you encounter splitting, make sure to pre-drill pilot holes that are slightly smaller than the screws or nails to minimize stress on the wood.

Loose Hooks

If hooks become loose over time, remove them and apply a bit of wood glue before re-screwing them back in place.

Conclusion

A driftwood jewelry hanger is not just a practical solution for organizing your jewelry but also a beautiful and unique piece of home decor. By following the steps outlined in this article, you’ll be able to create your own charming driftwood jewelry hanger that combines functionality with rustic elegance. The joy of crafting something with your hands makes it even more special and adds a personal touch to your home.

So why wait? Dive into this creative project, and you’ll soon have a stunning display for your treasured jewelry pieces, not to mention the satisfaction of having made something both beautiful and practical.

Filed Under: Driftwood Ideas Tagged With: Craft Project, Driftwood, Handmade, home decor, Jewelry Organizer

Driftwood Jewelry Holder

June 28, 2024 by admin

Welcome to your next favorite DIY project: the Driftwood Jewelry Holder! Imagine a delightful piece of nature serving not just as decor, but also as a practical organizer for your cherished accessories. With just a bit of creativity and a touch of patience, you can transform a simple piece of driftwood into an elegant and functional display. This article will guide you through the steps to create a personalized jewelry holder that adds a coastal charm to your space while keeping your jewelry neatly arranged. Let’s dive into this fun and easy craft to bring a hint of the seaside into your home! Have you ever found yourself tangled in a mess of necklaces or searching for a lost earring in your jewelry box? If so, it’s time to think about a stylish and functional way to store your favorite pieces. Enter the Driftwood Jewelry Holder: a charming, rustic way to organize your jewelry that adds a natural flair to your home décor.

Driftwood Jewelry Holder

What is a Driftwood Jewelry Holder?

A Driftwood Jewelry Holder is a creative storage solution crafted from pieces of driftwood collected from rivers, beaches, or lakes. Each piece of driftwood brings its own unique history and character, making every jewelry holder a one-of-a-kind piece of art. These holders can have hooks, knobs, or strings to hold your rings, bracelets, necklaces, and earrings.

Why Choose a Driftwood Jewelry Holder?

Choosing a Driftwood Jewelry Holder has numerous benefits beyond its obvious aesthetic appeal. Here’s why you might want one:

  1. Unique Design: No two pieces of driftwood are alike, giving you a unique, personalized touch to your décor.
  2. Eco-Friendly: Using found driftwood is an environmentally friendly option. It repurposes natural materials that would otherwise go to waste.
  3. Versatile Storage: Perfect for hanging a variety of jewelry items, from earrings to necklaces.
  4. Stylish Décor: Adds a natural, rustic touch to any room’s interior design.

How To Find Driftwood

Finding quality driftwood is the first step in creating your very own Driftwood Jewelry Holder. Here are some tips on where and how to collect it:

Local Beaches and Rivers

The most common places to find driftwood are along beaches and riverbanks. You might need to go for a few walks to collect enough pieces for your project.

Quality Check

Ensure the wood is dry and free from pests or decay. Driftwood that has been aged in water for a long time will generally be more durable and attractive.

Legal and Environmental Considerations

Check local laws and regulations before collecting driftwood. Some areas protect their shoreline ecosystems and restrict the removal of natural materials.

Tools and Materials Needed

Creating a Driftwood Jewelry Holder is a hands-on project that requires some basic tools and materials. Here’s a list to get you started:

Tool/MaterialPurpose
DriftwoodMain structure of the holder
SandpaperSmoothing the driftwood surface
Hooks/KnobsFor hanging jewelry
Drill and ScrewsAttaching hooks or knobs
Hanging HardwareFor wall mounting
Paint/Stain (optional)Customize the look (if desired)

Recommended Items

While some materials are optional, certain tools like a drill and sandpaper are essential for preparing and customizing your driftwood.

Step-by-Step Guide to Making Your Driftwood Jewelry Holder

Here’s a detailed guide on how to transform your found driftwood into a stunning jewelry holder.

Step 1: Clean the Driftwood

Start by thoroughly cleaning the driftwood. Soak it in a mixture of water and a small amount of bleach to kill any bacteria or pests. Rinse well and let it dry completely.

Step 2: Sand the Surface

Using fine-grit sandpaper, smooth the surface of the driftwood. This will help remove any rough spots or splinters, making it safer for handling and more attractive.

Step 3: Plan Your Design

Think about how you want to arrange your hooks or knobs. Lay out your jewelry to visualize the spacing and placement.

Step 4: Drill Holes

Carefully drill holes for the hooks or knobs where you marked your placements. Ensure the holes are evenly spaced and deep enough to hold the hooks securely.

Step 5: Attach Hooks and Knobs

Screw in the hooks or knobs, making sure they are secure. Double-check that everything is sturdy and placed where you want it.

Step 6: Add Hanging Hardware

Attach hanging hardware to the back of your driftwood jewelry holder. This will allow you to mount it on the wall. Choose a spot that is easily accessible but also showcases your beautiful holder.

Optional: Paint or Stain

If you want to match your holder to your home décor, you can paint or stain the driftwood. This step is entirely optional but can add a personalized touch.

Driftwood Jewelry Holder

Using and Maintaining Your Driftwood Jewelry Holder

Now that you’ve created your jewelry holder, it’s time to put it to use and keep it looking great. Here are some tips:

Organize Your Jewelry

Start by hanging your jewelry in an organized way. Use the hooks for necklaces and bracelets, and knobs for rings. Smaller hooks can be used for earrings.

Regular Cleaning

To keep your driftwood jewelry holder in pristine condition, dust it regularly. Wipe it down with a soft, damp cloth to remove any buildup without damaging the wood.

Inspect for Wear and Tear

Periodically check the hooks and knobs to ensure they are still secure. Tighten any loose screws and replace any worn-out hooks as needed.

Creative Variations and Upgrades

If you love DIY projects, consider these creative variations and upgrades to personalize your driftwood jewelry holder even further.

Incorporate Shelves

Add small shelves to your driftwood for additional storage. This can be a great place for keeping small jewelry boxes or decorative items.

Use Decorative Hooks

Instead of plain hooks, use decorative ones that complement your home’s style. Look for vintage knobs or colorful hooks to add an extra element of design.

Add a Mirror

Incorporate a small mirror into your driftwood piece for a convenient way to check your appearance while accessorizing.

Conclusion

Creating a Driftwood Jewelry Holder is not only a fun and rewarding DIY project but also a way to add a unique and eco-friendly piece of décor to your home. By following the steps outlined here, you can design a holder that fits your personal style and helps keep your jewelry organized. Plus, every time you glance at your handmade creation, you’ll be reminded of the joy and satisfaction of making something both beautiful and functional.

So next time you find yourself on a beach or near a river, keep an eye out for that perfect piece of driftwood. With a little creativity and effort, you can turn it into something truly special. Happy crafting!

Filed Under: Driftwood Ideas Tagged With: crafts, DIY, Driftwood, home decor, Jewelry Holder

  • « Previous Page
  • Page 1
  • …
  • Page 17
  • Page 18
  • Page 19
  • Page 20
  • Page 21
  • …
  • Page 30
  • Next Page »

Primary Sidebar

Driftwood4us.com, is a participant in the Amazon Services LLC Associates Program, an affiliate advertising program designed to provide a means for sites to earn advertising fees by advertising and linking to amazon.com.