Have you ever thought about creating a unique and stunning Christmas decoration that not only captures the spirit of the holidays but also adds a touch of nature and coastal charm to your home? If so, a driftwood Christmas tree might be the perfect project for you!
Why Choose a Driftwood Christmas Tree?
A driftwood Christmas tree is an eco-friendly and artistic alternative to traditional holiday decorations. It’s a perfect project if you love the beach or want to bring a bit of the seaside into your home. Plus, creating this unique tree can be a fun and rewarding craft project for the whole family.
Eco-Friendly Decoration
Using driftwood to create your Christmas tree means you are reusing materials that nature has already provided. This reduces waste and can be a sustainable way to decorate for the holidays without cutting down a live tree or purchasing a plastic one.
Unique Aesthetic Appeal
No two pieces of driftwood are the same, which means your tree will be completely unique. The natural textures and colors of the driftwood can add a rustic and organic feel to your holiday decor, making it stand out from the typical Christmas decorations.
Gathering Materials
Before you start crafting your driftwood Christmas tree, you’ll need to gather your materials. Here’s what you’ll need:
Essential Materials
| Material | Description |
|---|---|
| Driftwood | Collect various sizes for branches and a sturdy base piece for the trunk. |
| Drill | Needed for making holes in the driftwood. |
| Wooden Dowel | This will serve as the central support structure of your tree. |
| Base | A sturdy base, like a wooden slab or a heavy stone, to support the tree. |
| Glue Gun | A hot glue gun will help secure the branches in place. |
| Sandpaper | To smooth down rough edges on the driftwood. |
| Saw | A small hand saw to cut the driftwood as needed. |
| Protective Finish | Optional: to coat the driftwood if you want to preserve its look. |
Optional Decorations
To personalize your tree, you might also consider:
| Decoration | Description |
|---|---|
| Fairy Lights | Add a magical glow to your tree. |
| Ornaments | Small, lightweight decorations can be hung on the branches. |
| Star/Topper | Choose or make a special topper for your tree. |
| Garland | String together shells, beads, or other coastal items for a unique garland. |

Step-by-Step Guide to Building Your Driftwood Xmas Tree
Now that you’ve gathered your materials, let’s break down the steps to create your stunning driftwood Christmas tree.
Step 1: Collect and Prepare Driftwood
Collecting your driftwood can be a fun adventure on its own. Look for pieces of different lengths and thicknesses. Once you have your driftwood, clean it thoroughly to remove any sand, dirt, or sea salt. You can scrub it with a brush and rinse it well. Allow it to dry completely before use.
Step 2: Create the Support Structure
Select a sturdy piece of driftwood or a wooden base to serve as the trunk of your tree. Drill a hole in the center of your base to insert the wooden dowel. Secure the dowel with glue to ensure it stands straight and firm.
Step 3: Arrange Your Branches
Sort your driftwood pieces by length, from longest to shortest. This will help you create a balanced and aesthetically pleasing tree shape. Starting from the bottom, drill holes through the center of each piece of driftwood and slide them onto the dowel, arranging from largest to smallest to create a tree shape.
Step 4: Secure the Driftwood
Use your glue gun to secure each piece of driftwood in place. Apply a small amount of glue at the point where each piece of driftwood meets the dowel. This will help keep your tree stable and prevent the branches from shifting.
Step 5: Sand and Finish
Once your tree is assembled, use sandpaper to smooth any rough edges on the driftwood. If desired, apply a protective finish to preserve the wood and enhance its natural color and texture.
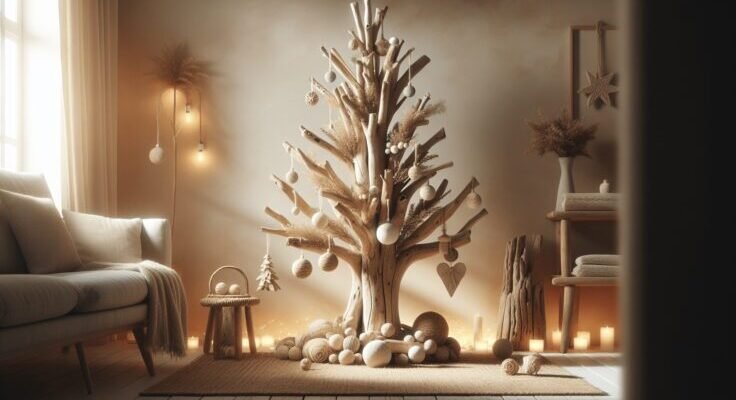
Decorating Your Driftwood Christmas Tree
With your tree assembled, it’s time to add some festive decorations. The beauty of a driftwood Christmas tree lies in its natural look, so you might prefer to keep decorations minimal.
Adding Lights
Fairy lights can add a soft, enchanting glow to your tree. Choose battery-operated lights to avoid the hassle of hiding cords. Wrap the lights around the branches, ensuring they are evenly distributed.
Ornaments and Garlands
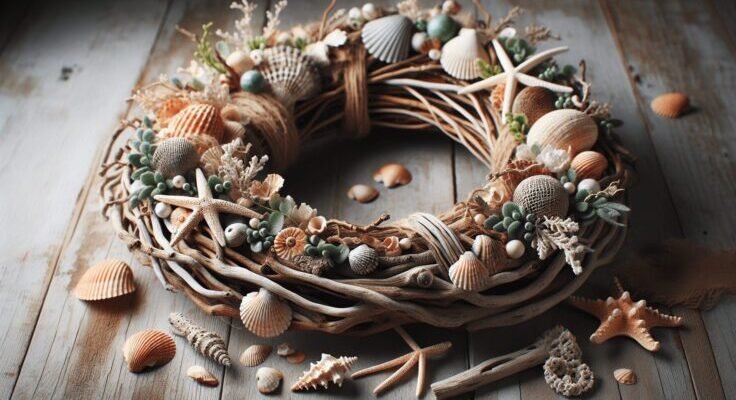
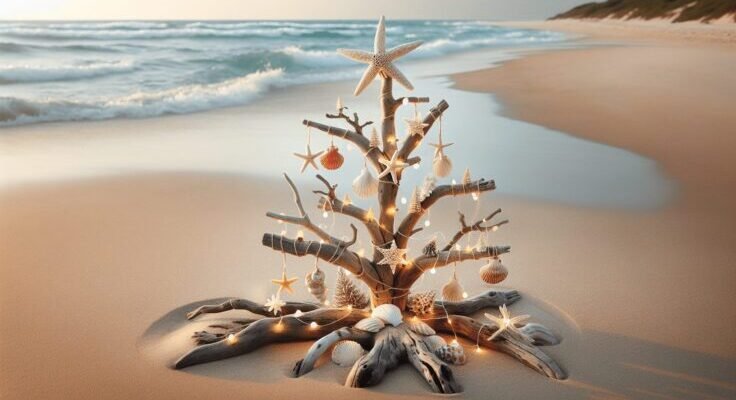
Keep the ornaments light and simple to avoid weighing down the branches. Seashells, starfish, and small coastal-themed ornaments can complement the driftwood beautifully. You could also create a garland using natural materials like shells, beads, or dried seaweed.
Topper
Finish off your tree with a unique topper. This could be a star made from smaller pieces of driftwood, a large shell, or any other item that fits your theme.

Displaying Your Driftwood Xmas Tree
Once decorated, think about where and how to display your unique Christmas tree. Here are a few ideas to help you showcase your creation:
Indoors
Place your driftwood tree in a prominent spot where it can be admired. Consider:
- Living room corners
- Entryways
- On a side table or as a centerpiece
Outdoors
If you have a covered porch or sheltered area, your driftwood tree could add a festive touch to your outdoor decor. Remember to secure it well, especially if it’s in a windy area.
Caring for Your Driftwood Christmas Tree
To keep your driftwood tree looking its best, you might need to give it a little TLC. Here are some tips for caring for your tree:
Indoor Use
- Dust the tree regularly with a soft, dry cloth.
- Avoid placing it in direct sunlight for extended periods to prevent fading.
- If you used a protective finish, reapply it each year to keep the driftwood looking fresh.
Outdoor Use
- Ensure it is in a sheltered area to protect it from rain and harsh weather.
- Bring the tree indoors during extreme weather conditions.
- Check the glue and structural integrity each season before setting it up.
Why DIY?
Creating your own driftwood Christmas tree not only allows for a unique and personalized holiday decoration but also gives you a sense of accomplishment. There’s something incredibly satisfying about making something beautiful with your own hands, especially during the festive season.
Family Bonding
This project can be a fun and engaging activity for the whole family. Getting outdoors to collect driftwood, cleaning and preparing the pieces together, and assembling the tree can create lasting memories and foster a sense of teamwork and creativity.
Cost-Effective
Using found driftwood and simple materials can be a budget-friendly alternative to purchasing a new Christmas tree and decorations. Plus, the unique nature of your creation makes it a one-of-a-kind piece.
Tips for Success
To ensure your driftwood Christmas tree turns out beautifully, keep these tips in mind:
Selecting Driftwood
Choose pieces that are sturdy and free of rot. Variety in size creates a more interesting and balanced look. If you’re planning to use the tree year after year, the more robust the pieces, the better.
Drilling Holes
When drilling holes, do so slowly and carefully to avoid splitting the wood. A clamp can help hold the driftwood steady while you work.
Securing the Base
Ensure your base is heavy and stable enough to support the entire tree. If using a wooden base, consider adding extra support with screws or additional glue.
Inspiration and Variations
Want to get even more creative? Here are a few variations and inspirations to consider:
Colorful Driftwood Tree
Paint each piece of driftwood in different shades of the same color for a monochromatic yet modern look. Alternatively, use multiple colors for a vibrant and festive tree.
Miniature Driftwood Trees
Create smaller versions of the tree to use as table centerpieces or mantel decorations. This concept also makes for a wonderful handmade gift.
Driftwood and Seashell Tree
Incorporate seashells and other coastal elements into the design. Glue shells directly onto the driftwood or string them together to create garlands.
Conclusion
Creating a stunning driftwood Christmas tree is not only an eco-friendly and unique way to celebrate the holiday season but also a chance to bond with loved ones and showcase your creativity. With a bit of time and effort, you can craft a beautiful and memorable decoration that brings a touch of the coast into your home, making your holidays even more special. Enjoy the process and happy crafting!